Herunterladen Inhalt Inhalt Diese Seite drucken
Linksys WRT150N Installation

Linksys WRT150N Installation

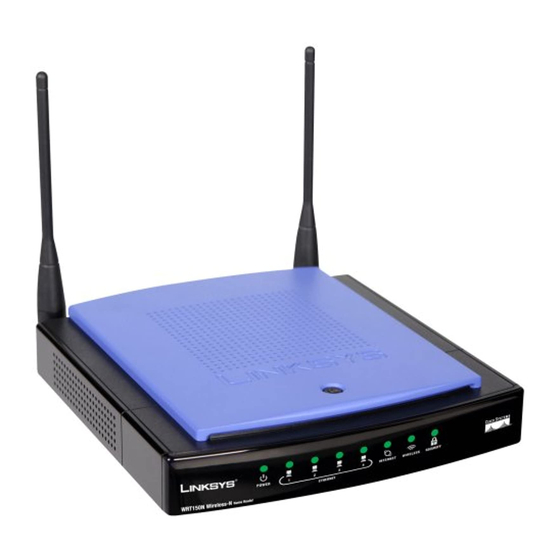
Wireless-n home router

Werbung

Verfügbare Sprachen
  • DE

Verfügbare Sprachen

  • DEUTSCH, seite 18
English
Dansk
Deutsch
Español
Français
Italiano
Nederlands
Português
Svenska
WRT150N (EU)
Model No:
QUICK INSTALLATION
Wireless-N
Home Router

Werbung

Inhaltsverzeichnis
loading

Inhaltszusammenfassung für Linksys WRT150N

  • Seite 1 QUICK INSTALLATION Wireless-N Home Router English Dansk Deutsch Español Français Italiano Nederlands Português Svenska WRT150N (EU) Model No:...
  • Seite 3: Inhaltsverzeichnis

    Copyright and Trademarks Specifications are subject to change without notice. Linksys is a registered trademark or trademark of Cisco Systems, Inc. and/or its affiliates in the U.S. and certain other countries. Copyright © 2007 Cisco Systems, Inc. All rights reserved.
  • Seite 4: Installation (English)

    Installation (English) Insert the Setup Wizard CD‑ROM into the CD drive. The Language Selection screen will appear. Select the appropriate language and click Next. This Welcome screen will appear on your monitor. Click Click Here to Start.
  • Seite 5 Installation Follow the steps on the Wizard, as shown below.
  • Seite 6 Installation...
  • Seite 7 Installation...
  • Seite 8: Additional Information

    Additional Information For warranty, regulatory information, and specifications, refer to the User Guide on the CD‑ROM. Linksys contact information is available at the end of this document and on the CD‑ROM. WEB: Visit us online for information on the latest products and updates to your existing products at www.linksys.eu or www.linksys.com/international...
  • Seite 9: Installation (Dansk)

    Installation (Dansk) Placer installations‑cd‑rom’en i cd‑rom‑drevet. Skærmen Vælg sprog vises. Vælg det relevante sprog, og tryk på Næste. Denne skærm Velkommen vises på skærmen. Klik på knappen Klik her for at starte.
  • Seite 10 Installation Følg vejledningen i den guidede konfiguration på skærmen.
  • Seite 11 Installation...
  • Seite 12 Installation...
  • Seite 13 Tillykke. Installationen af Trådløs-N-hjemmerouteren er færdig. Yderligere oplysninger Se brugervejledningen på cd‑rom’en for at få oplysninger om garanti, specifikationer og lovmæssige forhold. Du kan finde Linksys kontaktoplysninger i slutningen af dette dokument og på cd‑rom’en. WEB: Besøg os på internettet for at få oplysninger om de nyeste produkter og opdateringer til eksisterende produkter på...
  • Seite 14: Installation (Deutsch)

    Installation (Deutsch) Legen Sie die Installations‑CD‑ROM in Ihr CD‑ROM‑Laufwerk ein. Das Fenster zur Sprachauswahl wird angezeigt. Wählen Sie die gewünschte Sprache aus, und klicken Sie auf Weiter. Das Fenster Willkommen wird auf Ihrem Bildschirm angezeigt. Klicken Sie auf die Schaltfläche Klicken Sie hier, um zu starten.
  • Seite 15 Installation Befolgen Sie die Anweisungen des Setup‑Assistenten auf dem Bildschirm.
  • Seite 16 Installation...
  • Seite 17 Installation...
  • Seite 18 Gratulation! Die Installation des Wireless-N Home-Routers ist abgeschlossen. Weitere Informationen Garantie‑ und Zulassungsinformationen sowie Spezifikationen finden Sie im Benutzerhandbuch auf der CD‑ROM. Kontaktinformationen zu Linksys finden Sie am Ende dieses Dokuments und auf der CD‑ROM. WEB: Weitere Informationen zu den aktuellen Produkten und Aktualisierungen für bereits installierte Produkte...
  • Seite 19: Instalación (Español)

    Instalación (Español) Introduzca el CD‑ROM de configuración en la unidad de CD‑ROM. Aparecerá la pantalla Selección de idioma. Seleccione el idioma adecuado y haga clic en Siguiente. La pantalla Bienvenido aparecerá en el monitor. Haga clic en el botón Haga clic aquí...
  • Seite 20 Instalación Siga las instrucciones del asistente de configuración que aparecen en la pantalla.
  • Seite 21 Instalación...
  • Seite 22 Instalación...
  • Seite 23: Información Adicional

    Para obtener información sobre la garantía, la normativa y las especificaciones, consulte la guía del usuario que se incluye en el CD‑ROM. La información de contacto de Linksys está disponible al final de este documento y en el CD‑ROM. WEB: Visítenos en línea para obtener información sobre...
  • Seite 24: Installation (Français)

    Installation (Français) Insérez le CD‑ROM d’installation dans le lecteur de votre ordinateur. L’écran Sélection de la langue s’affiche. Sélectionnez la langue de votre choix, puis clique sur Suivant. L’écran Bienvenue doit apparaître à l’écran. Cliquez sur le bouton Cliquez ici pour démarrer.
  • Seite 25 Installation Suivez les instructions de l’Assistant de configuration qui s’affichent.
  • Seite 26 Installation...
  • Seite 27 Installation...
  • Seite 28: Informations Supplémentaires

    Pour obtenir de plus amples informations sur la garantie, les réglementations et les spécifications, reportez‑vous au guide d’utilisateur de ce CD‑ROM. Les informations permettant de contacter Linksys se trouvent à la fin de ce document et sur le CD‑ROM. WEB: Consultez notre site Web pour obtenir des informations sur les derniers produits et les mises à...
  • Seite 29: Installazione (Italiano)

    Installazione (Italiano) Inserire il CD per l’installazione guidata nell’apposita unità. Sarà visualizzata la schermata Selezione della lingua. Selezionare la lingua desiderata e fare clic su Avanti. La schermata Benvenuti verrà visualizzata sullo schermo. Selezionare Fare clic qui per iniziare.
  • Seite 30 Installazione Seguire le istruzioni visualizzate sullo schermo durante l’installazione guidata.
  • Seite 31 Installazione...
  • Seite 32 Installazione...
  • Seite 33: Ulteriori Informazioni

    Ulteriori informazioni Per informazioni sulla garanzia, sulle normative e sulle specifiche, fare riferimento alla Guida per l’utente sul CD‑ROM. Le informazioni sui contatti Linksys sono disponibili alla fine del presente documento e sul CD‑ROM. WEB: Per informazioni sugli ultimi prodotti e sugli aggiornamenti disponibili, visitare il sito www.linksys.eu o...
  • Seite 34: Installatie (Nederlands)

    Installatie (Nederlands) Plaats de installatie‑cd in het cd‑romstation van uw computer. Het scherm Taal selecteren wordt weergegeven. Selecteer de gewenste taal en klik op Volgende. Het scherm Welkom wordt weergegeven op uw monitor. Klik op de knop Klik hier om te beginnen.
  • Seite 35 Installatie Volg de instructies van de installatiewizard op het scherm.
  • Seite 36 Installatie...
  • Seite 37 Installatie...
  • Seite 38: Aanvullende Informatie

    Aanvullende informatie Informatie over de garantie, informatie over de regelgeving en specificaties vindt u in de gebruikershandleiding op de cd‑rom. Linksys‑contactgegevens vindt u aan het einde van dit document en op de cd‑rom. WEB: Bezoek ons online voor informatie over de nieuwste producten en updates voor uw bestaande producten op www.linksys.eu of www.linksys.com/international...
  • Seite 39: Instalação (Português)

    Instalação (Português) Coloque o CD‑ROM de configuração na unidade de CD‑ROM. Será apresentado o ecrã Selecção do idioma. Seleccione o idioma adequado e clique em Seguinte. Este ecrã Bem-vindo será apresentado no seu monitor. Clique no botão Clique aqui para iniciar.
  • Seite 40 Instalação Siga as instruções apresentadas no ecrã do Setup Wizard (Assistente de configuração).
  • Seite 41 Instalação...
  • Seite 42 Instalação...
  • Seite 43 Informações adicionais Para obter informações sobre a garantia, informações de regulamentação e as especificações, consulte o Manual do Utilizador no CD‑ROM. As informações de contacto da Linksys estão disponíveis no final deste documento e no CD‑ROM. WEB: Para obter informações sobre os produtos mais recentes e para obter actualizações para os produtos que já...
  • Seite 44: Installation (Svenska)

    Installation (Svenska) Sätt in installations‑cd:n i cd‑enheten. Skärmen Språkval visas. Välj det språk som passar och klicka sedan på knappen Nästa. Den här skärmen Välkommen visas på datorns bildskärm. Klicka på knappen Klicka här om du vill starta.
  • Seite 45 Installation Följ anvisningarna på skärmen i Installationsguiden.
  • Seite 46 Installation...
  • Seite 47 Installation...
  • Seite 48: Ytterligare Information

    Klart. Installationen av Wireless-N Hemmarouter är klar. Ytterligare information Information om garanti, föreskrifter och specifikationer finner du i användarhandboken på cd‑skivan. Kontaktinformation för Linksys finns i slutet av det här dokumentet och på cd‑skivan. WEB: Om du vill ha information om de senaste produkterna och uppdateringarna till dina befintliga produkter kan du besöka oss online på: www.linksys.eu eller...
  • Seite 49: Contact Information

    Contact Information If you experience problems with any Linksys product, you can e‑mail us at: Europe Location E-mail Address Austria support.at@linksys.com Belgium support.be@linksys.com Czech Republic support.cz@linksys.com Denmark support.dk@linksys.com Finland support.fi@linksys.com France support.fr@linksys.com Germany support.de@linksys.com Greece support.gr@linksys.com (English only) Hungary support.hu@linksys.com Ireland support.ie@linksys.com...
  • Seite 50 Turkey support.tk@linksys.com United Kingdom support.uk@linksys.com Outside of Europe Location E-mail Address Asia Pacific asiasupport@linksys.com (English only) support.portuguese@linksys.com or Latin America support.spanish@linksys.com Middle East & Africa support.mea@linksys.com (English only) South Africa support.ze@linksys.com (English only) support.ae@linksys.com (English only) U.S. and Canada support@linksys.com...
  • Seite 52 www.linksys.com...

Inhaltsverzeichnis