Werbung
Quicklinks
IN
Gebrauchsanweisung
Instructions for use
Mode d'emploi
Modo de empleo
Modalità d'uso
 Informationen zu Produkten finden Sie unter www.dentaurum.com
„
 For more information on our products, please visit www.dentaurum.com
„
 Vous trouverez toutes les informations sur nos produits
„
sur www.dentaurum.com
 Descubra nuestros productos en www.dentaurum.com
„
 Informazioni su prodotti sono disponibili nel sito www.dentaurum.com
„
Stand der Information I Date of information I Mise à jour I
Fecha de la información I Data dell'informazione: 05/18
Turnstr. 31 I 75228 Ispringen I Germany I Tel. + 49 72 31 / 803 -0 I Fax + 49 72 31 / 803 - 295
www.dentaurum.com I info@dentaurum.com
DE
Sehr geehrte Kundin, sehr geehrter Kunde
Vielen Dank, dass Sie sich für ein Qualitätsprodukt aus dem Hause Dentaurum
entschieden haben.
Damit Sie dieses Produkt sicher und einfach zum größtmöglichen Nutzen für sich und
die Patienten einsetzen können, muss diese Gebrauchs an wei sung sorgfältig gelesen
und beachtet werden.
In einer Gebrauchsanweisung können nicht alle Gegebenheiten einer möglichen
Anwendung beschrieben werden. Bei Fragen und Anregungen können Sie sich gerne
an unsere Hotline (+49 7231 / 803-550) wenden.
Aufgrund der ständigen Weiterentwicklung unserer Produkte empfehlen wir Ihnen
auch bei häufiger Verwendung des gleichen Produktes immer wieder das aufmerksame
Durchlesen der jeweils aktuell beiliegenden bzw. im Internet unter www.dentaurum.
com hinterlegten Gebrauchsanweisung.
1. Hersteller
Dentaurum GmbH & Co. KG I Turnstr. 31 I 75228 Ispringen I Deutschland
2. Allgemeine Beschreibung
discovery
®
pearl ist ein Keramikbracket, das im CIM (Ceramic Injection Molding)
Verfahren hergestellt wird. Es besteht aus hochreinem polykristallinem Aluminiumoxid.
Die discovery
®
pearl Keramikbrackets werden in allen Systemen mit einem
Identifizierungssystem (Setz hilfen + FDI-Beschriftung auf der Basis, siehe Punkt 9)
angeboten. Die Brackets lassen sich so einfach identifizieren und platzieren.
3. Anwendungszweck
Zur Behandlung von Zahnfehlstellungen im Rahmen kieferorthopädischer
Behandlungen.
4. Verarbeitungsschritte
4.1 Patientenaufklärung
Klären Sie den Patienten über die möglichen Folgen und Risiken der Therapie mit
Brackets, insbesondere beim Debonding, auf. Dies gilt vor allem für Zähne, deren
Schmelz schon Vorschädigungen (Risse, Sprünge, Abplatzungen etc.) aufweisen.
4.2 Zahnvorbehandlung
Bitte beachten Sie für die Konditionierung der Zähne die Herstellerangaben des jeweils
verwendeten Bracket-Adhäsives.
4.3 Auswahl Bracket-Adhäsive
Sie können discovery
pearl Brackets mit allen handelsüblichen Bracketadhäsiven
®
befestigen. Wir empfehlen CONTEC lc (REF 163-111-00), ConTec Go! (REF 163-321-
00) und SmartBond
®
(REF 163-506-00). Bitte beachten Sie die Herstellerangaben des
jeweiligen Bracket-Adhäsives.
4.4 Entnahme und Handhabung
Fassen Sie discovery
®
pearl Brackets mit einer Klemmpinzette (z. B. REF 025-277-00)
mesial-distal bzw. am Steg der Setzhilfen, um sie aus der Verpackung zu entnehmen und
gemäß den folgenden Arbeitsschritten zu handhaben. Die Basis der discovery
Brackets sollte nicht mit den Fingern berührt oder in irgendeiner Weise kontaminiert
werden, da sonst die Haftung negativ beeinflusst werden könnte.
4.5 Anwendung des Bracket-Adhäsives
Zähne und Bracket-Adhäsiv werden gemäß den Herstellerangaben vorbereitet. Tragen
Sie eine kleine, aber für die Benetzung der gesamten Bracketbasis ausreichende Menge
auf die Mitte der Bracketbasis auf. Dies garantiert eine optimale Haftung.
4.6 Indirekte Bondingtechnik
Das Bonden von discovery
®
pearl erfolgt auf dem Gips- oder Kunststoffmodell bereits
mit dem Bracket-Adhäsiv. Diese Adhäsivschicht darf nicht mehr entfernt werden!
Ungeeignet sind indirekte Bondingtechniken mittels Zuckerlösung oder anderen
wasserlöslichen Labor adhäsiven, die später wieder vollständig entfernt werden müssen.
Bei diesem Prozess wird die mechanische Retention von discovery
zuverlässiger Halt des Brackets auf dem Zahn ist dadurch nicht mehr gegeben!
Als Übertragungsmatrix können tiefgezogene Schienen oder Transfersilikone, z.B.
Lingusil (REF 164-000-00) verwendet werden.
4.7 Applikation und Ausrichtung der Brackets
Nach dem Aufbringen des Adhäsives wird das Bracket wie gewohnt auf den Zahn
gesetzt, ausgerichtet und angedrückt, bis das Adhäsiv seitlich heraustritt.
Antagonistenkontakt ist aufgrund der Abrasionsgefahr und / oder dem vorzeitigen
Bracketverlust unbedingt zu vermeiden. Bringen Sie ggf. eine Bisserhöhung durch einen
palatinalen Aufbiss, z. B. mittels Bite-Bumper™ (REF 705-000-00), an.
Vor dem Aushärten ist das ausgetretene überschüssige Adhäsiv vollständig zu
entfernen. Dies ist von besonderer Bedeutung für ein einfaches Debonding am Ende
der Behandlung.
4.8 Einligieren der Bögen
Zur Anfangsbehandlung werden Tensic
®
, rematitan
®
pearl Bögen empfohlen. Bögen nicht mit Gewalt einligieren. Bögen nicht im
einligierten Zustand torquen.
Nach Aushärtung des Adhäsives (Aushärtungszeit gemäß Herstellerangaben des
jeweiligen Adhäsives beachten) und Entfernung der Setzhilfen kann wie üblich mit
Draht- oder Kunststoffligaturen (z. B. Dentalastics
®
werden.
Hinweis: Sorgfältiges Ligieren vermeidet Bracket-Beschädigungen!
4.9 Bracket-Debonding
Entfernen Sie als erstes den Bogen. Für das Debonding der discovery
empfehlen wir das spezielle discovery
®
pearl Debonding-Instrument, REF 019-001-00,
welches das Bracket körperhaft bis zur Basis umfasst. Durch leichtes seitliches Kippen
in Slot- bzw. Bogenverlaufsrichtung wird das Bracket sanft vom Bracket-Adhäsiv gelöst.
Alternativ kann für das Debonding der discovery
pearl Brackets die Bracket-Abnehme-
®
zange, gerade (REF 004-346-00), verwendet werden. Setzen Sie die Schneiden dieser
Bracket-Abnehmezange mesial-distal an der Bracketbasis, direkt an der
Zahnoberfläche, an. Durch leichtes Wegknicken der Zange wird das Bracket sanft
vom Zahn abgelöst.
Hinweis:
discovery
pearl Brackets sind trotz ihrer sehr grazilen Form bei sachgemäßer
®
Anwendung nicht bruchgefährdet. Die Verwendung anderer Instrumente kann zum
Bruch der Brackets führen. Sollte bei unsachgemäßem Debonding ein Bracketbruch
eintreten, wird empfohlen, die am Adhäsiv haftenden Bracket-Bruchstücke mit
einer geeigneten Bracket-Abnehmezange (z. B. REF 003-349-00) oder einem Scaler
(z. B. REF 027-349-00) zusammen mit dem Adhäsiv vorsichtig vom Zahnschmelz
abzuschaben.
Zahnschmelz nicht beschädigen, Gefahr von Schmelzausrissen. Absaugvor-
richtung benutzen, Schutzbrille tragen.
5. Angaben zur Zusammensetzung
Die Zusammensetzung entnehmen Sie bitte der Werkstoffliste, siehe Katalog bzw.
www.dentaurum.com.
6. Sicherheitshinweise
Sollten auf einen oder mehrere der Inhaltsstoffe allergische Reaktionen bekannt sein,
darf das Produkt nicht angewendet werden.
7. Lagerung und Haltbarkeit
discovery
pearl Brackets in der geschlossenen Verpackung lagern.
®
discovery
®
pearl Brackets unterliegen keiner Haltbarkeitsbegrenzung.
8. Hinweise für Produkte zum einmaligen Gebrauch
discovery
®
pearl Brackets sind nur zur einmaligen Verwendung vorgesehen. Die Wieder-
aufbereitung eines einmal benutzten discovery
®
pearl Brackets (Recycling) sowie dessen
erneute Anwendung am Patienten ist nicht zulässig.
Durch die Beanspruchung während der Behandlung und insbesondere beim Debonding
können Mikrorisse in der Keramik entstehen, die zu Brüchen bei der Wiederverwendung
führen können!
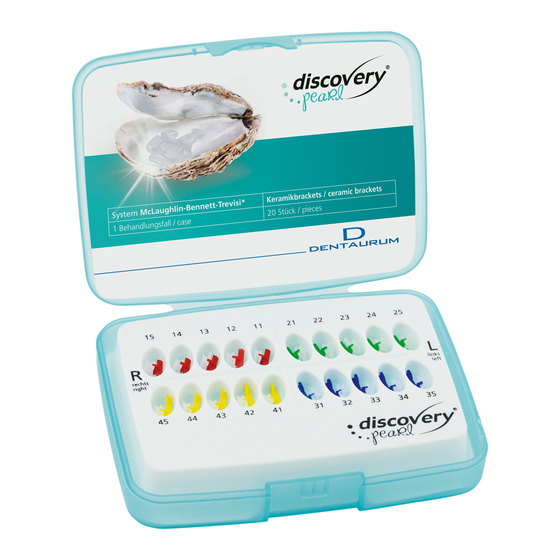
9. Hinweise zum Identifizierungssystem (Setzhilfen)
9.1 Die Farbe der Setzhilfen, das Zahnsymbol und die FDI-Beschriftung kennzeichnen
die Zahn- / Bracket-Kombination.
9.2
Oberkiefer:
rechts = rot
links = grün
Unterkiefer: rechts = gelb
links = blau
9.3. Der okklusal-gingivale Abstand kann mittels des okklusalen Richtungsweisers
bestimmt werden. Der Abstand zwischen dem okklusalen Ende und der Mitte des Slots
beträgt 6 mm.
9.4. Die Zahnsymbole weisen immer von okklusal nach distal.
9.5. Entfernung der Setzhilfen
Nach Aushärten des Adhäsives (Aushärtungszeit gemäß Herstellerangaben des
jeweiligen Adhäsives beachten) die Setzhilfen mit einer Pinzette oder Weingartzange
(z. B. REF 003-120-00) im mittleren Bereich fassen und abziehen.
10. Sonstige Hinweise
Die technischen Informationen wie Torque, Angulation, Größe etc. entnehmen Sie
„
„
bitte dem jeweiligen Produkt-Etikett oder den Katalog-Angaben.
Es bestehen keine besonderen Vorsichtsmaßnahmen bei Entsorgung der
„
„
discovery
®
pearl Brackets.
11. Lieferprogramm
Das discovery
®
pearl Lieferprogramm entnehmen Sie bitte dem Orthodontie-Katalog.
12. Qualitätshinweise
Dentaurum versichert dem Anwender eine einwandfreie Qualität der Produkte. Der Inhalt
dieser Gebrauchsanweisung beruht auf eigener Erfahrung. Der Anwender ist für die
Verarbeitung der Produkte selbst verantwortlich. In Ermangelung einer Einflussnahme
von Dentaurum auf die Verarbeitung besteht keine Haftung für fehlerhafte Ergebnisse.
13. Erklärung der verwendeten Etikettensymbole
Etikett beachten. Zusätzliche Hinweise finden Sie im Internet unter
www.dentaurum.com (Erklärung der Etikettensymbole REF 989-313-00).
EN
Dear Customer
Thank you for choosing a quality product from Dentaurum.
It is essential to read these instructions carefully and adhere to them to ensure safe,
efficient use and ensure that you and your patients gain full benefit.
Instructions for use cannot describe every eventuality and possible application. In case
of questions or ideas, please contact your local representative.
As our products are regularly upgraded, we recommend that you always carefully read
the current instructions for use supplied with the product and stored in the internet at
www.dentaurum.com, even though you frequently use the same product.
1. Manufacturer
Dentaurum GmbH & Co. KG I Turnstr. 31 I 75228 Ispringen I Germany
2. General description
discovery
®
pearl is a ceramic bracket manufactured using the CIM (Ceramic Injection
Molding) process. It consists of highly pure polycrystalline aluminum oxide.
discovery
pearl ceramic brackets are supplied with an identification system
®
(positioning guides + FDI marking on the base, see section 9) for all systems. This
allows for easy identification and placement of the brackets.
3. Intended use
For the orthodontic treatment of malocclusions.
4. Working stages
4.1 Patient consultation
Inform the patient about the possible consequences and risks involved in treatment
using brackets, in particular during debonding. This applies especially in the case of
teeth with enamel that already exhibits signs of initial damage (cracks, crazing, splitting
off, etc.).
4.2 Tooth conditioning
Adhere to the bracket adhesive manufacturer's instructions for conditioning the teeth.
4.3 Selection of bracket adhesives
discovery
®
pearl brackets can be bonded using all commercially available bracket
adhesives. We recommend CONTEC lc (REF 163-111-00), ConTec Go! (REF 163-321-
00) and SmartBond
the bracket adhesive.
4.4 Removal and handling
Grip the discovery
mesio-distally and at the bar of the positioning guide to remove them from the
packaging and handle according to the following steps. The base of the discovery
brackets should not be touched with your fingers or contaminated in any way, as this
could otherwise detrimentally affect the bond.
4.5 Application of the bracket adhesive
Teeth and bracket adhesive are prepared according to the manufacturer's instructions.
pearl
®
Apply a small amount of adhesive to the center of the bracket base, but enough to cover the
entire bracket base. This guarantees an optimum bond.
4.6 Indirect bonding technique
discovery
pearl brackets are bonded on the plaster or the plastic model with the bracket
®
adhesive. This adhesive layer should not be removed anymore! Not suitable are indirect
bonding techniques using sugar solution or other water-soluble lab adhesives that
later have to be completely removed. This process destroys the mechanical retention of
discovery
pearl. A reliable fit of the bracket on the tooth is no longer guaranteed!
®
Thermoformed splints or silicone transfers, e.g. LinguSil (REF 164-000-00) can be used
as transfer matrix.
4.7 Placement and alignment of the bracket
After applying the adhesive, place, align and press the bracket in the usual way onto
pearl zerstört. Ein
®
the tooth until the adhesive exudes from the sides.
It is essential to avoid contact with the antagonist due to the risk of abrasion and / or
premature bracket loss. If necessary, a palatal bite raise can be used e.g. Bite-Bumper™
(REF 705-000-00).
Completely remove the exuded excess adhesive before it has cured. This is particularly
important to ensure easy debonding at the end of the treatment.
4.8 Ligating the archwires
For the initial treatment phase we recommend the use of super elastic Tensic
rematitan
"LITE" or translucent pearl archwires.
®
Do not use force to ligate the archwires. Do not torque the archwires when
they are ligated.
Once the adhesive has cured (curing time according to the adhesive manufacturer's
instructions) and the placement aids have been removed, ligating can be completed in
the usual way using wire or plastic ligatures (e.g. Dentalastics
„LITE" oder die transluzenten
Note: Careful ligation avoids damage to the brackets!
4.9 Bracket debonding
First, remove the archwire. For debonding the discovery
the special discovery
body of the bracket directly at the base. The bracket is gently removed from the bracket
pearl REF 774-563-00) ligiert
adhesive by slightly tipping it sideways in the direction of the slot and archwire.
Alternatively, the straight bracket removal pliers (REF 004-346-00) can be used for
debonding the discovery
mesio-distally on the bracket base, directly on the surface of the tooth. The
pearl Brackets
®
bracket is gently removed from the tooth by slightly twisting the pliers.
Note:
Despite their small, delicate shape there is no risk of fracture with discovery
brackets provided they are used correctly. Use of other instruments can result in bracket
fracture. If the bracket fractures during incorrect debonding, we recommend carefully
removing the fractured segments and the adhesive from the enamel using bracket
debonding pliers (e.g. REF 003-349-00) or a scaler (e.g. REF 027-349-00).
Use care when debonding the segments, as there is a risk of the enamel
chipping. Use an aspirator and wear protective glasses.
5. Information about the composition
Information about the composition is included in the materials list, see catalog or
www.dentaurum.com.
6. Safety information
The product should not be used if there is a known allergy to one or more of the
ingredients.
7. Storage and shelf-life
Store discovery
discovery
pearl brackets do not have a limited shelf life.
®
8. Information for single-use products
discovery
®
pearl brackets are intended for single use only. Reconditioning of
discovery
®
pearl brackets that have already been used (recycling) and reuse on patients
is not permitted.
Micro cracks may result from loading during treatment and in particular bracket
removal that could cause fractures in the ceramic during reuse!
9. Notes about the identification system (positioning guides)
9.1 The color of the positioning guides and the tooth symbol indicate the tooth / bracket
combination.
9.2
Maxilla:
Mandible:
9.3 The occlusal-gingival distance can be determined by means of the occlusal
indicator. The distance between the occlusal end and the center of the slot is 6 mm.
9.4 The tooth symbol always points from occlusal to distal.
9.5 Removing positioning guides
Once the adhesive has cured (curing time according to the adhesive manufacturer's
instructions), grip the mid-section of the positioning guides using tweezers or Weingart
pliers (e.g. REF 003-120-00) and remove.
The practical FDI notation on the base also aids clear identification.
10. Additional tips
Technical information such as torque, angulation, size etc. can be found on the
„
„
relevant product label or in the catalog information.
There are no particular precautions to be taken when disposing of discovery
„
„
brackets after treatment.
11. Delivery program
For the complete range of discovery
Catalog.
12. Quality information
Dentaurum ensures a faultless quality of the products manufactured by us. These
recommendations are based upon our own experiences. The user himself is responsible
for the processing of the products. Responsibility for failures cannot be taken, as we
have no influence on the processing on site.
13. Explanation of symbols used on the label
Please refer to the label. Additional information can be found at
www.dentaurum.com (Explanation of the symbols used on the label
REF 989-313-00).
(REF 163-506-00). Adhere to the manufacturer's instructions for
®
®
pearl brackets using clamping tweezers (e. g. REF 025-277-00)
pearl REF 774-563-00).
®
®
pearl brackets we recommend
®
pearl debonding instrument, REF 019-001-00, which grips the
®
pearl brackets. Place the blades of the bracket removal pliers
pearl brackets in closed packaging.
®
right = red
left = green
right = yellow
left = blue
pearl products please see our Orthodontics
®
®
pearl
,
®
pearl
®
pearl
®
Werbung

Verwandte Anleitungen für Dentaurum discovery pearl


Inhaltszusammenfassung für Dentaurum discovery pearl
- Seite 1 1. Manufacturer Modo de empleo auch bei häufiger Verwendung des gleichen Produktes immer wieder das aufmerksame Dentaurum GmbH & Co. KG I Turnstr. 31 I 75228 Ispringen I Germany Modalità d‘uso Durchlesen der jeweils aktuell beiliegenden bzw. im Internet unter www.dentaurum.
- Seite 2 1. Fabricant 1. Produttore utilice el mismo producto fre cuentemente. Dentaurum GmbH & Co. KG I Turnstr. 31 I 75228 Ispringen I Allemagne Dentaurum GmbH & Co. KG I Turnstr. 31 I 75228 Ispringen I Germania 1. Fabricante 2. Description générale 2.