Werbung
Quicklinks
IN
Gebrauchsanweisung I Instructions for use I
Mode d'emploi I Modo de empleo I Modalità d'uso
Selbstligierende Brackets
Self-ligating brackets
Brackets autoligaturants
Brackets autoligables
Brackets autoleganti
 Informationen zu Produkten finden Sie unter www.dentaurum.com
„
 For more information on our products, please visit www.dentaurum.com
„
 Vous trouverez toutes les informations sur nos produits sur www.dentaurum.com
„
 Descubra nuestros productos en www.dentaurum.com
„
 Informazioni su prodotti sono disponibili nel sito www.dentaurum.com
„
Stand der Information I Date of information I Mise à jour I
Fecha de la información I Data dell'informazione: 09/16
Änderungen vorbehalten I Subject to modifications I Sous réserve
de modifications I Reservado el derecho de modificación I
Con riserva di apportare modifiche
Turnstr. 31 I 75228 Ispringen I Germany I Tel. + 49 72 31 / 803 - 0 I Fax + 49 72 31 / 803 - 295
www.dentaurum.com I info@dentaurum.com
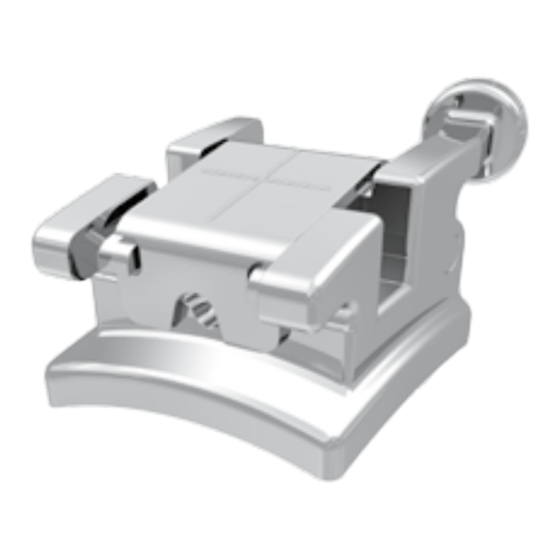
Figa. 1
Fig. 2
Fig. 3
Fig. 4 a
Fig. 4 b
Fig. 5
CapSafe
®
Fig. 6
Fig. 7
Fig. 8
Fig. 9
Fig. 10
DE
Sehr geehrte Kundin, sehr geehrter Kunde
Vielen Dank, dass Sie sich für ein Qualitätsprodukt aus dem Hause Dentaurum entschieden
haben.
Damit Sie dieses Produkt sicher und einfach zum größtmöglichen Nutzen für sich und
die Patienten einsetzen können, muss diese Gebrauchs an wei sung sorgfältig gelesen und
beachtet werden.
In einer Gebrauchsanweisung können nicht alle Gegebenheiten einer möglichen Anwendung
beschrieben werden. Bei Fragen und Anregungen können Sie sich gerne an unsere Hotline
(+ 49 72 31 / 803 -550) wenden.
Aufgrund der ständigen Weiterentwicklung unserer Produkte empfehlen wir Ihnen auch bei
häufiger Verwendung des gleichen Produktes immer wieder das aufmerksame Durchlesen
der jeweils aktuell beiliegenden bzw. im Internet unter www.dentaurum.com hinterlegten
Gebrauchsanweisung.
1. Hersteller
Dentaurum GmbH & Co. KG I Turnstr. 31 I 75228 Ispringen I Deutschland
2. Verarbeitungsschritte
Klären Sie den Patienten über die möglichen Folgen und Risiken der Therapie mit Brackets,
insbesondere beim Debonding auf.
2.1 Zahnvorbehandlung
Prüfen Sie jeden Zahn sorgfältig auf eventuell vorhandene Schmelz schädigungen, um beim
Debonding nicht von Zahnschädigungen "überrascht" zu werden.
Bitte beachten Sie für die Konditionierung der Zähne die Hersteller angaben des jeweils
verwendeten Bracket-Adhäsives.
2.2 Bracket-Adhäsivauswahl
Sie können discovery
®
sl Brackets mit allen handelsüblichen Bracket-Adhäsiven befestigen.
Wir empfehlen unser ConTec-Go!, Adhäsiv sowie SmartBond
. Bitte beachten Sie die
®
Hersteller angaben des jeweiligen Bracket-Adhäsives.
2.3 Entnahme und Handhabung
Fassen Sie discovery
sl Brackets mit einer Klemmpinzette (z. B. REF 025-277-00) mesial-
®
distal, um sie aus der Verpackung zu entnehmen und gemäß den folgenden Arbeitsschritten
zu handhaben. Die patentierte laserstrukturierte Basis der selbstligierenden Brackets sollte
nicht mit den Fingern berührt oder in irgendeiner Weise kontaminiert werden, da sonst die
Haftung negativ beeinflusst werden könnte.
2.4 Anwendung des Bracket-Adhäsives
Das jeweilige Bracket-Adhäsiv wird gemäß den Herstellerangaben vor bereitet. Tragen Sie
eine kleine, aber für die Benetzung der gesamten Bracketbasis ausreichende Menge auf die
Mitte der Bracketbasis auf. Dies garantiert eine optimale Haftung.
2.5 Applikation und Ausrichtung der Brackets
Nach dem Aufbringen des Adhäsives platzieren Sie das discovery
sl Bracket wie gewohnt
®
auf dem Zahn.
Als Orientierungshilfe zum Ausrichten dienen die Lasermarkierungen auf dem Deckel des
Brackets (Fig. 1). Die vertikale Linie markiert die Mitte des Brackets. Die horizontale Linie ist
identisch mit der Mitte des Slots. Der Slot liegt nicht in der Mitte des Brackets! Dies
ist bei der Ausrichtung des Brackets zu berücksichtigen.
Antagonistenkontakt ist aufgrund der Abrasionsgefahr und / oder dem vorzeitigen
Bracketverlust unbedingt zu vermeiden. Bringen Sie ggf. eine Bisserhöhung durch einen Aufbiss
an. Entfernen Sie vor dem Aushärten das an der Bracketbasis ausgetretene, überschüssige
Adhäsiv vollständig. Achten Sie darauf, dass auf der Gingival- und Okklusalseite des
Brackets kein Adhäsiv in die Mechanik des Verschlusses (Bracketdeckel) gelangt.
Dies könnte die Funktion des Deckels behindern oder zerstören. Das Entfernen
der Überschüsse ist für ein einfaches Debonding am Ende der Behandlung von besonderer
Bedeutung.
2.6 Funktionsweise der Verschlussmechanik / Ligieren der Bögen
Der Slot des selbstligierenden Brackets discovery
sl wird mit einem Deckel verschlossen.
®
Alle Deckel, sowohl im Ober- als auch im Unterkiefer, werden von okklusal nach gingival
geöffnet (Fig. 2). Dazu ist unbedingt das sl-Instrument (REF 023-276-00) zu verwenden
(Fig. 3).
Bevor der Bogen eingesetzt werden kann, sind die Deckel zu öffnen. Das spitze Ende des
sl-Instrumentes in die Aussparung des Deckels zwischen den okklusalen Bracketflügeln
einführen (Fig. 4a und 4b). Mit dem sl-Instrument den Deckel nach vestibulär gingival durch
eine leichte Hebelbewegung öffnen (Fig. 5). Der Deckel springt auf.
Die discovery
sl Brackets verfügen über eine Mechanik (CapSafe
), die den Deckel
®
®
während des Einsetzens des Bogens offen hält. Zur Aktivierung von CapSafe
drückt man den
®
Deckel nach der spontanen Öffnungsbewegung mit dem Finger oder dem sl-Instrument in
gingivale Richtung, bis ein deutlicher Widerstand zu spüren ist (Fig. 6). Der Deckel ist nun
sicher in der Öffnungsposition fixiert (Fig. 7).
Den Bogen in den Slot einlegen (Fig. 8), dies ggf. unter Zuhilfenahme des gabelförmigen
Arbeitsendes des sl-Instrumentes. Mit dem Finger oder dem sl-Instrument den Deckel
von gingival nach okklusal schließen (Fig. 9). Der Deckel muss spürbar einrasten. Dies
gewährleistet den sicheren Verschluss des Slots (Fig. 10).
Um ein unbeabsichtigtes Zufallen der Deckel während des Bogenwechsels zu vermeiden,
empfehlen wir die Verwendung von Lippenretraktoren (REF 075-600-00 oder 075-601-00).
2.7 Bracket Debonding
Die ausgezeichneten Hafteigenschaften von discovery
sl Brackets bedürfen im Rahmen des
®
Debondings besonderer Beachtung: Das Debonding der discovery
®
sl Brackets können Sie
mit einer Weingart-Zange (z. B. REF 003-120-00) oder im Seitenzahnbereich mit der abge-
winkelten Bracket-Abnehmezange (REF 004-347-00) vornehmen. Fassen Sie die Brackets
mesial-distal an den Flügeln. Drehen Sie das Bracket dann mit einer kurzen Links- oder
Rechtsdrehung ohne Zug vom Zahn.
3. Hinweise für den Behandler/Patienten
Bitte beachten Sie, dass z.B. beim Bogenwechsel die Zähne nicht mit geöffneten Bracket-
„
„
Deckeln geputzt werden dürfen! Dies führt zum Verbiegen der grazilen Deckel. Dadurch
wird die Funktion des Verschlussmechanismus zerstört und die Klappe kann nicht mehr
optimal schließen.
Dieses Produkt enthält Nickel und Chrom. Patienten, bei denen eine Allergie gegen diese
„
„
Metalle besteht, sollten mit diesem Produkt nicht behandelt werden. Weitere Risiken und
Nebenwirkungen auf das Material von discovery
sl sind nicht bekannt.
®
Da der Werkstoff 1.4542 der selbstligierenden discovery
sl Brackets zu den gering
„
„
®
magnetisierbaren Metallen gehört, empfehlen wir die Abnahme der Brackets vor der
MRT-Untersuchung.
4. Sonstige Hinweise
Die technischen Informationen wie Torque, Angulation, Größe etc. entnehmen Sie bitte
„
„
dem jeweiligen Produkt-Etikett oder den Katalogangaben.
discovery
®
sl Brackets in der geschlossenen Verpackung lagern.
„
„
Es bestehen keine besonderen Vorsichtsmaßnahmen bei Entsorgung der discovery
„
„
Brackets nach der Behandlung.
5. Qualitätshinweise
Dentaurum versichert dem Anwender eine einwandfreie Qualität der Produkte. Der Inhalt
dieser Gebrauchsanweisung beruht auf eigener Erfahrung. Der Anwender ist für die
Verarbeitung der Produkte selbst verantwortlich. In Ermangelung einer Einflussnahme von
Dentaurum auf die Verarbeitung besteht keine Haftung für fehlerhafte Ergebnisse.
6. Erklärung der verwendeten Etikettensymbole
Bitte Etikett beachten. Zusätzliche Hinweise finden Sie im Internet unter
www.dentaurum.com (Erklärung der Etikettensymbole REF 989-313-00).
EN
Dear customer
Thank you for choosing a quality product from Dentaurum.
It is essential to read these instructions carefully and adhere to them to ensure safe, efficient
use and ensure that you and your patients gain full benefit.
Instructions for use cannot describe every eventuality and possible application. In case of
questions or ideas, please contact your local representative.
As our products are regularly upgraded, we recommend that you always carefully read
the current instructions for use supplied with the product and stored in the internet at
www.dentaurum.com, even though you frequently use the same product.
1. Manufacturer
Dentaurum GmbH & Co. KG I Turnstr. 31 I 75228 Ispringen I Germany
2. Working Steps
Inform the patient of the possible risks and adverse effects accompanying treatment with
brackets, especially during debonding.
2.1 Tooth preparation
Check each tooth carefully for possible cracks or damage so that there are no
complications during the debonding stage.
Please observe the manufacturer's instructions for the bracket adhesive you intend to use
for conditioning the teeth.
2.1. Choice of bracket adhesive
discovery
®
sl brackets can be bonded using any standard bracket adhesive. We recommend
our own adhesives ConTec-Go! adhesive and SmartBond
. Please read the respective
®
instructions for use for any bracket adhesive you choose.
2.3 Removal and handling
Grasp the discovery
®
sl brackets mesio-distally using bracket tweezers (eg. REF 025-277-00),
remove from the packaging, and then observe the following working steps. The patented
laser structured base of the self-ligating brackets should not be touched by fingers or
contaminated in any way, as this could have an adverse effect on the bonding quality.
2.4 Using the bracket adhesive
Prepare the bracket adhesive according to the relevant manufacturer's instructions. Apply
a small amount of adhesive on the center of the bracket base, enough to cover the entire
bracket base. This will guarantee an optimal bond.
2.5 Application and alignment of the brackets
After having applied the adhesive, place the discovery
sl bracket onto the surface of the
®
tooth in the customary manner.
Use the laser markings on the top of the brackets (Fig. 1) as a positioning guide. The vertical
line marks the bracket center. The horizontal line marks the middle of the slot. Please
note that the slot does not lie in the center of the bracket, and take this into
consideration when aligning the bracket!
It is essential to avoid adverse contact due to the risk of abrasion and / or premature bracket
loss. If necessary a bite plate can be used in order to raise the bite. Remove all excess
adhesive material from the bracket base before it sets. It is essential to ensure that no
adhesive material enters the bracket fastening mechanism on the gingival and
occlusal side of the bracket, as this could restrict or destroy the functionality
of the lid. The removal of excess adhesive material is especially important to facilitate
debonding after the treatment has ended.
2.6 How the fastening mechanism works / securing the arch wire
The slot of the discovery
®
sl brackets is closed off with a lid. All lids, whether they are
designed for the upper or lower jaw, open from the occlusal side towards gingival (Fig. 2).
This is carried out using the sl instrument (REF 023-276-00) (Fig. 3).
The lid must be opened in order to insert the arch wire. Place the pointed end of the
sl instrument into the notch in the lid between the occlusal bracket wings (Fig. 4a and 4b)
and flip the lid open, using slight leverage towards vestbular-gingival (Fig. 5). The lid will
spring open.
The discovery
sl brackets include a mechanism (CapSafe
), which enables the lid to remain
®
®
open while the arch wire is being inserted. In order to activate CapSafe
press it back in a gingival direction with your finger or the sl instrument until there is a feeling
of resistance (Fig. 6). The lid is now secured in the open position (Fig. 7).
Place the arch wire into the slot (Fig. 8). If necessary, use the forked end of the sl instrument
to aid in this step. To close the lid, use your finger or the sl instrument to press the lid from
the gingival to the occlusal position (Fig. 9). The lid should close with a distinct click, which
guarantees the lid is now secure (Fig. 10).
In order to prevent an unintentional closing of the lid during arch wire change, we
recommend to use lip retractors (REF 075-600-00 or 075-601-00).
2.7 Bracket debonding
The excellent bonding characteristics of discovery
®
sl brackets means the process of
debonding requires special attention: When debonding discovery
to use a Weingart plier (eg. REF 003-120-00) or in the molar region, an angled bracket
removing plier (REF 004-347-00). Grasp the bracket mesio-distally on the tie wings, and
twist toward the left or the right without pulling away from the tooth.
3. Note for doctor and patient
Please consider that teeth must never be brushed with the bracket lids open e.g. for arch
„
„
wire change! This leads to torsion of the delicate lids, which distructs the function of the
closing mechanism so that the lid cannot be optimally closed any more.
This product contains nickel and chrome. Patient's suffering from allergic reactions to
„
„
these metals must not undergo treatment with this product. There are no other known
risks or side effects regarding the material used in discovery
As the material 1.4542 used in the self-ligating discovery
„
„
slightly magnetizable metals, we recommend to take the brackets off before the magnetic
resonance imaging examination.
4. Additional Tips
Technical information such as torque, angulation, size etc. can be found on the relevant
„
„
product label or in the catalog information.
„
„
Store discovery
®
sl in sealed packaging.
There are no particular precautions to be taken when disposing of discovery
„
„
after treatment.
5. Quality information
Dentaurum ensures a faultless quality of the products manufactured by us. These
recommendations are based upon our own experiences. The user himself is responsible for
the processing of the products. Responsibility for failures cannot be taken, as we have no
influence on the processing on site.
6. Explanation of symbols used on the label
Please refer to the label. Additional information can be found at
sl
®
www.dentaurum.com (Explanation of the symbols used on the label REF 989-313-00).
®
, open the lid and
®
sl brackets it is advisable
®
sl.
sl brackets is one of the
®
®
sl brackets
Werbung

Verwandte Anleitungen für Dentaurum discovery sl


Inhaltszusammenfassung für Dentaurum discovery sl
- Seite 1 Sehr geehrte Kundin, sehr geehrter Kunde Dear customer Mode d’emploi I Modo de empleo I Modalità d‘uso Vielen Dank, dass Sie sich für ein Qualitätsprodukt aus dem Hause Dentaurum entschieden Thank you for choosing a quality product from Dentaurum. haben.
- Seite 2 No respondemos por présent mode d’emploi repose sur notre propre expérience. L’utilisateur est personnellement resultados incorrectos, debido a que Dentaurum no tiene influencia alguna en la forma de 6. Spiegazione dei simboli presenti sull‘etichetta responsable de la mise en œuvre des produits.