Herunterladen Inhalt Inhalt Diese Seite drucken
Vorschau ausblenden Andere Handbücher für PROFILER:
Inhaltsverzeichnis

Werbung

Verfügbare Sprachen
  • DE

Verfügbare Sprachen

  • DEUTSCH, seite 28
KEMPER PROFILER
Profiling Guide
English Page 3
Deutsch Seite 29
Español - Página 53
Français - Page 75
Italiano – Pagina 97

Werbung

Inhaltsverzeichnis
loading

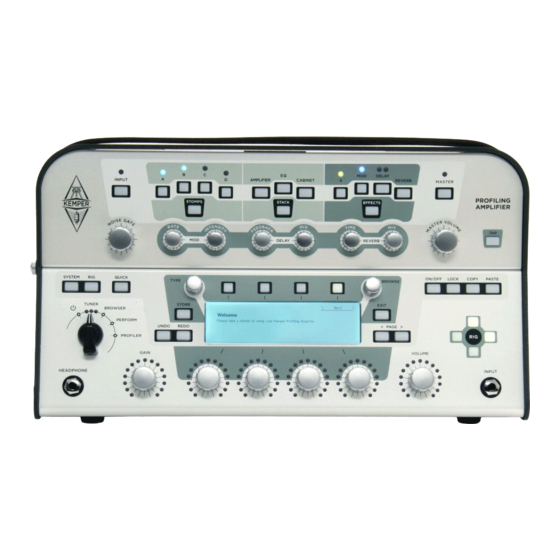
Inhaltszusammenfassung für Kemper PROFILER

  • Seite 1 KEMPER PROFILER Profiling Guide English Page 3 Deutsch Seite 29 Español - Página 53 Français - Page 75 Italiano – Pagina 97...
  • Seite 3 KEMPER PROFILER Profiling Guide...
  • Seite 4: Legal Notice

    Kemper GmbH. Kemper GmbH assumes no responsibility or liability for any errors or inaccuracies that may appear in this book. Except as permitted by such license, no part of this publication may be reproduced, stored in a retrieval system, or transmitted in any form or by any means, electronic, mechanical, recording, by smoke signals or otherwise without the prior written permission of Kemper GmbH.
  • Seite 5: Inhaltsverzeichnis

    Table Of Contents Profiling Guide Profiling an Amp General Considerations Making Connections Connections for Profiling a Guitar Amplifier Connections for Profiling a Combination of Amp and Stomp Box Connections for Profiling a Computer-Based Guitar Amp Simulation Taking a Profile Evaluating the Profile Refining the Profile The Resulting Profile How to Profile an Amp without a Cabinet [Direct Amp Profiles]...
  • Seite 6 KEMPER PROFILER...
  • Seite 7: Profiling Guide

    Profiling Guide...
  • Seite 8: Profiling An Amp

    In order to make a Profile, the original amplifier (which we will refer to as the “reference amp”) has to be con- nected to the Profiler using the DIRECT OUTPUT and the RETURN INPUT on the back. The Profiler then sends various tones and signals into the reference amp —...
  • Seite 9 Since the Profiler sends its own test-tones into the reference amp during Profiling, it should be obvious that the sound of your guitar isn’t part of the result. The Profiler is designed to react to any guitar in an identical way to the reference amp that was profiled.
  • Seite 10: Other Considerations

    Press the GROUND LIFT button on the back of the Profiler for both the MAIN OUTPUTS and the RETURN INPUT. If that does not solve the problem, try different combinations using the other GROUND LIFT buttons.
  • Seite 11: Making Connections

    Connect the DIRECT OUTPUT/SEND of the Profiler to the guitar input of your reference amplifier. • • Connect your microphone, or microphone preamp, to the RETURN INPUT jack of the Profiler (use either the XLR or quarter-inch input, depending on your microphone or microphone preamp). Guitar Input...
  • Seite 12 Kettner Redbox™ or Palmer™ boxes, you can connect the line-out from a load box directly to the RETURN INPUT of your Profiler. The reference amp has to be connected to the Profiler in such a way that only the Profiler will send and receive the signals. This effectively turns the Profiler into a monitoring device.
  • Seite 13: Connections For Profiling A Combination Of Amp And Stomp Box

    MAKING CONNECTIONS It’s a good idea to make the Profiler the central hub for all your guitar recordings and use it as your main switch- ing device. That way, you can use all of your favorite amps alongside the internal effects of the Profiler. Once you’ve finished recording, it will only take a few button pushes to preserve the exact sound for future use.
  • Seite 14: Connections For Profiling A Computer-Based Guitar Amp Simulation

    ✔ ✔ The Profiler can only take an accurate profile of preamp stomp boxes, such as overdrive and distortion pedals, EQs and filters, tube preamp pedals, and so on. Attempting to profile a delay, reverb or modulation pedal is un- likely to work as expected.
  • Seite 15 Press the soft button labeled “Next”. On this page, you can inform the Profiler whether the sound you want to profile is clean or distorted by pressing the appropriate soft buttons. If your reference amp has a clean sound you can set the Profiler to “Clean”. In truth, this step isn’t strictly necessary;...
  • Seite 16: Evaluating The Profile

    - you need to play several chords, with attitude! This will generate inter-modulation in the distortion that the Profiler needs to do its refining. Be sure to strum especially hard so that the Profiler has a chance to analyze the transients.
  • Seite 17: The Resulting Profile

    The actual gain range of the Profiler is probably much larger than your original amp. This means that you can play the new Profile from ultra-clean to super-distorted, even if you couldn’t do so on the reference amp itself.
  • Seite 18: How To Profile An Amp Without A Cabinet [Direct Amp Profiles]

    We assume that the sound of the reference amp is exactly the tone that you want to achieve, hence the equalizer in the Profiler is set to a neutral state, leaving you free to tweak the sound to your taste.
  • Seite 19 TAKING A PROFILE Guitar Input Speaker Direct Out/ Send Speaker Return Input Speaker Thru Why do I need my speaker cabinet when I want to capture a Profile without a speaker? It’s true, the sound of the speaker will not be captured in this case, but the complex impedance behavior of the speaker is still needed to create those oft-mentioned interactions between the power tube-amp and the con- nected speaker cabinet.
  • Seite 20 KEMPER PROFILER Besides the DI box, it helps if you own either a Profiler with built-in power-amp, or a separate solid-state power- amp, for capturing a Direct Amp Profile. Otherwise, it is not possible to immediately play and check the Profile that has been captured.
  • Seite 21: How To Create Merged Profiles

    Note: If you like, do the setup and cabling for both profiles. Position the microphones by the speaker as required. However, you will not be able to take both profiles in one go, since the Profiler only supports one return signal for profiling.
  • Seite 22: Profiling A Rotary Speaker Cabinet

    To do this, first set up the rotary speaker as you would in a normal recording situation. Next, connect the whole chain to the Profiler, just as you would with a guitar amp. This time, however, two microphones should be used to capture the cabinet - one for the bass rotor, and one for the tweeter horn.
  • Seite 23 TAKING A PROFILE In the third step, the Profiler sends a complex tonal texture that follows a mathematically based set of rules to the reference amp. This texture creates unique interference patterns that allow the Profiler to take a “fingerprint” of the DNA of the reference amp’s particular sound.
  • Seite 24 KEMPER PROFILER...
  • Seite 27 KEMPER PROFILER Grundlagen Anleitung...
  • Seite 28: Rechtliche Hinweise

    Der Inhalt dieses Handbuchs ist rein informell und kann zu jeder Zeit, ohne Voran- kündigung von Kemper GmbH geändert werden. Kemper GmbH haftet weder für inhaltliche- noch für Druckfehler. Ohne schriftliche Genehmigung der Kemper GmbH ist es nicht zulässig, diese Publikation oder Teile davon zu reproduzieren und/oder in schriftlicher- und/oder elektronischer Form zu veröf-...
  • Seite 29 Inhaltsverzeichnis Profiling Leitfaden Erstellen eines Profils Voraussetzungen Erstellen eines Profils mit eingebundenen Effekten Abhören während des Profiling-Vorgangs Nebengeräusche vermeiden Was darüber hinaus zu beachten ist Verkabelung der Komponenten Verkabelung, um einen Verstärker zu profilen Verkabelung, um zusätzlich einen Bodeneffekt einzubinden Verkabelung, um eine computerbasierte Verstärkersimulation zu profilen Der Profiling-Vorgang Verfeinern des Profils [Refining]...
  • Seite 30 KEMPER PROFILER...
  • Seite 31: Profiling Leitfaden

    Profiling Leitfaden...
  • Seite 32: Erstellen Eines Profils

    -auslöschungen wird erkannt und zu einem Bestandteil des Profils. Machen sie sich keine Sorgen, wenn das bereits zu kompliziert klingt. Sie müssen nur wissen, dass der Profiler die scheinbar verrückten Messtöne benötigt, um herauszufinden, wie der Referenz-Amp seinen Klang dynamisch im Laufe der Zeit verändert.
  • Seite 33: Erstellen Eines Profils Mit Eingebundenen Effekten

    Da der Profiler während des Profiling-Vorgangs ausschließlich seine eigenen Testtöne zum Referenz-Amp schickt, hat der Klang der Gitarre keinerlei Einfluss auf das Ergebnis. Der Profiler ist so konzipiert, dass er auf jede Gitarre exakt so reagiert, wie es der Referenz-Amp auch getan hätte.
  • Seite 34: Nebengeräusche Vermeiden

    ✔ ✔ Stellen sie sicher, dass sie das zuvor ausgewählte Referenz-Rig im Profiler hören, wenn sie beim A/B Vergleich auf „Kemper Amp“ schalten bzw. dass der Referenz-Amp zu hören ist, wenn sie auf „Reference Amp” wechseln. Sollte das nicht der Fall sein, überprüfen sie die Verkabelung zwischen dem Referenz-Amp und dem Profiler.
  • Seite 35: Verkabelung Der Komponenten

    VERKABELUNG DER KOMPONENTEN Verkabelung der Komponenten Verkabelung, um einen Verstärker zu profilen Hier einige Beispiele, wie sie den Kemper Profiler mit ihrem Equipment für das Profiling verbinden müssen: • Verbinden sie ihre Gitarre mit der vorderen INPUT-Buchse des Profilers. Verbinden sie den DIRECT OUTPUT/SEND des Profilers mit dem Gitarreneingang des Referenz-Amps.
  • Seite 36 Line-Ausgang der Load-Box direkt mit dem RETURN INPUT am Profiler verbinden. Der Referenz-Amp, von dem das Profil erstellt werden soll, muss mit dem Profiler so verkabelt werden, dass nur der Profiler Signale sendet und empfängt. Dadurch wird der Profiler zu einer Art Abhörzentrale.
  • Seite 37: Verkabelung, Um Zusätzlich Einen Bodeneffekt Einzubinden

    Return ✔ ✔ Der Profiler kann nur exakte Profile von Kombinationen aus Bodeneffekten, wie Overdrive, Boostern, Distortion, Equalizern und Filtern, Röhrenvorverstärkerpedalen usw. und dem Referenz-Amp erstellen. Der Versuch, Effekte wie Delay, Reverb oder Modulationseffekte einzubinden, wird keine brauchbaren Ergebnisse liefern.
  • Seite 38: Verkabelung, Um Eine Computerbasierte Verstärkersimulation Zu Profilen

    Wählen sie als erstes ein Referenz-Rig aus ihrem Bestand im Browse-Modus und stellen sie dann den Wahlschal- ter (Chicken Head) auf den Profiler Modus. Wählen sie am besten ein Rig, dessen Sound dem Charakter des Referenz-Amps ähnelt. Dadurch wird es einfacher, das bereits bestehende Rig mit dem Setup zu vergleichen, von dem sie ein Profil erstellen wollen.
  • Seite 39 Drücken sie nun den Softtaster „Next“. Auf dieser Seite teilen sie dem Profiler mit, ob der Sound, von dem sie ein Profil erstellen wollen, verzerrt („Dis- torted“) oder unverzerrt („Clean“) ist, indem sie den entsprechenden Softtaster drücken. Sollte der Referenz-Amp einen unverzerrten Sound haben, so wählen sie „Clean“.
  • Seite 40: Verfeinern Des Profils [Refining]

    Dadurch entstehen Intermodulationen in der Verzerrung, die der Profiler für den Refining-Vorgang benötigt. Schlagen sie die Saiten richtig hart an, um Transienten zu erzeugen, die der Profiler analysieren kann. Drücken sie anschließend den blinkenden Soft-Taster „Finish“, um den Vorgang zu beenden. Vergleichen sie das Resultat mit dem Referenz-Amp und wiederholen sie den Vorgang im Bedarfsfall.
  • Seite 41: Das Fertige Profil

    DER PROFILING-VORGANG Das fertige Profil Nach dem erfolgreichen Profiling kann das neue Profil in Form eines neuen Rigs im Profiler gespeichert werden. Wir empfehlen ihnen, das Rig abzuspeichern, bevor sie die Parameter verstellen, um den Originalklang festzuhalten. Herzlichen Glückwunsch! Sie haben soeben einen neuen Amp und ein neues Cabinet zum Arsenal ihres Profilers hinzugefügt.
  • Seite 42: Profil Eines Verstärkers Ohne Lautsprecher [„Direct Amp-Profil"]

    KEMPER PROFILER Profil eines Verstärkers ohne Lautsprecher [„Direct Amp-Profil“] Bisher haben wir Gitarrenverstärker und Gitarrenboxen gemeinsam geprofilt. Das Ergebnis ist ein sogenanntes „Studio-Profil“. Es ist auch möglich in einem Profil ausschließlich den Sound des Gitarrenverstärkers einschließlich seiner Endstufe abzubilden. Ein solches Profil bezeichnen wir als „Direct Amp-Profil“. Wenn ein Direct Amp Profil später entweder durch die im PowerHead bzw.
  • Seite 43 Return Input Speaker Thru Neben der DI-Box selbst benötigen sie natürlich einen Profiler mit eingebauter Class-D-Endstufe oder eine ver- gleichbare externe Endstufe, denn sonst können sie ihre Direct Amp Profile nicht ausprobieren. Aufbau, um ein Direct Amp-Profil zu erzeugen: ♦...
  • Seite 44: Erzeugen Eines Merged-Profils

    PUT des PowerHead bzw. PowerRack an. • Spielen sie Gitarre und drehen sie „Monitor Volume“ vorsichtig auf. • Erledigt! Der Profiler wird nun in Verbindung mit der Gitarrenbox denselben Sound produzieren wie der Referenz- Amp zuvor. • Speichern sie ihr neues Direct Amp-Profil.
  • Seite 45 Wenn sie vorher bereits die Verkabelung zur Erstellung beider Profile vorbereiten möchten, so können sie das Mikrofon schon einmal vor dem Lautsprecher in Position bringen. Allerdings können Mikrofon und DI-Box nicht gleichzeitig am RETURN angeschlossen werden, denn der Profiler unterstützt beim Profilen immer nur ein Signal. •...
  • Seite 46: Profiling Eines Rotary Speakers

    Für den Fall, dass sie sich für die technischen Details des Profiling-Vorgangs interessieren: In der ersten Phase hören sie ein ansteigendes Rauschen. Damit misst der Profiler den Frequenzgang des Verstär- kers und des Signalwegs. Dieser Frequenzgang ändert sich mit zunehmender Lautstärke und Verzerrung massiv.
  • Seite 47 DER PROFILING-VORGANG angeregt. Sie vervollständigen das charakteristische Interferenzmuster, welches der Profiler nach Abschluss der Messung perfekt reproduziert.
  • Seite 48 KEMPER PROFILER...
  • Seite 49 KEMPER PROFILER Guía de creación de perfiles...
  • Seite 50 Kemper GmbH. Kemper Profiling Amplifier es una marca comercial de Kemper GmbH. Todas las otras marcas comer- ciales aquí mencionadas son propiedad de sus respectivos propietarios. Todas las características y es- pecificaciones están sujetas a cambios sin previo aviso.
  • Seite 51 Tabla de Contenido Guía de creación de perfiles Crear perfiles para un amplificador Consideraciones generales Realizar las conexiones Conexiones para crear el perfil de un amplificador de guitarra Conexiones para crear un perfil de una combinación de amplificador y pedalera Conexiones para crear un perfil de una simulación de amplificador de guitarra por ordenador 60 Seleccionar un perfil Evaluar el perfil...
  • Seite 52 KEMPER PROFILER...
  • Seite 53: Guía De Creación De Perfiles

    Guía de creación de perfiles...
  • Seite 54: Crear Perfiles Para Un Amplificador

    Si te parece un poco complicado, no te preocupes. Lo más importante es tener claro que esos extraños sonidos son el modo en que el Profiler determina la forma exclusiva con que el amplificador de referencia cambia el so- nido de tu guitarra dinámicamente en el tiempo. Esta información se utiliza posteriormente para crear un perfil digital de tu amplificador de referencia.
  • Seite 55 El Profiler envía sus propios sonidos de prueba al amplificador de referencia durante la creación de perfiles, por lo que debería resultar obvio que el sonido de tu guitarra no forma parte del resultado. El Profiler está diseñado para reaccionar a cualquier guitarra de manera idéntica al amplificador de referencia para el que se crearon per- files.
  • Seite 56: Otras Consideraciones

    Pulsa el botón GROUND LIFT de la parte posterior del Profiler tanto para los zócalos MAIN OUTPUT como para el zócalo RETURN INPUT. Si esto no soluciona el problema, prueba diferentes combinaciones utili- zando los otros botones GROUND LIFT.
  • Seite 57: Realizar Las Conexiones

    Conecta el zócalo DIRECT OUTPUT/SEND del Profiler a la entrada de guitarra del amplificador de referencia. • Conecta el micrófono o el preamplificador de micrófono al jack RETURN INPUT del Profiler (utiliza la entrada XLR o 6,35mm, dependiendo del micrófono o del preamplificador de micrófono).
  • Seite 58 RETURN INPUT de tu Profiler. El amplificador de referencia debe estar conectado al Profiler de forma que sólo el Profiler envíe y reciba las se- ñales. A efectos prácticos, esto convierte al Profiler en un dispositivo de monitorización.
  • Seite 59: Conexiones Para Crear Un Perfil De Una Combinación De Amplificador Y Pedalera

    De esta forma, puedes utilizar todos tus amplificadores favoritos jun- to con los efectos internos del Profiler. Cuando termines de grabar, sólo es cuestión de pulsar unos cuantos boto- nes para conservar el sonido exacto para utilizarlo en el futuro.
  • Seite 60: Conexiones Para Crear Un Perfil De Una Simulación De Amplificador De Guitarra Por Ordenador

    ✔ ✔ El Profiler sólo puede utilizar un perfil preciso de las pedaleras del preamplificador, como pedales de saturación y distorsión, ecualizadores y filtros, pedales de preamplificador de válvulas, etc. Si intentas crear un perfil de un pedal de delay, reverb o modulación, seguramente no funcionará de la forma esperada.
  • Seite 61 Pulsa el botón programable marcado como “Next”. En esta página, puedes informar al Profiler de si el sonido del que quieres crear un perfil es nítido o distorsiona- do pulsando los botones programables específicos. Si el amplificador de referencia dispone de un sonido nítido, puedes ajustar el Profiler a “Clean”.
  • Seite 62: Evaluar El Perfil

    Profiler necesita para mejorar. Rasguea siempre con intensidad, de forma que el Profiler pueda analizar los transitorios. Cuando creas que ya has mejorado bastante el perfil, pulsa el botón programable intermitente para detener el proceso. Ahora realiza otra comparación A/B para comprobar el resul-...
  • Seite 63: El Perfil Resultante

    Browse Pool. Es muy recomendable guardar el perfil antes de empezar a modificar sus parámetros para conservar los ajustes originales. ¡Enhorabuena! Has añadido un nuevo amplificador y una nueva caja al arsenal del Profiler. Ahora dispones de to- tal libertad para combinarlos con otros amplificadores o cajas para crear nuevos stacks híbridos.
  • Seite 64: Cómo Crear Un Perfil De Un Amplificador Sin Una Caja [Perfiles De Amplificador Directos]

    KEMPER PROFILER distorsionar este sonido si lo deseas. Dentro del Profiler, el parámetro “Preamp Definition” se ha ajustado a la po- sición central y puede modificarse en cualquier momento. Si trabajamos con sonidos potentes o de gain alto, el valor “Preamp Definition” se ajusta automáticamente a una posición que coincide con el amplificador de referencia.
  • Seite 65 Esta caja DI específica permite escalar el voltaje hasta una señal de nivel de línea, adecuado para el Profiler, en un jack de salida XLR. La señal de alta potencia se envía a la caja del altavoz a tra- vés de un jack de salida diferente.
  • Seite 66 Además de la caja DI, para capturar un perfil de amplificador directo resulta útil disponer de un Profiler con am- plificador integrado o con amplificador de estado sólido independiente. En caso contrario, no será posible tocar de inmediato y comprobar el perfil que se ha capturado.
  • Seite 67: Cómo Crear Perfiles Combinados

    • Conecta el micrófono (en lugar de la caja DI) al zócalo RETURN INPUT del Profiler. Si deseas desactivar la caja DI y conectar la caja directamente, no te olvides de colocar primero el amplificador de referencia en modo de espe- •...
  • Seite 68: Crear Un Perfil De La Caja De Un Altavoz Giratorio

    Para hacerlo, primero configura el altavoz giratorio tal y como lo harías en una situación de grabación normal. A continuación, conecta toda la cadena al Profiler de la misma forma que lo harías con un amplificador de guitarra. Esta vez, sin embargo, debes utilizar dos micrófonos para capturar la caja: uno para el rotor de graves y otro para la corneta de agudos.
  • Seite 69: Otros Detalles

    En la siguiente fase, un ruido blanco con pulsos lentos se envía al amplificador de referencia. El volumen del ruido blanco se ajusta a un nivel donde el amplificador de referencia empieza a distorsionarse. Así es como el Profiler conoce la curva de distorsión dinámica de las válvulas del amplificador de referencia. Con esta información, el Profiler puede recrear dicha curva con la máxima precisión posible.
  • Seite 70 KEMPER PROFILER...
  • Seite 71 KEMPER PROFILER Guide de profilage...
  • Seite 72: Mention Légale

    à titre informatif: il est susceptible d’être modifié sans avis préalable et ne peut en aucun cas être considéré comme un engagement de la part de Kemper GmbH. Kemper GmbH décline toute responsabilité pour d’éventuelles erreurs ou imprécisions pouvant figurer dans ce manuel.
  • Seite 73 Profiler un ampli Considérations générales Connexions Connexions pour le profilage d’un ampli de guitare Connexions pour profiler un ampli avec une pédale d’effet Connexions pour le profilage d’une simulation logicielle d’ampli de guitare Réaliser un profil Evaluer le profil Affiner le profil Votre profil Profiler un ampli sans enceinte [Profilage direct d’un ampli]...
  • Seite 74 KEMPER PROFILER...
  • Seite 75: Guide De Profilage

    Guide de profilage...
  • Seite 76: Profiler Un Ampli

    Pour réaliser un profil, l’amplificateur original (que nous appelons “ampli de référence”) doit être branché au Profiler au moyen des prises DIRECT OUTPUT et RETURN INPUT en face arrière. Le Profiler transmet divers sons et signaux à l’ampli de référence: vous entendez des gargouillements et ce qui ressemble à des bruits parasites à...
  • Seite 77 Comme le Profiler transmet ses propres tonalités de test à l’ampli de référence, le son de votre guitare n’inter- vient pas dans le résultat final. Le Profiler est conçu pour réagir à n’importe quelle guitare de la même façon que l’ampli de référence profilé.
  • Seite 78: Autres Remarques

    à ne pas créer de boucle de rétroaction (larsen). Une façon simple d’éviter ce problème consiste à utiliser un casque pour écouter la sortie du Profiler durant le profilage. Vous pouvez aussi effectuer les réglages nécessaires au sein de votre logiciel DAW pour éviter que les signaux du Profiler ne lui soient renvoyés.
  • Seite 79: Connexions

    Branchez la prise DIRECT OUTPUT/SEND du Profiler à l’entrée guitare de l’amplificateur de référence. • • Branchez votre micro ou préampli de micro à la prise RETURN INPUT du Profiler (utilisez la prise XLR ou jack 6,35mm selon votre micro ou préampli de micro). Guitar Input...
  • Seite 80 à la prise RETURN INPUT du Profiler. L’ampli de référence doit être branché au Profiler de telle façon que seul le Profiler envoie et reçoive les signaux. Vous transformez ainsi le Profiler en dispositif d’écoute.
  • Seite 81: Connexions Pour Profiler Un Ampli Avec Une Pédale D'effet

    CONNEXIONS Vous pouvez en fait transformer le Profiler en centre nerveux pour tous vos enregistrements de guitare et l’utiliser comme poste de contrôle et de commutation principal. Cela vous permet d’utiliser tous vos amplis favoris avec les effets internes du Profiler. Quand l’enregistrement est terminé, il suffit de quelques pressions sur des boutons pour mémoriser le son afin de l’utiliser ultérieurement.
  • Seite 82: Connexions Pour Le Profilage D'une Simulation Logicielle D'ampli De Guitare

    ✔ ✔ Le Profiler ne peut profiler avec précision que des pédales d’effets dotées d’un préampli comme les pédales de saturation et de distorsion, les pédales d’égalisation et de filtres, les pédales de préamplis à lampe etc. Si vous tentez un profilage avec une pédale de delay, de réverbération ou de modulation, le résultat risque d’être déce- vant.
  • Seite 83 RÉALISER UN PROFIL L’utilisation d’effets internes du Profiler dans le rig de référence durant le profilage ne pose par contre aucun pro- blème. Ces effets activés restent audibles quand vous écoutez l’ampli de référence, ce qui vous permet de confi- gurer les effets en fonction de l’ampli à...
  • Seite 84: Evaluer Le Profil

    KEMPER PROFILER sion sur “Clean” peut donc épargner votre matériel d’écoute et vos oreilles. Si vous voulez profiler un son avec distorsion, appuyez sur “Distorted”. L’égaliseur 4 bandes de cette page permet d’ajuster le signal revenant de l’ampli de référence, comme vous égali- seriez le signal de micro sur une table de mixage avant de le renvoyer.
  • Seite 85: Votre Profil

    Rien ne vous empêche bien sûr d’actionner la commande GAIN pour saturer ce son! Au sein du Profiler, le paramètre “Preamp Definition” a été réglé sur la position centrale et peut être modifié à tout instant.
  • Seite 86: Profiler Un Ampli Sans Enceinte [Profilage Direct D'un Ampli]

    Quand ce profil passera par un ampli de puissance de classe D ou un ampli de puissance à transistor du Profiler pour être envoyé à un haut-parleur de guitare, il restituera fidèlement le son et les sensations de l’ampli à lampes original.
  • Seite 87 (W) sont élevées, ce qui nécessite une boîte de direct (DI) spéciale. Cette boîte DI spéciale peut réduire la tension d’une sortie XLR à celle d’un signal de niveau ligne, adapté au Profiler. Le signal à haute puissance est envoyé...
  • Seite 88 De plus, si vous utilisez un Profiler avec ampli de puissance interne ou un ampli de puissance externe à tran- sistors, la boîte DI vous aide à réaliser un profil direct d’ampli. Sans cela, il est impossible de jouer et d’essayer immédiatement le profil réalisé.
  • Seite 89: Fusionner Des Profils

    être basés sur le même son d’ampli original. • Branchez le microphone (au lieu de la boîte DI) à la prise RETURN INPUT du Profiler. Si vous voulez supprimer la boîte DI pour brancher directement l’enceinte, n’oubliez surtout pas de mettre votre ampli de référence en veille.
  • Seite 90: Profiler Des Haut-Parleurs Rotatifs

    KEMPER PROFILER Profiler des haut-parleurs rotatifs Le Profiler contient déjà un rig appelé “CK Rotary Speaker” réalisé à partir de l’original mais si vous avez accès à un type particulier d’enceinte avec haut-parleurs rotatifs, vous pouvez aussi réaliser vos propres profils.
  • Seite 91 RÉALISER UN PROFIL Lors de la troisième phase, le Profiler envoie à l’ampli de référence une texture tonale complexe suivant un en- semble de règles mathématiques. Cette texture crée des motifs d’interférences uniques permettant au Profiler de prendre l’ADN du son de l’ampli de référence. La distorsion de l’enceinte ainsi que la non-linéarité de l’excursion de la membrane du haut-parleur sont mises en évidence par cette mixture tonale.
  • Seite 92 KEMPER PROFILER...
  • Seite 93 KEMPER PROFILER Guida al Profiling...
  • Seite 94 è soggetto a modifiche senza preavviso e non deve essere considerato vincolante per Kemper GmbH. Kemper GmbH non si assume nessuna responsabilità per la presenza di eventuali errori o imprecisio- ni in questo manuale. Ad eccezione di quanto consentito da questa licenza, nessuna parte di questa pubblicazione può...
  • Seite 95 Indice Guida al Profiling Profilare un Amplificatore Considerazioni Generali 101 I Collegamenti Collegamenti per Profilare un Amplificatore per Chitarra Collegamenti per Profilare una Combinazione di Ampli ed Effetti a Pedale Collegamenti per Profilare una Simulazione di Ampli per Chitarra su Computer 104 Realizzare un profilo Valutazione del profilo Perfezionare il Profilo...
  • Seite 96 KEMPER PROFILER Indice Guida al Profiling Profilare un Amplificatore Considerazioni Generali, 10 I Collegamenti Collegamenti per Profilare un Amplificatore per Chitarra, 13 Collegamenti per Profilare una Combinazione di Ampli ed Effetti a Pedale, 15 Collegamenti per Profilare una Simulazione di Ampli per Chitarra su Computer, 16...
  • Seite 97 Guida al Profiling...
  • Seite 98: Profilare Un Amplificatore

    Poi il Profiler ascolta il modo in cui questi suoni vengono riprodotti dall’ampli di riferimento e ana- lizza i risultati. Quindi le stesse caratteristiche vengono ricreate virtualmente dal processamento del segnale del Profiler.
  • Seite 99 Lo stesso vale per quegli ampli modellati che offrono un controllo di guadagno separato per il pre e per il finale. Il Profiler permette di realizzare profili solo in mono. Il profiling stereo attualmente non è supportato, ma in realtà, quanti ampli per chitarra hanno una circuitazione realmente stereofonica? Dato che durante l’operazione di profiling i segnali test vengono generati dal Profiler, è...
  • Seite 100 Il modo più semplice per evitarlo mentre realizzate i profili è quello di ascoltare l’uscita del Profiler solo in cuffia. Per evitare di inviare l’uscita del Profiler al suo stesso ingresso potete anche fare le appropriate impostazioni nella vostra DAW.
  • Seite 101: Collegamenti

    Collegate il connettore DIRECT OUTPUT/SEND del Profiler all’ingresso per chitarra dell’amplificatore di riferimen- • • Collegate il microfono o il preamplificatore del microfono al connettore RETURN INPUT del Profiler (usate l’in- gresso XLR o jack 6,35mm, a seconda del microfono o del preamplificatore che utilizzate). Guitar Input...
  • Seite 102 RETURN INPUT del vostro Profiler. L’amplificatore di riferimento deve essere collegato al Profiler in modo tale che sia solo il Profiler ad inviare e rice- vere i segnali. Questo trasforma, in pratica, il Profiler in un sistema di monitoraggio.
  • Seite 103: Collegamenti Per Profilare Una Combinazione Di Ampli Ed Effetti A Pedale

    I COLLEGAMENTI Vi consigliamo di usare il Profiler come centro nevralgico di tutte le vostre registrazioni di chitarra ed usarlo come dispositivo principale di smistamento. Così potete usare tutti i vostri ampli preferiti insieme agli effetti interni del Profiler. Una volta terminata la registrazione, vi basterà premere solo alcuni pulsanti per conservare esattamente lo stesso suono ed utilizzarlo in futuro.
  • Seite 104: Collegamenti Per Profilare Una Simulazione Di Ampli Per Chitarra Su Computer

    ✔ Il Profiler può profilare accuratamente solo pedali preamplificatori, cioè pedali di overdrive e distorsori, EQ e filtri, pedali di preampli a valvole e così via. Se tentate di profilare un delay, un riverbero o un pedale di un effetto di modulazione probabilmente non otterrete i risultati sperati.
  • Seite 105 In questa pagina, con i pulsanti software appropriati, potete indicare al Profiler se il suono che volete profilare è pulito o distorto. Se il vostro ampli di riferimento ha un suono pulito allora impostate il Profiler su “Clean”. A dire il vero questo passo non è...
  • Seite 106: Valutazione Del Profilo

    Profiler ha bisogno per perfezionare il suono. Cercate di suo- nare particolarmente forte in modo che il Profiler possa analizzare i transienti. Quando vi sembra di aver perfezio- nato a sufficienza il profilo, premete il pulsante software lampeggiante per terminare il processo. Ora fate un altro confronto A/B per controllare il risultato.
  • Seite 107: Il Profilo Risultante

    Congratulazioni! Avete aggiunto un nuovo ampli ed una nuova cassa al vostro arsenale del Profiler. Ora siete liberi di combinare ognuno di loro con altri ampli o altre casse per creare dei nuovi stack ibridi.
  • Seite 108: Come Profilare Un Ampli Senza Cassa [Profili Direct Amp]

    Lo scopo dei profili Direct Amp è quello di catturare il suono di un ampli a valvole compreso il finale di po- tenza. Quando questo profilo verrà poi utilizzato con il finale interno in classe-D del Profiler o con un finale di potenza a stato solido separato per pilotare una cassa per chitarra, replicherà fedelmente il suono e il feeling dell’ampli a valvole originale.
  • Seite 109 è necessaria una DI box apposita. Questa DI box specifica è in grado di attenuare la tensione fino ad ot- tenere un segnale a livello di linea, adatto per il Profiler, su di un’uscita XLR. Il segnale ad alta potenza viene poi rimandato all’altoparlante della cassa da un’uscita differente.
  • Seite 110 Oltre alla DI box, per realizzare un Profilo Direct Amp, è di aiuto disporre di un Profiler con il finale di potenza incorporato o un finale allo stato solido separato. Altrimenti non sarà possibile riprodurre immediatamente e con- trollare il Profilo appena realizzato.
  • Seite 111: Come Creare Profili Misti

    • Collegate il microfono (invece della DI box) al connettore RETURN INPUT del Profiler. Se volete togliere la DI box e collegare direttamente la cassa, non dimenticate prima di mettere in standby l’ampli di riferimento.
  • Seite 112: Profilare Un Cabinet Con Altoparlanti Rotanti

    Come Funziona Nel caso siate interessati ai dettagli tecnici, qui di seguito vi diamo una descrizione di cosa fa il Profiler durante la procedura di profiling: Durante la prima fase, sentirete del rumore bianco con ampiezza crescente. In questo momento il Profiler sta rac-...
  • Seite 113 Nella terza fase, il Profiler invia all’ampli di riferimento una struttura sonora complessa ottenuta da una serie di re- gole matematiche. Questa struttura genera dei modelli di interferenze unici che permettono al Profiler di rilevare le “impronte digitali”...
  • Seite 114 KEMPER PROFILER...

Inhaltsverzeichnis