Herunterladen Inhalt Inhalt Diese Seite drucken

Werbung

Verfügbare Sprachen

Verfügbare Sprachen

DE | EN | FR
Geo3P
BEDIENUNGSANLEITUNG
USER MANUAL
MODE D'EMPLOI
www.geo-fennel.de
www.geo-fennel.com
www.geo-fennel.fr

Werbung

Inhaltsverzeichnis
loading

Inhaltszusammenfassung für geo-FENNEL Geo3P

  • Seite 1 DE | EN | FR Geo3P BEDIENUNGSANLEITUNG USER MANUAL MODE D‘EMPLOI www.geo-fennel.de www.geo-fennel.com www.geo-fennel.fr...
  • Seite 2: Lieferumfang

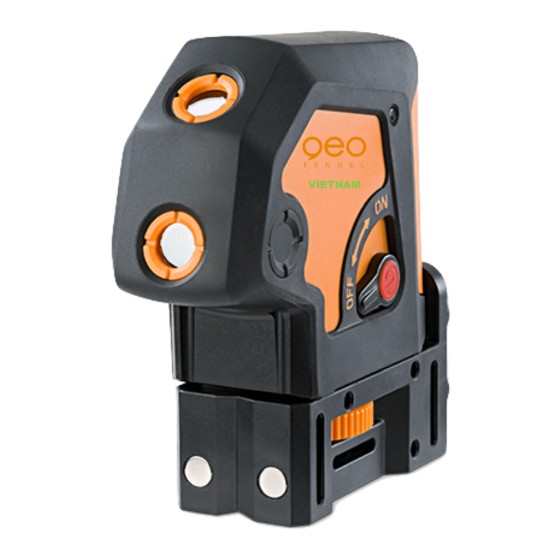
    Precision by tradition. Inhaltsverzeichnis 1. Lieferumfang 2. Bedienelemente 3. Bedienung 4. Sicherheitshinweise LIEFERUMFANG • Selbstnivellierender 3-Punktlaser Geo3P • Multifunktionale Halterung • Magnetische Zieltafel • 3 x AA Alkalinebatterien • Geopolstere Tasche • Bedienungsanleitung FUNKTIONEN Für Übertragungen des Lotpunktes vom Boden zur Decke. Drei Laserpunkte stehen im rechten Winkel...
  • Seite 3: Technische Daten

    Technische Daten Selbstnivellierbereich ±3,5° Genauigkeit ± 2 mm / 10 m Arbeitsbereich 30 m* Laserdiode 635 nm Laserklasse Stromversorgung 3 x AA Alkalinebatterien Betriebsdauer 20 h Temperaturbereich -10°C bis +50° Staub-/Wasserschutz IP 54 Gewicht (nur Gerät) 0,5 kg *abhängig von den Lichtverhältnissen BEDIENELEMENTE Laseraustrittsfenster AN-/AUS-Knopf...
  • Seite 4: Bedienung

    Ein optischer (blinkende Punkte) und akustischer Alarm zeigt an, dass das Gerät ausserhalb des Selbstnivellierbereiches aufgestellt wurde. In diesem Fall eine waagerechte Position suchen. • Der Geo3P kann mit dem 1/4“-Gewinde (3) direkt auf ein Kamerastativ montiert werden. MULTIFUNKTIONALE HALTERUNG Gerät mit der multifunktionalen Halterung verbinden.
  • Seite 5: Prüfung Der Nivelliergenauigkeit

    Befestigung an vertikalen und horizontalen Rohren, Ständern, Pfeilern, ... mit dem Befestigungsriemen. Befestigung an einem Nagel / einer Schraube mit dem Loch in der multifunktionalen Halterung. ANWENDUNGSBEISPIEL PRÜFUNG DER NIVELLIERGENAUIGKEIT: Gerät in 10 m Entfernung parallel zu einer Wand aufstellen. Einschalten. Laserpunkt „A“ auf Wand markieren.
  • Seite 6: Sicherheitshinweise

    SICHERHEITSHINWEISE UMSTÄNDE, DIE DAS MESSERGEBNIS VERFÄLSCHEN KÖNNEN Messungen durch Glas- oder Plastikscheiben; verschmutzte Laseraustrittsfenster; Sturz oder starker Stoß. Bitte Genauigkeit überprüfen. Große Temperaturveränderungen: Wenn das Gerät aus warmer Umgebung in eine kalte oder umgekehrt gebracht wird, vor Benutzung einige Minuten warten. UMGANG UND PFLEGE Messinstrumente generell sorgsam behandeln.
  • Seite 7: Bestimmungsgemässe Verwendung

    BESTIMMUNGSGEMÄSSE VERWENDUNG Das Gerät sendet einen sichtbaren Laserstrahl aus, um z.B. folgende Messaufgaben durchzuführen: Ermittlung von Höhen; rechten Winkeln, Ausrichtung von horizontalen und vertikalen Bezugsebenen (abhängig vom Gerät). WARN- UND SICHERHEITSHINWEISE · Richten Sie sich nach den Anweisungen der Bedienungsanleitung. ·...
  • Seite 8 Precision by tradition. Contents 1. Supplied with 2. Features 3. Operation 4. Safety notes SUPPLIED WITH • Self-levelling 3 Point Laser Geo3P • Multi-functional mount • Magnetic target • 3 x AA Alkaline battery • Padded carrying case • User manual FUNCTIONS...
  • Seite 9: Technical Data

    Technical data Self-levelling range ±3,5° Accuracy ± 2 mm / 10 m Working range 30 m* Laser diode 635 nm Laser class Power supply 3 x AA Alkaline batteries Operating time 20 h Temperature range -10°C to +50° Protection class IP 54 Weight (instrument only) 0,5 kg...
  • Seite 10: Multi-Functional Mount

    A visual (blinking laser points) and audible alarm indicates that the unit was set up outside of the compensator range. Set it up on a more even surface! • Geo3P can be connected to a camera tripod or a floor-to-ceiling pillar by means of the 1/4“ thread (3). MULTI-FUNCTIONAL MOUNT Connect Geo3P to the multi-functional mount.
  • Seite 11: Example Of Application

    Fix it to horizontal or vertical frames, poles, pipes, ... by use of the fixing strap. Fix the instrument to a nail / screw with the hole of the multi-functional mount. EXAMPLE OF APPLICATION ACCURACY CHECK Set up instrument parallel to a wall at a distance of 10 m. Switch the instrument on. Mark a visible laser point “A”...
  • Seite 12: Safety Notes

    SAFETY NOTES SPECIFIC REASONS FOR ERRONEOUS MEASURING RESULTS Measurements through glass or plastic windows; dirty laser emitting windows; after the instrument has been dropped or hit. Please check the accuracy. Large fluctuation of temperature: If the instrument will be used in cold areas after it has been stored in warm areas (or the other way round) please wait some minutes before carrying out measurements.
  • Seite 13: Intended Use Of Instrument

    INTENDED USE OF INSTRUMENT The instrument emits a visible laser beam in order to carry out the following measuring tasks (depending on the instru- ment): Setting up heights, horizontal and vertical planes, right angles. SAFETY INSTRUCTIONS · Follow up the instructions given in the user manual. ·...
  • Seite 14 Precision by tradition. Contenu 1. Contenu 2. Description 3. Opération 4. Consignes de sécurité CONTENU • Laser automatique à 3 points Geo3P • Support multi-fonctions • Cible magnétique • 3 x AA piles alcalines • Sacoche rembourrée • Mode d‘emploi CARACTÉRISTIQUES...
  • Seite 15: Donnés Techniques

    Donnés techniques Plage d‘autonivellement ±3,5° Précision ± 2 mm / 10 m Plage de travail 30 m* Diode de laser 635 nm Classe de laser Alimentation 3 x AA piles alcalines Autonomie 20 h Plage de température -10°C à +50° Étanchéité...
  • Seite 16 à l’horizontale. • Le laser Geo3P peut être monté directement sur un trépied d’appareil photos ou sur un pied à une seule branche, à l’aide de la pièce (3) à filetage de 1/4“ .
  • Seite 17: Exemple D'application

    Fixation à des tuyaux verticales et horizontales, supports, colonnes, ... avec les courroies de fixation. Fixation sur un clou / une vis au moyen du trou du support multi-fonctions. EXEMPLE D‘APPLICATION VÉRIFICATION DE LA PRÉCISION DU NIVEAU Placer l’appareil parallèlement et à 10 m d’une paroi. Le mettre en circuit. Marquer sur la paroi la trace ponctuelle du laser désignée ”A“...
  • Seite 18: Consignes De Sécurité

    CONSIGNES DE SÉCURITÉ CIRCONSTANCES POUVANT FAUSSER LES RÉSULTATS DE MESURES Mesures effectuées à travers des plaques de verre ou de matière plastique; mesures effectuées à travers la fenêtre de sortie du faisceau laser lorsqu‘elle est sale. Mesures après que le niveau soit tombé ou ait subi un choc très fort. Mesures effectuées pendant de grandes différences de température - p.ex.
  • Seite 19: Exclusion De La Responsabilité

    EXCLUSION DE LA RESPONSABILITÉ 1. L ‘utilisateur de ce produit est tenu de respecter ponctuellement les instructions du mode d‘emploi. Tous les instru- ments ont été très soigneusement vérifiés avant leur livraison. Toutefois, l‘utilisateur devra s‘assurer de la précision de ce niveau avant chaque emploi. 2.
  • Seite 20 geo-FENNEL GmbH Technische Änderungen vorbehalten. Kupferstraße 6 All instruments subject to technical changes. D-34225 Baunatal Sous réserve de modifications techniques. Tel. +49 561 / 49 21 45 +49 561 / 49 72 34 info@geo-fennel.de 01/2016 www.geo-fennel.de Precision by tradition.

Inhaltsverzeichnis