Herunterladen Inhalt Inhalt Diese Seite drucken

Werbung

Verfügbare Sprachen
  • DE

Verfügbare Sprachen

LO L LO
Manuale di Istruzioni
Istruzioni originali
Instruction manual
Translation of original instructions
Manuel d'Instructions
Traduction des instructions d'origine
Bedienungsanleitung
Übersetzung der Originalanleitung
Manual de instrucciones
Traducción de las instrucciones originales

Werbung

Inhaltsverzeichnis
loading

Inhaltszusammenfassung für VBM LOLLO

  • Seite 1 LO L LO Manuale di Istruzioni Istruzioni originali Instruction manual Translation of original instructions Manuel d’Instructions Traduction des instructions d’origine Bedienungsanleitung Übersetzung der Originalanleitung Manual de instrucciones Traducción de las instrucciones originales...
  • Seite 2 VIBIEMME SRL via Charles Gounod, 25/27 - 20092 Cinisello Balsamo, Milan, Italy T. (+39) 02 66016691 · F. (+39) 02 66016636 info@vbmespresso.com · www. v bmespresso.com LOLLO. Modello n° Timbro rappresentante locale Model Stamp of local agent Modèle Timbre du représentant local...
  • Seite 3 MANUALE DI ISTRUZIONI, INDICE. AVVERTENZE GENERALI DESCRIZIONE SIMBOLOGIE USO PREVISTO USO SCORRETTO RIFERIMENTI NORMATIVI PREDISPOSIZIONI A CARICO DELL’ACQUIRENTE OPERAZIONI DI EMERGENZA IN CASO DI INCENDIO RISCHIO DI ESPLOSIONE LIVELLO DI PRESSIONE ACUSTICA VIBRAZIONI ZONE OPERATORE / PERICOLO RELATIVO ZONE OPERATORE ZONE A PERICOLO RESIDUO ZONE PERICOLOSE DESCRIZIONE MACCHINA...
  • Seite 4 IDENTIFICAZIONE MACCHINA IDENTIFICAZIONE COMPONENTI COLLEGAMENTI ALLACCIAMENTO IDRICO ALLACCIAMENTO ELETTRICO PRIMO A VVIAMENTO DESCRIZIONE COMANDI GRUPPO AVVIAMENTO MACCHINA PROGRAMMAZIONE DOSI (SOLO PER VERSIONE AUTOMATICA) FUNZIONAMENTO 12.1 PREPARAZIONE DELLA MACCHINA 12.2 PREPARAZIONE CAFFÈ 12.3 EROGAZIONE ACQUA CALDA 12.4 EROGAZIONE VAPORE 12.5 PREPARAZIONE CAPPUCCINO 12.6 LA VAGGIO GRUPPO CON PROGRAMMA AUTOMATICO 12.7...
  • Seite 5 PULIZIA 13.1 A VVERTENZE GENERALI DI PULIZIA 13.2 LA VAGGIO GRUPPO MANUALE 13.3 PULIZIA GIORNALIERA CONTROLLI E SOSTITUZIONI 14.1 SOSTITUZIONE DOCCETTA REGOLAZIONI 15.1 REGOLAZIONE PRESSIONE / TEMPERATURA CALDAIA 15.2 REGOLAZIONE PRESSIONE POMPA MESSA FUORI SERVIZIO TEMPORANEA RIMESSA IN SERVIZIO MACCHINA GUIDA ALLA SOLUZIONE DI ALCUNI PROBLEMI SMALTIMENTO...
  • Seite 7 A VVERTENZE GENERALI. Vibiemme S.r.l. ha preso ogni possibile precauzione per un funzionamento sicuro e un’attrezzatura efficiente. I dispositivi di sicurezza incorporati, mirano a proteggere gli operatori ed i tecnici autorizzati. • Leggere attentamente il presente manuale prima di installare, avviare e usare la macchina. L’inosservanza di questa istruzione può...
  • Seite 8 • Non rimuovere i dispositivi di sicurezza. • Onde evitare rischi personali, utilizzare solo attrezzi idonei e conformi ai regolamenti nazionali di sicurezza. • In caso di malfunzionamenti della macchina o danni ai componenti contattare il concessionario di zona o il costruttore.
  • Seite 9 • inserire cucchiai, forchette o altri utensili nelle parti interne della macchina; • far funzionare la macchina in assenza d’acqua; • ostruire aperture di areazione: lasciare almeno 10 cm. di spazio tra la macchina ed eventuali pareti ed almeno 5 cm su entrambi i lati, per permettere una corretta ventilazione. PER UN CORRETTO FUNZIONAMENTO USARE: •...
  • Seite 10 1.1, DESCRIZIONE SIMBOLOGIE. Le informazioni riguardanti le operazioni a rischio riportate in questo manuale sono Pericolo dovuto ad elettricità. marcate dai seguenti simboli che indicano: ATTENZIONE! Pericolo generico o informazioni varie. Pericolo termico (ustioni). AVVERTENZA Pericolo per danni alla macchina. 1.2, USO PREVISTO.
  • Seite 11 1.3, USO SCORRETTO. La macchina per caffè è stata realizzata e progettata per un uso esclusivamente alimentare e quindi è vietato: • introdurre liquidi diversi da acqua; • riscaldare bevande o altre sostanze non alimentari; • introdurre, nei portafiltri, macinato diverso da caffè; •...
  • Seite 12 1.5, PREDISPOSIZIONI A CARICO DELL’ACQUIRENTE. Predisposizione luogo installazione. • L’acquirente deve predisporre una superficie di appoggio per la macchina come indicato nel capitolo installazione. Predisposizione elettrica. • L’impianto elettrico di alimentazione deve essere conforme a quanto indicato dalle vigenti norme nazionali del luogo e dotato di una efficiente messa a terra.
  • Seite 13 1.7, RISCHIO DI ESPLOSIONE. • La macchina non è adatta per essere utilizzata in ambienti con rischio di esplosione. 1.8, LIVELLO DI PRESSIONE ACUSTICA. La macchina è stata costruita al fine di mantenere il livello di pressione acustica continuo equivalente ponderato A(dB) al di sotto del limite massimo consentito di 70dB.
  • Seite 14 ZONE OPERATORE / PERICOLO RELATIVO. 2.1, ZONE OPERATORE. La macchina funziona con un solo operatore che, durante il funzionamento della macchina, è posizionato frontalmente alla stessa in modo da poter effettuare agevolmente le operazioni di preparazione caffè o altre bevande calde. 2.2, ZONE A PERICOLO RESIDUO.
  • Seite 15 DESCRIZIONE MACCHINA. Di seguito vengono elencate le principali caratteristiche della macchina per caffè espresso semiautomatica ad erogazione controllata da leva. • Caldaia in rame (con scambiatori di calore) per l’erogazione del caffè e per la produzione di acqua calda e vapore. •...
  • Seite 16 DATI TECNICI. 2 Gruppi 1 Gruppo 2 Gruppi 3 Gruppi MiniMax...
  • Seite 17 2 Gruppi 1 Gruppo 2 Gruppi 3 Gruppi MiniMax Capacità caldaia litri Peso netto Tensione di alimentazione Portenza resistenza caldaia (230 V) 1800 4000 4000 5000 Potenza resistenza scaldatazze ND * 0,2 opt. 0,25 Potenza elettropompa 0,165 0,165 Potenza totale 2000 4100 4400...
  • Seite 18 DISIMBALLO E POSIZIONAMENTO. 5.1, DISIMBALLO DELLA MACCHINA. ATTENZIONE: Le operazioni di disimballo e di posizionamento della macchina devono essere effettuate da un tecnico specializzato ed autorizzato. • Controllare sempre l’integrità dell’imballo: informare il trasportatore di eventuali danni. • Aprire la parte superiore (1) dell’imballo. •...
  • Seite 19 Nella dotazione della macchina è presente una targhetta matricola (1) da posizionare in una zona visibile. Sulla targhetta (1) sono presenti i seguenti dati: Modello. Numero gruppi. Mod. Lollo Versione macchina 1: elettronica o semiautomatica. Gr. 2 Vers. 1 ELETTRONICA Versione macchina 2: HX.
  • Seite 20 IDENTIFICAZIONE COMPONENTI. Legenda: Interruttore generale. Premuto in posizione “ON” si inserisce tensione in macchina e si illumina la spia (2) del pulsante. Premuto in posizione “OFF” toglie tensione alla macchina, la spia (2) si spegne. Interruttore scaldatazze. Il suo funzionamento è abilitato dall’interruttore (1) in posizione “ON”. Premuto in posizione “ON”...
  • Seite 21 O F F O F F...
  • Seite 22 COLLEGAMENTI. ATTENZIONE: Le operazioni di allacciamento della macchina devono essere effettuate da un tecnico specializzato ed autorizzato. 8.1, ALLACCIAMENTO IDRICO. Scarico Nelle vicinanze della macchina deve essere predisposta una piletta di scarico acqua (1) con sifone. ATTENZIONE: Il sifone di scarico deve essere posizionato sotto il piano di appoggio della macchina di almeno 20 cm.
  • Seite 23 8.2, ALLACCIAMENTO ELETTRICO. • Verificare che tutti gli interruttori siano in posizione OFF prima di collegare elettricamente la macchina. • È assolutamente obbligatorio il collegamento di messa a terra, nonché la corrispondenza dell’impianto con le normative vigenti nel paese di installazione. •...
  • Seite 24 8.3, PRIMO A VVIAMENTO. ATTENZIONE: Le operazioni di primo avviamento devono essere effettuate da un tecnico specializzato ed autorizzato. • Aprire il rubinetto di alimentazione idrica posto a monte della macchina. • Inserire alimentazione elettrica in macchina posizionando su ON l’interruttore differenziale posto a monte della macchina. •...
  • Seite 25 DESCRIZIONE COMANDI GRUPPO. VERSIONE SEMIAUTOMATICA Su ogni gruppo è presente una pulsantiera per l’erogazione del caffè. Pulsantiera per versione semiautomatica. 1 Tasto start erogazione caffè “ ”. • Premendo il tasto (1), si illumina il rispettivo led e inizia l’erogazione del caffè, per fermare l’erogazione premere il tasto (2).
  • Seite 26 A VVIAMENTO MACCHINA. • Avviare la macchina premendo l’interruttore (1) su “ON”, il led (2) si illumina. • Automaticamente inizia il riscaldamento dell’acqua presente nella caldaia indicato dall’illuminazione del led (3). • Attendere il raggiungimento della temperatura stabilita indicata dallo spegnimento del led (3), la pressione indicata sul manometro (4) deve essere di circa 1 bar (0,1 MPa).
  • Seite 27: Programmazione Dosi

    PROGRAMMAZIONE DOSI (SOLO PER VERSIONE AUTOMATICA). È possibile memorizzare la quantità di caffè erogata per tutti i tasti presenti nella pulsantiera ad eccezione del tasto di erogazione continua “ ”. ATTENZIONE: Programmando la prima pulsantiera di sinistra, si programmano automaticamente le altre pulsantiere presenti in macchina.
  • Seite 28 FUNZIONAMENTO. 12.1, PREPARAZIONE DELLA MACCHINA. • Controllare che il rubinetto di alimentazione idrica posto a monte della macchina sia aperto. • Controllare che l’interruttore differenziale magnetotermico posto a monte della macchina sia in posizione “ON”. • Avviare la macchina premendo l’interruttore (1) su “ON”, il led (2) si illumina. •...
  • Seite 29 12.2, PREPARAZIONE CAFFÈ. • Togliere il portafiltro (1) dal gruppo (2) ruotandolo nel senso indicato dalla freccia “R”. • Gettare gli eventuali fondi presenti. • Riempire il portafiltro con la dose di caffè (una dose per caffè singolo, due dosi per due caffè). •...
  • Seite 30 VERSIONE SEMIAUTOMATICA Versione semiautomatica. • Premere il tasto “ ” per iniziare l’erogazione del caffè, raggiunta la quantità desiderata premere il tasto “ ” per fermare l’erogazione. Versione automatica. VERSIONE AUTOMATICA • Premere uno dei tasti “ ”, “ ”, “ ”, “...
  • Seite 31 12.3, EROGAZIONE ACQUA CALDA. La lancia (1) è molto calda; pericolo di scottatura. • Posizionare un bricco sotto la lancia (1). • Aprire il rubinetto spostando la leva (2) orizzontalmente o verticalmente. • Una volta raggiunta la quantità desiderata chiudere il rubinetto (2) riportando la leva in posizione centrale.
  • Seite 32 12.4, EROGAZIONE VAPORE. • Ruotare la lancia vapore (1) verso la bacinella quindi effettuare una breve erogazione a vuoto di vapore spostando lentamente il rubinetto (2) in senso orizzontale o verticale in modo da eliminare gli eventuali residui di acqua presenti all’interno del circuito. La lancia (1) è...
  • Seite 33 12.5, PREPARAZIONE CAPPUCCINO. La lancia (2) è molto calda. Spostare la lancia solo tramite l’apposita protezione in gomma (1 ); pericolo di scottatura. • Versare in un bricco resistente al calore, preferibilmente in acciaio inox, del latte fresco. • Immergere completamente la lancia (2) nel latte e spostare in senso orizzonatale o verticale la leva (3) in funzione alla quantità di vapore desiderato.
  • Seite 34 12.6, LA VAGGIO GRUPPO CON PROGRAMMA AUTOMATICO. È possibile effettuare un lavaggio automatico di ogni gruppo agendo come segue: • Rimuovere il portafiltro (1) dal gruppo (2) e svuotarlo dai residui di caffè. • Rimuovere il filtro dal portafiltro e montare il filtro cieco (3) in dotazione. •...
  • Seite 35 12.7, SPEGNIMENTO. ATTENZIONE: Prima di spegnere la macchina è necessario effettuare le operazioni di pulizia indicate nel relativo capitolo. • Spegnere la resistenza dello scaldatazze agendo sull’interruttore (1); il led (2) si spegne. • Spegnere la macchina premendo l’interruttore (3) su “OFF”; il led (4) si spegne. •...
  • Seite 36 PULIZIA. Le operazioni di pulizia devono essere effettuate con macchina spenta e fredda e con l’interruttore generale disinserito in posizione “OFF” e il cavo di alimentazione elettrica scollegato dalla presa, posizionando la spina in modo visibile. AVVERTENZA: Una manutenzione e una pulizia improprie, con l’uso di acqua non addolcita, o danni alle parti interne possono causare eventuali interruzioni improvvise del flusso d’acqua ed inattesi getti di liquido o di vapore, con conseguenze gravi.
  • Seite 37 VERSIONE AUTOMATICA 13.2, LA VAGGIO GRUPPO MANUALE. Alla fine del turno di lavoro è necessario effettuare per ogni gruppo la pulizia con filtro cieco. • Rimuovere il portafiltro (1) dal gruppo (2) e svuotarlo dai residui di caffè. • Rimuovere il filtro dal portafiltro e montare il filtro cieco (3) in dotazione. •...
  • Seite 38 13.3, PULIZIA GIORNALIERA. Pulizia lance. • Pulire accuratamente le lance (1) e (2) a fine giornata (ed anche immediatamente dopo ogni uso come descritto nei paragrafi “erogazione acqua” ed “erogazione vapore”) onde evitare il formarsi di batteri o incrostazioni che possono otturare i fori del diffusore ed evitare inoltre che bevande di diversa natura riscaldate in precedenza possano alterare il sapore delle bevande in riscaldamento.
  • Seite 39 CONTROLLI E SOSTITUZIONI. 14.1, SOSTITUZIONE DOCCETTA. Almeno ogni mese è necessario sostituire la doccetta (1) per la sostituzione agire come segue: • Con un cacciavite fare leva sulla doccetta (1) e rimuoverla dal gruppo (2) con la relativa guarnizione. • Sostituire la doccetta (1) e la guarnizione (3).
  • Seite 40 REGOLAZIONI. ATTENZIONE: Queste operazioni devono essere effettuate da un tecnico qualificato operando con estrema cautela. 15.1, REGOLAZIONE PRESSIONE / TEMPERATURA CALDAIA. È possibile regolare la pressione e quindi la temperatura dell’acqua presente in caldaia tramite il pressostato visualizzandola sul manometro (1). •...
  • Seite 41 MESSA FUORI SERVIZIO TEMPORANEA. Se si prevede di non utilizzare la macchina per un lungo periodo è necessario effettuare le seguenti operazioni: • Effettuare le operazioni di manutenzione. • Staccare l’alimentazione idrica e elettrica. • Scaricare l’acqua contenuta nella caldaia agendo come segue. ATTENZIONE: Prima di effettuare questa operazione accertarsi che la macchina per caffè...
  • Seite 42 GUIDA ALLA SOLUZIONE DI ALCUNI PROBLEMI. In caso di anomalie di funzionamento, spegnere immediatamente la macchina, e sfilare la spina dalla presa elettrica. Chiamare il Centro Assistenza Autorizzato. Causa Soluzione Il rubinetto della rete idrica o i rubi netti del Aprire i rubinetti.
  • Seite 43 Causa Soluzione Guarnizioni asse rubinetto difettose. Chiamare il servizio assistenza. Si verifica perdita di acqua o di vapore sotto le manopole dei rubinetti durante l’apertura. Nella sede del portafiltro ci sono residui di Pulire. Il caffè fuoriesce dai bordi del sporco che impediscono la fuoriuscita del portafiltro.
  • Seite 44 Causa Soluzione Rubinetto di alimentazione chiuso. Aprire il rubinetto. La macchina non eroga acqua calda. Elettrovalvola di erogazione guasta. Chiamare il servizio assistenza. Condotti di erogazione ostruiti. Chiamare il tecnico per eseguire la pulizia anticalcare. SMALTIMENTO. • La messa in disuso della macchina va effettuata da personale autorizzato. La pressione del circuito idraulico deve essere abbassata completamente, il cavo di alimentazione deve essere scollegato e le sostanze potenzialmente dannose per l’ambiente devono essere smaltite legalmente e correttamente.
  • Seite 45 INSTRUCTION MANUAL, CONTENTS. GENERAL W ARNINGS DESCRIPTION OF THE SYMBOLS INTENDED USE INCORRECT USE REFERENCE STANDARDS PREPARATIONS BY THE PURCHASER EMERGENCY OPERATIONS IN CASE OF FIRE RISK OF EXPLOSION SOUND PRESSURE LEVEL VIBRATION OPERATOR AREAS AND RELATIVE HAZARDS OPERATOR AREAS AREAS WITH RESIDUAL RISK HAZARDOUS AREAS MACHINE DESCRIPTION...
  • Seite 46 MACHINE IDENTIFICATION COMPONENT IDENTIFICATION CONNECTIONS W ATER CONNECTION ELECTRICAL CONNECTION FIRST STARTING DESCRIPTION OF THE UNIT CONTROLS STARTING THE MACHINE PROGRAMMING THE DOSES (ONLY FOR THE AUTOMATIC VERSION) OPERATION 12.1 PREPARING THE MACHINE 12.2 PREPARING COFFEE 12.3 DISPENSING HOT W ATER 12.4 DISPENSING STEAM 12.5...
  • Seite 47 CLEANING 13.1 GENERAL CLEANING W ARNINGS 13.2 MANUALLY RINSING THE UNIT 13.3 DAILY CLEANING CHECKS AND REPLACEMENTS 14.1 REPLACING THE SPRAY HEAD ADJUSTMENTS 15.1 ADJUSTING THE BOILER TEMPERATURE/PRESSURE 15.2 ADJUSTING THE PUMP PRESSURE PUTTING THE MACHINE OUT OF SERVICE TEMPORARILY PUTTING THE MACHINE BACK INTO SERVICE TROUBLESHOOTING DISPOSAL...
  • Seite 49 GENERAL W ARNINGS. Vibiemme S.r.l. has taken every possible precaution to ensure safe operation and an efficient machine. The incorporated safety devices are aimed at protecting operators and authorised technicians. • Carefully read this manual before installing, starting and using the machine. Inobservance of this instruction may cause damage to the machine, poor machine performance, and risks to health or personal injury.
  • Seite 50 • If case of machine malfunctioning or damage to the components, contact your local dealer or the manufacturer. • THESE SAFETY STANDARDS INTEGRATE OR BALANCE THE LOCAL SAFETY REGULATIONS IN FORCE. • IN CASE OF DOUBT, ALW AYS REQUEST THE INTERVENTION OF SPECIALISED PERSONS. •...
  • Seite 51 FOR PROPER FUNCTIONING USE: • Only ground coffee. • Only fresh mains water appropriately softened (~7 French degrees). • Only original Vibiemme S.r.l. spare parts. Failure to comply with these instructions will result in forfeiture of the warranty and the manufacturer or the maintenance technician declines all responsibility.
  • Seite 52 1.1, DESCRIPTION OF THE SYMBOLS. The information provided in this manual regarding the operations at risk is marked Electricity hazard. with the following symbols which indicate: W ARNING! Generic hazard or miscellaneous information. Heat hazard (burns). CAUTION Risk of damaging the machine. 1.2, INTENDED USE.
  • Seite 53 1.3, INCORRECT USE. The coffee machine has been designed and constructed exclusively for food use and it is therefore prohibited to: • Introduce liquids other than water. • Heat non-food drinks or other substances. • Introduce ground substances other than coffee in the filter holders. •...
  • Seite 54 1.5, PREPARATIONS BY THE PURCHASER. Preparation of the place of installation. • The purchaser must prepare a support surface for the machine as described in the paragraph on installation. Electrical preparation. • The electric system must comply with the national regulations in force in the place of installation and have an efficient grounding system.
  • Seite 55 1.7, RISK OF EXPLOSION. • The machine is not suitable for use in environments with a risk of explosion. 1.8, SOUND PRESSURE LEVEL. The machine has been constructed to maintain an equivalent continuous A-weighted sound pressure level below the maximum permitted limit of 70dB.
  • Seite 56 OPERATOR AREAS AND RELATIVE HAZARDS. 2.1, OPERATOR AREAS. The machine is to be operated by only one operator standing in front of the machine in order to easily prepare coffee and other hot drinks. 2.2, AREAS WITH RESIDUAL RISK. Residual risk areas are areas that cannot be protected because they serve a specific purpose; for the coffee machine, these are the following: •...
  • Seite 57 MACHINE DESCRIPTION. The main features of the semiautomatic espresso coffee machine with lever-controlled dispensing are listed below. • Copper boiler (with heat exchangers) for dispensing coffee and producing hot water and steam. • Boiler filling by means of a rotary pump that is automatically activated when the machine is turned on. •...
  • Seite 58 TECHNICAL DATA. 2 MiniMax 1 unit 2 units 3 units units...
  • Seite 59 1 unit 2 MiniMax units 2 units 3 units Boiler capacity litres Net weight Power supply voltage Boiler heating element power 1800 4000 4000 5000 (230V) Cup heating plate heating NA * 0.2 opt. 0.25 element power Electric pump power 0.165 0.165 Total power...
  • Seite 60 UNPACKING AND POSITIONING. 5.1, UNPACKING THE MACHINE. W ARNING: W ARNING: the unpacking and positioning operations must be carried out by a specialised and authorised technician. • Always check the integrity of the packaging and inform the carrier of any damage.
  • Seite 61 The machine equipment includes an identification plate (1) to be positioned in a visible area. The plate (1) bears the following data: Model. Number of units. Mod. Lollo Machine version 1: electronic or semiautomatic. Gr. 2 Vers. 1 ELETTRONICA Machine version 2: HX.
  • Seite 62 COMPONENT IDENTIFICATION. Legend: Main switch. Set to ON, the machine power is turned on and the LED (2) on the switch comes on. Set to OFF, the machine power is turned off and the LED (2) on the switch goes off. Cup heating plate switch.
  • Seite 63 O F F O F F...
  • Seite 64 CONNECTIONS. W ARNING: The machine connection operations must be carried out by a specialised and authorised technician. 8.1, W ATER CONNECTION. Draining A water drain (1) with siphon must be installed in the vicinity of the machine. W ARNING: The drain siphon must be positioned at least 20cm below the machine support surface.
  • Seite 65 8.2, ELECTRICAL CONNECTION. • Check that all the switches are in OFF position before electrically connecting the machine. • A grounding connection is absolutely obligatory and the system must comply with the regulations in force in the country of installation. •...
  • Seite 66 8.3, FIRST STARTING. W ARNING: The first machine starting operations must be carried out by a specialised and authorised technician. • Open the water supply tap upstream of the machine. • Power the machine by setting the differential switch located upstream of the machine to ON. •...
  • Seite 67 DESCRIPTION OF THE UNIT CONTROLS. SEMIAUTOMATIC VERSION Each unit has a selector knob for coffee dispensing. Selector knob for semiautomatic version. 1 Coffee dispensing start button “ ”. • Press the button (1) to start dispensing coffee; the relative LED will come on; to stop dispensing, press the button (2).
  • Seite 68 STARTING THE MACHINE. • Start the machine by setting the switch (1) to ON; the LED (2) will come on. • The water in the boiler will automatically start heating up indicated by the LED (3) coming on. • Wait until the set temperature has been reached indicated by the LED (3) going off;...
  • Seite 69 PROGRAMMING THE DOSES (ONLY FOR THE AUTOMATIC VERSION). You can store the amount of coffee dispensed for all the buttons on the selector knob, except the continuous dispensing button “ ”. W ARNING: Programming the first selector knob on the left, the other selector knobs on the machine will automatically be programmed.
  • Seite 70 OPERATION. 12.1, PREPARING THE MACHINE. • Check that the water supply tap upstream of the machine is open. • Check that the magnetothermal differential switch upstream of the machine is set to ON. • Start the machine by setting the switch (1) to ON; the LED (2) will come on. •...
  • Seite 71 12.2, PREPARING COFFEE. • Remove the filter holder (1) from the unit (2) by turning it in the direction indicated by the arrow “R”. • Discard any coffee grounds present. • Fill the filter with a dose of coffee (one dose for a single coffee and two for two cups of coffee) •...
  • Seite 72 SEMIAUTOMATIC VERSION Semiautomatic version. • Press the button “ ” to start coffee dispensing and when the desired amount has been reached, press the button “ ” to stop dispensing. Automatic version. AUTOMATIC VERSION • Press one of the buttons “ ”, “...
  • Seite 73 12.3, DISPENSING HOT W ATER. The nozzle (1) is very hot and there is a risk of scalding yourself. • Place a jug underneath the nozzle (1). • Open the tap by moving the lever (2) horizontally or vertically. • Once the desired amount has been reached, close the tap (2) by moving the lever back into central position.
  • Seite 74 12.4, DISPENSING STEAM. • Turn the steam nozzle (1) towards the drip tray and dispense briefly into the tray by slowly moving the tap lever (2) horizontally or vertically in order to remove any residual water present in the circuit. The nozzle (1) is very hot.
  • Seite 75 12.5, PREPARING CAPPUCCINO. The nozzle (2) is very hot. Only move the nozzle gripping it by its rubber protection (1) as there is a risk of scalding yourself. • Pour fresh milk into a heatproof jug, preferably in stainless steel. •...
  • Seite 76 12.6, AUTOMATICALLY RINSING THE UNIT. Each unit can automatically be rinsed operating as follows: • Remove the filter holder (1) from the unit (2) and empty out the coffee grounds. • Remove the filter from the filter holder and mount the blind filter (3) provided. •...
  • Seite 77 12.7, TURNING OFF. W ARNING: Before turning off the machine, carry out the cleaning operations described in the relative section. • Turn off the cup heating plate heating element by setting the switch (1) to OFF; the LED (2) will go off. •...
  • Seite 78 CLEANING. The cleaning operations must be carried out with the machine off and cold, the main switch in OFF position and the power cable unplugged putting the plug in a visible position. CAUTION: Improper cleaning and maintenance using unsoftened water or damage to the internal parts may cause sudden water flow interruptions and unexpected water or steam jets with serious consequences.
  • Seite 79 AUTOMATIC VERSION 13.2, MANUALLY RINSING THE UNIT. At the end of the work shift, each unit has to be cleaned with the blind filter. • Remove the filter holder (1) from the unit (2) and empty out the coffee grounds. •...
  • Seite 80 13.3, DAILY CLEANING. Cleaning the nozzles. • Thoroughly clean the nozzles (1) and (2) at the end of the day (and also immediately after every use as described in the paragraphs “dispensing water” and “dispensing steam”) in order to prevent the formation of bacteria or encrustations that may clog the holes of the diffuser and also to prevent that drinks of a different nature heated before alter the flavour of the drinks being heated.
  • Seite 81 CHECKS AND REPLACEMENTS. 14.1, REPLACING THE SPRAY HEAD. The spray head (1) has to replaced at least once a month operating as follows: • Use a screwdriver to prise out the spray head (1) and remove it and the relative gasket from the unit (2).
  • Seite 82 ADJUSTMENTS. W ARNING: These operations must be carried out by a qualified technician operating with extreme care. 15.1, ADJUSTING BOILER TEMPERATURE/ PRESSURE. You can adjust the pressure and hence the temperature of the water in the boiler by means of the pressure switch viewing it on the pressure gauge (1). •...
  • Seite 83 PUTTING THE MACHINE OUT OF SERVICE TEMPORARILY. If the machine is not to be used for a long period of time, carry out the following operations: • Carry out the maintenance operations. • Disconnect the water and power supply. • Drain the water contained in the boiler as follows: W ARNING: Before carrying out this operation, make sure that the coffee machine is off (power supply upstream of the machine...
  • Seite 84 TROUBLESHOOTING. In the event of malfunctions, immediately turn off the machine and pull out the plug from the socket. Call the Authorised Service Centre. Cause Solution The water mains tap or the purifier taps are Open the taps. The unit does not dispense closed.
  • Seite 85 Cause Solution Defective tap seals. Call Technical Service. Water or steam leaks from under the knobs of the taps during opening. There is dirt in the filter holder seat that Clean. Coffee overflows from the edges prevents the coffee from coming out of the of the filter holder.
  • Seite 86 Cause Solution Supply tap closed. Open the tap. The machine does not dispense hot water. Faulty dispensing solenoid valve. Call Technical Service. Dispensing ducts obstructed. Call a technician to descale the machine. DISPOSAL. • The machine must be decommissioned by authorised persons. The pressure of the hydraulic circuit must be fully released, the power cable must be disconnected and any substances potentially harmful to the environment must be legally and properly disposed of.
  • Seite 87 MANUEL DES INSTRUCTIONS, TABLE DES MATIÈRES. CONSIGNES GÉNÉRALES DESCRIPTION DES SYMBOLES UTILISATION PRÉVUE UTILISATION IMPROPRE NORMES DE RÉFÉRENCE INSTALLATIONS A LA CHARGE DU L’ACHETEUR OPÉRATIONS D’URGENCE EN CAS D’INCENDIE RISQUE D’EXPLOSION NIVEAU DE PRESSION ACOUSTIQUE VIBRATIONS ZONES OPÉRATEUR / DANGER CORRESPONDANT ZONES OPÉRATEUR ZONES EXPOSÉES A UN RISQUE RÉSIDUEL ZONES DANGEREUSES...
  • Seite 88 IDENTIFICATION DE LA MACHINE IDENTIFICATION DES COMPOSANTS RACCORDEMENTS/BRANCHEMENTS RACCORDEMENT EAU BRANCHEMENT ÉLECTRIQUE PREMIÈRE MISE EN MARCHE DESCRIPTION DES COMMANDES DU GROUPE MISE EN MARCHE DE LA MACHINE PROGRAMMATION DES DOSES (POUR LA SEULE VERSION AUTOMATIQUE) FONCTIONNEMENT 12.1 PRÉPARATION DE LA MACHINE 12.2 PRÉPARATION DU CAFÉ...
  • Seite 89 NETTOYAGE 13.1 CONSIGNES GÉNÉRALES DE NETTOYAGE 13.2 LA VAGE MANUEL DU GROUPE 13.3 NETTOYAGE QUOTIDIEN CONTRÔLES ET CHANGEMENT DE PIÈCES 14.1 CHANGEMENT DE LA DOUCHETTE RÉGLAGES 15.1 RÉGLAGE PRESSION / TEMPÉRATURE CHAUDIÈRE 15.2 RÉGLAGE PRESSION POMPE MISE HORS SERVICE TEMPORAIRE REMISE EN SERVICE DE LA MACHINE GUIDE DE DÉPANNAGE ÉLIMINATION...
  • Seite 91 CONSIGNES GÉNÉRALES. Vibiemme S.r.l. a pris toutes les précautions possibles pour assurer un fonctionnement sûr et efficace. Les dispositifs de sécurité installés sont conçus pour protéger les opérateurs et les techniciens agréés. • Lire attentivement le présent manuel avant d’installer, de mettre en marche et d’utiliser la machine. Le non- respect de cette recommandation peut entraîner des dommages matériels, le mauvais fonctionnement de la machine et expose à...
  • Seite 92 • Ne pas retirer les dispositifs de sécurité. • Afin d’éviter des risques personnels, n’utiliser que des appareils électriques conformes aux réglementations nationales en matière de sécurité. • En cas de dysfonctionnements de la machine ou de détériorations des composants, contacter le revendeur ou le fabricant.
  • Seite 93 dans la chaudière pourrait geler et causer des dommages ; • installer la machine à un endroits où sont utilisés des jets d’eau qui pourraient atteindre la machine ; • faire fonctionner la machine si une porte ou un panneau ne sont pas correctement fermées ; •...
  • Seite 94 1.1, DESCRIPTION DES SYMBOLES. Les informations concernant les opérations à risque dans le présent e manuel sont Danger dû à l’électricité. marqués des symboles suivants qui indiquent : ATTENTION ! Danger général ou informations diverses. Risque thermique (brûlures). AVERTISSEMENT Risque de dommages de la machine. 1.2, UTILISATION PRÉVUE.
  • Seite 95 1.3, UTILISATION IMPROPRE. La machine à café a été construite et conçue uniquement pour un usage alimentaire, aussi il est interdit de : • introduire des liquides autres que l’eau ; • réchauffer des boissons ou autres substances non alimentaires ; •...
  • Seite 96 1.5, INSTALLATIONS A LA CHARGE DU L’ACHETEUR. Préparation du lieu d’installation. • L’acheteur doit préparer une surface d’appui pour la machine comme indiqué dans le chapitre Installation. Installation électrique. • L’installation électrique d’alimentation doit être conformes aux normes nationales applicables sur le lieu d’installation et doit être dotée d’une mise à...
  • Seite 97 1.7, RISQUE D’EXPLOSION. • La machine n’est pas adaptée à une utilisation dans un environnement exposé à un risque d’explosion. 1.8, NIVEAU DE PRESSION ACOUSTIQUE. La machine est conçue pour maintenir le niveau de pression acoustique continu équivalent pondéré A (dB) en deçà de la limite maximale admise de 70 dB.
  • Seite 98 ZONES OPÉRATEUR / DANGER CORRESPONDANT. 2.1, ZONES OPÉRATEUR. La machine est utilisable par un seul opérateur qui, pendant le fonctionnement de la machine, se trouve face à elle de façon à pouvoir effectuer aisément les opérations de préparation du café ou autres boissons chaudes. 2.2, ZONES EXPOSÉES A UN RISQUE RÉSIDUEL.
  • Seite 99 DESCRIPTION DE LA MACHINE. Ci-après la liste des principales caractéristiques de la machine semi-automatique pour expresso, avec distribution commandée par une manette. • Chaudière en cuivre (avec échangeurs de chaleur) pour la distribution du café et pour la production d’eau chaude et de vapeur. •...
  • Seite 100 CARACTÉRISTIQUES TECHNIQUES. 2 Groupes 1 Groupe 2 Groupes 3 Groupes MiniMax...
  • Seite 101 2 Groupes 1 Groupe 2 Groupes 3 Groupes MiniMax Capacité chaudière litres Poids net Tension d'alimentation Puissance résistance chaudière 1800 4000 4000 5000 (230 V) Puissance résistance ND * 0,2 opt. 0,25 chauffe-tasses Puissance pompe électrique 0,165 0,165 Puissance totale 2000 4100 4400...
  • Seite 102 DÉBALLAGE ET POSITIONNEMENT. 5.1, DÉBALLAGE DE LA MACHINE. ATTENTION : Les opérations de déballage et de positionnement de la machine doivent être effectuées par un technicien qualifié et autorisé à cet effet. • Veiller à toujours vérifier l’intégrité de l’emballage : informer le transporteur de tout dommage.
  • Seite 103 La machine est fournie avec une plaque d’identification (1) à positionner à un endroit visible. Sur la plaque (1), sont présentes les données suivantes : Modèle. Nombre groupes. Mod. Lollo Version machine 1 : Gr. 2 Vers. 1 ELETTRONICA électronique ou semi-automatique.
  • Seite 104 IDENTIFICATION DES COMPOSANTS. Légende : Interrupteur général. Maintenu enfoncé sur la position “ON”, met la machine sous tension ; le voyant (2) du bouton s’allume. Maintenu enfoncé sur la position “OFF”, coupe la tension d’alimentation de la machine ; le voyant (2) s’éteint. Interrupteur chauffe-tasses.
  • Seite 105 O F F O F F...
  • Seite 106 RACCORDEMENTS/BRANCHEMENTS. ATTENTION : Les opérations de branchement/raccordement de la machine doivent être effectuées par un technicien qualifié et autorisé à cet effet. 8.1, RACCORDEMENT EAU. Évacuation À proximité de la machine, une évacuation d’eau (1) avec siphon doit être présente. ATTENTION : Le siphon d’évacuation doit être positionné...
  • Seite 107 8.2, BRANCHEMENT ÉLECTRIQUE. • S’assurer que tous les interrupteurs sont en position OFF avant de brancher la machine à l’alimentation électrique. • Il est absolument obligatoire de relier la machine à la terre et le circuit électrique doit être conforme aux normes en vigueur dans le pays d’installation.
  • Seite 108 8.3, PREMIÈRE MISE EN MARCHE. ATTENTION : Les opérations de première mise en marche doivent être effectuées par un technicien qualifié et autorisé à cet effet. • Ouvrir le robinet d’alimentation d’eau situé en amont de la machine. • Mettre la machine sous tension en plaçant sur ON l’interrupteur différentiel situé en amont de la machine. •...
  • Seite 109 DESCRIPTION DES COMMANDES DES GROUPES. VERSION SEMI-AUTOMATIQUE Sur chaque groupe, sont présentes des touches de distribution du café. Touches sur version semi-automatique. 1 Touche start distribution café “ ”. • En appuyant sur la touche (1), le voyant correspondant s’allume et la distribution du café...
  • Seite 110 MISE EN MARCHE DE LA MACHINE. • Mettre en marche la machine en appuyant sur l’interrupteur (1) sur la position “ON” ; le voyant (2) s’allume. • Automatiquement, le chauffage de l’eau de la chaudière commence, indiqué par l’allumage du voyant (3). •...
  • Seite 111: Programmation Des Doses

    PROGRAMMATION DES DOSES (UNIQUEMENT SUR VERSION AUTOMATIQUE). Il est possible de mémoriser la quantité de café distribuée pour toutes les touches de commande à l’exception de la touche de distribution continue “ ”. ATTENTION : En programmant le premier groupe de commandes de gauche, les autres groupes de commande de la machine sont automatiquement programmés.
  • Seite 112 FONCTIONNEMENT. 12.1, PRÉPARATION DE LA MACHINE. • S’assurer que le robinet d’alimentation d’eau situé en amont de la machine est ouvert. • S’assurer que l’interrupteur différentiel magnétothermique situé en amont de la machine est sur le position “ON”. • Mettre en marche la machine en appuyant sur l’interrupteur (1) sur la position “ON”...
  • Seite 113 12.2, PRÉPARATION DU CAFÉ. • Retirer le porte-filtre (1) du groupe (2) en le tournant dans le sens indiqué par la flèche “R”. • Jeter les fonds éventuellement présents. • Remplir le filtre de la dose de café (une dose pour un seul café, deux doses pour deux cafés). •...
  • Seite 114 VERSION SEMI-AUTOMATIQUE Version semi-automatique. • Appuyer sur la touche “ ” pour entamer la distribution du café et, une fois atteinte la quantité voulue, appuyer sur la touche “ ” pour arrêter la distribution. VERSION AUTOMATIQUE Version automatique. • Appuyer sur une des touches “ ”, “...
  • Seite 115 12.3, DISTRIBUTION EAU CHAUDE. La lance (1) est très chaude : risque de brûlure. • Placer un pot sous la lance (1). • Ouvrir le robinet en déplaçant la manette (2) horizontalement ou verticalement. • Une fois atteinte la quantité voulue, fermer le robinet (2) en replaçant la manette en position centrale.
  • Seite 116 12.4, DISTRIBUTION VAPEUR. • Tourner la lance de vapeur (1) vers la vasque puis effectuer une brève distribution de vapeur à vide en déplaçant lentement le robinet (2) horizontalement ou verticalement de façon à éliminer l’eau éventuellement présente dans le circuit. La lance (1) est très chaude.
  • Seite 117 12.5, PRÉPARATION D’UN CAPPUCCINO. La lance (2) est très chaude. Déplacer la lance uniquement à l’aide de la protection en caoutchouc (1) : risque de brûlure. • Verser dans un pot résistant à la chaleur, si possible en acier inox, du lait frais. •...
  • Seite 118 12.6, LA VAGE DU GROUPE A VEC PROGRAMME AUTOMATIQUE. Il est possible d’effectuer un lavage automatique de chaque groupe en procédant comme suit : • Retirer le porte-filtre (1) du groupe (2) et en éliminer les résidus de café. • Retirer le filtre du porte-filtre et monter le filtre aveugle (3) fourni à...
  • Seite 119 12.7, EXTINCTION. ATTENTION : Avant d’éteindre la machine, il est d’effectuer les opérations de nettoyage décrites dans le chapitre correspondant. • Éteindre la résistance du chauffe-tasses à l’aide de l’interrupteur (1) ; le voyant (2) s’éteint. • Éteindre la machine en appuyant sur l’interrupteur (3) sur la position “OFF” ; le O F F voyant (4) s’éteint.
  • Seite 120 NETTOYAGE. Le nettoyage doit être effectué sur la machine éteinte et froide, avec l’interrupteur général en position “OFF” et le câble d’alimentation débranché (fiche en position visible). AVERTISSEMENT : Un entretien et un nettoyage inapproprié, avec l’utilisation d’eau non traitée, ou des dommages aux parties internes, peuvent provoquer des interruptions brusques de l’écoulement de l’eau et des jets inattendus de liquide ou de vapeur, avec des conséquences graves.
  • Seite 121 VERSION AUTOMATIQUE 13.2, LA VAGE MANUEL DU GROUPE. En fin de travail, il est nécessaire d’effectuer, sur chaque groupe, un nettoyage avec filtre aveugle. • Retirer le porte-filtre (1) du groupe (2) et en éliminer les résidus de café. • Retirer le filtre du porte-filtre et monter le filtre aveugle (3) fourni à...
  • Seite 122 13.3, NETTOYAGE QUOTIDIEN. Nettoyage des lances. • Nettoyer soigneusement les lances (1) et (2) en fin de journée (et immédiatement après chaque utilisation, comme décrit dans les chapitre “distribution d’eau” et “distribution de vapeur”) afin de prévenir la formation de bactéries ou d’incrustations qui peuvent boucher les trous du diffuseur et pour éviter que les boissons de nature différente, préalablement chauffées, puissent altérer le goût des boissons chauffées.
  • Seite 123 CONTRÔLES ET CHANGEMENT DE PIÈCES. 14.1, CHANGEMENT DE LA DOUCHETTE. Au moins une fois par mois, changer la douchette (1) en procédant comme suit : • A l’aide d’un tournevis, faire levier sur la douchette (1) et la retirer du groupe (2) joint compris.
  • Seite 124 RÉGLAGES. ATTENTION : Ces opérations doivent être effectuées avec grande précaution et être confiées à un technicien qualifié. 15.1, RÉGLAGE PRESSION / TEMPÉRATURE CHAUDIÈRE. Il est possible de régler la pression et dont la température de l’eau présente dans la chaudière à...
  • Seite 125 MISE HORS SERVICE TEMPORAIRE. S’il est prévu de ne pas utiliser la machine pendant une longue durée, effectuer les opérations suivantes : • Effectuer les opérations d’entretien. • Couper l’alimentation d’eau et l’alimentation électrique. • Évacuer l’eau présente dans la chaudière en procédant comme suit. ATTENTION : Avant d’effectuer cette opération, s’assurer que la machine à...
  • Seite 126 GUIDE DE DÉPANNAGE. En cas de mauvais fonctionnement, éteindre immédiatement la machine et débrancher la fiche de la prise d’alimentation électrique. Appeler le Centre d’assistance agréé. Cause Solution L'eau ne s'écoule pas du groupe. Le robinet de l'alimentation d’eau ou les Ouvrir les robinets.
  • Seite 127 Cause Solution Joints axe robinet défectueux. Appeler le Service d'assistance. Fuite d'eau ou de vapeur sous les commandes des robinets pendant l'ouverture. Présence de résidus de saleté dans le logement Nettoyer. Le café s'écoule des bords du du porte-filtre qui empêchent l'écoulement du porte-filtre.
  • Seite 128 Cause Solution Robinet d'alimentation fermé. Ouvrir le robinet. La machine ne distribue pas d'eau chaude. Électrovanne de distribution défectueuse. Appeler le Service d'assistance. Conduits de distribution bouchés. Appeler le technicien pour effectuer le détartrage. ÉLIMINATION. • La mise hors service de la machine doit être confiée à un personnel autorisé à cet effet. La pression du circuit hydraulique doit être nulle, le câble d’alimentation doit être débranché...
  • Seite 129: Inhaltsverzeichnis

    BEDIENUNGSANLEITUNG, INHALTSVERZEICHNIS. ALLGEMEINE HINWEISE BESCHREIBUNG DER SYMBOLE VORGESEHENER GEBRAUCH ZWECKWIDRIGER GEBRAUCH RECHTSVERWEISE VOM KÄUFER DURCHZUFÜHRENDE VORBEREITUNGEN NOTFALLMASSNAHMEN IM BRANDFALL EXPLOSIONSGEFAHR SCHALLDRUCKPEGEL VIBRATIONEN BEDIENUNGSBEREICH / GEFAHREN BEDIENUNGSBEREICH BEREICHE MIT RESTRISIKO GEFAHRENBEREICHE BESCHREIBUNG DER MASCHINE TECHNISCHE DATEN AUSPACKEN UND AUFSTELLEN AUSPACKEN DER MASCHINE AUSSTATTUNG AUFSTELLEN DER MASCHINE...
  • Seite 130 KENNDATEN DER MASCHINE IDENTIFIZIERUNG DER BAUTEILE ANSCHLÜSSE W ASSERANSCHLUSS ELEKTRISCHER ANSCHLUSS ERSTE INBETRIEBNAHME BEDIENUNG DER BRÜHGRUPPE INBETRIEBNAHME DER MASCHINE DOSISPROGRAMMIERUNG (NUR AUTOMATISCHE AUSFÜHRUNG) BETRIEB 12.1 VORBEREITUNG DER MASCHINE 12.2 ZUBEREITUNG VON ESPRESSO 12.3 AUSGABE VON HEISSW ASSER 12.4 DAMPFAUSGABE 12.5 ZUBEREITUNG VON CAPPUCCINO 12.6 RÜCKSPÜLEN DER BRÜHGRUPPE MIT AUTOMATIKPROGRAMM...
  • Seite 131 REINIGUNG 13.1 ALLGEMEINE HINWEISE ZUR REINIGUNG 13.2 RÜCKSPÜLEN DER MANUELLEN BRÜHGRUPPE 13.3 TÄGLICHE REINIGUNG KONTROLLEN UND ERSATZ 14.1 ERSETZEN DER DUSCHE EINSTELLUNGEN 15.1 EINSTELLUNG DES BOILERDRUCKS / DER BOILERTEMPERATUR 15.2 EINSTELLUNG DES PUMPENDRUCKS VORÜBERGEHENDE AUSSERBETRIEBSETZUNG ERNEUTE INBETRIEBNAHME DER MASCHINE ANLEITUNG ZUR BEHEBUNG EINIGER PROBLEME ENTSORGUNG...
  • Seite 133: Allgemeine Hinweise

    ALLGEMEINE HINWEISE. Viebiemme S.r.l. hat jede mögliche Vorsichtsmaßnahme getroffen , um einen sicheren Betrieb und effiziente Geräte zu gewährleisten. Die eingebauten Sicherheitsvorrichtungen dienen zum Schutz der Bediener und der autorisierten Techniker. • Bitte lesen Sie diese Anleitung vor der Installation, Inbetriebnahme und Benutzung der Maschine aufmerksam durch.
  • Seite 134 • Für Eingriffe am Hauptschalter oder in dessen Nähe muss das Netz, an dem der Hauptschalter angeschlossen ist, spannungslos gesetzt werden. • Sicherheitseinrichtungen nicht entfernen. • Zur Vermeidung persönlicher Risiken nur geeignetes Werkzeug verwenden, das die nationalen Sicherheitsbestimmungen erfüllt. • Bei Betriebsstörungen der Maschine oder Schäden an den Bauteilen wenden Sie sich bitte an den für Ihr Gebiet zuständigen Vertragshändler oder an den Hersteller.
  • Seite 135 das Wasser im Boiler gefrieren und Schäden verursachen könnte; • die Maschine an Orten aufzustellen, an denen sie von Wasserspritzern erreichert werden könnte; • die Maschine in Betrieb zu setzen, solange nicht alle Klappen oder Verkleidungen korrekt geschlossen sind; • Löffel, Gabeln oder sonstige Utensilien in die Maschine zu stecken;...
  • Seite 136: Beschreibung Der Symbole

    1.1, BESCHREIBUNG DER SYMBOLE. Die in diesen Anleitungen enthaltenen Informationen zu gefährlichen Eingriffen Warnung vor gefährlicher elektrischer Spannung. sind folgenden Symbolen gekennzeichnet: ACHTUNG! Allgemeine Gefahr oder sonstige Informationen. Warnung vor heißer Oberfläche (Verbrennungen). WICHTIGER HINWEIS Gefahr von Maschinenbeschädigung. 1.2, VORGESEHENER GEBRAUCH. Die Espressomaschine wurde für professionelle Anwender und ausschließlich für die Zubereitung von Espresso und heißen Getränken (Tee, Cappuccino, usw..) mit heißem Wasser oder Dampf gebaut und ausgelegt.
  • Seite 137: Zweckwidriger Gebrauch

    1.3, ZWECKWIDRIGER GEBRAUCH. Die Espressomaschine wurde ausschließlich für lebensmittelgeeignete Verwendung gebaut und entworfen, und daher ist es verboten: • andere Flüssigkeiten als Wasser einzufüllen; • Getränke oder andere nicht zum Verzehr geeignete Substanzen zu wärmen; • in die Siebträger etwas anderes als gemahlenen Kaffee zu füllen; •...
  • Seite 138: Vom Käufer Durchzuführende Vorbereitungen

    1.5, VOM KÄUFER DURCHZUFÜHRENDE VORBEREITUNGEN. Vorbereitung des Standorts. • Der Käufer muss eine Stellfläche für die Maschine bereitstellen, die die im Kapitel Aufstellung genannten Vorgaben erfüllt. Elektrische Voraussetzungen. • Die elektrische Anlage für die Stromversorgung muss die Vorgaben der am Aufstellungsort geltenden nationalen Vorschriften erfüllen und mit einer effizienten Erdung ausgestattet sein.
  • Seite 139: Explosionsgefahr

    1.7, EXPLOSIONSGEFAHR. • Die Maschine ist nicht zur Verwendung in explosionsgefährdeten Räumen ausgelegt. 1.8, SCHALLDRUCKPEGEL. Die Maschine wurde so ausgelegt, dass ein A-bewerteter äquivalenter Dauerschallpegel A(dB) unter der zulässigen Höchstgrenze von 70 dB gewährleistet wird. 1.9, VIBRATIONEN. Die Maschine ist mit vibrationsdämpfenden Gummifüßen ausgestattet. Während des normalen Betriebs werden keine schädlichen Vibrationen an den Bediener und an die Umgebung übertragen.
  • Seite 140: Bedienungsbereich / Gefahren

    BEDIENUNGSBEREICH / GEFAHREN. 2.1, BEDIENUNGSBEREICH. Die Maschine kann von nur einer Person bedient werden, der während des Betriebs vor der Maschine steht, um den Espresso oder sonstige Heißgetränke bequem zubereiten zu können. 2.2, BEREICHE MIT RESTRISIKO. Die Bereiche mit Restrisiko, die aufgrund der speziellen Zubereitungsart der Espressomaschine nicht geschützt werden können, sind: •...
  • Seite 141: Beschreibung Der Maschine

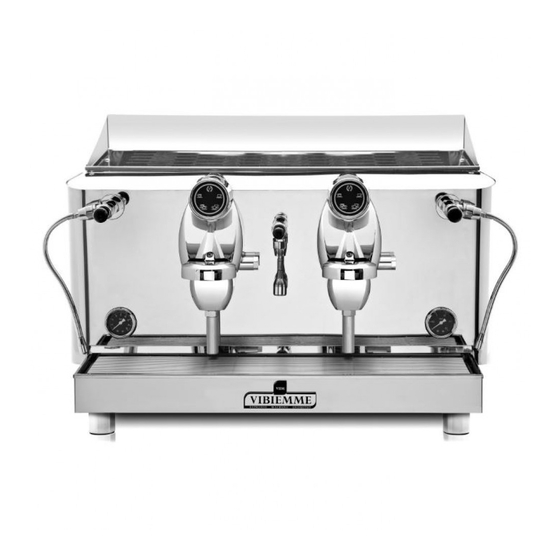
    BESCHREIBUNG DER MASCHINE. Nachstehend sind die wichtigsten Merkmale der halbautomatischen Espressomaschine mit über einen Hebel gesteuerter Ausgabe. • Kupferboiler (mit Wärmetauschern) für die Kaffeeausgabe und die Heißwasser- und Dampfbereitung. • Befüllen des Boilers mittels Rotationspumpe, die bei Einschalten der Maschine automatisch aktiviert wird. •...
  • Seite 142: Technische Daten

    TECHNISCHE DATEN. 2 Brühgruppen Brühgruppe MiniMax Brühgruppen Brühgruppen...
  • Seite 143 2 Brühgruppen 1 Brühgruppe 2 Brühgruppen 3 Brühgruppen MiniMax Füllmenge Boiler Liter Nettogewicht Versorgungsspannung Leistung Heizwiderstand Boiler 1800 4000 4000 5000 (230 V) Leistung Heizwiderstand n.v. * 0,2 opt. 0,25 Tassenwärmer Leistung Elektropumpe 0,165 0,165 Gesamtleistung 2000 4100 4400 5500 Betriebsdruck Boiler Bar/MPa Kaffee-Ausgabedruck...
  • Seite 144: Auspacken Und Aufstellen

    AUSPACKEN UND AUFSTELLEN. 5.1, AUSPACKEN DER MASCHINE. ACHTUNG: Die Maschine muss von einem autorisierten Fachmann ausgepackt und aufgestellt werden. • Überprüfen Sie immer die Unversehrtheit der Verpackung und melden Sie eventuelle Schäden dem Spediteur. • Die Verpackung oben (1) aufklappen. •...
  • Seite 145: Aufstellen Der Maschine

    Zur Ausstattung der Maschine gehört ein Typenschild (1), der gut sichtbar anzubringen ist. Auf dem Typenschild (1) sind die folgenden Daten angegeben: Modell. Anzahl Brühgruppen. Mod. Lollo Maschinenausführung 1: Gr. 2 Vers. 1 ELETTRONICA elektronisch oder halbautomatisch. Vers. 2 HX Maschinenausführung 2: HX.
  • Seite 146: Identifizierung Der Bauteile

    IDENTIFIZIERUNG DER BAUTEILE. Legende: Hauptschalter. In gedrückter Stellung auf “ON“ wird die Spannungszufuhr zur Maschine eingeschaltet und die Lampe (2) der Taste leuchtet auf. In gedrückter Stellung auf “OFF“ wird die Spannungszufuhr zur Maschine unterbrochen und die Lampe (2) erlischt. Schalter des Tassenwärmers.
  • Seite 147 O F F O F F...
  • Seite 148: Anschlüsse

    ANSCHLÜSSE. ACHTUNG: Der Anschluss der Maschine muss von einem autorisierten Fachmann vorgenommen werden. 8.1, W ASSERANSCHLUSS. Ablauf In der Nähe der Maschine muss eine Ablaufgarnitur (1) mit Siphon bereitgestellt werden. ACHTUNG: WICHTIG : Der Ablaufsiphon muss mindestens 20 cm unterhalb der Auflagefläche der Maschine angebracht werden. •...
  • Seite 149: Elektrischer Anschluss

    8.2, ELEKTRISCHER ANSCHLUSS. • Vor dem elektrischen Anschluss der Maschine muss sichergestellt werden, dass alle Schalter auf OFF stehen. • Die Erdung und die Konformität der Anlage mit den im Installationsland geltenden Bestimmungen sind zwingend erforderlich. • Sicherstellen, dass die Spannungswerte mit jenen des lokalen Stromnetzes übereinstimmen.
  • Seite 150: Erste Inbetriebnahme

    8.3, ERSTE INBETRIEBNAHME. ACHTUNG: Die erstmalige Inbetriebnahme muss von einem autorisierten Fachmann vorgenommen werden. • Den Wasserhahn vor der Maschine öffnen. • Den Fehlerstromschutzschalter vor der Maschine auf ON stellen, um die Stromzufuhr zur Maschine einzuschalten. • Den Schalter (1) auf “ON“ stellen. Die LED (2) leuchtet auf und der Boiler wird mit Wasser gefüllt. ACHTUNG: Wenn die Befüllung nicht innerhalb 120 Sekunden erfolgt, schaltet die Maschine auf Alarm und die LEDs an den Tasten der Brühgruppen blinken.
  • Seite 151: Bedienung Der Brühgruppe

    BEDIENUNG DER BRÜHGRUPPE. HALBAUTOMATISCHE AUSFÜHRUNG An jeder Brühgruppe befindet sich ein Tastenfeld für die Kaffeeausgabe. Tastenfeld der halbautomatischen Ausführung. 1 Taste Start Kaffeeausgabe “ “. • Bei Drücken der Taste (1) leuchtet die entsprechende LED auf und die Kaffeeausgabe beginnt. Zum Beenden der Ausgabe die Taste (2) drücken. 2 Taste Stopp Kaffeeausgabe “...
  • Seite 152: Inbetriebnahme Der Maschine

    INBETRIEBNAHME DER MASCHINE. • Den Schalter (1) auf “ON“ drücken, um die Maschine in Betrieb zu setzen. Die LED (2) leuchtet auf. • Die Erhitzung des Wassers im Boiler beginnt automatisch und wird durch Aufleuchten der LED (3) angezeigt. • Warten, bis die eingestellte Temperatur erreicht ist und die LED (3) erlischt.
  • Seite 153: Programmierung Der Dosis

    PROGRAMMIERUNG DER DOSIS (NUR AUTOMATISCHE AUSFÜHRUNG). Die ausgegebene Kaffeemenge kann für alle Tasten am Tastenfeld gespeichert werden, mit Ausnahme der Dauerausgabetaste “ “. ACHTUNG: Durch Programmieren des ersten Tastenfelds von links werden automatisch auch die anderen Tastenfelder der Maschine programmiert. Außerdem kann für jedes Tastenfeld die ausgegebene Kaffeemenge personalisiert werden, indem für jedes Tastenfeld die Phasen der Dosisprogrammierung wiederholt werden.
  • Seite 154: Betrieb

    BETRIEB. 12.1, VORBEREITUNG DER MASCHINE. • Sicherstellen, dass der Wasserhahn vor der Maschine geöffnet ist. • Sicherstellen, dass der Fehlerstromschutzschalter vor der Maschine auf “ON“ steht. • Den Schalter (1) auf “ON“ drücken, um die Maschine in Betrieb zu setzen. Die LED (2) leuchtet auf.
  • Seite 155: Zubereitung Von Espresso

    12.2, ZUBEREITUNG VON ESPRESSO. • Den Siebträger (1) in die vom Pfeil “R“ angegebene Richtung drehen, um ihn aus der Brühgruppe (2) zu nehmen. • Eventuell vorhandenen Kaffeesatz wegwerfen. • Den Siebträger mit der entsprechenden Dosis Kaffeepulver füllen (eine Dosis für eine Tasse Espresso, zwei Dosen für zwei Tassen Espresso).
  • Seite 156 HALBAUTOMATISCHE AUSFÜHRUNG Halbautomatische Ausführung. • Die Taste “ “ drücken, um die Kaffeeausgabe zu starten. Sobald die gewünschte Menge erreicht ist, die Taste “ “ drücken, um die Ausgabe zu beenden. Automatische Ausführung. AUTOMATISCHE AUSFÜHRUNG • Eine der Tasten “ “, “...
  • Seite 157: Ausgabe Von Heissw Asser

    12.3, AUSGABE VON HEISSW ASSER. Die Lanze (1) ist sehr heiß. Es besteht Verbrennungsgefahr. • Ein Kännchen unter die Heißwasserlanze (1) stellen. • Den Hebel (2) waagrecht oder senkrecht bewegen, um den Hahn zu öffnen. • Sobald die gewünschte Menge erreicht ist, den Hebel wieder in die mittlere Stellung bringen, um den Hahn (2) zu schließen.
  • Seite 158: Dampfausgabe

    12.4, DAMPFAUSGABE. • Die Dampflanze (1) zur Abtropfschale drehen, dann den Hebel (2) waagrecht oder senkrecht bewegen, um kurz Dampf abzulassen, damit das eventuell im Kreislauf enthaltene restliche Wasser austritt. Die Lanze (1) ist sehr heiß. Die Lanze nur am Gummischutz (3) verschieben; es besteht Verbrennungsgefahr. •...
  • Seite 159: Zubereitung Von Cappuccino

    12.5, ZUBEREITUNG VON CAPPUCCINO. Die Lanze (2) ist sehr heiß. Die Lanze nur am Gummischutz (1) verschieben; es besteht Verbrennungsgefahr. • Frische Milch in ein hitzebeständiges Kännchen, vorzugsweise aus Edelstahl, geben. • Die Lanze (2) vollständig in die Milch eintauchen und den Hebel (3) je nach der gewünschten Dampfmenge waagrecht oder senkrecht bewegen.
  • Seite 160: Rückspülen Der Brühgruppe Mit Automatikprogramm

    12.6, RÜCKSPÜLEN DER BRÜHGRUPPE MIT AUTOMATIKPROGRAMM. Für jede Brühgruppe kann wie folgt ein automatisches Rückspülen durchgeführt werden: • Den Siebträger (1) aus der Brühgruppe (2) nehmen und die Kaffeerückstände entleeren. • Das Sieb aus dem Siebträger nehmen und das mitgelieferte Blindsieb (3) einsetzen. •...
  • Seite 161: Ausschalten

    12.7, AUSSCHALTEN. ACHTUNG: Bevor die Maschine abgeschaltet wird, müssen die im entsprechenden Kapitel beschriebenen Reinigungsvorgänge durchgeführt werden. • Den Heizwiderstand des Tassenwärmers mit dem Schalter (1) ausschalten; die LED (2) erlischt. • O F F Den Schalter (3) auf “OFF“ drücken, um die Maschine abzuschalten. Die LED (4) erlischt.
  • Seite 162: Reinigung

    REINIGUNG. Die Reinigung darf nur an der ausgeschalteten und kalten Maschine mit Hauptschalter auf “OFF“ und von der Steckdose getrenntem Netzkabel durchgeführt werden. Den Stecker während der Reinigung sichtbar positionieren. WICHTIGER HINWEIS: Eine unsachgemäße Wartung und Reinigung unter Verwendung von nicht enthärtetem Wasser oder Schäden an den Innenteilen können plötzliche Unterbrechungen des -Wasserflusses sowie das unvermittelte Austreten von Spritzern oder Dampf mit schwerwiegenden Folgen verursachen.
  • Seite 163: Rückspülen Der Manuellen Brühgruppe

    AUTOMATISCHE AUSFÜHRUNG 13.2, RÜCKSPÜLEN DER MANUELLEN BRÜHGRUPPE. Bei Feierabend muss für jede Brühgruppe die Reinigung mit Blindsieb durchgeführt werden. • Den Siebträger (1) aus der Brühgruppe (2) nehmen und die Kaffeerückstände entleeren. • Das Sieb aus dem Siebträger nehmen und das mitgelieferte Blindsieb (3) einsetzen.
  • Seite 164: Tägliche Reinigung

    13.3, TÄGLICHE REINIGUNG. Reinigung der Lanzen. • Die Lanzen (1) und (2) am Feierabend (und auch sofort nach jedem Gebrauch wie in den Abschnitten “Wasserausgabe“ und “Dampfausgabe“ beschrieben) sorgfältig säubern, um die Bildung von Bakterien und Verkrustungen zu vermeiden, die die Austrittslöcher verstopfen können.
  • Seite 165: Kontrollen Und Ersatz

    KONTROLLEN UND ERSATZ. 14.1, ERSETZEN DER DUSCHE. Mindestens einmal im Monat muss die Dusche (1) wie folgt ersetzt werden: • Die Dusche (1) mithilfe eines Schraubendrehers anheben und mit der dazugehörenden Dichtung aus der Brühgruppe (2) nehmen. • Die Dusche (1) und die Dichtung (3) ersetzen. •...
  • Seite 166: Einstellungen

    EINSTELLUNGEN. ACHTUNG: Diese Vorgänge müssen sehr vorsichtig von einem qualifizierten Techniker durchgeführt werden. 15.1, EINSTELLUNG DES BOILERDRUCKS / DER BOILERTEMPERATUR. Der Druck und damit die Temperatur des Wassers im Boiler kann mit dem Pressostat geregelt werden und wird am Manometer (1) angezeigt. •...
  • Seite 167: Vorübergehende Ausserbetriebsetzung

    VORÜBERGEHENDE AUSSERBETRIEBSETZUNG. Wenn die Maschine für eine längere Zeit nicht benutzt werden soll, wie folgt vorgehen: • Die Wartungseingriffe durchführen. • Die Wasser- und Stromzufuhr trennen. • Das im Boiler enthaltene Wasser wie folgt entleeren. ACHTUNG: Bevor dieser Vorgang durchgeführt wird, muss sichergestellt werden, dass die Kaffeemaschine ausgeschaltet (Stromversorgung vor der Maschine getrennt), der Wasserhahn des Wasserzulaufs geschlossen, und das Wasser im Boiler kalt ist.
  • Seite 168: Anleitung Zur Behebung Einiger Probleme

    ANLEITUNG ZUR BEHEBUNG EINIGER PROBLEME. Bei Auftreten von Betriebsstörungen die Maschine sofort ausschalten und Netzstecker ziehen. Den Vertragskundendienst rufen. Ursache Abhilfe Der Wasserhahn des Wassernetzes oder die Wasserhähne öffnen. Aus der Brühgruppe tritt kein Wasserhähne des Wasseraufbereiters sind Wasser aus. geschlossen.
  • Seite 169 Ursache Abhilfe Hahndichtungen defekt. Kundendienst rufen. Unter den Griffen der Hähne tritt während der Öffnung Wasser oder Dampf aus. In der Aufnahme des Siebträgers befinden Reinigen. Der Kaffee tropft über die sich Schmutzrückstände, die das Austreten Ränder des Siebträgers. des Kaffees aus der Düse verhindern. Dichtung der Brühgruppe abgenutzt.
  • Seite 170: Entsorgung

    Ursache Abhilfe Wasserhahn geschlossen. Wasserhahn öffnen. Maschine gibt kein Heißwasser aus. Magnetventil an der Ausgabe defekt. Kundendienst rufen. Ausgabeleitungen verstopft. Techniker rufen und entkalken. ENTSORGUNG. • Die Außerbetriebsetzung der Maschine muss von autorisiertem Personal durchgeführt werden. Der Wasserkreis muss vollständig drucklos gesetzt und das Netzkabel getrennt werden.
  • Seite 171 MANUAL DE INSTRUCCIONES, ÍNDICE. INFORMACIÓN GENERAL DESCRIPCIÓN DE LOS SÍMBOLOS USO PREVISTO USO INCORRECTO NORMATIVAS DE REFERENCIA PREDISPOSICIONES A CARGO DEL COMPRADOR OPERACIONES DE EMERGENCIA EN CASO DE INCENDIO RIESGO DE EXPLOSIÓN NIVEL DE PRESIÓN ACÚSTICA VIBRACIONES ZONAS DEL OPERADOR / PELIGRO RELATIVO ZONAS DEL OPERADOR ZONAS CON PELIGRO RESIDUAL ZONAS PELIGROSAS...
  • Seite 172 IDENTIFICACIÓN DE LA MÁQUINA IDENTIFICACIÓN DE LOS COMPONENTES CONEXIONES CONEXIÓN HÍDRICA CONEXIÓN ELÉCTRICA PRIMERA PUESTA EN MARCHA DESCRIPCIÓN DE LOS MANDOS DEL GRUPO PUESTA EN MARCHA DE LA MÁQUINA PROGRAMACIÓN DE DOSIS (SOLO PARA VERSIÓN AUTOMÁTICA) FUNCIONAMIENTO 12.1 PREPARACIÓN DE LA MÁQUINA 12.2 PREPARACIÓN DE CAFÉ...
  • Seite 173 LIMPIEZA 13.1 INFORMACIÓN GENERAL SOBRE LA LIMPIEZA 13.2 LA VADO DEL GRUPO MANUAL 13.3 LIMPIEZA DIARIA CONTROLES Y SUSTITUCIONES 14.1 SUSTITUCIÓN DEL CABEZAL DE INFUSIÓN REGULACIONES 15.1 REGULACIÓN DE LA PRESIÓN/TEMPERATURA DE LA CALDERA 15.2 REGULACIÓN DE PRESIÓN DE LA BOMBA PUESTA FUERA DE SERVICIO TEMPORAL VOLVER A PONER EN SERVICIO LA MÁQUINA GUÍA PARA LA SOLUCIÓN DE ALGUNOS PROBLEMAS...
  • Seite 175 INFORMACIÓN GENERAL. Vibiemme S.r.l. ha tomado todas las precauciones posibles para garantizar un funcionamiento seguro y un equipo eficiente. Los dispositivos de seguridad están diseñados para proteger a los operadores y a los técnicos autorizados. • Leer atentamente este manual antes de instalar, arrancar y utilizar la máquina. El no hacerlo puede resultar en daños al equipo, bajo rendimiento de la máquina, riesgos para la salud o daños personales.
  • Seite 176 la línea a la que esté conectado el interruptor general. • No retirar los dispositivos de seguridad. • Para evitar riesgos personales, utilizar solo equipos adecuados y conformes a las normas nacionales de seguridad. • En caso de mal funcionamiento de la máquina o de daños a los componentes, contactar con el distribuidor local o con el fabricante.
  • Seite 177 • instalar la máquina en lugares donde se utilicen chorros de agua que podrían llegar a la máquina; • utilizar la máquina si alguna puerta o algún panel no cierra correctamente; • introducir cucharas, tenedores u otros utensilios en las partes internas de la máquina; •...
  • Seite 178 1.1, DESCRIPCIÓN DE LOS SÍMBOLOS. La información relativa a las operaciones de riesgo indicadas en este manual están Peligro debido a la electricidad. marcadas con los siguientes símbolos que indican: ATENCIÓN Peligro general o informaciones varias. Peligro térmico (quemaduras). ADVERTENCIA Peligro de daños a la máquina.
  • Seite 179 1.3, USO INCORRECTO. La máquina de café se ha creado y diseñado para un uso exclusivamente alimentario y, por lo tanto, está prohibido: • introducir líquidos distintos del agua; • calentar bebidas u otras sustancias no alimenticias; • introducir en los portafiltros sustancias molidas que no sean café; •...
  • Seite 180 1.5, PREDISPOSICIONES A CARGO DEL COMPRADOR. Predisposición del lugar de instalación. • El comprador debe predisponer una superficie de apoyo para la máquina, como se indica en el capítulo de instalación. Predisposición eléctrica. • La instalación eléctrica de alimentación debe ser conforme a lo indicado por las normas nacionales vigentes del lugar y debe disponer de una puesta a tierra eficiente.
  • Seite 181 1.7, RIESGO DE EXPLOSIÓN. • La máquina no es adecuada para usarse en ambientes con riesgo de explosión. 1.8, NIVEL DE PRESIÓN ACÚSTICA. La máquina se ha fabricado para mantener un nivel de presión acústica continuo equivalente ponderado A(dB) por debajo del límite máximo permitido de 70 dB.
  • Seite 182 ZONAS DEL OPERADOR / PELIGRO RELATIVO. 2.1, ZONAS DEL OPERADOR. La máquina funciona con un solo operador que, durante el funcionamiento, se encuentra delante de esta para poder realizar fácilmente las operaciones de preparación de café u otras bebidas calientes. 2.2, ZONAS CON PELIGRO RESIDUAL.
  • Seite 183 DESCRIPCIÓN DE LA MÁQUINA. A continuación se indican las características principales de la máquina de café expreso semiautomática de dispensación controlada por palanca. • Caldera de cobre (con intercambiadores de calor) para la dispensación de café y para la producción de agua caliente y vapor. •...
  • Seite 184 DATOS TÉCNICOS. 2 Grupos 1 Grupo 2 Grupos 3 Grupos MiniMax...
  • Seite 185 2 Grupos 1 Grupo 2 Grupos 3 Grupos MiniMax Capacidad de la caldera litros Peso neto Tensión de alimentación Potencia resistencia caldera (230 V) 1800 4000 4000 5000 Potencia resistencia calentador ND * 0,2 opt. 0,25 de tazas Potencia bomba eléctrica 0,165 0,165 Potencia total...
  • Seite 186 DESEMBALAJE Y POSICIONAMIENTO. 5.1, DESEMBALAJE DE LA MÁQUINA. ATENCIÓN: Las operaciones de desembalaje y de posicionamiento de la máquina deben realizarse por un técnico especializado y autorizado. • Comprobar siempre la integridad del embalaje: informar al transportista de cualquier daño. •...
  • Seite 187 En el suministro de la máquina se incluye una placa de matrícula (1) que debe colocarse en una zona visible. La placa (1) incluye los siguientes datos: Modelo. Número de grupos. Mod. Lollo Versión de la máquina 1: Gr. 2 Vers. 1 ELETTRONICA electrónica o semiautomática.
  • Seite 188 IDENTIFICACIÓN DE LOS COMPONENTES. Leyenda: Interruptor general. Pulsado en la posición de encendido, «ON», se introduce tensión en la máquina y se ilumina el indicador (2) del botón. Pulsado en la posición de apagado, «OFF», se corta la tensión de la máquina y se apaga el indicador (2). Interruptor del calentador de tazas.
  • Seite 189 O F F O F F...
  • Seite 190 CONEXIONES. ATENCIÓN: Las operaciones de conexión de la máquina deben realizarse por un técnico especializado y autorizado. 8.1, CONEXIÓN HÍDRICA. Descarga En las proximidades de la máquina debe predisponerse una pileta de descarga de agua (1) con sifón. ATENCIÓN: El sifón de desagüe debe colocarse al menos 20 cm por debajo de la superficie de apoyo de la máquina.
  • Seite 191 8.2, CONEXIÓN ELÉCTRICA. • Comprobar que todos los interruptores estén en la posición «OFF» antes de conectar la máquina a la instalación eléctrica. • Es obligatoria la conexión de puesta a tierra, así como la correspondencia de la instalación con las normativas vigentes en el país de instalación.
  • Seite 192 8.3, PRIMERA PUESTA EN MARCHA. ATENCIÓN: Las operaciones de la primera puesta en marcha deben realizarse por un técnico especializado y autorizado. • Abrir el grifo de alimentación hídrica situado aguas arriba de la máquina. • Introducir la alimentación eléctrica en la máquina colocando en la posición «ON» el interruptor diferencial situado aguas arriba de la máquina.
  • Seite 193 DESCRIPCIÓN DE LOS MANDOS DEL GRUPO. VERSIÓN SEMIAUTOMÁTICA En cada grupo hay presente un panel de mandos para la dispensación de café. Panel de mandos para versión semiautomática. 1 Tecla de inicio de dispensación de café « ». • Pulsando la tecla (1) se ilumina el indicador correspondiente y se inicia la dispensación de café.
  • Seite 194 PUESTA EN MARCHA DE LA MÁQUINA. • Poner en marcha la máquina pulsando el interruptor (1) en «ON». El indicador (2) se ilumina. • Automáticamente se inicia el calentamiento del agua presente en la caldera, indicado por la iluminación del indicador (3). •...
  • Seite 195 PROGRAMACIÓN DE DOSIS (SOLO PARA VERSIÓN AUTOMÁTICA). Es posible memorizar la cantidad de café dispensada para todas las teclas presentes en el panel de mandos, menos para la tecla de dispensación continua « ». ATENCIÓN: Programando el primer panel de mandos de la izquierda se programan automáticamente los otros paneles de mandos presentes en la máquina.
  • Seite 196 FUNCIONAMIENTO. 12.1, PREPARACIÓN DE LA MÁQUINA. • Comprobar que el grifo de alimentación hídrica situado aguas arriba de la máquina esté abierto. • Comprobar que el interruptor diferencial magnetotérmico situado aguas arriba de la máquina esté en la posición «ON». •...
  • Seite 197 12.2, PREPARACIÓN DE CAFÉ. • Retirar el portafiltro (1) del grupo (2) girándolo en el sentido indicado por la flecha «R». • Desechar los posibles posos presentes. • Rellenar el portafiltro con la dosis de café (una dosis para un café, dos dosis para dos cafés). •...
  • Seite 198 VERSIÓN SEMIAUTOMÁTICA Versión semiautomática. • Pulsar la tecla « » para iniciar la dispensación de café. Cuando se alcance la cantidad deseada, pulsar la tecla « » para detener la dispensación. VERSIÓN AUTOMÁTICA Versión automática. • Pulsar una de las tecla « », «...
  • Seite 199 12.3, DISPENSACIÓN DE AGUA CALIENTE. La varilla (1) está muy caliente; peligro de quemaduras. • Colocar una jarra bajo la varilla (1). • Abrir el grifo moviendo la palanca (2) horizontal o verticalmente. • Una vez alcanzada la cantidad deseada, cerrar el grifo (2) llevando la palanca nuevamente a la posición central.
  • Seite 200 12.4, DISPENSACIÓN DE VAPOR. • Girar la varilla de vapor (1) hacia la cubeta y, a continuación, realizar una breve dispensación de vapor en vacío desplazando lentamente el grifo (2) en sentido horizontal o vertical, para eliminar los posibles restos de agua presentes dentro del circuito. La varilla (1) está...
  • Seite 201 12.5, PREPARACIÓN DE CAPUCHINO. La varilla (2) está muy caliente. Desplazar la varilla solo mediante la correspondiente protección de goma (1); peligro de quemaduras. • Echar leche fresca en una jarra resistente al calor, preferiblemente de acero inoxidable. • Sumergir la varilla (2) completamente en la leche y desplazar en sentido horizontal o vertical la palanca (3) en función de la cantidad de vapor que se desee.
  • Seite 202 12.6, LA VADO DEL GRUPO CON PROGRAMA AUTOMÁTICO. Es posible realizar un lavado automático de cada grupo del siguiente modo: • Retirar el portafiltro (1) del grupo (2) y vaciar los restos de café que contenga. • Retirar el filtro del portafiltro y montar el filtro ciego (3) suministrado. •...
  • Seite 203 12.7, APAGADO. ATENCIÓN: Antes de apagar la máquina es necesario realizar las operaciones de limpieza indicadas en el capítulo correspondiente. • Apagar la resistencia del calentador de tazas mediante el interruptor (1); el indicador (2) se apaga. • Apagar la máquina pulsando el interruptor (3) en la posición «OFF»; el indicador O F F (4) se apaga.
  • Seite 204 LIMPIEZA. Las operaciones de limpieza deben realizarse con la máquina apagada y fría, y con el interruptor general desconectado en la posición «OFF» y el cable de alimentación eléctrica desconectado de la toma, colocando el enchufe en un lugar visible. ADVERTENCIA: Un mantenimiento y una limpieza inadecuados, con agua no ablandada, o daños en las partes internas, pueden causar interrupciones súbitas del flujo de agua y chorros inesperados de líquido o de vapor, con consecuencias graves.
  • Seite 205 VERSIÓN AUTOMÁTICA 13.2, LA VADO DEL GRUPO MANUAL. Al final del turno de trabajo hay que realizar la limpieza de cada grupo con filtro ciego. • Retirar el portafiltro (1) del grupo (2) y vaciar los restos de café que contenga. •...
  • Seite 206 13.3, LIMPIEZA DIARIA. Limpieza de las varillas. • Limpiar a fondo las varillas (1) y (2) al final del día (e inmediatamente después de cada uso, como se indica en los apartados «dispensación de agua» y «dispensación de vapor») para evitar la formación de bacterias o depósitos que puedan bloquear los orificios del difusor y, por otra parte, para evitar que las bebidas de diferente naturaleza calentadas anteriormente puedan alterar el sabor de las bebidas que se calienten.
  • Seite 207 CONTROLES Y SUSTITUCIONES. 14.1, SUSTITUCIÓN DEL CABEZAL DE INFUSIÓN. Al menos cada mes es necesario sustituir el cabezal de infusión (1). Para la sustitución, seguir estos pasos: • Con un destornillador hacer palanca en el cabezal de infusión (1) y retirarlo del grupo (2) con la junta correspondiente.
  • Seite 208 REGULACIONES. ATENCIÓN: Estas operaciones deben realizarse por un técnico cualificado operando con extrema cautela. 15.1, REGULACIÓN DE LA PRESIÓN/TEMPERATURA DE LA CALDERA. Es posible regular la presión y la temperatura del agua presente en la caldera mediante el presostato, visualizándola en el manómetro (1). •...
  • Seite 209 PUESTA FUERA DE SERVICIO TEMPORAL. Si se prevé que no se va a usar la máquina durante un largo período de tiempo, es necesario realizar las siguientes operaciones: • Realizar las operaciones de mantenimiento. • Desconectar la alimentación hídrica y eléctrica. •...
  • Seite 210 GUÍA PARA LA SOLUCIÓN DE ALGUNOS PROBLEMAS. En caso de mal funcionamiento, apagar la máquina inmediatamente y retirar el enchufe de la toma eléctrica. Llamar al Centro de servicio autorizado. Causa Solución El grifo de la red hídrica o los grifos de la Abrir los grifos.
  • Seite 211 Causa Solución Juntas del eje del grifo defectuosas. Llamar al Servicio de asistencia. Se observa la pérdida de agua o de vapor bajo los pomos de los grifos durante la apertura. En el alojamiento del portafiltro hay residuos Limpiar. Sale café por los bordes del de suciedad que impiden la salida de café...
  • Seite 212 Causa Solución Grifo de alimentación cerrado. Abrir el grifo. La máquina no dispensa agua caliente. Electroválvula de dispensación defectuosa. Llamar al Servicio de asistencia. Conductos de dispensación obstruidos. Llamar técnico para realizar descalcificación. ELIMINACIÓN. • La puesta en desuso de la máquina debe realizarse por personal autorizado. La presión del circuito hidráulico se debe reducir por completo, el cable de alimentación debe desconectarse y las sustancias potencialmente nocivas para el medio ambiente deben eliminarse de una forma legal y correcta.
  • Seite 214 VIBIEMME SRL via Charles Gounod, 25/27 - 20092 Cinisello Balsamo, Milan, Italy T. (+39) 02 66016691 · F. (+39) 02 66016636 info@vbmespresso.com · www. v bmespresso.com...

Inhaltsverzeichnis