
Verwandte Anleitungen für Tecno-gaz Hydra EVO


Inhaltszusammenfassung für Tecno-gaz Hydra EVO
- Seite 1 Istruzioni per l’uso User Manual Mode d’emploi Instrucciones de uso Bedienungsanleitung Hydra EVO Hydra EVO Plus DHET012 Rev_4...
- Seite 3 DANS LE MANUEL ON IDENTIFIERA COMME: A LO LARGO DEL MANUAL EXPLICAREMOS COMO: IM HANDBUCH IDENTIFIZIEREN WIR WIE: HYDRA EVO MOD. 1 HYDRA EVO PLUS MOD. 2 Costruito da / The Manufacturer / Fabriqué par / Fabricado por / Hersteller: MEDILINE ITALIA s.r.l.
- Seite 4 IMPIEGO E DESTINAZIONE D’USO DELL’AUTOCLAVE L’autoclave deve essere utilizzata per sterilizzare gli strumenti presenti nello studio, seguendo le indicazioni del costruttore per la sterilizzazione di ogni strumento. Accertarsi della temperatura massima che gli strumenti possono sopportare. L’autoclave può essere utilizzata nel campo dentale, medicale, estetico ed in generale in tutti i settori in cui si procede alla sterilizzazione degli strumenti e dei materiali.
- Seite 5 EMPLEO DE LA AUTOCLAVE El autoclave se utiliza para la esterilizaciòn de todos los instrumentos presentes en el estudio médico, segun las indicaciones del constructor. Verifique la temperatura màxima que los instrumentos pueden soportar. El autoclave puede ser utilizado en el sector dental, medico, estetico y en general en todos los sectores donde se procede a la esterilización de instrumentos y materiales.
-
Seite 9: Norme Di Riferimento
SICUREZZA E SIMBOLI PRESENTI SULL’APPARECCHIATURA SYMBOLS AND SAFETY ON THE EQUIPMENT SECURITE ET SYMBOLES PRESENT SUR L’APPAREIL SEGURIDAD Y SÍMBOLOS PRESENTES EN EL APARATO SICHERHEIT UND SYMBOLE AM GERÄT Norme di riferimento Direttiva Bassa Tensione Prove e verifiche di sicurezza elettrica •... -
Seite 10: Normes De Référence
Normes de référence Directive Basse Tension Tests de sécurité électrique • Caractérisation énergétique – Mesure de la puissance et du courant absorbés (EN 61010-1 – Art. 5.1.3) • Mesure du courant de dispersion à la température de fonctionnement (EN 61010-1 – Art. 6.5) •... - Seite 11 TENSIONE - VOLTAGE – TENSION – TENSION - SPANNUNG TOGLIERE TENSIONE PRIMA DI APRIRE IL PORTELLO DISCONNECT THE MAINS SUPPLY BEFORE REMOVING THIS COVER ENLEVER LA TENSION AVANT D’OUVRIR LA PORTE QUITAR TENSION ANTE DE ABRIR LA VENTANILLA UNTERBINDEN SIE DIE STROMZUFUHR, BEVOR SIE DIE TUR OFFNEN ATTENZIONE: ALTA TEMPERATURA ATTENTION: HIGH TEMPERATURE ATTENTION: TEMPERATURES ELEVEES...
- Seite 12 1. INDICE PARAGRAFO ARGOMENTO Indice Istruzioni per l’imballo e lo stoccaggio - smaltimento Caratteristiche tecniche Accessori in dotazione Installazione Introduzione alla sterilizzazione Tabella cicli di sterilizzazione Carico serbatoio acqua Scarico serbatoio acqua Messa in funzione e preparazione alla sterilizzazione Manutenzione Indicazioni di errori Garanzia LA CASA PRODUTTRICE SI RISERVA IL DIRITTO DI APPORTARE MODIFICHE...
-
Seite 13: Smaltimento
2. ISTRUZIONI PER L’ IMBALLO E LO STOCCAGGIO L’autoclave è imballata nel seguente modo: richiusa in un sacchetto di POLIETILENE, protetta da un composto di cartone e inserita in una scatola di cartone ondulato, alla cui base sono inchiodati due listelli in legno. L’imballo non è... -
Seite 14: Caratteristiche Tecniche
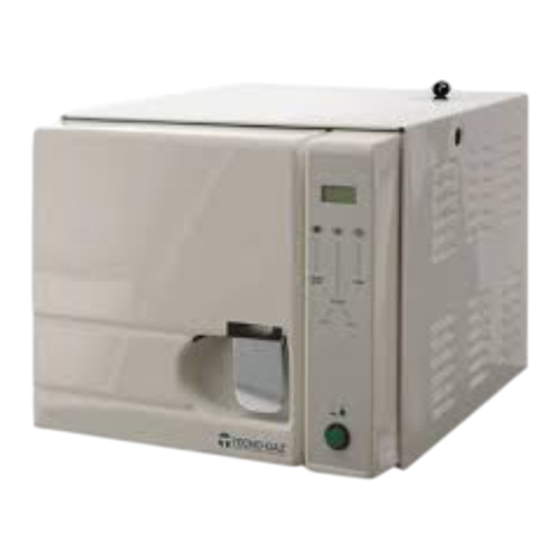
3. CARATTERISTICHE TECNICHE CARATTERISTICHE MECCANICHE DELL’APPARECCHIO Temperatura ambiente di utilizzo +5°C ÷ +40° C Dimensioni apparecchio (X,Y,Z) 445mm, 385mm, 500mm MOD. 1 – 2 Ingombro sportello aperto 380 mm Peso a serbatoi vuoti dell’apparecchio 30 kg MOD. 1 – 2 Peso a serbatoi pieni dell’apparecchio 35 kg MOD. - Seite 15 CARATTERISTICHE PORTA-TRAY IN DOTAZIONE Materiale Alluminio anodizzato Numero di Porta-tray in dotazione Dimensione del Porta-tray (X;Y;Z) 192 x 165 x 280 mm MOD. 1 – 2 CARATTERISTICHE TRAY IN DOTAZIONE Materiale Alluminio anodizzato Numero di tray in dotazione Dimensione del tray (X;Y;Z) 184 x 17 x 280 mm MOD.
-
Seite 16: Accessori In Dotazione
4. ACCESSORI IN DOTAZIONE L’autoclave è venduta con accessori compresi nell’articolo e contenuti nello stesso imballo. Accessori in dotazione: N° PEZZI DESCRIZIONE Chiave estrazione tray e regolazione portello Tray Tubo di scarico serbatoio Spugna Porta tray N.B. GLI ACCESSORI SOPRA ELENCATI NON NECESSITANO DI AVVERTENZE ATTENZIONE: IL COPERCHIO DEL SERBATOIO E’... -
Seite 17: Introduzione Alla Sterilizzazione
15. Collegare la spina dell’ apparecchio ad una presa con tensione nominale alternata 230V±10% MONOFASE + TERRA, frequenza 50/60Hz, corrente 16A, come descritto nella targhetta posta sul retro dell’ autoclave. 16. Non connettere mai la spina dell’apparecchio a riduzioni di qualsiasi genere. 17. -
Seite 18: Carico Serbatoio Acqua
7. TABELLA CICLI DI STERILIZZAZIONE DURATA DURATA PRESSIONE CICLI STERILIZZAZIONE ASCIUGATURA DI LAVORO [minuti] [minuti] [Bar Relativi] 121° C 22,5 1,3 ± 0,2 (non imbustati) 134° C 2,25 ± 0,2 (non imbustati) La scelta del ciclo di sterilizzazione si deve basare sui dati forniti dal costruttore dell’oggetto. 8. -
Seite 19: Scarico Serbatoio Acqua
TABELLA LIVELLI QUALITATIVI STABILITI DALLA NORMATIVA UNI EN 13060 : 2005 CEN STANDARD UNI EN 13060 : 2005 ≤ Residuo evaporazione mg/l ≤ Ossido di silicio mg/l ≤ Ferro mg/l ≤ Cadmio 0.005 mg/l ≤ Piombo 0.05 mg/l ≤ Resti di metalli pesanti tranne ferro, cadmio, piombo mg/l ≤... -
Seite 20: Messa In Funzione E Preparazione Alla Sterilizzazione
10. MESSA IN FUNZIONE E PREPARAZIONE ALLA STERILIZZAZIONE 1. Riempire il serbatoio dell’acqua (vedere dettagli al paragrafo 8). 2. Premere il pulsante MAIN BUTTON per accendere la macchina. 3. Aprire la porta 1A. 4. Premere il pulsante PUMP per caricare l’acqua in camera. Il caricamento è... - Seite 21 10. Dare avvio al ciclo di sterilizzazione premendo il pulsante START/STOP. L’autoclave inizia la fase di preriscaldo (sul display viene visualizzata la scritta “HEATING”). Quando la macchina arriva alla pressione di lavoro per il ciclo selezionato inizia la fase di sterilizzazione (sul display viene visualizzata la scritta “STERILIZ”).
-
Seite 22: Manutenzione Trimestrale
11. MANUTENZIONE ATTENZIONE: TOGLIERE SEMPRE TENSIONE PRIMA DI OGNI OPERAZIONE DI MANUTENZIONE! 11.1. MANUTENZIONE ORDINARIA GIORNALIERA • Pulire la guarnizione del portello e il bordo esterno della camera di sterilizzazione con un panno morbido umido o la parte morbida della spugna fornita in dotazione. Tale pulizia deve essere eseguita per rimuovere eventuali impurità... - Seite 23 12. INDICAZIONI DI ERRORI MESSAGGIO PROBLEMA E RIMEDIO ERROR100 Il ciclo di sterilizzazione è stato interrotto dall’utente premendo il tasto START/STOP. ERROR120 Bassa pressione in camera durante la fase di sterilizzazione. ERROR125 Alta pressione in camera durante la fase di sterilizzazione. La pressione non è...
- Seite 24 1. INDEX PARAGRAPH THEME Index Instructions for package and storing – disposal Technical features Supplied accessories Installation Introduction for sterilisation Sterilisation table Filling of the water tank Emptying the water tank Commissioning and preparing for sterilisation Maintenance Messages of the alarm and error displays Warranty THE MANUFACTURER RESERVES THE RIGHT TO CARRY OUT IMPROVING TECHNICAL CHANGES WITHOUT ANY PREVIOUS NOTICE.
- Seite 25 2. ISTRUCTIONS FOR PACKAGE AND STORING The autoclave is packed as follows: It is in a polyethylene bag which is protected by a carton protection. The package is not sterile. The package and the autoclave are fragile, therefore handle with care, transport without shakes and hits and do not turn upside down.
-
Seite 26: Technical Features
3. TECHNICAL FEATURES DEVICE MECHANICAL FEATURES Use room temperature +5°C ÷ +40° C Device dimensions (X,Y,Z) 445mm, 385mm, 500mm MOD. 1 - 2 Opened door overall dimensions 380 mm Weight with empty device tanks 30 kg MOD. 1 - 2 Weight with full device tanks 35 kg MOD. - Seite 27 FEATURES OF THE SUPPLIED TRAY-HOLDERS Material Anodized aluminium Number of supplied tray-holders Tray-holder dimensions (X;Y;Z) 192 x 165 x 280 mm MOD. 1 - 2 FETAURES OF THE SUPPLIED TRAY Material Anodized aluminium Number of supplied trays Tray dimensions (X;Y;Z) 184 x 17 x 280 mm MOD.
-
Seite 28: Supplied Accessories
4. SUPPLIED ACCESSORIES The autoclave is sold with the accessories included in the article and contained in the same package. Accessories provided: N° PIECE DESCRIPTION Tray extraction and door adjusting key Tray Instruments holder Funnel Tray holder THE EQUIPMENT LISTED ABOVE DO NOT REQUIRE ADVICES ATTENTION: LE COUVERCLE DU RESERVOIR D’EAU SE TROUVE A L’INTERIEUR DU KIT ACCESSORIES 5. -
Seite 29: Introduction For Sterilisation
15. Connect the device pin to a socket with a rated voltage of 230V±10% MONOPHASE + EARTH, frequency 50/60Hz, current 16A, as shown on the identification plate place in the rear side of the device. 16. Never connect the device pin to reductions of any type. 17. -
Seite 30: Sterilisation Table
7. STERILISATION TABLE STERILISATION DRYING WORKING CYCLES TIME TIME PRESSURE [minutes] [minutes] [Bar Relative] 121° C 22,5 1,3 ± 0,2 (not wrapped) 134° C 2,25 ± 0,2 (not wrapped) The choice of the sterilisation cycle must be based on the data supplied by the producer of the object you want to sterilise. -
Seite 31: Emptying The Water Tank
TABLE OF QUALITY LEVEL IN ACCORDING TO DIRECTIVE UNI EN 13060 : 2005 CEN STANDARD UNI EN 13060 : 2005 ≤ Evaporation residue mg/l ≤ Silicium oxide, SiO2 mg/l ≤ Iron mg/l ≤ Cadmium 0.005 mg/l ≤ Lead 0.05 mg/l ≤... - Seite 32 10. COMMISSIONING AND PREPARING FOR STERILIZATION 1. Fill in the water tank (see paragraph 8); 2. Push the MAIN BUTTON to start the machine; 3. Open the door 1A; 4. Push the button PUMP to let the water in the chamber. It is only when the water level reaches completed the metal the tablet in the lower part of the chamber Photo E.
- Seite 33 10. Start the sterilization cycle up pressing the START/STOP button. The autoclave is starting the preheating phase (on the display you can read HEATING). When the machine is reaching the necessary pressure for the chosen cycle, the sterilization phase is starting (on the display you can read “STERILIZ”).
- Seite 34 11. MAINTENANCE CAUTION: DISCONNECT ALWAYS THE MAIN SUPPLY BEFORE EACH TECHNICAL INTERVENTION! 11.1. DAILY ROUTINE MAINTENANCE • Clean the seal on the door and on the outer edge of the sterilisation chamber sealing the gasket using a wet cloth or the soft part of the supplied sponge. This cleaning operation must be carried out to remove possible dirt which can cause a pressure loss in the sterilisation chamber and a possible seal cut.
-
Seite 35: Messages Of The Alarm And Error Displays
12. MESSAGES OF THE ALARM AND ERROR DISPLAYS MESSAGE CAUSE The sterilization cycle was interrupted by the operator pressing the START/STOP button ERROR100 Low pressure in the chamber while sterilizing ERROR120 High pressure in the chamber while sterilizing ERROR125 The pressure did not increase properly during the preheating phase or the machine could not discharge the pressure at the end of the sterilizing cycle. - Seite 36 1. INDEX PARAGRAPHE ARGUMENT Index Instructions pour l’emballage et le stockage – mise au rebut Caractéristiques techniques Accessoires fournis Installation Introduction à la stérilisation Tableau de la stérilisation Charge réservoir eau propre Vidage réservoir eau sale Mise en fonction et préparation à la stérilisation Entretien Indications d’erreurs Garantie...
-
Seite 37: Mise Au Rebut
2. INSTRUCTIONS POUR L’EMBALLAGE ET LE STOCKAGE L’autoclave est emballée de la façon suivante: renfermée dans un sachet en POLYETHYLENE, protégée par un combiné en carton et insérée dans une boîte en carton ondulé, à la base de laquelle deux lamelles en bois sont clouées. L’emballage n’est pas stérile. -
Seite 38: Caracteristiques Techniques
3. CARACTERISTIQUES TECHNIQUES CARACTERISTIQUES MECANIQUES DE L’APPAREIL Température au lieu d’utilisation +5°C ÷ +40° C Dimensions de l’appareil (X, Y, Z) 445mm, 385mm, 500mm MOD. 1 – 2 Encombrement porte ouverte 380 mm Poids avec réservoirs de l’appareil vides 30 kg MOD. - Seite 39 CARACTERISTIQUES PORTE PLATEAUX EN DOTATION Matériel Aluminium anodisé Nombre porte plateaux en dotation Dimension du porte plateaux (X, Y, Z) 192 x 165 x 280 mm MOD. 1 – 2 CARACTERISTIQUES PLATEAUX EN DOTATION Matériel Aluminium anodisé N. plateaux en dotation Dimensions du plateau (X, Y, Z) 184 x 17 x 280 mm MOD.
- Seite 40 4. ACCESSORIES FOURNIS L’autoclave est vendu avec ses accessoires inclus dans le même emballage. Equipement de série : N° PIECES DESCRIPTION Clef extraction plateau et régulation porte Plateau Tuyau de vidage réservoir Eponge Porte plateau P.S. ACCESSOIRES ENUMERE’S N’ONT PAS BESOIN D’INSTRUCTIONS ATTENTION : LE COUVERCLE DU RESERVOIR D’EAU SE TROUVE A L’INTERIEUR DU KIT ACCESSORIES...
- Seite 41 14. Vérifier que l’ installation électrique à laquelle est branché l’ appareil a èté construit selon les normes en viguer et qu’ elle est adaptée aux caractéristiques de l’ appareil. Voir PAR.2 de ce manuel. 15. Brancher la fiche de l’ appareil dans une prise ayant une tension nominale alternée de 230V±10% MONOPHASE + TERRE, fréquence 50/60Hz, courant 16A, comme indiqué...
- Seite 42 7. TABLEAU DE LA STERILISATION TEMPS DE TEMPS DE CYCLES PRESSION DE TRAVAIL STERILISATION SECHAGE [Bar Relatifs] [minutes] [minutes] 121° C 22,5 1,3 ± 0,2 (Non enveloppé) 134° C 2,25 ± 0,2 (Non enveloppé) Les données reportées sur le présent tableau sont indicatives, le choix du cycle de stérilisation doit se baser sur les données fournies par le constructeur de l’objet que l’on veut stériliser.
- Seite 43 TABLEAU DES NIVEAX QUALITATIFS ETABLIS PAR LA REGLEMENTATION UNI EN 13060 : 2005 CEN STANDARD UNI EN 13060 : 2005 ≤ Evaporation residuelle mg/l ≤ Oxide de silicium mg/l ≤ mg/l ≤ Cadmium 0.005 mg/l ≤ Plomp 0.05 mg/l ≤ Residu de metaux Lourdes, sauf fer, cadmium, plomp mg/l ≤...
- Seite 44 10. MISE EN FONCTION ET PREPARATION A LA STERILISATION 1. Remplir le réservoir de l’eau (voir les détails au paragraphe 8). 2. Appuyer sur le bouton MAIN BUTTON pour allumer l’appareil. 3. Ouvrir la porte1A. 4. Appuyer sur le bouton PUMP pour charger l’eau dans la chambre.
- Seite 45 10. Faire démarrer le cycle de stérilisation en appuyant sur le bouton START/STOP. L’autoclave commence la phase de préchauffage (l’afficheur montre “HEATING”). Quand l’appareil arrive à la pression de travail pour le cycle sélectionné la phase de stérilisation commence (l’afficheur montre “STERILIZ”). Le temps de stérilisation restant est indiqué...
-
Seite 46: Entretien Trimestriel
11. ENTRETIEN ATTENTION: ENLEVER TOUJOURS LA TENSION AVANT N’IMPORTE QUEL ENTRETIEN! 11.1. ENTRETIEN ORDINAIRE QUOTIDIEN • Nettoyer le joint placé sur la porte et le bord externe de la chambre de stérilisation servant d’étanchéité, en utilisant un chiffon doux humide ou bien le côté souple de l’éponge fournie. Tel nettoyage doit être fait pour enlever d’éventuelles impuretés, pouvant causer la perte de pression de la chambre de stérilisation et des entailles du joint. -
Seite 47: Indications D'erreurs
12. INDICATIONS D’ERREURS MESSAGE DEPANNAGE Le cycle de stérilisation a été interrompu par l’utilisateur en appuyant sur la touche ERROR100 START/STOP. ERROR120 Basse pression dans la chambre pendant la phase de stérilisation. ERROR125 Pression élevée dans la chambre pendant la phase de stérilisation. La pression n’est pas augmentée pendant la phase de préchauffage ou l’appareil n’a pas réussi à... - Seite 48 1. ÍNDICE PÁRRAFO CARACTERISTICAS Indice Instrucciones para el embalaje y el almacenamiento - eliminación Caracterìsticas técnicas Accesorios en dotaciòn Instalaciòn Introduccion a la esterilizaciòn Tabla de la esterilizaciòn Carga del depósito de agua Desagüe del depósito Puesta en función y preparación para realizar la esterilización Mantenimiento Errores Garantia...
- Seite 49 2. INSTRUCCIONES PARA EL EMBALAJE Y EL ALMACENAMIENTO La autoclave tiene el siguiente embalaje: Se encuentra encerrado en una bolsa de POLIETILENO, está protegido por un compuesto de cartón y se introduce en una caja de cartón ondulado, en cuya base están clavados dos listones de madera. El embalaje no es estéril.
-
Seite 50: Caracteristicas Tecnicas
3. CARACTERISTICAS TECNICAS CARACTERISTICAS MECANICAS DE LA INSTALACION Temperatura ambiente de uso +5°C ÷ +40° C Dimensiones de la instalación (X, Y, Z) 445 mm, 385 mm, 500 mm MOD. 1 – 2 Espacio ocupado con ventanilla abierta 380 mm Peso con depósitos vacíos de la instalación 30 kg MOD. - Seite 51 CARACTERISTICAS PORTA-CHAROLA EN DOTACION Material Aluminio anodizado Numero de porta-charola en dotación Dimensiones del porta-charola (X, Y, Z) 192 x 165 x 280 mm MOD. 1 – 2 CARACTERISTICAS DE LA CHAROLA EN DOTACION Material Aluminio anodizado Numero de charolas en dotación Dimensiones de la charola (X, Y, Z) 184 x 17 x 280 mm MOD.
-
Seite 52: Accesorios En Dotacion
4. ACCESORIOS EN DOTACION La autoclave se vende con accesorios comprendidos en el artículo y contenidos en el mismo embalaje. Accesorios en dotación: N° PIEZAS DESCRIPCION Llave para extracción charola y regulación puerta Charola Tubo desagüe depósito Esponja Porta-charola N.B: LOS ACCESSORIOS REPORTADOS ANTES NON NECESITAN DE PRUDENCIA ATENCION: LA TAPA DEL DEPOSITO DE AGUA SE ENCONTRA AL INTERIOR DE LA CAMARA DE ESTERILIZACION 5. -
Seite 53: Introduccion A La Esterilizacion
15. Conectar la toma de corriente del equipo a una enchufe con una tensión nominal alternada 230V±10% MONOFASICO + TIERRA, frecuencia 50/60Hz, corriente 16A, como descrito en la tarjeta, colocada en la parte posterior de la autoclave. 16. No conectar nunca la enchufe de la instalación a reducciones de ningún tipo. 17. -
Seite 54: Tabla De La Esterilizacion
7. TABLA DE LA ESTERILIZACION TIEMPO DE TIEMPO DE PRESION DE CICLOS ESTERILIZACION SECADO TRABAJO [minutos] [minutos] [Bar Relativos] 121° C 22,5 1,3 ± 0,2 (No colocados en sobre) 134° C 2,25 ± 0,2 (No colocados en sobre) Los datos reportados en la presente tabla son indicativos, la selección del ciclo de esterilización se debe basar en los datos proporcionados por el constructor sobre el objeto que se quiere esterilizar. -
Seite 55: Desagüe Del Depósito
QUADRO DE NIVEL DE CUALIDAD CONFORME A LA LEY UNI EN 13060 : 2005 CEN STANDARD UNI EN 13060 : 2005 ≤ Residuo evaporaciòn mg/l ≤ Oxido de silicio mg/l ≤ Hierro mg/l ≤ Cadmio 0.005 mg/l ≤ Plomo 0.05 mg/l ≤... - Seite 56 10. PUESTA EN FUNCIÓN Y PREPARACIÓN PARA REALIZAR LA ESTERILIZACIÓN 1. Llenar el depósito del agua (véase detalles en el párrafo 8). 2. Presionar el botón MAIN BUTTON para encender el aparato. 3. Abrir la puerta 4. Presionar el botón PUMP para llenar la cámara.
- Seite 57 10. Empezar el ciclo de esterilización presionando el botón START/STOP. El autoclave empieza la fase de precalentamiento (en la pantalla se visualiza “HEATING”) Cuando el aparato alcanza la presión de trabajo adecuada para el ciclo seleccionado empieza la fase de esterilización (en la pantalla se visualiza “STERILIZ”) El tiempo de esterilización restante se visualiza en la pantalla.
-
Seite 58: Mantenimiento Trimestral
11. MANTENIMIENTO ATENCION: QUITAR SIEMPRE LA TENSION ANTE DE CUALQUIER OPERACION DE MANTENIMIENTO! 11.1 MANTENIMIENTO ORDINARIO DIARIO • Limpiar la guarnición colocada en la ventanilla y el borde exterior de la cámara de esterilización sobre el que se encuentra la propia guarnición, utilizando un trapo suave húmedo o la parte suave de la esponja entregada con el equipo. - Seite 59 12. ERRORES MENSAJE PROBLEMA Y SOLUCIÓN El ciclo de esterilización ha sido interrumpido por el usuario presionando el botón ERROR100 START/STOP. ERROR120 Presión baja en cámara durante la fase de esterilización. ERROR125 Presión alta en cámara durante la fase de esterilización La presión no ha salido de forma correcta durante la fase de precalentamiento o el aparato no ha conseguido descargar la presión al final de la esterilización.
-
Seite 60: Inhaltsverzeichnis
1. INHALTSVERZEICHNIS KAP. THEMA Inhaltsverzeichnis Hinweise zur Verpackung und Lagerung - entsorgung Technische Eigenschaften Serienmäßiges Zubehör Installation Anleitungen zur Sterilisation Sterilisationstabelle Auffüllen des Wasserbehälters Entleeren des Wasserbehälters Inbetriebnahme und Vorbereitung der Sterilisation Wartung Fehlerhinweise Garantie DER HERSTELLER BEHÄLT DAS RECHT VOR, DAS GERÄT OHNE VORANKÜNDIGUNG TECHNISCH ZU VERÄNDERN UND ZU VERBESSERN. -
Seite 61: Hinweise Zur Verpackung Und Lagerung - Entsorgung
2. HINWEISE ZUR VERPACKUNG UND LAGERUNG Der Autoklav auf folgende Art und Weise verpackt ist: er befindet sich in einem Beutel aus POLYÄTHYLEN, geschützt von einem Kartonverbund, der in einen Karton aus Wellpappe gelegt wird auf dessen Boden zwei Holzleisten angenagelt sind. Die Verpackung ist nicht steril. -
Seite 62: Technische Eigenschaften
3. TECHNISCHE EIGENSCHAFTEN MECHANISCHE EIGENSCHAFTEN DES GERÄTES Gebrauchsumgebungstemperatur von +5° C bis +40° C Abmessungen des Gerätes (X, Y, Z) 445mm, 385mm, 500mm MOD. 1 – 2 Abmessungen der geöffneten Tür 380 mm Gewicht des Gerätes bei leeren Wasserbehältern 30 kg MOD. - Seite 63 EIGENSCHAFTEN DER SERIENMÄSSIGEN TABLETTSTÄNDER Material eloxiertes Aluminium Anzahl der beigegebenen Tablettständer Tablettständerabmessungen (X, Y, Z) 192 x 165 x 280 mm MOD. 1-2- EIGENSCHAFTEN DER SERIENMÄSSIGEN TABLETTS Material eloxiertes Aluminium Anzahl der beigegebenen Tabletts Tablettabmessungen (X, Y, Z) 184 x 17 x 280 mm MOD.
-
Seite 64: Serienmäßiges Zubehör
4. SERIENMÄSSIGES ZUBEHÖR Der Druckkessel wird mit serienmäßigem Zubehör verkauft, das zu dem Produkt gehört und mit ihm selbst verpackt ist. Mitgeliefertes Zubehör: ANZAHL BESCHREIBUNG Schlüssel zur Tablettentnahme und Türeinstellung Tablett Wasserablassschlauch Schwamm Tablettständer WICHTIG: DIE OBENGENANNTEN ZUBEHORTEILE ERFORDEN KEINE GESONDERTEN HINWEISE ACHTUNG: DER DECKEL VOM WASSERTANK BEFINDET SICH IM ZUBEHORENSATZ 5. -
Seite 65: Anleitungen Zur Sterilisation
14. Sich vergewissern, dass die elektrische Anlage, an welche man das Gerät anschliesst, gem. den geltenden Normen gebaut ist und gem. den Geräteeigenschaften angemessen bemessen ist, siehe KAP.2 dieses Handbuchs . 15. Den Stecker des Geräts an eine Steckdose mit einer alternierenden Nennspannung von 230±10% EINPHASIG + ERDUNG, Frequenz 50/60 H, Strom 16A, wie auf dem Schild, welches sich auf der Rückseite des Sterilisationsgerätsbefindet, beschrieben ist, anschliessen. -
Seite 66: Sterilisationstabelle
7. STERILISATIONSTABELLE STERILISATIO TROCKNUNG PROGRAMME BETRIEBS - DRUCK NSZEIT SZEIT [bar Relativ] [minuten] [minuten] 121° C 22,5 1,3 ± 0,2 (Nicht Eingetütet) 134° C 2,25 ± 0,2 (Nicht Eingetütet) Die Angaben in der vorliegenden Tabelle sind nicht verbindlich; die Wahl des Sterilisationsprogramms muss von den technischen Daten abhängen, die vom Hersteller des jeweiligen Instruments, das sterilisiert werden soll, geliefert werden. -
Seite 67: Entleeren Des Wasserbehälters
TABELLE DER VON DER UNI-NORM EN 13060 : 2005 FESTGELEGTEN QUALITATIVEN WERTE CEN STANDARD UNI EN 13060 : 2005 ≤ Wasserdampfrestwert Mg/l ≤ Siliziumoxyd Mg/l ≤ Eisen Mg/l ≤ Kadmium 0.005 Mg/l ≤ Blei 0.05 Mg/l ≤ Reste anderer Schwermetalle außer Eisen, Kadmium und Blei Mg/l ≤... -
Seite 68: Inbetriebnahme Und Vorbereitung Der Sterilisation
10. INBETRIEBNAHME UND VORBEREITUNG DER STERILISATION 1. Den Wassertank füllen (siehe Anweisungen im Absatz 8). 2. Das Gerät am MAIN BUTTON einschalten. 3. Die Tür öffnen 1A. 4. Die Taste PUMP drücken, um die Kammer mit Wasser zu füllen. Das Befüllen ist erst abgeschlossen wenn der Wasserstand die Metalltablette, die sich unten in der Kammer befindet, erreicht hat Photo E. - Seite 69 10. Über die Taste START/STOP den Sterilisationszyklus auslösen. Der Autoklav beginnt mit der Aufheizphase (auf dem Display erscheint die Schrift „HEATING“). Wenn das Gerät den Arbeitsdruck für den angewählten Zyklus aufgebaut hat, beginnt die Sterilisationsphase (auf dem Display erscheint die Schrift „STERILIZ“). Die verbleibende Sterilisationszeit wird auf dem Display angezeigt.
-
Seite 70: Wartung
11. WARTUNG ACHTUNG! : UNTERBINDEN SIE VOR JEDER WARTUNGSARBEIT DIE STROMZUFHUR 11.1. REGELMÄSSIGE TÄGLICHE WARTUNG • Reinigen Sie die Dichtung an der Innenseite der Tür und den Außenrand der Sterilisationskammer, an dem die Dichtung aufliegt, indem Sie dazu ein weiches feuchtes Tuch oder die weiche Seite des beigegebenen Schwamms verwenden. -
Seite 71: Fehlerhinweise
12. FEHLERHINWEISE MELDUNG PROBLEM UND ABHILFE Der Sterilisationszyklus wurde vom Bediener durch Betätigung der START/STOP ERROR100 Taste unterbrochen. ERROR120 Zu geringer Druck in der Kammer während der Sterilisationsphase. ERROR125 Zu hoher Druck in der Kammer während der Sterilisationsphase. Der Druck wurde in der Aufheizphase nicht ordnungsgemäß aufgebaut oder das Gerät konnte den Druck am Ende der Sterilisation nicht ablassen. - Seite 72 7. La garanzia non comporta alcun risarcimento danni diretti o indiretti di qualsiasi natura verso persone o cose, dovuti all’inefficienza della macchina. 8. TECNO-GAZ non risponde di guasti o danni causati dal prodotto usato impropriamente o sul quale non sia praticata la manutenzione ordinaria o siano trascurati gli elementari principi del buon mantenimento (negligenza).
- Seite 73 13. TECNO-GAZ does not accept return from final users, unless specifically authorized in writing. 14. Return to TECNO-GAZ for repairs, must be controlled by the dealer or by service centers chosen by the final user in compliance with commercial procedures CM-P-003 entitled “CONTROL OF REQUESTS FOR RETURN, REPAIR, SUBSTITUTION OF TECNO-GAZ PRODUCTS AND CLIENT COMPLAINTS”.
-
Seite 74: Garantie
13. TECNO-GAZ n'accepte aucun retour en provenance du client final, sauf si autorisé par écrit. 14. Le retour chez TECNO-GAZ pour réparation doit être géré par le revendeur ou le centre SAV choisi par le client final conformément à la procédure commerciale CM-P-003 intitulée “GESTION DES RETOURS POUR RÉPARATION OU CHANGEMENT DES PRODUITS TECNO-GAZ ET... - Seite 75 6. La garantía no conlleva indemnizaciones por daños directos o indirectos de cualquier naturaleza hacia personas o cosas, debidos a la ineficiencia del equipo. 7. TECNO-GAZ no responderá por averías o daños causados al producto por mal uso, por omisión de mantenimiento rutinario o por descuido de los elementales fundamentos de buen mantenimiento (negligencia).
- Seite 76 Garantieanspruch sowie die direkte gesetzliche Haftung des Herstellers aus. Dies auch, wenn die Eingriffe nach Ablauf der Garantiezeit ausgeführt werden. 12. Bei Ersatz der Teile in der Garantiezeit müssen diese der TECNO-GAZ frachtfrei zurückgegeben werden. Die nicht erfolgte Rückgabe binnen 10 Tagen bringt die automatische Lastschrift der Kosten mit sich.
- Seite 78 Vorankündigung Änderungen TECNO-GAZ reserves the préavis. documento sin avisos previos. in dieser Dokumentation La ditta TECNO-GAZ si riserva property of the document and TECNO-GAZ se réserve la La empresa TECNO-GAZ vorzunehmen. la proprietà del presente forbids others to use it or propriété...