Herunterladen Inhalt Inhalt Diese Seite drucken
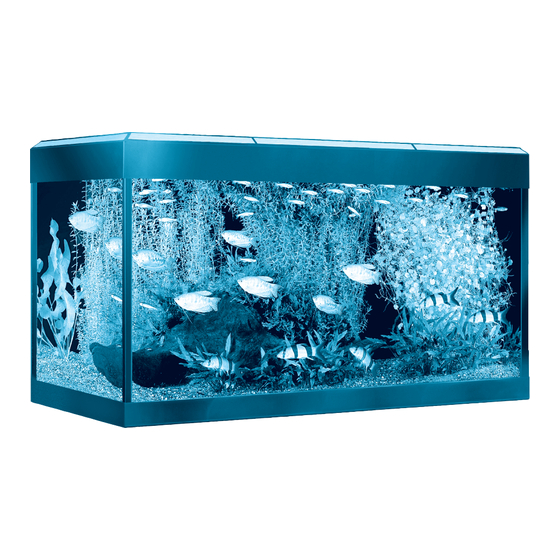
Fluval Roma LED Gebrauchsanleitung

Fluval Roma LED Gebrauchsanleitung

Led-strip-light und aquarium
Vorschau ausblenden Andere Handbücher für Roma LED:
Inhaltsverzeichnis

Werbung

Verfügbare Sprachen

Verfügbare Sprachen

Roma LED
Instruction Manual: Led Strip Light and aquarium tank
Manuel d'utilisation : galerie à LED et cuve d'aquarium
Manual de instrucciones: Tanque de acuario con luminaria LED
Gebrauchsanleitung: LED-Strip-Light und Aquarium

Werbung

Inhaltsverzeichnis
loading

Inhaltszusammenfassung für Fluval Roma LED

  • Seite 1 Roma LED Instruction Manual: Led Strip Light and aquarium tank Manuel d’utilisation : galerie à LED et cuve d’aquarium Manual de instrucciones: Tanque de acuario con luminaria LED Gebrauchsanleitung: LED-Strip-Light und Aquarium...
  • Seite 2: Inhaltsverzeichnis

    Intake system installation ....................................7 Easy connection system replacement parts ............................8 EXTERNAL/INTERNAL FLUVAL FILTER INSTALLATION AND PREPARATION FOR THE START UP _____ 8 FLUVAL HEATER INSTALLATION AND PREPARATION FOR THE START UP _________________________ 8 LED STRIP LIGHT INSTALLATION INSTRUCTIONS ________________________________________________ 9 Features and tips ........................................
  • Seite 3 Instalación del sistema de entrada ................................21 Piezas de recambio del sistema de conexión fácil ..........................22 INSTALACIÓN DEL FILTRO FLUVAL EXTERNO/INTERNO Y PREPARACIÓN PARA SU PUESTA EN MARCHA _____ 23 INSTALACIÓN DEL CALENTADOR FLUVAL Y PREPARACIÓN PARA SU PUESTA EN MARCHA ________ 23 INSTRUCCIONES DE INSTALACIÓN DE LA LUMINARIA LED ______________________________________ 23...
  • Seite 4: Fluval Roma Led: Parts

    READ THOROUGHLY PRIOR TO INSTALLATION AND OPERATION FLUVAL ROMA LED: PARTS A) 1 x TOP FRAME attached to the aquarium B) CANOPY • 2 x LIDS for opening and closing the aquarium (B1) • 1 x black aluminium beam (B2)
  • Seite 5: Aquarium Glass Tank Instructions

    AQUARIUM GLASS TANK INSTRUCTIONS Read Thoroughly Prior To Installation The Fluval Roma aquarium glass tank comes complete with bottom and top plastic frames glued to it. Do not try to remove top and bottom frames. Although the glass tank was manufactured with the maximum care and the most advanced techniques, we still recommend making a simple inspection prior to the installation to verify that unexpected events during handling and transportation have not damaged the tank or impaired its water-tightness.
  • Seite 6: Placing The Aquarium With Its Cabinet In The Final Location

    Place your new Fluval Roma Aquarium and Cabinet close The position selected should have an even and level surface. Place your new Fluval Aquarium and Cabinet close to to an electrical outlet.
  • Seite 7: Output System Installation

    rings (C). Do not proceed with the installation if one of the rubber Connector Locate the 2 openings in the tank bottom glass and assure that rings (C) is missing but contact your local supplier. Stem (A) the corresponding openings in the cabinet are aligned with them. The 2 openings in the tank bottom glass are complete with factory- installed special plastic fittings, which must never be removed, Before proceeding, check stems (A) for the presence of all 3 rubber rings (C).
  • Seite 8: Easy Connection System Replacement Parts

    (Q) remains in its seat properly. Screw plug (P) by hand only until it will go without forcing it. DO NOT USE ANY TOOLS, AS DOING SO MAY DAMAGE THE UNIT. Easy connection system replacement parts Always use genuine Fluval Spare Parts to guarantee continued performance and safety. For a full listing of replacement parts please visit www.hagen.com...
  • Seite 9: Led Strip Light Installation Instructions

    To minimize salt accumulations on the Fluval Canopy and on the LED Strip Light, it is recommended to take note of the following helpful tips: 1. Make sure filter outputs do not spray above the water surface, position them below the water surface with a...
  • Seite 10: Cleaning The Led Strip Light

    Never place the LED Strip Light under water jets or submerge in water. No special maintenance is required for the Fluval LED Strip Light and Canopy, other than periodic cleaning with a damp cloth (never use harsh chemical products or detergents). To remove calcareous deposits, it is recom- mended to use a mild acid such as lemon juice, followed by a thorough wipe down with a damp cloth to remove any residue.
  • Seite 11: Fluval Roma Led: Composition

    Lire attentivement avant l’installation et la mise en service. FLUVAL ROMA LED: COMPOSITION A) 1 x ENTOURAGE DE GALERIE fixée sur la cuve B) GALERIE • 2 x COUVERCLES pour ouvrir et fermer l’aquarium(B1) • 1 x Support en aluminium noir (B2) C) 1 x Rampe d’éclairage LED...
  • Seite 12: Instructions Pour Votre Aquarium En Verre

    INSTRUCTIONS DE MISE EN PLACE POUR L’AQUARIUM EN VERRE Lire soigneusement avant l’installation L’aquarium en verre Fluval Roma est livré avec des cadres en plastique situés à la base et sur la partie supérieure et collés à la cuve. Ne pas essayer d’enlever les cadres supérieurs et inférieurs.
  • Seite 13: Placer L'aquarium Avec Son Meuble À Son Emplacement Définitif

    46 cm (18.1”) 265 kg (584 lb) The position selected should have an even and level surface. Place your new Fluval Aquarium and Cabinet close to ATTENTION Assurez-vous que l’emplacement choisi est de niveau et que sa surface est capable de supporter an electrical outlet.
  • Seite 14: Installation De Sortie

    Ring Nut (R) Locate the 2 openings in the tank bottom glass and assure that the corresponding openings in the cabinet are aligned with them. The 2 openings in the tank bottom glass are complete with factory- OUTPUT INTA Locate the 2 openings in the tank bottom glass and assure that Ouverture de la installed special plastic fittings, which must never be removed, Locate the 2 openings in the tank bottom glass and assure that...
  • Seite 15: Pièces Détachés Pour Le Système « Easy Connect

    INSTALLATION ET PREPARATION AU DEMARRAGE DU FILTRE FLUVAL EXTERIEUR/INTERIEUR Veuillez, s’il vous plait, vous référer aux instructions contenues dans la notice d’emploi du filtre Fluval. INSTALLATION ET PREPARATION AU DEMARRAGE DU CHAUFF- AGE FLUVAL Veuillez, s’il vous plait, vous référer aux instructions contenues dans la notice d’emploi du chauffage Fluval.
  • Seite 16: Instruction Pour L'installation De La Rampe D'éclairage Led

    INSTRUCTIONS POUR L’INSTALLATION DE LA GALERIE D’ECLAIRAGE LED AVERTISSEMENT: Débranchez la prise de tous les équipements électriques utilisés pour l’aquarium, avant de placer vos mains dans l’eau et / ou d’effectuer un entretien quelconque. Caractéristiques et conseils Couvercles d’accès La galerie supérieure est équipée de 2 trappes d’accès. Ceci permet un accès facile à...
  • Seite 17: Nettoyage De La Rampe D'éclairage Led

    Ne placer jamais la rampe d’éclairage sous l’eau ou sous le jet d’un robinet d’eau. La rampe d’éclairage Fluval ne requiert aucun entretien spécial autre qu’un nettoyage périodique avec un linge humide (ne jamais utiliser de produits chimique ou de détergents corrosifs). Afin d’enlever les dépôts calcaires, il est conseillé...
  • Seite 18: Fluval Roma Led: Componentes

    LEA DETENIDAMENTE ESTAS INSTRUC- CIONES ANTES DE LA INS- TALACIÓN Y EL USO FLUVAL ROMA LED: COMPONENTES A) 1 x MARCO SUPERIOR unido al tanque del acuario B) CUBIERTA • 2 x TAPAS para abrir y cerrar el acuario (B1) •...
  • Seite 19: Instrucciones Del Acuario De Vidrio

    INSTRUCCIONES DEL ACUARIO DE VIDRIO Lea detenidamente estas instrucciones antes de la instalación El acuario de vidrio Fluval Roma viene completo con marcos de plástico superior e inferior fijados a él. No in- tente quitar los marcos superior e inferior.
  • Seite 20: Colocación Definitiva Del Acuario Con Su Armario

    ADVERTENCIA. Asegúrese de que la posición seleccionada tiene una superficie uniforme y nivelada que pueda soportar el peso total del acuario lleno de agua y el armario. Coloque el acuario y el armario Fluval Roma cerca de una toma eléctrica. Después de colocar el armario, asegúrese de que está perfectamente nivelado usando un nivel de aire adecuado.
  • Seite 21: Instalación Del Sistema De Salida

    Installing water intake/output with “EasyConnect” system make the aquarium level, use cabinet feet for regulation. All Fluval Vicenza and Venezia aquariums feature the new and innovative Output “EasyConnect” system, which allows the direct connection of the tank to the Nozzle (N) external filter through the bottom glass by means of special fittings.
  • Seite 22: Piezas De Recambio Del Sistema De Conexión Fácil

    Pict. 5 Pict. 6 Piezas de recambio del sistema de conexión fácil Use siempre repuestos originales Fluval para garantizar un rendimiento y seguridad continuos. Para obtener una lista completa de las piezas de repuesto, visite www.hagen.com. INSTALACIÓN DEL FILTRO FLUVAL EXTERNO/INTERNO Y PREPARACIÓN PARA SU PUESTA EN MARCHA...
  • Seite 23: Instalación Del Filtro Fluval Externo/Interno Y Preparación Para Su Puesta En Marcha

    Para reducir las acumulaciones de sal sobre la cubierta Fluval y la luminaria LED se recomienda aplicar los siguientes consejos útiles: 1. Cerciórese de que las salidas de los filtros no salpiquen por encima de la superficie de agua. Coloque las salidas por debajo del nivel de la superficie de agua con un ligero ángulo hacia abajo;...
  • Seite 24: Acuarios De Agua Salada

    Para registrar su conjunto de acuario Fluval, localice el Formulario de registro y garantía en la guía de cuidados adjunta. Para el registro en línea (o para más información sobre este y otros productos), visite www.hagen.com RECICLAJE Este producto lleva el símbolo de clasificación selectiva para residuos de aparatos eléctricos y electrónicos...
  • Seite 25: Fluval Roma Led: Teile

    BITTE VOR DER INSTALLATION UND INBETRIEB- NAHME AUFMERKSAM LESEN UND BEFOLGEN FLUVAL ROMA LED: TEILE A) 1 x am Aquarium befestigter OBERER RAHMEN B) ABDECKUNG • 2 x DECKEL zum Öffnen und Schließen des Aquariums (B1) • 1 x schwarzer Aluminiumstreifen (B2)
  • Seite 26: Anleitungen Zum Glasbecken

    ANLEITUNGEN ZUM GLASBECKEN Bitte vor der Installation genau lesen An dem Fluval Roma Glasaquarium sind der obere und untere Rahmen aus Kunststoff bereits befestigt. Bitte versuchen Sie nicht, den oberen oder den unteren Rahmen zu entfernen. Obwohl das Glasbecken mit der größt möglichen Vorsicht und der neuesten Technik hergestellt wurde, empfehlen wir trotzdem, dass Sie das Becken vor der Installation untersuchen.
  • Seite 27: Positionierung Des Aquariums Mit Schrank Am Bestimmungsort

    Positionieren Sie Ihr neues Fluval Roma Aquarium mit Schrank in der Nähe eines Stromanschlusses. Nachdem The position selected should have an even and level surface. Place your new Fluval Aquarium and Cabinet close to Sie den Aquarienschrank am gewünschten Ort aufgestellt haben, müssen Sie mit einer Wasserwaage sicherstel- an electrical outlet.
  • Seite 28: Installation Des Auslasssystems

    Locate the 2 openings in the tank bottom glass and assure that the corresponding openings in the cabinet are aligned with them. OUTPUT The 2 openings in the tank bottom glass are complete with factory- Beckenöffnung GROUP Tank opening installed special plastic fittings, which must never be removed, Plug Deckel turned or loosened and with two sealing plugs (P) and (Q).
  • Seite 29: Ersatzteile Des „Easyconnect" Systems

    Abb. 6 Pict. 3 Pict. 4 Pict. 5 Pict. 6 Ersatzteile des „EasyConnect“ Systems Benutzen Sie ausschließlich Original-Fluval-Ersatzteile, um eine dauerhafte Leistung und Sicherheit zu es in gewährleisten. Eine vollständige Liste der Ersatzteile finden Sie auf www.hagen.com. INSTALLATION DES FLUVAL AUSSEN-/INNENFILTERS UND VORBEREITUNG AUF DIE INBETRIEBNAHME Bitte beziehen Sie sich auf die Bedienungsanweisung des Fluval Filters.
  • Seite 30: Installation Der Led-Strip-Light

    Es ist gemeinhin bekannt, dass Salzwasser korrosiver und leitfähiger (für Elektrizität) als Süßwasser ist und sowohl Plastik- als auch Metallteile sich in der Regel bei Salzwasser schneller abnutzen. Um Salzablagerungen an der Fluval Abdeckung und der LED-Strip-Light zu minimieren, halten Sie sich bitte an die folgenden Empfehlungen: 1.
  • Seite 31: Reinigung Der Led-Strip-Light

    GEWÄHRLEISTUNG Wir gewährleisten Ihnen, dass Ihr Fluval Roma Aquarium und Ihre LED-Strip-Light bei normaler Verwendung für die Dauer von 2 Jahren ab dem Zeitpunkt des Erwerbs von Material- bzw. Verarbeitungsfehlern frei sind. Sollte dies nicht der Fall sein, verpflichtet sich der Hersteller nach seinem alleinigen Ermessen zur Reparatur oder zum Ersatz der Einheiten. Diese Gewährleistung erstreckt sich nicht auf Geräte, die unsachgemäßer oder fahrlässiger Verwendung oder Manipulationen...
  • Seite 32: Customer Service

    CUSTOMER SERVICE CANADA: Customer Services: Rolf C. Hagen Inc., 20500, Trans Canada Hwy, Baie d’Urfe QC H9X 0A2 Help Line Number: 1 800 55HAGEN (1 800 554-2436), between 09:00 and 16:30 (EST), monday to friday. USA: For authorized guarantee repair service return with dated receipt and $4.00 for postage and handling to: Consumer Repairs, Rolf C.

Inhaltsverzeichnis