Kobra Cyclone Bedienungsanleitung

Verwandte Anleitungen für Kobra Cyclone


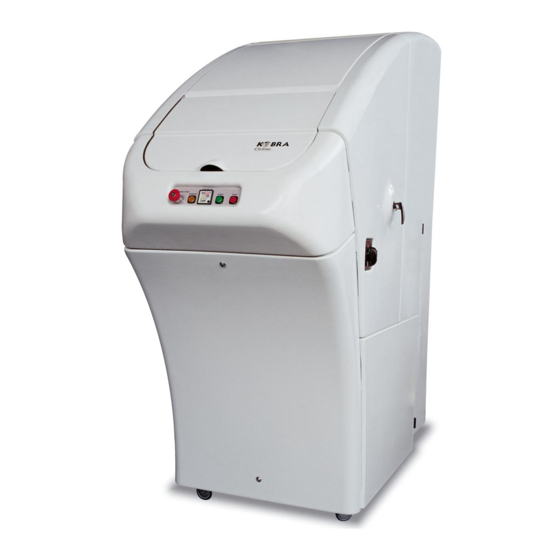
Inhaltszusammenfassung für Kobra Cyclone
- Seite 2 ATTENTION KOBRA CYCLONE IS CHECKED AND TESTED AT THE FACTORY BEFORE SHIPMENT. PAPER SHREDS YOU MAY FIND IN THE SHREDDING CHAMBER OR IN THE CYCLONE ARE LEFT OVER FROM THESE OPERATIONAL TESTS. 2 di 55 DI-129/06/30.03.12...
-
Seite 3: Inhaltsverzeichnis
ALIMENTAZIONE ELETTRICA / ELECTRICAL SUPPLY / ELEKTRISCHER ANSCHLUSS SACCO IN PLASTICA / PLASTIC BAG / PLASTIKSACK SACCO ASPIRATORE / VACUUM SYSTEM BAG / ABSAUGSACK 2. PRINCIPIO DI FUNZIONAMENTO / HOW THE CYCLONE WORKS / FUNKTIONSPRINZIP 3. CARATTERISTICHE TECNICHE / SCELTA DELLE GRIGLIE / LIVELLI DI SICUREZZA / CAPACITA’... - Seite 4 KOBRA CYCLONE AVVERTENZE – IMPORTANTE - PERICOLO PRIMA DELLA MESSA IN MARCIA DELL’ APPARECCHIO BISOGNA LEGGERE ATTENTAMENTE LE ISTRUZIONI SULL’ USO E LE SEGUENTI AVVERTENZE Prima di collegare l’ apparecchio fare attenzione che il voltaggio e la frequenza di rete corrispondano ai •...
- Seite 5 IMPORTANTE LE PORTE POSTERIORI DEVONO ESSERE TENUTE APERTE DURANTE DISTRUZIONI CONTINUE IMPORTANT BACK DOORS MUST BE OPEN WHEN SHREDDING CONTINUOUSLY WICHTIG DIE HITERTUREN MUSSEN WAHREND DER ANDAUERNDEN VERNICHTUNG OFFEN GEHALTEN WERDEN 5 di 55 DI-129/06/30.03.12...
- Seite 6 TAV.A / Tafel A Fig.1 / Abb. 1 Fig.2 / Abb. 2 6 di 55 DI-129/06/30.03.12...
- Seite 7 TAV.B / Tafel B Fig. 3 / Abb. 3 Fig. 4 / Abb. 4 7 di 55 DI-129/06/30.03.12...
- Seite 8 TAV.C / Tafel C Fig.5 / Abb. 5 8 di 55 DI-129/06/30.03.12...
- Seite 9 TAV.D / Tafel D Fig.6 / Abb. 6 Fig.7 / Abb. 7 Fig.9 / Abb. 9 Fig.8 / Abb. 8 9 di 55 DI-129/06/30.03.12...
- Seite 10 TAV.E / Tafel E Fig. 2 / Abb. 2 Fig. 1 / Abb. 1 Fig. 3 / Abb. 3 Fig. 4 / Abb. 4 10 di 55 DI-129/06/30.03.12...
- Seite 11 TAV.F / Tafel F Fig. 10 / Abb. 10 Fig. 11 / Abb. 11 11 di 55 DI-129/06/30.03.12...
- Seite 12 TAV.G / Tafel G Fig. 12 / Abb. 12 12 di 55 DI-129/06/30.03.12...
-
Seite 33: Aufstellung
[Tafel A – Abb. 2]. mit einem vierpoligen Kabel + Erdleiter von 3 Metern Länge, für die Versionen 380-400 V, bzw. mit einem Nun ist Ihr Cyclone frei und bewegt sich auf dem dreipoligen Kabel + Erdleiter, für die Versionen 220 V Untersatz. -
Seite 34: Elektrischer Anschluss
ELEKTRISCHER ANSCHLUSS WICHTIG !!! Nach Anschluss des Cyclones ist der “ALARM C” einzustellen, der im Abschnitt “Electrical Set-up and Tuning” beschrieben und dieser Betriebsanleitung beigefügt ist. Die Einstellung des “ALARM C” erlaubt es, mit der ortsüblichen Spannung das automatische Abschalten des Cyclones nach Beenden des Zerkleinerungsvorgangs einzustellen. - Seite 35 Gewichts. gestellt wird, Das Gewicht des Beutels hängt von der Art des den Cyclone von dem Bedienfeld aus einschalten, Rosts ab, für welchen man optiert hat, sowie von wo der Tastschalter START (D) [Tafel D – Abb. 6] der Materialart, die Sie zerkleinern.
-
Seite 36: Gebrauch Des Gerätes
GEBRAUCH DES GERÄTES WICHTIG !!! Bevor zu zerkleinerndes Material eingeführt wird, überprüfen: 1. ob sich durch Drücken des “START”-Tastschalters der Materialsammelbeutel durch die Turbinenluft aufbläht; ob sich die Maschine automatisch nach etwa 30-40 Sekunden abschaltet (bei Bedarf den “ALARM C” auf dem elektrischen Bedienfeld einstellen, siehe Electrical Set-up and Tuning) 36 di 55 DI-129/06/30.03.12... -
Seite 37: Einsatz Des Gerätes
Luke (7) wieder zu schließen, ohne den Stundenleistung: 400-420 kg. Cyclone abzuschalten, da das Abschalten verzögert ist und automatisch erfolgt, damit Ihr Cyclone in der Lage ist, das sich noch in der Kammer befindliche Material zu zerkleinern, für etwa 1 Minute lang, und den restlichen, noch im Umlauf befindlichen Staub zu beseitigen, für etwa weitere 30 Sekunden... - Seite 38 WICHTIG !!!! WAS TUN BEI EINEM MATERIALSTAU (DER SAMMELBEUTEL FÜR ZERMAHLENES MATERIAL BLÄHT SICH NICHT AUF UND MATRIAL WIRD NICHT IN DEN BEUTEL BEFÖRDERT) Für den Fall, dass sich die Maschine unversehens abschalten sollte, während Sie dabei sind, Papier zu zerkleinern, bzw. wenn eine zu große Papiermenge eingeführt wird, könnte sich der Turbinenausgang verstopfen und kein Material in den Sammelbeutel befördert werden.
-
Seite 39: Bedienfeld
Turbinen wirkende Last und zeigt dem Saugmotor ab. Benutzer fortwährend an, wie viel Papier eingeführt Wenn der Cyclone in der Kammer eine zu große werden kann. Menge an zu zerkleinerndem Material feststellt, LOAD METER grüner Bereich = 100% verfügbare dann meldet er es über das Instrument (C). -
Seite 40: Pflege Und Wartung
7. PFLEGE UND WARTUNG 8.2 Austausch der ROSTE DIE SPANNUNG ABSCHALTEN und genau so Bei dem Cyclone handelt es sich um eine robuste fortfahren, wie unter Punkt 8.1 beschrieben. und in der Anwendung einfache Maschine. Nachdem sämtliche Klingen entnommen wurden, Es ist keinerlei Schmierung erforderlich. - Seite 41 8.3 Austausch des TURBINENMOTORS Hierbei handelt es sich um einen besonderen Eingriff, der Spezialisierung und Fachkenntnisse erfordert, die nur eine ermächtigte Kundendienststelle garantieren kann. DIE SPANNUNG ABSCHALTEN In der gleichen Reihenfolge vorgehen, wie unter den Punkten 8.1 und Punkt 8.2 beschrieben. Am Ende der unter Punkt 8.2 beschriebenen Demontagearbeit, mit dem Abziehen der Nabe einschließlich der Turbine von der Motorwelle (1)
- Seite 42 ZUBEHÖRE 9.1 ROSTE Hier handelt es sich um einen außerordentlichen In der Standardausführung wird der Kobra Cyclone mit Eingriff, der Fachkenntnisse und Erfahrung erfordert und Rosten von 30 mm Durchmesser geliefert, was einer auch von anderem Personal als das von einer Stufe 003 entspricht, Code 51.204.
- Seite 47 BESTRIEBSSTÖRUNGEN GEFAHR: WICHTIG. SPANNUNG ABSCHALTEN, bevor irgendeine der nachstehend beschriebenen Störungen behoben wird. P RO B L E M W I E Ä U S S E R T S I C H D A S U R S A C H E B E H E B U N G Siehe Tafel F –...
- Seite 48 BESTRIEBSSTÖRUNGEN GEFAHR: WICHTIG. SPANNUNG ABSCHALTEN, bevor irgendeine der nachstehend beschriebenen Störungen behoben wird. P RO B L E M W I E Ä U S S E R T S I C H D A S U R S A C H E B E H E B U N G Das Anliegen der Spannung prüfen;...
- Seite 49 220 V.- 3 phases – 50/60 Hz. VERSIONE TRIFASE 220 V. (10x38) a chiave (10x38) (50A aM) (14x51) EMITTER K1 T1 0 V. TA di RECEIVER 0 V. 0 V. 3 ph M1 = 5,5 KW M2 = 0,8 KW 220 V 220 V.
- Seite 50 380 V.- 3 phases – 50 Hz. VERSIONE TRIFASE 380 V. (10x38) a chiave (10x38) (32A aM) (14x51) EMITTER 0 V. TA di RECEIVER 0 V. 0 V. 3 ph M1 = 5,5 KW M2 = 0,8 KW 380 V 220 V.
- Seite 51 51 di 55 DI-129/06/30.03.12...
- Seite 52 52 di 55 DI-129/06/30.03.12...
- Seite 53 53 di 55 DI-129/06/30.03.12...
- Seite 55 55 di 55 DI-129/06/30.03.12...