Werbung
Verfügbare Sprachen
Verfügbare Sprachen
Montage- und
Gebrauchsanweisung
Installation and
Operating Instructions
Instructions d'installation
et d'utilisation
Luft/Wasser-
Wärmepumpe für
Innenaufstellung
Bestell-Nr. / Order no. / N
WPL 150IR
WPL 190IR
WPL 220IR
Air-to-Water
Heat Pump for
Indoor Installation
o
de commande : 452158.66.06
Pompe à chaleur
air-eau pour
installation
intérieure
FD 8905
Werbung
Kapitel

Verwandte Anleitungen für Buderus WPL 150IR


Inhaltszusammenfassung für Buderus WPL 150IR
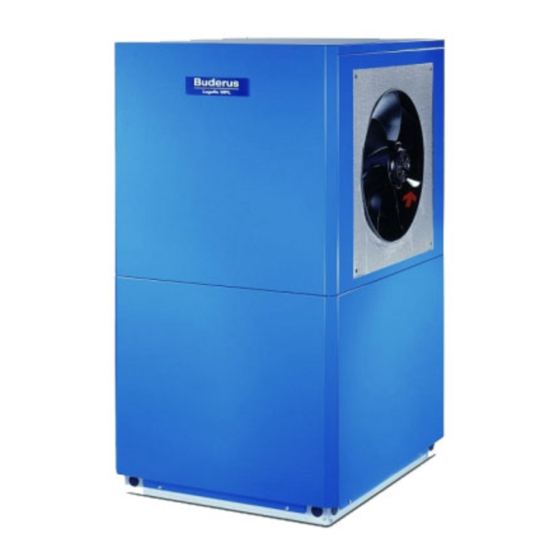
- Seite 1 Montage- und Gebrauchsanweisung Installation and Operating Instructions Instructions d’installation et d’utilisation WPL 150IR WPL 190IR WPL 220IR Luft/Wasser- Air-to-Water Pompe à chaleur Wärmepumpe für Heat Pump for air-eau pour Innenaufstellung Indoor Installation installation intérieure Bestell-Nr. / Order no. / N de commande : 452158.66.06...
-
Seite 3: Inhaltsverzeichnis
Inhaltsverzeichnis Bitte sofort lesen .......................... D-2 1.1 Wichtige Hinweise ..........................D-2 1.2 Bestimmungsgemäßer Gebrauch......................D-2 1.3 Gesetzliche Vorschriften und Richtlinien ....................D-2 1.4 Energiesparende Handhabung der Wärmepumpe .................D-2 Verwendungszweck der Wärmepumpe ..................D-3 2.1 Anwendungsbereich ..........................D-3 2.2 Arbeitsweise ............................D-3 Lieferumfang..........................D-3 3.1 Grundgerät..............................D-3 3.2 Schaltkasten ............................D-4 3.3 Wärmepumpenregler ..........................D-4 Transport............................ -
Seite 4: Bitte Sofort Lesen
Bitte sofort lesen 1.2 Bestimmungsgemäßer Gebrauch 1.1 Wichtige Hinweise Dieses Gerät ist nur für den vom Hersteller vorgesehenen Ver- wendungszweck freigegeben. Ein anderer oder darüber hinaus ACHTUNG! gehender Gebrauch gilt als nicht bestimmungsgemäß. Dazu Das Gerät ist nicht für Frequenzumrichterbetrieb geeignet. zählt auch die Beachtung der zugehörigen Produktschriften. -
Seite 5: Verwendungszweck Der Wärmepumpe
Verwendungszweck der Lieferumfang Wärmepumpe 3.1 Grundgerät 2.1 Anwendungsbereich Die Wärmepumpe wird in Kompaktbauweise geliefert und enthält unten aufgeführte Bauteile. Die Luft/Wasser-Wärmepumpe ist ausschließlich für die Erwär- Der Kältekreis ist „hermetisch geschlossen“ und enthält das vom mung von Heizungswasser vorgesehen. Sie kann in vorhande- Kyoto-Protokoll erfasste fluorierte Kältemittel R404A mit einem nen oder neu zu errichtenden Heizungsanlagen eingesetzt wer- GWP-Wert von 3260. -
Seite 6: Schaltkasten
Transport 3.2 Schaltkasten Der Schaltkasten befindet sich in der Wärmepumpe. Nach Ab- ACHTUNG! nahme der unteren Frontabdeckung und dem Lösen der sich Die Wärmepumpe darf beim Transport nur bis zu einer Neigung von 45° rechts oben befindenden Befestigungsschraube kann der (in jeder Richtung) gekippt werden. -
Seite 7: Aufstellung
Aufstellung Montage 5.1 Allgemein 6.1 Allgemein Das Gerät ist grundsätzlich in Innenräumen auf einer ebenen, An der Wärmepumpe sind folgende Anschlüsse herzustellen: glatten und waagerechten Fläche aufzustellen. Dabei sollte der Zu-/Abluft Rahmen rundum dicht am Boden anliegen, um eine geeignete Vor-/Rückläufe der Heizungsanlage Schallabdichtung zu gewährleisten. -
Seite 8: Heizungsseitiger Anschluss
Frostschutz Bei Wärmepumpen, die frostgefährdet aufgestellt sind, sollte eine manuelle Entleerung (siehe Bild) vorgesehen werden. So- fern Regler und Heizungsumwälzpumpe betriebsbereit sind, ar- beitet die Frostschutzfunktion des Reglers. Bei Außerbetrieb- nahme der Wärmepumpe oder Stromausfall ist die Anlage zu entleeren. Bei Wärmepumpenanlagen, an denen ein Strom- ausfall nicht erkannt werden kann (Ferienhaus), ist der Hei- zungskreis mit einem geeigneten Frostschutz zu betreiben. -
Seite 9: Inbetriebnahme
Inbetriebnahme Wärmequellen- max. Temperaturspreizung temperatur zwischen Heizungsvor- und 7.1 Allgemein Rücklauf -20 °C -15 °C Um eine ordnungsgemäße Inbetriebnahme zu gewährleisten, -14 °C -10 °C sollte diese von einem vom Werk autorisierten Kundendienst -9 °C -5 °C durchgeführt werden. Unter bestimmten Bedingungen ist damit -4 °C 0 °C eine Verlängerung der Gewährleistung verbunden (vgl. -
Seite 10: Reinigung / Pflege
Reinigung / Pflege 8.3 Reinigung Luftseite Luftkanäle, Verdampfer, Lüfter und Kondensatablauf sind vor der 8.1 Pflege Heizperiode von Verunreinigungen (Blätter, Zweige usw.) zu rei- nigen. Dazu ist die Wärmepumpe an der Frontseite zuerst unten Vermeiden Sie zum Schutz des Lackes das Anlehnen und Able- und dann oben zu öffnen. -
Seite 11: Geräteinformation
11 Geräteinformation Geräteinformation für Luft/Wasser-Heiz-Wärmepumpen Typ- und Verkaufsbezeichnung WPL 150IR WPL 190IR WPL 220IR Bauform Schutzart nach EN 60 529 für Kompaktgerät bzw. Heizteil IP 21 IP 21 IP 21 Aufstellungsort Innen Innen Innen Leistungsangaben Temperatur-Betriebseinsatzgrenzen: bis 58 / ab 18... -
Seite 12: Garantieurkunde
örtlichen Versorgungsunternehmen oder unsere Montage- und Gebrauchsanweisung sowie die in den Projektie- Österreich: rungsunterlagen enthaltenen Hinweise oder Einbindungssche- Buderus Austria Heiztechnik Gesellsch.mbH men nicht beachtet worden sind oder wenn unser funktionsnot- Rennbahnweg 65 wendiges Zubehör nicht eingesetzt wurde. Durch etwa seitens A-1220 Wien des Endabnehmers oder Dritter unsachgemäß... - Seite 13 Table of contents Please Read Immediately ......................E-2 1.1 Important Information:..........................E-2 1.2 Intended Use ............................E-2 1.3 Legal Regulations and Directives ......................E-2 1.4 Energy-Efficient Use of the Heat Pump ....................E-2 Purpose of the Heat Pump ......................E-3 2.1 Application .............................. E-3 2.2 Operating Principle ..........................
-
Seite 14: Please Read Immediately
Please Read 1.2 Intended Use Immediately This device is only intended for use as specified by the manufac- turer. Any other use beyond that intended by the manufacturer is prohibited. This includes the user's abiding by the manufacturer's 1.1 Important Information: product brochures. -
Seite 15: Purpose Of The Heat Pump
Purpose of the Heat Scope of Delivery Pump 3.1 Basic Device 2.1 Application The heat pump is of compact design and is supplied complete with the components listed below. The air-to-water heat pump is to be used exclusively for the heat- The refrigerant circuit is hermetically sealed. -
Seite 16: Switch Box
Transport 3.2 Switch Box The switch box is located in the heat pump. It can be swung out ATTENTION! after removing the lower front cover and loosening the fastening When transporting the heat pump, ensure that it is not tilted more than screw located in the upper right-hand corner. -
Seite 17: Set-Up
Set-UP Installation 5.1 General Information 6.1 General Information The unit must be installed indoors on a level, smooth and hori- The following connections need to be established on the heat zontal surface. The entire base of the frame should lie directly on pump: the floor to ensure a good soundproof seal. -
Seite 18: Heating System Connection
Antifreeze A method of manual drainage (see illustration) should be pro- vided for heat pumps which are exposed to frost. The antifreeze function of the heat pump controller is active whenever the con- troller and the heat circulating pump are ready for operation. If the heat pump is taken out of service or in the event of a power failure, the system has to be drained. -
Seite 19: Start-Up
Start-UP Any faults occurring during operation are also displayed on the heat pump controller and can be corrected as described in the operating instructions of the heat pump controller. 7.1 General Information For external temperatures below 10 °C and heating water tem- peratures below 16 °C, the buffer tank should be heated up with To ensure that start-up is performed correctly, it should only be the 2nd heat generator to at least 25 °C. -
Seite 20: Maintenance / Cleaning
Maintenance / Cleaning 8.3 Cleaning the Air System Air ducts, evaporator, ventilator and condensate outflow should 8.1 Maintenance be cleaned of contamination (leaves, twigs, etc.) before the heat- ing period. Do this by opening the front of the heat pump. The To protect the paintwork, avoid leaning or putting objects on the bottom should be opened first followed by the top. -
Seite 21: Device Information
11 Device Information Device information for air-to-water heat pumps (heating only) Type and order code WPL 150IR WPL 190IR WPL 220IR Design Degree of protection according to EN 60 529 for compact devices IP21 IP21 IP21 and heating components Installation location... - Seite 22 E-10...
- Seite 23 Table des matières A lire immédiatement !........................F-2 1.1 Importantes informations ........................F-2 1.2 Utilisation conforme ..........................F-2 1.3 Dispositions légales et directives......................F-2 1.4 Utilisation de la pompe à chaleur pour économiser de l'énergie ............F-2 Utilisation de la pompe à chaleur ....................F-3 2.1 Domaine d’utilisation..........................
-
Seite 24: Lire Immédiatement
A lire immédiatement ! 1.2 Utilisation conforme Cet appareil est destiné uniquement à l'utilisation prévue par le 1.1 Importantes informations fabricant. Toute autre utilisation est considérée comme non con- forme. La documentation accompagnant les produits doit égale- ment être prise en compte. Toute modification ou transformation ATTENTION ! de l'appareil est interdite. -
Seite 25: Utilisation De La Pompe À Chaleur
Utilisation de la pompe Fournitures à chaleur 3.1 Appareil de base 2.1 Domaine d’utilisation La pompe à chaleur est livrée sous forme compacte et contient les composants énumérés ci-dessous. La pompe à chaleur air/eau est prévue exclusivement pour le ré- Le circuit réfrigérant est «... -
Seite 26: Boîtier Électrique
Transport 3.2 Boîtier électrique Le boîtier électrique est monté dans la pompe à chaleur. Le boî- ATTENTION ! tier électrique peut être rabattu après avoir retiré l’habillage fron- Lors du transport, l’angle d’inclinaison de la pompe à chaleur ne doit pas tal inférieur et dévissé... -
Seite 27: Emplacement De Montage
Emplacement de Installation montage 6.1 Remarques d’ordre général 5.1 Remarques d’ordre général Les raccordements suivants doivent être réalisés sur la pompe à chaleur : En règle générale, l'appareil doit être installé à l'intérieur, sur une Aspiration/évacuation d’air surface plane, lisse et horizontale. Ici, le châssis de la pompe à Circuits départ et retour de l’installation de chauffage chaleur doit adhérer au sol sur toute sa circonférence afin de ga- Ecoulement des condensats... -
Seite 28: Raccordement Côté Chauffage
Protection antigel Dans le cas de pompes à chaleur exposées au gel, une vidange manuelle du circuit de chauffage devrait être prévue. La fonction de protection antigel du régulateur fonctionne dès que le régula- teur et les circulateurs de chauffage sont opérationnels. L’instal- lation doit être vidangée en cas de mise hors service de la pompe à... -
Seite 29: Mise En Service
Mise en service Température Différence de température max. de départ entre circuits départ et retour du 7.1 Remarques d’ordre général chauffage à -20 °C -15 °C Pour garantir une mise en service en règle, cette dernière doit -14 °C -10 °C être effectuée par un service après-vente agréé... -
Seite 30: Nettoyage / Entretien
Nettoyage / entretien 8.3 Nettoyage côté air Les conduits d’air, l’évaporateur, l’aérateur et l’écoulement des 8.1 Entretien condensats doivent être nettoyés de leurs impuretés (feuilles, branches etc.) avant la période de chauffage. Ouvrir la pompe à Il faut éviter d’appuyer ou de déposer des objets sur l’appareil chaleur sur le côté... -
Seite 31: Informations Sur Les Appareils
11 Informations sur les appareils Informations sur les pompes à chaleur air/eau pour chauffage Désignation technique et commerciale WPL 150IR WPL 190IR WPL 220IR Forme Type de protection selon EN 60 529 pour app. compact ou élt. de chauffe IP 21... - Seite 32 F-10...
- Seite 33 Anhang / Appendix / Annexes Maßbilder / Dimension Drawings / Schémas cotés..............A-II 1.1 Maßbild / Dimension Drawing / Schéma coté WPL 150IR ..............A-II 1.2 Maßbild / Dimension Drawing / Schéma coté WPL 190IR / WPL 220IR ..........A-III Diagramme / Diagrams / Diagrammes..................
-
Seite 34: Maßbilder / Dimension Drawings / Schémas Cotés
1 Maßbilder / Dimension Drawings / Schémas cotés 1.1 Maßbild / Dimension Drawing / Schéma coté WPL 150IR A-II... -
Seite 35: Maßbild / Dimension Drawing / Schéma Coté Wpl 190Ir / Wpl 220Ir
1.2 Maßbild / Dimension Drawing / Schéma coté WPL 190IR / WPL 220IR A-III... -
Seite 36: Diagramme / Diagrams / Diagrammes
2 Diagramme / Diagrams / Diagrammes 2.1 Kennlinien / Characteristic curves / Courbes caractéristiques WPL 150IR A-IV... -
Seite 37: Kennlinien / Characteristic Curves / Courbes Caractéristiques Wpl 190Ir
2.2 Kennlinien / Characteristic curves / Courbes caractéristiques WPL 190IR... -
Seite 38: Kennlinien / Characteristic Curves / Courbes Caractéristiques Wpl 220Ir
2.3 Kennlinien / Characteristic curves / Courbes caractéristiques WPL 220IR A-VI... -
Seite 39: Stromlaufpläne / Circuit Diagrams / Schémas Électriques
3 Stromlaufpläne / Circuit Diagrams / Schémas électriques 3.1 Steuerung / Control / Commande WPL 150IR A-VII... -
Seite 40: Last / Load / Charge Wpl 150Ir
3.2 Last / Load / Charge WPL 150IR A-VIII... -
Seite 41: Anschlussplan / Circuit Diagram / Schéma Électrique Wpl 150Ir
3.3 Anschlussplan / Circuit Diagram / Schéma électrique WPL 150IR A-IX... -
Seite 42: Legende / Legend / Légende Wpl 150Ir
3.4 Legende / Legend / Légende WPL 150IR Pressostat Abtauende Defrost end controller Pressostat fin de dégivrage Pressostat Hochdruck High-pressure switch Pressostat haute pression Pressostat Niederdruck Low-pressure switch Pressostat basse pression Thermostat Heißgasüberwachung Thermostat for hot gas monitoring Thermostat surveillance gaz de chauffage... -
Seite 43: Steuerung / Control / Commande Wpl 190Ir / Wpl 220Ir
3.5 Steuerung / Control / Commande WPL 190IR / WPL 220IR A-XI... -
Seite 44: Last / Load / Charge Wpl 190Ir / Wpl 220Ir
3.6 Last / Load / Charge WPL 190IR / WPL 220IR A-XII... -
Seite 45: Anschlussplan / Circuit Diagram / Schéma Électrique Wpl 190Ir / Wpl 220Ir
3.7 Anschlussplan / Circuit Diagram / Schéma électrique WPL 190IR / WPL 220IR A-XIII... -
Seite 46: Legende / Legend / Légende Wpl 190Ir / Wpl 220Ir
3.8 Legende / Legend / Légende WPL 190IR / WPL 220IR Pressostat Abtauende Defrost end controller Pressostat fin de dégivrage Pressostat Hochdruck High-pressure switch Pressostat haute pression Pressostat Niederdruck Low-pressure switch Pressostat basse pression Thermostat Heißgasüberwachung Thermostat for hot gas monitoring Thermostat surveillance gaz de chauffage Wicklungsschutz Ventilator Winding protection, ventilator... -
Seite 47: Hydraulische Prinzipschemen / Hydraulic Plumbing Diagrams / Schémas Hydrauliques
4 Hydraulische Prinzipschemen / Hydraulic Plumbing Diagrams / Schémas hydrauliques 4.1 Monoenergetische Anlage / Mono energy system / Installation mono- énergétique A-XV... -
Seite 48: Monoenergetische Anlage Und Warmwasserbereitung / Mono Energy System And Domestic Hot Water Preparation / Installation Mono-Énergétique Et Production D´eau Chaude
4.2 Monoenergetische Anlage und Warmwasserbereitung / Mono energy system and domestic hot water preparation / Installation mono- énergétique et production d´eau chaude A-XVI... -
Seite 49: Bivalente Anlage / Bivalent System / Installation Bivalente
4.3 Bivalente Anlage / Bivalent system / Installation bivalente A-XVII... -
Seite 50: Legende / Legend / Légende
4.4 Legende / Legend / Légende Absperrventil Shutoff valve Robinet d’arrêt Überstromventil Overflow valve Vanne de trop-plein Sicherheitsventilkombination Safety valve combination Groupe de valves de sécurité Umwälzpumpe Circulating pump Circulateur Ausdehnungsgefäß Expansion vessel Vase d´expansion Raumtemperaturgesteuertes Ventil Room temperature-controlled valve Valve commandée par température Absperrventil mit Rückschlagventil Shutoff valve with check valve... -
Seite 51: Konformitätserklärung / Declaration Of Conformity / Déclaration De Conformité
5 Konformitätserklärung / Declaration of Conformity / Déclaration de conformité A-XIX... -
Seite 52: Österreich
Heizungsfachbetrieb / Your local heating contractor / Cachet de l’installateur Deutschland Österreich Bosch Thermotechnik GmbH Buderus Austria Heiztechnik GesmbH D-35573 Wetzlar Karl-Schönherr-Straße 2 www.heiztechnik.buderus.de AT-4600 Wels info@heiztechnik.buderus.de www.buderus.at office@buderus.at Schweiz Frankreich Buderus Heiztechnik AG Buderus Chauffage SAS Netzibodenstraße 36 4 rue Wilhelm Schaeffler CH-4133 Pratteln B.P.