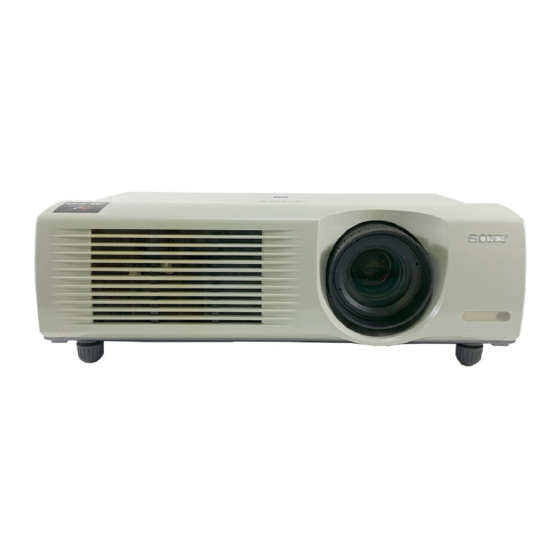
Sony VPL-PX41 Installationsanleitung
Data projector
Vorschau ausblenden
Andere Handbücher für VPL-PX41:
- Bedienungsanleitung (67 Seiten) ,
- Kurzreferenz (87 Seiten)
Inhaltsverzeichnis
Verfügbare Sprachen
Verfügbare Sprachen
Quicklinks
Data Projector
特約店様用設置説明書
3∼ 10、 46∼ 63 ページ
この特約店様用設置説明書には、 レンズの交換方法、別売りのレンズ使用時や天井吊りの場合の設置寸法
など、製品の設置時に必要な情報を記載しています。
お客様へ
この設置説明書は、特約店様用に書かれたものです。
お客様が設置説明書に記載された設置を行う と、 事故などによ り死亡や大けがにつながる こ とがあ り ます。 お
客様自身では絶対に設置をしないでく ださい。 設置については必ずお買い上げ店またはソニーテクニカルイ
ンフォメーシ ョ ンセンターにご相談く ださい。
特約店の方は、設置を安全に行うために、必ずこの説明書をよく お読みく ださい。
Installation Manual for Dealers
This installation Manual for Dealers explains how to install the projector. For example, it explains
lens replacement, installation measurements when using the optional lens and hanging the projector
from the ceiling.
Warning
This Installation Manual is for Dealers.
Manuel d'installation pour les revendeurs
Le manuel d'installation pour les revendeurs explique comment installer le projecteur. Par
exemple, il explique la procédure de remplacement de l'objectif, les dimensions d'installation
lorsque vous employez l'objectif en option et comment suspendre le projecteur au plafond.
Avertissement
Ce manuel d'installation est destiné aux revendeurs.
Manual de instalación para proveedores
En este manual de instalación para proveedores se describe cómo instalar el proyector. Por
ejemplo, se describe cómo sustituir el objetivo, las medidas de instalación cuando se utiliza el
objetivo opcional y cómo colgar el proyector en el techo.
Advertencia
Este manual de instalación es para los proveedores.
Installationsanleitung für Händler
In dieser Installationsanleitung für Händler wird erläutert, wie Sie den Projektor installieren.
Beispielsweise werden das Austauschen des Objektivs, die Installationsabmessungen beim
Verwenden des gesondert erhältlichen Objektivs und das Installieren des Projektors an der Decke
beschrieben.
Achtung
Diese Installationsanleitung richtet sich an Händler.
Manuale d'installazione per i rivenditori
Il presente manuale contiene le istruzioni relative all'installazione del proiettore. Vengono riportate
ad esempio le istruzioni su come sostituire l'obiettivo, le misure di installazione quando si utilizza
l'obiettivo opzionale e le procedure dell'installazione al soffitto.
Avvertenza
Il presente manuale d'installazione è destinato ai rivenditori.
VPL-PX41
2005 Sony Corporation
Pages 3, 11 to 16 and 46 to 63
Pages 3, 17 à 22 et 46 à 63
Páginas 3, 23 a 28 y 46 a 63
Seite 3, 29 bis 34 und 46 bis 63
Pagine 3, 35 a 40 e 46 a 63
2-592-492-01(1)
Inhaltsverzeichnis

Verwandte Anleitungen für Sony VPL-PX41


Inhaltszusammenfassung für Sony VPL-PX41
- Seite 1 Il presente manuale contiene le istruzioni relative all’installazione del proiettore. Vengono riportate ad esempio le istruzioni su come sostituire l’obiettivo, le misure di installazione quando si utilizza l’obiettivo opzionale e le procedure dell’installazione al soffitto. Avvertenza Il presente manuale d’installazione è destinato ai rivenditori. VPL-PX41 2005 Sony Corporation...
-
Seite 29: Deutsch
Deutsch Aufstellung Sicherheitsmaßnahmen • Mit Hilfe der Projektoraufhängung PSS-610 von Sony können Sie den Projektor an der Decke Sicherheit installieren. • Achten Sie auf ausreichende Luftzufuhr, damit sich • Achten Sie darauf, daß die Betriebsspannung des im Gerät kein Wärmestau bildet. Stellen Sie das Geräts der lokalen Stromversorgung entspricht. -
Seite 30: Reinigung
Boden und Wände mit einem Material In dieser Anleitung wird beschrieben, wie Sie den verkleidet sind, das kein Licht reflektiert. Ist dies Datenprojektor VPL-PX41 von Sony installieren, das nicht möglich, sollten Sie für Bodenbelag und Objektiv austauschen und die Objektivposition für die Wandverkleidung ein dunkles Material wählen. -
Seite 31: Austauschen Des Objektivs
Heben Sie das Objektiv nach oben heraus. Austauschen des Objektivs Die folgenden Objektivtypen können im Projektor installiert werden. • Zoomobjektiv VPLL-ZM102 mit langer Brennweite • Zoomobjektiv VPLL-ZM32 mit kurzer Brennweite Tauschen Sie das Objektiv nach dem folgenden Richten Sie die Positionen so aus, dass der Verfahren aus. -
Seite 32: Ändern Der Objektivposition Für Rückprojektion (Winkel Der Optischen Achse: 0 Grad)
Schieben Sie die Abdeckhaube zurück, bis sie Ändern der die Rückseite berührt. Objektivposition für Rückprojektion (Winkel der optischen Achse: 0 Grad) Ziehen Sie die Schraube (einzelne lange Für die Rückprojektion können Sie den Winkel der Schraube (M3)) auf der Unterseite an. optischen Achse auf 0 (Null) einstellen. - Seite 33 Heben Sie das Objektiv nach oben heraus. Richten Sie die Positionen so aus, dass der Stopper des Objektivs den Stopper der Projektoreinheit berührt, und setzen Sie dann das Objektiv ein. Stopper (Projektor) Stopper Entfernen Sie mit einem (Objektiv) Stopper (Projektor) Kreuzschlitzschraubenzieher die vier Schrauben (M3×6, schwarz), während Sie die Abstandsstücke auf der linken und rechten Seite...
- Seite 34 Richten Sie den Vorsprung unter dem Objektiv an der Abdeckhaube auf die Vertiefung in der Basis aus (siehe nachstehende Abbildung), und führen Sie dann die sechs Zungen an den Seiten der Abdeckhaube in die Schlitze des Projektors ein. Schieben Sie die Abdeckhaube zurück, bis sie die Rückseite berührt.
-
Seite 47: Diagrama De Instalación
Español Deutsch Italiano Diagrama de Installations- Diagramma di instalación diagramm installazione Installazione sul pavimento Instalación en el suelo Installation am Boden (proiezione frontale) (proyección frontal) (Frontprojektion) Standard: 4 ( キャビネットの前面からレンズ中心までの VPLL-ZM32: 7 ( 距離 Distance between the front of the cabinet and the center of the lens Distance entre l’avant du châssis et le centre de l’objectif... - Seite 48 日本語 English Français 設置寸法 Installation Diagram Schéma d’installation 床置き、フロント投影 Floor Installation (Front Installation au sol (projection Projection) frontale) ■ 標準レンズ / Standard lens / Objectif standard / Objetivo estándar / Standardobjektiv / Uso Obiettivo standard 単位:mm (インチ) / Unit: mm (inches) / Unité: mm (pouces) / Unidad: mm (pulgadas) / Einheit: mm (Zoll) / Unità: mm (pollici) 1490 2270 3040...
- Seite 49 Español Deutsch Italiano Diagrama de instalación Installations-diagramm Diagramma di installazione Instalación en el suelo Installation am Boden Installazione sul pavimento (proyección frontal) (Frontprojektion) (proiezione frontale) ■ VPLL-ZM102 単位:mm (インチ) / Unit: mm (inches) / Unité: mm (pouces) / Unidad: mm (pulgadas) / Einheit: mm (Zoll) / Unità: mm (pollici) 2610 4000 5390...
-
Seite 51: Instalación En El Techo (Proyección Frontal)
PSS-610. del proiettore PSS-610. solicite asistencia técnica únicamente a Wenn Sie das Gerät an der Decke montieren Per l’installazione al soffitto, rivolgersi personal especializado de Sony. wollen, wenden Sie sich bitte an esclusivamente a personale qualificato qualifiziertes Sony-Personal. Sony. Consulte las tablas de las páginas 52 a 53 en relación con las medidas de instalación. - Seite 52 日本語 English Français 天井つり、フロント投影 Ceiling Installation (Front Installation au platfond Projection) (projection frontale) ■ 標準レンズ / Standard lens / Objectif standard / Objetivo estándar / Standardobjektiv / Uso Obiettivo standard 単位:mm (インチ) / Unit: mm (inches) / Unité: mm (pouces) / Unidad: mm (pulgadas) / Einheit: mm (Zoll) / Unità: mm (pollici) PSS-610使用時...
- Seite 53 Español Deutsch Italiano Instalación en el techo Installation an der Decke Installazione sul soffitto (proyección frontal) (Frontprojektion) (proiezione frontale) ■ VPLL-ZM102 単位:mm (インチ) / Unit: mm (inches) / Unité: mm (pouces) / Unidad: mm (pulgadas) / Einheit: mm (Zoll) / Unità: mm (pollici) PSS-610使用時...
- Seite 54 日本語 English Français 天井つり、フロント投影 Ceiling Installation (Front Installation au platfond Projection) (projection frontale) ■ VPLL-ZM32 単位:mm (インチ) / Unit: mm (inches) / Unité: mm (pouces) / Unidad: mm (pulgadas) / Einheit: mm (Zoll) / Unità: mm (pollici) PSS-610使用時 / When using PSS-610 / Lors de l’utilisation du PSS-610 / Cuando se utiliza el PSS-610 / Bei Verwendung des PSS-610 / Quando viene utilizzato il PSS-610 2690 3300...
- Seite 55 Español Deutsch Italiano Instalación en el techo Installation an der Decke Installazione sul soffitto (proyección frontal) (Frontprojektion) (proiezione frontale) Las medidas de instalación y sus métodos de Die Installationsabmessungen und das Le misure di installazione e il loro metodo cálculo para cada objetivo se muestran jeweilige Berechnungsverfahren für die di calcolo per ogni obiettivo sono mostrati anteriormente.
- Seite 57 Español Deutsch Italiano Vista dettagliata del montaggio Vista detallada del montaje Detailansicht der Montage bei cuando se utiliza el soporte quando viene usato il Verwendung des Projektor- de suspensión del proyector supporto per appendere il Deckenhalters PSS-610 PSS-610 proiettore PSS-610 216.6 144.5 68.9...
-
Seite 59: Instalación En El Suelo (Proyección Posterior: Ángulo De Eje Óptico De 0 Grados)
Español Deutsch Italiano Instalación en el suelo Installazione sul pavimento Installation am Boden (proyección posterior: ángulo (proiezione posteriore: grado (Rückprojektion: Winkel der de eje óptico de 0 grados) zero dell’angolo di asse ottico) optischen Achse = 0 Grad) 150.6 a’’ 88.4 46.5 レンズの中心(水平)... - Seite 60 English Français 日本語 床置き、リア投影(打ち込み角 Floor Installation (Rear Installation au sol 0°) Projection: Optical Axis Angle (Rétroprojection: angle d’axe 0 Degree) optique de 0 degré) ■ 標準レンズ / Standard lens / Objectif standard / Objetivo estándar / Standardobjektiv / Uso Obiettivo standard 単位:mm (インチ)...
- Seite 61 Español Deutsch Italiano Instalación en el suelo Installation am Boden Installazione sul pavimento (proyección posterior: ángulo (Rückprojektion: Winkel der (proiezione posteriore: grado de eje óptico de 0 grados) optischen Achse = 0 Grad) zero dell’angolo di asse ottico) ■ VPLL-FM22 単位:mm (インチ)...
-
Seite 62: 寸法図
寸法図 / Dimensions / Dimensions / Dimensiones / Abmessungen / Dimensioni 前面 Front view Vue avant 86.5 Vista frontal Vorderseite 220.5 Vista anteriore 22.5 37.5 52.5 52.5 42.8 本体中心 レンズ中心 Center of unit Center of the lens Centre du projecteur Centre de l’objectif Centro de la unidad Centro del objetivo... - Seite 63 側面 Side view Vue de côté 287.3 Vista lateral Seite 197.1 Vista laterale 31.1 256.3 底面 Bottom view Vue de dessous Vista inferior Unterseite Vista dal basso 349.8 113.6 125.8 48.2 126.5 259.7 137.4 58.4 81.5 47.4 32.2 本体中心 単位:mm Center of unit Unit: mm Centre du projecteur...
- Seite 69 使用VPLL-ZM102长焦距变焦透镜时 屏幕尺寸(英寸) a” 最小 2710 4100 5500 6890 8280 10370 12460 13850 17330 20810 最大 4030 6070 8110 10160 12200 15270 18330 20380 25490 30590 x–79.7 计算方法(单位:mm) a” (最小) = {(SS × 67.077/0.98268) – 172.01} × 1.02 + 100.9 a” (最大) = {(SS × 102.47/0.98268) – 166.84} × 0.98 + 100.9 b = x c = x –...
- Seite 70 外形尺寸 正视图 86.5 220.5 22.5 37.5 52.5 52.5 42.8 投影机中心 透镜的中心 顶视图 单位:mm...
- Seite 71 侧视图 287.3 197.1 31.1 256.3 底视图 349.8 113.6 125.8 48.2 126.5 259.7 137.4 58.4 81.5 47.4 32.2 投影机中心 单位:mm...