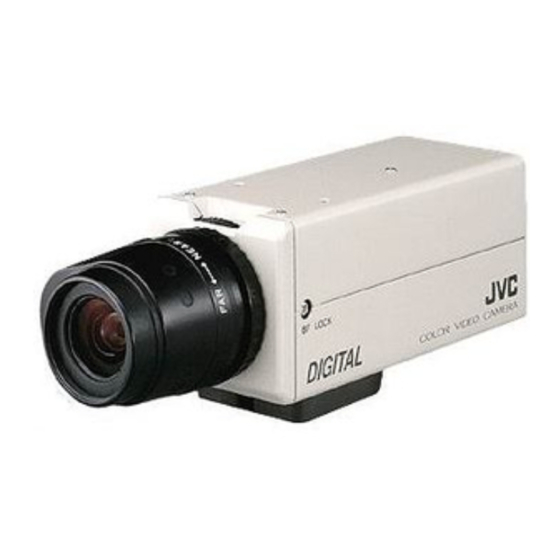
JVC TK-C700 Bedienungsanleitung
Quicklinks
®
TK-C700/TK-C701/TK-C720/TK-C721
These instructions are for TK-C700U, TK-C720U, TK-C700E, TK-C720E, TK-C701EG and TK-C721EG.
IMPORTANT SAFEGUARDS
1. Read all of these instructions.
2. Save these instructions for later use.
3. All warnings on the product and in the operating instructions should be adhered to.
4. Unplug this appliance system from the wall outlet before cleaning. Do not use liquid cleaners or aerosol cleaners.
Use a damp cloth for cleaning.
5. Do not use attachments not recommended by the appliance manufacturer as they may cause hazards.
6. Do not use this appliance near water - for example, near a bathtub, washbowl, kitchen sink, or laundry tub, in a wet
basement, or near a swimming pool, etc.
7. Do not place this appliance on an unstable cart, stand, or table. The appliance may fall,
causing serious injury to a child or adult, and serious damage to the appliance may fall,
causing serious injury to a child or adult, and serious damage to the appliance.
Use only with a cart or stand recommended by the manufacturer, or sold with the appliance.
Wall or shelf mounting should follow the manufacturer's instructions, and should use a mounting
kit approved by the manufacturer.
An appliance and cart combination should be moved with care. Quick stops, excessive
force, and uneven surfaces may cause the appliance and cart combination to overturn.
8. Slots and openings in the cabinet and the back or bottom are provided for ventilation, and to
insure reliable operation of the appliance and to protect it from overheating, these openings
must not be blocked or covered. The openings should never be blocked by placing the appliance on a bed, sofa,
rug, or other similar surface. This appliance should never be placed near or over a radiator or heat register. This
appliance should not be placed in a built-in installation such as a bookcase unless proper ventilation is provided.
9. This appliance should be operated only from the type of power source indicated on the marking label. If you are
not sure of the type of power supplied to your home, consult your dealer or local power company. For appliance
designed to operate from battery power, refer to the operating instructions.
10. This appliance system is equipped with a 3-wire grounding type plug (a plug having a third (grounding) pin). This
plug will only fit into a grounding-type power outlet. This is a safety feature. If you are unable to insert the plug into
the outlet, contact your electrician to replace your obsolete outlet. Do not defeat the safety purpose of the grounding
plug.
11. For added protection for this product during a lightning storm, or when it is left unattended and unused for long
periods of time, unplug it from the wall outlet and disconnect the antenna or cable system. This will prevent
damage to the product due to lightning and power-line surges.
12. Do not allow anything to rest on the power cord. Do not locate this appliance where the cord will be abused by
persons walking on it.
13. Follow all warnings and instructions marked on the appliance.
14. Do not overload wall outlets and extension cords as this can result in fire or electric shock.
15. Never push objects of any kind into his appliance through cabinet slots as they mat touch dangerous voltage
points or short out parts that could result in a fire or electric shock. Never spill liquid of any kind on the appliance.
16. Do not attempt to service this appliance yourself as opening or removing covers may expose you to dangerous
voltage or other hazards. Refer all servicing to qualified service personnel.
17. Unplug his appliance from the wall outlet and refer servicing to qualified service personnel under following conditions:
a. When the power cord or plug is damaged or frayed.
b. If liquid has been spilled into the appliance.
c. If the appliance has been exposed to rain or water.
d. If the appliance does not operate normally by following the operating instructions. Adjust only those controls
that are covered by the operating instructions as improper adjustment of other controls may result in damage
and will often require extensive work by a qualified technician to restore the appliance to normal operation.
e. If the appliance has been dropped or the cabinet has been damaged.
f. When the appliance exhibits a distinct change in performance - this indicates a need for service.
18. When replacement parts are required, be sure the service technician has used replacement parts specified by the
manufacturer that have the same characteristics as the original part. Unauthorized substitutions may result in fire,
electric shock, or other hazards.
19. Upon completion of any service or repairs to this appliance, ask the service technician to perform routine safety
checks to determine that the appliance is in safe operating condition.
A
B
(b)
C
D
VIDEO
DC
LEVEL
IRIS
VIDEO
DC
L
H
LEVEL
COLOR VIDEO CAMERA
E
F
q
w
IRIS
VIDEO
DO
L
H
COLOR VIDEO CAMERA
LEVEL
(f)
MAX.
7
mm
6mm
ON-AGC
OFF
ON-AES
e
OFF
ON-BLC
OFF
MAMU
2mm
AUTO
LL
INT
WHT.
PHASE
BAL
R
B
POWER
RESET
IRIS
VIDEO
DO
L
H
LEVEL
COLOR VIDEO CAMERA
FARBVIDEOKAMERA
Wir danken Ihnen für den Kauf dieser JVC-Farbvideokamera.
Bitte lesen Sie für beste Ergebnisse mit Ihrer neuen Kamera diese Anleitung vor der Verwendung sorgfältig
durch, und bewahren Sie die Bedienungsanleitung fut auf.
WARNUNG:
ZUR VERHÜTUNG VON FEUER ODER ELEKTRISCHEM SCHLAG DIESES GERÄT NICHT
REGEN ODER FEUCHTIGKEIT AUSSETZEN.
VORSICHTSHINWEISE
• Wenn der AGC-Schalter eingeschaltet ist, nimmt die Empfindlichkeit an dunklen Orten automatisch zu.
Es ist kein Fehlfunktion wenn das Bild körnig aussieht.
• Wenn ein Zoom-Objektiv verwendet wird, so überprüfen Sie vor der Montage den Rückfokus. Dies gilt
auch für Objektiv-ALC und LEVEL. (Einzelheiten siehe Anleitung für das Objektiv.)
• Wenn ein Objekt hoher Intensität (wie z.B. eine Lampe) aufgenommen wird, so kann das Bild auf dem
Bildschirm vertikale Linien (Verschmierung) zeigen oder an der Peripherie verschwimmen
(Überstrahlung) (besonders in AES-Betrieb). Dies ist eine CCD-Charakteristik und kein Defekt.
• Wenn ein EE-Objektiv verwendet wird, so stellen Sie den Schalter für den automatischen elektronischen
Verschluß (AES) auf OFF (Aus). Bei Stellung auf ON (Ein) kann es zu Flackern kommen. Wenn ein
Objekt mit manueller Blende verwendet wird, so stellen Sie den AES-Schalter auf ON (Ein).
PORTABLE CART WARNING
• Bei Verwendung an Orten mit hoher Temperatur können vertikale Linien auf dem Bildschirm dieser
(symbol provided by RETAC)
Kamera erscheinen. Dies ist eine CCD-Charakteristik und kein Defekt der Kamera.
• Das automatische Nachführsystem funktioniert möglicherweise nicht korrekt, wenn unter ungewöhnlicher
Beleuchtung oder Beleuchtung mit einer Farbtemperatur außerhalb der Fähigkeit der Kamera
aufgenommen wird. Stellen Sie in einem solchen Fall auf "MANU".
• Wenn das Aufnahmeobjekt nur einfarbig bunt ist (nicht weiß) hat, so versucht die automatische Weiß-
Schaltung normalerweise, dies zu korrigierin. In diesem Fall kann kein Weißebgleich erfolgen und der
zuvor gespeicherte Wert wird weiter vetwendet, bis sich das Objekt geändert hat.
S3126A
• Wenn starke elektromagnetische Wellen oder Magnetismus vorhanden sind, z.B. in der Nähe eines
Radio- oder Fernsehsenders, eines Transformators, eines Motors usw., so kann das Bild Störungen
enthalten und die Farben können verfälscht sein.
• Schalten Sie zum Einsparen von Energie das System aus, wenn es nicht verwendet wird.
ANBRINGEN EINES OBJEKTIVS
1. Überprüfen Sie vor der Anbringung eines Objektivs, ob das Objektiv eine C-Fassung oder eine CS-
Fassung hat. Wenn das Objektiv eine C-Fassung hat, so lösen Sie die Rückfokus-Feststellschraube
(M 2,6) mit einem Kreuzschlitz-Schraubenzieher und drehen Sie den Rückfokus-Einstellring mit
Ihren Fingern oder mit einem Schraubenzieher, um die Anbringungsmethode zu ändern.
2. Die in der Abbildung gezeigte Abmessung (b) muß wie in der folgenden Tabelle gezeigt sein.
Wenn (b) den in der Tabelle gezeigten Wert überschreitet, kann das Innere der Kamera
beschädigt werden oder korrekte Anbringung kann unmöglich sein. Bringen Sie bei
Verwendung der CS-Fassung kein Objektiv mit C-Fassung an.
Objektiv
Flanschrückseite (c)
Objektiv mit C-Fassung
17,526 mm
Objektiv mit CS-Fassung
12,5 mm
Die F-Markierung bezeichnet einen Fokuspunkt.
3. Bringen Sie das Objektiv durch Drehung im Uhrzeigersinn an der Kamera an. Stellen Sie
seine Position ein.
4. Stellen Sie bei Verwendung eines Objektivs mit automatischer Blende mit einem EE-
Verstärker den Schalter auf "VIDEO". Wenn kein EE-Verstärker vorhanden ist, so stellen
Sie den Schalter auf "DC".
5. Wenn das Objektiv eine automatische Blende hat, so schließen Sie das Objektivkabel
nach Überprüfung der Stiftanordnung an.
Wenn das Objektivkabel einen anderen Steckertyp hat, so verwenden Sie den mitgelieferten
vierpotigen Stecker.
Objektiv
DC-Blende
VIDEO-Blende
(enthält keinen EE- Verstärker)
(enthält einen EE-Verstärker)
Siftnummer
1
Bremse –
9,5V[max 50mA]
2
Bremse +
NC
3
Antrieb +
VIDEO
4
Antrieb –
Erde
F
ANSCHLUSS
1. Wenn die Kamera mit Strom versorgt wird, leuchtet die Leuchtdiode POWER auf.
Kameratyp
Stromversorgung
~
TK-C700U/TK-C720U
Ws
24 V (nur Klasse 2) oder Gs -12 V
~
TK-C700E/TK-C720E
Ws
24 V (nur isolierte Stromversorgung)oder Gs-12V
~
TK-C701EG/TK-C721EG
Ws
220 bis 240 V (Das Netzkabel ist 250 mm lang.)
• Niemals DC 12 V und AC 24 V gleichzeitig anschließen.
(c)
• Beim Anschluß der 12 V Gleichstromversorgung die korrekte Polarität (+, –) beachten.
Nur EG
Bei der Verwendung dieser Kamera muß die Steckdose in der Nähe der Ausrüstung installiert
werden, damit die Kamera leicht abgetrennt werden kann.
2. Schließen Sie an einen Videomonitor usw. an. (75Ω)
3. Verwenden Sie das Stativgewinde (d) an der Kamerahalterung, um die Kamera auf einer
(d)
Befestigungseinheit, einem Kameraschwenkkopf usw. zu installieren.
ACHTUNG: Verwenden Sie eine Schraube mit einer Gewindelänge von weniger als
7 mm von der Kamerabefestigungsfläche.
Verwenden Sie weiterhin das Loch (e) zur Verhütung von Verdrehen, um ein Herabfallen
der Kamera zu verhüten und die Kamera sicher anzubringen.
Besondere Vorsichtsmaßnahmen sind erforderlich für Anbringung der Kamera an einer
Wand oder einer Decke. Wir haften nicht für durch unsachgemäße Installation verursachte
Schäden.
4. Installation der Kamera
(e)
• Anbringung von der Unterseite her
Diese Kamera ist ursprünglich für Anbringung von der Unterseite her entworfen, wie in
q gezeigt. Das Loch hat das Standardgewinde für ein Fotostativ (1/4-20 UNC). Beispiel
für Anbringen der Kamera auf einem Kameraschwenkkopf.
• Anbringen von der Oberseite her
Entfernen Sie den stativadopter (f) von der Unterseite durch Entfernen der zwei
Befestigungssch-rauben wie in w gezeigt. Bringen Sie den stativadopter (f) an der
Oberseite an, und montieren Sie dann die Kamera wie in e gezeigt an der
Befestigungseinheit. Verwenden Sie zum Anbringen des Kamerahalters unbedingt die
zwei Originalschrauben. Achten Sie darauf, eine 6 mm lange Feststellschraube für den
Kamerahalter zu verwenden. (Diese Kamera ist für Verwendung in Gebäuden und
unter ähnlichen Bedingungen.)
Fallschutz
• Lassen Sie bei Installation des Gerätes an Wand oder Decke maximale Vorsicht walten.
Sie sollten die Installierung nicht selbst durchführen. Lassen Sie die Installierung von
einem Fachmann durchführen, da Herunterfallen des Gerätes Verletzungen oder Unfälle
M3 × 6mm
verursachen kann.
• Achten Sie bei Installation auf einer Befestigungsvorrichtung, einem Drehtisch usw. auf sichere In-
stallation unter Verwendung des Drehverhütungslochs, um ein Herunterfallen zu verhüten.
DC12V
1
2
AC24V
TYPE)
• Schließen Sie das Gerät zum Verhüten von Herunterfallen mit einem Drahtseil o.ä. an ein Teil mit
CLASS 2 ONLY(U
POWER ONLY
ISOLATED
(E TYPE)
VIDEO OUT
ausreichender Festigkeit (Deckenplatte oder U-Eisen) an. Verwenden Sie das Gewindeloch an der
CTION
SEE INSTRU
MANUA L
Rückseite des Gerätes für die Installierung.
Achten Sie auch sorgfältig auf die Länge des Drahtes.
• Festgelegte Schraube (M3 x 6 mm)
Verwenden Sie niemals eine längere Schraube als festgelegt, da sonst das Innere beschädigt werden
kann.
Bedienungsanleitung
TELECAMERA A COLORI
Grazie per avere acquistato questa telecamera a colori JVC.
Per ottenere i migliori risultati dalla telecamera, leggere attentamente queste istruzioni prima dell'uso;
conservare il manuale per riferimenti futuri.
AVVERTENZA:
PER EVITARE IL RISCHIO DI INCENDI O SCOSSE ELETTRICHE, NON ESPORRE QUESTO
APPARECCHIO ALLA PIOGGIA O ALL'UMIDITÀ.
PRECAUZIONI
• Se si attiva I'interruttore AGC, la sensibilità aumenta automaticamente in luoghi scuri. L'aspetto granuloso
dell'immagine non è indice di guasti.
• Se si usa un obiettivo zoom, controllare il fuoco posteriore prima di installare la telecamera. Questo
vale anche per ALC e LEVEL dell'obiettivo. (Per i dettagli fare riferimento alle istruzioni sugli obiettivi.)
• Se viene ripreso un oggetto ad alta intensità (come una lampada), l'immagine sullo schermo può
presentare strisce verticali (stracciatura) o sfocatura (annebbiamento) ai suoi margini (in particolare
nel modo AES). Questa è una caratteristica del CCD e non si tratta di un difetto.
• Se si usa un obiettivo EE, regolare l'interruttore di otturatore automatico elettronico (AES) su OFF. Se
l'interruttore è regolato su ON, si può verificare sfarfallamento. Se si usa un obiettivo a diaframma
manuale, regolare l'AES su ON.
• Quando si usa questa telecamera in luoghi caldi, strisce verticali possono apparire sullo schermo della
telecamera. Questa è una caratteristica del CCD e non si tratta di un guasto della telecamera.
• Il sistema di allineamento automatico può non funzionare correttamente quando si riprende con una
luce anomala o con una luce la cui temperatura del colore supera la capacità della telecamera. In tali
casi, regolare l'interruttore sulla posizione "MANU".
• Se il soggetto ripreso dalla telecamera è un singolo colore uniforme (diverso dal bianco), il circuito di
bilanciamento automatico del bianco normalmente tenterà di cambiare questo colore in bianco. Nel
caso di questa telecamera, se essa non può effettuare una previsione corretta, l'impostazione del
bilanciamento del bianco precedente sarà mantenuta finché i colori del soggetto diventano più vari.
• In luoghi con forti onde elettromagnetiche o magnetismo, ad esempio nei pressi di trasmettitori radio o
TV, trasformatori, motori, ecc., l'immagine può risultare disturbata e i colori possono non essere corretti.
• Per risparmiare energia, spegnere il sistema quando non lo si utilizza.
ATTACCO DI UN'OBIETTIVO
∆A
1. Prima di montare un'obiettivo, controllare per vedere se è un obiettivo ad attacco C o uno
ad attacco CS.
Se si usa un obiettivo ad attacco C, allentare la vite di blocco (M 2.6) regolazione messa a
fuoco posteriore, utilizzando un cacciavite con punta a croce, con le dita, o con il cacciavite,
∆B
la rotella di regolazione messa a fuoco posteriore, e cambiare metodo di montaggio.
2. La dimensione (b) dell'obiettivo mostrato nell'illustrazione deve essere come indicato nella
tabella sottostante. Se (b) supera il valore indicato nella tabella, l'obiettivo può danneggiare
l'interno della telecamera o può essere impossibile un attacco corretto; pertanto, non usare
mai tali obiettivi. Non applicare un obiettivo ad attacco C quando si usa un attacco CS.
Abmessung
Obiettivo
10 mm oder weniger
Obiettivo ad attacco C
5.5 mm oder weniger
Obiettivo ad attacco CS
Il marchio F indica un punto focale.
∆C
3. Montare l'obiettivo sulla telecamera girando l'obiettivo in senso orario. Regolare la sua
posizione.
4. Quando si usa un obiettivo a diaframma automatico con amplificatore EE, regolare
l'interruttore sul lato "VIDEO". Se non dispone di amplificatore EE, regolare l'interruttore
sul lato "DC".
5. Se l'obiettivo è dotato di meccanismo di diaframma automatico,
Collegare il cavo obiettivo dopo aver controllato la disposizione dei poli.
Se il cavo obiettivo ha un tipo di spina diverso, usare la spina a 4 poli in dotazione.
Obiettivo
DC IRIS
1 3
N. polo
(senza amplificatore EE)
1
Freno –
2
Freno +
3
Pilota +
4
Pilota –
2
4
COLLEGAMENTO
1. Quando la telecamera riceve alimentazione, il LED POWER si illumina.
Tipo di telecamera
TK-C700U/TK-C720U
TK-C700E/TK-C720E
TK-C701EG/TK-C721EG
• Non collegare mai simultaneamente gli ingressi alimentazione 12 V CC e 24 V CA.
• Assicurarsi di osservare la corretta polarità +, – quando si collega l'ingresso alimentazione 12 V
CC.
Solo EG
Quando si usa questa telecamera, la presa di corrente deve trovarsi vicino all'apparecchio per
permettere di scollegare facilmente.
2. Collegamento ad un monitor video, ecc. (75Ω)
3. Per installare la fotocamera su un'unità di fissaggio, un'unità di movimento orizzontale/
∆D
verticale, ecc., usare il foro della vite di fissaggio fotocamera (d) che si trova sulla staffa di
montaggio fotocamera.
ATTENZIONE: Usare la vite con una lunghezza inferiore a 7 mm da una facciata di
montaggio fotocamera.
Inoltre, utilizzare il foro di impedimento rotazione (e) per evitare che la fotocamera cada, e
fissare saldamente la fotocamera.
Sono necessarie precauzioni particolari quando si installa la telecamera su una parete o
un soffitto. Non siamo responsabili per qualsiasi danno causato da installazioni improprie.
∆E
4. Installazione della telecamera
• Montaggio dal fondo
Questa telecamera è stata realizzata originariamente per essere montata dal fondo,
come mostrato q. Il foro è delle dimensioni standard per viti fotografiche (1/4-20 UNC).
Esempio unità di fissaggio o unità di movimento orizzontale/verticale.
• Montaggio dall'alto
Rimuovere la STAFFA DI MONTAGGIO TELECAMERA (f) dal fondo della telecamera
rimuovendo le due viti di fissaggio, come da illustrazione w.
Applicare la STAFFA DI MONTAGGIO TELECAMERA (f) sulla parte superiore e quindi
montare la telecamera sull'unità di fissaggio come illustrato e. Assicurarsi di usare le
due viti originali per montare la STAFFA D MONTAGGIO TELECAMERA (f). Per la staffa
di montaggio della telecamera, si raccomanda di usare una vite di fissaggio lunga 6 mm.
(Questa telecamera è usata in interni e condizioni simili.)
Prevenzione caduta
• In caso di installazione dell'unità su parete o al soffitto, fare molta attenzione. Si consiglia
∆F
di non eseguire l'installazione se non adeguatamente preparati. Richiedere l'installazione
a una persona esperta in quanto la caduta dell'unità può essere causa di infortuni o
incidenti.
• Quando l'unità viene installata su un dispositivo di fissaggio, su una base girevole, ecc., controllare
che sia installata saldamente utilizzando un foro di impedimento rotazione appositamente previsto
per evitare che l'unità cada.
• Per evitare che l'unità cada, collegarla a una parte adeguatamente solida (pannello di soffitto o
canalina) utilizzando un filo di prevenzione caduta del tipo catena metallica o cosa simile. Per
l'installazione, usare il foro della vite che si trova sul retro dell'unità.
Fare anche molta attenzione a che la lunghezza del filo sia adeguata.
• Vite specificata (M3 x 6 mm)
Non utilizzare viti di lunghezza superiore a quella specificata, per non danneggiare i dispositivi presenti
all'interno.
Istruzioni
彩色攝像機
感謝您惠購 JVC 視頻攝像機﹐為了使您的新攝像機獲得最佳的使用效果﹐使用之前請仔細閱讀本
說明書﹐並妥善保存書以備將來查閱。
警告︰
為了防止火災或免遭電擊﹐請不要將本機暴露在雨中或放置在潮濕的地方。
使用注意事項
• 如果將 AGC 開關設置于 ON 的位置﹐在黑暗的地方可自動提高感光度﹐此時﹐畫面上可能會出
現顆粒﹐但不屬于故障。
• 如果使用變焦鏡頭﹐在安裝到攝像機之前請先檢查后焦距。對于鏡頭的 ALC 和 LEVEL 也同樣
(詳細內容請參見鏡頭使用說明書)。
• 在拍攝高亮度的物體(如電燈)時﹐圖像中的高亮度物體的上下會出現拖尾現象(SMEAR)﹐也
可能在被攝物體的周圍出現光滲(BLOOMING)的現象(特別是在 AES 模式下)﹐這是 CCD 器
體的特點﹐而不屬于本機故障。
• 如果使用 EE 鏡頭﹐請將自動電子快門開關(AES)設定為"OFF"。
如果設定為 ON﹐可能會出現閃爍。使用手調光圈鏡頭時﹐請先將開關設定為"ON"。
• 當在酷熱的場合使用時﹐攝像機的屏幕上可能出現垂直線條。這是 CCD 器件的特點﹐而不屬于
本機故障。
• 當在非標準照度下或色溫超過攝像機許可的范圍拍攝時﹐自動尋跡系統可能不起作用。這時將開
關設定在"MANU"位置。
• 如果拍攝物體為單一色彩(非白色)﹐自動白色平衡電路通常將會色彩變為白色。如果攝像機得
不到色彩變化正確的預測﹐以前的白平衡設定值將會繼續保持﹐直到拍攝物體的色彩出現較大的
變化。
• 在有很強的電磁波或強磁場的地方﹐例如﹐在收音機、電視發射機、變壓器或馬達附近﹐畫面上
可能會出現許多噪波﹐而且可能色彩不正。
• 未使用時﹐請務必關閉系統以節省能量。
鏡頭安裝方法
1. 在安裝鏡頭之前﹐請檢查是 C 型框架或 CS 型框架鏡頭。
∆A
如果使用 C 型安裝鏡頭﹐請用十字頭螺絲刀擰松后焦距固定螺絲(M2.6)﹐用手指
或螺絲刀轉動后焦距調整環並改變安裝方式。
2. 圖中所示的鏡頭的尺寸(b)必須為下表所列的數值﹐如果(b)超過表中的數值﹐可
能會損壞攝像機內部的機件或不能進行正常安裝;不要使用這類鏡頭。當使用 CS 型
框架時一定不能安裝 C 型框架鏡頭。
∆B
鏡頭
Retroflangia (c)
Dimensione (b)
C 型框架鏡頭
17,526 mm
10 mm o meno
CS 型框架鏡頭
12,5 mm
5,5 mm o meno
記號 F 表示焦點
3. 按順時針方向旋轉鏡頭﹐將鏡頭固定在攝像機上。並調節其位置。
4. 如果使用帶有內裝 EE 放大器的手動光圈鏡頭時﹐請把開關轉到"VIDEO"一邊。
如果使用沒有內裝 EE 放大器的鏡頭時﹐請把開關轉到"DC"一邊。
∆C
5. 如果鏡頭具有自動光闌機構﹐
在檢驗插頭針的狀況后﹐連接好鏡頭電纜。
如果鏡頭電纜有不同的插頭﹐請使用附帶的 4P 插頭。
針編號
1 3
VIDEO IRIS
(con amplificatore EE)
9,5 V (mass. 50 mA)
NC
VIDEO
2
4
MASSA
連接
1. 攝像機接通電源時﹐POWER LED(電源指示燈)亮。
攝像機型號
Alimentazione
TK-C700U/TK-C720U
~
TK-C700E/TK-C720E
24 V CA
(solo classe 2) o 12 V CC
~
TK-C701EG/TK-C721EG
24 V CA
(solo alimentazione isolata) o 12VCC
~
220 a 240 V CA
(Il cavo di alimentazione elettrica è lungo 250 mm.)
• 嚴禁同時與直流 12V 和交流 24V 連接。
• 與直流 12V 的輸入電源相連接時﹐務必保証 +﹐- 極連接正確。
只對 EG
使用本攝像機時﹐電源插座應安放在本機附近﹐以確保斷開電源方便。
2. 連接到視頻監視器等。(75Ω)
3. 要把攝像機安裝在固定器、轉台等處時,請使用攝像機安裝支架所提供的攝像機安裝
∆D
螺絲孔(d)。
注意︰對于安裝攝像機用螺絲的長度,請使用小于攝像機安裝面 7 毫米以下的螺絲。
另外,請使用防旋轉孔(e)牢固安裝以免本機落下。
把攝像機安裝在牆壁或天花板上時必須特別小心。
對于安裝不正確而造成的攝像機損壞﹐本公司不承擔任何責任。
4. 攝像機的安裝方法
• 從底部安裝
如圖 q 所示﹐本攝像機開始考慮為從底部進行安裝。安裝孔的尺寸為攝影錐形頭
∆E
螺釘的標準尺寸(1/4-20 UNC)。示例為固定式支架或全景式 俯仰式支架的安裝
方法。
• 從頂部安裝
如圖 w 所示﹐卸下二個固定螺絲后﹐從攝像機底部卸下攝像機安裝支架(CAMERA
MOUNTING BRACKET(f))﹐並將其裝到攝像機的上部﹐然后如圖 e 所示﹐將攝像
機裝到固定式支架上。確認在安裝攝像機安裝支架(f)時是否使用了二個原配的螺
絲。請使用 6 毫米長度的攝像機安裝支架固定螺絲。(本攝像機可用于室內及具有
與室內相似條件的場合。)
防止落下
• 將本裝置安裝在牆壁或天花板上時尤須小心。非專業人員請勿擅自進行安裝﹐因本
裝置落下將造成人身傷害及意外事故。
• 將本裝置安裝在固定器、轉臺等處時﹐必須使用所提供的防旋轉孔牢固安裝以防裝
置落下。
∆F
• 為防止落下﹐請使用金屬鏈或類似品將裝置連接到具有足夠強度的部位(天花板或槽道)。請
利用本裝置背部的安裝用螺絲孔。
並對金屬鏈的長度予以特別注意。
• 指定螺絲(M3 × 6mm)
切勿使用指定長度以外的螺絲以免損壞內部部件。
使用說明書
∆A
∆B
法蘭后部(c)
尺寸(b)
17.526 毫米
10 毫米或小于 10 毫米
12.5 毫米
5.5 毫米或小于 5.5 毫米
∆C
鏡頭
直流光闌
影像光闌
(不使用 EE 放大器)
(使用 EE 放大器)
1
製動
–
9.5V(最大 50mA)
2
製動
+
NC
3
驅動
視頻
+
4
驅動
–
GND
電源
交流 24V ∼(只適用于第 2 類)或直流 12V
交流 24V ∼(只適用于隔離電源)或直流 12V
交流 220-240V ∼(電源電纜長 250 mm)
∆D
∆E
∆F
1 3
2
4

Verwandte Anleitungen für JVC TK-C700


Inhaltszusammenfassung für JVC TK-C700
- Seite 1 彩色攝像機 使用說明書 Wir danken Ihnen für den Kauf dieser JVC-Farbvideokamera. Grazie per avere acquistato questa telecamera a colori JVC. 感謝您惠購 JVC 視頻攝像機﹐為了使您的新攝像機獲得最佳的使用效果﹐使用之前請仔細閱讀本 Bitte lesen Sie für beste Ergebnisse mit Ihrer neuen Kamera diese Anleitung vor der Verwendung sorgfältig Per ottenere i migliori risultati dalla telecamera, leggere attentamente queste istruzioni prima dell'uso;...
- Seite 2 : Da –10°C a 50°C (funzionamento) ︰ 0°C∼40°C(推荐溫度) VICTOR COMPANY OF JAPAN, LIMITED ©2000 VICTOR COMPANY OF JAPAN, LIMITED Masse : TK-C700/TK-C720: 360 g Da 0°C a 40°C (consigliata) 重量 ︰ TK-C700/TK-C720︰360g TK-C701/TK-C721: 700 g Massa : TK-C700/TK-C720: 360 g ®...