Herunterladen Inhalt Inhalt Diese Seite drucken
Nice E MAT ST 1011 Kurzanleitung

Nice E MAT ST 1011 Kurzanleitung

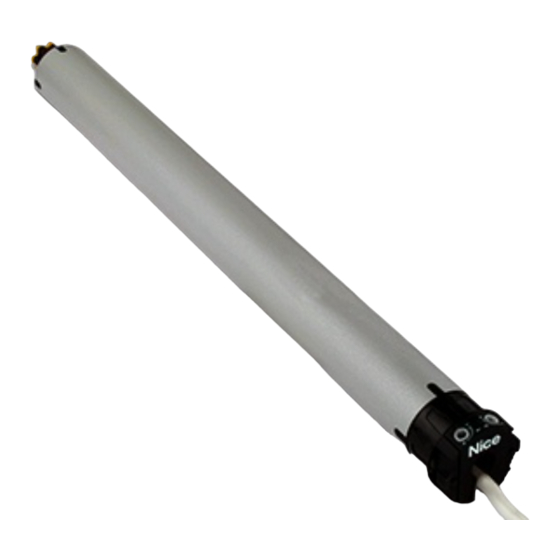
Era mat t serie; rohrförmiger motor für markisen
Inhaltsverzeichnis

Werbung

Verfügbare Sprachen
  • DE

Verfügbare Sprachen

  • DEUTSCH, seite 66
Nice
E MAT ST 324
E MAT ST 524
E MAT ST 611
E MAT ST 1011
E MAT MT 426
E MAT MT 1026
E MAT MT 817
E MAT MT 1517
E MAT MT 3017
E MAT MT 4012
Tubular motor
EN - Instructions and warnings for installation and use
IT - Istruzioni ed avvertenze per l'installazione e l'uso
FR - Instructions et avertissements pour l'installation et l'utilisation
ES - Instrucciones y advertencias para la instalación y el uso
DE - Installierungs-und Gebrauchsanleitungen und Hinweise
PL - Instrukcje i ostrzeżenia do instalacji i użytkowania
NL - Aanwijzingen en aanbevelingen voor installatie en gebruik
E MAT MT 5012
E MAT MKT 1517
E MAT MKT 3017
E MAT MKT 5012
E MAT LT 5517
E MAT LT 6517
E MAT LT 7517
E MAT LT 8012
E MAT LT 10012
E MAT LT 12012

Werbung

Inhaltsverzeichnis
loading

Inhaltszusammenfassung für Nice E MAT ST 1011

  • Seite 1 E MAT MT 5012 E MAT ST 524 E MAT MKT 1517 E MAT ST 611 E MAT MKT 3017 E MAT ST 1011 E MAT MKT 5012 E MAT MT 426 E MAT LT 5517 E MAT MT 1026...
  • Seite 2: Electrical Connections

    Quick start guide Note for reading this Guide • In this Quick Start Guide, the numbering of the figures is separate and does not cor- Era Mat T respond to the numbering cited in the tubular motor for complete manual. • This guide does not awnings substitute the complete manual.
  • Seite 3: Product Description And Intended Use

    (see fig. 3); Instructions translated from Italian • it can be programmed via radio, with a portable transmitter or with a Nice hand- held programmer (these accessories are not included in the package); • it can move the awning up or down; stop it at the upper limit switch, the lower limit Complete Manual switch or various intermediate positions;...
  • Seite 4 5.4.1 - Compatible transmitters ming phases; refer to the procedures given in this manual (procedure 5.11) and Consult the Nice product catalogue or go to www.niceforyou.com to find the Nice those given in the manuals supplied with the devices. devices compatible with the radio receiver built into the motor.
  • Seite 5 Application types and operating requirements Recommended programming Vertical roller awning Limit switch programming: • with automatic stop in the upper limit Programming in semiautomatic mode (paragraph 5.7) switch position “0” (with box) • without containment mechanical con- Programming in manual mode (paragraph 5.6) straints in the upper limit switch “0”...
  • Seite 6 PROCEDURES 5.5 - Memorising the FIRST transmitter Warning – Every time the motor is powered, 2 movements are performed if at least one transmitter and the limit switch heights are not in the memory. Before starting the procedure, bring the awning to the midpoint of its stroke. 01.
  • Seite 7 sec. sec. sec. “1” “1” sec. limit switch “1” desired fine adjustment Notes – When performing the procedure, at any time you can cancel it by keeping the n and t keys pressed simultaneously for 4 seconds. Otherwise, do not press any key and wait 60 seconds for the motor to perform 6 movements.
  • Seite 8 5.8 - Automatic programming of both limit switches WARNING! – This programming is intended for awnings with retainer lock on both the limit switches (“0” and “1”). Warnings • This procedure overwrites previously adjusted heights with the new heights using this same procedure. • Memorising the limit switches with this pro- cedure, the two heights are controlled and updated constantly by the “limit switch self-update”...
  • Seite 9 sec. sec. sec. NEW transmitter OLD transmitter NEW transmitter Note – When performing the procedure, at any time you can cancel it by keeping the n and t keys pressed simultaneously for 4 seconds. Otherwise, do not press any key and wait 60 seconds for the motor to perform 6 movements. 5.10.2 - Memorising a second transmitter in “Mode II”...
  • Seite 10 5.12 - “RDC” Function: adjustment of the motor traction force when closing This function prevents the excessive traction of the canvas at the end of the closing manoeuvre. During the final phase of this manoeuvre, the function automatically reduces the motor traction torque, based on the factory setting or the one adjusted by the installer with the following procedure. Warning! –...
  • Seite 11 5.14 - “FTA” Function: tensioning the canvas when open awnings fitted with a manual hook- ing and unhooking mechanism of the awning when opening This function is useful to eliminate the unsightly depression of the canvas that may form when the awning is open. The function may be used exclusively in awnings that let you lock the canvas in the open position through a mechanism manually attachable and detachable by the user (e.g.
  • Seite 12 sec. sec. sec. “1” “1” “S” “S” sec. move the awning in the “S” position fine adjustment Note – When performing the procedure, at any time you can cancel it by keeping the n and t keys pressed simultaneously for 4 seconds. Otherwise, do not press any key and wait 60 seconds for the motor to perform 6 movements.
  • Seite 13: Optional Accessories

    white Paragraph 5.16.1 white-black 5.17 - Locking and unlocking the memory This procedure allows you to lock or unlock the memory to prevent accidental memorisation of other transmitters not included in the system. Before starting the procedure, bring the awning to the midpoint of its stroke. 01.
  • Seite 14 • The climate sensors must not be considered as devices to increase the safety of the awning when it rains or there is strong wind. Nice declines all liability for any ma- 6.2.4 - Priority among atmospheric events and operating prior- terial damages that occur due to atmospheric events not detected by the sensors.
  • Seite 15 6.A - Allocating a command (“Open” or “Step-by-step”) to a key (ref. paragraph 6.1) Before starting the procedure, bring the awning to the midpoint of its stroke. 01. Keep the n key pressed and wait for the motor to perform 2 movements. Upon completion, release the key. 02.
  • Seite 16 6.C - Adjustment of “Wind” climate sensor (ref. paragraph 6.2.3) At the factory, the intervention threshold to is set at level 3 and to change it you must take the following steps. Before starting the procedure, bring the awning to the midpoint of its stroke. 01.
  • Seite 17 – All technical specifications stated in this section refer to an ambient temperature of (troubleshooting guide) 20°C (± 5°C). – Nice reserves the right to apply modifications to products at any time when deemed necessary, maintaining the same intended use and functionality. q Powering an electrical phase, the motor does not move:...
  • Seite 18: Collegamenti Elettrici

    Guida rapida Nota alla consultazione • In questa Gui- da rapida la numerazione delle figure è autonoma e non corrisponde alla nu- Era Mat T merazione citata nel testo del Manuale motore tubolare per completo. • Questa guida non sostitui- tende da sole sce il Manuale completo.
  • Seite 19: Avvertenze E Precauzioni Ge Nerali Per La Sicurezza

    Per assemblare e installare il motore fare riferimento alla fig. 4. Inoltre consultare il DESTINAZIONE D’USO catalogo dei prodotti Nice o il sito www.niceforyou.com per scegliere la co rona del finecorsa (fig. 4-a), la ruota di trascinamento (fig. 4-b) e la staffa di fissaggio del motore (fig.
  • Seite 20 Consultare il catalogo dei prodotti Nice oppure il sito www.niceforyou.com per co- Bianco, può essere utilizzato l’ingresso Passo-passo. noscere i dispositivi di comando Nice compatibili con il ricevitore radio integrato nel motore. Accessori collegabili via radio (trasmettitori portatili e qualche modello di sensore climatico): memorizzare questi accessori nel motore durante le fasi della Program- 5.3.2 - Gerarchia nella memorizzazione dei trasmettitori...
  • Seite 21 Tipologie delle applicazioni ed esigenze operative Programmazioni consigliate Tenda verticale, a rullo Programmazione Finecorsa: • con arresto automatico nella posizione di Programmazione in modo semiautomatico (paragrafo 5.7) finecorsa alto “0” (con cassonetto) • senza vincoli meccanici di contenimento Programmazione in modo manuale (paragrafo 5.6) nel finecorsa alto “0”...
  • Seite 22 PROCEDURE 5.5 - Memorizzazione del PRIMO trasmettitore Avvertenza – Ogni volta che il motore viene alimentato, se nella sua memoria non sono presenti almeno un trasmettitore e le quote dei finecorsa, vengono eseguiti 2 movimenti. Prima di iniziare la procedura portare la tenda a metà della sua corsa. 01.
  • Seite 23 sec. sec. sec. “1” “1” sec. limit switch “1” desired fine adjustment Note • Durante l’esecuzione della procedura, in qualunque momento è possibile annullare la programmazione mantenendo premuti contemporaneamente i tasti n e t per 4 secondi. In alternativa non premere alcun tasto e attendere 60 secondi che il motore esegua 6 movimenti. • Dopo le regolazioni, il tasto s comanderà la manovra di Salita e il tasto t comanderà...
  • Seite 24 5.8 - Programmazione automatica di entrambi i finecorsa ATTENZIONE! – Questa programmazione è destinata alle tende da sole con blocco in battuta su entrambi i finecorsa (“0” e “1”). Avvertenze • Questa procedura sovrascrive le nuove quote su eventuali quote regolate in precedenza con questa stessa procedura. • Memorizzando i finecorsa con questa procedura le due quote vengono controllate e aggiornate costantemente dalla funzione “auto-aggiornamento dei finecorsa”...
  • Seite 25 sec. sec. sec. NEW transmitter OLD transmitter NEW transmitter Nota – Durante l’esecuzione della procedura, in qualunque momento è possibile annullare la programmazione mantenendo premuti contemporaneamente i tasti n e t per 4 secondi. In alternativa non premere alcun tasto e attendere 60 secondi che il motore esegua 6 movimenti. 5.10.2 - Memorizzazione di un secondo trasmettitore in “Modo II”...
  • Seite 26 5.12 - Funzione “RDC”: regolazione della forza di trazione del motore in chiusura Questa funzione permette di evitare che il telo resti in trazione eccessiva al termine della manovra di chiusura. Durante la fase finale di questa manovra la funzione riduce automaticamente la coppia di trazione del motore, in base al valore impostato in fabbrica o a quello regolato dall’installatore con la seguente procedura.
  • Seite 27 5.14 - Funzione “FTA”: tensionamento del telo in apertura per tende provviste di meccani- smo manuale di aggancio e sgancio della tenda in apertura Questa funzione è utile per eliminare gli antiestetici avvallamenti del telo che possono formarsi quando la tenda è aperta. La funzione può essere utilizzata esclusiva- mente nelle tende che consentono di bloccare il telo nella posizione di apertura mediante un meccanismo inseribile e disinseribile manualmente dall’utente (ad esempio, i catenaccioli presenti nelle tende a capanno, nelle tende a rullo con ganci, nelle tende a braccio retto, ecc).
  • Seite 28 sec. sec. sec. “1” “1” “S” “S” sec. move the awning in the “S” position fine adjustment Nota – Durante l’esecuzione della procedura, in qualunque momento è possibile annullare la programmazione mantenendo premuti contemporaneamente i tasti n e t per 4 secondi. In alternativa non premere alcun tasto e attendere 60 secondi che il motore esegua 6 movimenti. 5.16 - Cancellazione totale o parziale della memoria Questa procedura permette di scegliere al punto 05 i dati che si desidera cancellare.
  • Seite 29: Accessori Opzionali

    white Paragraph 5.16.1 Paragrafo 5.16.1 white-black 5.17 - Blocco o sblocco della memoria Questa procedura permette di bloccare o sbloccare la memoria del motore per impedire la memorizzazione accidentale di altri trasmettitori non previsti nell’impianto. Prima di iniziare la procedura portare la tenda a metà della sua corsa. 01.
  • Seite 30 “Sole”, “Pioggia” e “Vento” della tenda. Pertanto, questi sensori devono essere considerati parte di un auto- matismo, utile alla salvaguardia della tenda. Nice declina ogni responsabilità per Ogni condizione ha una priorità. La scala delle priorità è la seguente: danni materiali verificatisi a causa di eventi atmosferici non rilevati dai sensori.
  • Seite 31 6.A - Programmazione per assegnare un comando (“Apri” o “Passo-passo”) a un pulsante (rif. paragrafo 6.1) Prima di iniziare la procedura portare la tenda a metà della sua corsa. 01. Mantenere premuto il tasto n e attendere che il motore esegua 2 movimenti. Alla fine rilasciare il tasto. 02.
  • Seite 32 6.C - Regolazione del livello del sensore climatico “vento” (rif. paragrafo 6.2.3) In fabbrica la soglia di intervento è impostata al livello 3; per modificarla procedere nel modo seguente. Prima di iniziare la procedura portare la tenda a metà della sua corsa. 01.
  • Seite 33 (guida alla soluzione dei problemi) tale di 20°C (± 5°C). – Nice S.p.a. si riserva il diritto di apportare modifiche al prodotto, in qualsiasi mo- mento lo riterrà necessario, mantenendone la stessa destinazione d’uso e le stes- q Dando alimentazione a una fase elettrica, il motore non si muove: se funzionalità.
  • Seite 34 Guide rapide Note pour la consultation • Dans ce guide rapide la numérotation de figure est autonome et ne correspond pas à Era Mat T la numération indiquée dans le manuel moteur tubulaire complet. • Ce guide ne remplace pas le pour stores manuel complet.
  • Seite 35: Description Du Produit Et Application

    électronique du mouvement et la précision des fins de course ; • il est compatible avec toute l’électronique de commande de Nice (émetteur et cap- • Attention ! – Instructions importantes pour la sécurité : conserver ces ins- teurs climatiques) adoptant le système radio NRC ;...
  • Seite 36 Pour l’assemblage du moteur se référer à la fig. 4. Consulter en outre le catalogue des produits Nice ou le site www.niceforyou.com pour choisir la couronne de fin de course (fig. 4-a), la roue d’entraînement (fig. 4-b) et le support de montage du moteur (fig.
  • Seite 37 Typologie des applications et exigences opérationnelles Programmations conseillées Store vertical Programmation fin de • avec arrêt automatique dans la position de Programmation en mode semi-automatique (paragraphe à tambour course : fin de course haute « 0 » (avec coffre) 5.7) •...
  • Seite 38 PROCEDURES 5.5 - Mémorisation du PREMIER émetteur Avertissement – Chaque fois que le moteur est alimenté, si dans sa mémoire ne sont pas enregistrés au moins un émetteur et les cotes de fins de course, il effectue 2 mouvements. Avant de commencer cette procédure placer le store à mi-course. 01.
  • Seite 39 sec. sec. sec. “1” “1” sec. limit switch “1” desired fine adjustment Notes • Durant l’exécution de la procédure, on peut à tout moment annuler la programmation en maintenant appuyés simultanément les touches n et t pendant 4 secondes. En alternative n’appuyer sur aucune touche et attendre 60 secondes pour que le moteur effectue 6 mouvements. • Après le réglage, la touche s comman- dera la montée et la touche t commandera la descente.
  • Seite 40 5.8 - Programmation automatique des deux fins de course ATTENTION ! – Cette programmation est destinée aux stores avec des butées sur les deux fins de course (« 0 » et « 1 »). Recommandations • Cette procédure permet également d’imposer les nouvelles cotes sur les cotes éventuellement réglées précédemment par cette même procé- dure.
  • Seite 41 sec. sec. sec. NEW transmitter OLD transmitter NEW transmitter Note – Durant l’exécution de la procédure, on peut à tout moment annuler la programmation en maintenant appuyés simultanément les touches n et t pendant 4 secondes. En alternative n’appuyer sur aucune touche et attendre 60 secondes pour que le moteur effectue 6 mouvements. 5.10.2 - Mémorisation d’un second émetteur en «...
  • Seite 42 5.12 - Fonction « RDC » : réglage de la force de traction du moteur en fermeture Cette fonction permet d’éviter que la toile subisse une tension excessive au terme de la manœuvre de fermeture. Durant la phase finale de cette manœuvre la fonction réduit automatique le couple de traction du moteur, sur la base des valeurs fixées en usine ou de celles réglées par l’installateur par la procédure suivante.
  • Seite 43 5.14 - Fonction « FTA » : tensionnement de la toile en ouverture pour des stores pourvus de mécanismes manuels de blocage et déblocage de la toile en ouverture Cette fonction est utile pour éliminer les dépressions inesthétiques qui peuvent se former quand le store est ouvert. La fonction ne peut être utilisée que pour les stores qui permette de bloquer la toile en position d’ouverture par le biais d’un mécanisme à...
  • Seite 44 sec. sec. sec. “1” “1” “S” “S” sec. move the awning in the “S” position fine adjustment Note – Durant l’exécution de la procédure, on peut à tout moment annuler la programmation en maintenant appuyés simultanément les touches n et t pendant 4 secondes.
  • Seite 45: Accessoires Optionnels

    white Paragraph 5.16.1 Paragraphe 5.16.1 white-black 5.17 - Blocage et déblocage de la mémoire Cette procédure permet de bloquer ou de débloquer la mémoire du moteur pour empêcher la mémorisation accidentelle d’autres émetteurs non prévus dans l’ins- tallation. Avant de commencer cette procédure placer le store à mi-course. 01.
  • Seite 46 Ces capteurs doivent donc être considé- En usine le seuil d’intervention du capteur vent est réglé au niveau 3 (= vent à 15 km). rés comme faisant partie d’un automatisme utile à la sauvegarde du store. Nice Pour modifier cette valeur, utiliser la procédure 6.C.
  • Seite 47 6.A - Programmation de l’affectation d’une commande (« Ouvre » ou « Pas à pas ») à un bouton (réf. paragraphe 6.1) Avant de commencer cette procédure placer le store à mi-course. 01. Maintenir appuyée la touche n et attendre que le moteur effectue 2 mouvements. A la fin relâcher la touche. 02.
  • Seite 48 6.C - Réglage du niveau du capteur climatique « vent » (réf. paragraphe 6.2.3) À l’usine, le seuil de déclenchement est fixé au niveau 3 et de le changer, procédez comme suit. Avant de commencer cette procédure placer le store à mi-course. 01.
  • Seite 49: Caractéristique Techniques

    20°C (± 5°C). (guide pour la résolution des problèmes) – Nice S.p.a. se réserve le droit d’apporter des modifications au produit à tout mo- ment si elle le jugera nécessaire, en garantissant dans tous les cas les mêmes fonctions et le même type d’utilisation prévu.
  • Seite 50: Conexiones Eléctricas

    Guía rápida Nota para consultar • En esta guía rápi- da, la numeración de las figuras es in- dependiente y, por tanto, no se corres- Era Mat T ponde con la numeración citada en el motor tubular para texto del manual completo. • Esta guía toldos no sustituye el manual completo.
  • Seite 51: Descripción Del Producto Yuso Previsto

    GENERALES DE SEGURIDAD garantiza el control electrónico del movimiento y la precisión de los topes; • es compatible con toda la electrónica de control de Nice (transmisores y sensores climáticos) que incorpora el sistema de radio NRC; • ¡Atención! – Instrucciones importantes de seguridad: conserve estas ins- •...
  • Seite 52 Para montar e instalar el motor, consulte la fig. 4. Además, puede consultar el catá- logo de productos de Nice o visitar el sitio www.niceforyou.com para seleccionar la corona del tope (fig. 4-a), la rueda motriz (fig. 4-b) y la brida de soporte del motor (fig.
  • Seite 53 Tipos de aplicaciones y necesidades operativas Programación recomendada Toldo vertical Programación de topes: • con parada automática en la posición del Programación de forma semiautomática (apartado 5.7) enrollable tope alto “0” (con cajón) • sin límites mecánicos de contención en el Programación de forma manual (apartado 5.6) tope alto “0”...
  • Seite 54 PROCEDIMIENTO 5.5 - Memorización del PRIMER transmisor Advertencia – El motor efectúa 2 movimientos cada vez que recibe alimentación en caso de que en el mismo no estén memorizados al menos un transmisor y las cotas de los topes. Antes de iniciar el procedimiento, mueva el toldo hasta la mitad de su recorrido. 01.
  • Seite 55 sec. sec. sec. “1” “1” sec. limit switch “1” desired fine adjustment Notas • Durante la ejecución del procedimiento, puede anular en cualquier momento la programación; para ello, mantenga pulsados al mismo tiempo los botones n y t durante 4 segundos. Como alternativa, no pulse ningún botón y espere 60 segundos a que el motor efectúe 6 movimientos. • Tras realizar el ajuste, el botón s accionará...
  • Seite 56 5.8 - Programación automática de los dos topes ¡ATENCIÓN! – Esta programación está pensada para los toldos que incorporan un bloqueo de extensión entre ambos topes (“0” y “1”). Advertencias • Este procedimiento sobrescribe las cotas que se hayan podido regular anteriormente con este mismo procedimiento con las nuevas cotas. • Si se memorizan los topes con este procedimiento, las dos cotas se controlarán y actualizarán constantemente mediante la función de “actualización automática de los topes”...
  • Seite 57 sec. sec. sec. NEW transmitter OLD transmitter NEW transmitter Nota – Durante la ejecución del procedimiento, puede anular en cualquier momento la programación; para ello, mantenga pulsados al mismo tiempo los botones n y t durante 4 segundos. Como alternativa, no pulse ningún botón y espere 60 segundos a que el motor efectúe 6 movimientos. 5.10.2 - Memorización de un segundo transmisor en “Modo II”...
  • Seite 58 5.12 - Función “RDC”: ajuste de la fuerza de tracción del motor al cerrar Esta función permite evitar que la lona produzca una fuerza de tracción excesiva al final de la maniobra de cierre. Durante la fase final de esta maniobra, esta función reduce automáticamente el par de tracción del motor, en función del valor configurado de fábrica o conforme al ajuste definido por el instalador mediante el siguiente procedimiento.
  • Seite 59 5.14 - Función “FTA”: tensado de la lona en la maniobra de apertura para toldos provistos de mecanismo manual de enganche y desenganche del toldo al abrirlo Esta función resulta de utilidad para eliminar los abombamientos antiestéticos que pueden formarse en la lona cuando el toldo está abierto. La función se puede utilizar únicamente en los toldos que permiten bloquear la lona en la posición de apertura a través de un mecanismo que el usuario puede accionar o quitar de forma manual (por ejemplo, los cierres de seguridad existentes en los toldos veranda, en los toldos enrollables con ganchos, en los toldos de brazo recto, etc.).
  • Seite 60 sec. sec. sec. “1” “1” “S” “S” sec. move the awning in the “S” position fine adjustment Nota – Durante la ejecución del procedimiento, puede anular en cualquier momento la programación; para ello, mantenga pulsados al mismo tiempo los botones n y t durante 4 segundos.
  • Seite 61: Accesorios Opcionales

    white Paragraph 5.16.1 Apartado 5.16.1 white-black 5.17 - Bloqueo y desbloqueo de la memoria Este procedimiento permite bloquear o desbloquear la memoria del motor para impedir la memorización accidental de otros transmisores no previstos en el sistema. Antes de iniciar el procedimiento, mueva el toldo hasta la mitad de su recorrido. 01.
  • Seite 62 “Viento” como elementos que forman parte de un sistema de automatización y que resul- tan útiles para proteger el toldo. Nice declina cualquier responsabilidad por daños Cada condición tiene una prioridad. El orden de prioridad entre las condiciones at- mosféricas es el siguiente: materiales verificados a causa de condiciones atmosféricas no detectadas por los...
  • Seite 63 6.A - Programación para asignar un mando (“Abrir” o “Paso-paso”) a una tecla (véase el apartado 6.1) Antes de iniciar el procedimiento, mueva el toldo hasta la mitad de su recorrido. 01. Mantenga pulsado el botón n y espere a que el motor efectúe 2 movimientos. Cuando finalice el movimiento, suelte el botón. 02.
  • Seite 64 6.C - Ajuste del nivel del sensor climático “viento” (véase el apartado 6.2.3) De fábrica, el umbral de intervención se configura en el nivel 3 y, para modificarlo, es necesario proceder como se indica a continuación. Antes de iniciar el procedimiento, mueva el toldo hasta la mitad de su recorrido. 01.
  • Seite 65 – Todas las características técnicas indicadas se refieren a una temperatura am- biente de 20 °C (±5 °C). – Nice S.p.a. se reserva el derecho de hacer cambios en el producto siempre que lo q Suministrando alimentación a una fase eléctrica, el motor no se mueve: estime oportuno, pero manteniendo en todo momento la misma funcionalidad y el Excluyendo la posibilidad de que la protección térmica esté...
  • Seite 66: Elektrische Anschlüsse

    Kurzanleitung Hinweis • In dieser Schnellanleitung ist die Nummerierung der Abbildungen eigen- ständig und entspricht nicht der im Text Era Mat T des vollständigen Handbuchs aufgeführten Rohrförmiger Motor Nummerierung. • Diese Schnellanleitung für Markisen ersetzt nicht das ausführliche Handbuch. 1 - Elektrische Anschlüsse - siehe Kapitel 4 Kabel Farbe Anschluss...
  • Seite 67: Produktbeschreibung Und Einsatz

    Kontrolle der Bewegung und die Genauigkeit der Endschalter gewährleistet; • Achtung! – Wichtige Sicherheitsanweisungen: Bewahren Sie diese Hinwei- • ist kompatibel mit der gesamten Steuerelektronik Nice (Sender und Klimasenso- se sorgfältig auf. ren), die das Funksystem NRC anwendet;...
  • Seite 68: Elektrische Anschlüsse Vor Dem Einschalten

    Verletzungen führen. Für den Zusammenbau und die Installation des Motors, beziehen Sie sich auf die Abb. 4. Lesen Sie außerdem im Produktkatalog Nice oder auf der Webseite www. niceforyou.com nach, welchen Endschalterkranz (Abb. 4-a), welches Mitnehmerrad (Abb. 4-b) und welchen Motorbefestigungsbügel (Abb. 4-f) Sie benötigen.
  • Seite 69 Art der Anwendungen und Betriebsanforderungen Empfohlene Programmierungen Senkrechte Markise Programmierung Endschalter: • mit automatischem Stopp in der hohen Programmierung im halbautomatischen Modus (Kapitel 5.7) auf Rolle Endschalterposition „0“ (mit Kasten) • ohne mechanische Halterungseinschrän- Programmierung im manuellen Modus (Kapitel 5.6) kungen am oberen Endschalter „0“...
  • Seite 70: Speicherung Des Ersten Senders

    VORGANG 5.5 - Speicherung des ERSTEN Senders Hinweis – Jedes Mal, wenn der Motor mit Strom versorgt wird und in seinem Speicher nicht mindestens ein Transmitter und die Höhen der Endschalter vorhanden sind, werden 2 Bewegungen ausgeführt. Vor Beginn des Verfahrens die Markise auf halber Höhe positionieren. 01.
  • Seite 71: Halbautomatische Programmierung Der Endschalter

    sec. sec. sec. “1” “1” sec. limit switch “1” desired fine adjustment Anmerkungen • Während der Ausführung des Verfahrens ist es jederzeit möglich, die Programmierung durch gleichzeitiges, 4 Sekunden langes Drücken der Tasten n und t abzubrechen. Alternativ dazu 60 Sekunden lang warten, ohne eine Taste zu drücken, bis der Motor 6 Bewegungen ausführt. • Nach den Einstellungen steuert die Taste s den Anstieg und die Taste t den Abstieg des Rollladens.
  • Seite 72: Automatische Programmierung Beider Endschalter

    5.8 - Automatische Programmierung beider Endschalter ACHTUNG! – Diese Programmierung ist für Markisen mit Blockierung am Anschlag beider Endschalter („0“ und „1“) bestimmt. Hinweise • Dieses Verfahren überschreibt die eventuell vorher mit demselben Verfahren eingestellten Höhen mit den neuen Höhen. • Beim Speichern der Endschalter mit diesem Verfahren, werden die beiden Höhen ständig von der Funktion „automatische Aktualisierung der Endschalter“...
  • Seite 73: Speicherung Eines Über Funk Angeschlossenen Klimasensors

    sec. sec. sec. NEW transmitter OLD transmitter NEW transmitter Anmerkung – Während der Ausführung des Verfahrens ist es jederzeit möglich, die Programmierung durch gleichzeitiges, 4 Sekunden langes Drücken der Tasten n und t abzubrechen. Alternativ dazu 60 Sekunden lang warten, ohne eine Taste zu drücken, bis der Motor 6 Bewegungen ausführt. 5.10.2 - Speichern eines zweiten Senders im „Modus II“...
  • Seite 74 5.12 - Funktion „RDC“: Einstellung der Zugkraft des Motors beim Schließen Diese Funktion erlaubt zu vermeiden, dass der Stoff beim Schließen zu sehr gespannt wird. Während der Endphase dieses Manövers verringert diese Funktion auto- matisch das Zugdrehmoment des Motors, je nach werkseitig oder vom Installateur eingestellten Wert mit folgendem Verfahren. Achtung! –...
  • Seite 75 5.14 - Funktion „FTA“: Spannung des Stoffes beim Öffnen, für Markisen mit manuellem Ein- und Aushakmechanismus der offenen Markise Diese Funktion ist nützlich, um unästhetische Wellen des Stoffes zu verhindern, die bei offener Markise auftreten können. Die Funktion kann nur für Markisen benutzt werden, die erlauben, den Stoff in der geöffneten Position mit einem manuellen Ein- und Aushakmechanimus zu blockieren (z.B.
  • Seite 76: Teilweises Oder Vollständiges Löschen Des Speichers

    sec. sec. sec. “1” “1” “S” “S” sec. move the awning in the “S” position fine adjustment Anmerkung – Während der Ausführung des Verfahrens ist es jederzeit möglich, die Programmierung durch gleichzeitiges, 4 Sekunden langes Drücken der Tasten n und t abzubrechen. Alternativ dazu 60 Sekunden lang warten, ohne eine Taste zu drücken, bis der Motor 6 Bewegungen ausführt. 5.16 - Teilweises oder vollständiges Löschen des Speichers Dieses Verfahren ermöglicht, unter Punkt 05 die Daten auszuwählen, die man löschen möchte.
  • Seite 77: Sperre Oder Freigabe Des Speichers

    white Paragraph 5.16.1 Kapitel 5.16.1 white-black 5.17 - Sperre oder Freigabe des Speichers Dieses Verfahren erlaubt den Speicher des Motors zu blockieren bzw. freizugeben, um eine zufällige Speicherung von anderen nicht für die Anlage vorgesehenen Sender zu vermeiden. Vor Beginn des Verfahrens die Markise auf halber Höhe positionieren. 01.
  • Seite 78: Klimasensoren Für Wind, Sonne, Regen

    15 km/h) eingestellt. Diesen Wert ändern Sie mit Hilfe von Prozedur 6.C. Markise unmöglich machen. Deshalb müssen diese Sensoren als Bestandteil der Automatisierung betrachtet werden, die dem Schutz der Markise dienen. Nice ent- 6.2.4 - Priorität der Wetterbedingungen und Priorität bei der zieht sich jeglicher Haftung bei Materialschäden, die auf nicht von den Sensoren...
  • Seite 79: A - Programmierung Zur Zuordnung Eines Befehls („Öffnen" Oder „Schrittbetrieb") Zu Einer Taste (Siehe Paragraph 6.1)

    6.A - Programmierung zur Zuordnung eines Befehls („Öffnen“ oder „Schrittbetrieb“) zu einer Taste (Siehe paragraph 6.1) Vor Beginn des Verfahrens die Markise auf halber Höhe positionieren. 01. Halten Sie die Taste n gedrückt, und warten Sie, bis der Motor 2 Bewegungen ausführt. Am Ende lassen Sie die Taste los. 02.
  • Seite 80: C - Einstellung Der Empfindlichkeitsstufe Des Windsensors (Siehe Paragraph 6.2.3)

    6.C - Einstellung der Empfindlichkeitsstufe des Windsensors (Siehe paragraph 6.2.3) Im Werk wird der Grenzwert für das Eingreifen des Sensors auf der Stufe 3 eingestellt; für die Änderungen des Werts fahren Sie folgendermaßen fort. Vor Beginn des Verfahrens die Markise auf halber Höhe positionieren. 01.
  • Seite 81: Hinweise Für Den Täglichen Gebrauch Des Automatismus

    Was tun, wenn... peratur von 20°C (±5°C). (Hinweise zur Problemlösung) – Für eine Verbesserung der Produkte behält sich NICE S.p.A. das Recht vor, die technischen Merkmale jederzeit und ohne vorherige Benachrichtigung zu ändern, wobei die vorgesehenen Funktionalitäten und Einsätze erhalten bleiben.
  • Seite 82 Instrukcja skrócona Uwaga dotycząca korzystania z instrukcji • Nu- meracja rysunków zamieszczonych w niniejszej instrukcji nie jest taka sama jak numeracja ry- Era Mat T sunków zamieszczonych w kompletnej instruk- silnik rurowy do cji obsługi. • Niniejsza instrukcja nie zastępuje markiz kompletnej instrukcji obsługi.
  • Seite 83 (rys. 1). Działania takie mogą doprowadzić do uszkodzenia urządzenia i spowo- dować jego nieprawidłowe działanie lub sytuacje zagrożenia. Jeżeli zdarzenie takie nastąpi, należy niezwłocznie przerwać montaż i zwrócić się do serwisu techniczne- go firmy Nice. • Nie stosować śrub na rurze nawojowej w miejscu, w którym przechodzi silnik. Mogłyby one spowodować uszkodzenie silnika. • Nie demontować urządzenia w sposób nieprzewidziany w niniejszej instrukcji obsługi. • Nie modyfikować żadnej z części urządzenia, jeżeli modyfikacje takie nie zostały przewidziane w niniejszym w podręczniku. Producent nie ponosi odpowiedzialno- MONTAŻ SILNIKA I URZĄDZEŃ ści za szkody wynikające z samowolnych modyfikacji urządzenia. DODATKOWYCH • Kabel zasilający silnika jest wykonany z PCV i nadaje się do montażu w środowi- sku wewnętrznym. Jeśli urządzenie jest instalowane w innym środowisku, należy...
  • Seite 84 „Trybie I”). B - Drugi (lub trzeci, czwarty itp.) nadajnik • Procedury programowania mogą być wykonywane wyłącznie przy użyciu Przenośny nadajnik (lub czujnik klimatyczny radiowy) może zostać skonfiguro- nadajnika Nice, wyposażonego w przynajmniej przyciski s, n, t. wany jako drugi (lub trzeci, czwarty itp.) nadajnik tylko wtedy, jeżeli do silnika • Procedury programowania należy wykonywać wyłącznie przy użyciu nadajnika został już wpisany pierwszy nadajnik. W celu wykonania tej konfiguracji należy skonfigurowanego w „Trybie I”...
  • Seite 85 Typologie zastosowań i wymagań operacyjnych Zalecane programowanie Roleta pionowa Programowanie krańcówek: • z automatycznym zatrzymaniem w wyso- Programowanie półautomatyczne (paragraf 5.7) rolkowa kim położeniu krańcówki „0” (ze skrzynką) • bez mechanicznych ograniczeń zakresu Programowanie ręczne (paragraf 5.6) krańcówek w wysokim położeniu „0” Dostępne funkcje..przy zaczepach automatycznych w poło- Programowanie funkcji „FTC” (paragraf 5.15) żeniu dolnym krańcówki „1” ...przy zaczepach ręcznych lub zasuwkach Programowanie funkcji „FTA” (paragraf 5.14) w dolnym położeniu krańcówki „1” ...jeżeli konieczne jest zmniejszenie siły ude- Regulacja mocy silnika przy nawijaniu (funkcja „RDC” – rzeniowej podczas zamknięcia paragraf 5.12) Markiza z ramionami...
  • Seite 86 PROCEDURY 5.5 - Konfiguracja PIERWSZEGO nadajnika Ostrzeżenie – Za każdym razem, kiedy silnik zostaje zasilony, jeżeli w jego pamięci nie występuje przynajmniej jeden nadajnik oraz nie są ustalone wysokości krań- cówek, wykonywane są dwa manewry. Przed rozpoczęciem procedury należy umieścić markizę w połowie skoku. 01. Odłączyć zasilanie elektryczne w silniku, odczekać 2 sekundy i ponownie załączyć zasilanie: silnik wykonuje 2 manewry i pozostaje w pozycji oczekiwania bez ograniczeń czasowych. 02. Przytrzymać wciśnięty przycisk n i zaczekać, aż silnik wykona 3 manewry. Następnie zwolnić przycisk. sec. sec. Wskazówka – Po zakończonej konfiguracji, kierunek podnoszenia i opuszczania rolety nie jest jeszcze przypisany do poszczególnych przycisków s i t nadajnika. Przyciski te zostaną przypisane automatycznie podczas regulacji krańcówek „0” i „1”; ponadto markiza będzie przesuwała się w trybie „manualnym”, dopóki krańców- ki nie zostaną wyregulowane. 5.6 - Regulacja ręczna wysokości górnej („0”) i dolnej („1”) krańcówki Ostrzeżenia • Procedura ta pozwala również zastąpić nowymi parametrami ewentualne parametry zapisane uprzednio przy użyciu tej samej procedury. • Za każdym razem, kiedy silnik zostaje zasilony, jeżeli w jego pamięci nie występuje przynajmniej jeden nadajnik oraz nie są ustalone wysokości krańcówek, wykonywane są dwa manewry.
  • Seite 87 sec. sec. sec. “1” “1” sec. limit switch “1” desired fine adjustment Wskazówki • Podczas wykonywania procedury możliwe jest anulowanie programowania w dowolnym momencie poprzez jednoczesne wciśnięcie na 4 sekundy przycisków n i t. Ewentualnie można nie wciskać żadnego przycisku i odczekać 60 sekund, aż silnik wykona 6 manewrów. • Po wykonaniu regulacji przycisk s będzie sterował wykonaniem manewru podnoszenia, a przycisk t manewrem opuszczania. Markiza będzie poruszała się w obrębie limitów określonych przez obie wysokości krańcówek. 5.7 - Programowanie półautomatyczne krańcówek UWAGA! – Programowanie to przeznaczone jest do markiz wyposażonych w skrzynkę, a zatem przy zamknięciu koniec markizy znajduje się...
  • Seite 88 5.8 - Programowanie automatyczne obydwu krańcówek UWAGA! Programowanie to przeznaczone jest do markiz z blokadą na końcowym położeniu obydwu krańcówek („0” i „1”). Ostrzeżenia • Procedura ta powoduje zastąpienie nowymi parametrami ewentualnych parametrów zapisanych uprzednio przy użyciu tej samej procedury. • Konfi- guracja krańcówek przy użyciu tej procedury powoduje, że obie wysokości są stale kontrolowane i aktualizowane przez funkcję automatycznej aktualizacji krańcówek (patrz: paragraf 7.2). • Za każdym razem, kiedy silnik zostaje zasilony, jeżeli w jego pamięci nie występuje przynajmniej jeden nadajnik oraz nie są ustalone wysokości krańcówek, wykonywane są dwa manewry. Przed rozpoczęciem procedury należy umieścić markizę w połowie suwu. 01. Wydać polecenie wykonania manewru podnoszenia, przytrzymując w tym celu przycisk s (lub t) i zaczekać, aż markiza zostanie zatrzymana automatycznie w wyniku uderzenia o konstrukcję skrzynki (= górna krańcówka „0”). Następnie zwolnić przycisk.
  • Seite 89 sec. sec. sec. NEW transmitter OLD transmitter NEW transmitter Wskazówka – Podczas wykonywania procedury możliwe jest anulowanie programowania w dowolnym momencie poprzez jednoczesne wciśnięcie na 4 sekundy przycisków n i t. Ewentualnie można nie wciskać żadnego przycisku i odczekać 60 sekund, aż silnik wykona 6 manewrów. 5.10.2 - Konfiguracja drugiego nadajnika w „Trybie II” Uwaga! – Procedura powoduje konfigurację jednego z przycisków nowego nadajnika w „Trybie II”, niezależnie od trybu, w którym został skonfigurowany przycisk wciskany na starym nadajniku. Przed rozpoczęciem procedury należy umieścić markizę w połowie suwu. 01. (na nowym nadajniku) Przytrzymać przez 8 sekund przycisk, który ma zostać wczytany (na przykład: przycisk n), a następnie zwolnić go (w tym przypadku silnik nie wykonuje żadnego manewru). 02. (na starym nadajniku) Przytrzymać przycisk n i zaczekać, aż silnik wykona 4 manewry. Następnie zwolnić przycisk. 03. (na starym nadajniku) Wcisnąć na chwilę kilka razy przycisk n, w zależności od polecenia, które ma zostać skonfigurowane: 1 impuls = polecenie Krok po Kroku (Otwórz > Stop > Zamknij > Stop > ...) 2 impulsy = polecenie Otwórz >...
  • Seite 90 5.12 - Funkcja „RDC”: regulacja mocy silnika podczas zamykania Funkcja ta pozwala na uniknięcie nadmiernego rozciągnięcia tkaniny przy końcu manewru zamykania. Podczas końcowej fazy tego manewru funkcja automatycznie redukuje moment obrotowy silnika na podstawie wartości wprowadzonej fabrycznie lub ustawionej przez instalatora według następującej procedury. Uwaga! – Funkcja ta jest włączona fabrycznie, jednakże nie stosuje się jej, jeżeli krańcówki zostały zaprogramowane ręcznie (paragraf 5.6). Przed rozpoczęciem procedury należy umieścić markizę w połowie suwu. 01. Przytrzymać równocześnie przyciski n i s i zaczekać, aż silnik wykona 2 manewry. Następnie zwolnić przyciski. 02. Wcisnąć na chwilę kilka razy przycisk s w zależności od tego, jaki poziom czułości silnika na przeszkody ma zostać ustawiony: 1 impuls = poziom 1, standardowa czułość (ustawienie fabryczne)( * ) 4 impulsy = poziom 4, maksymalna czułość 2 impulsy = poziom 2, minimalna czułość 5 impulsy = poziom 5, funkcja wyłączona 3 impulsy = poziom 3, średnia czułość Po około 10 sekundach silnik wykonuje liczbę manewrów odpowiadającą numerowi wybranego poziomu. Wskazówka – Jeżeli to nie następuje, należy anulować...
  • Seite 91 5.14 - Funkcja „FTA”: naprężenie rozpostartej tkaniny dla markiz wyposażonych w ręczny mechanizm zaczepiania i odczepiania otwartej markizy Funkcja ta służy do eliminowania nieestetycznych zagłębień tkaniny, które mogą tworzyć się, kiedy markiza jest otwarta. Tej funkcji można używać w markizach po- zwalających zablokować tkaninę w pozycji otwartej za pomocą mechanizmu zakładanego i zdejmowanego przez użytkownika (na przykład, zasuwki znajdujące się w markizach typu pergola zwijanych, w roletach rolkowych z zaczepami, w markizach o wyprostowanych ramionach itp.). Dzięki mechanizmowi blokowania aktywowa- nie tej funkcji sprawia, że podczas manewru zamykania silnik zatrzymuje markizę w miejscu wyznaczonym przez mechanizm blokowania, pozostawiając naprężoną tkaninę. Aby odblokować markizę, konieczne będzie najpierw wydanie polecenia krótkiego przesunięcia w dół, aby móc zdjąć ręcznie blokadę, a następnie polecenia podnoszenia markizy. Uwaga! – Funkcję „FTA” można zaprogramować wyłącznie po zaprogramowaniu wysokości krańcówek „0” i „1”. Przed rozpoczęciem procedury należy umieścić markizę w połowie suwu. 01. Przytrzymać przycisk n i zaczekać, aż silnik wykona 2 manewry. Następnie zwolnić przycisk. 02. Przytrzymać przycisk s i zaczekać, aż silnik wykona 3 manewry. Następnie zwolnić przycisk. 03. Przytrzymać równocześnie przyciski n i s i zaczekać, aż silnik wykona 4 manewry. Następnie zwolnić przyciski. 04. • Aby uruchomić funkcję „FTA”: przytrzymać przycisk s i zaczekać, aż silnik wykona 3 manewry. Następnie zwolnić przycisk. •...
  • Seite 92 sec. sec. sec. “1” “1” “S” “S” sec. move the awning in the “S” position fine adjustment Wskazówka – Podczas wykonywania procedury możliwe jest anulowanie programowania w dowolnym momencie poprzez jednoczesne wciśnięcie na 4 sekundy przycisków n i t. Ewentualnie można nie wciskać żadnego przycisku i odczekać 60 sekund, aż silnik wykona 6 manewrów. 5.16 - Całkowite lub częściowe kasowanie pamięci Procedura ta umożliwia wybranie w punkcie 05 danych, które mają zostać skasowane. 5.16.1 - Procedura wykonywana za pomocą nadajnika skonfigurowanego w „Trybie I” Przed rozpoczęciem procedury należy umieścić markizę w połowie suwu.
  • Seite 93: Urządzenia Dodatkowe

    white Paragraph 5.16.1 Punkt 5.16.1 white-black 5.17 - Blokowanie i odblokowywanie pamięci Procedura ta umożliwia zablokowanie i odblokowanie pamięci siłownika w celu uniemożliwienia wykonania przypadkowego wczytania innych nadajników występują- cych w instalacji. Przed rozpoczęciem procedury należy umieścić markizę w połowie suwu. 01. Przytrzymać przycisk n i zaczekać, aż silnik wykona 2 manewry. Następnie zwolnić przycisk. 02. Przytrzymać przycisk s i zaczekać, aż silnik wykona 3 manewry. Następnie zwolnić przycisk. 03. Przytrzymać przycisk n i zaczekać, aż silnik wykona 3 manewry. Następnie zwolnić przycisk. 04. Przytrzymać równocześnie przyciski s i t i zaczekać, aż silnik wykona 2 manewry. Następnie zwolnić przyciski. 05. • Aby zablokować pamięć: przytrzymać przycisk s i zaczekać, aż silnik wykona 3 manewry. Następnie zwolnić przycisk. • Aby odblokować pamięć: Przytrzymać przycisk t i zaczekać, aż silnik wykona 5 manewrów. Następnie zwolnić przycisk. sec. sec. sec. sec. sec.
  • Seite 94 Jeśli pragnie się zmienić tę wartość, należy przeprowadzić procedurę 6.C. • Czujników klimatycznych nie należy traktować jako urządzenia zabezpieczającego, chroniącego przed uszkodzeniem markizy z powodu działania deszczu lub silne- 6.2.4 - Priorytety dotyczące zjawisk atmosferycznych i kolej- go wiatru. Zwykła przerwa w dostawie prądu uniemożliwia bowiem automatyczne ność działania czujników „słońce”, „deszcz” „wiatr” działanie markizy. W związku z tym, czujniki te należy traktować jako część auto- matyki ułatwiającą nadzór nad markizą. Firma Nice nie ponosi żadnej odpowie- Każdy warunek ma swoją wagę. Obowiązuje następująca hierarchia ważności: dzialności za straty materialne powstałe w wyniku działania czynników atmosfe- 1-wiatr, 2-deszcz, 3-słońce. rycznych, które nie zostały wykryte przez czujniki. Wiatr jest zjawiskiem o najwyższej wadze. Zjawisko o wyższej wadze anuluje stan dyktowany przez zjawisko o niższej wadze. 6.2.1 - Konfiguracja klimatycznego czujnika radiowego Przykład: 1) W piękny słoneczny dzień następuje opuszczenie markizy. 2) Jeżeli...
  • Seite 95 6.A - Programowanie w celu przypisania polecenia („Otwórz” lub „Krok po Kroku”) do przycisku (odn. punkt 6.1) Przed rozpoczęciem procedury należy umieścić markizę w połowie suwu. 01. Przytrzymać przycisk n i zaczekać, aż silnik wykona 2 manewry. Następnie zwolnić przycisk. 02. Przytrzymać przycisk s i zaczekać, aż silnik wykona 3 manewry. Następnie zwolnić przycisk. 03. Przytrzymać przycisk n i zaczekać, aż silnik wykona 3 manewry. Następnie zwolnić przycisk. 04. Przytrzymać przycisk n i zaczekać, aż silnik wykona 2 manewry. Następnie zwolnić przycisk. 05. • Aby przypisać przycisk do polecenia „Otwórz”: przytrzymać przycisk s i zaczekać, aż silnik wykona 3 manewry. Następnie zwolnić przycisk. • Aby przypisać przycisk do polecenia „Krok po Kroku”: Przytrzymać przycisk t i zaczekać, aż silnik wykona 5 manewrów. Następnie zwolnić przycisk. sec.
  • Seite 96 6.C - Regulacja poziomu czujnika klimatycznego „wiatr” (odn. punkt 6.2.3) Fabrycznie wartość progowa włączenia się systemu ustawiona jest na poziom 3. Można ją zmienić w następujący sposób. Przed rozpoczęciem procedury należy umieścić markizę w połowie suwu. 01. Przytrzymać przycisk n i zaczekać, aż silnik wykona 2 manewry. Następnie zwolnić przycisk. 02. Przytrzymać przycisk t i zaczekać, aż silnik wykona 3 manewry. Następnie zwolnić przycisk. 03. Wcisnąć na chwilę kilka razy przycisk s w zależności od tego, na jaki poziom ma zostać ustawiona wartość progowa: 1 naciśnięcie = wiatr o prędkości 5 km/h 2 naciśnięcia = wiatr o prędkości 10 km/h 3 naciśnięcia = wiatr o prędkości 15 km/h (ustawienie fabryczne)* 4 naciśnięcia = wiatr o prędkości 30 km/h 5 naciśnięcia = wiatr o prędkości 45 km/h Po około 10 sekundach silnik wykonuje liczbę manewrów odpowiadającą numerowi wybranego poziomu. Wskazówka – Jeżeli to nie następuje, należy anulować procedurę. W ten sposób regulacja zostaje zakończona bez zmiany ustawionego fabrycznie poziomu. 04. Przytrzymać przycisk n i zaczekać, aż silnik wykona 3 manewry. Następnie zwolnić przycisk. sec. sec. x 1 = wiatr o prędkości 5 km/h x 1 = vento a 5 Km/h x 2 = wiatr o prędkości 10 km/h x 2 = vento a 10 Km/h x 3 = vento a 15 Km/h( * )
  • Seite 97 • Stopień ochrony: IP 44 Uwagi: – Wszystkie podane dane techniczne dotyczą temperatury otoczenia 20 °C (± 5 °C). Co zrobić jeśli... – Nice S.p.a. zastrzega sobie prawo do wprowadzania zmian w produkcie w dowol- (pomoc w rozwiązywaniu problemów) nym momencie. Tym niemniej spółka gwarantuje zachowanie takich samych funk- cji i przeznaczenia użytkowego urządzeń. q Po podłączeniu zasilania do jednej fazy elektrycznej silnik nie włącza się: Wykluczając możliwość, że nastąpiła interwencja zabezpieczenia termicznego, w...
  • Seite 98: Elektrische Aansluitingen

    Snelgids Opmerking met betrekking tot raadpleging • In deze Snelgids wordt een autonome numme- ring van de afbeeldingen gehanteerd, die niet Era Mat T overeenkomt met de nummering in de tekst buismotor voor van de volledige handleiding. • Deze gids is zonneschermen geen vervanging van de volledige handleiding.
  • Seite 99 • Let op! – Belangrijke instructies voor de veiligheid: bewaar deze handlei- • is compatibel met alle besturingselektronica van Nice (zenders en klimaatsensoren) ding. die gebruikmaakt van het NRC-radiosysteem;...
  • Seite 100: Elektrische Aansluitingen En Eerste Inschakeling

    • De programmeringsprocedures mogen alleen worden uitgevoerd met een paragraaf 5.10. Nice-zender die ten minste is voorzien van de toetsen s, n en t. • De programmeringsprocedures mogen alleen worden uitgevoerd met een zender 5.4.3 - Twee modi voor geheugenopslag van de toetsen die in “Modus I”...
  • Seite 101 Typologie van toepassingen en bedieningsvereisten Aanbevolen programmeringen Verticaal scherm, Programmering eindaanslag: • met automatische stop op de stand van Programmering in de semi-automatische modus (paragraaf rolmodel de eindaanslag boven “0” (met behuizing) 5.7) • zonder mechanische belemmeringen Programmering in de semi-automatische modus (paragraaf voor demping bij eindaanslag boven “0”...
  • Seite 102 PROCEDURES 5.5 - Geheugenopslag van de EERSTE zender Waarschuwing – Steeds wanneer de voeding voor de motor wordt ingeschakeld, worden er 2 bewegingen uitgevoerd, indien er niet ten minste één zender en de hoogten voor de eindaanslagen zijn opgeslagen. Voordat u met de procedure begint, rolt u het scherm half af. 01.
  • Seite 103 sec. sec. sec. “1” “1” sec. limit switch “1” desired fine adjustment Opmerkingen • Tijdens de uitvoering van de procedure kan de programmering op elk gewenst moment geannuleerd worden door de toetsen n en t gedurende 4 seconden tegelijkertijd ingedrukt te houden. Als alternatief kunt u ook op geen enkele toets drukken en 60 seconden wachten tot de motor 6 bewegingen uitvoert. • Na de afstellingen wordt met de toets s de manoeuvre Omhoog en met de toets t de manoeuvre Omlaag aangestuurd.
  • Seite 104 5.8 - Automatische programmering van beide eindaanslagen LET OP! – Deze programmering is bedoeld voor zonneschermen met behuizing, waarbij dus sprake is van botsing tegen beide eindaanslagen (“0” en “1”). Waarschuwingen • Met deze procedure overschrijven de nieuwe hoogten eventuele hoogten die al eerder zijn afgesteld via dezelfde procedure. • Wanneer de eindaanslagen met deze procedure in het geheugen worden opgeslagen, worden de twee hoogten continu gecontroleerd en bijgwerkt door de functie “automatisch bijwerken van de eindaanslagen”...
  • Seite 105 sec. sec. sec. NEW transmitter OLD transmitter NEW transmitter Opmerking – Tijdens de uitvoering van de procedure kan de programmering op elk gewenst moment geannuleerd worden door de toetsen n en t gedurende 4 seconden tegelijkertijd ingedrukt te houden. Als alternatief kunt u ook op geen enkele toets drukken en 60 seconden wachten tot de motor 6 bewegingen uitvoert. 5.10.2 - Geheugenopslag van een tweede zender in “Modus II”...
  • Seite 106 5.12 - Functie “RDC”: afstelling van de trekkracht van de motor bij sluiting Via deze functie kunt u voorkomen dat het doek na de sluitmanoeuvre te strak gespannen blijft. Tijdens de eindfase van deze manoeuvre wordt via deze functie automatisch het trekkoppel van de motor verlaagd, op basis van de waarde van de fabrieksinstelling of de waarde die door de installeur is ingesteld via de volgende procedure.
  • Seite 107 5.14 - Functie “FTA”: automatische aanspanning van het doek bij opening voor schermen die niet zijn uitgerust met een handmatig mechanisme voor het vast- en loshaken van het scherm bij opening Deze functie dient ter eliminatie van lelijke verzakkingen in het doek die zich kunnen vormen wanneer het scherm wordt geopend. De functie kan alleen worden ge- bruikt bij schermen waarbij blokkering van het doek op de openingsstand mogelijk is via een mechanisme dat handmatig door de gebruiker geplaatst en verwijderd kan worden (bijvoorbeeld de vergrendelingen die aanwezig zijn bij schermen met luifel, bij rolschermen met haken, bij uitvalschermen, enzovoort).
  • Seite 108 sec. sec. sec. “1” “1” “S” “S” sec. move the awning in the “S” position fine adjustment Opmerking – Tijdens de uitvoering van de procedure kan de programmering op elk gewenst moment geannuleerd worden door de toetsen n en t gedurende 4 seconden tegelijkertijd ingedrukt te houden.
  • Seite 109: Optionele Accessoires

    white Paragraph 5.16.1 Paragraaf 5.16.1 white-black 5.17 - Vergrendeling of ontgrendeling van het geheugen Via deze procedure kunt u het geheugen van de motor vergrendelen of ontgrendelen, om ervoor te zorgen dat er geen andere zenders, die niet voorzien zijn voor de inrichting, onbedoeld in het geheugen worden opgeslagen.
  • Seite 110 Elk weersverschijnsel heeft een prioriteit. De prioriteit is als volgt opgebouwd: van het scherm. Nice wijst elke aansprakelijkheid af voor materiële schade ten ge- 1-wind, 2-regen, 3-zon. volge van atmosferische condities die niet door de sensoren gedetecteerd worden.
  • Seite 111 6.A - Programmering om een instructie (“Open” of “Stap-voor-stap”) aan een knop toe te wijzen (zie paragraaf 6.1) Voordat u met de procedure begint, rolt u het scherm half af. 01. Houd de toets n ingedrukt en wacht tot de motor 2 bewegingen heeft uitgevoerd. Laat ten slotte de toets los. 02.
  • Seite 112 6.C - Afstelling van het niveau van de klimaatsensor “wind” (zie paragraaf 6.2.3) In de fabriek is de activeringsdrempel op niveau 3 ingesteld; om deze te wijzigen gaat u als volgt te werk. Voordat u met de procedure begint, rolt u het scherm half af. 01.
  • Seite 113 20°C (± 5°C). (probleemoplossingsgids) – Nice behoudt zich het recht voor om op elk willekeurig moment wijzigingen in het product door te voeren die het bedrijf noodzakelijk acht, waarbij echter hetzelfde beoogde gebruik en dezelfde functionaliteit gehandhaafd blijven.
  • Seite 115 - Appendix - Appendice - Appendice - Apéndice - Anhang - Załącznik - Bijlage...
  • Seite 116 Com. ENGLISH ITALIANO FRANCAIS ESPANOL DEUTSCH POLSKI NEDERLANDS CABLES CAVI CÂBLES CABLES KABEL PRZEWODY KABELS Biało- White-orange Bianco-arancio Blanc-orange Blanco-naranja Weiß-orange Wit-oranje pomarańczowy White Bianco Blanc Blanco Weiß Biały White-black Bianco-nero Blanc-noir Blanco-negro Weiß-schwarz Biało-czarny Wit-zwart Brown Marrone Marron Marrón Braun Brązowy Bruin...
  • Seite 117 10 mm...
  • Seite 118 sunrise daytime dusk night-time Klux set threshold value: e.g. light 30Klux intensity over-threshold momentary drops in light, within the hysteresis hysteresis values drops in light, within the under-threshold hysteresis threshold: positioned under-threshold values automatically at half the set thresh- old value “1”...
  • Seite 119 alba giorno tramonto notte Klux valore di soglia impostato: es. intensità luminosa 30Klux sopra-soglia cali momentanei di luminosità, entro i isteresi valori di isteresi cali di luminosità entro i sotto-soglia soglia di isteresi: posizionata au- valori di sotto-soglia tomaticamente a metà del valore di soglia impostato “1”...
  • Seite 120 aube jour crépuscule nuit Klux valeur de seuil imposée : ex. intensité lumineuse 30Klux au-dessus seuil diminution momentanée de la luminosité entre les hystérésis valeurs d’hystérésis diminution de la luminosité entre les sous-seuil seuil d’hystérésis : positionné valeurs de sous-seuil automatiquement à...
  • Seite 121 alba día ocaso noche Klux valor configurado para el umbral: intensidad de la luz ej., 30 Klux superior al umbral reducciones momen- táneas de luz, dentro de histéresis los valores de histéresis reducciones de luz dentro de los valores inferiores inferior al umbral umbral de histéresis: posicio- al umbral namiento automático a mitad del...
  • Seite 122 Sonnenaufgang Sonnenuntergang Nacht Klux Eingestellter Grenzwert: z.B. Lichtintensität 30Klux über Grenzwert kurze Verringerung der Lichtintensität innerhalb Hysterese der Hysteresewerte Verringerung der Lichtin- tensität innerhalb der Wer- unter Grenzwert Hysteresegrenze: automatisch te unter dem Grenzwert auf der Hälfte des eingestellten Grenzwertes positioniert “1”...
  • Seite 123 świt dzień zmierzch Klux ustalona wartość progo- intensywność światła słonecznego wa: np. 30 klx powyżej wartości progowej chwilowe zmniejszanie się intensywności światła w histereza zakresie wartości histerezy zmniejszanie się intensyw- ności światła w zakresie poniżej wartości progowej próg histerezy: wyznaczony auto- wartości poniżej progowej matycznie pośrodku ustalonej war- tości progowej “1” “0” po 2 minutach system aktywny sterowanie automatyczne po 15 minutach system wyłączony system wyłączony sterowanie...
  • Seite 124 zonsopkomst overdag zonsondergang nacht Klux ingestelde drem- pelwaarde: bij- intensiteit van licht voorbeeld 30Klux boven drempel tijdelijke dalingen van de in- tensiteit van het licht, binnen hysterese de waarden voor hysterese dalingen van de intensi- teit van het licht, onder de onder drempel drempel voor hysterese: auto- drempelwaarde...
  • Seite 128 Nice SpA Oderzo TV Italia www.niceforyou.com info@niceforyou.com...

Inhaltsverzeichnis