Toshiba MMU-AP0091H Betriebsanleitung
Vorschau ausblenden
Andere Handbücher für MMU-AP0091H:
- Betriebsanleitung (29 Seiten) ,
- Betriebsanleitung (220 Seiten) ,
- Betriebsanleitung (230 Seiten)
Inhaltsverzeichnis
Werbung
Verfügbare Sprachen
Verfügbare Sprachen
Indoor Unit
<4-way Air Discharge Cassette Type>
MMU-AP0091H, AP0121H, AP0151H,
MMU-AP0181H, AP0241H, AP0271H,
MMU-AP0301H, AP0361H, AP0481H
MMU-AP0561H
<2-way Air Discharge Cassette Type>
MMU-AP0071WH, AP0091WH, AP0121WH,
MMU-AP0151WH, AP0181WH, AP0241WH,
MMU-AP0271WH, AP0301WH
MMU-AP0481WH
(CHINA market only)
<1-way Air Discharge Cassette Type>
MMU-AP0071YH, AP0091YH, AP0121YH,
MMU-AP0151SH, AP0181SH, AP0241SH
<Concealed Duct Standard Type>
MMD-AP0071BH, AP0091BH, AP0121BH,
MMD-AP0151BH, AP0181BH, AP0241BH,
MMD-AP0271BH, AP0301BH, AP0361BH,
MMD-AP0481BH, AP0561BH
<Concealed Duct High Static Pressure Type>
MMD-AP0181H, AP0241H, AP0271H,
MMD-AP0361H, AP0481H, AP0721H,
MMD-AP0961H
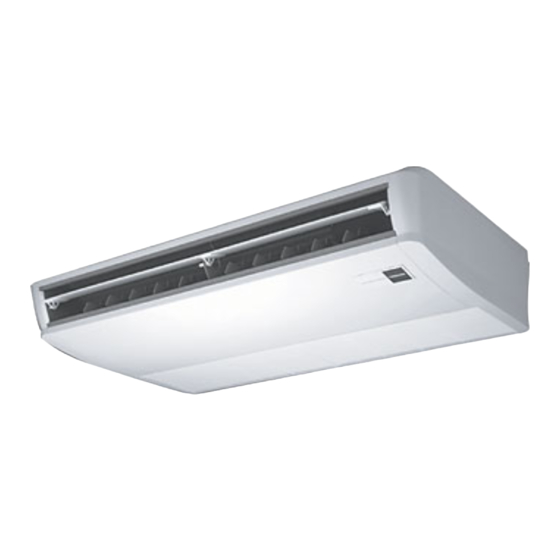
<Under Ceiling Type>
MMC-AP0151H, AP0181H, AP0241H,
MMC-AP0271H, AP0361H, AP0481H
<High Wall Type>
MMK-AP0071H, AP0091H, AP0121H,
MMK-AP0151H, AP0181H, AP0241H
<Floor Standing Cabinet Type>
MML-AP0071H, AP0091H, AP0121H,
MML-AP0151H, AP0181H, AP0241H
<Floor Standing Concealed Type>
MML-AP0071BH, AP0091BH, AP0121BH,
MML-AP0151BH, AP0181BH, AP0241BH
<Floor Standing Type>
MMF-AP0151H, AP0181H, AP0241H
MMF-AP0271H, AP0361H, AP0481H
MMF-AP0561H
MANUEL DU PROPRIETAIRE
BETRIEBSANLEITUNG
MANUALE DEL PROPRIETARIO
MANUAL DEL PROPIETARIO
MANUAL DO UTILIZADOR
GEBRUIKSAANWIJZING
For commercial use
Pour usage commercial
Nur für gewerbliche Nutzung
Per uso commerciale
Para uso comercial
Para uso comercial
Voor commercieel gebruik
Ãéá åìðïñéêÞ ÷ñÞóç
Outdoor Unit
Cooling Only Model
<Inverter Unit>
MMY-MAP0501T8, MAP0601T8
MMY-MAP0801T8, MAP1001T8
MMY-MAP1201T8
Heat Pump Model
<Inverter Unit>
MMY-MAP0501HT8, MAP0601HT8
MMY-MAP0801HT8, MAP1001HT8
MMY-MAP1201HT8
Heat Pump Model
<Inverter Unit>
MMY-MAP0501HT7, MAP0601HT7
MMY-MAP0801HT7, MAP1001HT7
MMY-MAP1201HT7
OWNER’S MANUAL
ÏÄÇÃÉÅÓ ×ÑÇÓÇÓ
Werbung
Inhaltsverzeichnis

Verwandte Anleitungen für Toshiba MMU-AP0091H


Inhaltszusammenfassung für Toshiba MMU-AP0091H
-
Seite 52: Sicherheitsvorkehrungen
SICHERHEITSVORKEHRUNGEN WARNUNG Warnhinweise zur Installation Lassen Sie die Installation nur von Ihrem Händler oder einem Fachbetrieb durchführen. Zur Installation sind fundierte Fachkenntnisse erforderlich. Versuchen Sie nicht, das Gerät selbst zu installieren. Wird die Installation nicht korrekt abgeschlossen, kann es zu Feuer, Stromschlag, Verletzungen oder Wasserschäden kommen. - Seite 53 VORSICHT Vorsichtsmaßnahmen bei der Installation Prüfen Sie, ob die Ablaufleitungen korrekt installiert sind, damit das Kondensat ablaufen kann. Sind die Leitungen nicht korrekt installiert, kann es zu Wasserschäden an Ihren Möbeln kommen. Prüfen Sie, ob eine Erdschluss-Sicherung installiert ist. Die Installation einer Erdschluss-Sicherung ist erforderlich. Anderenfalls kann ein Stromschlag die Folge sein.
-
Seite 54: Bezeichnungen Der Teile
BEZEICHNUNGEN DER TEILE Zubehörteile Außeneinheit Luftauslass (Abluft) Im Kühlbetrieb entweicht warme Luft. Im Heizbetrieb entweicht kalte Luft. Lufteinlass Lufteinlässe befinden vorn, hinten rechts und links. Öffnung für Stromversorgung CODE No. SET DATA Öffnung für Kältemittelrohrleitung UNIT No. Der Anschluss befindet sich im SETTING TEST R.C. - Seite 55 [Zwischendecken-Luftkanal] Luftauslassflansch Erdungsschraube Zuluftkanal wird angeschlossen. Die Erdungsschraube befindet sich im Schaltkasten SuMoTuWeTh Fr Sa PROGRAM1 ERROR PROGRAM2 PROGRAM3 Luftfilter WEEKLY TIMER Lufteinlass Filtert Staub und Schmutz Über das Abluftgitter wird die (Luftfilter befindet sich hinter Lüftungsgitter). Raumluft angesaugt. [Zwischendecken-Luftkanal für hohen statischen Druck] MMD-AP0181H bis AP0481H MMD-AP0721H, AP0961H Lufteinlass...
- Seite 56 [Truhenmodell] Luftauslass/Lüftungsklappe Je nach Bedarf gekühlte oder erwärmte Zuluft. Erdungsschraube Befindet sich im Schaltkasten. Luftfilter Filtert Staub und Schmutz (Luftfilter in Ansaugöffnung) Abluftöffnung Über die Abluftöffnung wird die Raumluft angesaugt. [Einbaumodell] Zuluftöffnung Erdungsschraube Kondensatschale (mit Kondensatfilter) Befindet sich im Schaltkasten. Dieses Zubehör wird bauseits montiert.
-
Seite 57: Teilebezeichnung Der Fernbedienung
TEILEBEZEICHNUNG DER FERNBEDIENUNG Anzeige CODE No. In der rechten Abbildung werden alle Anzeigen der Fernbedienung SET DATA UNIT No. dargestellt. Anzeige SETTING TEST R.C. Im Betrieb erscheinen nur die für die gewählte Betriebsart relevanten Anzeigen. • Wenn Sie das Gerät das erste Mal einschalten, blinkt auf der Fernbedienung die Anzeige [SET DATA]. -
Seite 58: Bedienung
Bedienung Drücken Sie eine Taste, um eine gewünschte Funktion auszuwählen. Mit dieser Fernbedienung können maximal 8 Inneneinheiten gesteuert werden. • Die gewünschte Betriebsart muss nur einmal eingerichtet werden. Danach kann das Klimagerät durch Drücken auf in der eingestellten Betriebsart gestartet werden. UNIT Auswahl der Lüftungsleistung Betriebsanzeige... -
Seite 59: Richtige Handhabung
RICHTIGE HANDHABUNG Wenn Sie das Klimagerät zum ersten Mal verwenden, oder wenn Sie die Vorgaben unter SET DATA ändern wollen, gehen Sie wie folgt vor. Vom nächsten Mal an, arbeitet das Klimagerät in derselben Betriebsart, wenn Sie die Taste drücken. Vorbereitung Schalten Sie den Hauptschalter (oder die Sicherung) an. -
Seite 60: Einstellung Des Luftstroms
VORAUSSETZUNGEN [Im Kühlbetrieb] • Der Kühlbetrieb startet nach etwa 1 Minute. [Im Heizbetrieb (nur bei Modellen mit integrierter Heizung)] • Nachdem der Heizbetrieb beendet ist, kann der Ventilator noch etwa weitere 30 Sekunde in Betrieb sein. • Der Lüfter der Inneneinheit stoppt in der Vorheizphase für 3 bis 5 Minuten und bläst danach warme Luft in den Raum. -
Seite 61: Einstellen Der Zuluftrichtung
Einstellen der Zuluftrichtung Drücken Sie Jedesmal, wenn Sie die Taste drücken, ändert sich die Zuluftrichtung. Im Heizbetrieb Richten Sie die Lüftungsklappen nach unten aus. Zeigen die Lamellen nach oben, erreicht die warme Luft nicht den Boden. Anfangseinstellung Im Kühl-/Trocknen-Betrieb Richten Sie die Lüftungsklappen nach oben aus. Sind sie nach unten gerichtet, kann es passieren, dass Kondenswasser von den Zuluftöffnungen nach unten tropft. -
Seite 62: Einstellen Der Lüftungsrichtung Und Der Schwenkbewegung
Abhängig von der Raumbeschaffenheit kann die warme oder kalte Luft in zwei oder drei Richtungen gelenkt werden. Wenden Sie sich für nähere Informationen hierzu an Ihren Fachhändler. INFORMATION • Sind die Klappen im Kühlbetrieb nach unten ausgerichtet, kann sic Kondensat bilden und in den Raum tropfen. •... - Seite 63 Abgehängtes Modell • Schaltet das Klimagerät ab, zeigen die horizontalen Lamellen (Einstellklappen für die Luftstromrichtung) automatisch nach oben. • Ist das Klimagerät bereit für den Heizbetrieb, zeigen die horizontalen Lamellen (Einstellklappen für die Luftstromrichtung) nach oben. Obwohl die Bewegung der Lamellen beginnt, nachdem der Status Heizung bereit erreicht wurde, wird auf der Fernbedienung SWING (Lamellen einstellen) angezeigt, auch wenn der Heizbetrieb den Status “bereit”...
-
Seite 64: Einstellung Des Luftstroms Nach Rechts Oder Links
Einstellung des Luftstroms nach rechts oder links Um den Luftstrom nach rechts oder links zu lenken, verschieben Sie die vertikalen Lamellen in die gewünschte Richtung. INFORMATION • Sind die Klappen im Kühlbetrieb nach unten ausgerichtet, kann sic Kondensat bilden und in den Raum tropfen. •... -
Seite 65: Wechsel Der Luftauslassöffnung
Truhenmodell [Im Kühlbetrieb] Verwenden Sie im Kühlbetrieb die horizontale Stellung der Lüftungsklappen, damit sich die kalte Luft gleichmäßig im Raum verteilt. [Im Heizbetrieb (nur bei Modellen mit integrierter Heizung)] Richten Sie im Heizbetrieb die Lüftungsklappen nach unten, damit die warme Luft bis auf den Boden geblasen wird. Wechsel der Luftauslassöffnung Gehen Sie hierzu wie folgt vor: Entfernen Sie die beiden Befestigungsschrauben der... - Seite 66 Standmodell Einstellung der Lüftungsrichtung nach oben/nach unten [Im Kühlbetrieb] Verwenden Sie im Kühlbetrieb die horizontale Stellung der Lüftungsklappen, damit sich die kalte Lüft gleichmäßig im Raum verteilt. Stellen Sie die Klappe hierzu von Hand ein. [Im Heizbetrieb (nur bei Modellen mit integrierter Heizung)] Richten Sie im Heizbetrieb die Lüftungsklappen nach unten, damit die warme Luft bis auf den Boden geblasen wird.
-
Seite 67: Zeitbetrieb
ZEITBETRIEB Sie können einen zeitgesteuerten Betrieb unter den drei folgenden Optionen auswählen: ABSCHALTZEIT : Wenn die voreingestellte Zeit erreicht ist, schaltet das Gerät ab. ABSCHALTZEIT Wiederholung : Jedes Mal, wenn die voreingestellte Zeit erreicht ist, schaltet das Gerät ab. EINSCHALTZEIT : Wenn die voreingestellte Zeit erreicht ist, schaltet das Gerät an. -
Seite 68: Elektrische Verkabelung
INSTALLATION Installationsort WARNUNG • Wählen Sie einen Platz, der stabil genug ist, um das Gewicht des Geräts aufzunehmen. Ist der Platz nicht stabil genug, kann das Gerät fallen und so Verletzungen verursachen. VORSICHT • Installieren Sie das Gerät nicht an einem Platz, an dem brennbare Gase ausströmen. Diese Gase können sich, wenn sie sich ansammeln, durch das Klimagerät entzündet werden. -
Seite 69: Wartung
WARTUNG Reinigen des Luftfilters • Wird auf der Fernbedienung [FILTER] angezeigt, reinigen Sie den Luftfilter. • Ein verstopfter Luftfilter beeinträchtigt die Wirksamkeit der Kühlung/Heizung. CODE No. SET DATA UNIT No. FILTER-Anzeige SETTING TEST R.C. Meldet, wenn der Filter gereinigt werden muss. UNIT FILTER zurücksetzen Drücken Sie nach der Reinigung die Taste FILTER. -
Seite 70: Einbaumodell
Wandmodell • Drücken Sie in die Mitte des Luftfilters. Die Klammer springt heraus. • Lösen Sie den Luftfilter und ziehen ihn nach unten, während Sie gegen das Gerät drücken. Drücken Sie gegen den Filter und ziehen ihn nach unten. Truhenmodell •... - Seite 71 Falls Sie das Klimagerät für mindestens einen Monat nicht benutzen, 1. Schalten Sie den Lüfter etwa 3 bis 4 Stunden ein, um das Innere des Geräts zu trocknen • Schalten Sie das Gerät in den FAN-(Lüfter)-Modus. 2. Stoppen Sie danach das Klimagerät und schalten Sie es mit dem Hauptschalter oder der Sicherung aus.
-
Seite 72: Funktionen Und Leistung Des Klimageräts
FUNKTIONEN UND LEISTUNG DES KLIMAGERÄTS Tests vor der Inbetriebnahme WARNUNG • Prüfen Sie, ob das Erdungskabel korrekt angeschlossen ist. Schalten Sie die Stromzufuhr 12 Stunden • Prüfen Sie, ob der Luftfilter in der Inneneinheit installiert ist. vor Inbetriebnahme ein. Heizbetrieb (nur bei Modellen mit integrierter Heizung) •... -
Seite 73: Betriebsbedingungen Des Klimageräts
Betriebsbedingungen des Klimageräts Um eine gute Leistung zu erzielen, betreiben Sie das Klimagerät unter folgenden Temperaturbedingungen: Kühlbetrieb Außentemperatur : –5°C bis 43°C Raumtemperatur : 21°C to 32°C (Trockentemp.), 15°C to 24°C (Nasstemp.) Relative Luftfeuchtigkeit im Raum weniger als 80 %. VORSICHT Wird das Klimagerät bei höheren Werten betrieben, kann sich an der Oberfläche Kondenswasser bilden. -
Seite 74: Vorgehensweise Bei Folgenden Symptomen
VORGEHENSWEISE BEI FOLGENDEN SYMPTOMEN Prüfen Sie die folgenden Punkte, ehe Sie sich an den Kundendienst wenden. Symptom Ursache Außeneinheit • Kalte, neblige Luft oder • Lüfter der Außeneinheit stoppt automatisch und Abtauung Wasser strömen aus. wird durchgeführt. • Manchmal ist ein Zischen •... -
Seite 75: Bestätigung Und Prüfung
Bestätigung und Prüfung Tritt ein Fehler auf, erscheint in der Anzeige der CODE No. Fernbedienung eine entsprechende Kennziffer und die Nummer der betroffenen Raumeinheit. UNIT No. Die Kennziffer wird nur während des Betriebs angezeigt. R.C. Erlischt die Anzeige, gehen Sie wie in dem Absatz “Aufruf des Fehlerspeichers”... - Seite 76 EH99919501...