LD Systems AM 8 Bedienungsanleitung
8-channel automatic mixer

Verwandte Anleitungen für LD Systems AM 8


Inhaltszusammenfassung für LD Systems AM 8
- Seite 1 USER´S MANUAL BEDIENUNGSANLEITUNG MANUEL D`UTILISATION MANUAL DE USUARIO INSTRUKCJA OBSŁUGI MANUALE D‘ USO AM 8 8-CHANNEL AUTOMATIC MIXER LDAM8...
-
Seite 2: Preventive Measures
You‘ve made the right choice! We have designed this product to operate reliably over many years. LD Systems stands for this with its name and many years of experience as a manufacturer of high-quality audio products. Please read this User‘s Manual carefully, so that you can begin making optimum use of your LD Systems product quickly. -
Seite 3: Sicherheitshinweise
FOR EQUIPMENT THAT CONNECTS TO THE POWER MAINS 22. CAUTION: If the power cord of the device is equipped with an earthing contact, then it must be connected to an outlet with a protective ground. Never deactivate the protective ground of a power cord. 23. -
Seite 4: Mesures Préventives
Dieses Gerät darf nur von autorisiertem Fachpersonal repariert werden. 19. Verwenden Sie zur Reinigung des Geräts ein trockenes Tuch. 20. Beachten Sie alle in Ihrem Land geltenden Entsorgungsgesetze. Trennen Sie bei der Entsorgung der Verpackung bitte Kunststoff und Papier bzw. Kartonagen voneinander. - Seite 5 respectez les instructions correspondantes ci après) Ne mettez pas l‘appareil en contact avec des matériaux, des liquides ou des gaz inflammables. 12. Vérifiez qu‘aucune projection ou liquide ne puisse s‘introduire dans l‘appareil. Ne posez sur l‘appareil aucun objet renfermant du liquide : vase, verre d‘eau... 13.
-
Seite 6: Medidas De Seguridad
MEDIDAS DE SEGURIDAD 1. Lea atentamente las instrucciones de este manual. 2. Guarde toda la información en un lugar seguro para futuras consultas. 3. Siga las instrucciones indicadas. 4. Siga todas las advertencias. No quite las instrucciones de seguridad ni cualquier otra información indicada en el equipo. 5. -
Seite 7: Środki Ostrożności
Daños auditivos por exposición prolongada a un nivel SPL alto: este equipo puede generar fácilmente un nivel de presión sonora (SPL) lo suficiente- mente elevado como para causar daños auditivos permanentes a los artistas, el personal de producción y el público. Deben tomarse precauciones para evitar la exposición prolongada a un SPL de más de 90 dB. -
Seite 8: Misure Precauzionali
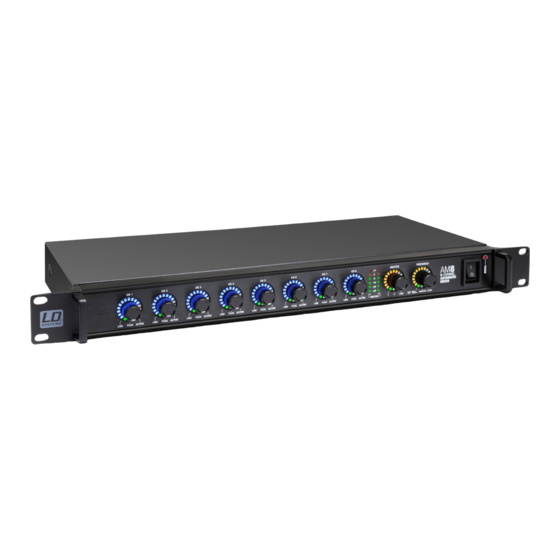
Trójkąt równoramienny z symbolem błyskawicy oznacza niezaizolowane, „niebezpieczne” napięcie w urządzeniu, które może spowodować niebezpieczne dla zdrowia porażenie prądem. Trójkąt równoramienny z wykrzyknikiem oznacza ważne wskazówki dotyczące obsługi i wskazówki ostrzegawcze. UWAGA NA WYSOKI POZIOM GŁOŚNOŚCI PRODUKTÓW AUDIO! To urządzenie przewidziane jest do profesjonalnych zastosowań. Komercyjne stosowanie tego urządzenia podlega obowiązującym w danym kraju przepisom i wytycznym dotyczącym zapobiegania wypadkom. - Seite 9 Introduction The LD Systems AM 8 is an automatic 8 x 2 matrix mixer with balanced mic line inputs, 96 kHz/24 bit signal processing and a frequency response of 20 Hz - 30 kHz. The Priority function of the AM8 automatic mixer can be switched on individually for each input; the total threshold for channel activation is selected automatically or manually using the threshold controller.
- Seite 10 Introduzione L'AM8 di LD Systems è un mixer a matrice automatico da 8x2 canali con ingressi bilanciati per microfono/linea, elaborazione del segnale da 96 kHz/24 bit e una risposta in frequenza di 20 Hz - 30 kHz. La funzione Priorità del mixer automatico AM8 può essere attivata per ogni ingresso separatamente;...
- Seite 11 SETTING AND DISPLAY ELEMENT MASTER / EINSTELL- UND ANZEIGEELEMENT MASTER / RÉGLAGES ET INDICATEURS CANAUX MASTER / CONTROL INDICADOR MASTER / REGULATOR I WSKAŹNIK MASTER / CONTROLLI E INDICATORI MASTER Rotary encoder, push-button and LED display with multi-function. Drehgeber, Drucktaster und LED-Anzeige mit Mehrfachfunktionen. Encodeur/sélecteur et couronne LED multifonctions Control giratorio, pulsador e indicadores LED multifunción.
- Seite 12 Po naciśnięciu przycisku RESET wszystkie ustawienia, takie jak np. ustawienia korektora dźwięku i trasowania, zostaną przywrócone do wartości fabrycznych. Nacisnąć i przytrzymać przycisk RESET przez ok. 6 sekund. Premendo il tasto RESET, tutte le impostazioni, quali ad esempio equalizzatore e instradamento, vengono ripristinate alla configurazione default. Tenere premuto il tasto per circa 6 secondi.
- Seite 13 [%V, +adres urządzenia (1 bit), +8 kanałów – głośność (8 bit), +głośność master (2 bit), +ręczny poziom progu (1 bit), +CRC +#] device address (1 bit): device 1–16, 1 for the master device [adres urządzenia (1 bit): urządzenie 1–16, 1 dla urządzenia głównego] channel volume (8 bit): channel 1–8, 0–60 dB, in steps of 1 dB [głośność...
- Seite 14 EXTERNAL CONTROL The D-SUB 25-pin interface offers the possibility of external control of the input channels (CH input). There is a 3.3 V DC voltage at the outputs 1 to 8 (CH output) for controlling external devices, once a channel is activated. Die D-SUB 25-Pin Schnittstelle bietet die Möglichkeit der externen Kontrolle über die Eingangs-Kanäle (CH Input).
- Seite 15 Sorties ligne symétriques Master 1 et 2 sur Phoenix (connecteur Phoenix livré, mise en place comme illustré). Le niveau de ces sorties se règle indépendamment (voir Point 23). Salidas de línea balanceadas Master 1 y 2 con bloques de terminales (se suministran bloques de terminales; se indica la disposición de pines). Se puede ajustar el nivel de las dos salidas de línea de forma independiente (ver punto 23).
- Seite 16 PUSH-BUTTON CH 1 - CH 8 / DRUCKTASTER CH 1 - CH 8 / ENCODEUR/TOUCHE CH 1 - CH 8 / PULSADOR CH 1 - CH 8 / PRZYCISKI KANAŁÓW 1–8 / PULSANTE CH 1 - CH 8 Input sensitivity - to switch an input from microphone to line sensitivity, and vice versa, press the push button of the rotary encoder of the corresponding channel.
- Seite 17 STATUS LED LINE / MIC LED flashing red: ready to switch LED green Line sensitivity, 48 V phantom power disabled LED off Microphone sensitivity, 48 V phantom power activated PEAK-LED CH 1 - CH 8 Once the PEAK LED lights up red, the corresponding channel is operating at the distortion limit. To avoid distortion, reduce the input gain using the rotary encoder (see point 17).
- Seite 18 Cet encodeur sert à régler le niveau de sortie ligne des bus Master 1 et Master 2 (double fonction) Si la LED 1 est allumée en vert (n°26), l'encodeur MASTER sert à régler le niveau de la sortie ligne du bus Master 1 ; si c'est la LED 2 qui est allumée (27), il sert à régler le niveau de la sortie ligne du bus Master 2.
- Seite 19 STATUS-LED MASTER 1 If the LED 1 display lights up green, the sum volume of the line output Master 1 can be adjusted as desired using the MASTER rotary encoder (see also point 23). Leuchtet die Anzeige-LED 1 grün, kann die Summenlautstärke des Line-Ausgangs Master 1 wunschgemäß mit Hilfe des Drehgebers MASTER eingestellt werden (siehe auch Punkt 23).
- Seite 20 Wskaźnik stanu poziomu wyjść liniowych Master 1 i Master 2. Kiedy dioda stanu świeci się na zielono, z odpowiedniego wyjścia liniowego Master 1 lub Master 2 zostaje wyprowadzony sygnał wyjściowy (np. dla wejścia liniowego końcówki mocy) o poziomie odpowiadającym sygnałowi liniowemu.
- Seite 21 Cette fonction permet de couper automatiquement (Mute) les canaux d'entrée sur lesquels le niveau du signal descend en dessous d'un certain seuil. On évite ainsi l'accumulation de bruits ambiants, d'éventuels parasites et l'apparition d'effets de filtre en peigne : autant de phénomènes inévitables dès que plusieurs micros sont ouverts simultanément, et qui nuisent à...
- Seite 22 STATUS-LED THRESHOLD AUTO / MANUAL The status LED indicates the operating mode of the threshold value (green = automatic adjustment of the threshold value, red = manual setting of the threshold value, see point 29). To change the operating mode, press the push-button of the THRESHOLD rotary encoder (one of the 3 LEDs AUTO / MANUAL / MASTER or LOCK now flashes red).
- Seite 23 Cuando se utiliza un único mezclador automático AM8, debe configurarse como equipo maestro. Al conectar en cascada hasta 16 mezcladores automáticos AM8 mediante el puerto LINK IN / LINK OUT del panel posterior (ver punto 14), debe configurar como master el equipo que va a funcionar como maestro.
- Seite 24 Aby uniemożliwić przypadkowe aktywowanie funkcji urządzenia, można zablokować elementy obsługi, wyłączając ich działanie. Jeżeli dioda stanu LOCK świeci ciągłym zielonym światłem, oznacza to, że elementy obsługi nie są zablokowane. Elementy obsługi są zablokowane, gdy dioda świeci ciągłym czerwonym światłem. W celu zmiany stanu blokady najpierw należy nacisnąć przycisk pokrętła enkodera przyrostowego THRESHOLD (jedna z 3 diod AUTO/MANUAL, MASTER lub LOCK pulsuje teraz na czerwono), przekręcić...
- Seite 25 Puesta en marcha - Para el cableado del mezclador automático AM8, emplee solo cables balanceados. - Para no dañar el sistema debido a realimentaciones acústicas, etc., sitúe al mínimo el volumen del sistema de audio antes de conectar o desconectar nada, y súbalo después con sumo cuidado.
- Seite 26 Daisy-Chaining Up to 16 LD Systems AM8 automatic mixers can be daisy-chained to an audio system. When daisy-chaining the AM8 automatic mixers using the LINK IN / LINK OUT interface on the rear panel of the unit, the device that must serve as the master unit needs to be configured as the master unit. All other AM8 automatic mixers in the audio system will be configured as slave units (see point 33, CONNECTIONS, CONTROL AND DISPLAY ELEMENTS).
- Seite 27 Collegamento a cascata A un sistema audio si possono collegare a cascata fino a 16 mixer automatici AM8 di LD Systems. Se si collegano a cascata i mixer automatici AM8 tramite la porta LINK IN / LINK OUT che si trova sul lato posteriore dell'apparecchio, l'AM8 che dovrà essere utilizzato come master deve essere configurato come unità...
- Seite 28 Instale el software AUTOMIX8 en un PC con sistema operativo Windows (Windows Vista, WIN 7, WIN 8, resolución mínima de 1366 x 768) y co- necte el mezclador automático AM8 mediante un cable LAN (CAT-5) al puerto Ethernet del ordenador. Como por defecto la dirección IP del mezclador automático AM8 es 192.168.1.88, deberá...
- Seite 29 Si la configuración y el cableado está correcto, al cabo de unos segundos se mostrarán los equipos conectados, su dirección IP y una ventana INFO con el texto «Search finished» (Búsqueda finalizada). Haga clic en «OK» (Aceptar). Después de escribir el nombre de usuario (USER NAME) y la contraseña (USER PSW), haga clic en el botón azul «OK».
- Seite 30 Only one automatic mixer can be connected to the software at any time. To connect a different automatic mixer with the software, remove the connection of the currently connected mixer by clicking on "MENU" and "DISCONNECT" (see figure). Now click on "MENU" and "CONNECT" to estab- lish a connection with an automatic mixer with a different IP address.
- Seite 31 SOFTWARE MAIN WINDOW / SOFTWARE HAUPTFENSTER / FENÊTRE PRINCIPALE DU LOGICIEL / VENTANA PRINCIPAL DEL PROGRAMA / GŁÓWNE OKNO PROGRAMU / FINESTRA PRINCIPALE DEL SOFTWARE CHANNELS Overview of the input channels (CHANNEL 1 - 8) and the line outputs (MASTER 1 & 2). Übersicht der Eingangs-Kanäle (CHANNEL 1 - 8) und der Line-Ausgänge (MASTER 1 &...
- Seite 32 Vista general de los canales de entrada (CHANNEL 1 - 8) y salidas de línea (MASTER 1 y 2). Przegląd kanałów wejściowych (KANAŁY 1–8) i wyjść liniowych (MASTER 1 I 2). Panoramica dei canali d'ingresso (CHANNEL 1 - 8) e delle uscite di linea (MASTER 1 e 2). Equalizer setting for the input channels and channel groups (GROUP 1-5).
- Seite 33 "OFF" gelb hervorgehoben, ist die Verbindung zwischen Automixer und Rechner getrennt. Si l'indicateur "ON" apparaît en jaune, la liaison est établie entre l'AM8 et l'ordinateur. Si l'indicateur "OFF" apparaît en jaune, la liaison est coupée entre l'AM8 et l'ordinateur. Si «ON» está sobre un fondo amarillo, indica que hay conexión entre el mezclador automático y el ordenador. Si «OFF» está sobre un fondo amarillo, no hay conexión entre el mezclador automático y el ordenador.
- Seite 34 LINE / MIC MASTER 1 & 2 Switching the output level of the line outputs Master 1 and Master 2 (single click with the left mouse button). The blue-highlighted button shows the option currently active (LINE = output signal with line level, e.g. for the line input of a power amplifier / MIC = output signal level attenuated by 20 dB, for example for the microphone input of a mixer).
- Seite 35 Pulsanti di attivazione e visualizzazione della funzione Priorità dei canali d'ingresso. Fare clic sul pulsante "PRIORITY" di un canale per assegnare la priorità a tale canale rispetto agli altri. Il colore del pulsante passa a giallo. Facendo di nuovo clic su "PRIORITY" la funzione di priorità si disattiva.
- Seite 36 GAIN CHANNEL 1 - 8 Set the input gain of the input channels using the mouse (click, hold, and drag). Stellen Sie die Eingangsvorverstärkung der Eingangs-Kanäle mit Hilfe der Computermaus ein (Klicken, Halten und Ziehen). Le réglage du gain du préampli du canal d'entrée s'effectue par l'intermédiaire de la souris (cliquer, maintenir enfoncé et faire glisser le curseur).
- Seite 37 EQUALIZER CHANNEL 1 - 8 (EDIT EQ) / EQUALIZER KANAL 1 - 8 (EDIT EQ) / ÉGALISEUR CANAUX 1 - 8 (EDIT EQ) / ÉGALISEUR CANAUX 1 - 8 (EDIT EQ) / ECUALIZADOR DE CANAL 1 - 8 (EDIT EQ) / EDIT EQ (ZMIANA USTAWIEŃ...
- Seite 38 Permite copiar la configuración del ecualizador de uno a otro canal. Haga clic en el botón (1) del canal que desea cambar (el color del canal seleccionado cambiará a amarillo). A continuación, seleccione en «COPY FROM» el canal cuya configuración de ecualizador desea copiar y confirme haciendo clic en «OK».
- Seite 39 La fréquence de coupure est réglable de 20 à 20000 Hz sur chacune des bandes de fréquence de l'égaliseur. Pour régler la valeur de fréquence désirée, vous pouvez taper directement la valeur dans le champ, ou les touches flèche haut/bas à côté du champ de fréquence. Vous pouvez aussi agir directement sur la fréquence et le gain en même temps, en faisant glisser à...
- Seite 40 Con il mouse, selezionare la caratteristica del filtro desiderata per ogni banda dell'equalizzatore (EQ = filtro passa banda, LowShelf = filtro shelving a bassa frequenza, HighShelf = filtro shelving ad alta frequenza). GRAPHICAL EQUALIZER DISPLAY / GRAFISCHE EQUALIZER-DARSTELLUNG / REPRÉSENTATION GRAPHIQUE DE LA COURBE D'ÉGALISATION / ECUALIZADOR GRÁFICO / GRAFICZNE ODWZOROWANIE KOREKTORA DŹWIĘKU / EQUALIZZATORE GRAFICO The graphical representation of the EQ curve is used for quick and clear overview of the equalizer settings.
- Seite 41 Haga clic en «BYPASS» para desactivar el ecualizador (haga clic de nuevo para activarlos. Es útil para comparar el sonido con y sin ecualización. Si el ecualizador está desactivado, el fondo de «BYPASS» estará en color azul. Kliknąć „BYPASS” w celu wyłączenia korektora dźwięku i ponownie, aby go włączyć (można w ten sposób bezpośrednio porównać dźwięk przed i po zmianie ustawienia).
- Seite 42 Q-FACTOR The value of the Q factor of the respective filter (filter quality) can be entered directly into the corresponding input field, or by using the arrow buttons to the right of the input field (Q-factor 0.3 to 20). Der Wert des Q-Faktors des jeweiligen Filters (Filtergüte) kann mittels der direkten Eingabe in das entsprechende Eingabefeld, oder mit Hilfe der Pfeiltasten rechts neben dem Eingabefeld erfolgen (Q-Faktor 0,3 bis 20).
- Seite 43 El limitador sirve para limitar los picos de la señal de las salidas de línea. Para ello, puede cambiar los siguientes parámetros. Limiter (ogranicznik wartości szczytowej) służy do ograniczania poziomów szczytowych sygnału audio wyjść liniowych. Dla tej opcji dostępne są ustawienia następujących parametrów. Il limitatore consente di limitare i picchi di livello del segnale audio delle uscite di linea utilizzando le impostazioni dei seguenti parametri.
- Seite 44 AUDIO MATRIX / MATRICE AUDIO / MATRIZ DE AUDIO / FUNKCJA AUDIO MATRIX / MATRICE AUDIO Each of the 8 input channels (INPUTS 1-8) can be individually routed to the two line outputs Master 1 and 2 using the audio matrix of the AM8 automatic mixer (M1 and M2).
- Seite 45 SYSTEM SETTINGS / SYSTEMEINSTELLUNGEN / PARAMÈTRES SYSTÈME / CONFIGURACIÓN DEL SISTEMA / USTAWIENIA SYSTEMU / IMPOSTAZIONI DI SISTEMA THRESHOLD When the signal levels of input channels drop below a certain threshold, these will be muted by this feature. This means that for the transmission of a channel, background noise, feedback and unwanted comb-filter effects from other active channels are effectively suppressed and the speech intelligibility is thus enhanced.
- Seite 46 Dzięki tej funkcji kanały wejściowe o poziomach sygnałów znajdujących się poniżej określonej wartości progowej (Threshold) zostaną włączone bezgłośnie (bez trzasków). Dzięki temu podczas przekazu na danym kanale dodatkowe odgłosy, sprzężenia zwrotne oraz niechciane efekty działania filtra grzebieniowego pochodzące z pozostałych otwartych kanałów zostaną skutecznie stłumione, a wyrazistość (stopień zrozumiałości) mowy ulegnie zwiększeniu.
- Seite 47 password for both users (USER PSW) is "000000" (six times the number zero). The password of the user who is currently logged on to the AM8 automatic mixer can be changed in the following ways: Click in the field for the old password "OLD PSW" and enter the old password. Now enter the new password (maximum 6 characters) in the "NEW PSW"...
- Seite 48 DEVICE MODE When using a single AM8 automatic mixer, it must be configured as a master unit. When daisy-chaining up to 16 AM8 automatic mixers using the LINK IN / LINK OUT interface on the rear panel of the device (see point 14 CONNECTIONS, CONTROLS, AND INDICATORS), the device serving as the master unit needs to be configured as the master unit.
- Seite 49 MENU / MENÜ / MENU / MENÚ / MENU / MENU OPEN FILE / SAVE FILE Save and load user settings (SAVE FILE / OPEN FILE). Custom settings can be saved directly to the computer as data files and can be reloaded. These data files contain all of the settings, such as equalizer, limiter, routing, channel groups etc..
- Seite 50 GROUP (GRUPA) Zarządzanie grupami kanałów. W celu otwarcia okna grup kanałów należy kliknąć „MENU”, przesunąć kursor myszy na „GROUP” i kliknąć jeden raz lewym przyciskiem myszy. GROUP Gestione dei gruppi di canali. Per aprire la finestra dei gruppi, fare clic su "MENU", spostare il cursore su "GROUP" e fare clic. EXIT(X) Exit the AUTOMIX8 software.
- Seite 51 Click on the button of the channels (CHANNEL 1-8 / MASTER 1 + 2) to be grouped in this channel group.. The buttons of the selected channels are highlighted in yellow. To remove a channel from a group, click on the button of the corresponding channel, the button will appear greyed out. Input and output channels can not be grouped in a channel group.
- Seite 52 SPECIFICATIONS / TECHNISCHE DATEN / CARACTÉRISTIQUES TECHNIQUES / CARACTERÍSTICAS TÉCNICAS / PRZYŁĄCZA, WYMIARY I MONTAŻ / DATI TECNICI Model Name: LDAM8 Product Type: automatic mixer Type: digital Version: 8 inputs, 2 outputs AD/DA Converter: 24-bit Sampling Frequency: 96 kHz DSP: EQ, Gain control, 8 x 2 Matrix, Dynamic control (Compressor/Limiter), Automix Frequency Response: 20 - 30,000 Hz...
- Seite 53 LDAM8 AUTOMIX8 Software Compatibility: Windows Vista, 7, 8 Required Interface: RS485 / Ethernet Parameter Inputs: EQ, LINE / MIC (switchable), PRIORITY, PHANTOM, MUTE, GAIN HPF Inputs: 35 - 150 Hz EQ Inputs: 5-Band Parametric or Shelf (+ / - 15 dB), Variable Q (0.3 – 20), Frequency 20 Hz – 20 kHz selectable in 1 Hz increments.
- Seite 54 Betriebsspannung: 110 - 240 V AC, 50 - 60 Hz Leistungsaufnahme: 60 W Betriebstemperatur: 0°C - 50°C Relative Luftfeuchtigkeit: 10% - 70%, nicht kondensierend Gewicht: 2,58 kg Abmessungen (B x H x T) 481 x 44 x 232 mm Weitere Eigenschaften: Netzkabel und Klemmblöcke inklusive, kostenlose Software AUTOMIX8 LDAM8 Software AUTOMIX8 Kompatibilität:...
- Seite 55 Connecteurs des Sorties Ligne Phoenix (symétrique) Analogiques : Impédance de Sortie : 100 ohms Niveau maximal de sortie Ligne : +20 dBu Nombre de Sorties numériques: 1 (AES/EBU) Connecteurs de Sortie numérique : Phoenix Ports : RS-232, RS485 Connecteurs ports : Sub-D 9 points, RJ45 Autres Connecteurs : LINK IN / LINK OUT (Mini-DIN 4-points), EXTERNAL CONTROL (Sub-D 25 points)
- Seite 56 Indicadores: 8 indicadores LED multifuncionales (CH1 - CH8), 1 indicador LED multifuncional Master, 1 indi- cador LED multifuncional Threshold, 2 vúmetros LED de 6 segmentos de nivel Master 1 + 2, LED Power Entradas de línea/micro: 8 (línea/micro seleccionable) Conectores de la entrada de línea/ Bloque de terminales balanceado micro: Sensibilidad de la entrada micro:...
- Seite 57 Oznaczenie modelu: LDAM8 Rodzaj produktu: automatyczny mikser Typ: cyfrowy Wersja: 8 wejść, 2 wyjścia Konwerter AD/DA: 24 bity Częstotliwość próbkowania: 96 kHz DSP: EQ, Gain control (sterowanie wzmocnieniem), 8 × 2 Matrix, Dynamic control (sterowanie dynami- ką) (Compressor/Limiter), Automix Charakterystyka częstotliwościowa: 20–30 000 Hz Stosunek sygnału do szumu (SNR): 85 dB Poziom szumów:...
- Seite 58 Oprogramowanie LDAM8 AUTOMIX8 Kompatybilność: Windows Vista, 7, 8 Wymagane interfejsy: RS485/Ethernet Parametry wejść: EQ (korektor dźwięku kanałów 1–8), LINE/MIC (współdzielone wejście liniowe/mikrofonowe), PRIORITY (priorytet), PHANTOM (zasilanie phantom), MUTE (wyciszenie), GAIN (wzmocnienie) Funkcja HPF wejść (filtr górnoprze- 35–150 Hz pustowy dla sygnału wejściowego): Funkcje EQ wejść...
- Seite 59 Connettori di uscita di linea digitale: Blocco morsetti Interfaccia: RS-232, RS-485 Collegamento porta: D-Sub 9 pin, RJ45 Altri collegamenti: LINK IN / LINK OUT (mini DIN a 4 poli), EXTERNAL CONTROL (D-sub 25 pin) Numero massimo di unità per il collegamento a cascata: Collegamento alla rete: Presa di rete IEC Tensione di esercizio:...
- Seite 60 MANUFACTURER´S DECLARATIONS / HERSTELLERERKLÄRUNGEN / DECLARATIONS / DECLARACIÓN DEL FABRICANTE / DEKLARACJE PRODUCENTA / DICHIARAZIONI DEL PRODUTTORE MANUFACTURER‘S WARRANTY & LIMITATIONS OF LIABILITY You can find our current warranty conditions and limitations of liability at: http://www.adamhall.com/media/shop/downloads/documents/manufactur- ersdeclarations.pdf. To request warranty service for a product, please contact Adam Hall GmbH, Daimler Straße 9, 61267 Neu Anspach / Email: Info@adamhall.com / +49 (0)6081 / 9419-0.
- Seite 61 GWARANCJA PRODUCENTA I OGRANICZENIE ODPOWIEDZIALNOŚCI Nasze aktualne warunki gwarancji i informacje dotyczące ograniczenia odpowiedzialności znajdą Państwo na stronie: http://www.adamhall.com/ media/shop/downloads/documents/manufacturersdeclarations.pdf. W razie konieczności skorzystania z serwisu proszę skontaktować się z firmą Adam Hall GmbH, Daimlerstraße 9, 61267 Neu Anspach / e-mail Info@adamhall.com / +49 (0)6081 / 9419-0. PRAWIDŁOWA UTYLIZACJA NINIEJSZEGO PRODUKTU (Obowiązuje w Unii Europejskiej i innych krajach europejskich stosujących system sortowania odpadów) Niniejszy symbol na produkcie lub związanych z nim dokumentach wskazuje, iż...
- Seite 64 WWW.LD-SYSTEMS.COM Adam Hall GmbH | Daimlerstrasse 9 | 61267 Neu-Anspach | Germany Tel. +49(0)6081/9419-0 | Fax +49(0)6081/9419-1000 web : www.adamhall.com | e-mail : mail@adamhall.com REV: 01...