WimTec Santec Proof P6 Montage- Und Bedienungsanleitung
Dusche-paneel mit thermischer desinfektion
Vorschau ausblenden
Andere Handbücher für Santec Proof P6:
- Montage- und bedienungsanleitung (37 Seiten) ,
- Montage- und bedienungsanleitung (36 Seiten) ,
- Montage- und bedienungsanleitung (24 Seiten)

Verwandte Anleitungen für WimTec Santec Proof P6


Inhaltszusammenfassung für WimTec Santec Proof P6
- Seite 1 PROOF P6 mit thermischer Desinfektion Montage- und Bedienungsanleitung Assembly and operating instructions...
-
Seite 2: Allgemeine Hinweise
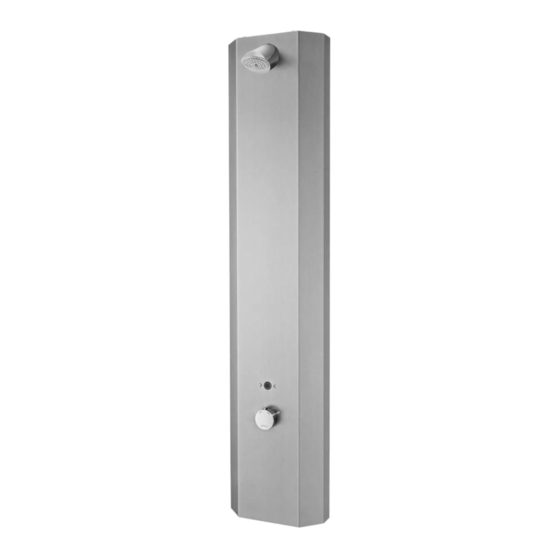
PROOF P6 mit thermischer Desinfektion Allgemeine Hinweise Gratulation zum Kauf Ihres Dusche-Paneels SanTec PROOF P6 mit thermischer Desinfektion. Damit Sie jahrelang Freude mit dieser hochwertigen Armatur haben, empfehlen wir Ihnen folgende Punkte bei der Reinigung und Pflege zu beachten: milde, seifenhaltige Reinigungsmittel verwenden keine kratzenden, scheuernden oder säurehaltigen... -
Seite 3: Technische Daten
70 °C (max. 80 °C für max. 10 min) Durchflussmenge: ca. 9 l/min bei 0,3 MPa (3 bar) Wasserzulauf: R 1/2“ IG Material: Paneel: Aluminium eloxiert, Brausekopf und Thermostatgriff: Messing verchromt Temperatureinstellung: Thermostat mit Heißwassersperre (nicht frostbeständig) Geräuschklasse: SanTec PROOF P6 mit thermischer Desinfektion Dusche-Paneel... - Seite 4 Intervall-Regler Dip-Schalter zum Einstellen Thermostatgriff zur Temperatur- der Funktionen regelung mit Taste zum Entriegeln der 38 °C Sicherheitssperre. Generell gilt für alle Regler: Gegen den Uhrzeiger- sinn zum Reduzieren. Im Uhrzeigersinn zum Erhöhen. SanTec PROOF P6 mit thermischer Desinfektion Dusche-Paneel...
-
Seite 5: Einstellung Der Programme & Funktionen
IR-Sensors von 10 - 60 cm. Maximallaufzeit schaltet die selbstständig eine Spülung für Duschearmatur automatisch 10 s aus, um das Stagnations- ab, um bei einer unbeab- wasser auszuspülen. sichtigten Daueraktivierung Wasser zu sparen. SanTec PROOF P6 mit thermischer Desinfektion Dusche-Paneel... - Seite 6 Eine Nachrüstung ist auf bestehenden Anschlüssen im Standardmaß 150 mm möglich. * E-Anschluss 12 V= vorsehen. Netzteil 230 V / 12 V nicht in Duschepaneel oder Schutz- bereichen anbringen. ½" * E-Anschluss 12 V= SanTec PROOF P6 mit thermischer Desinfektion Dusche-Paneel...
-
Seite 7: Verdrahtungsschema
PROOF P6 mit thermischer Desinfektion Verdrahtungsschema SanTec PROOF P6 – 12 V mit TD Steuerleitung für thermische Desinfektion 2 x 0,5 mm max. 100 m Gesamt-Kabellänge Schlüsselschalter (ohne Zylinder) Art.Nr. 110 418 12 V= 12 V= 12 V= 12 V=... -
Seite 8: Montage
3. Montagebügel mit Befestigungsschraube und Beilag- scheiben befestigen. 4. Stockschraube für Befestigung eindrehen. 5. Korbfilter in 90° Anschlusswinkel einsetzen und Absperrung aufdichten. 6. Anschlusswinkel mit Absperrung aufdichten und in Zuleitungen einschrauben – Vorabsperrung dabei schräg nach innen ausrichten. SanTec PROOF P6 mit thermischer Desinfektion Dusche-Paneel... - Seite 9 Gewünschte Funktionseinstellungen am Elektronikmodul Seite 7 und Polarität vornehmen (siehe S. 5). (grün = + / gelb = -) beachten! Dusche-Paneel in die vordere Bügellasche einhängen. Flexschläuche mit beigelegter Dichtung an Wasserzuleitung anschließen. SanTec PROOF P6 mit thermischer Desinfektion Dusche-Paneel...
- Seite 10 (Riegel stehen parallel zur Flussrichtung). Dusche-Paneel in die hintere Bügellasche einhängen. ACHTUNG! Keine Kabel oder Schläuche quetschen oder knicken. Duschepaneel von unten mit Beilagscheibe und Flügelmutter an der Stockschraube sichern. Hauptwasserleitung öffnen. Funktionstest durchführen. SanTec PROOF P6 mit thermischer Desinfektion Dusche-Paneel...
-
Seite 11: Programmbeschreibung
Durch erneutes Antippen der Dusche stoppt nach Ablauf ON/OFF Taste schaltet die der Nachlaufzeit, wenn der Dusche ab. Benutzer den Ansprechbereich verlässt oder nach Ablauf der Sicherheitsspülstopp-Zeit. SanTec PROOF P6 mit thermischer Desinfektion Dusche-Paneel 60 cm 60 cm 60 cm 60 cm... - Seite 12 Antippen der ON/OFF Taste Dusche stoppt nach Ablauf schaltet die Dusche ab. der Nachlaufzeit, wenn der Benutzer den Ansprechbereich verlässt oder nach Ablauf der Durch erneutes Tippen kann die Dusche wieder aktiviert Sicherheitsspülstopp-Zeit. werden. SanTec PROOF P6 mit thermischer Desinfektion Dusche-Paneel...
- Seite 13 AUSSCHALTEN: Taster Sicherheitsspülstopp Durch erneutes Antippen der Nach Ablauf der eingestellten ON/OFF Taste kann die Dusche Spülstopp-Zeit (siehe S. 5) immer wieder aus- und einge- schaltet die Dusche auto- schaltet werden. matisch ab. SanTec PROOF P6 mit thermischer Desinfektion Dusche-Paneel...
-
Seite 14: Funktionsbeschreibung
Tritt während dieser 30 s der Benutzer für mindestens 5 s in den Ansprechbereich geht die Dusche wieder in den Normal- betrieb über. 60 cm SanTec PROOF P6 mit thermischer Desinfektion Dusche-Paneel 60 cm 60 cm 60 cm 60 cm... - Seite 15 Dip Schalter 5 OFF = Verbrühschutz-Funktion deaktiviert. Manuell: 3 4 5 6 Raumüberwachung Sicherheitsstopp Während der thermischen Der Wasserfluss stoppt sofort, Desinfektion überwacht die wenn sich ein Benutzer dem Infrarot-Optik den Ansprech- Paneel annähert. bereich. SanTec PROOF P6 mit thermischer Desinfektion Dusche-Paneel...
- Seite 16 2 min nach die Armatur eine automatische dessen Deaktivierung aus. Stagnationsfreispülung für 10 s aus. 60 cm 3 - 48 h 10 s 60 cm 60 cm 60 cm 60 cm SanTec PROOF P6 mit thermischer Desinfektion Dusche-Paneel...
- Seite 17 3 s wieder in den Normalbetrieb über. 60 cm Im Vollautomatikmodus muss die Hand innerhalb einer Sekunde ab dem He- rantreten an den Infrarot- Sensor herangeführt werden, andernfalls löst die Armatur aus. SanTec PROOF P6 mit thermischer Desinfektion Dusche-Paneel...
- Seite 18 Duschkopf SanTec PROOF 120 349 Elektronikmodul TD 231 205 Magnetventil 231 312 Magnetventil-Adapter 230 741 6 V Lithium Batterie 230 987 Batteriemodul 6 V 117 899 Netzteil (1-fach) 113 792 Netzteil (5-fach) 107 159 Thermostat SanTec PROOF P6 mit thermischer Desinfektion Dusche-Paneel...
- Seite 36 WIMTEC Elektronische Steuerungs- u. Meßgeräte GmbH p: A - 3325 Ferschnitz, Freidegg 50, AUSTRIA t: +43 (0) 7473 5000 f: +43 (0) 7473 5000 - 500 m: verkauf@wimtec.com i: www.wimtec.com...