HomeMatic HMIP-WRC2 Montage- Und Bedienungsanleitung
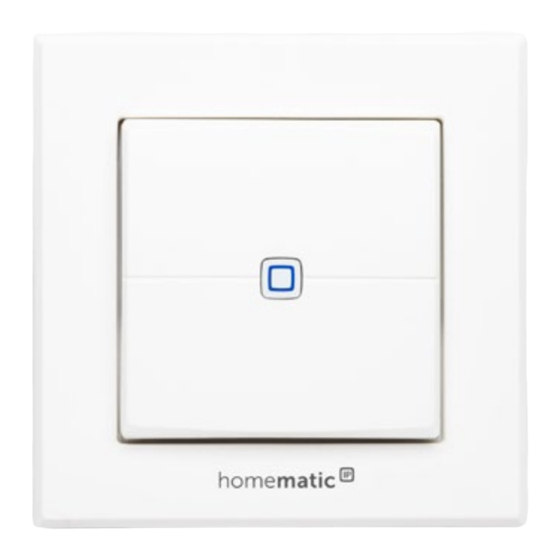
Wandtaster - 2-fach

Verwandte Anleitungen für HomeMatic HMIP-WRC2


Inhaltszusammenfassung für HomeMatic HMIP-WRC2
- Seite 1 Montage- und Bedienungsanleitung Mounting instruction and operating manual Wandtaster - 2-fach S. 2 Wall-mount Remote Control - p. 27 2-button HMIP-WRC2...
-
Seite 2: Lieferumfang
Lieferumfang Anzahl Bezeichnung Homematic IP Wandtaster - 2-fach Wechselrahmen Montageplatte Doppelseitige Klebestreifen Schrauben 3,0 x 30 mm Dübel 5 mm 1,5 V LR03/Micro/AAA Batterien Bedienungsanleitung 1. Ausgabe Deutsch 03/2015 Dokumentation © 2015 eQ-3 AG, Deutschland Alle Rechte vorbehalten. Ohne schriftliche Zustimmung des... -
Seite 4: Inhaltsverzeichnis
Inhaltsverzeichnis Hinweise zur Anleitung ...........8 Gefahrenhinweise ............8 Funktion und Geräteübersicht ........10 Allgemeine Systeminformationen ......11 Inbetriebnahme .............. 11 Anlernen ................11 Montage.................13 5.2.1 Klebestreifenmontage..........13 5.2.2 Schraubmontage ............14 5.2.3 Montage in Mehrfachkombinationen ....16 Ecobetrieb ................17 Batterien wechseln ............18 Fehlerbehebung .............19 Schwache Batterie ...............19 Befehl nicht bestätigt ............ -
Seite 5: Hinweise Zur Anleitung
Feuchtigkeit, Vibrationen, ständiger Lesen Sie diese Anleitung sorgfältig, bevor Sie Ihre Sonnen- oder anderer Wärmeeinstrahlung, Kälte Homematic IP Geräte in Betrieb nehmen. Bewahren Sie und keinen mechanischen Belastungen aus. die Anleitung zum späteren Nachschlagen auf! Wenn Sie das Gerät anderen Personen zur Nutzung über- Das Gerät ist kein Spielzeug! Erlauben Sie Kindern... -
Seite 6: Funktion Und Geräteübersicht
In der Raumklima-Lösung kann der Homematic IP Wand- Dieses Gerät ist Teil der Raumklima-Lösung von Home- taster - 2-fach komfortabel an den Homematic IP Access matic IP und kommuniziert über das HmIP Funkprotokoll. Point angelernt werden, um das gesamte System per Alle Geräte der Raumklima-Lösung können komfortabel... -
Seite 7: Montage
Inbetriebnahme Inbetriebnahme Zum Anlernen des Wandtasters gehen Sie wie folgt vor: • Leuchtet die LED rot, versuchen Sie es erneut. • Öffnen Sie die Homematic IP App auf Ihrem • Wählen Sie die gewünschte Lösung für Ihr Gerät Smartphone. aus. -
Seite 8: Schraubmontage
Inbetriebnahme Inbetriebnahme • Wählen Sie einen beliebigen Montageort aus. dass der Pfeil auf der Vorderseite der Montage- platte nach oben zeigt. Achten Sie darauf, dass der Montageuntergrund • Zeichnen Sie zwei der Bohrlöcher (I) anhand der glatt, eben, unbeschädigt, sauber, fett- sowie lö- Montageplatte (diagonal gegenüberliegend) mit sungsmittelfrei und nicht zu kühl ist, damit der einem Stift an der Wand an (s. -
Seite 9: Montage In Mehrfachkombinationen
Montageplatten/Tragringen angebracht und gehen Sie wie folgt vor: daran ausgerichtet wird. • Öffnen Sie die Homematic IP App auf Ihrem Smart- phone. Der Wandtaster passt in die Rahmen folgender Hersteller: • Tippen Sie auf das Menü-Symbol oben links im Bildschirm und wählen den Menüpunkt „Ecobe-... -
Seite 10: Batterien Wechseln
Bricht beim Senden die Spannung wieder zusammen, Pfeile auf der Rückseite des Tasters nach oben wird dies in der Homematic IP App und am Gerät ange- zeigen und die Klammern der Montageplatte in zeigt (s. „7.4 Fehlercodes und Blinkfolgen“ auf Seite 21). -
Seite 11: Befehl Nicht Bestätigt
Erreichen des 1 %-Limits nicht mehr senden, fehl nicht bestätigt“ bis diese zeitliche Begrenzung vorüber ist. Gemäß dieser auf Seite 20). Richtlinie, werden Homematic IP Geräte zu 100 % nor- menkonform entwickelt und produziert. Kurzes oranges Batterien leer... -
Seite 12: Wiederherstellung Der Werkseinstellungen
Fehlerbehebung Wiederherstellung der Werkseinstellungen Wiederherstellung der Werksein- Kurzes oranges Anlernmodus Geben Sie die stellungen Blinken (alle aktiv letzten vier Ziffern Die Werksteinstellungen des Gerätes können 10 s) der Geräte- wiederhergestellt werden. Dabei gehen alle Ein- Seriennummer zur Bestätigung ein (s. stellungen verloren. -
Seite 13: Wartung Und Reinigung
Tuch. Für die Entfernung von stärkeren Verschmutzungen kann das Tuch leicht mit lauwarmem Wasser angefeuchtet werden. Verwenden Geräte-Kurzbezeichnung: HMIP-WRC2 Sie keine lösemittelhaltigen Reinigungsmittel, das Kunst- Versorgungsspannung: 2x 1,5 V LR03/Micro/AAA stoffgehäuse und die Beschriftung können dadurch an- Stromaufnahme: 50 mA max. -
Seite 25: Maiburger Straße
Kostenloser Download der Homematic IP App! Free download of the Homematic IP app! Bevollmächtigter des Herstellers: Manufacturer’s authorised representative: eQ-3 AG Maiburger Straße 29 26789 Leer / GERMANY www.eQ-3.de...