Inhaltsverzeichnis
Werbung
Verfügbare Sprachen
Verfügbare Sprachen
Quicklinks
Werbung
Inhaltsverzeichnis

Verwandte Anleitungen für Beko HNT62610BH


Inhaltszusammenfassung für Beko HNT62610BH
- Seite 1 Cooker Hood User Manual HNT62610BH EN - RO - DE 01M-9205893200-1622-01...
- Seite 2 CONTENTS ENGLISH 03-15 ROMÂNĂ 16-32 DEUTSCH 33-47 2 / EN Cooker Hood / User Manual...
-
Seite 3: Please Read This User Manual First
Please read this user manual first! Dear Valued Customer, Thank you for preferring this Beko appliance. We hope that you get the best results from your appliance which has been manufactured with high quality and state-of- the-art technology. For this reason, please read this entire user manual and all other accompanying documents carefully before using the appliance and keep it as a reference for future use. -
Seite 4: Important Safety And Environmental Instructions
The manufacturer cannot be held • to follow these instructions shall liable for damages resulting from void any warranty. improper installation or misuse of Beko products comply with the • the product. applicable safety standards; the- This appliance can be used by •... - Seite 5 Important safety and environmental instructions The minimum distance between Do not touch the lamps if they • • the supporting surface for the have operated for a long time. cooking vessels on the hob and They can burn your hands since the lowest part of your product they will be hot.
- Seite 6 Important safety and environmental instructions Product shall be cleaned ac- city operate simultaneously. • cordance with user manual. If In the environment where the • cleaning was not carried out in appliance is being used, the ex- accordance with user manual, haust of devices running on fuel there may be fire risk.
-
Seite 7: Compliance With The Weee Directive And Disposing Of The Waste Product
Important safety and environmental instructions Objects placed on the product 1.3 Compliance with RoHS • Directive may fall. Do not place any ob- jects on the product. The product you have purchased complies with EU RoHS Directive (2011/65/EU). It does not contain Do not flambe under the your •... -
Seite 8: Technical Data
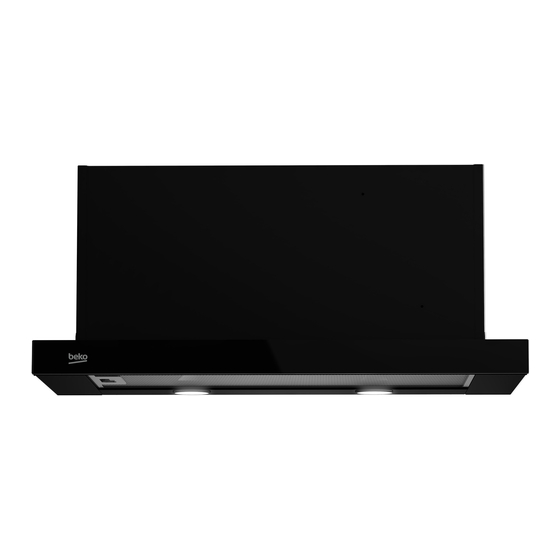
2.1 Overview 1. Slinder panel 2. Control panel 3. Grease filter 4. Lighting 2.2 Technical data Model HNT62610BH Supply Voltage and Frequency 220-240V ~ 50 Hz Lamp Power 2 x 3 W Motor Power 210 W Flow rate – 3. Level 648 m³/h... -
Seite 9: Using The Appliance
Using the appliance 3.1 Controlling the appliance • You may illuminate the cooking area by pressing the lamp (A). 3.4 Replacement of lamp CAUTION: Disconnect the electrical supply of the hood. Leave the lamps to cool down first because they co- uld burn your hands when they are hot. - Seite 10 Using the appliance 3.5 Operation with chimney connection • Vapour is extracted through the flue duct, which is fastened to the connection head on the hood. • The diameter of the flue duct must be the same as the connection ring. In horizontal settings, the pipe has to have a slight upward slope (around 10º) so that the air can exit the room easily.
-
Seite 11: Cleaning And Maintenance
Cleaning and Maintenance 4.2 Replacement of carbon filters Before cleaning and maintenance, unplug the product or turn off the Odour removing filters contain charcoal (Active car- switch. bon). Grease filter must be installed in the product, regardless of whether or not carbon filters are used. 4.1 Cleaning of grease filter Grease filter is used to retain the oil particles in the air. -
Seite 12: Installation Accessories
Installation of appliance 5.2 Installation accessories WARNING: Before starting the ins- tallation, read the safety information on user manual. WARNING: Failure to install with screws and stabilizers in accordance with these instructions may result in electric shock. For the installation of the hood, please contact the nearest Authorized Service. - Seite 13 Installation of appliance (Figure 2) By using the 4 x 40 screws provided with the hood, install the appliance to the cabinet from the points A, B, C and D. When the slider set moves, the front (Figure 1) panel shall not rub on the cabinet door (Figure 2) 1.
-
Seite 14: Handling And Transportation
Installation of appliance the adapter, the covers that prevent air return shall remain closed and air won't be sucked in. The length of the pipe connection as well as the num- ber of elbows must be as minimum as possible. Not Suitable Suitable Not OK... - Seite 15 Troubleshooting Troubleshooting Root cause Help Appliance is not working. Check your fuses. Fuse may be blown, inspect and restore it. Appliance is not working. Check the electrical connection. Mains voltage shall be between 220 and 240 V. Appliance is not working. Check the electrical connection. Check if other appliance in your kitchen operate.
- Seite 16 Vă rugăm să citiți mai întâi acest manual de utilizare! Stimate client, Vă mulțumim pentru că ați ales acest produs Beko. Sperăm să obțineți cele mai bune rezultate de la aparatul dumneavoastră, care a fost fabricat la o calitate înaltă și cu tehnologie performantă.
-
Seite 17: Siguranță Generală
• punderea pentru daunele provo- ranțiilor acordate. cate de instalarea incorectă sau Produsele de la Beko sunt con- • utilizarea greșită a produsului. forme standardelor de siguranță Acest aparat poate fi utilizat de aplicabile; din acest motiv, în caz •... - Seite 18 Instrucțiuni importante cu privire la siguranță și mediu Distanța minimă dintre suprafe- Amplasați aparatul astfel încât • • țele de susținere pentru vasele ștecherul să fie întotdeauna ac- de gătit de pe plită și partea cea cesibil. mai joasă a hotei trebuie să fie Nu atingeți lămpile dacă...
- Seite 19 Instrucțiuni importante cu privire la siguranță și mediu Produsul trebuie curățat conform funcționează simultan. • manualului de utilizare. În cazul În mediul în care este folosit pro- • în care curățarea nu a fost efec- dusul, evacuarea dispozitivelor tuată conform manualului de uti- care funcționează...
- Seite 20 Instrucțiuni importante cu privire la siguranță și mediu aparatelor care doar evacuează Eliminarea corespunzătoare a electrocasnicelor uzate ajută la prevenirea posibilelor consecințe aerul înapoi în cameră). negative pentru mediu și sănătatea umană. Obiectele plasate pe produs pot • 1.3 Conformitatea cu Directiva să...
-
Seite 21: Prezentare Generală
2.1 Prezentare generală 1. Panou frontal 2. Comutator 3. Filtru de grăsime din aluminiu 4. Lumină LED 2.2 Date tehnice Model HNT62610BH Tensiune alimentare 220-240V ~ 50 Hz Alimentare lampă 2 x 3 W Putere motor 210 W Debit – 3. Nivel 648 m³/h... -
Seite 22: Instrucțiuni De Utilizare
Funcționarea aparatului 3.1 Controlul aparatului • Puteți porni aparatul apăsând butonul de setare a vitezei dorit. (B,C) • Puteți ilumina zona de gătit apăsând lampa. (A) 3.4 Înlocuirea becului ATENȚIE: Deconectați alimenta- rea cu energie electrică a hotei. Așteptați să se răcească becurile CHEIE FUNCȚIE deoarece sunt fierbinți și vă... - Seite 23 Funcționarea aparatului 3.5 Funcționare cu racordare la tubul de evacuare • Vaporii sunt extrași prin con- ducta de evacuare, care este fixată pe capul de conectare de pe hotă. • Diametrul conductei de evacuare trebuie să fie același cu cel al inelului de conectare. În setări orizontale, țeava trebuie să...
-
Seite 24: Curățarea Și Întreținerea
Curățarea și întreținerea 4.2 Înlocuirea filtrelor de carbon Înainte de curățare și întreținere, deconectați produsul sau opriți în- Filtrele de îndepărtare a mirosului conțin cărbune trerupătorul. (carbon activ). Indiferent dacă este utilizat sau nu un filtru de carbon, trebuie instalate filtre de grăsi- 4.1 Curățarea filtrului de grăsime me din aluminiu. -
Seite 25: Instalarea Aparatului
Instalarea aparatului 5.2 Accesorii de instalare AVERTISMENT!: Înainte de a în- cepe instalarea, citiți informațiile de siguranță din Manualul utilizatorului. AVERTISMENT!: Instalarea cu șu- ruburi și stabilizatori în neconfor- mitate cu aceste instrucțiuni poate duce la electrocutare. Pentru instalarea hotei, vă rugăm să contactați cel mai apropiat service autorizat. - Seite 26 Instalarea aparatului (Figura 2) Utilizând șuruburile de 4 x 40 furnizate împreună cu hota, montați aparatul la dulap din punctele A, B, C și D. Dacă setul de culise se mișcă, panoul (Figura 1) frontal nu se freacă de ușa dulapului (Figura 2) 1.
-
Seite 27: Manevrarea Și Transportul
Instalarea aparatului • Nu plasați obiecte grele pe aparat sau pe amba- ză la putere maximă. Asigurați-vă că clapetele din laj. Aparatul poate fi deteriorat. interiorul tubului funcționează atunci când sunt strânse cu clemă. Conectați conducta de conec- • Căderea aparatului îl poate face nefuncțional sau poate provoca daune permanente. - Seite 28 Depanarea Problemă Cauză Soluție Produsul nu funcționează. Verificați siguranța dvs. Dacă siguranța dvs. este închisă, de- schideți-o. Produsul nu funcționează. Verificați conexiunea electrică. Tensiunea rețelei trebuie să fie între 220 și 240 V. Produsul nu funcționează. Verificați conexiunea electrică. Verificați dacă și celelalte aparate din bucătărie funcționează.
- Seite 29 - să păstra i cu grijă acest certi cat pentru a-l putea prezenta (împreună cu documentul scal de achiziţie), personalului SERVICE ARCTIC, la orice sesizare efectuată în perioada de garan ie. Vă mul umim că a i optat pentru cumpărarea unui produs Beko! Garanţia legală de conformitate Durata medie de utilizare a produsului este de 10 ani! Perioada de garan ie legală...
- Seite 30 Remedii incluse în garanţia legală de conformitate conform OUG nr. 140/2021 (vă rugăm să aveţi în vedere prevederile de mai jos) ARCTIC garantează toate drepturile legale prevăzute de OUG nr. 140/2021 în bene ciul consumatorilor cu privire la garanţia legală de conformitate. Dispoziţiile prezentului certi cat de garanţie legală...
- Seite 31 Service-ul acestui produs este asigurat de ARCTIC S.A. cu sediul în Găeşti, Dâmbovi a, str. 13 Decembrie nr. 210. • *9010 • www.arctic.ro • www.beko.ro • e-mail: service@arctic.ro Program Call Center: Luni - Vineri 08:30 - 20:00; Sâmbătă 08:30 - 17:00...
-
Seite 33: Bedeutung Der Symbole
Bitte lesen Sie zunächst diese Anleitung! Sehr geehrte Kundin, sehr geehrter Kunde, Vielen Dank, dass Sie sich für dieses Gerät der Marke Beko entschieden haben. Wir sind überzeugt, dass Sie mit diesem Gerät, das mit den höchsten Qualitätsanforderungen und modernster Technologie hergestellt wurde, beste Ergebnisse erzielen werden. -
Seite 34: Allgemeine Sicherheit
Bei Nichtbeachtung die- vorgesehenen Zweck verwendet ser Anweisungen erlischt die werden. Gewährleistung. Der Hersteller haftet nicht für • Beko-Produkte stimmen mit Schäden, die auf unsachgemäße • geltenden Sicherheitsstandards Installation oder fehlerhaften Ge- überein; daher sollten Gerät oder brauch zurückzuführen sind. -
Seite 35: Wichtige Sicherheits- Und Umweltanweisungen
Wichtige Sicherheits- und Umweltanweisungen WARNUNG: Schließen Sie das Kinder dürfen nicht mit dem • Gerät spielen. Reinigungs- und Gerät erst nach vollständig ab- Wartungsarbeiten dürfen nicht geschlossener Installation an das unbeaufsichtigt von Kindern Stromnetz an. ausgeführt werden. Stellen Sie das Gerät so auf, •... - Seite 36 Wichtige Sicherheits- und Umweltanweisungen Achten Sie auf Vorhänge und Ersticken Sie ein Feuer mit einer • • Abdeckungen, da Öl beim Zu- geeigneten Decke oder ähnlich, bereiten von Lebensmitteln, wie verwenden Sie zum Löschen Pommes frites, Feuer fangen niemals Wasser. kann.
-
Seite 37: Achtung: Zugängliche Teile Können Bei Verwendung Mit
Wichtige Sicherheits- und Umweltanweisungen Verschluckungsgefahr! Hal- Achten Sie darauf, dass niemals • • ten Sie alle Verpackungsmateri- hohe offene Flammen unter der alien von Kindern fern. Dunstabzugshaube entstehen, wenn diese in Betrieb ist. ACHTUNG: Zugängliche Teile können bei Verwendung mit Fritteusen müssen während der •... -
Seite 38: Einhaltung Von Rohs-Vorgaben
Wichtige Sicherheits- und Umweltanweisungen Die ordnungsgemäße Entsorgung gebrauchter Ort der Abgabe ist auch der private Haushalt, Geräte trägt dazu bei, mögliche negative Folgen wenn das neue Elektro- oder Elektronikgerät dor- für die Umwelt und die menschliche Gesundheit thin geliefert wird; in diesem Fall ist die Abholung zu vermeiden. -
Seite 39: Übersicht
Aufbau 2.1 Übersicht 1. Frontblende 2. Schalter 3. Filter 4. Beleuchtung 2.2 Technische Daten Modell HNT62610BH Versorgungsspannung 220-240V ~ 50 Hz Lampenleistung 2 x 3 W Motorleistung 210 W Fließrate – 3. Stufe 648 m³/h Motor-Isolationsklasse Klasse F Isolationsklasse Klasse I... -
Seite 40: Bedienung Des Gerätes
Bedienung des gerätes 3.3 Bedienungsanleitung 3.1 Nutzung des Kippschalters • Ihr Gerät enthält einen Motor, der verschiedene Geschwindigkeiten hat. • Für eine bessere Leistung empfehlen wir niedrige Geschwindigkeiten unter normalen Bedingungen und hohe Geschwindigkeiten bei starken Gerüchen und intensiven Dämpfen. •... - Seite 41 Bedienung des gerätes • Im rauchgaslosen Betrieb sind die Klappen im Glühbirne Inneren des Rauchgasadapters zu entfernen. • Entfernen Sie den Fettfilter. Zum Einbau des Kohlefilters den Filter auf die Laschen aufsetzen, indem Sie ihn auf dem Kunststoffteil auf beiden Leistung der Lampe Seiten des Gebläsegehäuses zentrieren.
-
Seite 42: Reinigen Und Pflegen
Reinigen und pflegen 4.2 Austausch des Kohlefilters Ziehen Sie vor der Reinigung und Wartung den Netzstecker oder Geruchsbeseitigende Filter enthalten Holzkohle schalten Sie den Schalter aus. (Aktivkohle). Aluminium-Fettfilter müssen in das Produkt eingebaut werden, unabhängig davon, ob 4.1 Reinigung des Fettfilters Kohlenstofffilter verwendet werden. -
Seite 43: Installation Des Geräts
Installation des Geräts 5.2 Installations-Zubehör WARNUNG: Lesen Sie vor Beginn der Installation die Sicherheitshinweise im Benutzerhandbuch. WARNUNG: Wenn Sie nicht mit Schrauben und Stabilisatoren gemäß diesen Anweisungen installieren, kann dies zu einem elektrischen Schlag führen. Um die Dunstabzugshaube zu installieren, wenden Hood User manual Sie sich bitte an den nächstgelegenen autorisierten... -
Seite 44: Verbindung Zum Abluftkanal
Installation des Geräts Nehmen Sie das Gerät aus seiner Verpackung. Installieren Sie die im Zubehör enthaltenen Kunststoff-Kaminklappen wie unten gezeigt am Luftauslasskamin des Geräts. Abb. 2 Befestigen Sie das Gerät mit den mitgelieferten Schrauben (4 x 40) an den Löchern A, B, C, D am Schrank. -
Seite 45: Handhabung Und Transport
Installation des Geräts 5.6 Handhabung und Transport mit voller Leistung läuft. Stellen Sie sicher, dass die Klappen im Inneren des Kamins funktionieren, • Tragen Sie das Gerät während der Handhabung wenn sie mit der Klemme festgezogen werden. und des Transports in der Originalverpackung. Schließen Sie den Abluftkanal außerhalb des Die Verpackung des Geräts schützt es vor phy- Adapters an. - Seite 46 Fehlerbehebung Fehlerbehebung Grund Hilfe Das Produkt funktioniert nicht. Überprüfen Sie Ihre Sicherung Ihre Sicherung könnte geschlossen sein, sorgen Sie dafür, dass sie funk- tioniert. Das Produkt funktioniert nicht. Überprüfen elektrische Die Netzspannung sollte zwischen Verbindung. 220-240V liegen. Das Produkt funktioniert nicht. Überprüfen elektrische Überprüfen Sie, ob die anderen Verbindung.
-
Seite 47: Garantiebedingungen
E-Mail: ersatzteile@beko.com Sehr geehrte Kundin, sehr geehrter Kunde, wir gratulieren Ihnen zum neuen Gerät der Marke Beko und wünschen Ihnen viel Freude daran. Sollten Sie dennoch einmal einen Grund zu einer Reklamation erkennen, dann wenden Sie sich bitte an unseren Kundendienst. - Seite 48 Arçelik A.Ş. Karaağaç Caddesi No: 2-6, 34445, Sütlüce, İstanbul, Türkiye www.beko.com...