Herunterladen Diese Seite drucken

Werbung

Verfügbare Sprachen

Verfügbare Sprachen

Strahlungsarmes schnurloses DECT−/GAP−Telefon
Téléphone DECT/GAP sans fil, à faible rayonnement
Telefono cordless DECT/GAP a basse radiazioni
Low−radiation cordless DECT/GAP telephone
DCT 587x Combo
Bedienungsanleitung
Mode d'emploi
Istruzioni per l'uso
Operating Instructions

Werbung

loading

Inhaltszusammenfassung für switel DCT 587x Combo

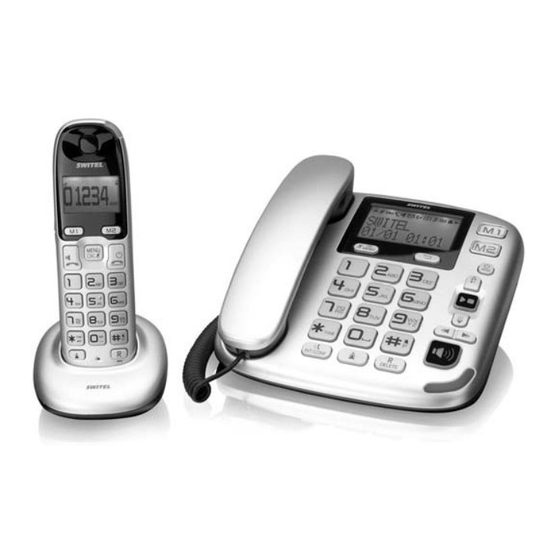
  • Seite 1 Strahlungsarmes schnurloses DECT−/GAP−Telefon Téléphone DECT/GAP sans fil, à faible rayonnement Telefono cordless DECT/GAP a basse radiazioni Low−radiation cordless DECT/GAP telephone DCT 587x Combo Bedienungsanleitung Mode d’emploi Istruzioni per l’uso Operating Instructions...
  • Seite 2 Bedienungsanleitung ... . . Mode d’emploi ....Istruzioni per l’uso ... . . Operating Instructions .
  • Seite 3 Inhaltsverzeichnis Sicherheitshinweise ....Inbetriebnahme ....Bedienelemente .
  • Seite 4 Sicherheitshinweise 1 Sicherheitshinweise Lesen Sie diese Bedienungsanleitung sorgfältig durch. Bestimmungsgemäße Verwendung Dieses Telefon mit Mobilteil ist geeignet zum Telefonieren innerhalb eines Telefonnetzes. Jede an- dere Verwendung gilt als nicht bestimmungsgemäß. Eigenmächtige Veränderungen oder Umbau- ten sind nicht zulässig. Öffnen Sie das Gerät in keinem Fall selbst und führen Sie keine eigenen Reparaturversuche durch.
  • Seite 5 Sicherheitshinweise Aufladbare Akkus Achtung: Werfen Sie Akkus nicht ins Feuer. Verwenden Sie nur Akkus des gleichen Typs! Achten Sie auf die richtige Polung! Bei verkehrter Polung der Akkus besteht beim Aufladen Explosionsgefahr. Achtung: Verwenden Sie nur die vorgeschriebenen Akkus. Verwenden Sie keine Bat- terien.
  • Seite 6 Verpackungsinhalt prüfen Zum Lieferumfang gehören: DCT 587X−Modell Inhalt DCT 5871 DCT 5872 DCT 5873 DCT 5874 Basisgerät Netzteil Hörer Hörerspiralkabel Telefonanschlusskabel Ladestation mit Netzteil Mobilteil Akkus (AAA 1.2 V NiMH) Bedienungsanleitung Unter www.switel.com erfahren Sie, ob dieses Telefon/Telefonset bereits erhältlich ist.
  • Seite 7 Inbetriebnahme Gerät in Betrieb nehmen Basisgerät anschließen Schließen Sie das Basisgerät wie auf der Skizze abgebildet an. Verwenden Sie aus Sicherheits- gründen nur das mitgelieferte Netzteil. Beachten Sie unbedingt die Ausführungen zum Aufstellungsort . Seite 4. Steckdose Telefonanschlussdose Telefonanschlusskabel Netzteil Basisgerät Hörer Hörerspiralkabel...
  • Seite 8 Inbetriebnahme Akkus in Mobilteil einsetzen Das Akkufach befindet sich auf der Rückseite Ihres Mobilteils. Öffnen Sie das Akkufach und setzen Sie 2 Akkus vom Typ AAA NiMH, 1.2 V 500 mAh ein. Achten Sie auf die richtige Polung! Schließen Sie das Akkufach. Akkus aufladen Stellen Sie das Mobilteil bei der ersten Inbetrieb- nahme für mindestens 8 Stunden in die Lade-...
  • Seite 9 Bedienelemente 3 Bedienelemente Die Tasten werden in dieser Bedienungsanleitung nachfolgend mit vereinheitlichten umrandeten Symbolen dargestellt. Leichte Abweichungen der Tastensymbole Ihres Telefons gegenüber den hier verwendeten Tastensymbolen sind daher möglich. Basisgerät Vorwärts−Taste h Hörer OK−/Menü−Taste N optische Rufanzeige (Anruf−LED) Display Mikrofon Zurück−Taste F Freisprech−Taste k Direktwahl−Tasten Q R...
  • Seite 10 Bedienelemente Mobilteil optische Rufanzeige (Anruf−LED) Hörmuschel LC−Display Direktwahl−Tasten q r Auflegen−/Ein−/Aus−Taste b Nummerische Tasten 1, 2... bis 0 Raute−Taste / Rufton aus / Wahlpause u R−Taste / Zurück d Mikrofon Wahlwiederholung c Stern−Taste t Menü−/OK−/Stumm−Taste m Gespräch−Taste / Freisprechen a Pfeil−Taste runter / Telefonbuch j Pfeil−Taste rauf / Anrufliste i...
  • Seite 11 Bedienelemente Symbole und Texte in den Displays Symbol Beschreibung Anzeige der Akkukapazität (voll, halbvoll, fast leer). ! " Leer: Die Akkus müssen geladen werden. Durchlaufende Segmente: Die Akkus werden geladen . Seite 8. Konstant angezeigte Segmente: Die Akkus sind voll geladen. Verbindung zur Basisstation.
  • Seite 12 Einführende Informationen 4 Einführende Informationen In diesem Kapitel finden Sie grundlegende Informationen zur Handhabung der Bedienungsanlei- tung. Darstellungsweisen in der Bedienungsanleitung Darstellung Beschreibung Darstellung von Tasten Abgebildete Taste kurz drücken Beliebige Taste kurz drücken 2 Sek. t Abgebildete Taste 2 Sekunden drücken ë...
  • Seite 13 Einführende Informationen Untermenü öffnen i / j Gewünschte Funktion auswählen Funktion öffnen i / j Gewünschte Einstellung auswählen ë Über Zifferntastenblock Ziffern oder Buchstaben eingeben Eingaben bestätigen Eine Ebene zurück im Menü Programmier− und Speichervorgänge abbrechen und in den Bereitschaftsmodus zurückkehren Viele Eingaben, die mit Taste M abgeschlossen werden, werden durch einen aktusti- schen Signalton bestätigt.
  • Seite 14 Menüstruktur 5 Menüstruktur 9 1 0 In das Hauptmenü gelangen Sie, wenn Sie die Taste n bzw. M drücken. Danach wählen Sie mit den Tasten i / j einen Eintrag aus und bestätigen Sie Ihre Auswahl mit der Taste n bzw.
  • Seite 15 Menüstruktur Nachr.länge Sekunden Sekunden Sekunden Sekunden Spracheinst. DEUTSCH FRANÇAIS NEDERLANDS ITALIANO Fernabf.−PIN Intercom Mobilteil 01 − 06 Anzeige gemäß der Anzahl von angemeldeten Mobilteilen...
  • Seite 16 Menüstruktur Telefonbuch Hinzufügen ë Name eing. ë Nummer ë Nummer VIP−Melodie / ... / Bearbeiten ë Name eing. ë Nummer ë Nummer VIP−Melodie / ... / Löschen Alle löschen Kopieren auf Direktwahl 1 Direktwahl 2 SPEICHER Die Zifferntasten sind mit Buchstaben beschriftet. Durch mehrmaliges Drücken der entspre- chenden Taste können Buchstaben, Ziffern und Sonderzeichen eingegeben werden.
  • Seite 17 Menüstruktur Zeit/Wecker Wecker st. Einmal ë Zeit eing. Täglich ë Zeit eing. Datumsformat TT.MM MM−TT Zeitformat 24 Stunden 12 Stunden ë Zeit einst. Über diesen Menüpunkt werden Datum und Zeit eingestellt.
  • Seite 18 Menüstruktur Nur an einem Mobilteil verfügbar: MT−Einstell. Rufton (MT) Ruftonlautst / ... / Rufton (ext) / ... / Rufton (int) / ... / Tastenton Ton ein Rufton Akku schwach Reichw.alarm Equalizer Natürlich Tiefen Höhen LCD−Kontrast / ... / ë MT−Name Auto.Annahme Babyruf ë...
  • Seite 19 Menüstruktur Nur an einem Mobilteil verfügbar: Basis−Einst. VMWI löschen Anmelden PIN? Basis Basis PIN? PIN? Basis PIN? Basis Basis wählen Basis Basis Basis Basis Automatisch Erw. Einst. Wahlverf. Flashzeit Kurz Mittel Lang ë Vorwahlnr. 01 ' / ... / Anrufsperre ë...
  • Seite 20 Menüstruktur Nur am Basisgerät verfügbar: Basis−Einst. Rufton Ruftonlautst / ... / Rufton (ext) / ... / Rufton (int) / ... / Tastenton Ton ein Rufton LCD−Kontrast / ... / VMWI löschen / ... / Sprache (9 Sprachen) Anmelden PIN? Basis PIN? Basis Basis...
  • Seite 21 Bedienung 6 Bedienung Viele Funktionen können sowohl vom Basisgerät als auch vom Mobilteil aus bedient werden. Be- achten Sie, dass viele der nachfolgend dargestellten Tasten sowohl am Basisgerät als auch am Mobilteil zu finden sind . Seite 9. Sie können während einer Bedienabfolge nicht zwischen der Bedienung am Basisgerät und der Bedienung am Mobilteil wechseln.
  • Seite 22 Bedienung Anrufen ë Rufnummer eingeben (max. 48 Ziffern) Bei Falscheingabe letzte Ziffer löschen a oder è oder k Rufnummer wählen Sie können auch zuerst am Mobilteil die Taste a drücken bzw. am Basisgerät den Hörer abnehmen oder die Taste k drücken und erhalten damit das Freizeichen. Die eingegebenen Ziffern Ihrer gewünschten Rufnummer (max.
  • Seite 23 Bedienung Interne Gespräche führen MT1: m oder BS: v, i / j , m oder v Intercom Internes Telefonieren einleiten MT1/BS: i / j, m oder v Gewünschtes Mobilteil bzw. Basisgerät auswählen MT2: a Internes Gespräch am anderen Mobilteil annehmen MT1/BS / MT2: b Internes Gespräch beenden Wenn das Mobilteil, das Sie intern anrufen wollen, ein externes Telefongespräch führt,...
  • Seite 24 Bedienung Anzeige der Gesprächsdauer Einige Sekunden nach Beginn eines Gesprächs zeigt Ihnen das Display die aktuelle Gesprächs- dauer in Minuten und Sekunden an. Hörerlautstärke einstellen Sie können während eines Gesprächs die Hörerlautstärke in 5 Stufen anpassen. i / j Hörerlautstärke erhöhen / verringern Ruftonlautstärke Sie können jeweils separat für das Mobilteil und für das Basisgerät die Lautstärke des Ruftons ver- ändern.
  • Seite 25 Bedienung Freisprechen Nutzen Sie diese Funktion, um den Gesprächspartner über den Lautsprecher zu hören. a bzw. k Während eines Gesprächs: Freisprechen einschalten a bzw. k Während eines Gesprächs: Freisprechen ausschalten Ist das Freisprechen aktiviert, wird im Display das Symbol angezeigt. Mikrofon stummschalten Sie können während eines Telefongesprächs das Mikrofon des Mobilteils bzw.
  • Seite 26 Bedienung Telefonbucheinträge erstellen . auch Seite 13 Telefonbuch öffnen m bzw. n Hinzufügen m bzw. n Untermenü auswählen und bestätigen ë, m bzw. n Name eing. Namen eingeben (max. 12 Stellen) und bestätigen ë, m bzw. n Nummer Rufnummer 1 (Handy−Nummer) eingeben (max.
  • Seite 27 Bedienung Telefonbucheinträge löschen Einen Eintrag löschen Telefonbuch öffnen i / j, m bzw. n Eintrag auswählen und bestätigen i / j, m bzw. n Löschen Untermenü auswählen und bestätigen Um auf einen Telefonbucheintrag schneller zugreifen zu können, drücken Sie im geöff- neten Telefonbuch die Taste mit dem Anfangsbuchstaben des Eintrags.
  • Seite 28 Bedienung Wahlwiederholungsliste Ihr Telefon speichert die 5 zuletzt gewählten Rufnummern mit Anrufdatum und −uhrzeit. Rufnummer aus der Wahlwiederholungsliste im Telefonbuch abspeichern Wahlwiederholungsliste öffnen i / j, m bzw. n Eintrag auswählen und bestätigen i / j, m bzw. n Untermenü auswählen und bestätigen Nr.speichern ë, m bzw.
  • Seite 29 Bedienung Anrufliste Während Ihrer Abwesenheit werden alle eingehenden Anrufe in einer Anrufliste gesammelt. Insge- samt können dort bis zu 40 Rufnummern gespeichert werden. Für jeden Anruf werden Datum und Uhrzeit des Eingangs festgehalten. Befinden Sie sich in der Anrufliste, wird im Display das Symbol angezeigt.
  • Seite 30 Bedienung Ton− und Anzeigeeinstellungen Sie können verschiedene Einstellungen vornehmen, um das Telefon Ihren Bedürfnissen entspre- chend einzurichten: Rufton einstellen Legen Sie für externe und für interne Anrufe den grundsätzlich zu verwendenden Rufton fest. Es stehen insgesamt 12 polyphone Ruftöne zur Verfügung. Rufton einstellen .
  • Seite 31 Bedienung Sonstige Einstellungen Automatische Rufannahme Haben Sie diese Funktion aktiviert, wird ein Anruf automatisch beim Herausnehmen des Mobilteils aus der Ladestation angenommen. Die automatische Anrufannahme wird über das Menü aktiviert oder deaktiviert. Automatische Rufannahme aktivieren . Menü Seite 18 Auto.Annahme Der Menüpunkt kann nur über das Menü...
  • Seite 32 Bedienung Wecker angezeigt. Wecker stellen Einmal Sie können wählen, ob Sie den Wecker nur für eine Weckaktion stellen wollen ( ) oder ob Täglich Sie Ihr Telefon täglich zur gleichen Zeit wecken soll ( ) . Menü Seite 17 Wecker st. Wecker einstellen ( Weckruf vorzeitig beenden Weckruf beenden...
  • Seite 33 Anrufbeantworter 7 Anrufbeantworter Der Anrufbeantworter speichert bis zu 57 Nachrichten (59 Nachrichten inklusive Ansagetexte). Die maximale Aufnahmezeit beträgt 15 Minuten (inklusive Ansagetexte). Ist die Speicherkapazität für neue Nachrichten erschöpft, wird kein Anruf mehr aufgezeichnet. Der Anrufbeantworter wechselt dann automatisch in den Nur−Ansage−Modus. Der Anrufbeantworter kann vom Basisgerät und vom Mobilteil aus bedient werden.
  • Seite 34 Anrufbeantworter Ansagetext Ihr Anrufbeantworter stellt Ihnen zwei voreingestellte Ansagetexte zur Verfügung. Sie können beide Ansagetexte durch eigene Texte ersetzen. Ansage 1 Im Ansage−und−Aufnahme−Modus wird Ansagetext verwendet, im Nur−Ansage−Modus Ansage 2 wird Ansagetext verwendet. Sobald Sie einen eigenen Ansagetext aufzeichnen, wird nur noch dieser Ansagetext verwendet.
  • Seite 35 Anrufbeantworter Standardansagetext wieder aktivieren Das Löschen des selbst aufgesprochenen Ansagetextes aktiviert den Standardansagetext. Das Löschen eines Ansagestextes erfolgt über das Menü . Menü Seite 14 ( Löschen Standardansagetexte können nicht gelöscht werden. Aufgezeichnete Nachrichten wiedergeben Sind neue Nachrichten vorhanden, blinken am Basisgerät und den angemeldeten Mobilteilen die optischen Rufanzeigen und im jeweiligen Display das Symbol [.
  • Seite 36 Anrufbeantworter Alternativ können diese Funktionen auch über das Drücken bestimmter Tasten erzeugt werden: Nachricht löschen Aktuelle Nachricht von vorne wiedergeben 2x 1 Vorherige Nachricht Wiedergabe stoppen (Pause) Nächste Nachricht Lautstärke für Nachrichtenwiedergabe einstellen Sie können die Lautstärke am Basisgerät während einer Wiedergabe in 5 Stufen einstellen. i / j Lautstärke erhöhen / verringern Sie können die Lautstärke am Mobilteil während einer Wiedergabe in 5 Stufen einstellen.
  • Seite 37 Anrufbeantworter Verzögerung der Anrufannahme Legen Sie über das Menü fest, wie oft das Telefon klingeln soll, bevor ein Ansagetext zu hören ist. Sie können zwischen 2, 4, 6 oder 8 Tonrufen wählen . Menü Seite 14 ( Rufannahme Werkseitig ist der Anrufbeantworter auf 4 Tonrufe eingestellt. Gebührsparer Zusätzlich können Sie die Einstellung für die gebührenfreie Vor−/Fernabfrage ver-...
  • Seite 38 Anrufbeantworter Fernabfrage Sie können Ihren Anrufbeantworter anrufen, um ihn einzuschalten oder um Nachrichten abzuhören und weitere Funktionen durchzuführen. Voraussetzung dafür ist ein Telefon mit Tonwahlfunktion. PIN−Code für die Fernabfrage Fernabf.−PIN Fernabf.−PIN ist werkseitig auf "1234" eingestellt. Es ist empfehlenswert die zu ändern, damit keine unbefugten Personen Zugriff auf Ihren Anrufbeantworter haben.
  • Seite 39 Anrufbeantworter Tastenfunktionen der Fernabfrage Die folgende Tabelle verschafft Ihnen eine Übersicht über die verfügbaren Funktionen und welche Taste gedrückt werden muss, um die jeweilige Funktion auszuführen. Taste Wenn keine Nachrichten abgespielt werden Wenn Nachrichten abgespielt werden Nachricht löschen Nachricht wiederholen Nachricht wiedergeben, Wiedergabe fortsetzen Wiedergabe stoppen (Pause) Nächste Nachricht abhören...
  • Seite 40 Über den international genormten GAP −Standard ist die Kompatibilität von Mobilteilen und Telefo- nen (Basisstationen) unterschiedlicher Hersteller geregelt. So ist es möglich, SWITEL−Geräte und Geräte anderer Hersteller zusammen in ein Telefonsystem zu integrieren. Es ist jedoch möglich, dass einige Funktionen nicht zur Verfügung stehen.
  • Seite 41 Erweitern des Telefonsystems Abmelden von Mobilteilen Sie können ein Mobilteil nur vom Basisgerät oder von einem weiteren am Basisgerät angemeldeten Mobilteil abmelden. Ein Mobilteil kann sich nicht selber abmelden. Mobilteile werden über das Menü abgemeldet . Menü Seiten 19 und 20. Am Basisgerät: n, i / j, Basis−Einst.
  • Seite 42 Nebenstellenanlagen / Zusatzdienste 9 Nebenstellenanlagen / Zusatzdienste R−Taste und Zusatzdienste Ihr Telefon unterstützt Zusatzdienste Ihres Netzbetreibers, wie z. B. Makeln, Anklopfen und Konfe- renz. Über die Taste d können Sie diese Zusatzdienste nutzen. Bitte fragen Sie Ihren Netzbe- treiber, welche Flash−Zeit Sie zur Nutzung von Zusatzdiensten einstellen müssen. Zur Freischal- tung von Zusatzdiensten wenden Sie sich bitte an Ihren Netzbetreiber.
  • Seite 43 Nebenstellenanlagen / Zusatzdienste Rufnummernanzeige (CLIP Die Rufnummernanzeige ist ein Zusatzdienst Ihres Netzbetreibers. Fragen Sie Ihren Netzbetreiber nach weiteren Informationen. Wenn diese Funktion an Ihrer Telefonleitung zur Verfügung steht, wird Ihnen bereits die Rufnum- mer des Anrufers angezeigt, wenn das Telefon klingelt. Hat der Anrufer das Übertragen seiner Rufnummer unterdrückt, wird eine entsprechende Meldung angezeigt.
  • Seite 44 Technische Eigenschaften 10 Technische Eigenschaften Merkmal Wert Standard DECT −GAP Stromversorgung (Basisgerät) Eingang: 100−240 V, 50−60 Hz Ausgang: 6 V, 500 mA Stromversorgung (Ladestation) Eingang: 100−240 V, 50−60 Hz Ausgang: 6 V, 150 mA Aufladbare Akkus 2 x 1.2 V 500 mAh NiMH, Größe: AAA Max.
  • Seite 45 Probleme Konformitätserklärung Dieses Gerät erfüllt die Anforderungen der EU−Richtlinie: 1999/5/EG Richtlinie über Funkanlagen und Telekommunikationsendeinrichtungen und die gegenseitige Anerkennung ihrer Konformität. Die Konformität mit der o. a. Richtlinie wird durch das CE−Zeichen auf dem Gerät bestätigt. Service−Hotline Haben Sie Probleme mit Ihrem Telefon, kontrollieren Sie zuerst die folgenden Hinweise. Bei techni- schen Problemen können Sie sich an unsere Service−Hotline unter Tel.
  • Seite 46 Probleme Fragen Antworten Das System reagiert nicht − Setzen Sie alle Funktionen auf Werkseinstellungen zurück . Seite 19. mehr − Ziehen Sie kurzzeitig das Netzteil aus der Steckdose. Die Akkus sind in kürzester − Die Akkus sind leer oder defekt. Zeit leer −...
  • Seite 47 Vorsatz oder grober Fahrlässigkeit des Herstellers beruhen. Sollte Ihr Gerät dennoch einen Defekt innerhalb der Garantiezeit aufweisen, wenden Sie sich bitte unter Vorlage Ihrer Kaufquittung ausschließlich an das Geschäft, in dem Sie Ihr SWITEL − Gerät gekauft haben. Alle Gewährleistungsansprüche nach diesen Bestimmungen sind ausschließlich gegenüber Ihrem Fachhändler geltend zu machen.
  • Seite 48 Stichwortverzeichnis 13 Stichwortverzeichnis Abmelden, 41 Babyruf, 32 Abwärts−Taste, 9 Basisgerät, 9 Akkuladezustand, 8 Basisgerät anschließen, 7 Akkus, 5, 44 Basisgeräte, 41 Akkus aufladen, 8 Basisstationen, 41 Akkus in Mobilteil einsetzen, 8 Bedienelemente, 9 Alle Einträge löschen, 27 Bedienung, 21 Alle Nachrichten löschen, 36 Bereitsschaftsmodus, 12 Alle Rufnummern löschen, 29 Besondere Funktionen, 31...
  • Seite 49 Stichwortverzeichnis Fernabfrage, 38 Makeln, 23 Fernabfrage beenden, 38 Maximale Aufnahmezeit, 33 Fernabfrage starten, 38 Medizinische Geräte, 5 Flash−Zeit, 42, 44 Mehrere Basisstationen, 41 Freisprech−Taste, 9 Mehrere Mobilteile, 40 Freisprechen, 10, 25 Memo aufzeichnen, 37 Memoaufzeichnung abbrechen, 37 Menü−/OK−/Stumm−Taste, 10 GAP, 44 Menüführung, 12 Garantie, 47 Menüsprachen, 44...
  • Seite 50 Stichwortverzeichnis Paging, 31 Service−Hotline, 45 Pfeil−Taste rauf, 10 Sicherheitshinweise, 4 Pfeil−Taste runter, 10 Speichern im Telefonbuch, 28, 29 Pflegehinweise, 47 Sprache der Ansagetexte, 34 PIN, 40, 44 Sprachen Standardansagetexte, 44 PIN ändern, 31 Stand−by−Modus, 12 PIN−Code für die Fernabfrage, 38 Stand−by−Zeit, 44 PIN−Code für Fernabfrage Stern−Taste, 9, 10...
  • Seite 51 Stichwortverzeichnis Verpackungsinhalt, 6 VMWI, 43 Vorwahlnummer, 31 Vorwärts−Taste, 9 Wählen, 22 Wahlpause, 42 Wahlverfahren, 32, 44 Wahlwiederholung, 10, 22 Wahlwiederholung−Taste, 9 Wahlwiederholungsliste, 28 Wahlwiederholungsliste löschen, 28 Warnton Akkukapazität, 30 Warnton Reichweite, 30 Wecker, 31 Wecker stellen, 32 Weckruf vorzeitig beenden, 32 Weiterleitung, 23 Wiedergabe−/Stopp−Taste, 9 Zeit−...
  • Seite 52 Notizen Notizen...
  • Seite 53 Table des matières Consignes de sécurité ....Mise en service ....Éléments de manipulation .
  • Seite 54 Consignes de sécurité 1 Consignes de sécurité Lisez très attentivement ce mode d’emploi. Utilisation conforme aux prescriptions Ce téléphone avec combiné convient pour téléphoner à l’intérieur d’un réseau téléphonique. Toute autre utilisation est considérée comme non conforme aux prescriptions. Des modifications ou transformations effectuées de façon arbitraire sont interdites.
  • Seite 55 Consignes de sécurité Accus rechargeables Attention : Ne jetez jamais les accus dans le feu. N’utilisez que des accus du même type ! Veillez à ce que la polarité soit correcte ! Risque d’explosion lors de la charge si celle−ci est incorrecte. Attention : N’utilisez que les accus rechargeables prescrits.
  • Seite 56 Bloc secteur Combiné Cordon spiralé du combiné Câble téléphonique Station d’accueil avec bloc secteur Combiné Accus (AAA 1.2 V NiMH) Guide de l’utilisateur À l’adresse www.switel.com, vous apprendrez si ce téléphone / kit téléphonique est déjà disponi- ble à la vente.
  • Seite 57 Mise en service Mettre l’appareil en service Raccorder l’appareil de base Raccordez l’appareil de base comme représenté sur le croquis. Pour des raisons de sécurité, n’uti- lisez que le bloc secteur fourni avec l’appareil. Tenez absolument compte des informations contenues dans le passage «Lieu d’installation» .
  • Seite 58 Mise en service Insérer les accus dans le combiné Le compartiment accus se trouve au dos du combiné. Ouvrez celui−ci et insérez 2 accus de type AAA NiMH, 1.2 V 500 mAh. Veillez à ce que la polarité soit correcte ! Refermez le comparti- ment.
  • Seite 59 Éléments de manipulation 3 Éléments de manipulation Dans ce guide de l’utilisateur, les touches du téléphone sont représentées par des icônes standar- disées encadrées. Il peut donc y avoir de légères différences entre les icônes des touches de vo- tre téléphone et celles des touches utilisées ici. Appareil de base Touche «vers l’avant»...
  • Seite 60 Éléments de manipulation Combiné Signalisation optique d’appel (LED appel) Écouteur Écran graphique Touches de sélection directe Q R Touche «Raccrocher»/Allumer/Éteindre b Clavier numérique 1, 2... à 0 Touche «dièse» / Sonn. désact. / Pause numérotation u Touche R / Retour d Microphone Répétition des derniers numéros c Touche «Étoile»...
  • Seite 61 Éléments de manipulation Icônes et textes affichés Icône Description État de charge de l’accu (plein, à moitié plein, presque vide). ! " Vide : les accus doivent être rechargés. Segments continus : les accus se rechargent . page 58. Segments constants : les accus sont totalement rechargés Connexion à...
  • Seite 62 Introduction 4 Introduction Dans ce chapitre, vous trouverez des informations de base vous expliquant comment vous servir du guide de l’utilisateur. Représentations dans le guide Représentation Description Représentation des touches Appuyer brièvement sur la touche représentée Appuyer brièvement sur une touche quelconque 2 sec.
  • Seite 63 Introduction Ouvrir le sous−menu i / j Sélectionner la fonction voulue Ouvrir la fonction i / j Sélectionner le réglage voulu ë Saisir des chiffres ou des lettres via le pavé numérique Confirmer les entrées Reculer d’un niveau Annuler les actions de programmation et de sauvegarde et retourner en mode veille De nombreuses saisies terminées avec la touche M sont confirmée par un bip so- nore.
  • Seite 64 Structure de menu 5 Structure de menu 88 89 Vous parvenez au menu principal en appuyant sur la touche n ou M. Ensuite sélectionnez avec les touches i / j un contact et validez votre sélection avec la touche n ou M. Pour d’autres informations relatives au menu et à...
  • Seite 65 Structure de menu Durée mess. Langue Français FRANÇAIS NEDERLANDS ITALIANO PIN distance Interphone Combiné 01 à 06 Affichage selon le nombre de combinés déclairés...
  • Seite 66 Structure de menu Répertoire Ajouter ë Entrez nom ë Numéro ë Numéro Mélodie VIP Désactivé / ... / Modifier ë Entrez nom ë Numéro ë Numéro Mélodie VIP Désactivé / ... / Supprimer Tout suppr. Copier dans MÉMOIRE Des lettres sont gravées sur les touches numériques. En appuyant plusieurs fois sur la tou- che adéquate, vous pouvez saisir des lettres, des chiffres et des caractères spéciaux.
  • Seite 67 Structure de menu Horl./Réveil Régl. réveil Une fois Désactivé ë Activé Entrez heure Chaque jour Désactivé ë Activé Entrez heure Format date JJ/MM MM/JJ Format heure 24 heures 12 heures ë Régl. heure Vous réglez la date et l’heure dans ce menu.
  • Seite 68 Structure de menu Disposnible seulement sur un combiné : Conf. comb. Sons comb. Volume comb. Désactivé / ... / Sonn. ext. / ... / Sonn. int. / ... / Désactivé Mélod. Bip touches sonn. Pile faible Activé Désactivé Hors portée Activé...
  • Seite 69 Structure de menu Disposnible seulement sur un combiné : Config. base Effac. VMWI Associer PIN ? Base PIN ? PIN ? Base PIN ? PIN ? Base PIN ? PIN ? Base PIN ? Sélect. base Base Base Base Base Auto Avancé...
  • Seite 70 Structure de menu Disponible seulement sur l’appareil de base : Config. base Mélodie Volume comb. Désactivé / ... / Sonn. ext. / ... / Sonn. int. / ... / Désactivé Mélod. Bip touches sonn. Contrast.LCD / ... / Effac. VMWI / ...
  • Seite 71 Utilisation 6 Utilisation Vous pouvez utiliser de nombreuses fonctions aussi bien de l’appareil de base que du combiné. Veuillez tenir compte que beaucoup des touches représentées par la suite se trouvent tant sur l’appareil de base que sur le combiné . page 59. Vous ne pouvez pas basculer d’un déroulement d’une utilisation de l’appareil de base sur celui du combiné.
  • Seite 72 Utilisation Émettre un appel ë Composer le numéro d’appel (max. 48 chiffres) Si la saisie est erronée, effacer le dernier chiffre a ou è ou k Composer le numéro Vous pouvez également appuyer d’abord sur la touche du combiné a ou décrocher le combiné...
  • Seite 73 Utilisation Téléphoner en interne CB 1 : m ou BS : v, i / j , m ou v Interphone Activer une communication en interne CB1/BS : i / j, m ou v Sélectionner le combiné voulu ou l’appareil de base CB2 : a Prendre une communication interne sur un autre combiné...
  • Seite 74 Utilisation CB2 : a Prendre une communication interne sur un autre combiné CB1 ou BS : 2 sec. 0 Conférence Conférences téléphoniques CB1 ou BS et CB2 : b Terminer la conférence Affichage de la durée de la communication Quelques secondes après le début de la communication l’écran affiche la durée actuelle de la communication en minutes et secondes.
  • Seite 75 Utilisation Mode mains−libres Utilisez cette fonction pour entendre le correspondant par l’intermédiaire du haut−parleur. a ou k Activer le mode mains−libres pendant une communication a ou k Désactiver le mode mains−libres pendant une communication Si le mode mains−libres est activé, l’icône s’affiche.
  • Seite 76 Utilisation Ajouter des contacts dans le répertoire . également page 63 Ouvrir le répertoire m ou n Ajouter m ou n Sélectionner le sous−menu et valider ë, M ou n Entrez nom Saisir le nom (max. 12 caractères) et valider ë, m ou n Numéro Saisir le numéro d’appel 1 (portable)
  • Seite 77 Utilisation Effacer des contacts du répertoire Effacer un contact Ouvrir le répertoire i / j, m ou n Sélectionner le contact et valider i / j, m ou n Supprimer sélectionner le sous−menu et valider Pour avoir accès plus rapidement à un contact du répertoire, appuyez, répertoire ou- vert, sur la touche avec l’initiale du contact.
  • Seite 78 Utilisation Liste de répétition des derniers numéros Votre combiné enregistre les 5 derniers numéros composés avec date et heure de l’appel. Enregistrer dans le répertoire un numéro de la liste de répétition des derniers numéros composés Ouvrir la liste des derniers numéros composés i / j, m ou n Sélectionner le contact et valider i / j,...
  • Seite 79 Utilisation Journal des appels Tous les appels entrant pendant votre absence sont rassemblés dans un journal des appels. Vous pouvez y enregistrer jusqu’à 40 numéros. La date et l’heure de chaque appel sont conservées. Si vous vous trouvez dans le journal des appels, l’icône s’affiche.
  • Seite 80 Utilisation Réglages du son et de l’affichage Vous pouvez effectuer différents réglages pour installer le téléphoner selon vos besoins : Régler la sonnerie Fixez pour les appels externes et internes la sonnerie devant toujours utilisée. 12 sonneries poly- phoniques sont disponibles. Programmer la sonnerie .
  • Seite 81 Utilisation Autres réglages Prise d’appel automatique Si vous avez activé cette fonction, l’appel sera automatiquement pris lorsque vous retirerez le combiné de la base. La prise d’appel automatique s’active ou se désactive via le menu. Activer la prise d’appel automatique . Menu page 68 Décroch.auto Vous pouvez appeler l’option de menu uniquement dans le menu d’un...
  • Seite 82 Utilisation Régler le réveil Une fois Vous pouvez choisir si vous désirez que le réveil vous réveille une seule fois ( ) ou si vous Chaque jour voulez qu’il vous réveille tous les jours ( ) . Menu page 67 Régl.
  • Seite 83 Répondeur 7 Répondeur Le répondeur enregistre 57 messages maximum (59 messages, y compris les textes d’annonce). La durée d’enregistrement maximum est de 15 minutes (y compris les textes d’annonce). Si la capacité de la mémoire est saturée et ne permet plus de recevoir de nouveaux messages, plus aucun appel ne sera enregistré.
  • Seite 84 Répondeur Texte d’annonce Votre répondeur met à votre disposition deux textes d’annonce prédéfinis. Vous pouvez remplacer les deux textes d’annonce par vos propres textes. Annonce 1 En mode «répondeur−enregistreur», c’est le texte qui est utilisé, en mode «annonce Annonce 2 simple», c’est le texte qui est utilisé.
  • Seite 85 Répondeur Activer à nouveau le texte d’annonce standard Si vous effacez votre propre texte d’annonce, le texte d’annonce standard sera réactivé. L’effacement du texte d’annonce s’effectue au menu . Menu page 64 ( Suppr. MSG Vous ne pouvez pas effacer les textes d’annonce standard. Diffuser les messages enregistrés Si vous avez de nouveaux messages, les signalisations optiques d’appel de l’appareil de base et des combinés déclarés clignotent et sur leur écran s’affiche l’icône [.
  • Seite 86 Répondeur Vous pouvez également créer ces fonctions en appuyant sur des touches déterminées : Effacer le message Diffuser le message actuel depuis le début 2x 1 Message précédent Arrêter la diffusion (Pause) Message suivant Régler le volume de la diffusion des messages Pendant une diffusion vous pouvez programmer le volume sur l’appareil de base sur 5 sensibilités.
  • Seite 87 Répondeur Report de la prise d’appel Définissez le nombre de fois que le téléphone doit sonner avant que l’appelant n’entende le texte d’annonce. Vous pouvez choisir entre 2, 4, 6 ou 8 sonneries d’appel . Menu page 64 ( 1ere. sonn.
  • Seite 88 Répondeur Consultation à distance Vous pouvez appeler votre répondeur pour l’activer ou pour écouter des messages et vous servir d’autres fonctions à condition que votre téléphone soit équipé de la fonctionnalité de numérotation par tonalité. Code PIN pour la consultation à distance PIN distance PIN di- est configuré...
  • Seite 89 Répondeur Fonctions des touches de la consultation à distance Le tableau suivant vous donne une vue d’ensemble des fonctions disponibles et sur quelle touche vous devez appuyer pour exécuter la fonction. Tou- Quand aucun message n’est diffusé Pendant la diffusion de messages Effacer le message Réentendre un message Diffuser le message, continuer la diffusion...
  • Seite 90 (bases) de fabricants différents. Il est ainsi possible d’intégrer ensem- ble des appareils SWITEL et des appareils d’autres fabricants dans un système téléphonique. Il est toutefois possible que certaines fonctions ne soient pas disponibles.
  • Seite 91 Élargir le système téléphonique Annuler des combinés Vous pouvez annuler un combiné uniquement depuis l’appareil de base ou depuis un autre combiné déclaré sur ce dernier. Un combiné ne peut pas s’annuler lui−même. Vous pouvez annuler les combinés au menu . Menu page 69 et 70. Sur l’appareil de base : n, i / j, Config.
  • Seite 92 Installations PABX / Services confort 9 Installations PABX / Services confort Touche R et services confort Votre téléphone supporte des services confort de votre opérateur tels que le va−et−vient, la signali- sation d’appel en instance et la conférence. Vous pouvez les utiliser via la touche d. Demandez à...
  • Seite 93 Installations PABX / Services confort Affichage du numéro d’appel (CLIP L’affichage du numéro d’appel est un service confort de votre opérateur. Veuillez lui demander de plus amples informations. Si cette fonction est disponible sur votre ligne téléphonique, le numéro d’appel du correspondant sera affiché...
  • Seite 94 Caractéristiques techniques 10 Caractéristiques techniques Caractéristique Valeur Standard DECT −GAP Alimentation en courant (appareil de base) Entrée : 100−240 V, 50−60 Hz Sortie : 6 V, 500 mA Alimentation en courant (station d’accueil) Entrée : 100−240 V, 50−60 Hz Sortie : 6 V, 150 mA Accus rechargeables 2 x 1.2 V 500 mAh NiMH, taille : AAA Max.
  • Seite 95 Problèmes Déclaration de conformité Cet appareil répond aux exigences de la directive de l’Union européenne : 1999/5/CE : Directive sur les installations de radio et de télécommunication et la re- connaissance réciproque de leur conformité. La conformité avec la directive mention- née ci−dessus est confirmée sur l’appareil par le symbole CE.
  • Seite 96 Problèmes Questions Réponses Le système ne réagit plus − Remettez toutes les fonctions en configuration usine . page 69. − Retirez le bloc secteur de la prise de courant pendant un court instant. Les accus se déchargent très − Ceux−ci sont vides ou défectueux. rapidement −...
  • Seite 97 SWITEL. Vous ne pouvez faire valoir vos droits à la garantie selon ces dispositions qu’ ex- clusivement auprès de votre revendeur. Deux ans après l’achat et la remise de nos produits, il...
  • Seite 98 Index 13 Index Accus, 94 Charger les accus, 58 Accus rechargeables, 55 Clavier numérique, 59, 60 Activer, 83 CLIP, 82, 93 Activer et désactiver la sonnerie, 74 Code d’accès, 92 Activer le répondeur via la consultation à Code PIN pour la consultation à distance, 88 distance, 89 Code PIN pour la consultation à...
  • Seite 99 Index Déclaration de conformité, 95 Économiseur de taxes, 87 DECLARER, 90 Écoute amplifiée, 86 Déclarer un combiné, 90 Écouter le texte d’annonce, 84 DECT, 94 Écouter les messages, 85 Démarrer la consultation à distance, 88 Écouteur, 60 Désactivation du microphone (Muet), 75 Écran, 59, 61 Désactiver, 83 Écran graphique, 60...
  • Seite 100 Index Icônes, 61 Navigation dans le menu, 62 Icônes affichées, 61 Nom du combiné, 80 Insérer les accus dans le combiné, 58 Nombre de contacts dans la répétition des derniers numéros, 94 Installations PABX, 58, 92 Nombre de contacts dans le journal Interception d’appel, 86 des appels, 94 Intercommunication, 73...
  • Seite 101 Index Que faire des appareils hors d’usage ?, 55 Saisie de texte, 75 Saisir un nom, 75 Sélection directe, 72 Raccorder l’appareil de base, 57 Sélectionner le mode de réponse, 83 Raccorder la station d’accueil, 57 Sélectionner les sous−menus, 63 Rappel, 72 Services confort, 92 Rappeler des appels entrés, 72, 79...
  • Seite 102 Index Téléphoner, 71 Utilisation, 71 Téléphoner en interne, 72, 73 Utilisation conforme aux prescriptions, 54 Temps de flash, 92, 94 Terminer la communication, 71 Va−et−vient, 73 Terminer la consultation à distance, 88 Vérifier la capacité du répertoire, 77 Terminer prématurément Verrouillage du clavier, 71, 81 la sonnerie du réveil, 82 VMWI, 93...
  • Seite 103 Contenuto Indicazioni di sicurezza ....Messa in funzione ....Elementi di comando .
  • Seite 104 Indicazioni di sicurezza 1 Indicazioni di sicurezza Leggere attentamente le presenti istruzioni per l’uso. Scopo d’impiego Il telefono munito di unità portatile consente di eseguire chiamate in una rete telefonica. Qualsiasi altro impiego è considerato non conforme agli usi previsti. Non sono consentite modifiche o trasfor- mazioni non autorizzate.
  • Seite 105 Indicazioni di sicurezza Batterie ricaricabili Attenzione: Non gettare le batterie ricaricabili nel fuoco. Utilizzare solo batterie ricari- cabili dello stesso tipo. Osservare la corretta polarità! Pericolo di esplosione in caso di inversione della polarità durante la carica delle batterie ricaricabili. Attenzione: Utilizzare solo le batterie ricaricabili consigliate.
  • Seite 106 Cavo a spirale per ricevitore Cavo di collegamento telefonico Stazione di carica con alimentatore di rete Unità portatile Batterie ricaricabili (AAA 1,2 V NiMH) Istruzioni per l’uso Per maggiori informazioni sulla disponibilità del telefono/set telefonico si prega di visitare il sito www.switel.com.
  • Seite 107 Messa in funzione Mettere in funzione l’apparecchio Collegare l’unità base Procedere al collegamento dell’unità base secondo quanto raffigurato sul disegno. Per motivi di si- curezza si prega di utilizzare solo l’alimentatore di rete fornito in dotazione. Osservare necessariamente le indicazioni relative al luogo di installazione . pagina 104. Presa elettrica Presa telefonica Cavo di collegamento...
  • Seite 108 Messa in funzione Inserire le batterie ricaricabili nell’unità portatile Il vano batterie si trova sul retro dell’unità portatile. Aprire il vano batterie e inserire 2 batterie ricaricabili tipo AAA NiMH, 1.2 V 500 mAh. Osservare la corretta polarità! Chiudere quindi il vano batterie.
  • Seite 109 Elementi di comando 3 Elementi di comando I tasti riportati nelle presenti istruzioni per l’uso sono raffigurati come simboli racchiusi in un riquadro. Sono possibili lievi scostamenti dei simboli dei tasti sul telefono rispetto ai simboli qui raffigurati. Unità base Tasto avanti h Ricevitore Tasto OK/Menu N...
  • Seite 110 Elementi di comando Unità portatile Segnalazione ottica di chiamata (LED di chiamata) Ricevitore Display LC Tasti di selezione diretta q r Tasto riaggancio / On / Off b Tasti numerici 1, 2... − 0 Tasto cancelletto / Segnale di chiamata off / Pausa di selezione u Tasto R / Indietro d Microfono...
  • Seite 111 Elementi di comando Simboli e testi di display Simbolo Descrizione Indicazione dello stato di carica delle batterie (cariche, cariche a metà, quasi scariche). ! " Scariche: caricare le batterie. Segmenti che scorrono: le batterie sono in fase di ricarica . pagina 108. Segmenti visualizzati in modo costante: le batterie ricaricabili sono completa- mente cariche.
  • Seite 112 Informazioni introduttive 4 Informazioni introduttive Il capitolo informa sulle modalità d’uso del presente manuale. Modi di rappresentazione nelle istruzioni per l’uso Rappresentazione Descrizione Rappresentazione dei tasti Premere brevemente il tasto raffigurato Premere brevemente un tasto a piacere 2 sec. t Premere il tasto raffigurato per 2 secondi ë...
  • Seite 113 Informazioni introduttive Aprire il sottomenu i / j Selezionare la funzione richiesta Aprire la funzione i / j Selezionare l’impostazione richiesta ë Immettere cifre o lettere attraverso il tastierino Confermare le immissioni Tornare indietro di un livello Interrompere le procedure di programmazione e memorizzazione e tornare indietro alla modalità...
  • Seite 114 Struttura di menu 5 Struttura di menu Per passare al menu principale, premere il tasto n o M. Selezionare quindi con i tasti i / j una voce e confermare la selezione con il tasto n o M. Maggiori informazioni su menu ed esercizio .
  • Seite 115 Struttura di menu Lungh ICM Voce ling DEUTSCH FRANÇAIS NEDERLANDS ITALIANO PIN remoto Intercom Cuffie 01 − 06 Visualizzazione in base al numero di unità portatili registrate...
  • Seite 116 Struttura di menu Rubrica Aggiungi ë Inser. nome ë Numero ë Numero Suon.VIP / ... / Modifica ë Inser. nome ë Numero ë Numero Suon.VIP / ... / Elimina Elim. tutto Copia su I tasti numerici riportano altresì delle lettere. Premendo ripetutamente il relativo tasto si ha modo di selezionare lettere, cifre e caratteri speciali.
  • Seite 117 Struttura di menu Orolog/Svegl Imp. sveglia Una volta ë Inser. ora Giornalmente ë Inser. ora Formato data GG/MM MM/GG Formato ora 24 ore 12 ore ë Imposta ora La voce di menu consente di impostare data e ora.
  • Seite 118 Struttura di menu Disponibile solo su un’unità portatile: Imp. Ricev. Suono Ricev Volume Suon. / ... / Suon. est. / ... / Suon. inter / ... / Tono tasti Tono Tono suon. Batt scarica Fuori portat Equalizzat. Naturale Bassi Acuti Contrast.LCD / ...
  • Seite 119 Struttura di menu Disponibile solo su un’unità portatile: Impost.base Canc. VMWI Registra Base PIN? Base PIN? Base PIN? Base PIN? Selez.base Base Base Base Base Auto Avanzato Mod.composiz Toni Impulsi Tempo flash Breve Medio Lungo ë Prefisso 01 ' / ... / Filtro Chiam ë...
  • Seite 120 Struttura di menu Disponibile solo sull’unità base: Impost.base Suoneria Volume Suon. / ... / Suon. est. / ... / Suon. inter / ... / Tono tasti Tono Tono suon. Contrast.LCD / ... / Canc. VMWI / ... / Lingua (9 lingue) Registra Base PIN?
  • Seite 121 Funzionamento 6 Funzionamento Numerose funzioni sono comandabili sia tramite unità base sia tramite unità portatile. Si tenga pre- sente che alcuni dei tasti raffigurati qui di seguito sono presenti sia sull’unità base sia sull’unità por- tatile . pagina 109. Con immissione in corso non è possibile passare dall’unità base all’unità portatile e vi- ceversa.
  • Seite 122 Funzionamento Compiere telefonate ë Immettere un numero di chiamata (max. 48 cifre) In caso di immissione errata, cancellare l’ultima cifra a oppure è oppure k Selezionare il numero di chiamata È altresì possibile premere prima il tasto a sull’unità portatile o sollevare il ricevitore sull’unità...
  • Seite 123 Funzionamento Compiere chiamate interne UP1: m oppure UB: v, i / j , m oppure v Intercom Avviare la chiamata interna UP1/UB: i / j, m oppure v Selezionare il portatile o la base richiesti UP2: a Accettare una telefonata interna presso l’altra unità portatile UP1/UB / UP2: b Concludere la chiamata interna...
  • Seite 124 Funzionamento UP2: a Accettare una telefonata interna presso l’altra unità portatile UP1 o UB: 2 sec. 0, Conferenza Avviare una chiamata in conferenza UP1 o UB e UP2: b Concludere la conferenza Visualizzare la durata di conversazione Trascorsi alcuni secondi dall’inizio di una conversazione, sul display viene visualizzata la durata di conversazione attuale in minuti e secondi.
  • Seite 125 Funzionamento Funzione vivavoce Utilizzare questa funzione per ascoltare il partner di chiamata attraverso l’altoparlante. a ovvero k Con chiamata in corso: attivare la funzione vivavoce a ovvero k Con chiamata in corso: disattivare la funzione vivavoce Con funzione vivavoce attivata, sul display compare il simbolo Silenziamento del microfono Con chiamata in corso è...
  • Seite 126 Funzionamento Creare voci in rubrica . anche pagina 113 Aprire la rubrica telefonica m ovvero n Aggiungi m ovvero n Selezionare il sottomenu e confermare ë, m ovvero n Inser. nome Immettere il nome (max. 12 lettere) e confermare ë, m ovvero n Numero Immettere il numero telefonico 1 (numero cellulare) (max.
  • Seite 127 Funzionamento Cancellare voci in rubrica Cancellare una voce Aprire la rubrica telefonica i / j, m ovvero n Selezionare la voce e confermare i / j, m ovvero n Elimina Selezionare il sottomenu e confermare Per poter accedere più velocemente ad una voce in rubrica, premere con rubrica aperta la lettera iniziale della voce richiesta.
  • Seite 128 Funzionamento Elenco di ripetizione di chiamata Il telefono memorizza gli ultimi 5 numeri di chiamata selezionati assieme alla data e all’ora della te- lefonata. Memorizzare in rubrica un numero dall’elenco di ripetizione di chiamata Aprire l’elenco di ripetizione di chiamata i / j, m ovvero n Selezionare la voce e confermare i / j,...
  • Seite 129 Funzionamento Elenco chiamate In caso di assenza tutte le chiamate giunte sono memorizzate in un apposito elenco chiamate. In tutto è possibile memorizzare fino a 40 numeri di chiamata. Con ogni numero telefonico sono al- tresì memorizzate data e ora della chiamata. Se ci si trova nell’elenco chiamate, sul display compare il simbolo Nell’elenco chiamate, l’ultimo numero perso è...
  • Seite 130 Funzionamento Richiamare chiamate ricevute . pagina 122 Impostare toni e indicazioni Varie opzioni di impostazione consentono di adattare il telefono alle proprie esigenze: Impostare lo squillo di chiamata Si prega di definire uno squillo per chiamate esterne e interne. In tutto è possibile scegliere tra 12 squilli polifonici.
  • Seite 131 Funzionamento Impostazioni varie Ricezione automatica di chiamate L’attivazione di questa funzione consente di ricevere automaticamente una chiamata estraendo semplicemente l’unità portatile dalla stazione di carica. L’accettazione di chiamata automatica è at- tivata o disattivata nel menu. Attivare l’accettazione automatica di chiamata . Menu pagina 118 Auto risp.
  • Seite 132 Funzionamento Impostare la sveglia Una volta È possibile definire se utilizzare la sveglia per un solo giorno ( ) oppure se si vuole es- Giornalmente sere svegliati allo stesso orario più volte ( Imp. sveglia Impostare la sveglia ( ). Menu pagina 117 Disattivare la sveglia anzitempo Disattivare la sveglia Funzione baby controllo...
  • Seite 133 Segreteria telefonica 7 Segreteria telefonica La segreteria telefonica memorizza fino a 57 messaggi (59 messaggi inclusi i messaggi di rispo- sta). La durata di registrazione max. è di 15 minuti (inclusi i messaggi di risposta). Non appena la capacità di memoria risulta esaurita non è più possibile registrare dei messaggi nuovi.
  • Seite 134 Segreteria telefonica Messaggio di risposta La segreteria telefonica offre due messaggi di risposta preimpostati. Entrambi i messaggi di rispo- sta possono essere sostituiti da messaggi individuali. Msg in usc.1 In modalità di risposta e registrazione, il messaggio di risposta utilizzato è , in mo- Msg in usc.2 dalità...
  • Seite 135 Segreteria telefonica Riattivare la risposta standard Se si cancella il messaggio di risposta personale, si attiva automaticamente il messaggio di rispo- sta standard. Elim. MSG Per cancellare un messaggio di risposta, navigare nel menu. Menu pagina 114 ( I messaggi di risposta standard non sono cancellabili. Riprodurre messaggi registrati In presenza di nuovi messaggi, sull’unità...
  • Seite 136 Segreteria telefonica In alternativa è possibile richiamare queste funzioni premendo una certa combinazione di tasti: Cancellare il messaggio Riprodurre il messaggio attuale dall’inizio 2x 1 Messaggio precedente Interrompere la riproduzione (Pausa) Messaggio successivo Impostare il volume per la riproduzione di messaggi Con riproduzione in corso, sull’unità...
  • Seite 137 Segreteria telefonica Ritardo nell’accettazione di chiamata Il menu consente di definire la frequenza con cui fare squillare il telefono prima di ascoltare un messaggio di risposta. È possibile scegliere tra 2, 4, 6 o 8 segnalazioni di chiamata . Menu pa- Rit.suon.
  • Seite 138 Segreteria telefonica Interrogazione a distanza È dato modo di chiamare la propria segreteria telefonica per attivarla, ascoltare messaggi ricevuti e compiere una serie di funzioni accessorie. Requisito per questa operazione è un telefono abili- tato alla selezione a toni. Codice PIN per l’interrogazione a distanza PIN remoto PIN re- è...
  • Seite 139 Segreteria telefonica Funzioni a tasti dell’interrogazione a distanza La seguente tabella offre una vista panoramica delle funzioni disponibili e dei tasti abbinati alle ri- spettive funzioni. Tasto Se non viene riprodotto nessun messaggio Durante la riproduzione di messaggi Cancellare un messaggio Ripetere il messaggio Riprodurre il messaggio, proseguire la riprodu- Interrompere la riproduzione (Pausa)
  • Seite 140 Lo standard internazionale GAP regola la compatibilità di unità portatili e telefoni (stazioni base) di costruttori differenti. In tal modo è possibile adoperare apparecchi SWITEL in combinazione con apparecchi di altri costruttori all’interno di un unico sistema telefonico. Ciò nonostante può comun- que anche verificarsi che determinate funzioni non siano disponibili.
  • Seite 141 Ampliare il sistema telefonico Annullare la registrazione di unità portatili L’annullamento della registrazione di un’unità portatile è possibile solo dall’unità base o da un’altra unità portatile anch’essa registrata alla stessa unità base. L’unità portatile non può annullare la registrazione autonomamente. Le unità...
  • Seite 142 Impianti telefonici interni / Servizi addizionali 9 Impianti telefonici interni / Servizi addizionali Tasto R e servizi addizionali Il telefono supporta servizi addizionali offerti dal proprio gestore di rete telefonica come ad es. le funzioni di chiamata in attesa, avviso di chiamata e chiamata in conferenza. Il tasto d consente di accedere ai servizi addizionali.
  • Seite 143 Impianti telefonici interni / Servizi addizionali Visualizzare il numero di chiamata (CLIP La visualizzazione del numero di chiamata è un servizio addizionale offerto dal proprio gestore di rete telefonica. Per informazioni rivolgersi al proprio gestore di rete telefo- nica. A condizione che il collegamento telefonico disponga di questa funzione, l’apparecchio visualizza il numero telefonico del chiamante non appena il telefono squilla.
  • Seite 144 Specifiche tecniche 10 Specifiche tecniche Caratteristica Valore Standard DECT −GAP Alimentazione elettrica (unità base) Ingresso: 100−240 V, 50−60 Hz Uscita: 6 V, 500 mA Alimentazione elettrica (stazione di carica) Ingresso: 100−240 V, 50−60 Hz Uscita: 6 V, 150 mA Batterie ricaricabili 2 x 1.2 V 500 mAh NiMH, tipo: AAA Max.
  • Seite 145 Problemi Dichiarazione di conformità Questo apparecchio risponde a quanto disposto dalla Direttiva UE 1999/5/CE concernente le apparecchiature radio, le apparecchiature terminali di tele- comunicazioni e il reciproco riconoscimento della loro conformità. La conformità con la direttiva di cui sopra viene confermata dal marchio CE applicato sull’apparecchio. Linea diretta di assistenza In presenza di problemi con il telefono, seguire le indicazioni riportate qui di seguito.
  • Seite 146 Problemi Domande Risposte − Ripristinare la configurazione iniziale per tutte le funzioni . pa- Il sistema non reagisce più gina 119. − Estrarre brevemente l’alimentatore di rete dalla presa di cor- rente. Le batterie si scaricano piutto- − Le batterie sono scariche o difettose. sto subito −...
  • Seite 147 Garanzia Gli apparecchi SWITEL sono costruiti e collaudati in osservanza dei processi di produzione più moderni. L’impiego di materiali selezionati e tecnologie altamente sviluppate sono garanti di una perfetta funzionalità e lunga durata in vita. La garanzia non viene considerata esecutiva qualora la causa del malfunzionamento dell’apparecchio sia riconducibile al gestore della rete telefonica op-...
  • Seite 148 Indice alfabetico 13 Indice alfabetico Accettare una chiamata, 136 Caduta di tensione, 104 Accettare una chiamata esterna con telefonata Cancellare i messaggi, 136 interna in corso, 123 Cancellare l’elenco di ripetizione Alimentatore di rete, 104 di chiamata, 128 Alimentazione elettrica, 144 Cancellare numeri dall’elenco chiamate, 129 Ampliare il sistema telefonico, 140 Cancellare singoli numeri di chiamata, 129...
  • Seite 149 Indice alfabetico DECT, 144 Impianti telefonici interni, 108, 142 Dichiarazione di conformità, 145 Impostare il volume del ricevitore, 124 Disattivare, 133 Impostare il volume di squillo dell’unità base, 124 Disattivare e attivare lo squillo di chiamata, 124 Impostare il volume Disattivare la sveglia anzitempo, 132 di squillo dell’unità...
  • Seite 150 Indice alfabetico Max. durata di registrazione, 133 Paging, 131 Max. volume del ricevitore, 144 Pausa di selezione, 142 Memorizzare in rubrica un numero dall’elenco di PIN, 140, 144 ripetizione di chiamata, 128 Più stazioni base, 141 Menu principale, 114 Più unità portatili, 140 Messa in funzione, 106 Portata, 144 Messaggio di risposta, 134...
  • Seite 151 Indice alfabetico Registrare, 140 Salvare in rubrica, 128, 129 Registrare il messaggio di risposta, 134 Scopo d’impiego, 104 Registrare un promemoria, 137 Segnalazione ottica di chiamata, 110 Registrare un’unità portatile, 140 Segnalazione ottica di chiamata (LED di chiamata), 109, 110 Reset, 131 Segreteria integrata nella rete telefonica, 143 Ricevere una chiamata, 121...
  • Seite 152 Indice alfabetico Tasti di selezione diretta, 109, 110 Tasti numerici, 109, 110 Tasto asterisco, 109, 110 Tasto avanti, 109 Tasto cancelletto, 109 Tasto cancelletto / Segnale di chiamata off / Pausa di selezione, 110 Tasto conversazione, 110 Tasto freccia giù, 110 Tasto freccia su, 110 Tasto indietro, 109 Tasto INT, 109...
  • Seite 153 Contents Safety Information ....Starting Up ..... . . Operating Elements .
  • Seite 154 Safety Information 1 Safety Information Please read this operating instruction manual thoroughly. Intended use The telephone with handset and charging station is suitable for telephoning within a public tele- phone network system. Any other use is considered unintended use. Unauthorised modification or reconstruction is not permitted.
  • Seite 155 Safety Information Rechargeable batteries Attention: Never throw batteries into a fire. Only use batteries of the same type. Pay attention to the correct polarity. Incorrect polarity of the battery represents a risk of explosion during charging. Attention: Only use the rechargeable batteries prescribed. Never use standard bat- teries.
  • Seite 156 DCT 58741 Base unit Power adapter plug Receiver Helix cable for receiver Telephone connection cable Charging station with power adapter plug Handset Batteries (AAA 1.2 V NiMH) Operating manual Visit www.switel.com to find out whether the telephone set is already available.
  • Seite 157 Starting Up Putting the units into operation Connecting the base unit Connect the base unit as illustrated in the diagram. For safety reasons, only use the power adapter plug supplied. It is essential to observe the information regarding the installation location; . Page 154. Power socket Telephone line socket...
  • Seite 158 Starting Up Inserting the batteries in the handset The battery compartment is located on the rear side of the handset. Open the battery compartment and insert the two 2 rechargeable batteries of the type AAA NiMH, 1.2 V 500 mAh. Pay attention to the correct polarity.
  • Seite 159 Operating Elements 3 Operating Elements The telephone keys in this operating manual are subsequently depicted with a uniform contour. Therefore, slight deviations in the appearance of the symbols on the telephone keys compared to those depicted here are possible. Base unit Forwards key h Receiver OK/Menu key N...
  • Seite 160 Operating Elements Handset Visual call indicator (Call LED) Earpiece LC display One−touch dialling keys q r On/Off / On−hook key b Digit keys 1, 2... to 0 Hash key / Ringing tone off / Dialling pause u R−key / Back d Microphone Redialling c Star key t...
  • Seite 161 Operating Elements Icons and texts in the display Icon Description Indicates the battery capacity (full, half empty, almost empty). ! " Segments empty: The batteries must be charged. Run−through segments: The batteries are being charged; . Page 158. Segments on: The batteries are fully charged. Connection to the base unit.
  • Seite 162 Preliminary Information 4 Preliminary Information This chapter provides basic information on using the operating instruction manual. Notation in the manual Display Description Displays the contour of keys Press the key depicted briefly Press any key briefly 2 sec. t Press the key depicted for 2 seconds ë...
  • Seite 163 Preliminary Information Open the submenu i / j Select the required function Open the function i / j Select the required setting ë Use the digit keys to enter numbers or letters Confirm the input Return to the previous menu level Cancel all programming and saving and return the handset to Standby mode Many entries which are concluded by pressing the M key are confirmed by an accom-...
  • Seite 164 Menu Structure 5 Menu Structure Press the n or M key to open the main menu. Then use the i / j keys to select an entry and confirm your selection by pressing the n or M key. Further information on the menu and operation: .
  • Seite 165 Menu Structure ICM length Voice lang DEUTSCH FRANÇAIS NEDERLANDS ITALIANO Remote PIN Intercom Handset 01 − 06 Display according to the number of the handsets registered...
  • Seite 166 Menu Structure Phonebook ë Enter name ë Number ë Number VIP melody / ... / Edit ë Enter name ë Number ë Number VIP melody / ... / Delete Delete all Copy to Usage Letters are also imprinted on the digit keys. Letters, digits and special characters are entered by pressing the relevant key the respective number of times.
  • Seite 167 Menu Structure Clock/Alarm Set alarm Once ë Enter time Daily ë Enter time Date format DD/MM MM/DD Time format 24−hour 12−hour ë Set time The date and time are set using this menu option.
  • Seite 168 Menu Structure Only available on a handset: HS setting HS sound Ring volume / ... / Ext. ring / ... / Int. ring / ... / Key tone Tone Ring tone Low batt Out−of−range Equalizer Natural Bass Treble LCD contrast / ...
  • Seite 169 Menu Structure Only available on a handset: Base setting Clear VMWI Register PIN? Base Base PIN? PIN? Base PIN? Base Select base Base Base Base Base Auto Advance Dial mode Tone Pulse Recall time Short Medium Long ë Prefix 01 ' / ...
  • Seite 170 Menu Structure Only available on the base unit: Base setting Melody Ring volume / ... / Ext. ring / ... / Int. ring / ... / Key tone Tone Ring tone LCD contrast / ... / Clear VMWI / ... / Language (9 languages) Register...
  • Seite 171 Operation 6 Operation Many functions can be operated from both the base unit as well as the handset. Please note that many of the keys depicted below are provided on both the base unit as well as the handset; . Page 159. However, when completing an operating sequence, you may not switch between oper- ation on the base unit and operation on the handset.
  • Seite 172 Operation Making a call ë Enter the phone number (max. 48 digits) Delete the last digit if it is wrong a or è or k Dial the phone number It is also possible to make a call by first pressing the a key on the handset or taking the receiver from the base unit or pressing the k key and then waiting for the dialling tone.
  • Seite 173 Operation Making internal calls HS1: m or BS: v, i / j , m or v Intercom Initiate an internal call HS1/BS: i / j, m or v Select the handset or base unit required HS2: a Internal call is taken on the other handset HS1/BS / HS2: b End the internal call If the handset you have dialled for an internal call is involved in an external call, you...
  • Seite 174 Operation Displaying the duration of a call A few seconds after a call has begun, the current duration of the call appears in the display in min- utes and seconds. Setting the receiver volume The volume at the receiver can be adjusted to one of 5 levels during a call. i / j Raise/Lower the receiver volume Ringing volume...
  • Seite 175 Operation Handsfree This function is used to listen to the caller via the loudspeaker. a or k During a call: Activate the handsfree facility a or k During a call: Deactivate the handsfree facility When the handsfree function is activated, the icon appears in the display.
  • Seite 176 Operation Creating phone book entries . Also refer to Page 163 Open the phone book m or n m or n Select the submenu and confirm it ë, m or n Enter name Enter the name (max. 12 characters) and confirm it ë, m or n Number Enter phone number 1 (mobile number)
  • Seite 177 Operation Deleting phone book entries Deleting an entry Open the phone book i / j, m or n Select an entry and confirm it i / j, m or n Delete Select the function and confirm it In order to access phone book entries more quickly, open the phone book and enter the first letters of the entry required.
  • Seite 178 Operation Redialling list The telephone stores the last 5 phone numbers dialled together with the date and time of call. Saving a number in the redialling list in the phone book Open the redialling list i / j, m or n Select an entry and confirm it i / j, m or n...
  • Seite 179 Operation Call list All incoming calls received in your absence are recorded in a call list. The call list can contain up to 40 phone numbers. The time and date of receipt are recorded for each call. When the call list is open, the icon appears in the display.
  • Seite 180 Operation Acoustic and visual settings You can define various settings in order to adapt the telephone to your specific needs: Setting the ringing tone It is recommended to set different ringing tones to distinguish between internal and external calls. There are a total of 12 polyphone ringing tones available. Setting the ringing tone;...
  • Seite 181 Operation Other settings Automatic answering If this function is activated, an incoming call is taken when the handset is removed from the charg- ing station. The automatic answering function is activated and deactivated using the menu. Activating automatic answering; . Menu Structure, Page 168 Auto Answer menu option can only be opened in the menu of a handset.
  • Seite 182 Operation Setting the alarm clock function Once You can define whether the alarm clock function should only be set for a one−off alert ( ) or Daily whether the alarm should alert you every day at the same time ( Set alarm Setting the alarm;...
  • Seite 183 Answering Machine 7 Answering Machine The answering machine can store up to 57 messages (59 messages including the outgoing mess- ages). The maximum recording time is 15 minutes (including the outgoing messages). When the memory capacity for new messages is exhausted, no further messages are recorded. The answering machine then automatically switches to Answer Only mode.
  • Seite 184 Answering Machine Outgoing message The answering machine is provided with two, pre−recorded outgoing messages (OGM). Both pre− recorded outgoing messages can be replaced by ones of your own. OGM1 When Answer and Record mode is activated, the outgoing message is used, when OGM2 Answer Only mode is activated, outgoing message is used.
  • Seite 185 Answering Machine Reactivating the pre−recorded message Deleting the outgoing message you recorded yourself automatically reactivates the pre−recorded, default message. The outgoing message can be deleted by means of the menu; . Menu Structure, Page 164 ( lete MSG The pre−recorded messages cannot be deleted. Playing recorded messages If new messages have been recorded, the visual call indicator flashes on the base unit and on the registered handsets and the [ icon appears in the respective display.
  • Seite 186 Answering Machine Alternatively, these functions can be performed by pressing the respective keys: Delete message Repeat current message from the beginning 2x 1 Skip to previous message Stop playback (Pause) Skip to next message Setting the volume for playing messages You can adjust the volume on the base unit to one of 5 levels while the message is playing.
  • Seite 187 Answering Machine Delaying answering a call Use the menu to define how often the telephone should ring before an outgoing message is played to the caller. You can select between 2, 4, 6 or 8 ringing tones; . Menu Structure, Page 164 Ring delay The answering machine is set to 4 rings by default.
  • Seite 188 Answering Machine Remote access You can call your answering machine from another telephone to switch it on or to play messages and execute other functions. Remember that the calling telephone must support tone dialling. PIN code for remote access Remote PIN Remote PIN is set to 1234"...
  • Seite 189 Answering Machine Remote access, key function assignment The following table provides an overview of the functions available and the key to press to initiate the respective function. If no messages are played If messages are played Delete message Play message again Play message, resume playback Stop playback (Pause) Play the next message...
  • Seite 190 The internationally approved GAP regulates the compatibility of handsets and telephones (base stations/units) from different manufacturers. As a result, it is possible to integrate SWITEL devices and devices from other manufacturers together in one telephone system. It is possible, however, that some functions are not available.
  • Seite 191 Extending the Telephone System Deregistering handsets You can only deregister a handset from the base unit or another base unit by using another handset registered on the respective base unit. A handset cannot deregister itself. Handsets are deregistered via the menu; . Menu Structure, Pages 169 and 170. On the base unit: n, i / j, Base setting...
  • Seite 192 PBX / Supplementary Services 9 PBX / Supplementary Services R−key and recall time, supplementary services Your telephone supports supplementary services provided by your telephone network provider, such as brokering, call waiting and conference facilities. Press the d to use these supplementary services.
  • Seite 193 PBX / Supplementary Services Caller number display (CLIP The caller number display (CLIP) is a supplementary service offered by your telephone network provider. Contact your network provider for further information. If this function is available with your telephone line, the number of the caller appears in the display when the phone rings.
  • Seite 194 Technical Properties 10 Technical Properties Feature Value Standard DECT −GAP Power supply (base unit) Input: 100−240 V, 50−60 Hz Output: 6 V, 500 mA Power supply (charging station) Input: 100−240 V, 50−60 Hz Output: 6 V, 150 mA Rechargeable batteries 2 x 1.2 V 500 mAh NiMH, Size: AAA Maximum Output Power (NTP) 24 dBm...
  • Seite 195 In Case of Problems Declaration of Conformity This device fulfils the requirements stipulated in the EU directive: 1999/5/EC directive on radio equipment and telecommunications terminal equipment and the mutual recognition of their conformity. Conformity with the above mentioned directive is confirmed by the CE mark on the device. Service hotline Should problems arise with the telephone, please refer to the following information first.
  • Seite 196 In Case of Problems Problems Solutions − Reset all functions to their default settings; . Page 169. The system no longer responds − Briefly disconnect the power adapter plug from the power socket. The batteries are empty within − The batteries are empty or defective. a short time −...
  • Seite 197 Apart from occasionally cleaning the housing, no other upkeep is necessary. Guarantee SWITEL equipment is produced and tested according to the latest production methods. The imple- mentation of carefully chosen materials and highly developed technologies ensure trouble−free functioning and a long service life. The terms of guarantee do not apply where the cause of equip- ment malfunction is the fault of the telephone network operator or any interposed private branch extension system.
  • Seite 198 Index 13 Index Access code, 192 Call barring, 182 Acoustic and visual settings, 180 Call key, 160 Acoustic warning signal, battery capacity, 180 Call LED, 159, 160 Acoustic warning signal, range, 180 Call list, 159, 160, 179 Adjusting the ringing volume Call screening, 186 of the base unit, 174 Callback , 172...
  • Seite 199 Index Deactivating the microphone, 175 Earpiece, 160 Declaration of Conformity, 195 ECO mode, 158 DECT, 194 Editing phone book entries, 176 Deleting all entries, 177 Emergency calls, 182 Deleting all messages, 186 Ending a call, 171 Deleting all phone numbers, 179 Ending remote access, 188 Deleting an entry, 177 Entering names, 175...
  • Seite 200 Index Icons, 161 No. of call list entries, 194 Inserting the batteries in the handset, 158 No. of phone book entries, 194 Installation location, 154 No. of redialling list entries, 194 INT key, 159 Notation in the manual, 162 Intended use, 154 Number of messages, answering machine, 194 Internal calls, 172 Interrupting recording a memo, 187...
  • Seite 201 Index Package contents, 156 Safety information, 154 Paging, 181 Saving a number in the redialling list in the phone book, 178 Phone book, 159, 160, 172, 175 Saving numbers in the phone book, 178, 179 Phone book entries, 163 Scroll down key, 159 PIN, 190, 194 Scroll up key, 159 PIN code for remote access, 188...
  • Seite 202 Index Taking a call, 171 Taking a call being recorded, 186 Taking external calls when an internal call is in progress, 173 Talk time, 174 Telephoning, 171 Time and date format, 180 Tollsaver, 187 Transferring calls, 173 Transferring external calls internally, 173 Visual call indicator, 160 Visual call indicator (Call LED), 159, 160 VMWI, 193...
  • Seite 203 Wichtiger Hinweis Die Basisstation Ihres Telefons ist mit einem energieeffizienten Schaltnetzteil (Input 100~240 V Output 6 V , 500 mA) ausgestattet. Die Nulllast beträgt ca. 0,15 W. Die durchschnittliche Effi- zienz beträgt 71 %. Die Leistungsaufnahme der Basisstation beträgt max. 0,78 W. Die mit einem Telefonset gelieferte(n) Ladestation(en) ist/sind mit einem energieeffizienten Schalt- netzteil (Input 100~240 V , Output 6 V...
  • Seite 204 This equipment complies with the European R&TTE directive. To view the complete Declaration of Conformity, please refer to the free download available at our web site: www.switel.com. Service Hotline Bei technischen Problemen können Sie sich an unsere Service−Hotline unter Tel. 0900 00 1675 innerhalb der Schweiz (Kosten Swisscom bei Drucklegung: CHF 2,60/min) wenden.