Herunterladen Inhalt Inhalt Diese Seite drucken
switel DC41-Serie Bedienungsanleitung

switel DC41-Serie Bedienungsanleitung

Strahlungsarmes schnurloses dect-/gap-telefon
Inhaltsverzeichnis

Werbung

Verfügbare Sprachen

Verfügbare Sprachen

Strahlungsarmes schnurloses DECT−/GAP−Telefon
Teléphone DECT/GAP sans fil et à faible rayonnement
Telefono cordless DECT/GAP a basse radiazioni
Low−radiation cordless DECT/GAP telephone
DC41x
Bedienungsanleitung
Mode d'emploi
Istruzioni per l'uso
Operating Instructions
Downloaded from
www.Manualslib.com
manuals search engine

Werbung

Inhaltsverzeichnis

Fehlerbehebung

loading

Inhaltszusammenfassung für switel DC41-Serie

  • Seite 1 Strahlungsarmes schnurloses DECT−/GAP−Telefon Teléphone DECT/GAP sans fil et à faible rayonnement Telefono cordless DECT/GAP a basse radiazioni Low−radiation cordless DECT/GAP telephone DC41x Bedienungsanleitung Mode d’emploi Istruzioni per l’uso Operating Instructions Downloaded from www.Manualslib.com manuals search engine...
  • Seite 2 DC41x Bedienungsanleitung ..Mode d’emploi ... . . Istruzioni per l’uso ... Operating Instructions .
  • Seite 3: Inhaltsverzeichnis

    Sicherheitshinweise ... . Telefon in Betrieb nehmen ..Bedienelemente ....Einführende Informationen .
  • Seite 4: Sicherheitshinweise

    1 Sicherheitshinweise Lesen Sie diese Bedienungsanleitung sorgfältig durch. Bestimmungsgemäße Verwendung Dieses Telefon ist geeignet zum Telefonieren innerhalb eines Telefonnet- zes. Jede andere Verwendung gilt als nicht bestimmungsgemäß. Eigen- mächtige Veränderungen oder Umbauten sind nicht zulässig. Öffnen Sie das Gerät in keinem Fall selbst und führen Sie keine eigenen Reparatur- versuche durch.
  • Seite 5: Entsorgung

    Kapitel 1. Verpackungsinhalt prüfen Zum Lieferumfang gehören: Inhalt DC411 DC412 DC413 DC414 Basisstation mit Netzteil Ladestation mit − Netzteil Mobilteil Telefonanschluss- kabel Akkus Bedienungsanlei- tung Unter www.switel.com erfahren Sie, ob dieses Telefonset bereits erhältlich ist. Downloaded from www.Manualslib.com manuals search engine...
  • Seite 6: Basisstation Anschließen

    Basisstation anschließen Achtung: Stellen Sie die Basisstation mit einem Mindestab- stand von 1 m zu anderen elektronischen Geräten auf, da es sonst zu gegenseitigen Störungen kommen kann. Schließen Sie die Basisstation wie auf der Skizze abgebildet an. Verwen- den Sie aus Sicherheitsgründen nur das mitgelieferte Netzteil sowie das beigefügte Telefonanschlusskabel.
  • Seite 7: Akkus Einlegen

    Akkus einlegen Öffnen Sie das Akkufach. Legen Sie die Akkus in das Akkufach ein. Schlie- ßen Sie das Akkufach. Achtung: Verwenden Sie nur NiMH−Akkus vom Typ AAA (Mi- krozellen) 1,2 V / 500 mAh! Niemals Batterien/Primärzellen ver- wenden! Achten Sie auf die richtige Polarität! Akkus aufladen Stellen Sie das Mobilteil bei der ersten Inbetriebnahme für min- destens 16 Stunden in die Basisstation / Ladestation.
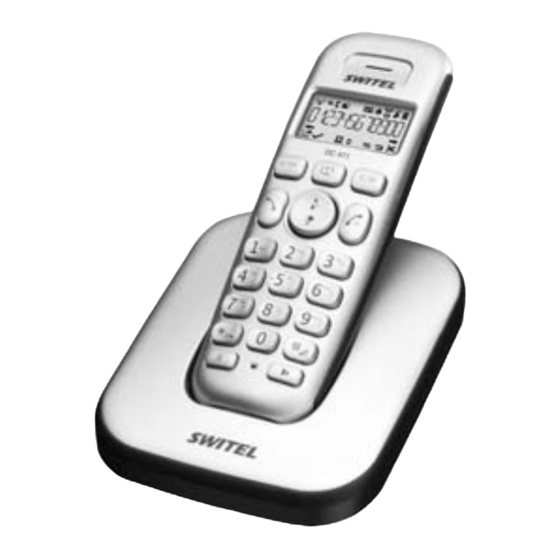
  • Seite 8: Bedienelemente

    3 Bedienelemente Die Tasten Ihres Telefons werden in dieser Bedienungsanleitung nachfol- gend mit vereinheitlichten umrandeten Symbolen dargestellt. Leichte Ab- weichungen der Tastensymbole Ihres Telefons gegenüber den hier verwen- deten Tastensymbolen sind daher möglich. Mobilteil Hörkapsel Telefonbuch−Taste Softkey (Int/C=Cancel, Mikrofon stumm) Auf−/Ab−Taste Auflegetaste Wahlwiederhol−Taste...
  • Seite 9: Einführende Informationen

    4 Einführende Informationen In diesem Kapitel finden Sie grundlegende Informationen zur Handhabung der Bedienungsanleitung und des Telefons. Darstellungsweise in der Bedienungsanleitung Darstellung von Tasten Abgebildete Taste kurz drücken 2 Sek. * Abgebildete Taste 2 Sekunden drücken Nummern oder Buchstaben eingeben Mobilteil klingelt Basisstation klingelt Mobilteil aus der Basisstation nehmen...
  • Seite 10: Telefonieren

    In der unteren Displayzeile werden zugehörig zu den beiden Softkeys die abhängig vom Betriebszustand verfügbaren Funktionen angezeigt. Aufruf des Menüs. Bestätigung der Einstellung. Aufbau eines Interngespräches (nur bei mehreren Mobilteilen an einer Basis). Zurück zum übergeordneten Menü bzw. Abbruch der Programmierung.
  • Seite 11: Gespräch Beenden

    Anrufen Geben Sie die Rufnummer ein. Fehler bei der Eingabe mit B korrigieren. Rufnummer wird gewählt. Sie können auch zuerst die Abnehmetaste drücken und erhalten damit das Freizeichen. Die eingegebenen Ziffern Ihrer ge- wünschten Rufnummer werden sofort gewählt. Eine Korrektur einzelner Ziffern der Rufnummer ist bei dieser Form des Ges- prächsaufbaus nicht möglich.
  • Seite 12: Hörer−/Lautsprecherlautstärke Einstellen

    Rufnummer wird gewählt. Anzeige der Gesprächsdauer Während eines Gesprächs wird die Gesprächsdauer in Stunden, Minuten und Sekunden angezeigt. Hörer−/Lautsprecherlautstärke einstellen D / E Sie können während eines Gesprächs die Lautstärke in 5 Stufen einstellen. Die Einstellungen sind getrennt voneinander und bleiben auch nach Ende des Gesprächs gespeichert.
  • Seite 13: Weitere Leistungsmerkmale

    Drücken Sie den Softkey Menü. D / E aus und drücken Sie OK. INTERN Wählen Sie Geben Sie die interne Rufnummer ein. Wenn das gerufenene Mobilteil eingeschaltet wird, KONFERENZ drücken und halten Sie die Stern−Taste, bis im Display erscheint. Legt einer der beteiligten Konferenzteilnehmer auf, bleiben die beiden anderen miteinander verbunden.
  • Seite 14: Anrufliste / Wahlwiederholung

    7 Anrufliste / Wahlwiederholung Anrufliste bearbeiten Öffnen Sie die Anrufliste. D / E Wählen Sie einen Eintrag aus. Drücken Sie den Softkey Menü. D / E Wählen Sie aus den folgenden Möglichkeiten und bestätigen Sie mit OK: NR.SPEICHERN Die Rufnummer wird im Telefonbuch gespeichert. Geben Sie einen Namen ein, bestätigen oder bearbeiten Sie die Rufnummer und legen Sie eine Ruftonmelodie für diesen Eintrag fest.
  • Seite 15: Telefonbuch

    8 Telefonbuch Telefonbucheinträge erstellen Im Telefonbuch können Sie 20 Rufnummern und zugehörige Na- men speichern. Sie können jedem Eintrag eine eigene Melodie zuordnen, mit der ein Anruf signalisiert werden soll. Geben Sie die Rufnummern immer mit der Ortsvorwahl ein; das ermöglicht eine korrekte Anzeige des jeweiligen Anrufers, für den ein Ein- trag angelegt ist und dessen Übertragung der Rufnummer an Ih- rem Anschluss verfügbar ist.
  • Seite 16: Telefon Einstellen

    Drücken Sie den Softkey Menü. D / E Wählen Sie aus den folgenden Möglichkeiten und bestätigen Sie mit OK: EINTRAG NEU Sie können einen neuen Eintrag anlegen. ANSEHEN Der Eintrag wird angezeigt. Mit den Pfeiltasten sehen Sie Name, Rufnummer und Melodie. AENDERN Sie können den Eintrag ändern.
  • Seite 17: Rufton Für Das Mobilteil Einstellen

    D / E aus und drücken Sie OK. Wählen Sie Geben Sie mit den Zifferntasten die Weckzeit ein. Drücken Sie OK. SNOOZE D / E und drücken Sie OK. Wählen Sie oder Ist „Snoozeˆ eingeschaltet, bedeutet dies, dass das Wecksignal nach 7 Minuten wiederholt wird, bis diese Funktion durch Drücken und Halten der Auflegetaste beendet wird.
  • Seite 18: Mobilteilnamen Einstellen

    Displaysprache einstellen Drücken Sie den Softkey Menü. D / E aus und drücken Sie OK. MT−EINSTEL. Wählen Sie D / E aus und drücken Sie OK. SPRACHE Wählen Sie D / E Wählen Sie eine Sprache und bestätigen Sie mit mit Mobilteilnamen einstellen Drücken Sie den Softkey Menü.
  • Seite 19: Flashzeit Einstellen

    TONWAHL Für die meisten Anschlüsse ist die richtige Einstellung. Flashzeit einstellen Drücken Sie den Softkey Menü. D / E aus und drücken Sie OK. BS−EINSTEL. Wählen Sie D / E aus und drücken Sie OK. FLASH−ZEIT Wählen Sie D / E KURZ MITTEL LANG...
  • Seite 20: Weiteres Mobilteil Des Gleichen Typs Anmelden

    Weiteres Mobilteil des gleichen Typs anmelden Drücken Sie den Softkey Menü. D / E aus und drücken Sie OK. ANMELDEN Wählen Sie Geben Sie die aktuelle PIN der Basis ein, an der das Mobiteil angemeldet werden soll, und drücken Sie OK. Drücken und halten Sie die Paging−Taste an der Basisstation so lange, bis der Anmeldeton hörbar ist (ca.
  • Seite 21: Anhang

    12 Anhang Menüstruktur ANRUFLISTE TELEFONBUCH BS−EINSTEL. MT ABMELDEN WAHLVERFAHR. TONWAHL IMPULSWAHL FLASH−ZEIT KURZ MITTEL LANG PIN AENDERN MT−EINSTEL.. WECKER AUS/EIN RUFTON INTERN MELODIE 1−10 EXTERN MELODIE 1−10 RUFTONLAUTST RUFTON AUS LAUTST. 1−5 TOENE TASTENTON EIN/AUS AKKU LEER EIN/AUS REICHWEITE EIN/AUS SPRACHE 11 SPRACHEN MT−NAME...
  • Seite 22: Fehlersuche

    13 Fehlersuche Haben Sie Probleme mit Ihrem Telefon, kontrollieren Sie zuerst die folgen- den Hinweise. Bei technischen Problemen können Sie sich an unsere Ser- vice−Hotline unter Tel. 0900 00 1675 innerhalb der Schweiz (Kosten aus dem Festnetz von Swisscom bei Drucklegung: CHF 2.60/min) wenden. Bei Garantieansprüchen wenden Sie sich an Ihren Fachhändler.
  • Seite 23 Werkseinstellungen/Auslieferungszustand Anrufliste: Kein Eintrag Telefonbuch: Kein Eintrag Wecker: Tonruf Mobilteil: Intern: Melodie 2 Extern: Melodie 1 Tonruflautstärke: 3 Hinweistöne: Tastenton: Ein Akku leer: Ein Reichweite: Ein Sprache: Deutsch Mobilteilname: DC41x Displayanzeige: Mobilteilname Autom. Rufannahme: Datum & Zeit: Datumsformat: TT−MM−JJ Zeitformat: 24 Stunden Wahlverfahren: Tonwahl...
  • Seite 24: Technische Daten

    14 Technische Daten Standard: DECT / GAP Kanalzahl: 120 Duplexkanäle Frequenzen: 1880 MHz bis 1900 MHz Duplexverfahren: Zeitmultiplex, 10 ms Rahmenlänge Kanalraster: 1728 kHz Bitrate: 1152 kBit / s Modulation: GFSK Sprachkodierung: 32 kBit / s Sendeleistung: 10 mW (mittlere Leistung pro Kanal) Reichweite: bis zu 300 Meter im Freien, in Gebäuden bis zu 50 Metern...
  • Seite 25: Konformitätserklärung

    Konformität. Die Konformität mit der o. a. Richtli- nie wird durch das CE−Zeichen auf dem Gerät bestätigt. Für die komplette Konformitätserklärung nutzen Sie bitte den kostenlosen Download von unserer Website www.switel.com. Pflegehinweise Reinigen Sie die Gehäuseoberflächen mit einem weichen und fusselfreien Tuch.
  • Seite 26 Notizen Downloaded from www.Manualslib.com manuals search engine...
  • Seite 27 Consignes de sécurité ... Mettre votre téléphone en service . . . Éléments de manipulation ..Introduction ....Téléphoner .
  • Seite 28: Consignes De Sécurité

    1 Consignes de sécurité Lisez très attentivement ce mode d’emploi. Utilisation conforme aux prescriptions Ce téléphone convient pour téléphoner à l’intérieur d’un réseau téléphoni- que. Tout autre utilisation est considérée comme non conforme à l’usage. Des modifications ou changements effectués d’un propre gré ne sont pas autorisés.
  • Seite 29: Mettre Votre Téléphone En Service

    Base avec bloc secteur Chargeur avec − bloc secteur Combiné Câble de raccor- dement téléphoni- Piles rechargea- bles Mode d’emploi À l’adresse www.switel.com, vous apprendrez si ce kit téléphonique est déjà disponible à la vente. Downloaded from www.Manualslib.com manuals search engine...
  • Seite 30: Raccorder La Base

    Raccorder la base Attention : Posez la base à une distance minimum d’1 m par rapport à d’autres appareils électroniques, une distance inférieure pouvant provoquer des interactions. Raccordez la base comme représenté sur le croquis. Pour des raisons de sécurité, n’utilisez que le bloc secteur fourni avec l’appareil ainsi que le câ- ble de raccordement téléphonique ci−joint.
  • Seite 31: Prise D'appel Automatique

    Mettre en place les piles rechargeables Ouvrez le compartiment à piles. Introduisez les piles rechargeables dans le compartiment à piles. Fermez le compartiment à piles rechargeables. N’utilisez que des piles rechargeables NiMH de type AAA (piles rondes) 1,2 V / 500 mAh ! Ne vous servez jamais de piles / piles primaires ! Veillez à...
  • Seite 32: Éléments De Manipulation

    3 Éléments de manipulation Dans ce mode d’emploi, les touches de votre téléphone seront représen- tées par la suite par des icônes encadrées standardisées. Il peut donc y avoir de légères différences entre les icônes des touches de votre télé- phone et celles des touches utilisées ici.
  • Seite 33: Introduction

    4 Introduction Dans ce chapitre, vous trouverez des informations de base vous expli- quant comment vous servir du mode d’emploi et du téléphone. Mode de représentation dans le mode d’emploi Visualisation des touches Appuyer brièvement sur la touche 2 sec. * Appuyer 2 secondes sur la touche représentée Saisir des chiffres ou des lettres Le combiné...
  • Seite 34: Mode Veille

    Dans la ligne d’écran inférieure sont affichées les fonctions disponibles se- lon l’état de fonctionnement et liées aux deux touches softkey. Appel du menu. Confirmation du réglage. Une communication interne s’établit (uniquement dans le cas d’une base avec plusieurs combinés). Retour au menu supérieur ou interruption de la programmation.
  • Seite 35: Téléphoner

    5 Téléphoner Prendre un appel (V) (U) Votre téléphone sonne. Si le combiné ne se trouve pas sur la base : Appuyer sur la touche Décrocher REPONSE AUTO Si le combiné se trouve sur la base et si n’est pas activée : Appuyer sur la touche Décrocher REPONSE AUTO...
  • Seite 36: Affichage De La Durée De La Communication

    Appeler à partir de la liste d’appels Votre téléphone enregistre les 10 derniers appels dans la liste d’appels. Si le numéro de téléphone est mémorisé dans le réper- toire, le nom s’affiche. Pour faire afficher le numéro de téléphone correspondant, appuyez sur la touche dièse #. L’enregistre- ment ne peut avoir lieu que si la fonction „transfert d’appel (CLIP)ˆ...
  • Seite 37: Autres Caractéristiques

    Appuyez sur la touche softkey Interne. Si deux combinés sont déclarés, l’autre combiné est aussitôt appelé. Dans le cas de plusieurs combinés déclarés, leurs numéros internes s’affichent (par ex. 2 3 4). Appuyez sur le numéro interne souhaité. Si vous appuyez sur „9ˆ...
  • Seite 38: Désactiver Le Combiné

    Désactiver la sonnerie du combiné Vous pouvez aussi désactiver la sonnerie via le menu . > REGL. COMB SONNERIES Appuyez sur la touche dièse et maintenez−la enfoncée jusqu’à ce que le symbole de la sonnerie désactivée apparaisse à l’écran j. Pour réactiver la sonnerie, appuyez de nouveau sur la touche dièse et maintenez−la enfoncée jusqu’à...
  • Seite 39: Répertoire

    Éditer la répétition des derniers numéros Ouvrez la répétition des derniers numéros. D / E Sélectionnez un enregistrement. Appuyez sur la touche softkey Menu. D / E Sélectionnez une des possibilités suivantes et confirmez avec OK. AJOUTER Le numéro de téléphone est mémorisé dans le répertoire.
  • Seite 40 Terminez la saisie du nom avec OK. Saisissez le numéro (20 chiffres max.). Si votre téléphone est raccordé à une installation téléphonique, saisissez également le préfixe d’accès au réseau. Si une pause de numérotation est nécessaire, après le préfixe d’accès au réseau, appuyez sur la touche 0 pendant env.
  • Seite 41: Régler Le Téléphone

    9 Régler le téléphone Date/heure Appuyez sur la touche softkey Menu. D / E et appuyez sur OK. REGL. COMB Sélectionnez D / E et appuyez sur OK. DATE & HEURE Sélectionnez D / E Sélectionnez une des possibilités suivantes et confirmez avec OK.
  • Seite 42 D / E Sélectionnez une des possibilités suivantes et confirmez avec OK. SONNERIE INT Sélectionnez une mélodie pour la signalisation d’un appel interne. SONNERIE EXT Sélectionnez une mélodie pour la signalisation d’un appel externe. VOL.SONNERIE SONNERIES Sélectionnez le volume sonore pour la .
  • Seite 43: Régler Le Temps De Flash

    D / E et appuyez sur OK. AFFICHAGE Sélectionnez D / E Sélectionnez si le nom du combiné ou l’heure doivent être affichés en mode veille et confirmez avec OK. Régler la prise d’appel automatique Appuyez sur la touche softkey Menu. D / E et appuyez sur OK.
  • Seite 44: Déclarer Et Annuler Des Combinés

    Le code PIN à quatre chiffres protège certains réglages contre un accès non autorisé. Si vous avez oublié le code PIN, veuillez bien vous adresser à notre service hotline. Remettre le téléphone dans son état de livraison Appuyez sur la touche softkey Menu. D / E et appuyez sur OK.
  • Seite 45: Fonctionnement Avec Installations Téléphoniques / Services Confort

    11 Fonctionnement avec installations téléphoniques / services confort Fonctionnement avec installations téléphoniques Si votre téléphone est raccordé à une installation téléphonique, vous pou- vez, au moyen de la touche R, tirer profit de certaines fonctions comme par ex. le transfert d’appels et le rappel automatique. Veuillez lire dans le mode d’emploi de votre installation téléphonique le temps de flash à...
  • Seite 46: Annexe

    12 Annexe Structure du menu JOURNAL REPERTOIRE REGL. BASE ANNULER COMB NUMEROTATION FREQ. VOCALE DECIMALE DELAI R COURT MEDIUM LONG MODIFIER PIN REGL. COMB. ALARME OFF/ON SONNERIES SONNERIE INT MELODIE 1−10 SONNERIE EXT MELODIE 1−10 VOL.SONNERIE VOLUME OFF VOLUME 1−5 ALERTES SON.
  • Seite 47: Diagnostic De Panne

    13 Diagnostic de panne Si vous avez des problèmes avec votre téléphone, contrôlez d’abord les re- marques suivantes. S’il s’agit de problèmes techniques, vous pouvez vous adresser à notre hotline de service en Suisse en appelant le numéro de tel. 0900 00 1675 (frais à...
  • Seite 48 Réglages usine / état à la livraison Liste d’appels : Pas d’enregistrement Répertoire : Pas d’enregistrement Alarme : Désactivée Sonnerie combiné :Interne : Mélodie 2 Externe : Mélodie 1 Volume de la sonnerie : 3 Tonalités d’avertissement : Son des touches : Activé Pile rechargeable vide : Activé...
  • Seite 49: Caractéristiques Techniques

    14 Caractéristiques techniques Standard : DECT / GAP Nombre de canaux : 120 canaux duplex Fréquences : 1880 MHz à 1900 MHz Processus duplex : multiplexage temporel, 10 ms longueur de marge Trame canaux : 1728 kHz Débit binaire : 1152 kBit / s Modulation : GFSK...
  • Seite 50: Déclaration De Conformité

    La conformité à la directive ci−dessus est confir- mée sur l’appareil par le symbole CE. Pour obtenir la déclaration de conformité intégrale, veuillez vous servir du téléchargement gratuit de notre site Internet www.switel.com. Remarques d’entretien Nettoyez les surfaces du boîtier avec un chiffon doux et non pelucheux.
  • Seite 51 Indicazioni di sicurezza ..Mettere in funzione il telefono ..Elementi di comando ... . Informazioni introduttive .
  • Seite 52: Indicazioni Di Sicurezza

    1 Indicazioni di sicurezza Leggere attentamente le presenti istruzioni per l’uso. Impiego conforme agli usi previsti Il presente telefono consente di svolgere telefonate all’interno di una rete telefonica. Qualsiasi altro impiego è considerato come non conforme agli usi previsti. Non sono consentite modifiche o trasformazioni non autoriz- zate.
  • Seite 53: Smaltimento

    Stazione di carica − con alimentatore di rete Unità portatile Cavo di collega- mento telefonico Accumulatori Istruzioni per l’uso Per ulteriori informazioni riguardo la disponibilità di questo set telefonico si prega di visitare il sito www.switel.com. Downloaded from www.Manualslib.com manuals search engine...
  • Seite 54 Collegare l’unità base Attenzione: Montare l’unità base con una distanza minima di 1 m da altri apparecchi elettronici in modo da evitare interferenze reciproche. Procedere al collegamento dell’unità base seguendo quanto raffigurato nella figura. Utilizzare per motivi di sicurezza solo l’alimentatore di rete oltre al cavo di collegamento telefonico fornito in dotazione.
  • Seite 55: Caricare Gli Accumulatori

    Inserire gli accumulatori Aprire il vano accumulatori. Inserire gli accumulatori nell’apposito vano ac- cumulatori. Chiudere quindi il vano accumulatori. Inserire gli accumulatori nel vano accumulatori precedentemente aperto. Attenzione: Utilizzare solo batterie ricaricabili al NiMH tipo AAA (microcelle) 1,2 V / 500 mAh! Non utilizzare mai batterie/celle pri- marie! Osservare la corretta polarità! Caricare gli accumulatori Riporre l’unità...
  • Seite 56: Elementi Di Comando

    3 Elementi di comando I tasti del telefono riportati nel presente manuale d’istruzioni per l’uso sono raffigurati sotto forma di simboli uniformi all’interno di un riquadro. Sono possibili lievi scostamenti dei simboli dei tasti sul telefono rispetto ai simboli qui raffigurati. Unità...
  • Seite 57: Informazioni Introduttive

    4 Informazioni introduttive In questo capitolo sono riportate le principali informazioni riguardo l’uso delle presenti istruzioni e del telefono. Modi di rappresentazione nelle istruzioni per l’uso Modi di rappresentazione dei tasti Premere brevemente il tasto raffigurato 2 sec. * Premere per 2 secondi il tasto raffigurato Inserire numeri o lettere Unità...
  • Seite 58: Compiere Telefonate

    Nella riga di display inferiore vengono visualizzate le funzioni disponibili per entrambi i tasti softkey a seconda della modalità. Richiamare il menu. Confermare la selezione. Attivare una chiamata interna (solo per più unità portatili su una sola unità base). Tornare al livello precedente del menu o concludere la programmazione.
  • Seite 59: Concludere Una Chiamata

    RISPOSTA AUT L’unità portatile si trova inserita nell’unità base e la è attivata: Estrarre l’unità portatile dalla base mentre la chiamata è accettata automaticamente. Telefonare Immettere il numero di chiamata. In caso di immissione errata, correggere con B. Il numero di chiamata è selezionato. È...
  • Seite 60 Chiamare un numero dalla rubrica telefonica La rubrica può contenere fino a 20 voci. Per immettere una voce si veda la sezione „Rubrica telefonicaˆ. Aprire la rubrica telefonica. D / E Selezionare una voce. Il numero di chiamata è selezionato. Visualizzazione della durata di conversazione Durante lo svolgimento di una chiamata, la durata di conversazione è...
  • Seite 61: Funzioni Speciali

    Immettere il numero di chiamata interno. La chiamata esterna è trattenuta. Se l’unità portatile chiamata è inserita, annunciare se occorre la presenza della comunicazione. Premere il tasto di riaggancio. La chiamata è trasferita. Conferenza Con chiamata esterna in corso... Premere il tasto softkey Menu. D / E e premere OK.
  • Seite 62: Elenco Chiamate / Ripetizione Di Chiamata

    Disattivare l’unità portatile Allo scopo di non sollecitare troppo gli accumulatori è possibile spegnere l’unità portatile. Tenere premuto il tasto di riaggancio. Dopo alcuni secondi l’unità portatile è disinserita. L’illuminazione del display si spegne. Per riaccendere l’unità portatile tenere premuto il tasto di riaggancio fino a quando non si avverte un segnale acustico ed il display non si illumina di nuovo.
  • Seite 63: Rubrica Telefonica

    ELIMINA La voce è cancellata. ELIM. TUTTI L’intera rubrica è cancellata a seguito di un’ulteriore richiesta di conferma. 8 Rubrica telefonica Creare voci nella rubrica telefonica Nella rubrica è possibile memorizzare fino a 20 numeri di tele- fono e relativi nomi. È possibile associare ad ogni voce una me- lodia di suoneria, con la quale verrà...
  • Seite 64: Impostazioni Del Telefono

    Tornare indietro alla modalità di stand−by. È possibile accedere all’elenco chiamate anche dal menu: y D E RUBRICA Modificare le voci della rubrica telefonica Premere il tasto rubrica telefonica. D / E Selezionare una voce. Premere il tasto softkey Menu. D / E Selezionare una delle seguenti opzioni e confermare con OK.
  • Seite 65 In caso di caduta della corrente, l’impostazione è cancellata se l’unità portatile risulta contemporaneamente disattivata o con accumulatori scarichi. Sveglia Premere il tasto softkey Menu. D / E e premere OK. IMPOSTA PORT Selezionare D / E e premere OK. SVEGLIA Selezionare D / E...
  • Seite 66 TONO TASTI Attivare o disattivare il tono dei tasti. TONO BATT Attivare o disattivare il tono di avviso che segnala quando gli accumulatori devono essere ricaricati. FUORIPORTATA Attivare o disattivare il tono che segnala quando l’unità portatile si trova fuori dalla portata dell’unità base. Impostare la lingua di display Premere il tasto softkey Menu.
  • Seite 67: Impostare Il Tempo Flash

    Impostare la procedura di selezione Premere il tasto softkey Menu. D / E e premere OK. IMPOSTA BASE Selezionare D / E e premere OK. MODO SELEZ Selezionare D / E e confermare con OK. TONI IMPULSI Selezionare La maggior parte di impianti telefonici richiedono l’impostazione TONI della modalità...
  • Seite 68: Registrare/Cancellare Le Unità Portatili

    10 Registrare/Cancellare le unità portatili Su una stazione base è possibile registrare fino a 5 unità portatili. Le unità portatili fornite con il vostro telefono sono già registrate con l’unità base. Per registrare un’unità portatile „estraneaˆ si prega di consultare il manuale di istruzioni.
  • Seite 69: Esercizio In Impianti Telefonici Interni / Servizi Addizionali

    11 Esercizio in impianti telefonici interni / Servizi addizionali Esercizio in impianti telefonici interni Avendo collegato il telefono ad un impianto telefonico interno, il tasto R consente di accedere a tutte le altre funzioni disponibili come per es. tra- sferimento di chiamata e funzione di richiamata automatica. Si prega di consultare le istruzioni per l’uso del proprio impianto telefonico interno per individuare il tempo flash da impostareal fine di poter usufruire di queste funzioni.
  • Seite 70: Appendice

    12 Appendice Struttura di menu LISTA CHIAM RUBRICA IMPOSTA BASE CANC PORTAT MODO SELEZ TONI IMPULSI FLASH BREVE MEDIO LUNGO CAMBIA PIN IMPOSTA PORT SVEGLIA DISATTIVA ATTIVA SUON PORTAT CHIAMATE INT MELODIA 1−10 CHIAMATE EST MELODIA 1−10 VOLUME ESCLUSA VOLUME 1−5 IMPOSTA TONI TONO TASTI ATTIVA...
  • Seite 71: Localizzazione Di Errori

    13 Localizzazione di errori In presenza di problemi con il telefono, seguire le indicazioni riportate qui di seguito. In caso di problemi tecnici è possibile rivolgersi alla nostra linea di assistenza chiamando al numero telefonico 0900 00 1675 nell’ambito della Svizzera (spese per chiamate praticate dalla rete Swisscom alla data di stampa: CHF 2.60/min).
  • Seite 72 Impostazioni predefinite/Configurazione iniziale Elenco chiamate: Vuoto Rubrica telefonica: Vuoto Sveglia: Disattivato Suoneria unità portatile: Interno: Melodia 2 Esterno: Melodia 1 Volume suoneria: 3 Toni segnalazione: Tono tasti: Attivato Accumulatore scarico: Attivato Portata: Attivato Lingua: Tedesco Nome unità portatile: DC41x Visualizzazione sul display: Nome portatile Risposta automatica: Attivato Data &...
  • Seite 73: Specifiche Tecniche

    14 Specifiche tecniche Standard: DECT / GAP Numero canali: 120 canali duplex Frequenze: da 1880 MHz a 1900 MHz Procedura duplex: Divisione di tempo, 10 ms lunghezza trama Distanza canali: 1728 kHz Bit rate: 1152 kBit / s Modulazione: GFSK Codifica voce: 32 kBit / s Potenza di trasmissione: 10 mW (potenza media per canale)
  • Seite 74: Dichiarazione Di Conformità

    Direttiva di cui sopra viene confermata dal marchio CE appli- cato sull’apparecchio. Per la dichiarazione di conformità completa si prega di voler usufruire del servizio gratuito di download dal nostro sito Internet www.switel.com. Consigli per la cura Pulire le superfici degli apparecchi con un panno morbido e antipelucchi.
  • Seite 75 Safety Information ....Preparing the Telephone ..Operating Elements ... . . Preliminary Information .
  • Seite 76: Safety Information

    1 Safety Information Please read this operating instruction manual thoroughly. Intended use The telephone is suitable for telephoning within a public telephone network system. Any other use is considered unintended use. Unauthorised modifi- cation or reconstruction is not permitted. Under no circumstances open the device or complete any repair work yourself.
  • Seite 77: Preparing The Telephone

    Base station with power adapter plug Charging station − with power adap- ter plug Handset Telephone con- nection cable Batteries Operating instruc- tions Visit www.switel.com to find out whether the telephone set is already avail- able. Downloaded from www.Manualslib.com manuals search engine...
  • Seite 78: Connecting The Base Station

    Connecting the base station Attention: Position the base station at least 1 meter away from other electronic devices, otherwise there is a risk of mutual di- sturbance. Connect the base station as illustrated in the diagram. For reasons of safety, only use the power adapter plug and telephone connection line sup- plied.
  • Seite 79: Inserting The Batteries

    Inserting the batteries Open the battery compartment cover. Insert the batteries in the battery compartment. Close the battery compartment. Only use NiMH rechargeable batteries of the type AAA cell, 1.2 V / 500 mAh! Never use standard batteries/primary cells! Pay at- tention to correct polarity.
  • Seite 80: Operating Elements

    3 Operating Elements The buttons in this operating manual are subsequently depicted with a uni- form contour. Therefore, slight deviations in the appearance of the symbols on the telephone buttons compared to those depicted here are possible. Handset Earpiece Phone book button Softkey (Int / C=Cancel, Mute microphone) Scroll up/down...
  • Seite 81: Preliminary Information

    4 Preliminary Information This chapter provides basic information on using the operating instruction manual and the telephone. Description of operating sequences in the manual Displays the contour of buttons Press the button depicted briefly 2 sec. * Press the button depicted for 2 seconds Enter digits or letters Handset rings Base station rings...
  • Seite 82: Telephoning

    The functions assigned to the respective softkeys are displayed in the bot- tom line of the display; the functions available vary according to the current operating status. Open the menu Confirm the setting Make an internal call (only when several handsets are registered on a base station) Back to the previous menu or cancel programming Scroll back to delete characters during entry (press...
  • Seite 83: Dialling From The Call List

    Making a call Enter the phone number. Delete any wrong entries by pressing B. The phone number is dialled. It is also possible to press the Off−hook button first to obtain the dialling tone. The digits then entered are dialled immediately. It is not possible to correct wrong digits individually using this dial- ling procedure.
  • Seite 84: Internal Calls

    D / E Select an entry from the list. The phone number is dialled. Call timer The duration of a call is displayed in hours, minutes and seconds during the call. Setting the receiver/loudspeaker volume D / E You can adjust the volume of a caller to one of five levels during a call.
  • Seite 85: Other Features

    Enter the internal call number. When the handset called answers, press and hold the CONFERENCE Star button until appears in the display. If one of the conference participants ends the call, the remaining participants remain connected. 6 Other Features Key lock The key lock function prevents functions assigned to buttons being activated inadvertently.
  • Seite 86: Call List / Redialling

    7 Call List / Redialling Editing the call list Open the call list. D / E Select an entry from the list. Press the Menu softkey. D / E Select one of the following options and confirm by pressing OK: ADD TO PB The phone number is stored in the phone book.
  • Seite 87: Creating A New Entry

    Creating a new entry Press the Phone Book button. If no entries yet exist, EMPTY is displayed. If entries already exist, the first entry is displayed. Press the Menu softkey. by pressing OK. Confirm Enter the name (max. 12 characters). Letters are also imprinted on the digit keys.
  • Seite 88: Setting Up The Telephone

    DELETE ALL The entire list is deleted after confirming a prompt. PB STATUS The current phone book status is displayed (e.g. 07/20 USED : 7 of 20 possible entries are stored). 9 Setting Up the Telephone Date/Time Press the Menu softkey. D / E and press OK.
  • Seite 89: Setting The Alert Tones

    Setting the ringing tone for the handset Press the Menu softkey. D / E and press OK. HS SETTINGS Select D / E and press OK. RING SETUP Select D / E Select one of the following options and confirm by pressing OK.
  • Seite 90: Setting The Display

    Setting the display Press the Menu softkey. D / E and press OK. HS SETTINGS Select D / E and press OK. HS DISPLAY Select D / E Select whether you want to display the handset name or the time when in Standby mode and confirm by pressing OK.
  • Seite 91: Registering/Deregistering Handsets

    Enter the new PIN and press OK. Enter the new PIN again and press OK. The four−digit PIN protects certain functions from unauthorised access. If you forget the PIN, please contact our service hotline. Resetting the phone to its default status Press the Menu softkey.
  • Seite 92: Operating In A Pbx / Supplementary Services

    11 Operating in a PBX / Supplementary Services Operating in a PBX If the telephone is connected to a private branch exchange, functions such as transferring calls and automatic call back can be used via the R button. Refer to the operating manual provided with your private branch exchange as to which Flash time must be set in order to use these functions.
  • Seite 93: Appendix

    12 Appendix Menu Structure CALL LIST PHONEBOOK BS SETTINGS DELETE HS DIAL MODE TONE PULSE FLASH TIME SHORT MEDIUM LONG CHANGE PIN HS SETTINGS ALARM OFF/ON RING SETUP INT. RING MELODY 1−10 EXT. RING MELODY 1−10 RING VOLUME VOLUME OFF VOLUME 1−5 TONE SETUP KEY TONE...
  • Seite 94: Troubleshooting

    13 Troubleshooting Should problems arise with the telephone, please refer to the following in- formation first. In the case of technical problems, you can contact our hot- line service, Tel. 0900 00 1675 within Switzerland (Swisscom fees, via landline, at time of going to print: CHF 2.60/min). In the case of claims under the terms of guarantee, please contact your sales outlet.
  • Seite 95 Default settings/State on delivery Call list: No entries Phone book: No entries Alarm: Handset ringing tone: Internal calls: Melody 2 External calls: Melody 1 Ringing tone volume: 3 Alert tones: Key tone: On Battery empty: On Range: On Language: German Handset name: DC41x Display:...
  • Seite 96: Technical Data

    14 Technical Data Standard: DECT / GAP No. of channels: 120 duplex channels Frequencies: 1880 MHz to 1900 MHz Duplex method: Time multiplex, 10 ms frame length Channel raster: 1728 kHz Bit rate: 1152 kBit / s Modulation: GFSK Voice encoding: 32 kBit / s Transmission power: 10 mW (medium performance per channel) Range:...
  • Seite 97: Declaration Of Conformity

    Conformity with the above mentioned directive is confirmed by the CE symbol on the device. To view the complete Declaration of Conformity, please refer to the free download available on our web site www.switel.com. Maintenance Clean the housing surfaces with a soft, fluff−free cloth.
  • Seite 98 Notes Downloaded from www.Manualslib.com manuals search engine...
  • Seite 99 Notes Downloaded from www.Manualslib.com manuals search engine...
  • Seite 100: Service-Hotline

    Quest’apparecchiatura è conforme alla direttiva europea R&TTE. Per la dichiarazione di conformità completa si prega di voler usufruire del servizio gratuito di download dal nostro sito Internet www.switel.com. This equipment complies with the European R&TTE directive. To view the complete Declaration of Conformity, please refer to the free download available at our web site: www.switel.com.

Diese Anleitung auch für:

Dc411 dc412Dc413Dc414

Inhaltsverzeichnis