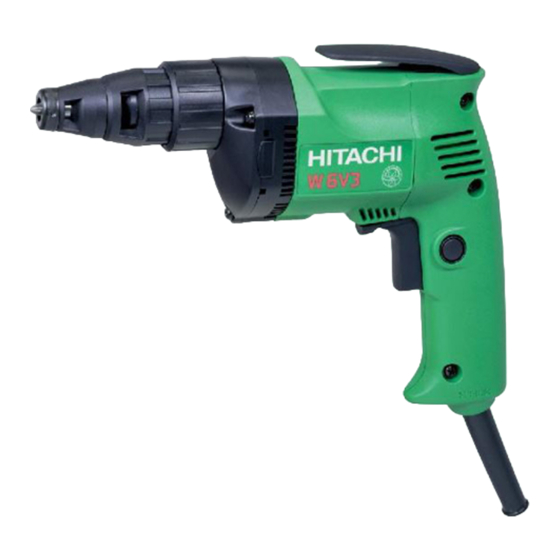
Herunterladen Inhalt Inhalt Diese Seite drucken

Werbung

Verfügbare Sprachen
  • DE

Verfügbare Sprachen

  • DEUTSCH, seite 9
SCREW DRIVER
SCHRAUBER
VISSEUSE
AVVITATORE
SCHROEVEDRAAIER
ATORNILLADOR
W 6V3 • W 6VA3 • W 6VB2 • W 8VB
W6V3 • W6VA3
Read through carefully and understand these instructions before use.
Diese Anleitung vor Benutzung des Werkzeugs sorgfältig durchlesen und verstehen.
Lire soigneusement et bien assimiler ces instructions avant usage.
Prima dell'uso leggere attentamente e comprendere queste istruzioni.
Deze gebruiksaanwijzing s.v.p. voor gebruik zorgvuldig doorlezen.
Leer cuidadosamente y comprender estas instrucciones antes del uso.
Handling instructions
Bedienungsanleitung
Mode d'emploi
Istruzioni per l'uso
Gebruiksaanwijzing
Instrucciones de manejo
W6VB2 • W8VB

Werbung

Inhaltsverzeichnis
loading

Inhaltszusammenfassung für Hitachi Koki W 6V3

  • Seite 1 VISSEUSE AVVITATORE SCHROEVEDRAAIER ATORNILLADOR W 6V3 • W 6VA3 • W 6VB2 • W 8VB W6V3 • W6VA3 W6VB2 • W8VB Read through carefully and understand these instructions before use. Diese Anleitung vor Benutzung des Werkzeugs sorgfältig durchlesen und verstehen.
  • Seite 3 1 – 1.5 mm 1.5 – 2 mm 1 – 1.5 mm...
  • Seite 4 English Deutsch Français Lever Hebel Levier R side R Seite Côté R Unteranschlag Sub-Stopper Butée secondaire Locator Aufnehmer Positionneur Manchon de blocage Lock sleeve Sperrhülse Spline Keilnuta Cannelure Couvercle d’engrenage Gear cover Getriebedeckel Hex. head screw Sechskantschraube Vis à tête six pans Drywall screw Drywall-Schraube Vis Drywall...
  • Seite 5 English 13. Do not overreach. Keep proper footing and balance GENERAL OPERATIONAL PRECAUTIONS at all times. 14. Maintain tools with care. Keep cutting tools sharp WARNING! When using electric tools, basic safety and clean for better and safer performance. Follow precautions should always be followed to reduce the risk instructions for lubrication and changing of fire, electric shock and personal injury, including the...
  • Seite 6: Standard Accessories

    English STANDARD ACCESSORIES (1) No. 2 Plus bit ........1 (W6V3, W6VA3) (2) Magnetic hex socket (H= 10 mm) ..1 (W6VB2, W8VB) (3) Hook ..................1 Standard accessories are subject to change without notice. OPTIONAL ACCESSORIES (sold separately) 1. For hex-head screws Hex-socket Sub-Stopper (B) Magnetic type...
  • Seite 7: Maintenance And Inspection

    English 4. Confirm the direction of bit rotation (Fig.1) will then remain ON even when the finger is released. The bit rotates clockwise (viewed from the rear By pulling the trigger switch again, the switch side) when the reversing switch lever is set to the stopper disengages and the switch is turned OFF “R”...
  • Seite 8 English (3) Remove the carbon brushes from the brush holders. Assembly (1) Insert the new carbon brushes into the brush holders. (2) Insert the brush holders together with the carbon brushes into the brush holder chambers in the housing. (3) Ensure that the lead wire and other parts are properly positioned, and that there is no possibility of the lead wire coming in contact with the armature or other moving parts.
  • Seite 9: Allgemeine Vorsichtsmassnahmen

    Deutsch 12. Den Arbeitsplatz gut absichern. Zwingen oder einen ALLGEMEINE VORSICHTSMASSNAHMEN Schraubstock zur Befestigung des Werkstücks verwenden. Das ist sicherer als die Benutzung der WARNUNG! Bei der Verwendung von Elektrowerkzeugen Hände und macht beide Hände zur Bedienung des müssen immer die grundlegenden Vorsichtsmaßnahmen Werkzeugs frei.
  • Seite 10: Technische Daten

    Deutsch TECHNISCHE DATEN Modell W6V3 W6VA3 W6VB2 W8VB Spannung (je nach Gebiet)* (110V, 115V, 120V, 127V, 220V, 230V, 240V) Leistungsaufnahme* 600W Leerlaufdrehzahl 0 – 4000/min 0 – 2600/min 0 – 1700/min Kapazität 6 mm 8 mm Bohrschenklgröße 6,35 mm Hex. Gewicht (ohne Kabel) 1,3 kg 1,4 kg...
  • Seite 11: Anbringen Und Abnehmen Der Sechskantmuffe Oder Des Schraubenziehers

    Deutsch 3. Plastikgehäuse 4. Haken (3) Für selbstbohrende Schrauben mit Kreuzschlitzkopf: Die selbstbohrende Schraube wird auf den Schraubenzieher aufgesetzt und der Abstand zwischen dem Ende des Unteranschlags und der Unterseite des Schraubenkopfes wird wie in Abb.5 gezeigt auf 1 bis 1,5 mm eingestellt. 6.
  • Seite 12: Wartung And Inspektion

    Deutsch drücken. Dann dreht sich die Sechskantmuffe und (3) Die Kohlenbürste wird auf dem Kohlenbürstenhalter zieht die Schraube an. entfernt. ACHTUNG Einbau Schraubenzieher muß senkrecht (1) Die neue Kohlenbürste wird in den Bürstenhalter Schraubenkopf gehalten werden. Wenn er schräg eingesetzt. gehalten wird, wird die Antriebskraft richt voll auf (2) Der Bürstenhalter wird zusammen mit der die Schraube übertragen, und der Schraubenkopf...
  • Seite 13 Français 13. Ne pas présumer de ses forces. Essayer de garder PRECAUTIONS GENERALES DE TRAVAIL son équilibre en toute circonstance. 14. Entretenir les outils avec soin. Les conserver bien ATTENTION! Lors de l’utilisation d’un outillage électrique, aiguisés et les nettoyer afin d’en obtenir les les précautions de base doivent être respectées de meilleures performances et de pouvoir les utiliser manière à...
  • Seite 14: Accessoires Standard

    Français SPECIFICATIONS Modèle W6V3 W6VA3 W6VB2 W8VB Tension (par zone)* (110V, 115V, 120V, 127V, 220V, 230V, 240V) Puissanae* 600W Vitesse sans charge 0 – 4000/min 0 – 2600/min 0 – 1700/min Capacités 6 mm 8 mm Dimension queue de mèche 6,35 mm Hex.
  • Seite 15: Avant La Mise En Marche

    Français 3. Boîtier en plastique 4. Crechet (3) Pour vis autoperceuses à tête ronde : Monter les vis autoperceuses sur la tête de vissage et régler la distance entre l’extrémité de la butée secondaire et la base de la tête des vis à 1-1,5 mm, comme l’indique la Fig.5.
  • Seite 16 Français 3. Sens de rotation du manchon six pans (4) Remettre le capot de la poignée en faisant bien Le manchon six pans tourne dans le sens des attention à ce que le fil électrique ne soit pas coincé aiguilles d’une montre (vu de l’arrière) quand le entre le capot et le boîtier, et fixer le capot avec sélecteur de marche arrière est amené...
  • Seite 17: Precauzioni Generali

    Italiano tenendolo fermo con le mani, che restano libere PRECAUZIONI GENERALI per maneggiare l’elettroutensile. 13. Non squilibrare il corpo durante l’esecuzione di ATTENZIONE! un lavoro. Stare sempre su due piedi, in equilibrio Quando si usano elettroutensili, bisogna sempre seguire stabile. le precauzioni basilari di sicurezza per ridurre il rischio di 14.
  • Seite 18: Caratteristiche

    Italiano CARATTERISTICHE W6V3 W6VA3 W6VB2 W8VB Modell (110V, 115V, 120V, 127V, 220V, 230V, 240V) Voltagio (per zona)* 600W Potenza assorbita* Veloclitá senza carico 0 – 4000/min 0 – 2600/min 0 – 1700/min 6 mm 8 mm Capacità 6,35 mm Hex. Misure gambo della vite Peso (senza il cavo) 1,3 kg...
  • Seite 19 Italiano 3. Custodia in plastica 4. Gancio Montare una vite autofilettante sulla punta e impostare la distanza tra il fermo secondario e il fondo della tesa della vite su 1–1,5 mm, come mostrato nella Fig.5. 6. Montaggio della punta Atteneresi alle instruzioni riportate al paragrafo “Montaggio e smontaggio della punta”.
  • Seite 20: Manutenzione E Controlli

    Italiano 3. Direzione di rotazione dell’allogiamento esagonale ATTENZIONE Se la levetta di inversamento è in posizione “R”, Accertarsi di eseguire eszattamente il suddetto l’alloggiamento esagonale gira in senso orario (visto procedimento di montaggio. Qualora i fili all’interno da dietro). Se la levetta è in posizione “L”, dovessero venire a contatto con l’armatura o essere l’alloggiamento esagonale gira in senso antiorario, presi tra il coperchio dell’impugnature e l’involucro,...
  • Seite 21 Nederlands 13. Buig u nooit te ver naar voren. Kies een goede ALGEMENE VOORZORGMAATREGELEN plaats en behoud altijd uw evenwicht. 14. Behandel het gereedschap voorzichtig. Zorg ervoor WAARSCHUWING! Bij gebruik van elektrisch dat het gereedschap scherp en schoon is zodat gereedschap moet u altijd de normale basisvoorzorgen een goed en veilig prestatievermogen wordt voor de veiligheid in acht nemen om de kans op brand,...
  • Seite 22: Technische Gegevens

    Nederlands TECHNISCHE GEGEVENS W6V3 W6VA3 W6VB2 W8VB Model Voltage (verschillend van (110V, 115V, 120V, 127V, 220V, 230V, 240V) gebied tot gebied)* 600W Opgenomen vermogen* Toerental onbelast 0 – 4000/min 0 – 2600/min 0 – 1700/min 6 mm 8 mm Capaciteiten 6,35 mm Hex.
  • Seite 23: Voor Het Gebruik

    Nederlands 3. Plastic doos 4. Haak (3) Voor zelftappende kruiskopschroeven: zelftappende schroef schroevendraaierpunt en stel de afstand tussen het uiteinde van de sub-stopper en de onderkant van de schroefkop in op 1–1,5 mm, zoals afgebeeld in Afb.5. 6. Bevestiging van de boor “Aanbrengen verwijderen schroevendraaier”...
  • Seite 24: Onderhoud En Inspectie

    Nederlands VOORZICHTIG (2) De bourstelhouder wordt samen met de koolborstel Er moet goed op gelet worden, dat de in de daarvoor bestemde ruimte gezet. schroevedraaier loodrecht op de kop van de schroef (3) Er moet op gelet worden, dat de kabel en de overige wordt gehouden.
  • Seite 25 Español 13. No extenderse excesivamente para efectuar un PRECAUCIONES GENERALES PARA OPERACIÓN trabajo. Mantener en todo momento un buen balance y base de apoyo. ¡ADVERTENCIA! Cuando utilice herramientas eléctricas, 14. Mantener cuidadosamente las herramientas.Tener tome las medidas de seguridad básicas para reducir el las siempre limpias y afiladas para obtener un riesgo de incendios, descargas eléctricas, y lesiones, mejor rendimiento y un funcionamiento más...
  • Seite 26 Español ESPECIFICACIONES W6V3 W6VA3 W6VB2 W8VB Modelo Voltaje (por areas)* (110V, 115V, 120V, 127V, 220V, 230V, 240V) Acometida* 600W Velocidad de marcha en vacio 0 – 4000/min 0 – 2600/min 0 – 1700/min Capacidades 6 mm 8 mm Tamaño de porta-broca 6,35 mm Hex.
  • Seite 27: Antes De La Puesta En Marcha

    Español 3. Caja de plástico 4. Gancho la cabeza del tornillo a 1,5–2 mm, como mostrado en Fig.4. (3) Para tornillos autorroscante de grandes: Montar el tornillo autorroscante en la broca y graduar la distancia entre el extermo del retén secundario y la base del tornillo autorroscante a 1–1,5 mm, como mostrado en Fig.5.
  • Seite 28 Español (4) Reinstalar la cobertura del asidero asegurándose al 3. Dirección de giro del portatornillos mismo tiempo de que las conducciones no se pillen El portatornillos hexagonal gira hacia la derecha entre cobertura y carcasa y asegurar la cobertura (visto desde aterás) cuando la palanca del interruptor del asidero con los tres tornillos.
  • Seite 30 Representative office in Europe Hitachi Power Tools Europe GmbH 31. 10. 2003 Siemensring 34, 47877 Willich 1, F. R. Germany Head office in Japan Hitachi Koki Co., Ltd. K. Kato Shinagawa Intercity Tower A, 15-1, Konan 2-chome, Board Director Minato-ku, Tokyo, Japan Hitachi Koki Co., Ltd.

Diese Anleitung auch für:

W 6va3W 6vb2W 8vb

Inhaltsverzeichnis