Pkm KG 238.4 A+++ Bedienungsanleitung

Verwandte Anleitungen für Pkm KG 238.4 A+++


Inhaltszusammenfassung für Pkm KG 238.4 A+++
- Seite 1 All manuals and user guides at all-guides.com Bedienungsanleitung Instruction Manual Kühl-Gefrierkombination Freezer Fridge KG 238.4 A+++ www.pkm-online.de...
-
Seite 2: Inhaltsverzeichnis
All manuals and user guides at all-guides.com INHALT English language on page 25ff. KAPITEL THEMA SEITE Vorwort Erklärung der Signalwörter Klimaklassen Sicherheits- und Warnhinweise Aufbau und Anschluss Beschreibung des Geräts Thermostat und Bedienung Reinigung und Pflege Außerbetriebnahme Problembehandlung Technische Daten Entsorgung Garantiebedingungen Technische Änderungen bzw. -
Seite 3: Vorwort
All manuals and user guides at all-guides.com 1. VORWORT Sehr geehrte Kundin/ sehr geehrter Kunde! Wenn Sie sich mit dieser Bedienungsanleitung vertraut gemacht haben, wird die Bedienung des Geräts für Sie kein Problem darstellen. Bevor Ihr Gerät das Herstellerwerk verlassen durfte, wurde es eingehend auf seine Sicherheit und Funktionstüchtigkeit überprüft. -
Seite 4: Erklärung Der Signalwörter
All manuals and user guides at all-guides.com 2. ERKLÄRUNG DER SIGNALWÖRTER Beachten Sie unbedingt die in der Bedienungsanleitung eingefügten Signalwörter verweist auf eine WARNUNG! verweist auf eine GEFAHR! Gefahrensituation, die ,wenn sie nicht Gefahrensituation, die ,wenn sie nicht abgewendet wird, eine unmittelbare abgewendet wird, eine... -
Seite 5: Sicherheits- Und Warnhinweise
All manuals and user guides at all-guides.com 4. SICHERHEITS- UND WARNHINWEISE Bewahren Sie diese Bedienungsanleitung so auf, dass sie bei Bedarf jederzeit griffbereit ist. Befolgen Sie sorgfältig alle Hinweise, um Unfälle oder eine Beschädigung des Geräts zu vermeiden. dieser Bedienungsanleitung enthaltenen Anweisungen Beschreibungen wurden für verschiedene Typen von Kühlgeräten entwickelt. - Seite 6 All manuals and user guides at all-guides.com HINWEIS! Behandeln Sie die Oberflächen des Geräts immer äußerst schonend. Bereits Ringe an Ihren Fingern oder Armschmuck können die Oberflächen durch Kratzer erheblich beschädigen. Energieversorgung 1. Ziehen Sie immer den Netzstecker aus der Steckdose, bevor Sie irgendwelche Reinigungs- oder Wartungsarbeiten an dem Gerät vornehmen.
- Seite 7 All manuals and user guides at all-guides.com Ziehen Sie nicht den Stecker aus der Steckdose und benutzen Sie nicht die Bedienelemente des Geräts. Berühren Sie nicht das Gerät, bis sämtliches Gas abgezogen ist. Bei Missachtung dieser Anweisungen können Funken entstehen, die das Gas entflammen.
-
Seite 8: Aufbau Und Anschluss
All manuals and user guides at all-guides.com 5. AUFBAU UND ANSCHLUSS WARNUNG! Verwenden Sie bei 220–240 V/50 Hz Netzbetrieb keine Steckdosenleisten, Mehrfachsteckdosen oder Verlängerungskabel. Alle Netzanschlussleitungen, die Beschädigungen aufweisen, müssen von einer qualifizierten Fachkraft (Elektrotechniker/-in)ausgewechselt werden. Lassen Sie alle Reparaturen nur von Ihrem autorisierten Kundendienst durchführen. - Seite 9 All manuals and user guides at all-guides.com 3. Zu Ihrer eigenen Sicherheit muss das Gerät geerdet sein. Das Gerät ist mit einem 3-poligen Erdungsstecker ausgestattet. Verwenden Sie nur eine entsprechende Sicherheitssteckdose, um die Gefahr eines Stromschlags zu minimieren. 4. Die technischen Daten Ihrer elektrischen Versorgung müssen den auf dem Typenschild angegebenen Werten entsprechen.
- Seite 10 All manuals and user guides at all-guides.com 2. Entfernen Sie das obere Scharnier an Punkt C. 3. Entfernen Sie die Tür des Kühlbereichs. Schritt 2 1. Entfernen Sie das mittlere Scharnier an Punkt D.. 2. Entfernen Sie die Tür des Kühlbereichs. 3.
- Seite 11 All manuals and user guides at all-guides.com 1. Entfernen Sie die Scharnierachse an Punkt G. Bringen Sie die Achse an der spiegelgleichen Seite an. 2. Bringen Sie das getauschte Scharnier an an der linken Unterseite des Geräts an. 3. Tauschen Sie den linken und rechten Standfuß. Bringen Sie die Standfüße an den dafür vorgesehenen Löchern an.
-
Seite 12: Beschreibung Des Geräts
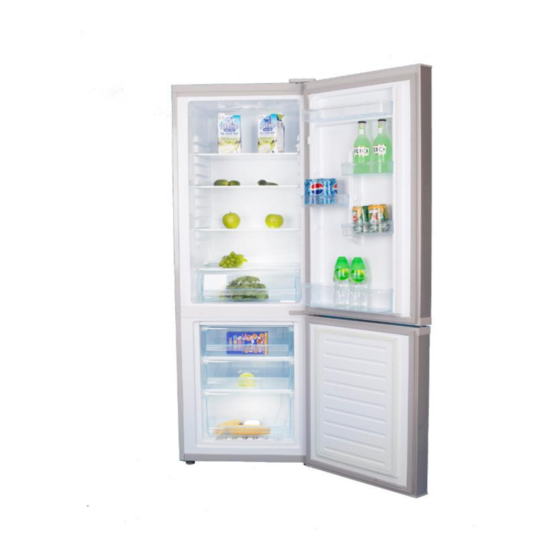
All manuals and user guides at all-guides.com 4. Bringen Sie die obere Scharnierabdeckung und die Abdeckung für die Löcher an. Der Wechsel des Türanschlags ist abgeschlossen. 6. BESCHREIBUNG DES GERÄTS Das von Ihnen gekaufte Gerät wurde möglicherweise inzwischen verbessert und weist somit vielleicht Unterschiede zur Bedienungsanleitung auf. -
Seite 13: Thermostat Und Bedienung
All manuals and user guides at all-guides.com 7. THERMOSTAT UND BEDIENUNG Temperaturregelung SOBALD SIE DAS GERÄT AUFGESTELLT HABEN, WARTEN SIE BITTE 4 STUNDEN, BEVOR SIE ES EINSCHALTEN! 24 S ENUTZEN SIE DEN EFRIERBEREICH ERST NACH TUNDEN Einstellung Stufe Minimal Stufe 1 Normal Stufe 3 Maximal... - Seite 14 All manuals and user guides at all-guides.com f. Sie das Gerät nicht überfüllen. g. Sie kein warmes oder heißes Kühlgut in das Gerät geben. 2. Hohe Umgebungstemperaturen bei gleichzeitigem Betrieb der kältesten Einstellungen können dazu führen, dass der Kompressor durchgehend arbeitet, um die Temperatur im Inneren des Geräts aufrecht zu erhalten.
-
Seite 15: Reinigung Und Pflege
All manuals and user guides at all-guides.com Wenn Sie die Tür öffnen, schließen Sie diese wieder sobald als möglich. Überprüfen Sie laufend, ob das Gerät genügend belüftet wird. Das Gerät muss an allen Seiten gut belüftet werden. Stellen Sie die Temperatur sobald wie möglich von einer hohen auf eine niedrige Einstellung, abhängig davon, wie beladen das Gerät ist und wie hoch die Umgebungstemperatur ist. - Seite 16 All manuals and user guides at all-guides.com 2. Wischen Sie anschließend mit klarem Wasser nach 3. Wischen Sie die gereinigte Fläche trocken. 4. Überprüfen Sie den Ablauf und die Ablauföffnung im Inneren des Geräts. Türdichtungen Waschen Sie diese mit warmem Wasser und einem milden Reinigungsmittel ab. Ablaufrinne/Ablauföffnung Reinigen Sie die Ablaufrinne und Ablauföffnung regelmäßig;...
-
Seite 17: Außerbetriebnahme
All manuals and user guides at all-guides.com 6. Entfernen Sie anschließend die kleineren Eisstücke. 7. Wischen Sie das Gerät und die Türdichtungen abschließend mit trockenen und weichen Tüchern ab und sorgfältig trocken. 8. Nach der Reinigung muss die Tür eine Zeitlang offen bleiben, damit das Gerät durchlüftet. -
Seite 18: Problembehandlung
All manuals and user guides at all-guides.com 1. Verfahren sie entweder wie im Abschnitt oben, oder 2. lassen Sie das Gerät in Betrieb und a. entfernen Sie alle verderblichen Lebensmittel aus dem Kühlbereich. b. reinigen Sie den Kühlbereich. c. lagern Sie alle dafür geeigneten Lebensmittel im Gefrierbereich. Wenn Sie das Gerät bewegen wollen: 1. - Seite 19 All manuals and user guides at all-guides.com Ineffiziente Kühlleistung. Tür wurde zu häufig geöffnet. Zu warme Temperatureinstellung am Tür ist nicht richtig geschlossen. Thermostat. Wählen Eisablagerungen im Gerät. gegebenenfalls eine andere Ungenügende Abstände an der Einstellung. Rückwand und an den Seiten. Tür/Türdichtungen überprüfen.
-
Seite 20: Technische Daten
All manuals and user guides at all-guides.com kann bei hoher Luftfeuchtigkeit / sehr warmen Außentemperaturen entstehen. Klicken ist immer dann zu hören, wenn sich der Kompressor ein- oder ausschaltet. Summen wird vom Kompressor verursacht, während er arbeitet. Klopfen / Knacken kann durch Ausdehnung und Schrumpfung der Bestandteile des Kühlsystems entstehen und wird infolge von Temperaturschwankungen vor und nach dem Einschalten des Kompressors ausgelöst. - Seite 21 All manuals and user guides at all-guides.com Bitte entsorgen Sie das Gerät unter Beachtung der jeweiligen Gesetzgebung hinsichtlich explosiver Gase. Altgeräte dürfen nicht einfach zusammen mit dem Hausmüll entsorgt werden. Bringen Sie Ihr altes Gerät stattdessen zu einer geeigneten Sammel- oder Entsorgungseinrichtung Ihrer Gemeinde.
-
Seite 22: Garantiebedingungen
All manuals and user guides at all-guides.com Wenn elektrische Geräte auf Mülldeponien oder Müllhalden entsorgt werden, können gesundheitsgefährdende Stoffe ins Grundwasser gelangen. Somit gelangen solche Stoffe in die Nahrungskette und schädigen Ihre Gesundheit und Ihr Wohlbefinden. Kühlmittel Brandgefahr! Beschädigen Sie den Kühlmittelkreislauf nicht. WARNUNG! Der Kühlmittelkreislauf des Geräts enthält das Kühlmittel R600a, ein natürliches Gas von hoher Umweltverträglichkeit. - Seite 23 Garantiezeit auf Wunsch das alte Gerät kostenfrei durch ein neues Gerät gleicher Art, gleicher Güte und gleichen Typs ersetzt. Sofern das betroffene Gerät zum Zeitpunkt der Fehleranzeige nicht mehr hergestellt wird, ist PKM berechtigt, ein ähnliches Gerät zu liefern.
- Seite 24 5. Schäden am Produkt, die durch nicht fachgerechte Installation oder Transport verursacht wurden; 6. Schäden infolge nicht haushaltsüblicher Nutzung; 7. Schäden, die außerhalb des Geräts durch ein PKM-Produkt entstanden sind - soweit eine Haftung nicht zwingend gesetzlich angeordnet ist. Die Gültigkeit der Garantie endet bei: 1.