Inhaltsverzeichnis
Werbung
Verfügbare Sprachen
Verfügbare Sprachen
Quicklinks
Calidad en
Empresa
Automoción
Registrada
IATF 16949
ISO 9001
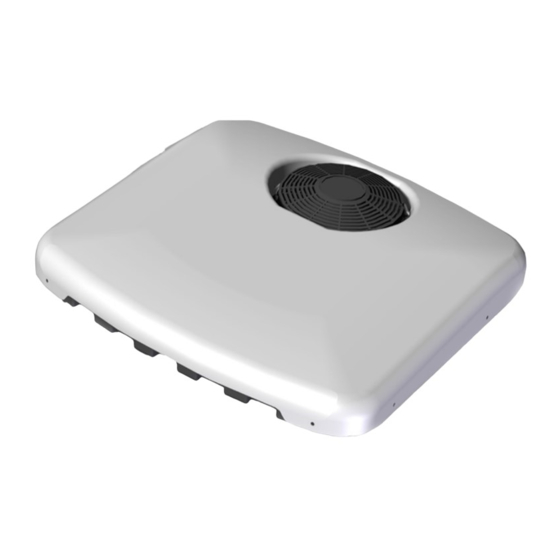
SLIM FIT
DAF
Instrucciones de Montaje
Mounting Instructions
Instructions de Montage
Montageanweisungen
Istruzioni di Montaggio
®
ES
Spanish
EN
English
FR
French
GE
German
IT
Italian
220AA35383
Werbung
Inhaltsverzeichnis

Verwandte Anleitungen für Bergstrom bycool green line SLIM FIT DAF


Inhaltszusammenfassung für Bergstrom bycool green line SLIM FIT DAF
- Seite 1 ® SLIM FIT Instrucciones de Montaje Spanish Mounting Instructions English Instructions de Montage French Montageanweisungen German Istruzioni di Montaggio Italian Calidad en Empresa Automoción Registrada 220AA35383 IATF 16949 ISO 9001...
- Seite 2 ó manta protectora para evitar posibles arañazos. Al instalar Slim Cool en el techo hay que tener en cuenta Dirna Bergstrom queda exenta de responsabilidad que, normalmente, las cabinas que vienen provistas de si se producen averías que procedan de una inadecuada manipulación ó...
- Seite 3 SLIM FIT ® IMPORTANTE: Este documento contiene las instrucciones de montaje para los modelos: - DAF XF 105 Space Cab. - DAF XF 105 Space Cab (Desde fecha fabricación del vehículo: 10/09/2012). - DAF XF 105 Super Space Cab. - DAF XF 105 Space Cab (Euro 6). Seguir las intrucciones de montaje correspondiente al modelo del vehículo.
- Seite 4 SLIM FIT ® DAF XF 105 Super Space Cab Desmontar embellecedores laterales (*) tirando de ellos y desplazándolos hacia la parte trasera de la cabina. Desmontar embellecedor delantero (*) tirando de el hacia abajo y desconectar clemas de luces. Desmontar grupillas de sujección del tapizado de la parte delantera desde el riel de la cortina con útil especial.
- Seite 5 SLIM FIT ® DAF XF 105 Super Space Cab Desplazando tapizado hacia abajo, desmontar tornillos delanteros de sujección del riel de cortinilla de la escotilla y desmontar éste. Desmontar marco interior de escotilla (*). Desmontar escotilla quitando tornillos de sujección y desconectando conector.
-
Seite 6: Todos Los Modelos
SLIM FIT ® TODOS LOS MODELOS Pegue la junta EPDM alrededor del hueco de escotilla (mirar el detalle para cortar los bordes finales de unión de la junta). - DAF XF 105 Space Cab. - junta 30X25. - DAF XF 105 Space Cab (Euro 6). - junta 30X25. - Seite 7 SLIM FIT ® TODOS LOS MODELOS Poner equipo vertical y roscar (4) hexágonos M8/125x26 con arandela goma, arandela ala ancha en los insertos de la base y apretar con par de apriete 12,7±10% Nm. DAF SUPER SPACE CAB Roscar (4) hexágonos M8x32 sobre hexágonos roscados en la base y apretar contra los mismos haciendo contratuerca (ver esquema página 10).
- Seite 8 SLIM FIT ® Roscar (2) hexágonos M6 L=36 en la parte trasera sentido de la marcha y (2) hexágonos L=78 en la parte delantera con arandela de goma, arandela al ancha y apretar. Para vehículos DAF XF 105 Space Cab fabricados desde el 10/09/2012 en adelante se deben sustituir los hexágonos M-H M6 L78 y L36 por los hexágonos M-H M6 de...
- Seite 9 SLIM FIT ® TODOS LOS MODELOS EXTERIOR CABINA: Posicionar el Slim Fit en el hueco de la escotilla. Escotilla ¡Atención! Al colocar el equipo en el hueco escotilla, revisar que las salidas de desagüe no queden obstruidas por la junta EPDM. DAF XF 105 Space Cab DAF XF 105 Super Space Cab Introducir soportes de fijación por debajo del...
- Seite 10 SLIM FIT ® Vista explosionada hasta la fijación de los soportes DAF XF 105 Space Cab Euro 6 M8 M-H L=26 Junta EPDM 30x25 M8 M-H L=26 M6 M-H L=78 Techo cabina M6 M-H L=36 Tapizado Soporte fijación 8/125x45 DAF XF 105 Space Cab (Desde fecha fabricación del vehículo: 10/09/2012) M8 M-H L=26 Junta EPDM 25x15 M8 M-H L=26...
- Seite 11 SLIM FIT ® Vista explosionada hasta la fijación de los soportes DAF XF 105 Super Space Cab M8 M-H L=26 M8 M-H L=26 Junta EPDM 30x25 M6 M-H L=76 Techo cabina Hexágono M6 M-H L=76 M8 M-H (L=32) Tapizado Hexágono M8 M-H (L=32) Soporte fijación 8/125x45...
- Seite 12 SLIM FIT ® Posicionar consola y mover el equipo hasta que quede centrado. Una vez centrado quitar consola y apretar tornillos M8 hasta que hagan tope los soportes de fijación con los hexágonos M8 para la fijación total de la unidad.
- Seite 13 SLIM FIT ® TODOS LOS MODELOS EXCEPTO EURO 6 Instrucciones detalladas sobre la instalación del cableado de alimentación con acceso por guantera superior derecha Abra la cubierta de la guantera superior derecha y quite los dos tornillos del lado inferior. (A) Separe ligeramente la guantera e introduzca la mano a través del lado inferior para recoger el cableado...
- Seite 14 SLIM FIT ® TODOS LOS MODELOS EXCEPTO EURO 6 Instrucciones detalladas sobre la instalación del cableado de alimentación sin acceso por guantera superior derecha Desmontar barras de desplazamiento de cortinas delanteras aflojando tornillos con llave allen. Desmontar tornillos superiores de guanteras y bascular éstas.
- Seite 15 SLIM FIT ® TODOS LOS MODELOS EXCEPTO EURO 6 Instrucciones detalladas sobre la instalación del cableado de alimentación En parte central está ubicado el cable original de alimentación (A); hacer conexión con cable suministrado. Abrir tapa de fusibles y colocar maxifusible de 40 A en lugar del indicado.
- Seite 16 SLIM FIT ® Instrucciones detalladas sobre instalación del cableado modelo Euro 6 Por el interior de la cabina desmontar tapas indicadas. Desmontar caja de fusibles. Pasar el extremo del cable azul con caja suministrado acompañado a cables originales hasta punto A y conectar.
- Seite 17 SLIM FIT ® Instrucciones detalladas sobre instalación del cableado modelo Euro 6 Colocar fusible de 25A en (B). Pasar el extremo del cable marrón con caja suministrado acompañado a cables originales hasta punto C y conectar.
- Seite 18 SLIM FIT ® Instrucciones detalladas sobre instalación del cableado modelo Euro 6 Abrir guantera superior derecha (D) y desmontar tapa (E). Por tubo corrugado ubicado en parte inferior lado pasajero, introducir cable Az y M y sacarlo por el extremo del tubo que sale por la guantera superior derecha.
- Seite 19 SLIM FIT ® Instrucciones detalladas sobre instalación del cableado modelo Euro 6 Conectar cajas de cableados y llevar cableado por detrás de las guanteras originales y el tapizado hasta el equipo y conectar con el mismo. TODOS LOS MODELOS Volver a montar embellecedores originales en su posición.
- Seite 20 SLIM FIT ® Vista explosionada lateral hasta la fijación de las consolas DAF XF 105 Super Space Cab Hexágono Hexágono Junta EPDM 30x25 M-H (L=78) M-H (L=36) Techo cabina Frente Tapizado Soporte fijación Consola DAF XF 105 Super Space Cab Tapizado Consola Tornillo 6/100x15 allen...
- Seite 21 SLIM FIT ® Vista explosionada lateral hasta la fijación de las consolas DAF XF 105 Space Cab hexágono Hexágono Junta EPDM 30x25 M-H L 36 M-H (L=78) Techo cabina Frente Tapizado Soporte fijación Consola DAF XF 105 Space Cab Euro 6 Hexágono M-H 78mm Tapizado Consola...
- Seite 22 SLIM FIT ® Vista explosionada frontal hasta la fijación de las consolas DAF XF 105 Space Cab (Desde fecha fabricación del vehículo: 10/09/2012) hexágono Hexágono Junta EPDM 25x15 M-H L 26 M-H (L=68) Techo cabina Frente Tapizado Soporte fijación Consola DAF XF 105 Space Cab (Desde fecha fabricación del vehículo: 10/09/2012) Separador 10 mm Hexágono M-H 68mm...
- Seite 23 SLIM FIT ® TODOS LOS MODELOS EXCEPTO EURO 6- Esquema eléctrico AVISO IMPORTANTE! ¡ Precaución de no invertir las polaridades al conectar el equipo. Si esto sucediera, la placa de mandos no se enciende y el equipo no funciona. Sensor aire de retorno NTC 15KΩ...
- Seite 24 SLIM FIT ® MODELOS EURO 6- Esquema eléctrico AVISO IMPORTANTE! ¡ Precaución de no invertir las polaridades al conectar el equipo. Si esto sucediera, la placa de mandos no se enciende y el equipo no funciona. Sensor aire de retorno NTC 15KΩ...
- Seite 25 SLIM FIT ®...
- Seite 26 When installing air conditioning equipment on roof, the training in vehicles air conditioning. upper cabin part must be protected with a cloth or a Dirna Bergstrom shall not be responsible for protective blanket to avoid possible scratches. When breakdowns or damages coming from an inadequate...
- Seite 27 SLIM FIT ® IMPORTANT: This document contains assembly instructions for the following models: - DAF XF 105 Space Cab. - DAF XF 105 Space Cab (From vehicle manufacture date: 10/09/2012). - DAF XF 105 Super Space Cab. - DAF XF 105 Space Cab (Euro 6). Follow the assembly instructions for the vehicle model.
- Seite 28 SLIM FIT ® DAF XF 105 Super Space Cab Remove the side decorative pieces (*) by pulling on them and moving them to the back of the cab. Remove the front decorative piece (*) by pulling it downwards, and disconnect the light terminals.
- Seite 29 SLIM FIT ® DAF XF 105 Super Space Cab Move the upholstery downwards and remove the front screws which support the hatch curtain rail, and remove it. Take down the inside hatch frame (*). Take down the hatch by removing the support screws and disconnecting the connector.
-
Seite 30: All Models
SLIM FIT ® ALL MODELS Attach the EPDM seal around the hatch gap (see the details to cut the ends of the seal joint). - DAF XF 105 Space Cab. - seal 30X25. - DAF XF 105 Space Cab 8 (Euro 6). - seal 30X25. - Seite 31 SLIM FIT ® ALL MODELS Place the unit upright and screw on (4) M8/125x26 hexagons with a rubber washer and a wide-rimmed washer in the base inserts and tighten with a torque of 12.7±10% Nm. DAF SUPER SPACE CAB Screw (4) M8x32 hexagons on the base hexagons and tighten by way of counter nut (see diagram on page 33).
- Seite 32 SLIM FIT ® Screw (2) M6 L=36 hexagons to the rear section in the direction of travel and (2) L=78 hexagons to the front section with a rubber washer and wide-rimmed washer and tighten. For DAF XF 105 Space Cab vehicles manufactured since 10/09/2012, replace the M-F M6 L78 and L36 hexagons with M-F M6 L68 and L26 hexagons respectively.
- Seite 33 SLIM FIT ® ALL MODELS CABIN EXTERIOR: Position the Slim Fit in the hatch gap. Hatch Caution! When positioning the unit above the hatch gap, check that the wastewater run-offs are not blocked by the EPDM seal. DAF XF 105 Space Cab DAF XF 105 Super Space Cab Introduce the fastening supports underneath the upholstery and secure to the hexagons with...
- Seite 34 SLIM FIT ® Exploded view through to the support attachment DAF XF 105 Space Cab Euro 6 M8 M-H L=26 EPDM Seal 30x25 M8 M-H L=26 M6 M-H L=78 Cabin roof M6 M-H L=36 Upholstery Attachment support 8/125x45 DAF XF 105 Space Cab (From vehicle manufacture date: 10/09/2012) M8 M-H L=26 EPDM seal 25x15 M8 M-H L=26...
- Seite 35 SLIM FIT ® Exploded view through to the support attachment DAF XF 105 Super Space Cab M8 M-H L=26 M8 M-H L=26 EPDM Seal 30x25 M6 M-H L=76 Cabin roof M6 M-H L=76 Hexagon (L=32) Upholstery Hexagon M8 M-H (L=32) Attachment support 8/125x45...
- Seite 36 SLIM FIT ® Position the console and move the unit until it is aligned. Once aligned, remove the console and tighten M8 screws until the fastening supports come up against the M8 hexagons to fully fasten the unit.
- Seite 37 SLIM FIT ® ALL MODELS EXCEPT EURO 6 Detailed instructions on the installation of power cables with access through the top right glove compartment Open the top right glove compartment cover and remove the two screws from the bottom section. (A) Slightly separate the glove box and gather in the original wiring by inserting your hand through the lower side.
- Seite 38 SLIM FIT ® ALL MODELS EXCEPT EURO 6 Detailed instructions on the installation of power cables without access through the top right glove compartment Take down the front curtain rails by releasing the screws with an Allen key. Remove the top glove compartment screws and tilt.
- Seite 39 SLIM FIT ® ALL MODELS EXCEPT EURO 6 Detailed instructions on the installation of power cables The original power cable (A) is located in the central section; connect using the supplied cable. Open the fuse cover and position 40 A maxi- fuse in the indicated place.
- Seite 40 SLIM FIT ® Detailed instructions on the installation of Euro 6 model cables Take down the indicated covers on the inside of the cabin. Remove the fuse box. Pass the end of the blue wire with the supplied box along with the original wires to point A and connect.
- Seite 41 SLIM FIT ® Detailed instructions on the installation of Euro 6 model cables Position 25A fuse in (B). Pass the end of the brown wire with the supplied box along with the original wires to point C and connect.
- Seite 42 SLIM FIT ® Detailed instructions on the installation of Euro 6 model cables Open the top right glove compartment (D) and remove the cover (E). Insert Az and M wire through the corrugated pipe located at the bottom of the passenger side, and remove it through the end of the pipe in the top right glove compartment.
- Seite 43 SLIM FIT ® Detailed instructions on the installation of Euro 6 model cables Connect the wiring boxes and run the wiring behind the original glove compartments and the upholstery through to the unit and connect. ALL MODELS Return the original decorative pieces to their position.
- Seite 44 SLIM FIT ® Exploded side view through to console attachment DAF XF 105 Super Space Cab M-F Hexagon EPDM seal 30x25 Hexagon (L=78) (L=36) Cabin roof Front Upholstery Attachment support Console DAF XF 105 Super Space Cab Upholstery Console 6/100x15 Allen screw Interior air distribution panel...
- Seite 45 SLIM FIT ® Exploded side view through to console attachment DAF XF 105 Space Cab M-F Hexagon EPDM seal 30x25 hexagon (L=78) (L=36) Cabin roof Front Upholstery Attachment support Console DAF XF 105 Space Cab Euro 6 M-F Hexagon 78 mm Upholstery Console 6/100x15 Allen screw...
- Seite 46 SLIM FIT ® Exploded front view through to console attachment DAF XF 105 Space Cab (From vehicle manufacture date: 10/09/2012) M-F Hexagon EPDM seal 25x15 hexagon (L=68) (L=26) Cabin roof Front Upholstery Attachment support Console DAF XF 105 Space Cab (From vehicle manufacture date: 10/09/2012) Spacer 10 mm M-F Hexagon 68 mm Upholstery...
- Seite 47 SLIM FIT ® ALL MODELS EXCEPT EURO 6- Electrical Diagram IMPORTANT NOTE! Take care not to invert polarities when connecting the unit to the power supply. If this were to happen, the plate would not come on and the unit would not work. Return air sensor NTC 15KΩ...
- Seite 48 SLIM FIT ® EURO 6 MODELS - Electrical Diagram IMPORTANT NOTE! Take care not to invert polarities when connecting the unit to the power supply. If this were to happen, the plate would not come on and the unit would not work. Return air sensor NTC 15KΩ...
- Seite 49 SLIM FIT ®...
- Seite 50 Durant l’installation du , tenir compte du fait Slim Cool Dirna Bergstrom, ne sera pas responsable des que normalement les cabines pourvues d’écoutille dommages ou des bris dérivés d’une installation ou possède une structure suffisamment solide pour d’une manipulation incorrecte ni des modifications...
- Seite 51 SLIM FIT ® IMPORTANT : Ce document contient les instructions de montage des modèles : - DAF XF 105 Space Cab. - DAF XF 105 Space Cab (depuis date fabrication véhicule : 10/09/2012). - DAF XF 105 Super Space Cab. - DAF XF 105 Space Cab (Euro 6).
- Seite 52 SLIM FIT ® DAF XF 105 Super Space Cab Démonter les enjoliveurs latéraux (*) en les tirant et en les déplaçant vers la partie arrière de la cabine. Démonter l’enjoliveur avant (*) en le tirant vers le bas et déconnecter les bornes des lumières.
- Seite 53 SLIM FIT ® DAF XF 105 Super Space Cab En déplaçant la tapisserie vers le bas, démonter les vis frontales de fixation du rail du rideau de l’écoutille et le démonter. Démonter le cadre intérieur de l’écoutille (*). Démonter l’écoutille en retirant les vis de fixation et en débranchant le connecteur.
-
Seite 54: Tous Les Modèles
SLIM FIT ® TOUS LES MODÈLES Collez le joint EPDM autour du creux de l’écoutille (regarder le détail pour couper les bords finaux d’union du joint). - DAF XF 105 Space Cab. - joint 30x25. - DAF XF 105 Space Cab 8Euro 6). - joint 30x25. - Seite 55 SLIM FIT ® TOUS LES MODÈLES Placer l’équipement verticalement et visser (4) hexagones M8/125x26 avec une rondelle en caoutchouc, rondelle surface large, dans les inserts de la base et appliquer un couple de serrage de 12,7±10% Nm. DAF SUPER SPACE CAB Visser (4) hexagones M8x32 sur les hexagones filetés à...
- Seite 56 SLIM FIT ® Visser (2) hexagones M6 L=36 à la partie arrière dans le sens de la marche et (2) hexagones L=78 à la partie avant avec une rondelle en caoutchouc, une rondelle à surface large et serrer. Pour les véhicules DAF XF 105 Space Cab fabriqués depuis le 10/09/2012 il faut remplacer les hexagones M-H M6 L78 et L36 par les hexagones M-H M6 de L68 et...
- Seite 57 SLIM FIT ® TOUS LES MODÈLES EXTÉRIEUR CABINE : Placer le Slim Fit dans le creux de l’écoutille. Écoutille Attention ! Avant de placer l’équipement sur le creux de l’écoutille, vérifier que les sorties d’écoulement ne soient pas bouchées par le joint EPDM. DAF XF 105 Space Cab DAF XF 105 Super Space Cab Introduire les supports de fixation sous la...
- Seite 58 SLIM FIT ® Vue décomposée jusqu’à la fixation des supports DAF XF 105 Space Cab Euro 6 M8 M-H L=26 Joint EPDM 30x25 M8 M-H L=26 M6 M-H L=78 Plafond cabine M6 M-H L=36 Tapisserie Support fixation 8/125x45 DAF XF 105 Space Cab (From vehicle manufacture date: 10/09/2012) M8 M-H L=26 Joint EPDM 25x15 M8 M-H L=26...
- Seite 59 SLIM FIT ® Vue décomposée jusqu’à la fixation des supports DAF XF 105 Super Space Cab M8 M-H L=26 M8 M-H L=26 Joint EPDM 30x25 M6 M-H L=76 Plafond cabine M6 M-H L=76 Hexagon (L=32) Tapisserie Hexagon M8 M-H (L=32) Support fixation 8/125x45...
- Seite 60 SLIM FIT ® Placer la console et déplacer l’équipement jusqu’à ce qu’il reste centré. Après avoir procédé au centrage, retirer la console et serrer les vis M8 jusqu’à ce que les supports de fixation atteignent les hexagones M8 pour la fixation complète de l’unité.
- Seite 61 SLIM FIT ® TOUS LES MODÈLES SAUF EURO 6 Instructions détaillées sur l’installation du câblage d’alimentation avec accès par la boîte à gants supérieure droite Ouvrez le couvercle de la boîte à gants supérieure droite et retirez les deux vis du côté inférieur (A) Séparez légèrement la boîte à...
- Seite 62 SLIM FIT ® TOUS LES MODÈLES SAUF EURO 6 Instructions détaillées sur l’installation du câblage d’alimentation sans accès par la boîte à gants supérieure droite Démonter les barres de déplacement des rideaux de la partie frontale en desserrant les vis avec une clé allen. Démonter les vis supérieures des boîtes à...
- Seite 63 SLIM FIT ® TOUS LES MODÈLES SAUF EURO 6 Instructions détaillées sur l’installation du câblage d’alimentation Le câble d’origine d’alimentation (A) est situé sur la partie centrale ; connectez-le au câble fourni. Ouvrir le couvercle des fusibles et placer un maxi-fusible de 40A au lieu de celui indiqué.
- Seite 64 SLIM FIT ® Instructions détaillées sur l’installation du câblage modèle Euro 6 À l’intérieur de la cabine, démonter les couvercles indiqués. Démonter la boîte à fusibles. Passer l’extrémité du câble bleu avec boîte fourni en accompagnant les câbles d’origine jusqu’au point A et connecter.
- Seite 65 SLIM FIT ® Instructions détaillées sur l’installation du câblage Modèle Euro 6 Placer un fusible de 25A sur (B). Passer l’extrémité du câble marron avec boîte fourni en accompagnant les câbles d’origine jusqu’au point C et connecter.
- Seite 66 SLIM FIT ® Instructions détaillées sur l’installation du câblage Modèle Euro 6 Ouvrir la boîte à gants supérieure droite (D) et démonter le couvercle (E). À travers le tube cannelé placé sur la partie inférieure du côté du passager, introduire le câble Az et M et le sortir par l’extrémité...
- Seite 67 SLIM FIT ® Instructions détaillées sur l’installation du câblage Modèle Euro 6 Connecter les boîtes de câblage et porter le câblage derrière les boîtes à gants d’origine et la tapisserie jusqu’à l’équipement et effectuer une connexion avec ce dernier. TOUS LES MODÈLES Monter à...
- Seite 68 SLIM FIT ® Vue décomposée latérale jusqu’à la fixation des consoles DAF XF 105 Super Space Cab Hexagone Hexagone M-H Joint EPDM 30x25 (L=78) (L=36) Plafond cabine Partie frontale Tapisserie Support fixation Console DAF XF 105 Super Space Cab Tapisserie Console Vis 6/100x15 allen Panneau intérieur de distribution d‘air...
- Seite 69 SLIM FIT ® Vue décomposée latérale jusqu’à la fixation des consoles DAF XF 105 Space Cab Hexagone Hexagone Joint EPDM 30x25 M-H (L=78) (L=36) Plafond cabine Partie frontale Tapisserie Support fixation Console DAF XF 105 Space Cab Euro 6 Hexagone M-H 78mm Tapisserie Console Vis 6/100x15 allen...
- Seite 70 SLIM FIT ® Vue décomposée frontale jusqu’à la fixation des consoles DAF XF 105 Space Cab (depuis date fabrication véhicule : 10/09/2012) Hexagone Hexagone M-H Joint EPDM 25x15 (L=68) (L=26) Plafond cabine Partie frontale Tapisserie Support fixation Console DAF XF 105 Space Cab (depuis date fabrication véhicule : 10/09/2012) Séparateur 10 mm Hexagone M-H 68mm Tapisserie...
- Seite 71 SLIM FIT ® TOUS LES MODÈLES SAUF EURO 6- Schéma électrique AVIS IMPORTANT ! Attention de ne pas inverser les polarités dans la connexion de l’alimentation à l’équipement. Si cela se produisait, la plaque ne s’allumerait pas et l’équipement ne fonctionnerait pas. Capteur d’air de retour NTC 15KΩ...
- Seite 72 SLIM FIT ® MODÈLES EURO 6- Schéma électrique AVIS IMPORTANT ! Attention de ne pas inverser les polarités dans la connexion de l’alimentation à l’équipement. Si cela se produisait, la plaque ne s’allumerait pas et l’équipement ne fonctionnerait pas. Capteur d’air de retour NTC 15KΩ...
- Seite 73 SLIM FIT ®...
- Seite 74 Kratzer geschützt werden. Bei der Installation der Slim Cool auf dem Kabinendach muss Dirna Bergstrom übernimmt keine Verantwortung für darauf geachtet werden, dass mit Luken ausgestattete Schäden oder Brüche aufgrund einer nicht ordnungsgemäßen Kabinen über eine ausreichend stabile Struktur verfügen, Installation oder Bedienung des Geräts oder den Austausch...
- Seite 75 SLIM FIT ® WICHTIG: Dieses Dokument enthält die Montageanleitung für die Modelle: - DAF XF 105 Space Cab. - DAF XF 105 Space Cab (ab Herstellungsdatum des Fahrzeugs: 10.09.2012). - DAF XF 105 Super Space Cab. - DAF XF 105 Space Cab (Euro 6). Befolgen Sie die Montageanleitung, die zu Ihrem Fahrzeugmodell gehört.
- Seite 76 SLIM FIT ® DAF XF 105 Super Space Cab Seitenverblendungen in Richtung Kabinenheck abziehen (*). Vordere Verblendung nach unten abziehen (*) und Leuchtenklemmen abtrennen. Sicherungsstifte der vorderen Verkleidung mit Spezialwerkzeug aus der Vorhangschiene herauslösen.
- Seite 77 SLIM FIT ® DAF XF 105 Super Space Cab Die Verkleidung nach unten schieben, dabei die vorderen Feststellschrauben aus der Vorhangschiene der Luke lösen und diese abnehmen. Innenrahmen der Luke abnehmen (*). Feststellschrauben lösen, Stecker ziehen und Luke abnehmen.
-
Seite 78: Alle Modelle
SLIM FIT ® ALLE MODELLE Die EPDM-Dichtung um die Lukenöffnung kleben (Zum Schneiden der Dichtungslippen an den Enden bitte Detailabbildung beachten). - DAF XF 105 Space Cab. - Dichtung 30X25. - DAF XF 105 Space Cab 8Euro 6). - Dichtung 30X25. - DAF Space Cab. - Seite 79 SLIM FIT ® ALLE MODELLE Gerät vertikal stellen und (4) Sechskant- Verbindungsmuttern M8/125x26 Gummiunterlegscheibe Breitflansch- Flachscheibe in die Einsätze der Grundplatte schrauben und mit einem Anzugsmoment von 12,7±10% Nm anziehen. DAF SUPER SPACE CAB Sechskant-Verbindungsmuttern M8x32 auf die in der Grundplatte geschraubten Sechskant-Verbindungsmuttern schrauben und gegeneinander anziehen (siehe Schema...
- Seite 80 SLIM FIT ® Sechskantschrauben L=36 der Rückseite in Fahrtrichtung und (2) Sechskantschrauben L=78 auf der Vorderseite Gummischeibe Breitflansch- Flachscheibe einschrauben und anziehen. Für Fahrzeuge Space Cab, die ab dem 10.9.2012 hergestellt worden sind, müssen die Sechskant- Verbindungsmuttern M-W M6 L78 und L36 durch die Sechskant-Verbindungsmuttern M-W M6 L68 und L26 ersetzt werden.
- Seite 81 SLIM FIT ® ALLE MODELLE KABINENAUSSENSEITE: Slim Lukenaussparung positionieren. Luke Achtung! Beim Auflegen des Geräts Lukenaussparung darauf achten, dass die Ablassausgänge nicht EPDM-Dichtung zusammengedrückt werden. DAF XF 105 Space Cab DAF XF 105 Super Space Cab Befestigungshalterungen hinter Verkleidung mit (4) Schrauben 8/125x45, (4) Breitflansch-Unterlegscheiben Ø...
-
Seite 82: Explosionsansicht Bis Zur Befestigung Der Auflagen
SLIM FIT ® Explosionsansicht bis zur Befestigung der Auflagen DAF XF 105 Space Cab Euro 6 Dichtung EPDM M8 M-H L=26 M8 M-H L=26 30x25 M6 M-H L=78 Kabinendach M6 M-H L=36 Verkleidung Auflagenbefestigung 8/125x45 DAF XF 105 Space Cab (ab Herstellungsdatum des Fahrzeugs: 10.09.2012) M8 M-H L=26 Dichtung EPDM M8 M-H L=26... - Seite 83 SLIM FIT ® Explosionsansicht bis zur Befestigung der Auflagen DAF XF 105 Super Space Cab M8 M-H L=26 M8 M-H L=26 Dichtung EPDM 30x25 M6 M-H L=76 Kabinendach Sechskant M6 M-H L=76 M-H (L=32) Verkleidung Hexagon M8 M-H (L=32) Auflagenbefestigung 8/125x45...
- Seite 84 SLIM FIT ® Konsole positionieren Gerät zentrieren. Nach dem Zentrieren Konsole abnehmen Schrauben anziehen, Befestigungshalterungen an die Sechskant- Verbindungsmuttern M8 anschlagen.
- Seite 85 SLIM FIT ® ALLE MODELLE AUSSER EURO 6 Ausführliche Anweisungen zur Installation der Leistungsverdrahtung mit Zugang über das obere rechte Handschuhfach Öffnen Sie die Abdeckung des oberen rechten Handschuhfachs und entfernen Sie die Schrau- ben an der Unterseite. (A) Ziehen Sie das Handschuhfach etwas ab und greifen Sie mit der Hand durch die Unterseite, um die Originalverkabelung aufzunehmen.
- Seite 86 SLIM FIT ® ALLE MODELLE AUSSER EURO 6 Ausführliche Anweisungen zur Installation der Leistungsverdrahtung ohne Zugang über das obere rechte Handschuhfach Die vorderen Vorhangleisten abmontieren, die Schrauben mit einem Imbussschlüssel lösen. Die Schrauben oben an den Handschuhfächern herausdrehen und die Fächer kippen.
-
Seite 87: Ausführliche Anweisungen Zur Installation Der Leistungsverdrahtung
SLIM FIT ® ALLE MODELLE AUSSER EURO 6 Ausführliche Anweisungen zur Installation der Leistungsverdrahtung Das Original-Leistungskabel befindet sich an zentraler Stelle (A); Sie müssen es mit dem mitgelieferten Kabel verbinden. Sicherungsabdeckung öffnen und Maxi- Sicherung 40A an der angezeigten Stelle einsetzen. -
Seite 88: Ausführliche Anweisungen Zur Installation Der Verdrahtung Modell Euro
SLIM FIT ® Ausführliche Anweisungen zur Installation der Verdrahtung Modell Euro 6 Im Inneren des Fahrerhauses die angezeigten Abdeckungen abnehmen. Sicherungskasten ausbauen. Das Ende des blauen Kabels mit dem mitgelieferten Kasten zur Komplettierung der Originalkabel bis zu Punkt A führen und anschließen. - Seite 89 SLIM FIT ® Ausführliche Anweisungen zur Installation der Verdrahtung Modell Euro 6 Sicherung 25A in (B) einsetzen. Das Ende des braunen Kabels mit dem mitgelieferten Kasten zur Komplettierung der Originalkabel bis zu Punkt C führen und anschließen.
- Seite 90 SLIM FIT ® Ausführliche Anweisungen zur Installation der Verdrahtung Modell Euro 6 Oberes rechtes Handschuhfach (D) öffnen und Abdeckung (E) abbauen. Kabel Az und M durch das Wellrohr im unteren Teil auf der Beifahrerseite führen und aus dem anderen Ende des Rohres ziehen, das durch das obere rechte Handschuhfach verläuft.
- Seite 91 SLIM FIT ® Ausführliche Anweisungen zur Installation der Verdrahtung Modell Euro 6 Kabelkästen anschließen und Kabel hinter den Original-Handschuhfächern und der Verkleidung entlang zum Gerät führen und mit diesem verbinden. ALLE MODELLE Die Originalverblendungen wieder an ihrem Platz anbringen. Konsole auf den Sechskanten H-H mit (4) Imbussschrauben 6/100x15 befestigen, dabei die kürzere Konsolenseite weiter vorn in der Kabine positionieren.
-
Seite 92: Explosionsseitenansicht Bis Zur Befestigung Der Konsolen
SLIM FIT ® Explosionsseitenansicht bis zur Befestigung der Konsolen DAF XF 105 Super Space Cab Sechskantschraube M-H (L=36) Sechskantschraube Dichtung EPDM 30x25 M-H (L=78) Kabinendach Vorderseite Verkleidung Auflagenbefestigung Konsole Verkleidung Konsole Innere Luftverteilertafel Imbussschraube 6/100x15... - Seite 93 SLIM FIT ® Explosionsseitenansicht bis zur Befestigung der Konsolen DAF XF 105 Space Cab Sechskantschraube Sechskantschraube M-H (L=36) Dichtung EPDM 30x25 M-H (L=78) Kabinendach Vorderseite Verkleidung Auflagenbefestigung Konsole DAF XF 105 Space Cab Euro 6 Sechskantschraube M-H 78mm Verkleidung Konsole Imbussschraube 6/100x15 Innere Luftverteilertafel...
-
Seite 94: Explosionsvorderansicht Bis Zur Befestigung Der Konsolen
SLIM FIT ® Explosionsvorderansicht bis zur Befestigung der Konsolen DAF XF 105 Space Cab (ab Herstellungsdatum des Fahrzeugs: 10.09.2012) Sechskantschraube Sechskantschraube M-H (L=26) Dichtung EPDM 25x15 M-H (L=68) Kabinendach Vorderseite Verkleidung Auflagenbefestigung Konsole Abstandshalter 10 mm Sechskantschraube M-H 68mm Verkleidung Konsole Imbussschraube 6/100x15 Innere Luftverteilertafel... - Seite 95 SLIM FIT ® ALLE MODELLE AUSSER EURO 6 - Elektroschaltplan WICHTIGER WARNHINWEIS! Darauf achten, dass die Polaritäten beim Anschluss der Stromversorgung an das Gerät nicht vertauscht werden. Ist dies der Fall, schaltet sich die Elektroniktafel nicht ein und das Gerät funktioniert nicht.
- Seite 96 SLIM FIT ® MODELLE EURO 6 - Elektroschaltplan WICHTIGER WARNHINWEIS! Darauf achten, dass die Polaritäten beim Anschluss der Stromversorgung an das Gerät nicht vertauscht werden. Ist dies der Fall, schaltet sich die Elektroniktafel nicht ein und das Gerät funktioniert nicht. Abluftsensor NTC 15KΩ...
- Seite 97 SLIM FIT ®...
- Seite 98 Per l’installazione del Slim Cool, tenere presente che normalmente le cabine munite Dirna Bergstrom declina ogni responsabilità per di oblò dispongono di una struttura abbastanza danni o rotture derivanti dall’errata installazione o dall’errato uso dell’impianto o da sostituzioni solida per sostenere il peso dell’impianto.
- Seite 99 SLIM FIT ® NOTA BENE: Questo documento contiene le istruzioni di montaggio per i modelli: - DAF XF 105 Space Cab. - DAF XF 105 Space Cab (dalla data di produzione del veicolo: 10/09/2012). - DAF XF 105 Super Space Cab. - DAF XF 105 Space Cab (Euro 6).
- Seite 100 SLIM FIT ® DAF XF 105 Super Space Cab Smontare gli elementi decorativi laterali (*) tirandoli e spostandoli verso la parte posteriore della cabina. Smontare l’elemento decorativo anteriore (*) tirandolo verso il basso e disinserire i morsetti delle luci. Con un attrezzo speciale, smontare gli elementi di fissaggio della tappezzeria sulla parte anteriore dal binario della tendina.
- Seite 101 SLIM FIT ® DAF XF 105 Super Space Cab Spostando la tappezzeria verso il basso, svitare le viti anteriori di fissaggio del binario della tendina del tettuccio apribile e smontare il binario. Smontare il telaio interno del tettuccio apribile (*). Smontare il tettuccio apribile svitando le viti di fissaggio e disinserendo il connettore.
-
Seite 102: Tutti I Modelli
SLIM FIT ® TUTTI I MODELLI Incollare la guarnizione EPDM intorno al vano del tettuccio apribile (vedi il particolare per tagliare le estremità della guarnizione). - DAF XF 105 Space Cab. - guarnizione 30x25. - DAF XF 105 Space Cab (Euro 6). - guarnizione 30x25. - Seite 103 SLIM FIT ® TUTTI I MODELLI Mettere l’impianto in posizione verticale e avvitare (4) perni esagonali M8/125x26 con la rondella di gomma, la rondella a testa larga negli inserti della base e stringere con coppia di serraggio di 12,7±10% Nm. DAF SUPER SPACE CAB Avvitare (4) perni esagonali M8x32 sui perni esagonali filettati della base e stringere come...
- Seite 104 SLIM FIT ® Avvitare (2) perni esagonali M6 L=36 nella parte posteriore secondo il senso di marcia e (2) perni esagonali L=78 nella parte anteriore con la rondella di gomma, la rondella a testa larga e stringere. Per i veicoli DAF XF 105 Space Cab prodotti dal 10/09/2012 occorre sostituire i perni esagonali M-F M6 L78 e L36 rispettivamente con i perni esagonali M-F M6 L68 e L26.
- Seite 105 SLIM FIT ® TUTTI I MODELLI ESTERNO CABINA: Inserire lo Slim Fit nel vano del tettuccio apribile. Tettuccio apribile Attenzione! Quando posiziona l’impianto sul vano del tettuccio apribile, controllare che le uscite di scarico non siano ostruite dalla guarnizione EPDM. DAF XF 105 Space Cab DAF XF 105 Super Space Cab Inserire i supporti di fissaggio sotto la...
- Seite 106 SLIM FIT ® Esploso fino al fissaggio dei supporti DAF XF 105 Space Cab Euro 6 M8 M-H L=26 Guarnizione EPDM M8 M-H L=26 30x25 M6 M-H L=78 Tettuccio cabina M6 M-H L=36 Tappezzeria Supporto fissaggio 8/125x45 DAF XF 105 Space Cab (dalla data di produzione del veicolo: 10/09/2012) M8 M-H L=26 Guarnizione EPDM M8 M-H L=26...
- Seite 107 SLIM FIT ® Esploso fino al fissaggio dei supporti DAF XF 105 Super Space Cab M8 M-H L=26 M8 M-H L=26 Guarnizione EPDM 30x25 M6 M-H L=76 Tettuccio cabina Perno esagono M6 M-H L=76 M8 M-H (L=32) Tappezzeria Esagono M8 M-H (L=32) Supporto fissaggio 8/125x45...
- Seite 108 SLIM FIT ® Inserire la console e spostare l’impianto fino a centrarlo. Una volta centrato, rimuovere la console e stringere le viti M8 finché i supporti di fissaggio non sono a battuta con i perni esagonali M8 per il fissaggio completo dell’unità.
- Seite 109 SLIM FIT ® TUTTI I MODELLI, TRANNE EURO 6 Istruzioni particolareggiate per l’installazione del cablaggio di alimentazione con accesso dal vano portaoggetti superiore destro Aprire il coperchio del vano portaoggetti superiore destro e svitare le due viti sul lato inferiore. (A) Separare leggermente il vano portaoggetti e inserire la mano dal lato inferiore per afferrare il cablaggio originale.
- Seite 110 SLIM FIT ® TUTTI I MODELLI, TRANNE EURO 6 Istruzioni particolareggiate per l’installazione del cablaggio di alimentazione senza accesso dal vano portaoggetti superiore destro Smontare le sbarre di scorrimento delle tendine anteriori allentando le viti con una chiave a brugola. Svitare le viti superiori dei vani portaoggetti e ribaltarli.
- Seite 111 SLIM FIT ® TUTTI I MODELLI, TRANNE EURO 6 Istruzioni particolareggiate per l’installazione del cablaggio di alimentazione Nella parte centrale si trova il cavo originale di alimentazione (A); fare la connessione con il cavo fornito in dotazione. Aprire la scatola dei fusibili e inserire il maxifusibile da 40 A al posto di quello indicato.
- Seite 112 SLIM FIT ® Istruzioni particolareggiate per l’installazione del cablaggio modello Euro 6 Dall’interno della cabina smontare i coperchi indicati. Smontare la scatola dei fusibili. Far passare l’estremità del cavo blu con la scatola in dotazione insieme ai cavi originali fino al punto A e collegare.
- Seite 113 SLIM FIT ® Istruzioni particolareggiate per l’installazione del cablaggio modello Euro 6 Inserire il fusibile da 25 A in (B). Far passare l’estremità del cavo marrone con la scatola in dotazione insieme ai cavi originali fino al punto C e collegare.
- Seite 114 SLIM FIT ® Istruzioni particolareggiate per l’installazione del cablaggio modello Euro 6 Aprire il vano portaoggetti superiore destro (D) e smontare il coperchio (E). Nel tubo corrugato, situato nella parte inferiore del lato passeggero, inserire il cavo blu (Az) e quello marrone (M) ed estrarli dall’estremità del tubo che fuoriesce dal vano portaoggetti superiore destro.
- Seite 115 SLIM FIT ® Istruzioni particolareggiate per l’installazione del cablaggio modello Euro 6 Collegare le scatole dei cablaggi, far passare il cablaggio dietro i vani portaoggetti originali e la tappezzeria fino all’impianto e quindi collegare al medesimo. TUTTI I MODELLI Rimontare gli elementi decorativi originali. Montare la console sui perni esagonali F-F con (4) viti a brugola 6/100x15, posizionando la parte più...
- Seite 116 SLIM FIT ® Esploso visto di lato fino al fissaggio delle console DAF XF 105 Super Space Cab Perno esagonale Perno esagonale M-F M-F (L=36) (L=78) Guarnizione EPDM 30x25 Tettuccio cabina Frontalino Tappezzeria Supporto fissaggio Console Tappezzeria Console Vite a brugola 6/100x15 Pannello interno distribuzione aria...
- Seite 117 SLIM FIT ® Esploso visto di lato fino al fissaggio delle console DAF XF 105 Space Cab Perno esagonale M-F (L=36) Perno esagonale M-F Guarnizione EPDM 30x25 (L=78) Tettuccio cabina Frontalino Tappezzeria Supporto fissaggio Console DAF XF 105 Space Cab Euro 6 Perno esagonale M-F 78 mm Tappezzeria Console...
- Seite 118 SLIM FIT ® Esploso visto di fronte fino al fissaggio delle console DAF XF 105 Space Cab (dalla data di produzione del veicolo: 10/09/2012) Perno esagonale M-F (L=26) Perno esagonale M-F Guarnizione EPDM 25x15 (L=68) Tettuccio cabina Frontalino Tappezzeria Supporto fissaggio Console Distanziatore 10 mm Perno esagonale M-F 68 mm...
- Seite 119 SLIM FIT ® TUTTI I MODELLI, TRANNE EURO 6- Schema elettrico AVVERTENZA IMPORTANTE! Fare attenzione a non invertire le polarità effettuando la connessione dell’alimentazione all’impianto, altrimenti il quadro comandi non si accende e l’impianto non funziona. Sensore aria ritorno NTC 15KΩ a 25º Ventilatore centrifugo 2,6 Amp.
- Seite 120 SLIM FIT ® MODELLI EURO 6- Schema elettrico AVVERTENZA IMPORTANTE! Fare attenzione a non invertire le polarità effettuando la connessione dell’alimentazione all’impianto, altrimenti il quadro comandi non si accende e l’impianto non funziona. Sensore aria ritorno NTC 15KΩ a 25º Ventilatore centrifugo Connettori...
- Seite 121 SLIM FIT ®...
- Seite 122 SLIM FIT ®...
- Seite 123 SLIM FIT ®...
- Seite 124 Dirna Bergstrom behält sich vor, aus technischen oder kaufmännischen Gründen jederzeit Änderungen HIWEIS: der Angaben dieser Veröffentlichung vorzunehmen. Dirna Bergstrom si riserva il diritto di effettuare modifiche in qualsiasi momento ai dati contenuti in questa ATTENZIONE: pubblicazione, per motivi tecnici o commerciali.