Harvia SS20 Bedienungs Und Installationsanleitung Handbuch
Sauna steamer
Vorschau ausblenden
Andere Handbücher für SS20:
- Bedienungs- und installationsanleitung (28 Seiten) ,
- Bedienungs- und installationsanleitung (28 Seiten)

Verwandte Anleitungen für Harvia SS20


Inhaltszusammenfassung für Harvia SS20
- Seite 1 HARVIA SAUNA STEAMER SS20 Käyttö- ja asennusohje Installations- och bruksanvisningar Instructions for use and installation Bedienungs- und Installationsanleitung Руководство по эксплуатации и установке Ekspluatàcijas un montà¾as instrukcija 22012010...
- Seite 2 SISäLLySLUETTELo INNEHåLL 1. TEKNISET TIEDoT ............ 4 1. TEKNISKA DATA ............4 2. KäyTTäJäN oHJE ........... 4 2. BRUKSANVISNINGAR ..........4 2.1. Höyrystimen toiminta ........4 2.1. Funktion ............4 2.2. Käyttö ............. 5 2.2. Användning ............. 5 2.2.1. Vesisäiliön täyttö, kylmä höyrystin .... 5 2.2.1.
-
Seite 3: Specifications
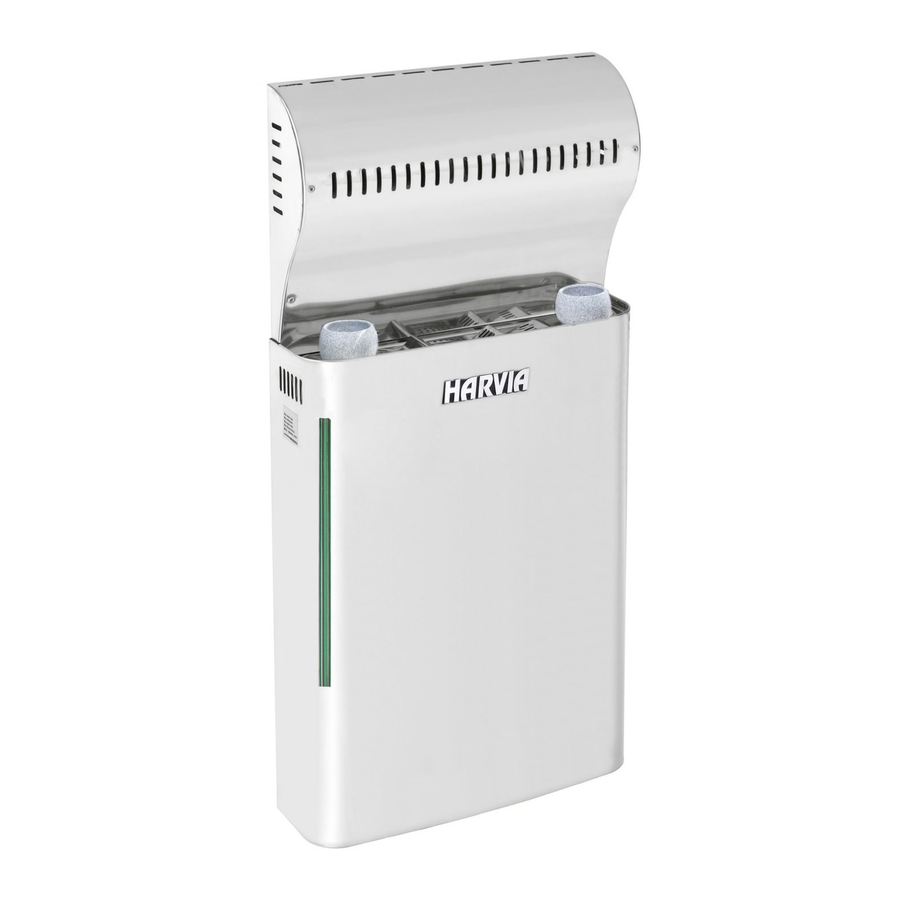
Saunen verwendete Saunaöfen und Steuerge- the user’s instructions carefully before using the räte beträgt drei (3) Monate. Bitte lesen Sie diese An- steamer. leitung sorgfältig durch, bevor Sie den Harvia Sauna NoTE! Steamer in Gebrauch nehmen. These instructions for use and installation are... - Seite 4 Emptying valve Füllhöhe Ablassventil Electrical connections Elektrische Anschlüsse Thermostat setting Thermostateinstellung Figure 1. The Harvia Sauna Steamer Figure 2. Filling the water reservoir Abb. 1. Verdampfer Harvia Sauna Steamer Abb. 2. Füllen des Wassertanks 2.2. Use 2.2. Bedienung The steamer is easy to use. When the water Die Bedienung des Verdampfers ist einfach: Füllen...
- Seite 5 Kuva 3. Draining the water reservoir Abb. 3. Leeren des Wassertanks after the water has cooled for a few hours after heiß ist, empfiehlt es sich, nach dem Ausschalten switching the steamer off. (Figure 3.) mit der Leerung des Tanks einige Stunden zu war Please also see subsections 1, 2, and 3 of section ten (Abb.
-
Seite 6: The Sauna Room
2.3.1.The use of fragrances 2.3.1. Verwendung von Duftmischungen Liquid fragrances and fragrance bags can be used In dem Verdampfer können Duftmischungen in in the steamer. Liquid fragrances are poured into flüssiger oder in trockener Form verwendet wer the stone cups in the steamer. Fragrance bags are den. -
Seite 7: Instructions For Installation
4. INSTRUCTIoNS FoR 4. ANLEITUNG FüR DEN INSTALLA- INSTALLATIoN TEUR 4.1. Prior to installation 4.1. Vor der Installation Prior to installing the steamer, please study the Bevor Sie mit der Installation beginnen, machen Sie instructions for installation carefully. sich bitte sorgfältig mit dieser Anleitung vertraut. Note! The heater must be installed according to Achtung! Der Saunaofen muß... - Seite 8 Max. 2 mm Figure 5. Mounting the steamer onto the wall. Abb. 5. Anbringen des Verdampfers an der Wand 4.3. Electrical connections 4.3. Elektroanschlüsse The steamer may only be connected to the Der Anschluß des Verdampfers an das Stromnetz electrical network by an authorised professional darf nur von einer dazu befugten, qualifizierten electrician, in accordance with current regulations.
- Seite 9 Figure 6. Electrical connections of the steamer Abb. 6. Elektroanschlüsse des Verdampfers Figure 7. Electrical connections of the steamer, automatic filling Abb. 7. Elektroanschlüsse des Verdampfers, automatische Wasserbefüllung 4.4. Steamer insulation resistance 4.4. Isolationswiderstand des Verdampfers When final inspection electrical Bei der Endkontrolle der Elektroinstallationen kann installations is performed, a “leakage”...
-
Seite 10: Spare Parts
5. SPARE PARTS 5. ERSATZTEILE Steamer heating element Widerstand des Dampfentwicklers ZH102 Water reservoir Wassertank ZH70S Thermostat 88 Thermostat 88 ZSK762 Thermostat 112 Thermostat 112 ZSN250 Overheating protector Überhitzungsschutz ZSK764 Drain pipe, assembled Entleerungsrohr, montiert ZH110 Tap 1/4 Kran 1/4 ZH130 Steam grating Dampfgitter...