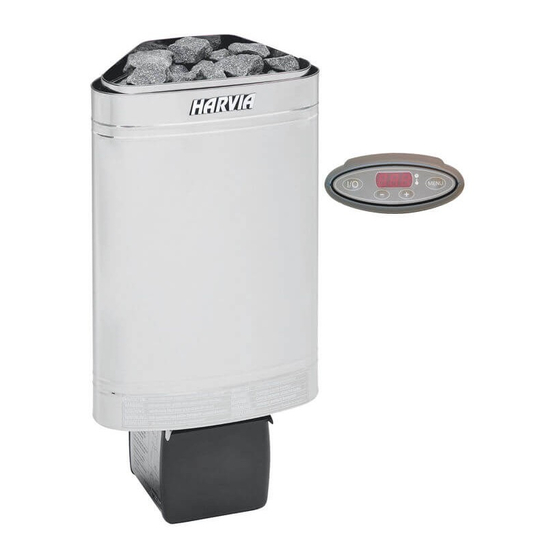
Harvia D23EE Gebrauchs- Und Montageanleitung
Elektrosaunaofen
Vorschau ausblenden
Andere Handbücher für D23EE:
- Gebrauchs- und montageanleitung (64 Seiten) ,
- Gebrauchs- und montageanleitung (76 Seiten)

Verwandte Anleitungen für Harvia D23EE


Inhaltszusammenfassung für Harvia D23EE
- Seite 1 D23EE, D29EE, D36EE Instructions for Installation and Use of Electric Sauna Heater Gebrauchs- und Montageanleitung des Elektrosaunaofens 01072016/Y05-0140...
-
Seite 2: Inhaltsverzeichnis
CONTENTS INHALT 1. INSTRUCTIONS FOR USE ........3 1. ANLEITUNG FÜR DEN BENUTZER.......3 1.1. Piling of the Sauna Stones .........3 1.1. Aufschichten der Saunaofensteine ....3 1.2. Heating of the Sauna ..........4 1.2. Erhitzen der Saunakabine ........4 1.2.1. Resetting the overheating limiter ..4 1.2.1. -
Seite 3: Instructions For Use
Purpose of the electric heater: Verwendungszweck des Elektrosaunaofens: The Delta EE heater is designed for the heating Der Delta EE Saunaofen dient zum Erwärmen von of small family saunas to bathing temperature. Heimsaunakabinen auf die Saunatemperatur. Er It is forbidden to use the heater for any other sollte nicht für andere Zwecke verwendet werden. -
Seite 4: Heating Of The Sauna
Saunaofen (der Überhitzungsschutz kann durch Drücken der entsprechenden Taste zurückgestellt werden, siehe Abb. 11). 1.3. Heater’s control units 1.3. Steuerung des Saunaofens Heater models D23EE, D29EE and D36EE are equipped with an internal electronic power Saunaofenmodelle D23EE, D29EE regulating unit which is controlled by a computer D36EE sind mit einer internen elektronischen and separate thermostat. -
Seite 5: Switching The Heater On And Off
Display screen 2. Heater on/off switch 3. Operation selection button 4. Number setting button 5. Number setting button 6. Temperature indicator light Timing operation indicator light Anzeige 2. Ein/Aus-Schalter des Ofens 3. Betriebswahlschalter 4. Wahlschalter 5. Wahlschalter 6. Temperaturkontrollleuchte Kontrollleuchte für die Zeitwahl Figure 2. -
Seite 6: Setting The Pre-Setting Times
as required to a minimum time of 30 minutes. er für den Ofen (4 Stunden) je nach Bedarf bis auf Pressing the button the first time reduces the time ein Minimum von 30 Minuten reduziert werden. Bei by 30 minutes, after which the time is reduced einmaligem Drücken der Taste wird die Zeitdauer by intervals of ten minutes. -
Seite 7: Sauna Water
throwing water on the stones with a small ladle, Badenden und das Atmen in der Sauna fällt leicht. the bather should feel the effect of air humidity Es empfiehlt sich, zunächst nur kleine Mengen on his skin. Both too high a temperature and air Wasser auf die Steine zu gießen, damit die Wirkung humidity will give an unpleasant feeling. -
Seite 8: Warnings
According to established sauna conventions, als angenehm empfinden. • you must not disturb other bathers by speaking Zu guten Saunamanieren gehört, daß Sie • in a loud voice. Rücksicht auf die anderen Badenden nehmen, Do not force other bathers from the sauna by indem Sie diese nicht mit unnötig lärmigem •... -
Seite 9: The Sauna Room
2. THE SAUNA ROOM 2. SAUNAKABINE 2.1. Insulation and Wall Materials of the 2.1. Isolation der Saunakabine und Wandma- Sauna Room terialien In an electrically heated sauna, all the massive wall In einer elektrisch beheizten Sauna müssen alle surfaces which store plenty of heat (such as bricks, massiven Wandflächen, die viel Wärme speichern glass blocks, plaster etc.), must be sufficiently in- (Ziegel, Glasziegel, Mörtel o.ä.) ausreichend isoliert... -
Seite 10: Sauna Room Floor
guidelines in the installation of the sauna heater, färben. the heater will not heat up enough to endanger the Wenn Sie bei der Installation des Saunaofens die vom Hersteller empfohlenen Richtlinien einhalten, flammable material in the sauna room. The maximum temperature allowed in the wall and ceiling surfaces erhitzt sich der Saunaofen nur so weit, dass keine of the sauna room is +140 degrees Celsius. -
Seite 11: Hygienic Conditions Of The Sauna Room
Mechanical ventilation Natural ventilation Maschinelle Ventilation Natürliche Ventilation 1. Air supply vent placing area. 1. Empfohlener Platz für Zuluft. 2. Exhaust air vent. 2. Abluftöffnung. 3. Possible drying valve, which is closed during heating and 3. Mögliches Trocknungsventil, das während der Erwärmung und bathing. -
Seite 12: Fastening The Heater To The Wall
3 x 2,5 1 x 16 Table 1. Installation details of DEE-heater *) To thermostat 4 x 0,5 mm (D23EE, D29EE, D36EE) *) An thermostat 4 x 0,5 mm (D23EE, D29EE, D36EE) Tabelle 1. Montageinformationen zur DEE-Saunaofen Figure 5. Safety distances from the heater Figure 4. - Seite 13 Öffnen der Klemmdose 230V 1N~ 400V 2N~ Control panel Control panel Bedienfeld Bedienfeld MENU MENU D23EE; 2x1150 W D23EE; 2x1150 W D29EE; 1x1150 W, 1x1800 W D29EE; 1x1150 W, 1x1800 W D36EE; 2x1800 W D36EE; 2x1800 W Sensor Sensor Fühler Fühler...
-
Seite 14: Safety Railing
Connector strip 1 Klemmleiste 1 Connector strip 2 Klemmleiste 2 Installation cable Installationskabel Figure 11. Reset button for Figure 10 A and B. 2-phase electrical connections of the heater overheating limiter Abbildung 10 A und B. 2-Phasen-Elektroanschlüsse des Saunaofens Abbildung 11. Connector strip 1 Rücksetzknopf des Klemmleiste 1... -
Seite 15: Installing The Thermostat Sensor On The Wall
Figure 13. Connections of the heater Connection box Abbildung 13. Anschuß des Saunaofens Junction box Connection cable Anschlußgehäuse Klemmdose Anschlußkabel 3.4. Montage des Thermostatfühlers an der Wand Der Thermostatfühler befindet sich in der Klemmdose des Saunaofens. Siehe Abb. 8 (A, B, C und D). Die Montage des Fühlers an der Wand ist in Abb. -
Seite 16: Electrical Connections
a hole made in the flange - the cable then stays te mit den zwei Schrauben aus der Packung an ei- between the mounting base and flange. nem geeigneten Bedienort an. 3. The installation flange is installed in a suitable 4. - Seite 17 Sensor cable Fühlerkabel Figure 14. Installing the sensor on the wall Abbildung 14. Montage des Thermostatfühlers an der Wand 180° 360° Installing the temperature sensor near the ventilation valves. Montage des Temperaturfühlers in der Nähe des Lüftungsventils.
-
Seite 18: Spare Parts / Ersatzteile
1. Heating element Heizelement 1800W/230V ZSN-160 D29EE (1 pc/stk), D36EE (2 pcs/stk) 2. Heating element Heizelement 1150W/230V ZSN-150 D23EE (2 pcs/stk), D29EE (1 pc/stk) 3. Thermostat/ Thermostat/ Overheat protector Überhitzungsschutz WX-232 D23EE, D29EE, D36EE 4. Control panel/ Bedienfeld/Elektronik Electronics unit ZSME-200-1 D23EE, D29EE, D36EE 5.