IMG STAGE LINE PARL-12 RGBW Bedienungsanleitung
Dmx-led-scheinwerfer
Inhaltsverzeichnis
Verfügbare Sprachen
Verfügbare Sprachen
Quicklinks
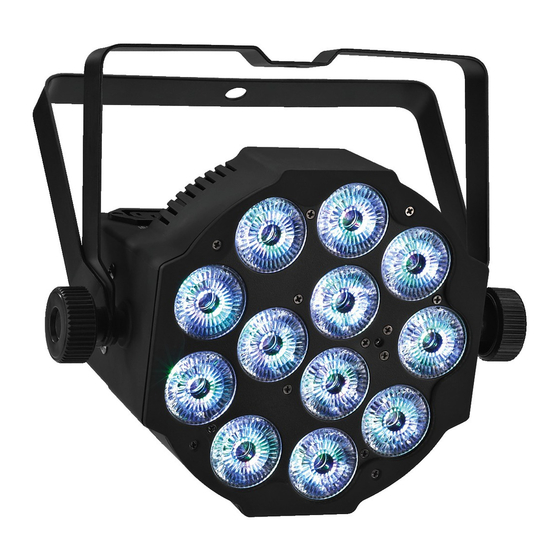
DMX-LED-Scheinwerfer
DMX LED Spotlight
PARL-12 RGBW
Bestell-Nr. • Order No. 38.6890
BEDIENUNGSANLEITUNG
INSTRUCTION MANUAL
MODE D'EMPLOI
ISTRUZIONI PER L'USO
GEBRUIKSAANWIJZING
MANUAL DE INSTRUCCIONES
INSTRUKCJA OBSŁUGI
SIKKERHEDSOPLYSNINGER
SÄKERHETSFÖRESKRIFTER
TURVALLISUUDESTA
ELECTRONICS FOR SPECIALISTS ELECTRONICS FOR SPECIALISTS ELECTRONICS FOR SPECIALISTS ELECTRONICS FOR SPECIALISTS
Kapitel
Inhaltsverzeichnis

Verwandte Anleitungen für IMG STAGE LINE PARL-12 RGBW


Inhaltszusammenfassung für IMG STAGE LINE PARL-12 RGBW
- Seite 1 DMX-LED-Scheinwerfer DMX LED Spotlight PARL-12 RGBW Bestell-Nr. • Order No. 38.6890 BEDIENUNGSANLEITUNG INSTRUCTION MANUAL MODE D’EMPLOI ISTRUZIONI PER L’USO GEBRUIKSAANWIJZING MANUAL DE INSTRUCCIONES INSTRUKCJA OBSŁUGI SIKKERHEDSOPLYSNINGER SÄKERHETSFÖRESKRIFTER TURVALLISUUDESTA ELECTRONICS FOR SPECIALISTS ELECTRONICS FOR SPECIALISTS ELECTRONICS FOR SPECIALISTS ELECTRONICS FOR SPECIALISTS...
- Seite 2 Deutsch . . . . . . . . . . Seite English . . . . . . . . . . . Page Français .
- Seite 3 MENU DOWN ENTER ➀ SLAVE AUTO AUTO SPEED SOUND SOUND DOWN STROBE ➁...
-
Seite 4: Inhaltsverzeichnis
Inhalt LED-Scheinwerfer Diese Anleitung richtet sich an Benutzer mit Übersicht der Bedienelemente und Grundkenntnissen in der DMX-Steuerung . Bitte Anschlüsse . . . . . . . . . . . . . . . 4 lesen Sie die Anleitung vor dem Betrieb gründ- lich durch und heben Sie sie für ein späteres 1.1 Infrarot-Fernbedienung . -
Seite 5: Infrarot-Fernbedienung
1.1 Infrarot-Fernbedienung (Abb . 2) 3 . wenn Funktionsstörungen auftreten . Geben Sie das Gerät in jedem Fall zur Repa- Taste Funktion ratur in eine Fachwerkstatt . alle LEDs aus- und wieder einschalten DMX-Betrieb, Eingabe der DMX-Startadres- • Ziehen Sie den Netzstecker nie am Kabel aus se mit den Zifferntasten (3-stellig) der Steckdose, fassen Sie immer am Stecker SLAVE... -
Seite 6: Inbetriebnahme
über das Netz-Verlängerungskabel AAC-170 / SW WARNUNG Der Scheinwerfer muss fachge- erfolgen . Auf diese Weise lassen sich mehrere recht und sicher montiert werden . PARL-12RGBW miteinander verbinden . Wird er an einer Stelle installiert, unter der sich Personen aufhal- ten können, muss er zusätzlich 6 Bedienung gesichert werden (z . -
Seite 7: Bedienung Über Das Menü
7 Betrieb ohne DMX-Steuergerät Bei längerem Nichtgebrauch die Batteri- en herausnehmen, damit die Fernbedienung bei einem eventuellen Auslaufen der Batteri- 7.1 Farbstrahler und Stroboskop en nicht beschädigt wird . In diesem Modus strahlt das Gerät konstant in Verbrauchte Batterien dürfen nicht in einer einstellbaren Farbe . -
Seite 8: Automatisch Ablaufende Programme
7.2 Automatisch ablaufende Programme Alternativ über den Untermenüpunkt mit der Taste UP oder DOWN die Emp- Zwei Programme können ausgewählt werden: findlichkeit zwischen ein- AUTO 1 = Farbfolge mit Überblendungen stellen und mit der Taste ENTER speichern . AUTO 2 = Farbfolge ohne Überblendungen 1) Das gewünschte Programm mit der Fern- 7.4 Master/ Slave-Betrieb bedienung (Taste AUTO 1 oder AUTO 2) -
Seite 9: Dmx-Steuerung
8 DMX-Steuerung verfügbaren Steuerkanäle am Lichtsteuergerät . Informieren Sie sich bitte im Kapitel 10 .1 über DMX ist die Abkürzung für Digital Multiplex die Funktionen, die jeweils möglich sind, und und ermöglicht die digitale Steuerung von wählen Sie danach die Anzahl aus: mehreren DMX-Geräten über eine gemeinsame Steuer leitung . -
Seite 10: Weitere Funktionen
9 Weitere Funktionen 10 Technische Daten Steuerprotokoll: ..DMX 512 9.1 IR-Empfänger ausschalten Anzahl der DMX-Kanäle: . . 1, 4, 5 oder 8 Um unbeabsichtigte Bedienung über die Infra- Leuchtmittel: ... 12 × 8-W-RGBW-LEDs rot-Fernbedienung auszuschließen, lässt sich der Abstrahlwinkel: . -
Seite 11: Dmx-Funktionen
10.1 DMX-Funktionen 10.1.2 4-Kanal-Modus DMX-Wert Funktion 10.1.1 1-Kanal-Modus Kanal 1: Rot-Anteil 0 – 255 Helligkeit Rot DMX-Wert Funktion Kanal 2: Grün-Anteil 0 – 255 Helligkeit Grün 1 – 4 Farbe 1 (Rot) Kanal 3: Blau-Anteil 5 – 9 Farbe 2 (Grün) 0 –... -
Seite 12: Menüstruktur
10.2 Menüstruktur Hauptmenü Firmware-Version MENU DOWN ENTER Temperatur, z.B. 29 °C Infrarot-Empfang Slave-Betrieb Musiksteuerung Modus (Sound) Sou1/ 2 Mikrofonempfindlichkeit (Sensitivity) SEN0… SEN9 Farbstrahlerbetrieb Helligkeit Weiß Helligkeit Blau Stroboskop- Blitzfrequenz St01 … St99 Helligkeit Grün Helligkeit Rot Farbstrahlerbetrieb mit vorgegebenen Farben Farbe (Colour) Co01…... - Seite 71 MONACOR INTERNATIONAL GmbH & Co. KG • Zum Falsch 36 • 28307 Bremen • Germany Copyright by MONACOR INTERNATIONAL. All rights reserved. A-1567.99.02.08.2017 ©...