Herunterladen Inhalt Inhalt Diese Seite drucken

Werbung

Verfügbare Sprachen
  • DE

Verfügbare Sprachen

  • DEUTSCH, seite 44
SPACE
IT
Manuale d'installazione ed uso
EN
Use and installation manual
DE
Bedienungs-und Montageanleitung
ES
Manual de instalación y uso
FR
Manuel d'installation et d'utilisation
1 1 P P I I D D S S 8 8 0 0 N N
1 1 P P I I D D S S 9 9 0 0 N N
1PIDC30N
1PIDC60N
1PIDC80N
1PIDC90N
1PIDC120N

Werbung

Inhaltsverzeichnis
loading

Inhaltszusammenfassung für Barazza 1PIDC30N

  • Seite 1 1 1 P P I I D D S S 8 8 0 0 N N 1 1 P P I I D D S S 9 9 0 0 N N 1PIDC30N 1PIDC60N 1PIDC80N 1PIDC90N 1PIDC120N SPACE Manuale d’installazione ed uso...
  • Seite 2 1PIDC30N OCTA 9 Power Level: 2100W Booster: 3000W OCTA 9 Power Level: 2100W Booster: 3000W Max Power: 3.7 kW 1PIDC60N OCTA OCTA 9 Power Level: 2100W 9 Power Level: 2100W Booster: 3000W Booster: 3000W OCTA OCTA 9 Power Level: 2100W...
  • Seite 3 1PIDC80N Ø200 Ø200 9 Power Level: 9 Power Level: 2300W 2300W Booster: Booster: 3000W 3000W Ø160 Ø160 9 Power Level: 9 Power Level: 1400W 1400W Booster: Booster: 2100W 2100W Max Power: 7.4 kW 1PIDC90N Ø200 OCTA OCTA 9 Power Level: 2300W 9 Power Level: 2100W 9 Power Level: 2100W...
  • Seite 4 Fig. 1/A 1PIDC30N A. Installation R 7mm B. Installation - Flush mode...
  • Seite 5 Fig. 1/B 1PIDC60N A. Installation R 7mm B. Installation - Flush mode...
  • Seite 6 Fig. 1/C 1PIDC80N A. Installation R 7mm B. Installation - Flush mode...
  • Seite 7 Fig. 1/D 1PIDC90N A. Installation B. Installation - Flush mode R 7mm...
  • Seite 8 Fig. 1/E 1PIDC120N A. Installation B. Installation - Flush mode R 7mm...
  • Seite 9 Fig. 2 ~ 2 mm Fig. 4/A 40 mm Fig. 3 30 mm min. 50 mm 20 mm Fig. 4/B Fig. 4 3PCLIOBIUE1.2 3PCLIOBIUE1...
  • Seite 10 Fig. 5 Induction Fig. 6/A 1PIDC60N ≤ Ø 90 mm ≤ Ø 90 mm ≥ Ø 110 mm ≥ Ø 110 mm ≤ Ø 190 mm ≤ Ø 190 mm ≥ Ø 230 mm ≥ Ø 230 mm...
  • Seite 11 Fig. 6/B 1PIDC30N ≤ Ø 90 mm ≥ Ø 110 mm ≤ Ø 190 mm ≥ Ø 230 mm...
  • Seite 12 Fig. 6/C 1PIDC80N ≤ Ø 90 mm ≥ Ø 110 mm ≤ Ø 70 mm ≥ Ø 90 mm...
  • Seite 13 Fig. 6/D 1PIDC90N ≤ Ø 90 mm ≤ Ø 90 mm ≥ Ø 110 mm ≥ Ø 110 mm ≤ Ø 190 mm ≤ Ø 90 mm ≥ Ø 110 mm ≥ Ø 230 mm...
  • Seite 14 Fig. 6/E 1PIDC120N ≤ Ø 90 mm ≤ Ø 90 mm ≥ Ø 110 mm ≥ Ø 110 mm ≤ Ø 190 mm ≤ Ø 190 mm ≥ Ø 230 mm ≥ Ø 230 mm...
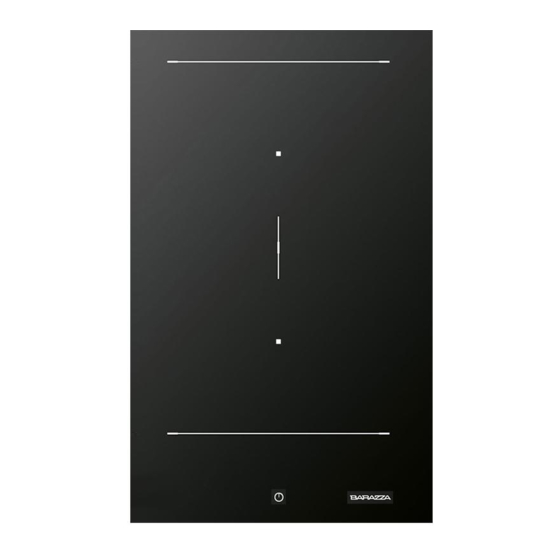
  • Seite 15 Fig. 7/A 1PIDC30N A_Power on Key A_Accensione/Spegnimento B_Key lock B_Blocco tasti C_Pause and Recall C_Pausa & Richiamo D_Keep warm key D_Funzione per tenere calda la pentola F_Timer level increment / Timer level decrement F_Regolazione timer ( + / - )
  • Seite 16 1PIDC60N Fig. 7/B 1PIDC80N 1PIDC120N A_Power on Key A_Accensione/Spegnimento B_Key lock B_Blocco tasti C_Pause and Recall C_Pausa & Richiamo D_Keep warm key D_Funzione per tenere calda la pentola E_Chef cook function E_Funzione cuoco F_Timer level increment / Timer level decrement F_Regolazione timer ( + / - ) G_Timer On G_Timer delle zone cottura...
  • Seite 17 Fig. 7/C 1PIDC90N A_Power on Key A_Accensione/Spegnimento B_Key lock B_Blocco tasti C_Pause and Recall C_Pausa & Richiamo D_Keep warm key D_Funzione per tenere calda la pentola E_Chef cook function E_Funzione cuoco F_Timer level increment / Timer level decrement F_Regolazione timer ( + / - ) G_Timer On G_Timer delle zone cottura H_Power level setting display...
  • Seite 18 Fig. 8/A 1PIDC30N 230V 1Ph+N...
  • Seite 19 Fig. 8/B 1PIDC60N 1PIDC80N 1PIDC90N 1PIDC120N 2Ph+N L2 L1 230V 1Ph+N Fig. 9...
  • Seite 20: Induction Hob

    or lacking of experience and Induction Hob | User instructions knowledge, unless they are supervised or well instructed GENERAL INFORMATION about the use of the appliance, Carefully read this use and maintenance manu- by a person who is responsi- al, where important information about installation, ble for their safety.
  • Seite 21: Use And Maintenance

    • Electric connections (Fig.8): Clean the heated area in the best way possible, using suitable products and a paper towel, then The installation of this appliance and the • rinse with water and wipe away with a clean cloth. connection to the electrical network should Through the use of the special scraper (optional), be entrusted only to an electrician perfectly promptly remove any pieces of aluminum foil and...
  • Seite 22 • Pan detection: burn risk is no longer present. • Timer function: This cooktop is fitted with an interactive control system that makes it very easy and comfortable There are 2 different types of timers. If ,more than to use. After switching on the cooktop, when you one timer is set, the timer will always display the put a cookware on the glass, the control system lowest remaining time.
  • Seite 23 • Bridge function egg timer) are suspended, moreover the booster (avaible just for the octa zones): function and heat-up automatic is stopped. To activate this function press C, all displays (L Bridging of 2 cooking zones is the connection of zone) show //.
  • Seite 24: Power Settings

    • Chef Cook Function: • Power settings: Chef Cook function is a features which enables The power of the all hob can be set from its max- 3 cooking zones with different heating powers. imum [7.4 kW or 3.7 kW (for the hob with two Starting from the left to the right.
  • Seite 25 Value Item Meaning Change- Remark Format able Max. power per 2.4 ... 5 Setting the max. allowed power per line conductor. line conductor The max. power is defined inside the service menu and can only be reduced in steps of 0.1 kW until the minimum power.
  • Seite 26: Tips On Saving Energy

    TIPS ON SAVING ENERGY • Operation Time Limitation: The Operation Time Limitation is an additional • Use a lid whenever possible to minimise safety feature to turn OFF cooking zone after cer- heat loss. tain time with no operation to the corresponding •...
  • Seite 27 Information for household electric hobs In acc. with regulation (EU) No. 66/2014 1PIDC30N 1PIDC60N 1PIDC80N 1PIDC90N 1PIDC120N Model name/ identifier Type of hob built-in built-in built-in built-in built-in Number of cooking zones and/ or areas Heating technology 1. = Induction 1.
  • Seite 28 1PIDC80N 1PIDC90N 1PIDC120N...
  • Seite 29: Error Code

    • Error Code: Error Possible Meaning Behavior Remedy Code Causes Overheat of temperature Corresponding Empty cookware Do not heat-up empty sensor for cooking zone cooking zone is pots turned OFF Wrong cookware Use appropriate cookware Pot or glass tempe- Cool down system rature is too high.
  • Seite 30 Power supply voltage is Cooking zone Power supply voltage is Contact technical out range (voltage and/or cannot be turned out of range (see tech- support. frequency) nical data for details) Wrong mains frequency Contact technical or mains voltage phase support. signal problems Internal error in genera- Contact technical...
  • Seite 31 ER21 Over temperature Cooktop switches Temperature sensor Let the cooktop cool on TC has detected a down (error disap- temperature > 85° C pears if temperature is <75°C). Contact technical support. ER22 Internal error inside TC Cooktop switches Contact technical off after3.5-7.5 support.
  • Seite 32: Informazioni Generali

    si) con limitate capacità Piano a induzione fisiche, sensoriali o men- User instructions tali, o prive di esperienza INFORMAZIONI GENERALI e conoscenza, a meno che Leggere attentamente il presente manuale d’uso non siano sorvegliate o ben e manutenzione, dove vengono fornite importanti istruite sull’uso dell’appar- informazioni sulla sicurezza d’uso e manutenzi- one.
  • Seite 33: Uso E Manutenzione

    mostrato in figura (Fig. 1- Dimensioni taglio). Uti- Attenzione! lizzare materiale sigillante lungo tutto il perimet- ro (Fig.2). Questa operazione è necessaria per Fare attenzione che i cavi siano correttamente evitare che eventuali liquidi entrino all’interno del agganciati e serrati. piano, poiché...
  • Seite 34 • Funzioni (Fig. 5): un numero da “1 a 9”. Per spegnere quella zona cottura è necessario A - Accensione/Spegnimento premere 0 nell’area H, e automaticamente il dis- B - Blocco comandi play della zona (L) mostrerà 0. C - Pausa & Richiamo D - Funzione per tenere calda la pentola •...
  • Seite 35: Blocco Comandi

    cuna azione per circa 5 sec. Il timer inizia il conto il piano cottura è stato spento inavvertitamente. alla rovescia. Al di sotto dei 10 minuti, il display Ad esempio, se il piano cottura è stato appena mostra l’ora corrente precisa al secondo. Se ha spento, l’utente può...
  • Seite 36 camente al livello di cottura desiderato. Il tempo durante il quale la zona cottura viene riscaldata a Numero zone Livelli di piena potenza dipende dal livello di cottura selezi- cottura potenza onato. Per attivare il Riscaldamento automatico è necessario premere per almeno 3 sec. il livel- lo di cottura desiderato (zona H).
  • Seite 37 di selezione della zona di cottura in senso orario, iniziando con il comando di selezione della zona di cottura anteriore sinistra. Salta selezione zone di cottura Comando non disponibile. Nella seguente tabella sono descritte le voci di menù utente implementate: Formato Articolo Descrizione...
  • Seite 38: Consigli Per Risparmiare Energia

    CONSIGLI PER • Limitazione del tempo di funzion- amento: RISPARMIARE ENERGIA La limitazione del tempo di funzionamento è una • Utilizzare un coperchio quando possibile, funzione di sicurezza aggiuntiva per spegnere per ridurre al minimo la perdita di calore. la zona cottura dopo un certo periodo di tempo, •...
  • Seite 39 Informazioni sui piani di cottura elettrici a uso domestico ai sensi del regolamento (UE) n. 66/2014 1PIDC30N 1PIDC60N 1PIDC80N 1PIDC90N 1PIDC120N Identificativo del modello Tipologia di piano cottura built-in built-in built-in built-in built-in Numero di zone e/o aree di cottura Tecnologia di riscaldamento 1.
  • Seite 40 1PIDC80N 1PIDC90N 1PIDC120N...
  • Seite 41: Codici Di Errore

    • Codici di errore: Codice di Descrizione Possibili cause Rimedi Comportamento errore Surriscaldamento del La zona cottura Pentola vuota Non riscaldare pento- sensore di temperatura corrispondente è la vuota per la zona di cottura spenta Pentola non adatta Usare pentola appropriata La temperatura della Raffreddare il sistema...
  • Seite 42 La tensione di alimenta- Non è possibile La tensione di alimen- Contattare il zione è fuori range (ten- accendere la tazione è fuori range supporto tecnico. sione e / o frequenza) zona di cottura (vedere i dati tecnici per i dettagli) Errata frequenza di Contattare il rete del segnale di fase...
  • Seite 43 Sensore di temperatura La zona di cottura Cambiamento di tem- Raffreddare la bloccato per la zona di corrispondente è peratura insufficiente superficie vetroce- cottura spenta dopo l’accensione del ramica piano cottura Nessun cambiamento Contattare il di temperatura (min. 10 supporto tecnico. K / 5 min) ER03 Rilevata attivazione conti-...
  • Seite 44: Allgemeine Hinweise

    Kinder) die aufgrund ihrer INDUKTIONSKOCHFELD physischen, sensorischen oder geistigen Fähigkeiten ALLGEMEINE HINWEISE oder ihrer Unerfahrenheit Diese Bedienungsanleitung gründlich lesen. Sie oder Unkenntnis nicht in enthält wichtige Anweisungen zu Sicherheit, In- der Lage sind, das Koch- stallation, Betrieb. Bewahren Sie diese Anleitung für zukünftiges Nachschlagen auf.
  • Seite 45: Funktionsweise Und War- Tung

    erforderlich, um zu verhindern, dass Flüssigkeit- Wir haften nicht bei einem Unfall aufgrund einer falschen Verbindung oder einer nicht en in das Kochfeld gelangen, da die Ebenheit der Oberfläche, des Glases und ihrer Verbindung vorhandenen oder fehlerhaften Erdung des nicht garantiert werden kann. Schieben Sie das Gerätes.
  • Seite 46: Kochtopferkennung

    • Bedienung (Abb. 5): Um diese Kochzone auszuschalten, betätigen Sie „0“ auf den H-Bereich, und auf der Zonenanzeige (L) wird automatisch 0 angezeigt. A- EIN- /AUS-Taste B - Tastensperre C - Pause & Recall • Booster: D - Warnhaltefunktion E - Chef-Funktion F - Timer einstellen (+/-) Der Booster ermöglicht es der Induktion, für G - Kochzonen-Timer...
  • Seite 47: Tastensperre

    • Recall: ein und führen Sie für 5 Sekunden lang keine Befehle durch. Der Timer beginnt mit dem Count- down. Unterhalb von 10 Minuten zeigt das Dis- Mit dieser Funktion können Sie die Leis- play die aktuelle Zeit sekundengenau an. Wenn 0 tungsstufen und Timer-Einstellungen wiederh- erreicht wird, ertönt ein Piepton.
  • Seite 48: Energieverwaltung

    9 auf 0 innerhalb von 10 Sekunden. Die Kinder- mit unterschiedlichen Leistungsstufen ein. Aus- sicherung ist jetzt deaktiviert. gehend von links nach rechts. Zum Aktivieren dieser Funktion betätigen Sie die Chef-Cook- Taste. Zum Deaktivieren betätigen Sie erneut die • Automatisches Vorheizen: Chef-Cook-Taste.
  • Seite 49 Steuerung an seine persönlichen Bedürfnisse Das Menü wird dann automatisch verlassen. anzupassen. Um das Benutzermenü aufzurufen, Betätigen Sie die Taste bis sie blinkt, dann betäti- muss sich die Steuerung im Standby-Modus be- gen Sie alle Kochzonen im Uhrzeigersinn, indem finden. Betätigen Sie die ON/OFF-Taste, um die Sie die mit der vorderen links beginnen.
  • Seite 50: Tipps Zum Energiesparen

    TIPPS ZUM ENERGIESPAREN • Sicherheitsabschaltung Die Sicherheitsabschaltung ist eine Funktion, • Verwende Sie so wie möglich einen Deckel, mit der das Gerät ausgestattet ist. Die nach ein- um den Wärmeverlust zu begrenzen. er bestimmten Zeit eingeschalteten Kochzonen • Verwenden Sie für kleine Mengen kleine Be- werden automatisch ausgeschaltet, ohne dass hälter.
  • Seite 51: Informationen Für Elektroherde Für Den Hausgebrauch

    Informationen für Elektroherde für den Hausgebrauch gemäß der Richtlinie (EU) N. 66/2014 1PIDC30N 1PIDC60N 1PIDC80N 1PIDC90N 1PIDC120N Modell Kochplattentyp built-in built-in built-in built-in built-in Nr. Kochzonen / Bereiche Heiztechnik. Induktion Kochzonen 1. = Induction 1. = Induction 1. = Induction 1.
  • Seite 52 1PIDC80N 1PIDC90N 1PIDC120N...
  • Seite 53: Mögliche Ursache

    • Error Code: Error Bedeutung Was passiert Mögliche Ursache Hilfe Code Überhitzungssensor der Die entsprechen- Leeres Kochgeschirr Kein leeres Kochge- Kochzone de Kochzone ist schirr verwenden Kein geeignetes Koch- Geeignetes Kochge- geschirr schirr verwenden Zu hohe Temperatur Abkühlen lassen des Kochgeschirrs oder der Kochplatte.
  • Seite 54 Die Versorgungsspan- Die Kochzone Versorgungsspannung Sich an den Tech- nung liegt außerhalb des schaltet sich außerhalb des Bereichs nischen Support Bereichs (Spannung und / nicht an (siehe technische wenden oder Frequenz). Daten für Details). Probleme mit dem Sich an den Tech- Phasensignal der Netz- nischen Support spannung oder falsche...
  • Seite 55 Temperatursensor Die entsprechen- Unzureichende Tem- Kochfeld abkühlen der Kochzone blockiert de Kochzone Ist peraturschwankung nach Einschalter des Kochfelds Keine Temperatur- Sich an den Tech- schwankung nischen Support (min.10 K / 5 min) wenden nach dem Kochen ER03 Key-Aktivierung erkannt Das Kochfeld Wasser oder Kochge- Wasser oder Kochge- schaltet sich nach...
  • Seite 56: Informaciones Generales

    usado por personas (in- Placa de inducción luso niños) con limitadas Instrucciones para el usuario capacidades físicas senso- INFORMACIONES riales, mentales o sin expe- GENERALES riencia y conocimiento, a Leer con atención este manual de uso y man- menos que no estén vigila- tenimiento donde se proporcionan importantes das o instruidas por parte informaciones sobre la seguridad de uso y man-...
  • Seite 57: Uso Y Mantenimiento

    • Posicionamiento: parte de atrás del revestimiento de la placa de cocción, para abrir la placa usar un destornil- lador medio. Este electrodoméstico fue proyectado para ser ¡Atención! empotrado en la mesada, como, muestra la figu- Prestar atención que los cables estén cor- ra (fig.
  • Seite 58 • Funciones (Fig. 5): mostrará en la pantallla luminosa con un número de “1 a 9”. A - Encendido / apagado Para apagar esa zona de cocción es necesario B - Bloque mandos usar 0 en la zona H, y automáticamente la pan- C - Pausa &...
  • Seite 59: Función De Recuperación

    porizador muestra “-”, tocar el temporizador, de 10 seg. cuya pantalla 00 parpadea por los siguientes 10 seg. Ajustar la hora de inicio deseada con +/-, no • Función de recuperación: realizar ninguna acción por al rededor de 5 seg. El temporizador inicia la cuenta regresiva.
  • Seite 60: Calentamiento Automático

    encender la placa, tocar y mantener pulsada la tiendo desde la izquierda hacia la derecha. zona L por 3 seg., Por lo tanto deslizarse hasta la Para activar esta función, pulsar la tecla función, zona H de 9 a 0 dentro de 10 segundos. De esta pulsar la tecla función Chef Cook (E).
  • Seite 61 ario. El menu del usuario está destinado al cliente sale en automático del menu. Pulsa y mantiene final, para adaptarlo a sus exigencies personales. pulsado el mando. Por lo tanto pulsar el mando Para entrar en el menu del usuario el comman- de selección de la zona de cocción en sentido do tiene que estar en modalidad de espera, to- horario, empezando con el mando de selección...
  • Seite 62 CONSEJOS PARA • Limitación del tiempo de funcionamiento AHORRAR ENERGIA La limitación del tiempo de funcionamiento es • Utilizar una tapa siempre que sea posible una función de seguridad adicional para apagar para minimizar la pérdida de calor. la zona de cocción después de un determinado •...
  • Seite 63 Informaciones sobre las placas de cocción eléctricas para uso doméstico Según la reglamentación (UE) n. 66/2014 1PIDC30N 1PIDC60N 1PIDC80N 1PIDC90N 1PIDC120N Identificación del modelo Tipo de placa de cocción empotrado empotrado empotrado empotrado empotrado Número de zonas y/o áreas de cocción...
  • Seite 64 1PIDC80N 1PIDC90N 1PIDC120N...
  • Seite 65: Código De Error

    • Código de error: Código de Descripción Posibles causas Remedios Comportamiento error Sobrecalentamiento del La zona de Olla vacía No calentar olla vacía sensor de temperatura cocción corre- para la zona de cocción spondiente está Olla no apta Usar olla apropiada apagada La temperature de Enfria el sistema...
  • Seite 66 La tension de alimenta- No està disponi- La tensión de alimen- Contactar el suporte ción està fuera de campo ble el encendido tación està fuera de técnico. (tension y/o frequencia) de la zona de campo (ver los datos cocción técnicos para detalles) Error en la frequencia Contactar el suporte de red del señal de...
  • Seite 67 Sensor de la temperatura La zona de Cambio de la tempertu- Enfriamiento de la bloqueado por la zona de cocción está ra insuficiente después superficie de vitro- cocción apagada del encendido de la cerámica placa de cocción Ningún cambiamento Contactar el suporte de temperature (min.
  • Seite 68: Généralités

    • Les personnes qui, en rai- PLAQUE DE CUISSON À INDUCTION son de leurs capacités physiques, sensorielles ou GÉNÉRALITÉS psychiques, de leur inex- Veuillez lire attentivement le contenu de ce ma- périence ou de leur man- nuel car il fournit des informations importantes connaissances, concernant l’installation, l’utilisation et l’entretien en toute sécurité.
  • Seite 69: Utilisation Et Entretien

    • Positionnement: AVERTISSEMENT ! Assurez-vous que les câbles sont correcte- ment fixés et serrés. Cet appareil a été conçu pour être encastré dans une table de cuisson (Fig. 1- Dimension du Nous pouvons être tenus pour trou). Utilisez un matériau d’étanchéité le long du responsables de tout accident résultant d’une périmètre (Fig.2).
  • Seite 70 • Fonctions (Fig. 5): (puissance min.)]. La puissance de chaque zone de cuisson peut être réglée dans 9 positions dif- férentes qui est affichée sur l’afficheur lumineux Allumage/Extinction correspondant avec un chiffre de “1 à 9”. Pour Verrouillage des commandes éteindre la zone de cuisson, appuyez sur 0 de la Pause &...
  • Seite 71: Verrouillage Des Commandes

    tion, assurez-vous qu’aucune zone de cuisson Pour active cette fonction appuyez sur C, tous les n’a été sélectionnée, la minuterie affichera «-». afficheurs (zone L) indiquent //. Pour désactiver, Sélectionnez le minuteur dont l’affichage 00 appuyez sur C et sur une autre touché arbitraire clignotera pendant les 10 secondes suivantes.
  • Seite 72: Préchauffage Automatique

    • Fonction Chef Cook: zone de cuisson de la zone L pendant 3 secondes, puis faites glisser votre doigt sur la zone H, de 0 à 9. Cette séquence doit être effectuée dans les 10 La fonction Chef Cook active 3 zones de cuisson secondes.
  • Seite 73 plaque avec 2 zones de cuisson] jusqu’à un min- est alors automatiquement quitté. imum de 1.4 kW, par un step de 100w (0,1 kW), Gardez appuyée la commande jusqu’elle com- à partir du menu Utilisateur. Le menu Utilisateur mence à clignoter. Appuyez ensuite sur la com- est destiné...
  • Seite 74: Extinction De Sécurité

    CONSEILS MATIÈRE • Extinction de sécurité: D’ÉCONOMIE D’ÉNERGIE L’extinction de sécurité est une fonction dont l’ap- pareil est équipé. Les zones de cuisson allumées, • Utilisez un couvercle autant que possible après un certain temps, s’éteignent automatique- pour minimiser les pertes de chaleur. ment, sans que l’utilisateur n’ait à...
  • Seite 75 Informations pour les plaques de cuisson électriques à usage domestique En accord avec la réglementation (EU) N° 66/2014 Modèle 1PIDC30N 1PIDC60N 1PIDC80N 1PIDC90N 1PIDC120N Type de plaque built-in built-in built-in built-in built-in N° zones de cuisson Technologie de chauffage 1. = Induction 1.
  • Seite 76 1PIDC80N 1PIDC90N 1PIDC120N...
  • Seite 77 • Code Erreur: Code Signification Causes possibles Remède Quoi faire Erreur Capteur de surchauffe de La zone de cuis- Récipients vides Ne chauffez pas de la température de la zone son correspon- casseroles vides de cuisson dante Récipients inadéquats Utilisez des récipients est éteinte adéquats Température trop...
  • Seite 78 La tension d’alimentation La zone de cuis- Tension d l’alimentation Contactez le service est hors de portée (volta- son ne peut pas hors de portée (voir technique ge et/ou fréquence) être allumée données techniques pour tout détail) Problèmes de signal Contactez le service de phase de la tension technique...
  • Seite 79 Capteur de température La zone de cuis- Écart de température Faire refroidir la de la zone de cuisson en son correspon- Insuffisante après la plaque panne dante est éteinte mise en marche de la de cuisson plaque de cuisson Aucune variation de Contactez le service température technique...
  • Seite 84 B B a a r r a a z z z z a a s s r r l l 31025 Sarano di S.Lucia di Piave (TV) ITALIA Via Risorgimento, 14 info@barazzasrl.it www.barazzasrl.it...

Diese Anleitung auch für:

1pidc60n1pidc80n1pidc90n1pidc120n

Inhaltsverzeichnis