Herunterladen Inhalt Inhalt Diese Seite drucken
Austroflamm Clou Compact 2.0 Betriebsanleitung

Austroflamm Clou Compact 2.0 Betriebsanleitung

Vorschau ausblenden Andere Handbücher für Clou Compact 2.0:
Inhaltsverzeichnis

Werbung

Verfügbare Sprachen

Verfügbare Sprachen

Betriebsanleitung / Operating manual
Istruzioni / Notice d`instructions
Clou Compact 2.0 945035
www.austroflamm.com

Werbung

Inhaltsverzeichnis
loading

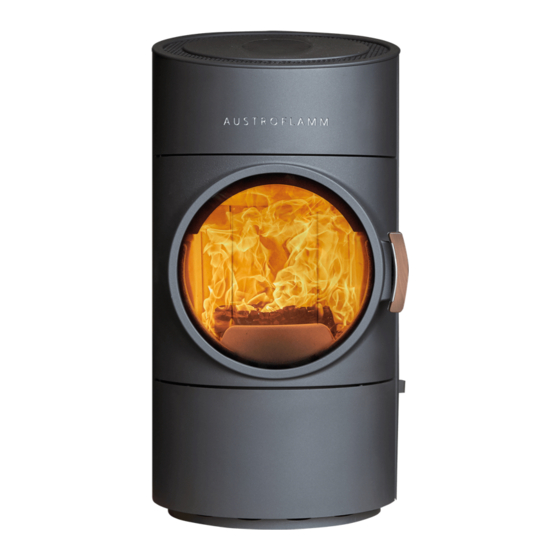
Inhaltszusammenfassung für Austroflamm Clou Compact 2.0

  • Seite 1 Betriebsanleitung / Operating manual Istruzioni / Notice d`instructions Clou Compact 2.0 945035 www.austroflamm.com...
  • Seite 2 Tel: +43 (0) 7249 / 46 443 www.austroflamm.com info@austroflamm.com Redaktion: Olivera Stojanovic Abbildungen: Konstruktion Text: TKT - Technisches Kreativteam - Austroflamm Copyright Alle Rechte vorbehalten. Der Inhalt dieser Anleitung darf nur mit Genehmigung des Herausgebers ver- vielfältigt oder verbreitet werden! Druck-, Rechtschreib- und Satzfehler vorbehalten.
  • Seite 3 Inhaltsverzeichnis Deutsch ........................English........................Français ........................Italiano ........................
  • Seite 4: Inhaltsverzeichnis

    Inhaltsverzeichnis Betriebsanleitung Clou Compact 2.0 Inhaltsverzeichnis Allgemeine Informationen ..........................Copyright.............................. Zweck der Anleitung ............................Aufbewahrung der Anleitung ......................Aufbau der Anleitung.......................... Verwendete Darstellungen ........................ Versionierung............................Abkürzungen............................Sicherheit ................................Bedeutung der Sicherheitshinweise ....................Warnung vor Gefahrenquellen ......................3.2.1 Allgemeine Sicherheitshinweise......................3.2.2 Besondere Gefahrenarten und persönliche Schutzausrüstung ............
  • Seite 5 Betriebsanleitung Clou Compact 2.0 Inhaltsverzeichnis 9.2.4 Externen Luftanschluss umbauen...................... 31 9.2.5 Keramott einbauen..........................32 10 Einstellungen............................... 33 10.1 Kaminofen ausrichten ......................... 33 10.2 Tür einstellen............................33 10.3 Türverschluss einstellen........................35 10.4 Türschließkraft einstellen........................35 11 Inbetriebnahme..............................37 11.1 Erste Inbetriebnahme.......................... 37 11.2...
  • Seite 6: Allgemeine Informationen

    1 | Allgemeine Informationen Betriebsanleitung Clou Compact 2.0 Allgemeine Informationen Sie haben sich für einen Austroflamm Kaminofen entschieden. Herzlichen Glückwunsch zu Ihrer Wahl und vielen Dank für Ihr Vertrauen. Richtige Handhabung und Pflege sind für einen störungsfreien Betrieb und eine lange Lebensdauer unerlässlich.
  • Seite 7: Zweck Der Anleitung

    Betriebsanleitung Clou Compact 2.0 2 | Zweck der Anleitung Zweck der Anleitung Diese Anleitung ist Bestandteil des Kaminofen und soll dazu beitragen, dass der Kaminofen sicher ein- gebaut und gewartet wird. TIPP Bitte lesen Sie diese Anleitung vor Inbetriebnahme. Aufbewahrung der Anleitung Bewahren Sie diese Anleitung für den Bedarfsfall auf.
  • Seite 8: Abkürzungen

    2 | Zweck der Anleitung Betriebsanleitung Clou Compact 2.0 Abkürzungen Abkürzung Bedeutung Heat Memory System KÖ Kaminöfen...
  • Seite 9: Sicherheit

    Betriebsanleitung Clou Compact 2.0 3 | Sicherheit Sicherheit In dieser Anleitung geben wir Ihnen zum sicheren Betrieb Ihres Kaminofen zahlreiche Sicherheitshin- weise. Diese Hinweise sind abhängig von ihrer Bedeutung wie folgt unterschiedlich gekennzeichnet: Bedeutung der Sicherheitshinweise HINWEIS Besondere Verhaltensweise und/oder Tätigkeiten, die für ein sicheres Arbeiten erforderlich sind.
  • Seite 10: Besondere Gefahrenarten Und Persönliche Schutzausrüstung

    3 | Sicherheit Betriebsanleitung Clou Compact 2.0 • Die Tür sowie alle Einstelleinrichtungen des Kaminofens sind zu schließen, wenn der Kaminofen außer Betrieb ist. • Beachten Sie, dass sich Oberflächen des Kaminofens während des Betriebes stark erwärmen. Zur Bedienung des Kaminofens empfehlen wir die Benutzung des Schutzhandschuhs.
  • Seite 11: Produktübersicht

    4 | Produktübersicht Produktübersicht Bestimmungsgemäße Verwendung Der in dieser Anleitung beschriebene, Austroflamm Kaminofen ist mit selbstschließender und verrie- gelnder Tür der Bauart A1 nach der EN Prüfung EN 13240 gefertigt und geprüft. HINWEIS Der Betrieb ist nur mit geschlossener/verriegelter Tür zulässig.
  • Seite 12 4 | Produktübersicht Betriebsanleitung Clou Compact 2.0 Abb. 2: Sicherheitsabstände 1) Auf (+) und Zu (-) (Primär-/Sekundärluftregler) Abb. 3: Luftregler...
  • Seite 13: Energielabel

    Betriebsanleitung Clou Compact 2.0 4 | Produktübersicht Energielabel -80% Austrof amm Clou Compact -60% -40% -20% ENERGIA · ЕНЕРГИЯ · ΕΝΕΡΓΕΙΑ · ENERGIJA · ENERGY · ENERGIE · ENERGI 2015/1186 Abb. 4: Energielabel Platzierung der Typenschilder Hier zeigen wir wo Sie das Typenschild finden. Ein Duplikat des Typenschildes Ihres Kaminofens fin- den sie auf der Rückseite dieser Anleitung.
  • Seite 14: Technische Daten

    5 | Technische Daten Betriebsanleitung Clou Compact 2.0 Technische Daten Als Kaminofen der Bauart 1 ist ein Anschluss an einen, bereits mit anderen Kaminöfen und Herden für feste Brennstoffe belegten Schornstein möglich, sofern die Schornsteinbemessung gemäß DIN 4705 – Teil 3, dem nicht widerspricht.
  • Seite 15 Betriebsanleitung Clou Compact 2.0 5 | Technische Daten Schwelkoks nein nein Bituminöse Kohle nein nein Braunkohlebriketts nein nein Torfbriketts nein nein Briketts aus einer Mi- nein nein schung aus fossilen Brenn- stoffen Sonstige fossile Brennstof- nein nein Briketts aus einer Mi-...
  • Seite 16: Allgemeine Technische Daten

    5 | Technische Daten Betriebsanleitung Clou Compact 2.0 Bei Feuerstätten ohne wasserführende Bauteile erfolgt kein Eintrag. Werte für Jahresnutzungsgrad und Emissionen sind hier für den bevorzugten Brennstoff anzugeben. Werte für Jahresnutzungsgrad und Emissionen sind hier für alle weiteren, sonstige geeignete Brenn- stoffe anzugeben.
  • Seite 17: Transport, Handhabung Und Lagerung

    Betriebsanleitung Clou Compact 2.0 6 | Transport, Handhabung und Lagerung Transport, Handhabung und Lagerung Transport Überprüfen Sie die angelieferte Ware umgehend auf Voll- ständigkeit und Transportschäden. Überprüfen Sie vor der Montage des Kaminofens die Funk- tion aller beweglichen Teile. Grundsätzlich sind alle Mängel vor der Montage des Kaminofens zu melden.
  • Seite 18: Anforderungen An Den Aufstellort

    Während des Betriebes muss für ausreichende Verbrennungsluftzufuhr gesorgt werden. Bei einer mo- dernen sehr dichten Gebäudehülle kann es vorkommen, dass die Verbrennungsluftversorgung, bei raumluftabhängigem Betrieb nicht gewährleistet ist, bzw. das Zugverhalten beeinträchtigt wird. In die- sem Fall ist für eine ausreichende Verbrennungsluftzufuhr zu sorgen. Ihr Austroflamm-Fachhändler berät Sie gerne. TIPP Stellen Sie sicher, dass Verbrennungsluftöffnungen nicht verschlossen sind!
  • Seite 19: Brennstoffmaterial/-Menge

    Betriebsanleitung Clou Compact 2.0 8 | Brennstoffmaterial/-menge Brennstoffmaterial/-menge Brennmaterial Holz Viele unserer heimischen Holzsorten können - nach entsprechender Trocknung - in Feuerstätten CO2- neutral verbrannt werden. Holz zeichnet sich aus, weil es nachwächst, nachhaltig bewirtschaftet wer- den kann, keine oder nur geringe zusätzliche Fremdenergie in den Brennstoff investiert werden muss - und kurze Wege vom Erzeuger zum Verbraucher sorgen für eine optimale Klimabilanz.
  • Seite 20 8 | Brennstoffmaterial/-menge Betriebsanleitung Clou Compact 2.0 Bitte beachten Sie jederzeit - auch beim Nachlegen - die maximal vorgegebene Auflagemenge laut Angaben in dieser Anleitung!!! Ihre Feuerstelle bringt sonst nicht die gewünschte Effizienz - vor allem aber können erhebliche Schäden an ihrem Gerät, an Dichtungen und Material und an der Rauchgas- führung entstehen.
  • Seite 21: Brennstoffmenge

    Maximal aufzugebende Brennstoffmenge: 1,3 kg Holz oder Briketts. HINWEIS Überhitzung Eine zu große Brennstoffmengen kann zu Überhitzung und Beschädigung an Ihrem Austroflamm- Ka- minofen führen HINWEIS Um Schäden zu vermeiden, dürfen Sie Ihren Kaminofen NIE mit einer größeren, als der in dieser Be-...
  • Seite 22: Montage

    9 | Montage Betriebsanleitung Clou Compact 2.0 Montage Die Montage darf ausschließlich vom autorisierten Fachbetrieb durchgeführt werden. Überprüfen Sie vor der Montage des Kaminofen die Funktion aller beweglichen Teile. Grundsätzlich sind alle Mängel vor der Montage zu melden. In den folgenden Kapiteln informieren wir Sie über, •...
  • Seite 23 Betriebsanleitung Clou Compact 2.0 9 | Montage 2) Je zwei Stück Befestigungsschrauben der Stahlseiten- verkleidung rechts und links oben innen lösen (M5/ TX25). Abb. 9: Schrauben lösen 3) Seitenverkleidung nach oben anheben und abneh- men. Abb. 10: Seitenverkleidung abnehmen...
  • Seite 24 9 | Montage Betriebsanleitung Clou Compact 2.0 4) Schrauben der oberen, vorderen Verkleidung lösen. Abb. 11: Schrauben der oberen, vorderen Verkleidung lösen 5) Tür öffnen. 6) Schrauben von unten lösen. Abb. 12: Schrauben lösen 7) Verkleidung abnehmen. Abb. 13: Verkleidung abnehmen...
  • Seite 25: Türgriff Umbauen (Softlock)

    Betriebsanleitung Clou Compact 2.0 9 | Montage 8) Tür öffnen. 9) Schrauben der unteren, vorderen Verkleidung lösen. Abb. 14: Schrauben der unteren, vorderen Verkleidung lösen 10) Unter Blende abnehmen. Abb. 15: Untere Blende abnehmen 9.2.2 Türgriff umbauen (Softlock) 1) Um den Deckel und nur die rechte Seitenverkleidung abzunehmen, gehen Sie wie im Kapitel Seitenverklei- dung demontieren [}auf Seite 22] beschrieben vor.
  • Seite 26 9 | Montage Betriebsanleitung Clou Compact 2.0 3) Ursprünglichen Schnapper abmontieren. Abb. 17: Schnapper abmontieren 4) Schrauben vom bestehenden Türgriff lösen. Abb. 18: Schrauben lösen 5) Türgriff abnehmen. Abb. 19: Türgriff abnehmen 6) Holzgriff (1) vom ursprünglichen Türgriff abnehmen. Abb. 20: Holzgriff abnehmen...
  • Seite 27 Betriebsanleitung Clou Compact 2.0 9 | Montage 7) Den Holzgriff an den neuen Türgriff mit den ursprüng- lichen Schrauben montieren. Abb. 21: Holzgriff montieren 8) Türgriff an die ursprüngliche Position montieren. ð Dabei die Schrauben vom alten Griff verwenden. Abb. 22: Türgriff montieren 9) Neue Schnappe an die ursprüngliche Position montie-...
  • Seite 28 9 | Montage Betriebsanleitung Clou Compact 2.0 11) Tür langsam schließen. Dabei beachten, ob die Tür richtig in die Schnappe einrastet. Abb. 25: Tür langsam schließen 12) Sollte die Tür nicht richtig in die Schnappe einrasten, kann die Schnappe mit den vier Schrauben nach oben, unten, vor und zurück eingestellt werden.
  • Seite 29: Rauchrohranschluss Umbauen

    Betriebsanleitung Clou Compact 2.0 9 | Montage 9.2.3 Rauchrohranschluss umbauen 1) Zuerst muss der Deckel abgenommen und die Seiten- verkleidung demontiert werden. Gehen Sie wie im Ka- pitel Seitenverkleidung demontieren [}auf Seite 22] beschrieben vor. 2) Den perforierten Ausschnitt an der Seitenverkleidung (hinten) mit einer Säge entfernen.
  • Seite 30 9 | Montage Betriebsanleitung Clou Compact 2.0 5) Teile tauschen und wieder montieren. Abb. 31: Abdeckung und Stutzen tauschen Abb. 32: Abdeckung und Stutzen vertauscht 6) Seitenverkleidung wieder montieren und Deckel an- bringen. Abb. 33: Seitenverkleidung montieren und Deckel anbringen...
  • Seite 31: Externen Luftanschluss Umbauen

    Betriebsanleitung Clou Compact 2.0 9 | Montage 9.2.4 Externen Luftanschluss umbauen 1) Um den Deckel und die Seitenverkleidung abzuneh- men, gehen Sie wie im Kapitel Seitenverkleidung de- montieren beschrieben vor. 2) Den perforierten Ausschnitt an der Seitenverkleidung (hinten) mit einer Säge entfernen.
  • Seite 32: Keramott Einbauen

    9 | Montage Betriebsanleitung Clou Compact 2.0 9.2.5 Keramott einbauen Nummerierung = Einbaureihenfolge Abb. 36: Keramott...
  • Seite 33: Einstellungen

    Betriebsanleitung Clou Compact 2.0 10 | Einstellungen Einstellungen 10.1 Kaminofen ausrichten 1) Zuerst müssen der Deckel und die Seitenverkleidung demontiert werden. ð Gehen Sie dabei, wie im Kapitel Seitenverkleidung demontieren [}auf Seite 22] beschrieben, vor. 2) Hinten am Kaminofen befinden sich zwei Schrauben.
  • Seite 34 10 | Einstellungen Betriebsanleitung Clou Compact 2.0 5) Unten die Schrauben lösen und Verkleidung demon- tieren. Abb. 40: unten vordere Verkleidung demon- tieren 6) An den Schrauben kann die Tür eingestellt werden. 7) Mit den Schrauben (1) kann die Tür rauf, runter, links und rechts eingestellt werden.
  • Seite 35: Türverschluss Einstellen

    Betriebsanleitung Clou Compact 2.0 10 | Einstellungen 10.3 Türverschluss einstellen 1) Tür öffnen. 2) Mit den gekennzeichneten Schrauben kann der Tür- verschluss nach oben, unten, vorne und zurück einge- stellt werden. Abb. 42: Türverschluss einstellen 10.4 Türschließkraft einstellen Bei diesem Schritt muss nur die linke Seitenverkleidung de- montiert.
  • Seite 36 10 | Einstellungen Betriebsanleitung Clou Compact 2.0 ü Unten an der Tür befindet sich ein Bolzen mit dem die Türschließkraft eingestellt werden kann. 4) Halten Sie mit einem Gabelschlüssel den Bolzen am unteren Ende fest (1). 5) Mit einem Schraubenzieher kann die Schließkraft mit der Schraube (2) eingestellt werden.
  • Seite 37: Inbetriebnahme

    Betriebsanleitung Clou Compact 2.0 11 | Inbetriebnahme Inbetriebnahme 11.1 Erste Inbetriebnahme HINWEIS Bei der Erstinbetriebnahme und in den folgenden 2-3 Anbrandzyklen sollen nur ca. 2/3 der maxima- len Brennstoffmenge verwendet werden. HINWEIS Um Schäden zu vermeiden, dürfen Sie Ihren Kaminofen NIE mit einer größeren, als in dieser Betriebs- anleitung angegebenen, Brennstoffmenge betreiben! Während der ersten 3-4 Abbrandzyklen - bei Nennwärmeleistung - kann es zu Geruchsentwicklung...
  • Seite 38: Bedienung

    12 | Bedienung Betriebsanleitung Clou Compact 2.0 Bedienung 12.1 Vor dem Anheizen Der Kaminofen kann nur ordnungsgemäß funktionieren, wenn dem Aufstellraum (dem Gerät) ausrei- chend Verbrennungsluft zuströmt, insbesondere beim gleichzeitigen Betrieb mehrerer Feuerstätten. Sorgen Sie bereits vor dem Anheizen für ausreichende Luftzufuhr. Die Verbrennungsluftklappe am Ka- minofen öffnen und über den gesamten Abbrandzeitraum offen halten.
  • Seite 39: Heizen In Der Übergangszeit

    Betriebsanleitung Clou Compact 2.0 12 | Bedienung 7) Schließen Sie die Tür. ð Am besten erste Holzauflage ohne Änderung der Luftschieberstellung abbrennen lassen. ð Wenn nur noch Grundglut vorhanden ist (keine Flammen mehr), können Sie, eine weitere Auflage Scheitholz nachlegen.
  • Seite 40: Instandhaltung

    13 | Instandhaltung Betriebsanleitung Clou Compact 2.0 Instandhaltung 13.1 Dichtung an der Tür tauschen 1) Alte Dichtung aus der Tür herausnehmen. 2) Neue Dichtung mit einem geeigneten Kleber (z.B. Sili- kon B310) einkleben. Abb. 48: Dichtung tauschen...
  • Seite 41: Reinigung

    Betriebsanleitung Clou Compact 2.0 14 | Reinigung Reinigung 14.1 Kaminofen, Rauchgaswege, Rauchrohr reinigen Der Kaminofen, die Rauchgaswege und Rauchrohre sollten jährlich – evtl. auch öfter, z.B. • nach der Reinigung des Schornsteines • auf Ablagerungen untersucht und • ggf. gereinigt werden.
  • Seite 42: Türglas Reinigen

    14.3 Türglas reinigen Glas mit Scheibenreiniger einsprühen und leicht einwirken lassen. • Wir empfehlen das Glas mit unserem Austroflamm Glasreiniger oder handelsüblichem Fenster- glasreiniger zu reinigen. • Vermeiden Sie, dass Tür- oder Glasdichtungen mit Wasser oder Reiniger in Kontakt kommen, da diese sonst aushärten und dadurch ihre Funktion verlieren.
  • Seite 43: Oberflächen Reinigen

    Betriebsanleitung Clou Compact 2.0 14 | Reinigung 14.4 Oberflächen reinigen • Lackierte Oberflächen dürfen nur mit einem weichen Tuch (evtl. feucht) gereinigt werden. • Aufgelösten Schmutz mit saugfähigem Lappen oder Haushaltspapier aufsaugen. • Für Edelstahloberflächen gibt es ebenfalls Spezialreiniger.
  • Seite 44: Hilfe

    15 | Hilfe Betriebsanleitung Clou Compact 2.0 Hilfe Problem Grund Lösung Die Glasscheibe verrußt Kaminzug unzureichend von Zeit zu Zeit (je nach Gebrauch) muss die Glasscheibe mit Glasreini- ger gereinigt werden Klärung mit Schornsteinfeger (ev. Schornstein verlängern/Zugmes- sung) falsche Bedienung des Luftreglers Unbedingt gemäß...
  • Seite 45: Feuerraumauskleidung

    Betriebsanleitung Clou Compact 2.0 15 | Hilfe Problem Grund Lösung Betriebstemperatur nicht erreicht Kaminofen auf die Betriebstempera- tur bringen Verrußen der Scheibe nach 8-10 Stunden Feuern ist normal Schornsteinzug zu gering Schornsteinfeger kontaktieren 15.1 Feuerraumauskleidung Die Ausmauerung Ihres Kaminofens besteht aus Keramott, einem hochwertigen Material mit besonde- ren verbrennungstechnischen Eigenschaften und ansprechender Optik.
  • Seite 46: Zubehör

    16 | Zubehör Betriebsanleitung Clou Compact 2.0 Zubehör Lassen Sie defekte Teile (Zubehör, Ersatzteile) von Ihrem Kaminofenfachhändler austauschen. Damit ist gewährleistet, dass Ihr Kaminofen sicher und funktionstüchtig ist und bleibt.
  • Seite 47: Ersatzteile

    Betriebsanleitung Clou Compact 2.0 17 | Ersatzteile Ersatzteile Keramott Pos. Nr. Anzahl Artikel Artikel-Nr. Keramottboden links 724051 Keramottboden hinten 724052 Keramottwand links 724053 Keramottwand seitlich 724054 Keramottwand hinten 724055 Keramottboden rechts 724056 Keramottwand rechts 724057 Kermott Umlenkung 724058 Keramottboden vorne 724059 Keramott Tür links...
  • Seite 48 17 | Ersatzteile Betriebsanleitung Clou Compact 2.0 Feuerraumtür Pos. Nr. Anzahl Artikel Artikel-Nr. FR-TÜr 724121-29 Runddichtung Ø14x1450 714223 Dichtung D6x1262 CULIMETA 718183 Scharnierbolzen 778931-92 Gewindestift m. ISR und Ringschrauben M5x6 DIN916 718032-92 Griff montiert 732135 Verschlussrolle (VR) montiert 732131 Dichtungsboard 724075 Zylinderschrauben m.
  • Seite 49 Betriebsanleitung Clou Compact 2.0 17 | Ersatzteile Softlock Pos. Nr. Anzahl Artikel Artikel-Nr. Scheibe o.F. f.M5 DIN125 718062-15 Gewindestift m. ISR u. Ringschrauben M4x12 DIN916 718064-92 Gewindestift m. ISR u. Ringschrauben M4x6 DIN916 718459-92 Sich.-scheibe f. Wellen Ø4 DIN6799 718685-92 Zylinderschraube m.
  • Seite 50: Demontage

    18 | Demontage Betriebsanleitung Clou Compact 2.0 Demontage Für eine fachgerechte Demontage bzw. Zerlegung des Kaminofens wenden Sie sich an Ihren Austro- flamm-Fachhändler.
  • Seite 51: Entsorgung

    Betriebsanleitung Clou Compact 2.0 19 | Entsorgung Entsorgung HINWEIS Um den Kaminofen ordnungsgemäß zu entsorgen, nehmen Sie Kontakt mit dem lokalen (ggfs. städti- schen) Entsorgungsunternehmen auf. HINWEIS Wir empfehlen, die feuerberührten Komponenten des Kaminofens wie Glas, Brennkammer, Roste, Feuerraumauskleidung (Keramott), Keramik, Sensoren, Umlenkplatten herauszunehmen und im Haus- müll zu entsorgen.
  • Seite 52 19 | Entsorgung Betriebsanleitung Clou Compact 2.0 Griffe und Deko-Elemente aus Metall Falls vorhanden, Griffe und Deko-Elemente aus Metall ab- bzw. ausbauen und als Metallschrott entsor- gen. Lokale Entsorgungsmöglichkeiten müssen beachtet werden.
  • Seite 53: Grantie / Gewährleistung

    Frankreich. Für alle übrigen Länder gelten gesonderte Bedingungen des Importeurs im jeweiligen Land. Kein Garantiefall tritt ein, wenn sich Ihr Austroflamm Kaminofen nicht im räumlichen Geltungsbe- reich der Garantie befindet, woran auch eine Beförderung oder Versendung durch Austroflamm nichts ändert.“...
  • Seite 54: Datenverarbeitung

    Sind Sie mit der entsprechenden Verarbeitung ihrer personenbezogenen Daten zu den nachfolgen- den Nutzungszwecken einverstanden, so kreuzen Sie dies bitte an. o Hiermit stimme ich zu, dass mir die Austroflamm GmbH sowie die AUSTROFLAMM Service GmbH & Co KG per E-Mail/ SMS/ Telefon Service-Reminder und Angebote zu weiteren Produkten der Austro- flamm GmbH zu Werbezwecken übersenden darf.
  • Seite 55: Inbetriebnahmeprotokoll

    Betriebsanleitung Clou Compact 2.0 22 | Inbetriebnahmeprotokoll Inbetriebnahmeprotokoll Betreiber / Kunde Händler / Techniker Name Firma Straße Straße PLZ Ort PLZ Ort Telefon Telefon E-Mail E-Mail Kaminofen In Ordnung Bemerkungen Modell Seriennummer Technik Optik Zubehör Bauseitige Bedingungen Kaminart Durchmesser der Rauchrohrleitung:...
  • Seite 56: Serviceprotokoll

    23 | Serviceprotokoll Betriebsanleitung Clou Compact 2.0 Serviceprotokoll Datum Techniker Anmerkungen Durchgeführte Arbeiten, verbaute Ersatzteile...
  • Seite 57 Betriebsanleitung Clou Compact 2.0 23 | Serviceprotokoll Datum Techniker Anmerkungen Durchgeführte Arbeiten, verbaute Ersatzteile...
  • Seite 58 Contents Operating manual Clou Compact 2.0 Contents General information ............................60 Copyright.............................. 60 Purpose of the manual ............................61 Storing the manual ..........................61 Structure of the manual........................61 Representations used.......................... 61 Version control............................. 61 Abbreviations ............................62 Safety ..................................63 Importance of the safety instructions ....................
  • Seite 59 Operating manual Clou Compact 2.0 Contents 9.2.3 Rearranging the flue pipe connection ....................83 9.2.4 Converting external air connection....................85 9.2.5 Installing Keramott..........................86 10 Settings................................. 87 10.1 Aligning the stove..........................87 10.2 Adjusting the door ..........................87 10.3 Adjusting the door lock ........................89 10.4...
  • Seite 60: General Information

    1 | General information Operating manual Clou Compact 2.0 General information You have decided in favor of an Austroflamm stove. Congratulations on your decision and thank you for your trust. Correct operation and care are essential for trouble-free operation and long service life.
  • Seite 61: Purpose Of The Manual

    Operating manual Clou Compact 2.0 2 | Purpose of the manual Purpose of the manual This manual is a component part of the stove and is intended to contribute to the stove being safely in- stalled and maintained. Please read this manual before using the stove for the first time.
  • Seite 62: Abbreviations

    2 | Purpose of the manual Operating manual Clou Compact 2.0 Abbreviations Abbreviation Meaning Heat Memory System Stoves...
  • Seite 63: Safety

    Operating manual Clou Compact 2.0 3 | Safety Safety In this manual we give you numerous safety instructions for the safe operation of your stove. These in- structions are characterized differently as follows, depending on their importance: Importance of the safety instructions NOTICE Particular behaviour and/or activities that are required for safe working.
  • Seite 64: Special Types Of Danger And Personal Protective Equipment

    3 | Safety Operating manual Clou Compact 2.0 • Please note that the surfaces of this stove heat up considerably during operation. We recommend that you use the protective glove supplied to operate your stove. • Please alert children to these dangers, and keep them away from the stove when it is operating.
  • Seite 65: Product Overview

    4 | Product overview Product overview Intended use The Austroflamm stove described in this manual is manufactured and tested with a type A1 self-closing and locking door under EN test EN 13240. NOTICE Operation is only permissible with closed/bolted door.
  • Seite 66 4 | Product overview Operating manual Clou Compact 2.0 Fig. 2: Safety distances 1) Open (+) and closed (-) (primary/secondary air control- ler) Fig. 3: Air control...
  • Seite 67: Energy Label

    Operating manual Clou Compact 2.0 4 | Product overview Energy label -80% Austrof amm Clou Compact -60% -40% -20% ENERGIA · ЕНЕРГИЯ · ΕΝΕΡΓΕΙΑ · ENERGIJA · ENERGY · ENERGIE · ENERGI 2015/1186 Fig. 4: Energy label Positioning of the nameplates Here we show where you can find the nameplate.
  • Seite 68: Technical Data

    5 | Technical data Operating manual Clou Compact 2.0 Technical data As a type 1 stove, a connection to a chimney already occupied with other solid-fuel stoves and ovens is possible provided that the chimney rating under DIN 4705 – part 3, does not contravene this.
  • Seite 69 Operating manual Clou Compact 2.0 5 | Technical data Lignite briquettes Peat briquettes Briquettes made from a mixture of fossil fuels Other fossil fuels Briquettes made from a mixture of biomass and fossil fuels Other mixture of biomass and solid fuels (*) PM = dust, OGC = organic gaseous connections, CO = carbon monoxide, NOx = nitrogen oxide (**) Only required when using correction factors F(2) or F(3).
  • Seite 70: General Specifications

    5 | Technical data Operating manual Clou Compact 2.0 Specification mg/m³ for heated filter method (in compliance with Annexe III, number 4, letter a, sec- tion i, point 1) or g/kg for measurement in dilution tunnel (in compliance with Annexe III, number 4, let- ter a, section i, point 2 and 3.)
  • Seite 71: Transport, Handling And Storage

    Operating manual Clou Compact 2.0 6 | Transport, handling and storage Transport, handling and storage Transportation Immediately checked the goods delivered for complete- ness and damage in transit. Before installing the stove, check that all movable parts are working. Any defects before the installation of the stove must be reported.
  • Seite 72: Requirements At The Installation Location

    When connecting the flue pipes to the chimney, national and/or local safety regulations must be com- plied with. Your Austroflamm stove is fitted at the factory with a flue pipe outlet at the top (diameter 150 mm). The connection can, as described in these instructions, be rearranged to the bottom. When connecting with other pipe diameters the approval of your responsible chimney sweep is required.
  • Seite 73: Fuel Material/-Quantity

    Operating manual Clou Compact 2.0 8 | Fuel material/-quantity Fuel material/-quantity Fuel Wood Many of our native types of wood can, after being appropriately dried, be burnt CO2-neutral in heat- producing appliances. Wood stands out because it grows again, can be sustainably harvested, re- quires little or no extra external energy to be invested in the fuel, and has a short journey from the pro- ducer to the consumer, which provides an optimal climate balance.
  • Seite 74 8 | Fuel material/-quantity Operating manual Clou Compact 2.0 Please observe at all times the maximum specified amount to be laid, even when putting on more wood! Otherwise your fire will not provide the desired efficiency - but above all considerable damage may be caused to your appliance, to gaskets and material and to the flue gas duct.
  • Seite 75: Fuel Quantity

    Maximum amount of fuel to be deposited: 1.3 kg wood or briquettes. NOTICE Overheating Too great a quantity of fuel can lead to overheating and damage to your Austroflamm stove NOTICE To avoid damage you must NEVER operate your Stove a greater quantity of fuel than that specified in...
  • Seite 76: Installation

    9 | Installation Operating manual Clou Compact 2.0 Installation Installation must only be carried out by an authorized specialist company. Before installing the stove, check that all movable parts are working. Any defects must be reported be- fore the installation.
  • Seite 77 Operating manual Clou Compact 2.0 9 | Installation 2) Loosen the two locking screws (M5/TX25) of the steel side cladding, right and left inside top. Fig. 9: Loosening the screws 3) Lift up and detach the side cladding. Fig. 10: Detaching the side cladding...
  • Seite 78 9 | Installation Operating manual Clou Compact 2.0 4) Undo the screws from the top front cladding. Fig. 11: Undoing the screws from the top front cladding 5) Open door. 6) Undo the screws from the bottom. Fig. 12: Undoing the screws 7) Remove cladding.
  • Seite 79: Converting The Door Handle (Softlock)

    Operating manual Clou Compact 2.0 9 | Installation 8) Open door. 9) Undo the screws from the bottom front cladding. Fig. 14: Undoing the screws from the bottom front cladding 10) Detach lower trim. Fig. 15: Detaching the lower trim 9.2.2 Converting the door handle (softlock)
  • Seite 80 9 | Installation Operating manual Clou Compact 2.0 3) Remove original latch bolt. Fig. 17: Removing the latch bolt 4) Undo screws of the existing door handle. Fig. 18: Undoing the screws 5) Remove door handle. Fig. 19: Removing the door handle 6) Detach wooden handle from original door handle (1).
  • Seite 81 Operating manual Clou Compact 2.0 9 | Installation 7) Mount the wooden handle on the new door handle with the original screws. Fig. 21: Mounting the wooden handle 8) Mount door handle in the original position. ð In doing so, use the screws from the old handle.
  • Seite 82 9 | Installation Operating manual Clou Compact 2.0 11) Close door slowly. In the process, note whether the door latches correctly into the catch. Fig. 25: Slowly closing the door 12) Should the door not correctly engage the catch, the four screws can be used to adjust the catch upwards, downwards, forwards and backwards.
  • Seite 83: Rearranging The Flue Pipe Connection

    Operating manual Clou Compact 2.0 9 | Installation 9.2.3 Rearranging the flue pipe connection 1) First the cover must be removed and the side clad- ding detached. Proceed as described in the section Removing the side cladding [}on page 76].
  • Seite 84 9 | Installation Operating manual Clou Compact 2.0 5) Replace parts and reinstall. Fig. 31: Replacing cover and bracket Fig. 32: Cover and bracket replaced 6) Remount side cladding and attach cover. Fig. 33: Remounting the side cladding and attaching the cover...
  • Seite 85: Converting External Air Connection

    Operating manual Clou Compact 2.0 9 | Installation 9.2.4 Converting external air connection 1) To remove the cover and the side cladding, Proceed as described in the section Removing the side clad- ding. 2) Using a saw, remove the perforated cut-out to the side cladding (rear).
  • Seite 86: Installing Keramott

    9 | Installation Operating manual Clou Compact 2.0 9.2.5 Installing Keramott Numbering = installation sequence Fig. 36: Keramott...
  • Seite 87: Settings

    Operating manual Clou Compact 2.0 10 | Settings Settings 10.1 Aligning the stove 1) First the cover and the side cladding must be de- tached. ð Proceed , as described in the section Removing the side cladding [}on page 76].
  • Seite 88 10 | Settings Operating manual Clou Compact 2.0 4) Undo screws and removing cladding. Fig. 39: removing upper front cladding 5) Undo the screws at the bottom and remove cladding. Fig. 40: removing lower front cladding...
  • Seite 89: Adjusting The Door Lock

    Operating manual Clou Compact 2.0 10 | Settings 6) The door can be adjusted on the screws. 7) Using the screws (1) the door can be adjusted up, down, left and right. 8) Using the grub screws (2) the door can be adjusted in and out.
  • Seite 90: Adjusting The Closing Pressure Of The Door

    10 | Settings Operating manual Clou Compact 2.0 10.4 Adjusting the closing pressure of the door Only the left side cladding needs to be removed for this step. 1) To remove the cover and the side cladding, Proceed as described in the section Removing the side clad- ding [}on page 76].
  • Seite 91: Commissioning

    Operating manual Clou Compact 2.0 11 | Commissioning Commissioning 11.1 Initial Commissioning NOTICE During the initial commissioning and in the following 2-3 combustion cycles, only approx. 2/3 of the maximum fuel quantity is to be used. NOTICE To avoid damage you must NEVER operate your Stove a greater quantity of fuel than that specified in this manual! During the first 3-4 combustion cycles at nominal heat output, odors may develop.
  • Seite 92: Operation

    12 | Operation Operating manual Clou Compact 2.0 Operation 12.1 Before heating up The stove can only function properly if there is sufficient combustion air coming to the room of installa- tion (the appliance), specially if several firing installations are being operated at the same time. Ensure sufficient air supply before heating up.
  • Seite 93: Heating In The Transition Period

    Operating manual Clou Compact 2.0 12 | Operation 7) Close the door. ð It is best to allow the first layer of wood to combust without altering the air damper setting. ð If only the bed of embers is left (no more flames), you can place another layer of log.
  • Seite 94: Maintenance

    13 | Maintenance Operating manual Clou Compact 2.0 Maintenance 13.1 Changing the seal on the door 1) Remove old seal from the door. 2) Glue in new seal with a suitable adhesive (e.g. silicon B310). Fig. 48: Changing the seal...
  • Seite 95: Cleaning

    Operating manual Clou Compact 2.0 14 | Cleaning Cleaning 14.1 Cleaning the stove, flue gas ducts and flue pipe The stove, the flue gas ducts and flues should be annually - possible even more often, e.g. • after the chimney has been cleaned •...
  • Seite 96: Cleaning The Door Window

    14.3 Cleaning the door window Spray window with glass cleaner and leave it for a moment to take effect. • We recommend cleaning the glass with our Austroflamm glass cleaner or a commercially available window cleaner. • Prevent door- or window seals from coming into contact with water or cleaner, since these will oth- erwise harden and in doing so lose their function.
  • Seite 97: Cleaning Surfaces

    Operating manual Clou Compact 2.0 14 | Cleaning 14.4 Cleaning surfaces • Varnished surfaces may only be cleaned with a soft cloth (if necessary damp). • Soak up dissolved dirt with absorbent cloths or household paper. • For stainless steel surfaces there are also special cleaners.
  • Seite 98: Help

    15 | Help Operating manual Clou Compact 2.0 Help Problem Cause Solution The glass window is sooty Insufficient draft from time to time (depending on use) the window must be cleaned with glass cleaner Clarification with chimney sweeper (poss extend chimney/measure...
  • Seite 99: Firebox Lining

    Operating manual Clou Compact 2.0 15 | Help Problem Cause Solution Operating temperature not reached Bring stove to the operating temper- ature Sooting up of the window after 8- 10 hours of fires is normal Chimney draft too low Contact chimney sweep 15.1 Firebox lining...
  • Seite 100: Accessories

    16 | Accessories Operating manual Clou Compact 2.0 Accessories Have defective parts (accessories, spare parts) replaced by your specialist stove dealer. This guaran- tees that stove is and remains safe and functional.
  • Seite 101: Spare Parts

    Operating manual Clou Compact 2.0 17 | Spare parts Spare parts Keramott Item no. Quantity Item Item no. Keramott floor left 724051 Keramott floor rear 724052 Keramott panel left 724053 Keramott panel side 724054 Keramott panel rear 724055 Keramott floor right...
  • Seite 102 17 | Spare parts Operating manual Clou Compact 2.0 Firebox door Item no. Quantity Item Item no. FB door 724121-29 O-seal Ø14x1450 714223 Seal D6x1262 CULIMETA 718183 Hinge pin 778931-92 Grub screw with hex and eyebolts M5x6 DIN916 718032-92 Handle mounted...
  • Seite 103 Operating manual Clou Compact 2.0 17 | Spare parts Softlock Item no. Quantity Item Item no. Washer without chamfer for M5 DIN125 718062-15 Grub screw with hex and eyebolts M4x12 DIN916 718064-92 Grub screw with hex and eyebolts M4x6 DIN916 718459-92 Safety washer for shafts Ø4 DIN6799...
  • Seite 104: Dismantling

    18 | Dismantling Operating manual Clou Compact 2.0 Dismantling For correct uninstallation and dismantling of the stove, contact your Austroflamm specialist dealer.
  • Seite 105: Disposal

    NOTICE For correct uninstallation and dismantling of the stove, contact your Austroflamm specialist dealer. Electric and electronic components Remove the electric and electronic components from the appliance by dismounting them. These com- ponents must not be disposed of via non-recyclable waste.
  • Seite 106 19 | Disposal Operating manual Clou Compact 2.0 Handles and decorative elements made of metal If present, disassemble or remove handles and decorative elements made of metal and dispose of as metal scrap. Local disposal options must be observed.
  • Seite 107: Guarantee / Warranty

    For the replaceability of the warranty case the start-up log must be received by Austroflamm within one month at the latest of the initial commissioning. In or- der to make a claim on the warranty, repairs to your stove must only be carried out by a service en- gineer authorized by Austroflamm.
  • Seite 108: Data Processing

    If you consent to the appropriate handling of your personal data for the following purposes, please tick this box. o I hereby agree that Austroflamm GmbH and AUSTROFLAMM Service GmbH & Co KG may send me service reminders and offers on other products from Austroflamm GmbH for the purposes of advert- ising via E-Mail/ SMS/ telephone.
  • Seite 109: Start Up Log

    Operating manual Clou Compact 2.0 22 | Start up log Start up log Operator / Customer Dealer / Engineer Name Company Street Street Town and postal code Town and postal code Telephone Telephone Email Email Stove Working Comments Model Serial number...
  • Seite 110: Service Report

    23 | Service Report Operating manual Clou Compact 2.0 Service Report Date Technicians Notes Work carried out, replacement parts installed...
  • Seite 111 Operating manual Clou Compact 2.0 23 | Service Report Date Technicians Notes Work carried out, replacement parts installed...
  • Seite 112 Sommaire Notice d'instructions Clou Compact 2.0 Sommaire Informations générales ............................114 Copyright..............................114 Objectif de la notice ............................115 Conservation de la notice........................115 Structure de la notice ..........................115 Représentations employées.......................115 Gestion des versions ...........................115 Abréviations ............................116 Sécurité................................. 117 Signification des consignes de sécurité ...................117 Avertissement contre les sources de danger...................117...
  • Seite 113 Notice d'instructions Clou Compact 2.0 Sommaire 9.2.3 Modifier le raccordement du conduit de fumée ................136 9.2.4 Modifier le raccordement à l’air externe ..................139 9.2.5 Installer la Keramott..........................139 10 Réglages................................140 10.1 Ajuster le poêle à bois ........................140 10.2 Régler la porte .............................140 10.3...
  • Seite 114: Informations Générales

    Notice d'instructions Clou Compact 2.0 Informations générales Vous avez fait le choix d’un poêle à bois Austroflamm. Nous vous félicitons pour votre choix et vous remercions de votre confiance. Une bonne utilisation et un entretien régulier sont essentiels au bon fonctionnement et à une durée de vie prolongée de votre appareil.
  • Seite 115: Objectif De La Notice

    Conservation de la notice Conservez cette notice pour la consulter en cas de besoin. Vous trouverez la version actuelle de la no- tice en ligne sur notre site internet www.austroflamm.com. Structure de la notice Vous trouverez le sommaire en page 3.
  • Seite 116: Abréviations

    2 | Objectif de la notice Notice d'instructions Clou Compact 2.0 Abréviations Abréviation Signification Heat Memory System Bois Poêles à bois...
  • Seite 117: Sécurité

    Notice d'instructions Clou Compact 2.0 3 | Sécurité Sécurité Dans cette notice, nous vous donnons de nombreuses consignes de sécurité pour une utilisation sûre de votre poêle à bois. Ces consignes sont signalées différemment en fonction de leur signification : Signification des consignes de sécurité...
  • Seite 118: Types De Dangers Particuliers Et Équipement De Protection Individuelle

    3 | Sécurité Notice d'instructions Clou Compact 2.0 • Notez que, pendant le fonctionnement, les surfaces du poêle à bois sont brûlantes. Lorsque vous utilisez le poêle à bois, nous vous recommandons d'utiliser le gant de protection. • Signalez ces dangers aux enfants et tenez-les éloignés du poêle à bois pendant le fonctionnement.
  • Seite 119: Vue D'ensemble Du Produit

    Vue d’ensemble du produit Utilisation conforme à la destination prévue Le poêle à bois Austroflamm décrit dans la présente notice a été construit et certifié avec une porte à fermeture et verrouillage automatiques de type A1 conformément à la Certification EN 13240.
  • Seite 120 4 | Vue d’ensemble du produit Notice d'instructions Clou Compact 2.0 Fig. 2: Distances de sécurité 1) Ouvert (+) et Fermé (-) (manette de régulation de l’air primaire / secondaire) Fig. 3: Manettes de régulation de l’air...
  • Seite 121: Label Énergétique

    Notice d'instructions Clou Compact 2.0 4 | Vue d’ensemble du produit Label énergétique -80% Austrof amm Clou Compact -60% -40% -20% ENERGIA · ЕНЕРГИЯ · ΕΝΕΡΓΕΙΑ · ENERGIJA · ENERGY · ENERGIE · ENERGI 2015/1186 Fig. 4: Label énergétique Emplacement des plaques signalétiques Nous vous montrons ici où...
  • Seite 122: Données Techniques

    5 | Données techniques Notice d'instructions Clou Compact 2.0 Données techniques En tant que poêle à bois de type 1, il est possible de le raccorder à un conduit de cheminée déjà occu- pé par d’autres pôles à bois et fourneaux pour combustibles solides dans la mesure où le dimension- nement du conduit de cheminée conformément à...
  • Seite 123 Notice d'instructions Clou Compact 2.0 5 | Données techniques Semi-coke Charbon bitumineux Briquettes de lignite Briquettes de tourbe Briquettes constituées d’un mélange de combus- tibles fossiles Autres combustibles fos- siles Briquettes constituées d'un mélange de bio- masse et de combustibles fossiles Autre mélange de bio-...
  • Seite 124: Données Techniques Générales

    5 | Données techniques Notice d'instructions Clou Compact 2.0 contrôle de la température ambiante avec détec- tion de fenêtre ouverte avec option télécommande Aucune entrée pour les foyers sans pièces en contact avec de l’eau. Indiquer ici les valeurs pour l’efficacité énergétique saisonnière et les émissions du combustible privi- légié.
  • Seite 125: Transport, Manipulation Et Stockage

    Notice d'instructions Clou Compact 2.0 6 | Transport, manipulation et stockage Transport, manipulation et stockage Transport Vérifiez immédiatement l'absence d'avaries de transport et la complétude de la marchandise livrée. Contrôlez le bon fonctionnement de toutes les pièces mo- biles avant le montage du poêle à bois. Toujours signaler tous les défauts avant le montage du poêle à...
  • Seite 126: Exigences Sur Le Lieu D'implantation

    être étanchéifiés en conséquence. Votre revendeur Austroflamm connaît les directives et se fera un plaisir de vous conseiller. Pour votre propre sécurité, le raccordement du conduit de fumée doit impérativement être réalisé par un spécialiste.
  • Seite 127: Type / Quantité De Combustible

    Notice d'instructions Clou Compact 2.0 8 | Type / quantité de combustible Type / quantité de combustible Combustible Bois Après un séchage approprié, un bon nombre d'essences de bois de nos forêts peuvent être utilisées dans les foyers comme combustible à empreinte carbone neutre. Renouvelable, le bois peut être ex- ploité...
  • Seite 128 8 | Type / quantité de combustible Notice d'instructions Clou Compact 2.0 20 cm de circonférence pèse environ 1kg lorsqu’elle est prête (suffisamment sèche) pour la combus- tion. Ce sont donc environ 750 grammes pour une longueur de 25 cm – et environ 1,5 kg pour 50 cm de longueur.
  • Seite 129: Quantité De Combustibles

    Quantité de combustibles Quantité maximale de combustibles Votre poêle à bois Austroflamm est conçu pour une puissance maximale (voir le chapitre Données techniques). Une quantité trop importante de combustibles peut conduire à une surchauffe et à un en- dommagement de votre poêle à bois Austroflamm ! Quantité...
  • Seite 130: Montage

    9 | Montage Notice d'instructions Clou Compact 2.0 Montage Le montage doit être réalisé exclusivement par une entreprise spécialisée agréée. Contrôlez le bon fonctionnement de toutes les pièces mobiles avant le montage du poêle à bois. Avant le montage, toujours signaler tous les défauts.
  • Seite 131 Notice d'instructions Clou Compact 2.0 9 | Montage 2) Dévisser de chaque côté, en haut à l’intérieur, deux vis de fixation de l’habillage en acier latéral (M5/TX25). Fig. 9: Dévisser les vis 3) Soulever l’habillage latéral et l’enlever. Fig. 10: Enlever l’habillage latéral 4) Dévisser les vis de l’habillage avant supérieur.
  • Seite 132 9 | Montage Notice d'instructions Clou Compact 2.0 5) Ouvrir la porte. 6) Dévisser les vis par le dessous. Fig. 12: Dévisser les vis 7) Enlever l’habillage. Fig. 13: Enlever l’habillage 8) Ouvrir la porte. 9) Dévisser les vis de l’habillage avant inférieur.
  • Seite 133: Modifier La Poignée (Softlock)

    Notice d'instructions Clou Compact 2.0 9 | Montage 9.2.2 Modifier la poignée (Softlock) 1) Pour enlever le couvercle et l’habillage latéral droit uniquement, procédez comme décrit au chapitre Dé- poser l’habillage latéral [}à la page 130]. ð Pour cette étape, il n’est pas nécessaire d’enlever l’habillage avant haut et bas.
  • Seite 134 9 | Montage Notice d'instructions Clou Compact 2.0 5) Enlever la poignée. Fig. 19: Enlever la poignée 6) Enlever la pièce en bois (1) de la poignée d’origine. Fig. 20: Enlever la pièce en bois 7) Installer la pièce en bois sur la nouvelle poignée avec les vis d’origine.
  • Seite 135 Notice d'instructions Clou Compact 2.0 9 | Montage 9) Installer le nouveau loqueteau à la position d’origine. Fig. 23: Visser le nouveau loqueteau 10) Enclencher le loqueteau comme sur l’illustration. Fig. 24: Enclencher le loqueteau 11) Fermer lentement la porte en contrôlant si la porte s’enclenche correctement dans le loqueteau.
  • Seite 136: Modifier Le Raccordement Du Conduit De Fumée

    9 | Montage Notice d'instructions Clou Compact 2.0 12) Si la porte devait ne pas s’enclencher correctement dans le loqueteau, il est possible d’utiliser les quatre vis du loqueteau pour l’ajuster vers le haut, le bas, l’avant et l’arrière. Fig. 26: Ajuster le loqueteau de la porte 13) Revisser l’habillage latéral et remettre le couvercle en...
  • Seite 137 Notice d'instructions Clou Compact 2.0 9 | Montage 3) Dévisser les vis à gauche et à droite et enlever le re- couvrement. Fig. 29: Démonter le recouvrement 4) Démonter la tubulure de fumées (1) et le recouvre- ment (2). Fig. 30: Démonter la tubulure de fumées et...
  • Seite 138 9 | Montage Notice d'instructions Clou Compact 2.0 5) Interchanger les pièces et les mettre en place. Fig. 31: Échanger le recouvrement et la tu- bulure Fig. 32: Recouvrement et tubulure échangés 6) Revisser l’habillage latéral et remettre le couvercle en place.
  • Seite 139: Modifier Le Raccordement À L'air Externe

    Notice d'instructions Clou Compact 2.0 9 | Montage 9.2.4 Modifier le raccordement à l’air externe 1) Pour enlever le couvercle et l’habillage latéral, procé- dez comme décrit au chapitre Déposer l’habillage la- téral. 2) Enlever à la scie la découpe perforée de l’habillage la- téral (à...
  • Seite 140: Réglages

    10 | Réglages Notice d'instructions Clou Compact 2.0 Réglages 10.1 Ajuster le poêle à bois 1) Il faut d’abord enlever le couvercle, puis déposer l’ha- billage latéral. ð Pour ce faire, procédez comme décrit au chapitre Déposer l’habillage latéral [}à la page 130].
  • Seite 141 Notice d'instructions Clou Compact 2.0 10 | Réglages 4) Dévisser les vis et déposer l’habillage. Fig. 39: Déposer l’habillage avant supérieur 5) En bas, dévisser les vis et déposer l’habillage. Fig. 40: Déposer l’habillage avant inférieur...
  • Seite 142: Régler La Serrure De La Porte

    10 | Réglages Notice d'instructions Clou Compact 2.0 6) Les vis permettent de régler la porte. 7) Avec les vis (1), il est possible d’ajuster la porte vers le haut, le bas, la gauche et la droite. 8) Avec les tiges filetées (2), il est possible d’ajuster la porte vers l’intérieur et l’extérieur.
  • Seite 143: Régler La Force De Fermeture De La Porte

    Notice d'instructions Clou Compact 2.0 10 | Réglages 10.4 Régler la force de fermeture de la porte Pour cette étape, il suffit de déposer le côté gauche de l’ha- billage latéral. 1) Pour enlever le couvercle et l’habillage latéral, procé- dez comme décrit au chapitre Déposer l’habillage la-...
  • Seite 144: Mise En Service

    11 | Mise en service Notice d'instructions Clou Compact 2.0 Mise en service 11.1 Première mise en service INDICATION Pour la première mise en service et les 2 ou 3 cycles d’allumage suivants, n’utiliser qu’environ les 2/3 de la quantité maximale de combustibles.
  • Seite 145: Utilisation

    Notice d'instructions Clou Compact 2.0 12 | Utilisation Utilisation 12.1 Avant l'allumage Le poêle à bois ne peut fonctionner correctement que si l'alimentation en air de combustion est suffi- sante dans la pièce où il se trouve, en particulier en cas d'utilisation simultanée de plusieurs foyers.
  • Seite 146: Chauffage À La Mi-Saison

    12 | Utilisation Notice d'instructions Clou Compact 2.0 7) Fermez la porte. ð Le mieux est de laisser brûler intégralement la pre- mière charge de bois sans modifier la position de la manette de régulation de l’air. ð Lorsqu’il ne reste plus que des braises (qu’il n’y a plus aucune flamme), vous pouvez remettre une couche de bûches.
  • Seite 147: Entretien

    Notice d'instructions Clou Compact 2.0 13 | Entretien Entretien 13.1 Remplacer le joint de la porte 1) Enlever l’ancien joint de la porte. 2) Coller le joint neuf avec une colle appropriée (silicone B310 par exemple). Fig. 48: Remplacer le joint...
  • Seite 148: Nettoyage

    14 | Nettoyage Notice d'instructions Clou Compact 2.0 Nettoyage 14.1 Nettoyer le poêle à bois, les canaux de circulation des fumées, le conduit de fumée Le poêle à bois, les canaux de circulation des fumées et les conduits de fumée doivent être contrôlés une fois par an –...
  • Seite 149: Nettoyer La Vitre De La Porte

    Notice d'instructions Clou Compact 2.0 14 | Nettoyage 3) Prenez le couvercle fourni et couvrez le bac à cendres. 4) Tournez la poignée du couvercle dans le sens des ai- guilles d’une montre jusqu'à ce que la poignée s’en- clenche.
  • Seite 150: Nettoyer Les Surfaces

    14 | Nettoyage Notice d'instructions Clou Compact 2.0 14.4 Nettoyer les surfaces • Ne nettoyer les surfaces peintes qu’avec un chiffon doux (éventuellement humide). • Absorber la saleté dissoute en frottant avec un chiffon ou du papier absorbant. • Pour les surfaces en acier inoxydable, il existe également un produit nettoyant spécifique.
  • Seite 151: Aide

    Notice d'instructions Clou Compact 2.0 15 | Aide Aide Problème Raison Solution La vitre s’encrasse Tirage insuffisant De temps à autre (en fonction de l’utilisation), la vitre doit être net- toyée avec un nettoyant pour vitres Clarification par le ramoneur (me- sure du tirage / rallongement éven-...
  • Seite 152: Habillage Interne Du Foyer

    15 | Aide Notice d'instructions Clou Compact 2.0 Problème Raison Solution Tirage du conduit de cheminée trop Clarification par le ramoneur (me- élevé sure du tirage / raccourcissement éventuel du conduit de cheminée) Les verres vitrocéramiques s’en- Le bois utilisé est incompatible Utiliser du bois sec et naturel.
  • Seite 153: Accessoires

    Notice d'instructions Clou Compact 2.0 16 | Accessoires Accessoires Faites remplacer les pièces défectueuses (accessoires, pièces de rechange) par votre revendeur spé- cialisé dans les poêles à bois. Cela permet de garantir que votre poêle à bois soit sûr et opérationnel...
  • Seite 154: Pièces De Rechange

    17 | Pièces de rechange Notice d'instructions Clou Compact 2.0 Pièces de rechange Keramott Pos. n°. Quantité Article Article n° Sole en Keramott gauche 724051 Sole en Keramott arrière 724052 Paroi en Keramott gauche 724053 Paroi latérale en Keramott 724054 Paroi en Keramott arrière...
  • Seite 155 Notice d'instructions Clou Compact 2.0 17 | Pièces de rechange Porte de la chambre de combustion Pos. n°. Quantité Article Article n° Porte du foyer 724121-29 Joint rond Ø14x1450 714223 Joint D6x1262 CULIMETA 718183 Axe de charnière 778931-92 Tige filetée à empreinte Torx et anneaux à vis M5x6 DIN916 718032-92 Poignée installée...
  • Seite 156 17 | Pièces de rechange Notice d'instructions Clou Compact 2.0 Softlock Pos. n°. Quantité Article Article n° Rondelle s. chanfrein p.M5 DIN125 718062-15 Tige filetée à empreinte Torx et anneau à vis M4x12 DIN916 718064-92 Tige filetée à empreinte Torx et anneau à vis M4x6 DIN916 718459-92 Circlip p.
  • Seite 157: Démontage

    Notice d'instructions Clou Compact 2.0 18 | Démontage Démontage Pour un démontage ou un désassemblage réglementaire de votre poêle à bois, adressez-vous à votre revendeur Austroflamm.
  • Seite 158: Élimination

    19 | Élimination Notice d'instructions Clou Compact 2.0 Élimination INDICATION Pour éliminer votre poêle à bois en bonne et due forme, prenez contact avec l’entreprise d’élimina- tion des déchets locale (urbaine). INDICATION Nous recommandons de retirer les composants du poêle à bois en contact avec le feu (vitre, chambre de combustion, grilles, habillage du foyer (Keramott), céramique, capteurs, plaques déflectrices etc.)
  • Seite 159 Notice d'instructions Clou Compact 2.0 19 | Élimination Poignées et éléments décoratifs en métal Si disponibles, démonter les poignées et éléments décoratifs en métal et les éliminer avec les déchets métalliques. Tenir compte des possibilités d’élimination locales.
  • Seite 160: Garantie Commerciale / Légale

    1) Déclaration de garantie commerciale Nous garantissons le bon fonctionnement du corps de chauffe de votre poêle à bois Austroflamm sur une période de six ans à compter de la date du pre- mier achat, et de deux ans pour tous les autres composants en acier et en fonte.
  • Seite 161: Traitement Des Données

    KG à me transmettre par e-mail / SMS / téléphone des rappels de service et des offres concernant d’autres produits d’Austroflamm GmbH à des fins publicitaires. ________________________________________________ Signature ________________________________________________ Date : Les mentions légales sont disponibles sur le site internet de la société Austroflamm GmbH à l’adresse suivante : https://www.austroflamm.com/de/datenschutz.
  • Seite 162: Protocole De Mise En Service

    22 | Protocole de mise en service Notice d'instructions Clou Compact 2.0 Protocole de mise en service Exploitant/client Revendeur/technicien Entreprise Code postal, Ville Code postal, Ville Téléphone Téléphone E-mail E-mail Poêle à bois Remarques Modèle Numéro de série Technique Aspect...
  • Seite 163: Protocole D'entretien

    Notice d'instructions Clou Compact 2.0 23 | Protocole d’entretien Protocole d’entretien Date Technicien Commentaires Travaux effectués, pièces de rechange utilisées...
  • Seite 164 23 | Protocole d’entretien Notice d'instructions Clou Compact 2.0 Date Technicien Commentaires Travaux effectués, pièces de rechange utilisées...
  • Seite 165 Istruzioni Clou Compact 2.0 Indice Indice Informazioni generali ............................167 Copyright..............................167 Scopo del manuale ............................. 168 Conservazione delle istruzioni ......................168 Struttura del manuale..........................168 Descrizioni utilizzate ..........................168 Versioni ..............................168 Abbreviazioni ............................169 Sicurezza ................................170 Significato delle indicazioni di sicurezza ..................170 Avvertenze contro le fonti di pericolo....................170 3.2.1...
  • Seite 166: Indice

    Indice Istruzioni Clou Compact 2.0 9.2.3 Modifica del raccordo del tubo dei fumi..................190 9.2.4 Modifica del collegamento dell'aria esterna ...................192 9.2.5 Installazione del Keramott ........................192 10 Impostazioni ................................ 193 10.1 Allineamento della stufa ........................193 10.2 Regolazione dello sportello .......................193 10.3 Regolazione della serratura dello sportello ..................195...
  • Seite 167: Informazioni Generali

    1 | Informazioni generali Informazioni generali Avete optato per una stufa a caminetto Austroflamm. Ci congratuliamo per la vostra scelta e vi ringraziamo per la vostra fiducia. Una maneggevolezza e una cura corrette sono indispensabili per un funzionamento senza disturbi e una lunga durata.
  • Seite 168: Scopo Del Manuale

    2 | Scopo del manuale Istruzioni Clou Compact 2.0 Scopo del manuale Le presenti istruzioni sono parte integrante della stufa e contribuiscono a una sua corretta e sicura in- stallazione e manutenzione. CONSIGLIO Leggere con cura queste istruzioni prima di mettere in funzione ‘apparecchio.
  • Seite 169: Abbreviazioni

    Istruzioni Clou Compact 2.0 2 | Scopo del manuale Abbreviazioni Abbreviazione Significato Heat Memory System KÖ Stufe a caminetto...
  • Seite 170: Sicurezza

    3 | Sicurezza Istruzioni Clou Compact 2.0 Sicurezza Nelle presenti istruzioni vi forniamo numerose avvertenze di sicurezza per l’utilizzo sicuro della vostra stufa a caminetto. Tali indicazioni sono contrassegnate in modo diverso a seconda del loro significato: Significato delle indicazioni di sicurezza AVVERTENZA Comportamento particolare e/o attività...
  • Seite 171: Tipi Particolari Di Pericolo E Dispositivi Di Protezione Individuale

    Istruzioni Clou Compact 2.0 3 | Sicurezza • Mentre è in funzione, si tenga presente che la superficie della stufa può riscaldarsi notevolmente. Per maneggiare la stufa utilizzare sempre il guanto protettivo. • I bambini devono essere istruiti in merito ai pericoli e devono essere tenuti lontani dalla stufa men- tre è...
  • Seite 172: Panoramica Del Prodotto

    Istruzioni Clou Compact 2.0 Panoramica del prodotto Uso conforme La stufa Austroflamm descritta nel presente manuale è un apparecchio di tipo A1, con sportello indi- pendente e chiusura automatica, prodotto e testato in conformità di Test EN 13240. AVVERTENZA Il funzionamento è consentito solo a sportello chiuso/bloccato.
  • Seite 173 Istruzioni Clou Compact 2.0 4 | Panoramica del prodotto Fig. 2: Distanze di sicurezza 1) Aperto (+) e chiuso (-) (regolatore dell'aria primaria/se- condaria) Fig. 3: Regolatore dell’aria...
  • Seite 174: Etichetta Energetica

    4 | Panoramica del prodotto Istruzioni Clou Compact 2.0 Etichetta energetica -80% Austrof amm Clou Compact -60% -40% -20% ENERGIA · ЕНЕРГИЯ · ΕΝΕΡΓΕΙΑ · ENERGIJA · ENERGY · ENERGIE · ENERGI 2015/1186 Fig. 4: Etichetta energetica Collocamento della targhetta Qui vi mostriamo dove si trova la targhetta. Sul retro delle presenti istruzioni è riportato un duplicato della targhetta.
  • Seite 175: Dati Tecnici

    Istruzioni Clou Compact 2.0 5 | Dati tecnici Dati tecnici Come stufa di tipo 1, è possibile collegarla a un camino già occupato da altre stufe e forni a combusti- bile solido, a condizione che i camini siano costruiti conformemente alla norma DIN 4705 - parte 3, che non contraddice tale disposizione.
  • Seite 176 5 | Dati tecnici Istruzioni Clou Compact 2.0 Coke di carbon fossile Semi-coke Carbone bituminoso Bricchette di lignite Bricchette di torba Bricchette fatte con una miscela di combustibili fossili Altri combustibili fossili Bricchette fatte da una mi- scela di biomassa e com-...
  • Seite 177: Dati Tecnici Generici

    Istruzioni Clou Compact 2.0 5 | Dati tecnici Per i camini sprovvisti di componenti per l'acqua non si applica alcuna registrazione. I valori del tasso di utilizzo annuale e di emissioni devono essere indicati qui per il combustibile prefe- renziale.
  • Seite 178: Trasporto, Gestione E Immagazzinamento

    6 | Trasporto, gestione e immagazzinamento Istruzioni Clou Compact 2.0 Trasporto, gestione e immagazzinamento Trasporto Controllare immediatamente la completezza e i danni di tra- sporto della merce consegnata. Prima di montare la stufa, controllare il funzionamento di tutte le parti mobili. Di norma, tutti i difetti devono essere segnalati prima del montaggio della stufa.
  • Seite 179: Requisiti Del Luogo Di Installazione

    Quando si collegano le canne fumarie al camino, si devono osservare le norme di sicurezza nazionali e/o locali. La vostra stufa Austroflamm è dotata di fabbrica di un'uscita della canna fumaria rivolta ver- so l'alto (diametro 150 mm). Il collegamento può essere spostato sulla parte posteriore, come descrit- to in queste istruzioni.
  • Seite 180: Tipo/Quantità Di Combustibile

    8 | Tipo/Quantità di combustibile Istruzioni Clou Compact 2.0 Tipo/Quantità di combustibile Materiale combustibile Legna Molte delle specie di legno indigeno possono essere bruciate nei caminetti in modo neutro dal punto di vista delle emissioni di CO2, ovviamente dopo un'adeguata essiccazione. Il legno si distingue dal fatto che ricresce, può...
  • Seite 181 Istruzioni Clou Compact 2.0 8 | Tipo/Quantità di combustibile con una circonferenza di circa 20 cm pesa circa 1 kg, se è idoneo alla combustione (abbastanza secco). Se è lungo 25 cm di lunghezza dovrà pesare circa 750 grammi, mentre se misura 50 cm peserà circa 1,5kg.
  • Seite 182: Quantità Di Combustibile

    Quantità di combustibile Quantità massima di combustibile La vostra stufa Austroflamm è progettata per un rendimento massimo, vedi capitolo Dati tecnici. Quan- tità eccessive di combustibile possono comportare un surriscaldamento e un danneggiamento della vostra stufa Austroflamm! Quantità...
  • Seite 183: Montaggio

    Istruzioni Clou Compact 2.0 9 | Montaggio Montaggio Il montaggio deve essere effettuato solo da una ditta specializzata autorizzata. Prima di montare la stufa, controllare il funzionamento di tutte le parti mobili. Di norma, tutti i difetti devono essere segnalati prima del montaggio della stufa.
  • Seite 184 9 | Montaggio Istruzioni Clou Compact 2.0 2) Svitare le viti di fissaggio del rivestimento laterale in acciaio, all'interno superiore destro e sinistro, 2 in tut- to (M5/TX25). Fig. 9: Svitamento delle viti 3) Sollevare il rivestimento laterale verso l'alto e rimuo- verlo.
  • Seite 185 Istruzioni Clou Compact 2.0 9 | Montaggio 5) Aprire lo sportello. 6) Svitare le viti dal basso. Fig. 12: Svitamento delle viti 7) Rimuovere il rivestimento. Fig. 13: Rimozione del rivestimento 8) Aprire lo sportello. 9) Svitare le viti del rivestimento anteriore inferiore.
  • Seite 186: Modifica Della Maniglia Dello Sportello (Softlock)

    9 | Montaggio Istruzioni Clou Compact 2.0 9.2.2 Modifica della maniglia dello sportello (Softlock) 1) Per rimuovere il coperchio e solo il rivestimento late- rale destro, procedere come descritto nel capitolo Ri- mozione del rivestimento laterale [}a pag. 183]. ð Per questo passo non è necessario togliere il rive- stimento anteriore superiore e inferiore.
  • Seite 187 Istruzioni Clou Compact 2.0 9 | Montaggio 5) Rimuovere la maniglia dello sportello. Fig. 19: Rimozione della maniglia dello spor- tello 6) Rimuovere l’impugnatura in legno (1) dalla maniglia originale. Fig. 20: Rimozione dell’impugnatura in le- 7) Montare l’impugnatura in legno con le viti originali sulla nuova maniglia.
  • Seite 188 9 | Montaggio Istruzioni Clou Compact 2.0 9) Montare il fermo nuovo nella sua posizione originale. Fig. 23: Montaggio del nuovo fermo 10) Incastrare il fermo come illustrato. Fig. 24: Incastro del fermo 11) Chiudere lentamente lo sportello. Controllare che lo sportello si incastri correttamente nel fermo.
  • Seite 189 Istruzioni Clou Compact 2.0 9 | Montaggio 12) Se lo sportello non si aggancia correttamente alla ser- ratura, è possibile regolare quest’ultima intervenendo sulle quattro viti in alto, in basso, in avanti e indietro. Fig. 26: Regolazione del fermo dello sportel- 13) Rimontare il rivestimento laterale e rimettere il coper- chio.
  • Seite 190: Modifica Del Raccordo Del Tubo Dei Fumi

    9 | Montaggio Istruzioni Clou Compact 2.0 9.2.3 Modifica del raccordo del tubo dei fumi 1) Per prima cosa togliete il coperchio e smontate il rive- stimento laterale. Procedere quindi come descritto al capitolo Rimozione del rivestimento laterale [}a pag.
  • Seite 191 Istruzioni Clou Compact 2.0 9 | Montaggio 5) Sostituire e rimontare le parti. Fig. 31: Sostituzione della copertura e del pezzo di collegamento Fig. 32: Copertura e pezzo di collegamento sostituiti 6) Rimontare il rivestimento laterale e rimettere il coper- chio. Fig. 33: Montaggio del rivestimento laterale...
  • Seite 192: Modifica Del Collegamento Dell'aria Esterna

    9 | Montaggio Istruzioni Clou Compact 2.0 9.2.4 Modifica del collegamento dell'aria esterna 1) Per rimuovere il coperchio e il rivestimento laterale destro, procedere come descritto nel capitolo Rimo- zione del rivestimento laterale. 2) Rimuovere con una sega il taglio forato sul rivestimen- to laterale (posteriore).
  • Seite 193: Impostazioni

    Istruzioni Clou Compact 2.0 10 | Impostazioni Impostazioni 10.1 Allineamento della stufa 1) In primo luogo, vanno rimossi il coperchio e il rivesti- mento laterale. ð Procedere , come descritto nel capitolo Smontag- gio del rivestimento laterale [}a pag. 183].
  • Seite 194 10 | Impostazioni Istruzioni Clou Compact 2.0 4) Svitare le viti e rimuovere il rivestimento. Fig. 39: Smontaggio del rivestimento ante- riore superiore 5) Svitare le viti in basso e smontare il rivestimento. Fig. 40: Smontaggio del rivestimento ante- riore inferiore...
  • Seite 195: Regolazione Della Serratura Dello Sportello

    Istruzioni Clou Compact 2.0 10 | Impostazioni 6) Lo sportello può essere regolato con le viti. 7) Lo sportello può essere regolato in alto, in basso, a destra e a sinistra con le viti (1). 8) Lo sportello può essere regolato all’interno e all’ester- no con le spine filettate (2).
  • Seite 196: Regolazione Della Forza Di Chiusura Dello Sportello

    10 | Impostazioni Istruzioni Clou Compact 2.0 10.4 Regolazione della forza di chiusura dello sportello A tal fine, occorre rimuovere solo il rivestimento del lato si- nistro. 1) Per rimuovere il coperchio e il rivestimento laterale destro, procedere come descritto nel capitolo Rimo- zione del rivestimento laterale [}a pag.
  • Seite 197: Messa In Servizio

    Istruzioni Clou Compact 2.0 11 | Messa in servizio Messa in servizio 11.1 Prima messa in servizio AVVERTENZA Durante l'avviamento iniziale e nei successivi 2-3 cicli di accensione, si dovrebbero utilizzare solo circa 2/3 della quantità massima di combustibile. AVVERTENZA Per evitare danni, non utilizzare MAI la stufa con una quantità...
  • Seite 198: Funzionamento

    12 | Funzionamento Istruzioni Clou Compact 2.0 Funzionamento 12.1 Prima di accendere La stufa può funzionare correttamente solo se c'è un flusso d'aria di combustione sufficiente nella stan- za in cui è installata (quindi nell'apparecchio), specialmente quando vengono accesi più caminetti con- temporaneamente.
  • Seite 199: Riscaldare Durante Il Periodo Di Transizione

    Istruzioni Clou Compact 2.0 12 | Funzionamento 7) Chiudere lo sportello. ð È meglio lasciar bruciare il primo strato di legna senza cambiare la posizione dello scorrevole dell’aria. ð Se rimangono solo braci (non più fiamme), si può aggiungere un altro strato di tronchetti.
  • Seite 200: Manutenzione

    13 | Manutenzione Istruzioni Clou Compact 2.0 Manutenzione 13.1 Sostituzione della guarnizione dello sportello 1) Rimuovere la vecchia guarnizione dallo sportello. 2) Incollare la nuova guarnizione con un adesivo idoneo (per esempio silicone B310). Fig. 48: Sostituzione della guarnizione...
  • Seite 201: Pulizia

    Istruzioni Clou Compact 2.0 14 | Pulizia Pulizia 14.1 Pulizia della stufa, dei passaggi dei gas di scarico e del tubo dei fumi La stufa, i passaggi dei gas di scarico e i tubi dei fumi dovrebbero essere puliti annualmente o più di frequente se necessario, per esempio •...
  • Seite 202: Pulizia Del Vetro Dello Sportello

    14.3 Pulizia del vetro dello sportello Spruzzare il vetro con un detergente per vetri e lasciarlo agire un po’. • Raccomandiamo di pulire il vetro con il nostro detergente per vetri Austroflamm o con un normale detergente per vetri. • Evitare che le guarnizioni della maniglia o dei vetri entrino in contatto con acqua o detergenti, altri- menti si induriscono e perdono la loro funzione.
  • Seite 203: Pulizia Delle Superfici

    Istruzioni Clou Compact 2.0 14 | Pulizia 14.4 Pulizia delle superfici • Le superfici verniciate possono essere pulite solo con un panno morbido (possibilmente umido). • Assorbire lo sporco sciolto con un panno assorbente o carta per uso domestico. • Sono disponibili anche detergenti speciali per le superfici in acciaio inossidabile.
  • Seite 204: Supporto

    15 | Supporto Istruzioni Clou Compact 2.0 Supporto Problema Causa Soluzione Il vetro si sporca di fuliggine Tiraggio del camino insufficiente Di tanto in tanto (a seconda dell'uso) il vetro deve essere pulito con un de- tergente per vetri Chiarirsi con lo spazzacamino (se...
  • Seite 205: Rivestimento Della Camera Di Combustione

    Istruzioni Clou Compact 2.0 15 | Supporto Problema Causa Soluzione I vetri ceramici si sporcano molto ra- Legna usata inidonea Usare legna asciutta e naturale. Si pidamente prega di fare riferimento alle infor- mazioni nel capitolo Materiale com- bustibile Temperatura d'esercizio non rag-...
  • Seite 206: Accessori

    16 | Accessori Istruzioni Clou Compact 2.0 Accessori Far sostituire le parti difettose (accessori, pezzi di ricambio) dal rivenditore. Ciò garantirà che la vostra stufa sia e rimanga sicura e in buone condizioni di funzionamento.
  • Seite 207: Ricambi

    Istruzioni Clou Compact 2.0 17 | Ricambi Ricambi Keramott N. pos. Q.tà Articolo N. art. Base in Keramott sx 724051 Base in Keramott posteriore 724052 Parete in Keramott sx 724053 Parete in Keramott laterale 724054 Parete in Keramott posteriore 724055...
  • Seite 208 17 | Ricambi Istruzioni Clou Compact 2.0 Sportello camera di combustione N. pos. Q.tà Articolo N. art. Sportello cam. comb. 724121-29 Guarnizione rotonda Ø14x1450 714223 Guarnizione D6x1262 CULIMETA 718183 Perni per cerniera 778931-92 Spina filettata con esalobulare e viti ad anello M5x6 DIN916...
  • Seite 209 Istruzioni Clou Compact 2.0 17 | Ricambi Softlock N. pos. Q.tà Articolo N. art. Rondella s. sm. p. M5 DIN125 718062-15 Spina filettata c. esalobulare e viti ad anello M4x12 DIN916 718064-92 Spina filettata c. esalobulare e viti ad anello M4x6 DIN916 718459-92 Rond.
  • Seite 210: Smontaggio

    18 | Smontaggio Istruzioni Clou Compact 2.0 Smontaggio Per lo smontaggio/disassemblaggio professionale della stufa, rivolgersi al proprio rivenditore specia- lizzato Austroflamm.
  • Seite 211: Smaltimento

    Istruzioni Clou Compact 2.0 19 | Smaltimento Smaltimento AVVERTENZA Per smaltire correttamente la stufa, contattare l’azienda locale (cittadina) di smaltimento dei rifiuti. AVVERTENZA Raccomandiamo di rimuovere i componenti a contatto con il fuoco quali il vetro, la camera di combu- stione, le griglie, il rivestimento della camera di combustione (Keramott), la ceramica, i sensori, i de- flettori e di smaltirli nei rifiuti domestici.
  • Seite 212 19 | Smaltimento Istruzioni Clou Compact 2.0 Maniglie ed elementi decorativi in metallo Se presenti, rimuovere o smontare le maniglie e gli elementi decorativi in metallo e smaltirli come rot- tami metallici. Occorre tener conto delle possibilità di smaltimento locali.
  • Seite 213: Garanzia

    La garanzia non copre i casi in cui la vostra stufa Austroflamm non si trovi nell'ambito territoriale della garanzia, che non viene modificato dal trasporto o dalla spedizione da parte di Austro- flamm".
  • Seite 214: Elaborazione Dei Dati

    Se acconsentite al trattamento dei vostri dati personali per le seguenti finalità, spunti questa casella. o Acconsento che Austroflamm GmbH e AUSTROFLAMM Service GmbH & Co KG mi inviino prome- moria di assistenza e offerte di altri prodotti di Austroflamm GmbH via e-mail/sms/telefono a scopo pubblicitario.
  • Seite 215: Protocollo Di Messa In Servizio

    Istruzioni Clou Compact 2.0 22 | Protocollo di messa in servizio Protocollo di messa in servizio Gestore/Cliente Distributore/Tecnico Nome Società CAP Località CAP Località Telefono Telefono E-mail E-mail Stufa a camino A posto Annotazioni Modello Numero di serie Tecnica Ottica...
  • Seite 216: Protocollo Di Servizio

    23 | Protocollo di servizio Istruzioni Clou Compact 2.0 Protocollo di servizio Data Tecnico Annotazioni Interventi effettuati, pezzi di ricambio installati...
  • Seite 217 Istruzioni Clou Compact 2.0 23 | Protocollo di servizio Data Tecnico Annotazioni Interventi effettuati, pezzi di ricambio installati...
  • Seite 218 Notizen / notes / appunti / remarques...
  • Seite 219 Notizen / notes / appunti / remarques...
  • Seite 220 Vollständigkeit / completeness / completo / complet Geprüft von / checked by / controlled da / contrôlé par ____________________________________________________ Datum / date / data / date ____________________________________________________ AUSTROFLAMM GMBH Austroflamm-Platz 1 A- 4631 Krenglbach Tel: +43 (0) 7249 / 46 443 www.austroflamm.com...

Inhaltsverzeichnis