
Verwandte Anleitungen für Electrolux SG181N


Inhaltszusammenfassung für Electrolux SG181N
- Seite 1 ..................... SG181N EN FREEZER USER MANUAL DE GEFRIERGERÄT BENUTZERINFORMATION...
- Seite 18 11. GARANTIE, GARANZIA, GUARANTEE ........34 WIR DENKEN AN SIE Vielen Dank, dass Sie sich für ein Electrolux Gerät entschieden haben. Sie haben ein Produkt gewählt, hinter dem eine jahrzehntelange professionelle Erfahrung und Innovation steht. Bei der Entwicklung dieses großartigen und eleganten Geräts haben wir an Sie gedacht.
-
Seite 19: Sicherheitshinweise
DEUTSCH SICHERHEITSHINWEISE Lesen Sie zu Ihrer Sicherheit und für eine Tür oder auf dem Deckel ersetzt, ma- optimale Nutzung des Geräts vor der chen Sie den Schnappverschluss vor Montage und dem ersten Gebrauch das dem Entsorgen des Altgerätes un- vorliegende Benutzerhandbuch ein- brauchbar. - Seite 20 20 www.electrolux.com – Offene Flammen und Zündfunken 1.3 Täglicher Gebrauch vermeiden • Stellen Sie keine heißen Töpfe auf die – Den Raum, in dem das Gerät instal- Kunststoffteile des Gerätes. liert ist, gut lüften • Lagern Sie keine feuergefährlichen Ga- •...
-
Seite 21: Umweltschutz
DEUTSCH • Das Gerät darf nicht in der Nähe von 1.7 Umweltschutz Heizkörpern oder Kochern installiert Das Gerät enthält im Kältekreis werden. oder in dem Isoliermaterial keine • Vergewissern Sie sich, dass der Netz- ozonschädigenden Gase. Das stecker des Gerätes nach der Installati- Gerät darf nicht wie normaler on frei zugänglich ist. -
Seite 22: Bedienfeld
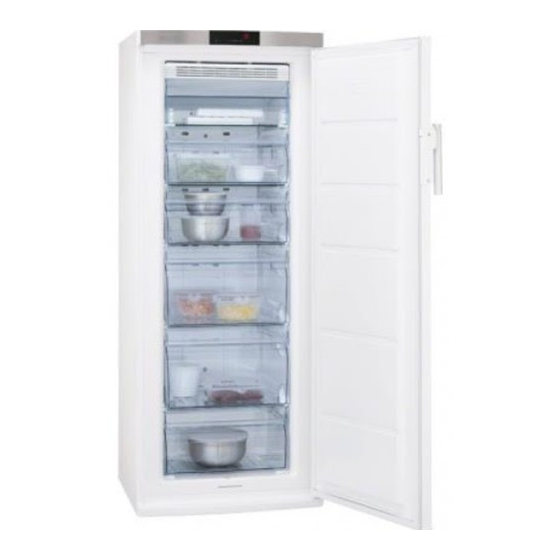
22 www.electrolux.com Gefrierschubladen Fach mit Klapptür Typenschild 3. BEDIENFELD Display Wenn auf dem Display „dEMo“ ange- zeigt wird, befindet sich das Gerät im Taste zum Erhöhen der Temperatur Demo-Modus. Schlagen Sie dazu bit- Taste zum Senken der Temperatur te unter „Was tun, wenn ...“ nach. -
Seite 23: Funktion Minute Minder
DEUTSCH Sie die Tasten zur Erhöhung und Verrin- 3.5 Funktion Minute Minder gerung der Temperatur drücken. Mit der Funktion Minute Minder wird ein akustischer Alarm auf eine gewünschte 3.6 Funktion Kindersicherung Zeit eingestellt. Dies ist zum Beispiel nütz- lich, wenn ein Rezept erfordert, dass eine Wählen Sie die Kindersicherung, um die Speise für eine bestimmte Zeit abkühlen Tasten gegen eine unbeabsichtigte Betäti-... -
Seite 24: Einfrieren Frischer
24 www.electrolux.com Kam es zum Beispiel durch einen gern von gefrorenen und tiefgefrorenen Stromausfall, der länger dauerte Lebensmitteln über einen längeren Zeit- als der in der Tabelle mit den raum. technischen Daten angegebene Um frische Lebensmittel einzufrieren, Wert (siehe „Lagerzeit bei Stö- schalten Sie bitte die FROSTMATIC-Funk- rung“) zu einem ungewollten Ab-... -
Seite 25: Reinigung Und Pflege
DEUTSCH • Nehmen Sie die Kälteakkus nicht aus verkürzt die Lagerzeit von Lebensmit- dem Gefrierkorb. teln im Gefrierfach; • werden Gefrierwürfel direkt nach der 5.3 Hinweise zum Einfrieren Entnahme aus dem Gefrierfach verwen- det, können Sie zu Frostbrand auf der Im Folgenden finden Sie einige wertvolle Haut führen;... -
Seite 26: Regelmäßige Reinigung
26 www.electrolux.com mittel dürfen daher nur durch vom wendeten Kunststoff angreifen können. Hersteller autorisiertes Fachperso- Aus diesem Grund ist es empfehlenswert, nal ausgeführt werden. das Gerät außen nur mit warmem Wasser und etwas flüssigem Tellerspülmittel zu reinigen. 6.2 Regelmäßige Reinigung Der gesamte Kühlschrank muss regelmä-... -
Seite 27: Fehlersuche
DEUTSCH 7. FEHLERSUCHE WARNUNG! Ziehen Sie vor der Fehlersuche immer den Netzstecker aus der Steckdose. Eine Fehlersuche, die von der in der vorliegenden Gebrauchsanlei- tung beschriebenen Fehlersuche abweicht, darf nur von einem qua- lifizierten Elektriker oder einer Fachkraft durchgeführt werden. Problem Mögliche Ursache Abhilfe... -
Seite 28: Schließen Der Tür
28 www.electrolux.com Problem Mögliche Ursache Abhilfe Die Tür wurde nicht richtig Siehe hierzu „Schließen der geschlossen. Tür“. Die Temperatur der Lebens- Lassen Sie die Lebensmittel mittel ist zu hoch. auf Raumtemperatur abküh- len, bevor Sie sie in das Ge- rät legen. -
Seite 29: Montage
DEUTSCH 8. MONTAGE WARNUNG! der Klimaklasse übereinstimmt, die auf Lesen Sie bitte die "Sicherheits- dem Typschild des Geräts angegeben ist: hinweise" sorgfältig vor der Auf- Klima- Umgebungstemperatur stellung des Geräts durch, um klasse Gefahren für Sie selbst zu vermei- den und einen korrekten Betrieb +10°C bis + 32°C des Geräts zu gewährleisten. -
Seite 30: Hintere Distanzstücke
30 www.electrolux.com 8.4 Hintere Distanzstücke Die beiden Distanzstücke befinden sich im Beutel mit den Unterlagen. Gehen Sie wie folgt vor, um die Distanz- stücke anzubringen: Lösen Sie die Schraube. Setzen Sie das Distanzstück unter dem Schraubenkopf ein. Drehen Sie das Distanzstück in die richtige Position. -
Seite 31: Technische Daten
DEUTSCH • Schrauben Sie den oberen Bolzen ab und an der gegenüberliegenden Seite wieder an. • Bringen Sie die Tür wieder an. • Stellen Sie sicher, dass die Türkante parallel zur Oberseitenkante verläuft. • Schrauben Sie den Bolzen (A) ab und an der gegenüberliegenden Seite wie- der an. -
Seite 32: Geräusche
32 www.electrolux.com Breite 595 mm Tiefe 658 mm Lagerzeit bei Störung 30 Std. Spannung 230-240 V Frequenz 50 Hz Die technischen Daten befinden sich auf dem Typenschild innen links im Gerät so- wie auf der Energieplakette. 10. GERÄUSCHE Während das Gerät in Betrieb ist, entste- hen bestimmte Geräusche (Kompressor... - Seite 33 DEUTSCH BRRR! BRRR! BLUBB! BLUBB! HISSS! HISSS! SSSRRR! SSSRRR!
-
Seite 34: Garantie, Garanzia, Guarantee
34 www.electrolux.com CRACK! CRACK! GARANTIE, GARANZIA, GUARANTEE 11.1 Kundendienst, service-clientèle, Servizio clienti, Customer Service Centres Servicestellen Points de Ser- Servizio dopo Point of Ser- vice vendita vice 5506 Mägenwil/Zürich In- 3018 Bern Mor- 1028 Préveren- 6928 Manno dustriestrasse 10 genstrasse 131 ges Le Trési 6... - Seite 35 DEUTSCH Garanzia Per ogni prodotto concediamo Warranty For each product we provide a una garanzia di 2 anni a partire dalla data two-year guarantee from the date of pur- di consegna o dalla sua messa in funzio- chase or delivery to the consumer (with a ne.
- Seite 36 www.electrolux.com/shop...