Herunterladen Inhalt Inhalt Diese Seite drucken
Inhaltsverzeichnis

Werbung

Verfügbare Sprachen
  • DE

Verfügbare Sprachen

  • DEUTSCH, seite 43
Owner's Manual
Bedienungsanleitung
Mode d'emploi
Manuale dell'utente
Manual del Usuario
Handleiding
All rights reserved. No part of this publication may be reproduced in any form
without the written permission of ROLAND CORPORATION.
Copyright © 2004 ROLAND CORPORATION
(p. 1)
(p. 41)
(p. 81)
(p. 121)
(p. 161)
(p. 201)

Werbung

Inhaltsverzeichnis

Fehlerbehebung

loading

Inhaltszusammenfassung für Roland HP107e

  • Seite 1 (p. 81) Manuale dell’utente (p. 121) Manual del Usuario (p. 161) Handleiding (p. 201) Copyright © 2004 ROLAND CORPORATION All rights reserved. No part of this publication may be reproduced in any form without the written permission of ROLAND CORPORATION.
  • Seite 2 WARNING: To reduce the risk of fire or electric shock, do not expose this apparatus to rain or moisture. The lightning flash with arrowhead symbol, within an CAUTION equilateral triangle, is intended to alert the user to the RISK OF ELECTRIC SHOCK presence of uninsulated “dangerous voltage”...
  • Seite 3: Main Features

    Expressiveness Only a Digital Instrument Can Provide Before using this unit, The HP107e lets you add just the right sounds to the piano for an effect that is full and rich. carefully read the sections You can layer different instrument sounds over the piano sound, layer sounds one octave higher, entitled: “Using the unit...
  • Seite 4: Using The Unit Safely

    Refer all a long period of time at a high volume level, or at servicing to your retailer, the nearest Roland Ser- a level that is uncomfortable. If you experience vice Center, or an authorized Roland distributor, any hearing loss or ringing in the ears, you should as listed on the “Information”...
  • Seite 5 • Before using the unit in a foreign country, consult • Disconnect all cords coming from external devices. with your retailer, the nearest Roland Service Cen- • Raise the adjusters on the stand (p. 11). ter, or an authorized Roland distributor, as listed •...
  • Seite 6: Important Notes

    352b • Noise may be produced if wireless communications and Roland assumes no liability concerning such loss of devices, such as cell phones, are operated in the vicinity data.
  • Seite 7 • Do not apply undue force to the music rest while it is in use. • Use a cable from Roland to make the connection. If using some other make of connection cable, please note the fol- lowing precautions.
  • Seite 8: Inhaltsverzeichnis

    HP107e – Contents Contents Using the unit safely ............2 Splitting the Keyboard Into Two Sections for Four-Hand Performances (Twin Piano Mode)..................22 Important notes ..............4 Chapter 3. Playing Along with the Built-in Songs ..23 Changing the Tempo..................23 Panel Descriptions .............7 Adding a count-in to match the timing (Count-In) ......23...
  • Seite 9: Panel Descriptions

    Panel Descriptions Panel Descriptions Front Panel 12 13 14 10 11 25 26 Power On 1. [Power On] switch 15.[Acoustic Layering] button You can layer and play recommended tones that comple- Turns the power on/off (p. 11). ment the piano’s own sound (p. 18). 2.
  • Seite 10: Rear Panel

    Also starts/stops recording of a performance (p. 25–p. 27). 27.[Center Pedal] button Switches the center pedal function (p. 21). 24.[Rec] button Puts the HP107e in recording-standby mode (p. 25–p. 27). KEY TOUCH 25.[Touch] button Modifies the playing feel of the keyboard (p. 15). Front Panel...
  • Seite 11: Before You Start Playing

    Insert the pedal cable into the Pedal connector on 1. Insert the included power cord into the AC inlet the rear panel of the HP107e. on the bottom panel of the HP107e. 2. Plug the power cord into a power outlet. Use only the attached power-supply cord.
  • Seite 12: Opening/Closing The Lid

    Press and twist the headphone hook included with the and slide it away from yourself. HP107e into the hole in the bottom of the HP107e (refer to To close the lid, pull it gently toward yourself, and the figure below). Turn the wing nut of headphone hook lower it softly after it has been fully extended.
  • Seite 13: Turning The Power On And Off

    [Power On] 21). switch. The Power indicator at the left front of the HP107e will go Soft pedal (left pedal) dark, and the power will be turned off. When you hold down this pedal and play the keyboard, If you need to turn off the power completely, first turn off the sound will have a softer tone.
  • Seite 14: Chapter 1. Enjoying The Built-In Songs

    HP107e – Chapter 1. Enjoying the Built-in Songs Chapter 1. Enjoying the Built-in Songs I Selecting a song and playing it Listening to Built-in Songs The HP107e comes with 68 piano songs onboard. “Chapter 3. Playing Along with the Built-in Songs” on page 23, “Tone List”...
  • Seite 15: Listening To The Demo Songs

    Chapter 1. Enjoying the Built-in Songs Listening to the Demo Songs When a button is pressed, the demo assigned to the button is played. Two versions of the demo will be played—one includes the function provided by the button you’ve You can listen to various demo songs, including those dem- pressed, the other doesn’t.
  • Seite 16: Chapter 2. Performance

    Chapter 2. Performance Performing with a Variety of Sounds Selecting a tone group The HP107e contains 36 different built-in tones. The tones are organized into five tone groups, which are assigned to the 1. Press any Tone button. Tone buttons.
  • Seite 17: Having Resonance Played When You Press The Damper Pedal (Damper Resonance)

    This is called the “Hammer cannot set this for other tones. Response” function. You can save this setting in the HP107e’s memory using 1. Hold down the Piano Resonance [Damper] button, the Memory Backup function (p. 31).
  • Seite 18: Adding A Sense Of Depth To The Sound (Grand Space)

    You can save this setting in the HP107e’s memory using You can save this setting in the HP107e’s memory using the Memory Backup function (p. 31).
  • Seite 19: Adding Liveliness To The Sound (Dynamic Emphasis)

    By applying the reverb effect you can produce a pleasant reverberation, making it sound as though you were per- forming in a concert hall. You can save this setting in the HP107e’s memory using 1. Press the [Reverb] button. the Memory Backup function (p. 31).
  • Seite 20: Transposing The Key Of The Keyboard (Transpose)

    By using the “Transpose function,” you can transpose your performance without changing the notes you play. For exam- With the HP107e, you can easily select the perfect tones to ple, even if the song is in a difficult key with numerous...
  • Seite 21: Changing The Volume Balance For Acoustic Layering

    The volume balance changes. To return to the original volume balance, press the [-] and [+] buttons simultaneously. You can save this setting in the HP107e’s memory using the Memory Backup function (p. 31). 1. Hold down the [Transpose] button, and press the [Split] button.
  • Seite 22: Playing Different Tones With The Left And Right Hands (Split)

    HP107e – Chapter 2. Performance Playing Different Tones with Changing tone played by the right hand Cancel Split performance, and then re-select the tone. the Left and Right Hands In Split performance, the damper pedal will be applied (Split) only to the right-hand area of the keyboard. If you want...
  • Seite 23: Changing How The Center Pedals Work

    Stopping the metronome I Sounding the metronome 5. Once again press the [Metronome/Count In] but- The HP107e features a built-in metronome. ton, getting its indicator to go dark. While a song plays back, the metronome will sound at the The metronome will stop.
  • Seite 24: Splitting The Keyboard Into Two Sections For Four-Hand Performances (Twin Piano Mode)

    HP107e – Chapter 2. Performance Splitting the Keyboard Into Two Sections for Four-Hand Performances (Twin Piano Mode) You can divide the keyboard into two separate sections, allowing two people to perform in the same registers. G The following occur when Twin Piano Mode is switched 1.
  • Seite 25: Chapter 3. Playing Along With The Built-In Songs

    Sounding a “count sound” leading up to playback of a song is called “Count-In.” On the HP107e, if you playback a song while the metro- nome is sounding, two measures of lead-in count will be Some of the built-in songs have tempos that change dur- heard at the beginning of the song.
  • Seite 26: Playing Each Hand Separately

    HP107e – Chapter 3. Playing Along with the Built-in Songs Playing Each Hand Playing back a song 2. Press the [Play] button, getting its indicator to Separately light. The song will begin playing back. The part you selected in The built-in songs allow you to select the performance part step 1 will not sound.
  • Seite 27: Chapter 4. Recording Your Performance

    Notes regarding recording • Only one song can be recorded. Record only the keyboard performance without playing • The HP107e includes a “Song Backup function” (p. 31), along with a built-in song. which allows you to store the song recorded with the HP107e in the instrument itself.
  • Seite 28: Recording Along With A Song

    [Play] button or play the keyboard. built-in song. Two measures of the count sound are played, and the The HP107e includes a “Song Backup function” (p. 31), recording begins. which allows you to store the song recorded with the Note that recording will also begin as soon as you play HP107e in the instrument itself.
  • Seite 29: Selecting And Recording The Track For Each Hand Separately

    Separately [Rec] buttons will go dark. Your performance has been recorded to the specified track The recorder of the HP107e has two recording tracks, button. allowing you to record the right and left hands separately. If you want to record on the other track, return to step 2 to Use the [Left] button or [Right] button to specify the record your performance again.
  • Seite 30: Chapter 5. Changing Various Settings

    HP107e – Chapter 5. Changing Various Settings Chapter 5. Changing Various Settings Making Detailed Settings Button Function Page (Function) Local Control Piano Resonance p. 35 You can make performance-related settings such as tuning [Key Off] and temperament. How to enter function mode MIDI send channel 1.
  • Seite 31: Tuning To Other Instruments' Pitches (Master Tuning)

    This setting remains in effect until you turn off the power. note to specify the desired tonic key. * You can save this setting in the HP107e’s memory using the The tonic note you specify will be displayed as follows.
  • Seite 32: Changing The Pitch By Octaves (Octave Shift)

    HP107e – Chapter 5. Changing Various Settings I Changing How Grand Space is Applied * You can save this setting in the HP107e’s memory using the Memory Backup function (p. 31). (Grand Space Mode) If you press the [Grand Space] button in step 2 of Mak- I Changing the Pitch by Octaves (Octave Shift) ing Detailed Settings (Function) (p.
  • Seite 33: Restoring The Settings To The Factory Condition (Factory Reset)

    Reset) Normally, any songs you have recorded are deleted when you turn off the power to the HP107e. However, if you wish, The settings stored in the HP107e can be returned to their you can have such recorded songs be saved even while the factory settings.
  • Seite 34: Using The V-Link Function

    Making the Settings for the USB Driver Connecting the HP107e to a V-LINK compatible image device allows you to control the images with the HP107e. If you intend to connect to a computer using the USB connec- V-LINK tor, you need to make the following setting before you make the connection.
  • Seite 35: Chapter 6. Connecting External Devices

    3. Adjust the volume of each device. the performance of the HP107e on a * You cannot use the HP107e to adjust the volume of the con- recording device nected sound generating device. Input R/L (Line In,...
  • Seite 36: Connecting Midi Devices

    4. Press the [Split] or [Chorus] button. The button’s indicator will return to the previous state. Set Local Off if you have connected the HP107e to a MIDI sequencer. Refer to “Switching Local Control on and off” (p. 35). Also set your MIDI sequencer to...
  • Seite 37: Midi Send Channel Settings

    Local Off messages when their power is switched on. If you Simply connecting a cable is not enough for communica- turn on the power in the order of the HP107e → MT series, tion to take place. The connected devices must be set to Local Off will be set automatically.
  • Seite 38: Appendix

    No sound is heard ment itself. Use the Song Backup function to save any perfor- Is the volume level of the HP107e turned all the way down? (p. 11) mance you do not want deleted to the HP107e. Are headphones plugged in? (p. 10) Depressing a pedal has no effect, or the pedal effect doesn’t stop...
  • Seite 39: Error Messages/Other Messages

    Error Messages/Other Messages Error Messages/Other Messages Display Meaning User Song. Stores recorded performances (p. 25). Usr. The “.” in the display indicates that there is performance material already recorded (p. 25). S.1~68 Built-in song number (p. 12). S. U This is a song backed up with the Song Backup function (p. 31). This appears when a song with a pickup (a song that does not start on the first beat) is played back.
  • Seite 40: Easy Operation List

    HP107e – Easy Operation List Easy Operation List 12 13 You want to Buttons Page Press the [Split] and [Chorus] buttons simultaneously, and press the [G] button. [Split] + [Chorus] → Piano Resonance [Key Off] Local Control p. 35 [Split] + [Chorus] → Piano Resonance [String] MIDI send channel settings p.
  • Seite 41: Main Specifications

    Weights 82kg (including Piano Stand) Owner’s manual, Roland 60 Classical Piano Masterpieces, USB Installation Guide, Accessories CD-ROM (Roland Digital Piano USB Driver), Power Cord, Headphone Hook * In the interest of product improvement, the specifications and/or appearance of this unit are subject to change without prior notice.
  • Seite 42 HP107e – Main Specifications...
  • Seite 43: Die Wichtigsten Funktionen

    Be- und niemals ermüdenden Klangeindruck bewirken. Wenn Sie einen Kopfhörer anschließen, leuch- dienungsanleitung durchle- tet eine Diode im Bedienfeld. Ferner ist das HP107e mit einem Haken ausgestattet, an dem Sie den sen, um alle Funktionen ken- Kopfhörer bequem aufhängen können.
  • Seite 44: Hinweise Für Eine Sichere Handhabung

    Schallpegel erzeugen, der zu einem qualifizierten Kundendienststelle oder dem offiziellen permanenten Hörschaden führen kann. Verwen- Roland-Vertrieb (siehe die Adressen auf der “Informa- den Sie es niemals über einen längeren Zeitraum tion”-Seite). bei hohem Schallpegel. Wenden Sie sich bei Ver- ......................
  • Seite 45 • Netz- und Signalkabel sollten niemals miteinan- WARNUNG der verdreht werden. Verlegen Sie alle Kabel • In Familien mit kleinen Kindern müssen die Eltern außerdem immer außerhalb der Reichweite von darauf achten, dass die Kinder das Gerät erst dann Kindern. alleine bedienen, wenn sie mit allen wichtigen ......................
  • Seite 46: Wichtige Hinweise

    Das ist vor allem bei Erhalt oder Beginn eines können die intern gespeicherten Daten nicht wiederher- Anrufs der Fall. Daher raten wir, niemals in unmittelba- gestellt werden. Roland haftet nicht für den Verlust sol- rer Nähe des Gerätes zu telefonieren und das Handy cher Daten.
  • Seite 47: Handhabung Von Cd-Roms

    Klappe und Tastatur geraten und dort eingeschlossen werden. Dann müssen Sie das Gerät sofort ausschalten und den Netzanschluss lösen. Wenden Sie sich anschlie- ßend an Ihren Roland-Händler oder an die nächste Kun- dendienststelle. Handhabung von CD-ROMs • Vermeiden Sie Kratzer und Flecke auf der glänzenden (Daten)Seite der CD.
  • Seite 48 HP107e – Inhaltsverzeichnis Inhaltsverzeichnis Hinweise für eine sichere Handhabung ......42 Kapitel 3. Spielen zu den internen Stücken....63 Ändern des Tempos..................63 Wichtige Hinweise ............44 Starten der Wiedergabe nach einem Einzähler......63 Separate Wiedergabe der beiden Hände ............64 Beschreibung der Bedienelemente ........47 Kapitel 4.
  • Seite 49: Beschreibung Der Bedienelemente

    Beschreibung der Bedienelemente Beschreibung der Bedienelemente Bedienfeld 12 13 14 10 11 25 26 Power On 1. [Power On]-Schalter 14.[Damper]-Taster Hiermit kann die Resonanz des Pedalspiels simuliert Hiermit schalten Sie das Instrument ein und aus (S. 51). werden (S. 55). 2.
  • Seite 50: Rückseite

    Schließen Sie hier das Kabel der Pedaleinheit an (S. 49). 29.Input-Buchsen Hier können die Audio-Ausgänge eines anderen Gerätes angeschlossen werden. Dessen Signal wird dann eben- falls über die Lautsprecher des HP107e ausgegeben (S. 73). 30.Output-Buchsen Bei Bedarf können Sie diese Buchsen mit den Eingängen eines Leistungsverstärkers, Mischpultes, Kassettendecks...
  • Seite 51: Vorbereitung

    Anschließen des Netzkabels Schließen Sie das Pedalkabel an die Pedal-Buchse 1. Verbinden Sie den kleineren Stecker des beilie- auf der Rückseite des HP107e an. genden Netzkabels mit dem Netzanschluss an der Unterseite des HP107e. 2. Verbinden Sie den größeren Stecker des Netzka- bels mit einer Steckdose.
  • Seite 52: Öffnen/Schließen Des Tastaturdeckels

    HP107e (siehe die Abbildung). Arretieren Sie ihn Kopfhörers anschließend mit der Flügelmutter. Ihr HP107e ist mit zwei Kopfhörerbuchsen versehen. Es kön- nen also zwei Kopfhörer angeschlossen werden, was z.B. für den Unterricht oder zum Spielen vierhändiger Stücke not- wendig ist. Außerdem stören Sie bei Verwendung eines Kopfhörers niemanden.
  • Seite 53: Ein- Und Ausschalten

    Bei einem akustischen Klavier schwingen bei Betätigen dieses Pedals auch andere Saiten mit jenen der gespielten Netzanzeige Noten mit. Dadurch wird der Klang voller. Das Das HP107e wird eingeschaltet und die Diode vorne links Dämpferpedal des HP107e simuliert dieses Phänomen, leuchtet. das man “Saitenresonanz-Simulation” nennt.
  • Seite 54: Kapitel 1. Abspielen Der Internen Stücke

    HP107e – Kapitel 1. Abspielen der internen Stücke Kapitel 1. Abspielen der internen Stücke I Anwahl des Stückes, das Sie sich anhören Anhören der internen Stücke möchten Das HP107e enthält 68 Klavierstücke. “Kapitel 3. Spielen zu den internen Stücken” auf S. 63, “Tone List”...
  • Seite 55: Anhören Der Demosongs

    Kapitel 1. Abspielen der internen Stücke Anhören der Demosongs Bei Drücken eines dieser Taster beginnt der entsprechende Demosong. Die Wirkung wird anhand eines A/B-Ver- gleichs (Wiedergabe mit und ohne Effekt) veranschau- Es stehen mehrere Demosongs zur Verfügung, darunter Stü- licht. cke, welche die verfügbaren Klänge (“Tones”) vorführen sowie Demos der Klavierfunktionen.
  • Seite 56: Kapitel 2. Und Nun Dürfen Sie Spielen

    Kapitel 2. Und nun dürfen Sie spielen Klanganwahl Anwahl der Klanggruppe Das HP107e enthält 36 Klänge (“Tones”). Diese sind in fünf Gruppen unterteilt, die man mit den Tone-Tastern wählt. 1. Drücken Sie einen Tone-Taster Die Diode des gedrückten Tasters leuchtet.
  • Seite 57: Ändern Der Resonanzintensität

    Noten gleich laut wiedergegeben werden gespielten Noten mit. Dadurch wird der Klang voller. Das und auch dieselbe Klangfarbe aufweisen. Dämpferpedal des HP107e simuliert dieses Phänomen, I Notenverzögerung bei variierendem das man “Saitenresonanz-Simulation” nennt. Diese Funktion ist nur für Klavierklänge belegt. Für Anschlag (Hammer Response) Anm.
  • Seite 58: Den Klang Mit 'Tiefe' Versehen (Grand Space)

    HP107e – Kapitel 2. Und nun dürfen Sie spielen Den Klang mit ‘Tiefe’ Den Klang im Kopfhörer mit versehen (Grand Space) ‘Tiefe’ versehen (Grand Space) Das HP107e verfügt über eine so genannte “Grand Space”- Funktion. Damit erzielen Sie eine “Tiefe”, die jener eines Flü- Die “Grand Space”-Funktion kann auch das Kopfhörersig-...
  • Seite 59: Den Klang 'Lebendiger' Machen (Dynamic Emphasis)

    Hall wieder auszuschalten (Diode erlischt). Die “Dynamic Emphasis”-Funktion wird aktiviert und Der Status (an/aus) des Halleffekts und der Effektanteil können mit der “Backup”-Funktion des HP107e gespei- der Klang erscheint lebendiger. chert werden (S. 71). 2. Drücken Sie den [Dynamic Emphasis]-Taster...
  • Seite 60: Transponieren Der Tastatur ("Transpose"-Funktion)

    HP107e – Kapitel 2. Und nun dürfen Sie spielen Transponieren der Tastatur Hinzufügen eines komple- (“Transpose”-Funktion) mentären Klangs zum Klavierklang (Acoustic Layer) Ihre Musik kann in einer anderen Tonart wiedergegeben werden als jener, in der Sie spielen. Beispiel: Stücke in einer Das HP107e bietet eine Funktion, mit der man blitzschnell schwierigen Tonart, d.h.
  • Seite 61: Ändern Der Balance Im 'Acoustic Layer'-Modus

    Um wieder die zuvor verwendete Balance zu wählen, müssen Sie den [–]- und [+]-Taster gleichzeitig drücken. Die Einstellung kann mit der “Backup”-Funktion des HP107e gespeichert werden (S. 71). 1. Halten Sie den [Transpose]-Taster gedrückt, wäh- rend Sie den [Split]-Taster betätigen.
  • Seite 62: Unterschiedliche Klänge Für Die Linke/Rechte Hand (Split-Modus)

    HP107e – Kapitel 2. Und nun dürfen Sie spielen Unterschiedliche Klänge für Anwahl eines anderen Klangs für die rechte Hälfte die linke/rechte Hand Verlassen Sie den Split-Modus und wählen Sie dann einen (Split-Modus) anderen Klang. Im Split-Modus bezieht sich das Dämpferpedal anfangs Das Instrument erlaubt das Aufteilen der Klaviatur, so dass nur auf den rechts gespielten Klang.
  • Seite 63: Funktion Des Mittleren Pedals

    12.8 12/8 I Arbeiten mit dem Metronom Anhalten des Metronoms Das HP107e bietet eine Metronomfunktion. 5. Drücken Sie den [Metronome/Count In]-Taster Während der Wiedergabe eines Stücks zählt das Metro- noch einmal, damit seine Diode wieder erlischt. nom im Takt (und Tempo) jenes Stücks.
  • Seite 64: Aufteilen Der Klaviatur Für Vierhändiges Spiel (Twin-Modus)

    HP107e – Kapitel 2. Und nun dürfen Sie spielen Aufteilen der Klaviatur für vierhändiges Spiel (Twin-Modus) Die Klaviatur kann in zwei separate Bereiche aufgeteilt werden, so dass zwei Personen gleichzeitig in derselben Tonlage spielen können. G Im Twin-Modus werden folgende Dinge eingestellt: 1.
  • Seite 65: Kapitel 3. Spielen Zu Den Internen Stücken

    Diese ist zwar nicht separat verfügbar, kann aber folgen- dermaßen aktiviert werden. Aktivieren Sie vor Starten der Wiedergabe das Metronom. Dann zählt das HP107e nämlich zwei Takte ein. Danach beginnt die Wiedergabe. Manche interne Stücke enthalten Tempowechsel. Das Display informiert Sie beim Einzählen folgenderma- ßen über die Taktanzahl vor Beginn des Stückes: “–2”...
  • Seite 66: Separate Wiedergabe Der Beiden Hände

    HP107e – Kapitel 3. Spielen zu den internen Stücken Separate Wiedergabe der Starten der Wiedergabe 2. Drücken Sie den [Play]-Taster (Diode muss leuch- beiden Hände ten). Die Wiedergabe beginnt. Den unter Schritt 1 gewählten Bei Bedarf können Sie selbst bestimmen, welcher Part des Part hören Sie jetzt nicht mehr.
  • Seite 67: Kapitel 4. Aufnehmen Ihres Spiels

    ‘Left’-Spur ‘Right’-Spur len – und bei Bedarf sogar einen zweiten Part hinzufügen. ‘Layer’ Zusatzklang Originalklang (Klavier) Die Aufnahmefunktion des HP107e kann auf verschiedene Layer-Klang (eine Oktave ‘Octave’ Originalklang Arten verwendet werden: höher) • Aufnahme nur des eigenen Spiels (→ “Aufnahme eines * Wenn Sie sich für Verfahren “B”...
  • Seite 68: Aufnahme Mit Einem Internen Stück

    HP107e – Kapitel 4. Aufnehmen Ihres Spiels Aufnahme mit einem Starten der Aufnahme 6. Die Aufnahme beginnt, sobald Sie eine Taste internen Stück anschlagen oder den [Play]-Taster betätigen. Das Instrument zählt zwei Takte ein und startet dann die Auch Ihr Spiel zu einem internen Stück kann aufgenom- Aufnahme.
  • Seite 69: Aufnahme Auf Zwei Spuren

    An anderer Stelle wurde bereits erwähnt, dass der Recor- Die Aufnahme hält an und die [Play]- und [Rec]-Diode der des HP107e zwei Spuren bietet. Die könnten Sie z.B. erlöschen wieder. dazu nutzen, den Part der linken und rechten Hand sepa- Ihr neuer Part befindet sich auf der oben gewählten Spur.
  • Seite 70: Kapitel 5. Weitere Funktionen

    Die Diode dieses Tasters verhält sich nun wieder “nor- mal”. Local-Funktion I Angleichen der Stimmung an ein anderes Piano Resonance S. 75 Instrument (Gesamtstimmung) [Key Off] Wenn Sie das HP107e zum Begleiten schwer oder über- haupt nicht stimmbarer Instrumente verwenden, können Sie seine Kammertonfrequenz an jene des akustischen...
  • Seite 71: Auswahl Des Stimmungssystems

    Für alle Stimmungen außer der gleichschwebenden müs- Instrument ausschalten. sen Sie auch den Grundton (Tonika für Dur und Sexte für * Die Einstellung kann mit der “Backup”-Funktion des HP107e Moll) für die Tonart des Stückes einstellen. gespeichert werden (S. 71).
  • Seite 72: Transponieren In Oktavschritten

    Drücken Sie in Schritt 2 unter “Weiter führende Einstel- * Diese Einstellung gilt nur für Klavierklänge. lungen (Funktionsmodus)” (S. 68) den [Grand Space]- * Die Einstellung kann mit der “Backup”-Funktion des HP107e Taster. Im Display erscheint nun z.B. folgende Meldung: gespeichert werden (S. 71).
  • Seite 73: Laden Der Werksvorgaben (Factory Reset)

    Speichern des (Factory Reset) aufgenommenen Stücks (Song Backup) Bei Bedarf können Sie für alle Funktionen des HP107e wieder die Werksvorgaben laden. Das selbst aufgenommene Stück wird bei Ausschalten des * Bei Verwendung dieser Funktion werden die intern gespei- HP107e wieder gelöscht. Vor dem Ausschalten können Sie es cherten Stücke nicht gelöscht (S.
  • Seite 74: Verwendung Der V-Link-Funktion

    Funktion Vor Anschließen des USB-Ports an Ihren Computer müssen Sie folgenden Parameter einstellen. Wenn Sie das HP107e mit einem V-LINK-kompatiblen Vide- 1. Halten Sie den [Split]-Taster gedrückt, während ogerät verbinden, können Sie die Ausgabe von Bilddaten mit dem HP107e beeinflussen.
  • Seite 75: Kapitel 6. Anbindung Externer Geräte

    Sie jedoch bei Ihrem Roland-Händler. externen Geräts an. * Das USB-Kabel darf maximal 3 Meter lang sein. * Schalten Sie das HP107e ein, bevor Sie auf dem Computer ein MIDI-Programm starten. Schalten Sie das HP107e niemals ein bzw. aus, wenn bereits ein MIDI-Programm läuft.
  • Seite 76: Arbeiten Mit Midi-Geräten

    4. Drücken Sie den [Split]- oder [Chorus]-Taster. Die Diode dieses Tasters verhält sich nun wieder “nor- mal”. * Schalten Sie die Local-Funktion des HP107e aus, wenn Sie es mit einem Sequenzer verbinden. Siehe “Ein-/Ausschalten der Local-Funktion” (S. 75). Außerdem müssen Sie die MIDI THRU-Funktion des Sequenzers aktivieren (damit die über...
  • Seite 77: Einstellen Des Midi-Kanals

    Local aus * Das HP107e empfängt auf allen MIDI-Kanälen (1~16). * Im Dual- (S. 59) bzw. Split-Modus (S. 60) sendet das HP107e die Daten des linken Klangwahltasters auf Kanal 5 (Dual) * Wenn Sie ein Gerät der MT-Serie anschließen, brauchen Sie bzw.
  • Seite 78: Anhang

    Haben Sie die Local-Funktion ausgeschaltet? gestellt werden. Dann hören Sie die auf der Tastatur gespielten Noten nicht mehr. Das HP107e bietet eine “Song Backup”-Funktion (S. 71), mit der Aktivieren Sie die Local-Funktion (“ON”, S. 75). man das zuletzt eingespielte Stück speichern kann. Wichtige Auf- Ist die V-LINK-Funktion aktiv? nahmen sollten Sie mit dieser Funktion intern speichern.
  • Seite 79: Fehler- Und Andere Meldungen

    Fehlersuche Die Lautstärke des an die Input-Buchsen angeschlossenen Instru- mentes/Gerätes ist viel zu gering Vielleicht verwenden Sie ein Audiokabel mit einem Widerstand. Versuchen Sie es einmal mit einem anderen Kabel. Fehler- und andere Meldungen Anzeige Bedeutung Der Speicher für Ihre Aufnahme. Hier befindet sich das Stück, das Sie selbst aufgenommen haben (S. 65). Usr.
  • Seite 80: Übersicht Der Internen Funktionen

    HP107e – Übersicht der internen Funktionen Übersicht der internen Funktionen 12 13 Sie möchten… Taster Siehe Den [Split]- und [Chorus]-Taster gedrückt halten, während Sie den [G]-Taster betätigen. [Split] + [Chorus] → Piano Resonance [Key Off] Local-Funktion S. 75 [Split] + [Chorus] → Piano Resonance [String] Einstellen des MIDI-Kanals S.
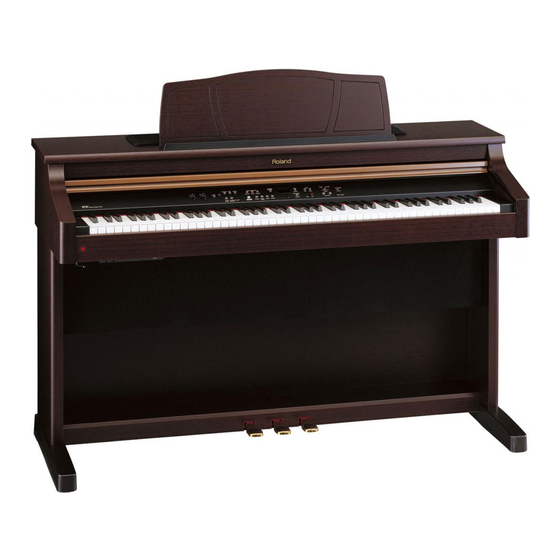
  • Seite 81: Technische Daten

    1425 (B) x 536 (T) x 1.083,5 (H) mm (Notenpult hochgeklappt) Gewicht 82kg (inklusive Ständer) Bedienungsanleitung, “60 Classical Piano Masterpieces”, USB-Installationshandbuch, Lieferumfang CD-ROM (“Roland Digital Piano USB Driver”), Netzkabel, Kopfhörerhaken * Änderungen der technischen Daten und des Designs ohne vorherige Ankündigung vorbehalten. Für Druckfehler wird keine Haftung übernommen.
  • Seite 82 HP107e – Technische Daten...
  • Seite 83: Caractéristiques Principales

    Cet instrument dispose d’un clavier avec marteaux à action progressive émulant le toucher d’un piano à queue: plus lourd dans le grave et plus léger dans l’aigu. Le HP107e simule même le “déclic” que vous ressentez lorsque vous enfoncez une touche sur un piano à queue (mécanisme d’échappement).
  • Seite 84: Consignes De Securité

    Roland le plus proche ou à ble. Ne l’utilisez donc pas trop longtemps à un distributeur Roland agréé (vous en trouverez la liste à volume élevé ou inconfortable. Si vous pensez la page “Information”).
  • Seite 85 Roland le plus proche ou un distributeur • Débranchez le cordon d’alimentation. Roland agréé (vous en trouverez la liste à la page “Information”). • Débranchez tous les câbles reliant l’instrument à ......................
  • Seite 86: Remarques Importantes

    (notamment lorsque les circuits touchant à la mémoire • Il peut y avoir du bruit si vous utilisez des moyens de elle-même sont endommagés). Roland rejette toute res- communication sans fil (tel qu’un téléphone mobile) à ponsabilité concernant la perte de ces données.
  • Seite 87 à l’intérieur. Dans un tel cas, coupez immé- diatement l’alimentation et débranchez le cordon d’ali- mentation de la prise. Consultez ensuite le revendeur qui vous a vendu l’instrument ou le SAV Roland le plus pro- che. Maniement des CD-ROM •...
  • Seite 88 HP107e – Sommaire Sommaire Consignes de sécurité .............82 Chapitre 3. Accompagner les morceaux internes ..103 Changer le tempo ................103 Remarques importantes ..........84 Ajouter un décompte (Count-In)...........103 Écouter séparément la partie d’une main........104 Description................87 Chapitre 4. Enregistrer votre jeu ........105 Face avant ....................87...
  • Seite 89: Description

    Description Description Face avant 12 13 14 10 11 25 26 Power On 1. Commutateur [Power On] 14.Bouton [Damper] Change la résonance produite lorsque la pédale forte est Mise sous/hors tension (p. 91). actionnée (p. 95). 2. Commande [Volume] 15.Bouton [Acoustic Layering] Détermine le volume global (p.
  • Seite 90: Face Arrière

    Ces entrées permettent de brancher un autre générateur de sons ou un appareil audio pour que le son de cet appa- reil soit produit par les haut-parleurs du HP107e (p. 113). 30.Prises Output Ces sorties permettent d’envoyer le son du piano à une sono afin d’obtenir un son plus puissant.
  • Seite 91: Avant De Commencer À Jouer

    Branchez le câble du pédalier à la prise Pedal en 1. Insérez le cordon d’alimentation dans la prise AC face arrière du HP107e. située sous le HP107e, à l’arrière. 2. Branchez le cordon d’alimentation à une prise sec- teur. Servez-vous exclusivement du cordon d’alimentation NOTE fourni.
  • Seite 92: Ouvrir/Fermer Le Couvercle

    Papillon Brancher un casque Crochet pour casque Le HP107e a deux prises pour casque. Cela permet à deux personnes d’écouter simultanément au casque, ce qui vient à point pour les leçons de piano ou le jeu à quatre mains. Cela vous permet en outre de jouer sans déranger votre entou-...
  • Seite 93: Mise Sous/Hors Tension

    L’instrument est sous tension et le témoin d’alimentation rendant ainsi le son plus riche et plus vaste. Le HP107e à l’avant gauche du HP107e s’allume. simule cette “résonance sympathique” produite par la Attendez quelques secondes avant de jouer.
  • Seite 94: Chapitre 1. Exploiter Les Morceaux Internes

    HP107e – Chapitre 1. Exploiter les morceaux internes Chapitre 1. Exploiter les morceaux internes I Choisir un morceau pour l’écouter Écouter les morceaux internes Le HP107e propose 68 morceaux de piano. “Chapitre 3. Accompagner les morceaux internes” à la page 103, “Tone List” (p. 240) I Écouter tous les morceaux consécutivement...
  • Seite 95: Écouter Les Morceaux De Démonstration

    Chapitre 1. Exploiter les morceaux internes Écouter les morceaux de Démo des fonctions des Contenu différents boutons démonstration Démonstration de la réso- Piano Resonance [String] p. 94 nance des cordes Vous pouvez écouter divers morceaux de démonstration Démonstration de la réso- dont ceux exploitant les sons de piano et d’autres sons ainsi Piano Resonance [Damper] p.
  • Seite 96: Chapitre 2. Jeu

    Chapitre 2. Jeu Jouer avec différents sons Sélectionner un groupe de sons Le HP107e est doté de 36 sons internes. Ils sont divisés en cinq groupes assignés chacun à un bouton Tone. 1. Appuyez sur n’importe quel bouton de son (Tone).
  • Seite 97: Résonance Sympathique (Damper)

    I Changer le timing en fonction de la force conférer plus de réverbération. La pédale forte du HP107e exercée sur les touches (Hammer Response) simule cette résonance (sympathique) lorsqu’elle est Cette fonction détermine la façon dont votre toucher déte-...
  • Seite 98: Rendre Le Son Plus Profond (Grand Space)

    (Grand Space) profondeur pour le casque (Grand Space) Le HP107e dispose d’une fonction “Grand Space” qui vous permet d’obtenir un son dont la profondeur évoque celle Vous pouvez également recréer la sensation de profondeur d’un piano à queue. Cette fonction vous permet donc de d’un piano de concert à...
  • Seite 99: Ajouter De La Dynamique Au Son (Dynamic Emphasis)

    1. Appuyez sur le bouton [Dynamic Emphasis] (son activée/coupée ainsi que l’intensité de la réverbération témoin s’allume). dans la mémoire du HP107e avec la fonction de La fonction “Dynamic Emphasis” est activée et anime le mémorisation (“Backup”) (p. 111). son.
  • Seite 100: Transposer Le Clavier (Transpose)

    La fonction de transposition vous permet de transposer votre jeu pour éviter certaines difficultés techniques. Si, par exem- Avec le HP107e, vous pouvez facilement sélectionner des ple, le morceau est dans une tonalité difficile comprenant de sons complétant parfaitement le son de piano et les ajouter nombreux dièses (#) ou bémols (b), vous pouvez transposer le...
  • Seite 101: Changer La Balance En Mode "Acoustic Layer

    Pour revenir à la balance originale, appuyez simultané- Vous pouvez sauvegarder ce réglage dans la mémoire du ment sur les boutons [–] et [+]. HP107e avec la fonction de mémorisation (“Backup”) (p. 111). 1. Maintenez le bouton [Transpose] enfoncé et appuyez sur le bouton [Split].
  • Seite 102: Produire Des Sons Différents Des Mains Gauche & Droite (Split)

    HP107e – Chapitre 2. Jeu Produire des sons différents Changer le son produit par la main droite Annulez le mode “Split” puis sélectionnez le son voulu. des mains gauche & droite En mode Split, la pédale forte (damper) n’a d’effet que (Split) sur la partie droite du clavier.
  • Seite 103: Changer La Fonction De La Pédale Centrale

    Arrêter le métronome I Faire sonner le métronome 5. Appuyez une fois de plus sur le bouton [Metro- Le HP107e a un métronome interne. nome/Count In] (son témoin s’éteint). Durant la reproduction d’un morceau, le métronome a le Le métronome s’arrête.
  • Seite 104: Partager Le Clavier En Deux Sections Pour Jeu À 4 Mains

    HP107e – Chapitre 2. Jeu Partager le clavier en deux sections pour jeu à 4 mains Vous pouvez diviser le clavier en deux sections distinctes afin de permettre à deux personnes de jouer dans les mêmes registres. G Voici ce qui se passe en mode de jeu à quatre mains: 1.
  • Seite 105: Chapitre 3. Accompagner Les Morceaux Internes

    L’instrument produit deux mesures de préparation appe- lées “décompte”. Sur le HP107e, si vous reproduisez un morceau tandis que le métronome est activé, vous entendez un décompte de Certains morceaux internes ont un tempo qui change au deux mesures au début du morceau.
  • Seite 106: Écouter Séparément La Partie D'une Main

    HP107e – Chapitre 3. Accompagner les morceaux internes Écouter séparément la partie Reproduire un morceau 2. Appuyez sur le bouton [Play] (son témoin d’une main s’allume). La reproduction du morceau commence. La partie sélec- Les morceaux internes vous permettent de sélectionner la tionnée à...
  • Seite 107: Chapitre 4. Enregistrer Votre Jeu

    Remarques concernant l’enregistrement morceau • Vous ne pouvez enregistrer qu’un seul morceau. • Le HP107e a une fonction de sauvegarde de morceau Vous n’enregistrez que votre jeu sur le clavier sans accom- (“Backup”) (p. 111) qui vous permet de sauvegarder le pagner un morceau interne.
  • Seite 108: Arrêter L'enregistrement

    [Left] et pour enregistrer celle de la main droite, appuyez sur le bouton [Right]. Les témoins du bouton que vous avez actionné et du bou- ton [Play] clignotent et le HP107e passe en mode d’attente d’enregistrement. Si “dEL” apparaît à l’écran, voyez p. 105.
  • Seite 109: Enregistrer Séparément La Partie De Chaque Main

    Arrêter l’enregistrement partie de chaque main 5. Appuyez sur le bouton [Play] ou [Rec]. L’enregistreur du HP107e a deux pistes, ce qui vous per- L’enregistrement s’arrête et les témoins des boutons [Play] met d’enregistrer séparément les parties des mains droite et [Rec] s’éteignent.
  • Seite 110: Chapitre 5. Changer Divers Réglages

    Local On/Off Lorsque vous jouez avec d’autres instruments, vous pou- Piano Resonance vez accorder la hauteur de référence (diapason) du p. 115 [Key Off] HP107e en fonction d’un autre instrument. La hauteur de référence est généralement déterminée par le La central.
  • Seite 111: Changer La Gamme

    * Vous pouvez sauvegarder ce réglage dans la mémoire du Maintenez le bouton [E. Piano] enfoncé et appuyez sur HP107e avec la fonction de mémorisation (“Backup”) (p. 111). une touche pour spécifier la tonique. La tonique choisie est affichée comme suit.
  • Seite 112: Transposition Par Octave

    “Réglages détaillés” (p. 108), un affichage ressem- blant au suivant apparaît. Le mode Piano uniquement bloque le HP107e dans un état qui n’autorise que le jeu de piano; tous les boutons sont désactivés. Cette fonction est souvent utile, notamment lors- que des enfants utilisent le piano: ils risquent d’actionner cer-...
  • Seite 113: Rappel Des Réglages Usine (Factory Reset)

    “End” (fin). Si vous coupez l’alimentation avant que ceau mémorisé est indiqué de la façon suivante à l’écran. ce message n’apparaisse, vous risquez d’endommager la mémoire interne du HP107e et de rendre l’instrument inutili- sable. Mémorisation des réglages I Effacer un morceau mémorisé...
  • Seite 114: Utiliser La Fonction V-Link

    HP107e – Chapitre 5. Changer divers réglages Utiliser la fonction V-LINK Réglages pour le pilote USB Vous pouvez brancher le HP107e à un appareil de traite- Si vous avez l’intention de brancher un ordinateur au con- ment d’image compatible V-LINK afin de piloter les images à...
  • Seite 115: Chapitre 6. Connexion D'appareils Externes

    * Servez-vous d’un câble USB d’une longueur maximale de 3m. * Mettez le HP107e sous tension avant de lancer une applica- tion MIDI sur l’ordinateur. Ne mettez pas le HP107e sous/ hors tension tant qu’une application MIDI tourne.
  • Seite 116: Connexion D'appareils Midi

    à l’échange de données musicales tent. entre instruments électroniques et ordinateurs. Le HP107e est pourvu de prises MIDI qui permettent Effectuer différents réglages d’échanger des données de jeu avec des appareils ou ins- 2. Appuyez sur le bouton assigné au paramètre truments externes.
  • Seite 117: Choisir Le Canal De Transmission Midi

    (p. 99) ou “Split” (p. 100), la partie de la main gauche est transmise sur le canal 5 en mode de superposition et sur le * Si le piano est branché à un séquenceur de la série Roland MT, canal 3 en mode “Split”. Le réglage de ces canaux de transmis- il n’est pas nécessaire de choisir Local Off.
  • Seite 118: Appendice

    Roland reproduisent fidèlement ces caractéristiques d’un piano Le son ne change pas acoustique. Sur le HP107e, la plage de notes qui n’est pas affectée Etes-vous en mode Piano uniquement (p. 110)? par la pédale forte change en fonction du réglage de transposi- Éteignez le piano puis rallumez-le.
  • Seite 119: Messages D'erreur Et Autres Messages

    Messages d’erreur et autres messages Messages d’erreur et autres messages Écran Signification Morceau utilisateur Mémoire pour les enregistrements (p. 105). Usr. Le point “..” affiché à l’écran indique la présence de données enregistrées (p. 105). S.1~68 Numéro de morceau interne (p. 92). S.
  • Seite 120: Liste Des Opérations

    HP107e – Liste des opérations Liste des opérations 12 13 Opération/paramètre Boutons Page Appuyez simultanément sur les boutons [Split] et [Chorus] et appuyez sur le bouton [G]. [Split] + [Chorus] → Piano Resonance [Key Off] Local On/Off p. 115 [Split] + [Chorus] → Piano Resonance [String] Choisir le canal de transmission MIDI p.
  • Seite 121: Fiche Technique

    Mode d’emploi, Roland 60 Classical Piano Masterpieces, Guide d’installation USB, Accessoires CD-ROM (pilote USB pour piano numérique Roland), câble d’alimentation, crochet pour casque * En vue d’améliorer le produit, les caractéristiques techniques et/ou l’aspect de ce produit peuvent être modifiés sans avis préalable.
  • Seite 122 HP107e – Fiche technique...
  • Seite 123: Manuale Dell'utente

    Inol- tre l’HP107e simula fedelmente anche il rumore che si sente quando si premono i tasti di un piano- forte a coda (meccanismo di scappamento).
  • Seite 124: Usare L'apparecchio In Modo Sicuro

    • Spegnete immediatamente l’apparecchio, staccate ......................• L’apparecchio deve essere utilizzato solo con un il cavo dell’alimentazione dalla presa e richiedete rack o con un supporto consigliato da Roland. l’intervento del vostro rivenditore o di uno dei Centri Assistenza Tecnica Autorizzati Roland ......................
  • Seite 125 • Prima di utilizzare l’apparecchio in un’altra • Staccate il cavo dell’alimentazione. nazione, contattate il vostro rivenditore o uno dei • Staccate tutti i cavi provenienti da dispositivi Centri Assistenza Tecnica Autorizzati Roland esterni. elencati nella pagina “Information”. • Alzate i regolatori del supporto (p. 131).
  • Seite 126: Note Importanti

    (come quando i circuiti di memoria sono danneg- 354b • Non esponete l’apparecchio alla luce diretta del sole, non giati) è impossibile ripristinare i dati e Roland non si ponetelo vicino a dispositivi che emettono calore, non assume alcuna responsabilità circa la perdita di tali dati.
  • Seite 127 MIDI (per es. un sequencer) una volta che sono andati persi. Roland Corporation non si assume alcuna responsabilità circa la perdita di tali dati. • Utilizzate con attenzione i pulsanti, gli slider e gli altri controlli dell’apparecchio nonché...
  • Seite 128 HP107e – Sommario Sommario Usare l’apparecchio in modo sicuro......122 Utilizzare il metronomo .................141 Far suonare il metronomo ..............141 Cambiare il volume del metronomo..........141 Note importanti ...............124 Dividere la tastiera in due parti per esecuzioni a quattro mani (modo Twin Piano) ..................142 Descrizione dei pannelli..........127...
  • Seite 129: Descrizione Dei Pannelli

    Descrizione dei pannelli Descrizione dei pannelli Pannello anteriore 12 13 14 10 11 25 26 Power On 1. Interruttore [Power On] 15.Pulsante [Acoustic Layering] Potete sovrapporre e suonare timbri particolarmente Accende e spegne l’apparecchio (p. 131). adatti a essere utilizzati con il pianoforte (p. 138). 2.
  • Seite 130: Pannello Posteriore

    27.Pulsante [Center Pedal] Inoltre avvia/arresta la registrazione di un’esecuzione Cambia la funzione del pedale centrale (p. 141). (p. 145~p. 147). 24.Pulsante [Rec] Mette l’HP107e nel modo standby di registrazione (p. 145~p. 147). Pannello anteriore Pannello posteriore Pannello inferiore Pannello posteriore 28.Connettore Pedal...
  • Seite 131: Prima Di Iniziare A Suonare

    Collegare il cavo dell’alimentazione Inserite il cavo dei pedali nel connettore Pedal che si trova nel pannello posteriore dell'HP107e. 1. Inserite il cavo dell’alimentazione fornito in dota- zione nella presa CA che si trova sul pannello inferiore sul retro dell’HP107e.
  • Seite 132: Aprire/Chiudere Il Coperchio

    Per chiudere il coperchio tiratelo leggermente Inserite e avvitate il gancio delle cuffie fornito in dota- verso di voi e, una volta estratto completamente, zione con l’HP107e nel foro che si trova nella parte infe- riore dell’HP107e (si veda la seguente figura). Ruotate il abbassatelo.
  • Seite 133: Accendere E Spegnere Lo Strumento

    “sim- patia” con le note suonate sulla tastiera aggiungendo ric- Indicatore Power chezza al suono. L’HP107e simula questo tipo di riso- nanza simpatetica. Lo strumento si accende e così pure l’indicatore Power Potete cambiare la quantità...
  • Seite 134: Capitolo 1. Ascoltare Le Song Incorporate

    HP107e – Capitolo 1. Ascoltare le song incorporate Capitolo 1. Ascoltare le song incorporate I Selezionare una song e riprodurla Ascoltare le song incorporate L’HP107e contiene 68 pezzi di pianoforte incorporate. “Capitolo 3. Suonare sulle song incorporate” a pagina 143, “Tone List” (p. 240)
  • Seite 135: Ascoltare Le Demo Song

    Capitolo 1. Ascoltare le song incorporate Ascoltare le demo song Quando premete un pulsante, viene riprodotta la demo assegnata a quel pulsante. Vengono riprodotte due ver- sioni della demo: una in cui è utilizzata la funzione del Potete ascoltare varie demo song tra cui quelle che presen- pulsante che avete premuto e una in cui non è...
  • Seite 136: Capitolo 2. Esecuzione

    Capitolo 2. Esecuzione Suonare utilizzando vari timbri Selezionare un gruppo di timbri L’HP107e contiene 36 diversi timbri incorporati. I timbri sono organizzati in gruppi assegnati ai pulsanti Tone. 1. Premete uno qualsiasi dei pulsanti Tone. Si accende l’indicatore del pulsante che avete premuto.
  • Seite 137: Produrre Risonanza Quando Viene Premuto Il Pedale Damper ( Damper Resonance)

    Quando viene premuto, il pedale damper dell’HP107e ricrea lo stesso tipo di riso- I Cambiare la temporizzazione dei suoni a nanza (risonanza simpatetica). seconda della forza utilizzata per premere i Questa impostazione è...
  • Seite 138: Aggiungere Profondità Al Suono (Grand Space)

    (Grand Space) di profondità per l’ascolto con cuffie (Grand Space) L’HP107e è dotato di una funzione “Grand Space” che vi per- mette di ottenere suoni caratterizzati da un senso di profon- Anche nell’ascolto con cuffie potete ottenere la profondità...
  • Seite 139: Aggiungere Vivacità Al Suono (Dynamic Emphasis)

    1. Premete il pulsante [Reverb]. Potete salvare questa impostazione nella memoria L’indicatore del pulsante si accende e al suono viene appli- dell’HP107e utilizzando la funzione Memory Backup cato l’effetto di riverbero. (p. 151). Per annullare l’effetto di riverbero, premete il pulsante [Reverb] in modo che l’indicatore si spenga.
  • Seite 140: Trasporre La Tonalità Della Tastiera (Transpose)

    Utilizzando la funzione “Transpose” potete trasporre l’esecu- zione senza cambiare le note che eseguite. Per esempio, se Con l’HP107e potete facilmente selezionare i timbri più una song è in una tonalità complicata con molti diesis (#) o adatti per essere utilizzati con quello di pianoforte. Questa bemolli (b), potete utilizzare questa funzione per eseguirla in funzione è...
  • Seite 141: Cambiare Il Bilanciamento Di Volume Quando Utilizzate L'acoustic Layering

    Il bilanciamento del volume cambia. Per tornare al bilanciamento di volume originale premete simultaneamente i pulsanti [–] e [+]. Potete salvare questa impostazione nella memoria dell’HP107e utilizzando la funzione Memory Backup (p. 151). 1. Tenete premuto il pulsante [Transpose] e premete il pulsante [Split].
  • Seite 142: Suonare Timbri Diversi Con La Mano Destra E Sinistra (Split)

    HP107e – Capitolo 2. Esecuzione Suonare timbri diversi con la Cambiare il timbro utilizzato dalla mano destra mano destra e sinistra (Split) Annullate la Split Performance e poi riselezionate il tim- bro. La “Split Performance” consiste nel dividere la tastiera in...
  • Seite 143: Cambiare Il Funzionamento Del Pedale Centrale

    Arrestare il metronomo I Far suonare il metronomo 5. Premete di nuovo il pulsante [Metronome/Count L’HP107e è dotato di un metronomo incorporato. In] in modo che l’indicatore si spenga. Quando viene riprodotta una song, il metronomo suona Il metronomo si arresta.
  • Seite 144: Dividere La Tastiera In Due Parti Per Esecuzioni A Quattro Mani (Modo Twin Piano)

    HP107e – Capitolo 2. Esecuzione Dividere la tastiera in due parti per esecuzioni a quattro mani (modo Twin Piano) Potete dividere la tastiera in due parti separate in modo che due persone possano suonare negli stessi registri. G Quando è attivato il modo Twin Piano accade ciò che 1.
  • Seite 145: Capitolo 3. Suonare Sulle Song Incorporate

    L’inserimento di un conteggio che precede la riproduzione della song viene chiamato “Count-In”. Se sull’HP107e riproducete una song utilizzando il metro- In alcune song incorporate il tempo cambia all’interno nomo, sentite un conteggio di due battute prima dell’ini- della song.
  • Seite 146: Suonare Le Due Mani Separatamente

    HP107e – Capitolo 3. Suonare sulle song incorporate Suonare le due mani Riprodurre una song 2. Premete il pulsante [Play] in modo che l’indicatore separatamente si accenda. La song inizia a essere riprodotta. La parte che avete sele- Le song incorporate vi permettono di selezionare la parte di zionato al punto 1 non viene riprodotta.
  • Seite 147: Capitolo 4. Registrare La Vostra Esecuzione

    Potete riprodurre un'esecuzione che avete registrato per sen- tire come l’avete suonata o per aggiungere delle parti. Funzione Traccia sinistra Traccia destra Con l’HP107e potete registrare in uno dei seguenti modi. Timbro originale (timbro di Layer Timbro Layer pianoforte) • Registrare solo la vostra esecuzione sulla tastiera (→...
  • Seite 148: Registrare Su Una Song

    [Play] o suonate la tastiera. porata. Vengono eseguite due battute di conteggio e poi la regi- L’HP107e contiene la funzione Song Backup (p. 151) che strazione inizia. vi permette di memorizzare nello strumento la song regi- Sappiate che la registrazione viene inoltre avviata se suo- strata con l’HP107e.
  • Seite 149: Selezionare E Registrare Separatamente La Traccia Di Ogni Mano

    Potete registrare pulsante [Right] per specificare la traccia di registrazione. mentre ascoltate l’esecuzione precedentemente registrata. L’HP107e contiene la funzione Song Backup (p. 151) che vi permette di memorizzare nello strumento la song regi- Riproducete l’esecuzione registrata strata con l’HP107e.
  • Seite 150: Capitolo 5. Cambiare Varie Impostazioni

    HP107e – Capitolo 5. Cambiare varie impostazioni Capitolo 5. Cambiare varie impostazioni Effettuare impostazioni Pulsante Funzione Pagina dettagliate (Function) Local Control Piano Resonance p. 155 Potete definire impostazioni relative alle esecuzioni come [Key Off] l’accordatura e il temperamento. Entrare nel modo Function Canale MIDI send 1.
  • Seite 151: Accordare Secondo Le Intonazioni Di Altri Strumenti (Master Tuning)

    ("C" per il maggiore e "A" per il minore) a seconda della tona- * Potete salvare questa impostazione nella memoria dell’HP107e utilizzando la funzione Memory Backup (p. 151). lità in cui volete suonare.
  • Seite 152: Cambiare L'intonazione In Intervalli Di Ottava (Octave Shift)

    (Panel Lock) I Applicare il pedale damper alla parte della La funzione “Panel Lock” blocca l'HP107e in modo che si mano sinistra possa utilizzare solo l'esecuzione del pianoforte disabilitando Quando utilizzate l’esecuzione Split (p. 140), potete appli- tutti i pulsanti.
  • Seite 153: Ripristinare Le Impostazioni Originali Del Costruttore

    Normalmente le song che avete registrate vengono cancellate * Le song che sono state sottoposte alla procedura Song Backup quando l’HP107e viene spento. Tuttavia, se volete, potete far (p. 151) non vengono cancellate quando viene eseguito il sì che queste song registrate rimangano salvate anche a stru- Factory Reset.
  • Seite 154: Utilizzare La Funzione V-Link

    HP107e – Capitolo 5. Cambiare varie impostazioni Utilizzare la funzione V-LINK Effettuare le impostazioni del Driver USB Se collegate l’HP107e a un dispositivo video compatibile con V-LINK potete controllare le immagini con l’HP107e. Se volete collegare un computer utilizzando il connettore V-LINK USB, prima di eseguire il collegamento dovete effettuare la seguente impostazione.
  • Seite 155: Capitolo 6. Collegare Dispositivi Esterni

    * Accendete l’HP107e prima di avviare le applicazioni MIDI sul computer. Non spegnete e non accendete l’HP107e durante l’esecuzione delle applicazioni MIDI. * Non collegate e non scollegate il cavo USB quando l’HP107e è acceso. * Se non utilizzate l’USB, scollegate il cavo USB dall’HP107e.
  • Seite 156: Collegare Dispositivi Midi

    4. Premete il pulsante [Split] o [Chorus]. L’indicatore del pulsante torna allo stato precedente. * Impostate Local Off se avete collegato l’HP107e a un sequen- cer MIDI. Si veda “Attivare e disattivare Local Control” (p. 155). Impostate inoltre il sequencer MIDI sul modo MIDI Thru (in modo che i messaggi ricevuti in MIDI IN vengano ritrasmessi da MIDI OUT senza essere modificati).
  • Seite 157: Impostazioni Del Canale Midi Send

    Local Off * L’HP107e riceve tutti i canali 1~16. * Quando utilizzate l’HP107e nel modo Dual (p. 139) o nel modo Split (p. 140), la mano sinistra dell’esecuzione viene tra- * Se collegate uno strumento Roland della serie MT, non è...
  • Seite 158: Appendice

    è stata cancellata. Avete selezionato Local Off? L’HP107e contiene la funzione Song Backup (p. 151) che vi permette di Se Local Control è impostato su OFF, non viene prodotto alcun suono memorizzare nello strumento la song registrata con l’HP107e. Utilizzate quando viene suonata la tastiera.
  • Seite 159: Messaggi Di Errore/Altri Messaggi

    Se ascoltate con le cuffie: Utilizzate un cavo di collegamento che non contiene una resistenza. In questo caso la causa potrebbe essere diversa. Contattate il vostro rivenditore o uno dei Centri Assistenza Tecnica Autorizzati Roland. Messaggi di Errore/Altri Messaggi Display Significato Brano dell’utente Memorizza le esecuzioni registrate (p.
  • Seite 160: Elenco Delle Operazioni

    HP107e – Elenco delle operazioni Elenco delle operazioni 12 13 Operazione Pulsanti Pagina Premete simultaneamente i pulsanti [Split] e [Chorus] e poi premete il pulsante [G]. [Split] + [Chorus] → Piano Resonance [Key Off] Local Control p. 155 [Split] + [Chorus] → Piano Resonance [String] Impostazioni del canale MIDI send p.
  • Seite 161: Principali Caratteristiche Tecniche

    Manuale dell’utente, “60 Classical Piano Masterpieces”, Guida all’installazione USB Accessori in dotazione CD-ROM (driver USB per pianoforte digitale Roland), cavo dell’alimentazione, gancio per cuffie * Al fine di migliorare il prodotto, le caratteristiche tecniche e/o l’aspetto dell’apparecchio sono soggetti a modifiche senza preavviso.
  • Seite 162 HP107e – Principali caratteristiche tecniche...
  • Seite 163: Características Principales

    Además, en el HP107e, se simula fielmente incluso el “clic” característico que se nota al pulsar una tecla en un piano de cola (“mecanismo de escape”).
  • Seite 164: Utilizar El Equipo De Forma Segura

    Roland. al establecimiento donde adquirió el equipo, al Centro de Servicio Roland más cercano, o a un dis- ......................tribuidor Roland autorizado, que aparecen lista- • Coloque siempre el equipo en posición horizontal dos en la página “Information”...
  • Seite 165 • Desconecte el cable de alimentación. con el Centro de Servicios Roland más cercano, o con un distribuidor Roland autorizado, que aparecen lis- • Desconecte todos los cables de equipos externos.
  • Seite 166: Precauciones Adicionales

    354b • No exponga el equipo a la luz solar directa, ni lo coloque será posible recuperar la información, y Roland no asu- cerca de dispositivos que desprendan calor, ni lo deje mirá ninguna responsabilidad concerniente a la pérdida dentro de un vehículo cerrado, ni lo someta a temperatu-...
  • Seite 167 ñarla o estropearla lo que podría provocar un funciona- miento anómalo. • No aplique fuerza excesiva sobre el atril cuando lo use. • Utilice un cable de Roland para realizar la conexión. Si utiliza cualquier otro cable de conexión, tenga en cuenta las siguientes precauciones.
  • Seite 168 HP107e – Contenido Contenido Utilizar el equipo de forma segura........162 Dividir el teclado en dos secciones para interpretaciones con cuatro manos (modo Twin Piano) ...........182 Notas importantes ............164 Capítulo 3. Tocar junto con las canciones internas ... 183 Cambiar el tempo ................183 Descripciones del panel ..........167...
  • Seite 169: Descripciones Del Panel

    Descripciones del panel Descripciones del panel Panel frontal 12 13 14 10 11 25 26 Power On 1. Conmutador [Power On] 14.Botón [Damper] Cambia la resonancia producida cuando se pulsa el pedal Activa y desactiva el equipo (p. 171). damper (p. 175). 2.
  • Seite 170: Panel Posterior

    Las interpretaciones de la mano izquierda de las cancio- nes internas se asignan a este botón. Este botón y el Alterna entre los modos de grabación-espera del HP107e siguiente [Right] se conocen en conjunto como los “boto- (p. 185~p. 187).
  • Seite 171: Antes De Empezar A Tocar

    Inserte el cable del pedal al conector Pedal del panel posterior del HP107e. 1. Inserte el cable de alimentación incluido a la toma de CA en el panel inferior del HP107e. 2. Conecte el cable de alimentación en una toma de corriente de pared.
  • Seite 172: Abrir/Cerrar La Tapa

    Presione y gire el gancho para los auriculares que se Para cerrar la tapa, tire de ella hacia usted y bájela entrega con el HP107e en el orificio de la parte inferior con cuidado después de extenderla por completo. del HP107e (consulte la figura inferior). Gire la palomilla del gancho para los auriculares para asegurarlo.
  • Seite 173: Activar Y Desactivar El Equipo

    El equipo se activará, y se iluminará el indicador Power rica. El HP107e simula esta resonancia por simpatía. que se encuentra en la parte frontal izquierda del HP107e. Puede cambiar la cantidad de resonancia aplicada con el pedal damper(p. 175).
  • Seite 174: Capítulo 1. Disfrutar De Las Canciones Internas

    I Seleccionar una canción y reproducirla Escuchar las canciones internas El HP107e se entrega con 68 canciones de piano internas. “Capítulo 3. Tocar junto con las canciones internas” en la p. 183, “Tone List” (p. 240) I Reproducir todas las canciones de manera...
  • Seite 175: Escuchar Las Canciones De Demostración

    Capítulo 1. Disfrutar de las canciones internas Escuchar las canciones de Botón con demostración Contenido de la demos- de función tración demostración Piano Resonance [Key Off] Demostración Key off p. 174 Demostración String Puede escuchar varias canciones de demostración, inclu- Piano Resonance [String] p.
  • Seite 176: Capítulo 2. Interpretación

    Puede ajustar el volumen del sonido que se escucha se reproduce un piano acústico. cuando se liberan las teclas en uno de los diez niveles dife- Puede guardar este ajuste en la memoria del HP107e con rentes. la función Memory Backup (p. 191).
  • Seite 177: Resonancia Al Pulsar El Pedal Damper (Damper Resonance)

    Se denomina función “Hammer Response”. 1. Mantenga pulsado el botón Piano Resonance Puede guardar este ajuste en la memoria del HP107e con [Damper], de forma que su indicador se ilumine. la función Memory Backup (p. 191).
  • Seite 178: Añadir Sensación De Profundidad Al Sonido (Grand Space)

    (Grand Space) auriculares (Grand Space) El HP107e incluye una función “Grand Space” que le permite También puede conseguir el tipo de profundidad sónica pro- conseguir sonidos con una sensación de profundidad como ducida con un piano de cola a través de los auriculares. Utili- en un piano acústico.
  • Seite 179: Añadir Vigor Al Sonido (Dynamic Emphasis)

    1. Pulse el botón [Reverb]. Puede guardar este ajuste en la memoria del HP107e con Se iluminará el indicador del botón y se aplicará un efecto la función Memory Backup (p. 191).
  • Seite 180: Transponer El Tono Del Teclado (Transpose)

    Utilizando la “función Transpose”, puede transponer la interpretación sin cambiar las notas que toca. Por ejemplo, Con el HP107e, puede seleccionar los sonidos perfectos para incluso si la canción tiene un tono difícil, con muchas notas complementar los sonidos de piano y tocarlos con los soni- sostenidas (#) o bemoles (b), puede transponerla a un tono dos de piano.
  • Seite 181: Cambiar El Balance De Volumen Al Interpretar Con Acoustic Layering

    Para volver al balance de volumen original, pulse los boto- nes [–] y [+] simultáneamente. Puede guardar este ajuste en la memoria del HP107e con la función Memory Backup (p. 191). 1. Mantenga pulsado el botón [Transpose] y pulse el botón [Split].
  • Seite 182: Tocar Diferentes Sonidos Con Las Manos Izquierda Y Derecha (Interpretación Split)

    HP107e – Capítulo 2. Interpretación Tocar diferentes sonidos con Cambiar el sonido que tocará con la mano derecha las manos izquierda y Cancele la interpretación Split y vuelva a seleccionar el derecha (Interpretación Split) sonido. En la interpretación Split, el pedal damper se aplicará...
  • Seite 183: Cambiar El Funcionamiento De Los Pedales Centrales

    Detener el metrónomo I Hacer sonar el metrónomo 5. Vuelva a pulsar el botón [Metronome/Count In], El HP107e dispone de un metrónomo integrado. con lo cual se apagará su indicador. Durante la reproducción de una canción, el metrónomo Se detendrá el metrónomo.
  • Seite 184: Dividir El Teclado En Dos Secciones Para Interpretaciones Con Cuatro Manos (Modo Twin Piano)

    HP107e – Capítulo 2. Interpretación Dividir el teclado en dos secciones para interpretaciones con cuatro manos (modo Twin Piano) Puede dividir el teclado en dos secciones por separado, permitiendo interpretar a dos personas en los mismos registros. G Con el modo Twin Piano activado, sucede lo siguiente: 1.
  • Seite 185: Capítulo 3. Tocar Junto Con Las Canciones Internas

    Escuchar un sonido de claqueta antes de empezar a repro- durante la canción. ducir la canción se denomina “Count-In”. En el HP107e, si reproduce una canción mientras el metró- Primero seleccione la canción que desea reproducir nomo suena, se escucharán dos compases de claqueta al (p.
  • Seite 186: Tocar Cada Mano Por Separado

    HP107e – Capítulo 3. Tocar junto con las canciones internas Tocar cada mano por Reproducir una canción 2. Pulse el botón [Play], de forma que su indicador se separado ilumine. La canción empezará a reproducirse. La parte seleccio- Las canciones internas le permiten seleccionar la parte de la nada en el paso 1 no sonará.
  • Seite 187: Capítulo 4. Grabar Su Interpretación

    Grabar una canción nueva • Sólo se puede grabar una canción. • El HP107e incluye la “función Song Backup” (p. 191), Aquí se graba sólo la interpretación del teclado sin inter- que le permite guardar la canción grabada con el pretar junto a una canción interna.
  • Seite 188: Grabar Junto Con Una Canción

    El HP107e incluye la “función Song Backup” (p. 191), cuando toque algo en el teclado, incluso si no pulsa el que le permite guardar la canción grabada con el HP107e en el mismo instrumento. botón [Play]. Al empezar así, no se reproduce sonido de claqueta.
  • Seite 189: Seleccionar Y Grabar La Pista Para Cada Mano Por Separado

    La grabación se detendrá, y los indicadores de los botones [Play] y [Rec] se apagarán. El grabador del HP107e tiene dos pistas de grabación, y le Su interpretación se ha grabado en el botón de la pista permite grabar las manos derecha e izquierda por sepa- especificada.
  • Seite 190: Capítulo 5. Cambiar Distintos Ajustes

    1. Pulse los botones [Split] y [Chorus] simultánea- Piano Resonance p. 192 [Damper] mente. El HP107e pasa al modo de ajustes. Los indicadores de los botones [Split] y [Chorus] y el botón en el que se Memory Backup asigna la función empiezan a parpadear. [Metronome/ p.
  • Seite 191: Cambiar El Temperamento

    Tonic unidad. Si interpreta con una afinación distinta a un tempera- * Puede guardar este ajuste en la memoria del HP107e con la mento equal, deberá especificar la nota tónica para afinar función Memory Backup (p. 191). la canción que se debe interpretar (es decir, la nota que...
  • Seite 192: Cambiar La Afinación Por Octavas (Octave Shift)

    (Función)” (p. 188), aparecerá una pan- talla como la siguiente. * Este efecto sólo funciona con los sonidos de piano. * Puede guardar este ajuste en la memoria del HP107e con la función Memory Backup (p. 191). I Cambiar la afinación por octavas (Octave Shift) Puede cambiar la afinación del sonido de la izquierda en...
  • Seite 193: Recuperar Los Ajustes Originales

    Si desactiva la alimentación antes de que se visua- recuperan su aspecto normal. lice podría dañar la memoria interna del HP107e, haciendo que * Puede seleccionar y reproducir canciones de las que se hayan el instrumento quede inutilizable.
  • Seite 194: Utilizar La Función V-Link

    Utilizar la función V-LINK Realizar los ajustes para el controlador USB Si conecta el HP107e a un dispositivo de imagen compatible con V-LINK podrá controlar las imágenes con el HP107e. Si desea conectarse a un ordenador con el conector USB, debe V-LINK realizar el siguiente ajuste antes de realizar la conexión.
  • Seite 195: Capítulo 6. Conectar Dispositivos Externos

    Output R/L (Line Out, Aux Out) Puede conectar dispositivos de audio para reproducir el sonido del HP107e a través de los altavoces de su sistema de audio, o para grabar su interpretación en un grabador de cin- HP107e tas u otro dispositivo de grabación.
  • Seite 196: Conectar Dispositivos Midi

    HP107e El indicador del botón volverá a su estado anterior. * Seleccione Local Off si ha conectado el HP107e a un secuencia- dor MIDI. Consulte la sección “Activar y desactivar Local Control” (p. 195). Además ajuste su secuenciador MIDI a modo MIDI Thru (de forma que los mensajes recibidos en MIDI IN serán retransmitidos sin cambios desde MIDI OUT).
  • Seite 197: Ajustes Del Canal De Envío Midi

    Local Off * El HP107e recibe todos los canales 1~16. * Si lo utiliza el HP107e en modo Dual (p. 179) o en modo Split (p. 180), la mano izquierda de la interpretación se transmite en * Al conectar un instrumento Roland MT series, no es necesario el canal 5 en modo Dual y en el canal 3 en modo Split.
  • Seite 198: Apéndices

    ¿El panel está bloqueado (p. 190)? El HP107e incluye la “función Song Backup” (p. 191), que le permite Desactive el equipo, luego vuélvalo a activar. guardar una canción grabada con el HP107e en el mismo instrumento.
  • Seite 199: Mensajes De Error/Otros Mensajes

    Solucionar Problemas Mensajes de error/Otros mensajes Pantalla Significado Canción de usuario. Almacena interpretaciones grabadas (p. 185). Usr. El “.” en la pantalla indica que ya existe material de interpretación grabado (p. 185). S.1~68 Número de canción interna (p. 172). S. U Se trata de una canción guardada con la función Song Backup (p.
  • Seite 200: Lista De Funcionamiento Fácil

    HP107e – Lista de funcionamiento fácil Lista de funcionamiento fácil 12 13 Nº Si quiere Botones Página Pulse los botones [Split] y [Chorus] simultáneamente y pulse el botón [G]. [Split] + [Chorus] → Piano Resonance [Key Off] Local Control p. 195 [Split] + [Chorus] →...
  • Seite 201: Especificaciones Principales

    Manual del Usuario, “60 Classical Piano Masterpieces” de Roland, guía de instalación USB, Accesorios CD-ROM (Controlador USB del piano digital de Roland), cable de alimentación, gancho para los auriculares * Con el objetivo de mejorar el producto, las especificaciones y/o el aspecto del equipo están sujetos a cambios sin previo aviso.
  • Seite 202 HP107e – Especificaciones principales...
  • Seite 203: Belangrijkste Kenmerken

    De HP107e voegt daar zelfs de typische “klik” aan toe die bij het indrukken van een toets op een akoestische vleugel optreedt (drukpuntsimulatie).
  • Seite 204: Veilig Gebruik Van Dit Product

    Roland erkende herstellingsdienst, uw Roland- ......................• Gebruik voor dit instrument enkel een rack of dealer of de verdeler (zie de “Information”- pagina): stand dat/die uitdrukkelijk door Roland wordt aanbevolen. • Wanneer de stekker of het netsnoer zichtbaar beschadigd is......................
  • Seite 205 WAARSCHUWING • Ga nooit op het apparaat staan en plaats er geen zware voorwerpen op. • In gezinnen met kleine kinderen moeten de ouders de kroost zo lang helpen bij het bedienen ......................van dit product tot de kinderen weten wat ze wel LET OP! en niet mogen doen.
  • Seite 206: Belangrijke Opmerkingen

    • Dit product kan de radio- of TV-ontvangst storen. Zet het getracht de geheugeninhoud te bewaren, maar een garan- daarom nooit in de buurt van dergelijke apparaten. tie hiervoor is er niet. Roland wijst elke aansprakelijkheid 352b • Als u in de buurt van dit product een draadloze telefoon, m.b.t.
  • Seite 207 • Behandel de muziekstandaard altijd met de nodige zorg. • Gebruik uitsluitend kabels van Roland voor de audiover- bindingen. Als u audiokabels van een ander merk gebruikt, moet u even het volgende in de gaten houden: •...
  • Seite 208 HP107e – Inhoud Inhoud Veilig gebruik van dit product ........202 Splitsen van het klavier in twee helften voor quatre-mainsstukken (Twin-mode) ....................222 Belangrijke opmerkingen..........204 Hoofdstuk 3. Meespelen met de interne stukken..223 Tempo instellen ....................223 Voorzieningen op de panelen........207 Weergave beginnen met een aftel ..........223 Aparte weergave van de twee partijen ............224...
  • Seite 209: Voorzieningen Op De Panelen

    Voorzieningen op de panelen Voorzieningen op de panelen Frontpaneel 12 13 14 10 11 25 26 Power On 1. [Power On]-schakelaar 14.[Damper]-knop Hiermee voorziet u het geluid van de typische resonan- Hiermee schakelt u het instrument in en uit (blz. 211). ties die bij gebruik van het demperpedaal optreden 2.
  • Seite 210: Achterpaneel

    Bovendien start/stopt u hiermee de opname (blz. 225~ 27.[Center Pedal]-knop blz. 227). Hiermee kunt u een andere functie aan het middelste 24.[Rec]-knop pedaal toewijzen (blz. 221). Hiermee maakt u de HP107e klaar voor de opname (blz. 225~blz. 227). Frontpaneel Achterpaneel Onderkant Achterpaneel 28.Pedal-connector...
  • Seite 211: Voorbereiding

    Gebruik van de lessenaar aan de stand zoals getoond op de connector aan de onderkant van de HP107e (achteraan) aan. 1. Houd de lessenaar met beide handen vast, terwijl Druk de stekker zo ver in de connector tot hij vastklikt.
  • Seite 212: Openen En Sluiten Van De Klep

    Leg de schroeven op een veilige plaats om ze later snel eventueel stuk. Zet het volume van de HP107e dus op de Opm. terug te vinden en te voorkomen dat kleine kinderen ze minimumwaarde alvorens een hoofdtelefoon aan te sluiten.
  • Seite 213: In- En Uitschakelen

    Het instrument wordt ingeschakeld en de stroomindica- andere snaren met de gespeelde noten beginnen mee te tor links aan de voorkant van de HP107e licht op. trillen. Zo wordt het geluid voller. Het demperpedaal van Enkele seconden later is het instrument beschikbaar en de HP107e simuleert dit fenomeen.
  • Seite 214: Hoofdstuk 1. Beluisteren Van De Interne Stukken

    HP107e – Hoofdstuk 1. Beluisteren van de interne stukken Hoofdstuk 1. Beluisteren van de interne stukken I Kiezen van het stuk dat u wilt beluisteren Luisteren naar de interne stukken De HP107e bevat 68 pianostukken. “Hoofdstuk 3. Meespelen met de interne stukken” op blz.
  • Seite 215: Luisteren Naar De Demosongs

    Hoofdstuk 1. Beluisteren van de interne stukken Luisteren naar de demo- Door een knop in te drukken selecteert u de bijbehorende demosong. U hoort dan telkens twee versies van de betref- songs fende demo: één mét de betreffende functie en één zónder. Uw instrument bevat verschillende stukken die de piano- en andere klanken evenals andere handige functies demonstre- ren.
  • Seite 216: Hoofdstuk 2. Zelf Spelen

    HP107e – Hoofdstuk 2. Zelf spelen Hoofdstuk 2. Zelf spelen Andere klanken kiezen Klankgroep kiezen De HP107e bevat 36 verschillende klanken (zgn. “Tones”) die in vijf groepen zijn onderverdeeld. De groepen selecteert u 1. Druk op een klankkeuzeknop. met de Tone-knoppen.
  • Seite 217: Respons Van De Demperresonantie

    (dynamiek) heeft geen enkele invloed op het noten beginnen te trillen. Hierdoor wordt het geluid vol- volume of de klankkleur: alle noten klinken even hard/ ler. Het demperpedaal van de HP107e simuleert dit feno- helder. meen. Dit heet ook wel “Sympathetic Resonance”.
  • Seite 218: Meer Diepte Voor Het Geluid (Grand Space)

    (Grand Space) hoofdtelefoon optimeren (Grand Space) De HP107e bevat een “Grand Space”-functie die voor een geluid zorgt dat qua diepte nauw aanleunt bij het geluid van Het diepte-effect kan tevens worden aangepast om zelfs bij een akoestische vleugel. Eén en ander wordt mogelijk dank- gebruik van een hoofdtelefoon nog optimaal over te komen.
  • Seite 219: Geluid Levendiger Maken (Dynamic Emphasis)

    [Reverb]-knop drukken (indicator dooft weer). De status en de intensiteit van het galmeffect kunt u in 1. Druk op de [Dynamic Emphasis]-knop (indicator een intern geheugen van de HP107e opslaan (blz. 231). moet oplichten). De “Dynamic Emphasis”-functie is nu actief en het geluid I Geluid ‘breder’...
  • Seite 220: Transponeren Van Het Klavier (Transpose)

    Met de Transpose-functie zorgt u dat een stuk in een andere toonaard wordt weergegeven dan degene waarin u het De HP107e is voorzien van een functie waarmee u heel een- speelt. Dat laat bv. toe om een stuk in een moeilijke toonaard...
  • Seite 221: Volumebalans Voor De 'Acoustic Layer'-Functie Instellen

    Om weer de oorspronkelijke balans te kiezen moet u de [–]- en [+]-knop samen indrukken. Deze instelling kunt u in een intern geheugen van de HP107e opslaan (blz. 231). 1. Houd de [Transpose]-knop ingedrukt, terwijl u op de [Split]-knop drukt.
  • Seite 222: Verschillende Klanken Voor De Linker-/Rechterhand (Split)

    HP107e – Hoofdstuk 2. Zelf spelen Verschillende klanken voor Andere klank voor de rechter helft kiezen Schakel de Split-mode even uit en kies vervolgens de de linker-/rechterhand (Split) benodigde klank. In de Split-mode heeft het demperpedaal aanvankelijk U kunt via de linker klavierhelft een andere klank bespelen alleen betrekking op de rechter klavierhelft.
  • Seite 223: Functie Van Het Middelste Pedaal Kiezen

    5. Druk nog een keer op de [Metronome/Count In]- I Werken met de metronoom knop om te zorgen dat zijn indicator weer dooft. De HP107e bevat een metronoom. De metronoom stopt. Indien nodig, tikt de metronoom tijdens de weergave van I Metronoomvolume wijzigen een stuk in de maat (Beat) en het tempo van dat stuk.
  • Seite 224: Splitsen Van Het Klavier In Twee Helften Voor Quatre-Mainsstukken (Twin-Mode)

    HP107e – Hoofdstuk 2. Zelf spelen Splitsen van het klavier in twee helften voor quatre- mainsstukken (Twin-mode) Het klavier kan in twee aparte secties worden verdeeld, zodat twee pianisten tegelijk in hetzelfde register kunnen spelen. G In de Twin-mode worden de volgende dingen ingesteld: 1.
  • Seite 225: Hoofdstuk 3. Meespelen Met De Interne Stukken

    Deze aftel is beschikbaar, wanneer u vóór het starten van de weergave de metronoom activeert. In dat geval telt de HP107e twee maten af en start hij ver- volgens de weergave. Weergave tijdens de aftel: “–2” (nog twee maten), “–1”...
  • Seite 226: Aparte Weergave Van De Twee Partijen

    HP107e – Hoofdstuk 3. Meespelen met de interne stukken Aparte weergave van de Weergave starten 2. Druk op de [Play]-knop (indicator moet oplich- twee partijen ten). De weergave van het stuk begint. De partij, die u in stap 1 U kunt zelf bepalen welke partij(en) van de interne stukken gekozen hebt, wordt niet afgespeeld.
  • Seite 227: Hoofdstuk 4. Zelf Iets Opnemen

    Ziehier hoe u kunt opnemen zonder begeleiding van een • Intern is er plaats voor één opname. intern stuk. • De HP107e bevat een songgeheugen (blz. 231) waarin u het laatst opgenomen stuk intern kunt opslaan. Opna- men, die u niet opslaat, worden gewist, zodra u het instrument uitschakelt.
  • Seite 228: Opnemen Tijdens De Weergave Van Een Intern Stuk

    [Left]-knop drukken; wilt u de partij van de rechter- hand zelf spelen, dan moet u op de [Right]-knop drukken. De indicators van de ingedrukte knop en de [Play]-knop knipperen. De HP107e is nu klaar voor de opname. Als de “dEL”-boodschap in het display verschijnt, zie dan blz. 225.
  • Seite 229: Aparte Opname Van De Linker- En Rechterhand

    2 vervolgen en die partij eveneens inspelen. Tijdens de tweede opname hoort u dan de daar- We hadden het er al over dat de Recorder van de HP107e net opgenomen partij. twee sporen biedt. Daar zou u gebruik van kunnen maken...
  • Seite 230: Hoofdstuk 5. Andere Handige Functies

    HP107e – Hoofdstuk 5. Andere handige functies Hoofdstuk 5. Andere handige functies Geavanceerde instellingen Knop Functie blz. (functies) Local-functie Piano Resonance blz. 235 Er zijn nog een aantal verborgen functies die u als volgt [Key Off] instelt: Oproepen van de functiemode MIDI-zendkanaal 1.
  • Seite 231: Algemene Stemming (Master Tune)

    (tonica voor majeur en sixt voor mineur) instellen om de juiste toonaard te kie- * Deze instelling kunt u in een intern geheugen van de HP107e zen. opslaan (blz. 231). Houd de [E. Piano]-knop ingedrukt, terwijl u op de I Ander stemmingssysteem kiezen toets van de noot drukt, die als tonica moet fungeren.
  • Seite 232: Toonhoogte In Octaven Transponeren (Octave Shift)

    (blz. 228) op de [Grand Space]-knop. Het display nosolo’s. toont nu bv. de volgende waarde. FabrieksinstellingOn * Deze instelling is enkel beschikbaar voor pianoklanken. * Deze instelling kunt u in een intern geheugen van de HP107e opslaan (blz. 231). Instel- Omschrijving I Toonhoogte in octaven transponeren (Octave...
  • Seite 233: Laden Van De Fabrieksinstellingen (Factory Reset)

    Opslaan van uw laatste (Factory Reset) opname (Song Backup) Indien nodig, kunt u voor alle parameters van de HP107e Bij het uitschakelen van de HP107e wordt uw opname weer opnieuw de fabriekswaarden kiezen. gewist, tenzij u ze eerst in een speciaal daarvoor bedoeld geheugen opslaat.
  • Seite 234: V-Link-Functie Gebruiken

    V-LINK-functie gebruiken Instellingen voor de USB- driver Door de HP107e op een V-LINK-compatibel videoapparaat aan te sluiten kunt u de beeldweergave vanop de HP107e Alvorens de USB-poort op een computer aan te sluiten moet beïnvloeden. u eerst het volgende instellen.
  • Seite 235: Hoofdstuk 6. Werken Met Externe Apparaten

    2. Schakel de HP107e in. Input R/L (Line In, Aux In) 3. Regel het volume op het externe apparaat. * Op de HP107e zelf kunt u het volume van het externe appa- raat niet bijregelen. HP107e Uitschakelen 1. Zet het volume van de HP107e en de externe appa- raten op de minimumwaarde.
  • Seite 236: Midi-Apparaten Aansluiten

    Functiemode verlaten 4. Druk op de [Split]- of [Chorus]-knop. * Schakel de Local-functie uit, wanneer u de HP107e op een De indicator van die knop werkt nu weer “normaal”. MIDI-sequencer aansluit. Zie ook “Local-functie: verbinding tussen het klavier en de klankbron”...
  • Seite 237: Midi-Zendkanaal Instellen

    * De HP107e ontvangt op alle MIDI-kanalen (1~16). * Als u de HP107e in de Dual- (blz. 219) of Split-mode * Als u een MT-sequencer van Roland aansluit, hoeft u de (blz. 220) gebruikt, worden de data van de linker klankkeuze- Local-functie niet handmatig uit te schakelen.
  • Seite 238: Appendix

    Reverb-volume. [Chorus]-knop (blz. 228, blz. 234). Bij gebruik van de luidsprekers: In dit geval ligt het probleem bij de HP107e zelf (met name bij de Soms vallen er noten weg De HP107e kan maximaal 128 noten tegelijk weergeven.
  • Seite 239: Fout- En Andere Boodschappen

    Fout- en andere boodschappen Fout- en andere boodschappen Display Betekenis Stuk in het “Usr”-geheugen. Dit geheugen bevat het stuk dat u zelf opneemt (blz. 225). Usr. Een “.” in het display betekent dat het User-geheugen al data bevat (blz. 225). S.1~68 Slaat op een intern stuk (blz.
  • Seite 240: Overzicht Van De Beschikbare Functies

    HP107e – Overzicht van de beschikbare functies Overzicht van de beschikbare functies 12 13 U wilt… Knoppen blz. Druk de [Split]- en [Chorus]-knop samen in en druk vervolgens op [G]. [Split] + [Chorus] → Piano Resonance [Key Off] Local-functie blz. 235 [Split] + [Chorus] →...
  • Seite 241: Specificaties

    1425 (B) x 536 (D) x 1.083,5 (H) mm (lessenaar opgeklapt) Gewicht 82kg (met pianostand) Handleiding, “60 Classical Piano Masterpieces”, USB-installatiehandboek, Accessoires CD-ROM (USB-driver voor digitale Roland-piano’s), netsnoer, hoofdtelefoonhaak * Wijzigingen van de specificaties en de afwerking zonder voorafgaande kennisgeving voorbehouden.
  • Seite 242: Tone List

    Tone List Tone List Piano Strings Grand Piano 1 Strings 1 Mellow Piano 1 Jazz Scat Honky-tonk Orchestra Mellow Piano 2 Choir Grand Piano 2 Strings 2 Detuned Piano Voice Oohs Rock Piano Glittery Pad Acoustic Bass Acoustic Bass + Cymbal 10 Fingered Bass E.Piano 11 Vox Bass...
  • Seite 243: Built-In Song List

    Built-in Song List Song Song Name Composer Copyright S. 1 Scherzo No.2 (Except) F. Chopin © 2004 Roland Corporation S. 2 La Fille aux Cheveux de Lin C. Debussy © 2004 Roland Corporation S. 3 La Campanella F. Liszt © 2004 Roland Corporation F.
  • Seite 244 His writing credits include commercial music for BBC radio and television, as well as scoring jazz and classical works. Having been a product specialist for Roland U.K., John is now actively involved in music software composing/ programming for both Roland Japan and various music publishers. Quite recently his “Musical Picture Book,” a volume of original piano music encompassing all standards of musical ability, which included the piano and orchestral accompaniment data in SMF format, was published and printed.
  • Seite 245: Midi Implementation Chart

    Built-in Song List MIDI Implementation Chart DIGITAL PIANO Date : Mar. 1, 2004 MIDI Implementation Chart Model HP107e Version : 1.00 Transmitted Recognized Remarks Function... Basic Default 1—16 1—16 Channel Changed — Default Mode 3 Mode 3 Mode Messages Altered...
  • Seite 246 Built-in Song List...
  • Seite 247: Federal Communications Commission Radio Frequency Interference Statement

    For EU Countries This product complies with the requirements of European Directives EMC 89/336/EEC and LVD 73/23/EEC. For the USA FEDERAL COMMUNICATIONS COMMISSION RADIO FREQUENCY INTERFERENCE STATEMENT This equipment has been tested and found to comply with the limits for a Class B digital device, pursuant to Part 15 of the FCC Rules.
  • Seite 248 RES 408-04 602.00.0058 E/D/F/It/Sp/Ol...
  • Seite 249 Traducido por www.caballeria.com...

Inhaltsverzeichnis