Herunterladen Inhalt Inhalt Diese Seite drucken

be cool BC12KL2201FW Bedienungsanleitung

Mobiles klimagerät
Vorschau ausblenden Andere Handbücher für BC12KL2201FW:

Werbung

Verfügbare Sprachen

Verfügbare Sprachen

BEDIENUNGSANLEITUNG
VIELEN DANK, DASS SIE SICH FÜR EIN PRODUKT VON BECOOL ENTSCHIEDEN
Diese Bedienungsanleitung gibt es in folgenden Sprachen
DEUTSCH
ENGLISH
NUR FÜR DAS BE COOL-SERVICECENTER
Reparaturanweisungen für Geräte die R290 enthalten
Mobiles Klimagerät
BC12KL2201FW
HERZLICHEN GLÜCKWUNSCH!
HABEN.
S. 1
Seite 2
15
Seite 16
29
Seite 30
35

Werbung

Inhaltsverzeichnis
loading

Inhaltszusammenfassung für be cool BC12KL2201FW

  • Seite 1 VIELEN DANK, DASS SIE SICH FÜR EIN PRODUKT VON BECOOL ENTSCHIEDEN HABEN. Diese Bedienungsanleitung gibt es in folgenden Sprachen DEUTSCH Seite 2 ENGLISH Seite 16 NUR FÜR DAS BE COOL-SERVICECENTER Seite 30 Reparaturanweisungen für Geräte die R290 enthalten S. 1...
  • Seite 2 LESEN SIE BITTE DIE BEDIENUNGSANLEITUNG SORGFÄLTIG DURCH BEVOR SIE MIT MONTAGE, INSTALLATION, BEDIENUNG ODER WARTUNG BEGINNEN. SCHÜTZEN SIE SICH SELBST UND ANDERE, INDEM SIE DIE SICHERHEITSHINWEISE BEFOLGEN. DIE NICHTBEACHTUNG VON ANWEISUNGEN KÖNNTE ZU PERSONEN UND/ODER SACHSCHÄDEN UND/ODER ZUM VERLUST DES GARANTIEANSPRUCHS FÜHREN! WICHTIGE INFORMATIONEN ZUR SICHERHEIT, STANDORT UND ZUM ELEKTRISCHEN...
  • Seite 3 Halten Sie einen Mindestabstand von mind. 50cm zu brennbaren Stoffen (z.B. Alkohol, u.ä.) oder unter Druck befindlichen Gefäßen (z.B. Sprühbehälter) ein. Benutzen Sie das Klimagerät nicht in der Nähe von Wasser oder starker Feuchtigkeit, z.B. im feuchten Keller, neben Schwimmbecken, Badewanne oder Dusche. Achten Sie darauf, dass kein Wasser in das Gerät eindringt.
  • Seite 4: Entsorgung Der Batterien

    Umgebung oder wenden Sie sich an den Händler, bei dem das Produkt gekauft wurde. KONFORMITÄTSERKLÄRUNG Hiermit bestätigen wir, dass dieser Artikel den grundlegenden Anforderungen, Vorschriften und Richtlinien der EU entspricht. Die ausführliche Konformitätserklärung können Sie jederzeit unter folgendem Link einsehen: www.becool.at.at/downloads/doc/bc12kl2201fw.pdf Irrtümer und technische Änderungen vorbehalten. www.becool.at S. 4...
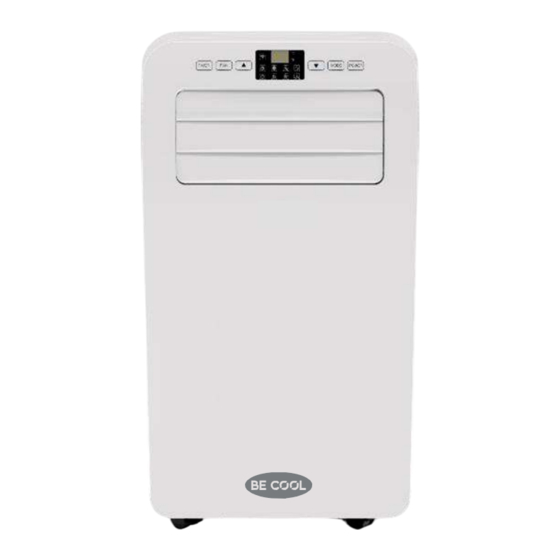
  • Seite 5: Beschreibung Des Gerätes Und Lieferumfang

    BESCHREIBUNG DES GERÄTES UND LIEFERUMFANG Tragegriff Lufteinlassgitter (L) Bedienelement Luftauslass Laufrollen Fernbedienung Lufteinlassgitter (R) Luftauslass Kondenswasserauslass 10. Lufteinlassgitter 11. Abluftschlauch 12. Fensterhalterung + Dichtungsplatte BEDIENFELD UND FERNBEDIENUNG S. 5...
  • Seite 6: Aufstellung Und Installation

    Ein- und Aus-Taste Drücken Sie die Taste , um die Klimaanlage Ein- und Aus zu schalten. Modus-Taste Drücken Sie die Taste, um Kühl-, Lüfter-, Entfeuchtungs-Modus auszuwählen. Temperatur-/Zeiteinstellungstaste Drücken Sie die Taste im Kühlmodus, um die Einstelltemperatur zu erhöhen oder reduzieren. Drücken Sie sie im Timer-Modus, um die Timer -ON / OFF-Zeit anzupassen;...
  • Seite 7 Installation Schrauben Sie den Abluftschlauch in den Luftauslass hinter der Platte (gegen den Uhrzeigersinn). Führen Sie den Abluftschlauch in die Dichtungspallte ein, stellen Sie die Öffnungsbreite des Fensters so ein, dass das Fenster richtig mit der Dichtungsplatte übereinstimmt; die Länge der Dichtungsplatte ist einstellbar. S.
  • Seite 8 Falsche Installation Es ist wichtig, den Abluftschlauch glatt zu halten. Eine falsche Installation beeinträchtigt die Leistung der Klimaanlage. Vermeiden Sie, dass sich der Abluftschlauch stark verbiegt. Stellen Sie sicher, dass die Luft reibungslos in den Schlauch fließen kann. Warnung: Der Abluftschlauch ist speziell für dieses Modell ausgelegt.
  • Seite 9: Funktionen Einstellen

    FUNKTIONEN EINSTELLEN Kühlmodus Wenn die Klimaanlage automatisch in den Kühlmodus wechselt oder nach dem Einschalten der Kühlmodus ausgewählt wird, leuchtet die Kühlanzeigeleuchte auf. Drücken Sie die Up/Down-Taste, um die Einstelltemperatur einzustellen (16°C~ 30°C). Drücken Sie die Geschwindigkeitstaste, um niedrige/mittlere/höhere Geschwindigkeitstufen auszuwählen. Lüftermodus Wenn Sie die Modustaste drücken oder den Lüftermodus durch...
  • Seite 10: Reinigung Und Wartung

    Hinweis: Wenn Sie die Entfeuchtungsfunktion verwenden, sollten Sie die Komponenten des Austrittsrohrs entfernen, da dies sonst zu einer schlechteren Entfeuchtungsleistung führt und "FL" Wasser-Voll - Alarm erscheint) Timer-Modus Drücken Sie im Standby-Zustand die Timer-Taste, um die EIN-Zeit einzustellen. Drücken Sie die Tasten Up und Down, um die EIN-Zeit (1 - 24H) einzustellen;...
  • Seite 11: Saisonale Reinigung

    Mit weichem, feuchtem Tuch abwischen. Verwenden Sie kein chemisches Mittel wie Benzol, Alkohol und Benzin usw., da sonst die Oberfläche der Klimaanlage und sogar die gesamte Klimaanlage beschädigt wird. Verhindern Sie, dass Wasser in die Klimaanlage spritzt. Filter Reinigung Waschen Sie das Filtersieb alle zwei Wochen. Wenn es durch Staub blockiert wird, wird die Leistung der Klimaanlage verringert.
  • Seite 12 Smart Home Wi-Fi Verbindungsanleitung App Installation Laden Sie sich die vom Play Store (Android) oder dem App Store (iOS) herunter. Über den folgenden QR gelangen Sie direkt zum App-Download: Ein Gerät mit dem Netzwerk verbinden: 1. Das zu verbindende Gerät einschalten und am Gerät 5 Sekunden lang auf den 3.
  • Seite 13: Fehlerbehebung

    FEHLER Fehlererkennung Fehlererkennungs- Multifunktionale Fehler code Fehler des Temperatursensors der Spule Fehler des Innentemperatursensors Frostschutz: Die Temperatur der Spule ist zu niedrig und die gesamte Klimaanlage ist ausgeschaltet. Bei Temperaturüberschreitungen von 8°C wird der Schutz wieder freigegeben und der vorherige Arbeitszustand wird wiederhergestellt.
  • Seite 14 Wenn die Klimaanlage nicht ordnungsgemäß funktioniert, schalten Sie sie aus und trennen Sie den Stecker und wenden Sie sich dann an professionelles Wartungspersonal. Die oben genannten technischen Parameter können ohne vorherige Ankündigung UND WARTUNG geändert werden. Technische Informationen Artikelnummer BC12KL2201FW Kühlleistung 12.000BTU Max. Leistungsaufnahme Eingangsspannung 220-240V~ Frequenz 50Hz Kältemittel/Füllung/GWP...
  • Seite 15: Garantie

    GARANTIE Mit diesem Qualitätsprodukt von BECOOL haben Sie eine Entscheidung für Innovation, Langlebigkeit und Zuverlässigkeit getroffen. Für dieses BECOOL Gerät gewähren wir eine Garantiezeit von 2 Jahren ab Kaufdatum gültig in Österreich! Sollten in diesem Zeitraum wider Erwarten dennoch Servicearbeiten an Ihrem Gerät notwendig sein, garantieren wir Ihnen hiermit eine kostenlose Reparatur (Ersatzteile und Arbeitszeit) oder (nach Ermessen der Firma Schuss) das Produkt auszutauschen.
  • Seite 16 PLEASE READ THE INSTRUCTION MANUAL CAREFULLY BEFORE STARTING ASSEMBLY, INSTALLATION, OPERATION OR MAINTENANCE. PROTECT YOURSELF AND OTHERS BY FOLLOWING THE SAFETY INSTRUCTIONS. FAILURE TO COMPLY WITH INSTRUCTIONS COULD RESULT IN PERSONS AND / OR PROPERTY DAMAGES AND / OR LOSS OF THE WARRANTY CLAIM! IMPORTANT INFORMATION ON SAFETY, LOCATION AND ELECTRICAL CONNECTION.
  • Seite 17 Maintain the air conditioner in good condition by caring for and cleaning the unit. The air filter should be cleaned at least once a week. Store the device vertically in a safe place, dry and out of the reach of children, when not in use. Do not cover the device with plastic packaging.
  • Seite 18: Disposal Of The Batteries

    We hereby confirm that this article complies with the essential requirements, regulations and directives of the EU. The detailed declaration of conformity can be viewed at any time under the following link: www.becool.at.at/downloads/doc/bc12kl2201fw.pdf Errors and technical changes reserved. www.becool.at S. 18...
  • Seite 19 PRODUCT INSTRUCTION MAIN PART AND COMPNENTES Handle Air inlet (L) Control panel Wind guide bar Caster Remote controller Air inlet (R) Air outlet Dehumidification drainage nozzle Air inlet grille Exhaust duct assembly Window sealing plate assembly S. 19...
  • Seite 20 CONTROL PANEL AND REMOTE CONTROLLER 1. Power key Press the key to turn ON/OFF the A/C. 2. Mode key Press the key to choose cooling,wind ,dehumidification andheating(cooling only model has no heating) mode. 3. Temperature/ time adjusting key Press the key at cooling mode to increase/reduce the setting temperature;...
  • Seite 21: Product Operation

    PRODUCT OPERATION PLACEMENT AND INSTALLATION Placement Place it at even and dry place, and keep it at least 50cm away from its surrounding object. Installation Screw the exhaust duct assembly in the air outlet behind the panel (anticlockwise). Insert the air exhaust hose into the window sealing plate, adjust opening width of window so that the window can match with the sealing plate properly;...
  • Seite 22 Incorrect installation important to keep the exhaust duct smooth. Incorrect installation will affect work of the A/C. Prevent the exhaust duct from seriously bending. Ensure air can flow smoothly in the duct. Warning: The exhaust duct is designed especially for this model.
  • Seite 23: Operation Method

    OPERATION METHOD Cooling mode When the A/C enters cooling mode automatically or cooling mode is selected after power ON, the cooling indicator lamp lights up. Press Up/Down key to adjust setting temperature (16 ~30 ). Press Speed key to choose High/Mid/Low speed. Fan mode When pressing mode key or choosing Fan mode by pressing the remote controller, the wind indicator lamp lights up.
  • Seite 24: Clean And Maintenance

    CLEAN AND MAINTENANCE Drainage Methode This product is equipped with automatic water vaporization system. The condenseris cooled with the circulating of condensing water, so as to improve cooling efficiency and save energy. If the internal vessel is full of water, the display screen will display and the compressor stops working automatically.
  • Seite 25 Take out the air inlet grille and pull out the filter screen at both sides according to thedirection shown in the following figures. Put the filter screen into the warm water (about 40 ) added with neutral detergent,dry it at a shady place after cleaning. SEASONAL CLEANING If the A/C will not be used for a long time: Pull out the water wedge to drain.
  • Seite 26 2. The system automatically recognises your country / area. You can also select your country code manually. Enter your mobile phone number/ email address and tap 3. If you choose the mobile phone number option, then enter the verification code in the finish your registration.
  • Seite 27: Troubleshooting

    Note: When device is online, it can be controlled. When device is offline, it COMMON FAILURES AND DIAGNOSIS INTELLIGENT ERROR DETECTION Error-detecting Multi-functional defection code Error of the temperature sensor Error of indoor temperature sensor Anti-freezing protection: temperature of the coil is too low and the whole A/C is off.
  • Seite 28 Notice: When there is any abnormal to the A/C, turn it off and unplug, and then contact professional maintenance personnel. The above technical parameters are subject to change without notice. Technical information Item no. BC12KL2201FW Cooling performance 12.000Btu Max. power consumption Input voltage...
  • Seite 29: Warranty

    WARRANTY By purchasing a BECOOL quality product you have acquired an innovative, long lasting and reliable item. For this BECOOL device we grant a warranty of 2 years from the date of purchase, valid in Austria only. In the unlikely event that service work is required on your device in this period we warrant free repair (spare parts and labour) or economical perspective we reserve the right to issue a credit based on current value.
  • Seite 30 WICHTIG! Diese Anweisungen sind nur für das BECOOL-Servicecenter! Der Service bzw. die Reparatur darf nur von einem qualifizierten Kältemitteltechniker, dem es erlaubt ist das R290-Kältemittel handzuhaben, durchgeführt werden. Versuchen Sie daher niemals das Gerät selbst zu reparieren oder das Gehäuse zu öffnen, dies führt zum sofortigen Verlust des Garantieanspruchs.
  • Seite 31 No person carrying out work in relation to a refrigeration system which involves exposing any pipe work that contains or has contained flammable refrigerant shall use any sources of ignition in such a manner that it may lead to the risk of fire or explosion.
  • Seite 32 Check that cabling will not be subject to wear, corrosion, excessive pressure, vibration, sharp edges or any other adverse environmental effects. The check shall also take into account the effects of aging or continual vibration from sources such as compressors or fans. 5 DETECTION OF FLAMMABLE REFRIGERANTS Under no circumstances shall potential sources of ignition be used in the searching for or detection of refrigerant leaks.
  • Seite 33 recovery process is supervised at all times by a competent person; recovery equipment and cylinders conform to the appropriate standards. Pump down refrigerant system, if possible. If a vacuum is not possible, make a manifold so that refrigerant can be removed from various parts of the system.
  • Seite 34 Unventilated (see Clause GG.2) Safety of the appliance does not depend on ventilation of the housing. Switching off the appliance or opening of the housing has no significant effect on the safety. Nevertheless, it is possible that leaking refrigerant may accumulate inside the enclosure and flammable atmosphere will be released when the enclosure is opened.
  • Seite 35 Evacuate the refrigerant circuit. o Purge the refrigerant circuit with nitrogen for 5 min. o Evacuate again. Cut out the compressor and drain the oil. Transportation, marking and storage for units that employ flammable refrigerants Transport of equipment containing flammable refrigerants Attention is drawn to the fact that additional transportation regulations may exist with respect to equipment containing flammable gas.

Inhaltsverzeichnis