Herunterladen Inhalt Inhalt Diese Seite drucken
bora PI 11-000 Montage- Und Bedienungsanleitung

bora PI 11-000 Montage- Und Bedienungsanleitung

Induktions-glaskeramikkochfeld mit schaltkasten
Inhaltsverzeichnis

Werbung

Verfügbare Sprachen
  • DE

Verfügbare Sprachen

  • DEUTSCH, seite 1
All manuals and user guides at all-guides.com
Induktions-Glaskeramikkochfeld
mit Schaltkasten
m
m
m
m
Montage- und Bedienungsanleitung
PI 11-000

Werbung

Inhaltsverzeichnis
loading

Inhaltszusammenfassung für bora PI 11-000

  • Seite 1 All manuals and user guides at all-guides.com Induktions-Glaskeramikkochfeld mit Schaltkasten PI 11-000 Montage- und Bedienungsanleitung...
  • Seite 2 All manuals and user guides at all-guides.com Liebe BORA-Kundin, lieber BORA-Kunde Wir danken Ihnen, dass Sie sich für den Kauf eines unserer Produkte entschieden haben. Ihr Gerät genügt hohen Ansprüchen und seine Bedienung ist einfach. Nehmen Sie sich trotzdem Zeit, diese Montage- und Bedienungsanleitung zu lesen. So werden Sie mit dem Gerät vertraut und können es optimal und störungsfrei...
  • Seite 3: Inhaltsverzeichnis

    All manuals and user guides at all-guides.com Inhalt Montage ....................5 Vor dem Einbau ............. 5 Flächenbündiger Einbau des Kochfeldes ....5 Einbau des Kochfeldes in den Ausschnitt einer Arbeitsplatte ........7 Einbau des Schaltkastens in die Blende des Unterschrankes......9 Einbau ................
  • Seite 4 All manuals and user guides at all-guides.com ... Inhalt Pflege und Wartung ................28 Reinigung ..............28 Reinigung der Glaskeramikfläche........ 28 Reinigung der Knebel ..........29 Störungen selbst beheben ..............30 Was tun, wenn ............30 Entsorgung.................... 32 Reparatur-Service ................. 32 Notizen....................
  • Seite 5: Montage

    All manuals and user guides at all-guides.com Montage Vor dem Einbau ■ Das Einbau-Kochfeld ist zum Einsetzen in den Ausschnitt einer Arbeitsplatte vorgesehen. Der zugehörige Schaltkasten wird in die Unterschrankblende eingebaut. ■ Das Gerät darf nur gemäß den nachfolgend angeführten Installations- vorgaben eingebaut und an das Stromnetz angeschlossen werden.
  • Seite 6: Arbeitsplatten-Ausschnitt

    All manuals and user guides at all-guides.com ... Montage Ausschnittmaße beim Einbau von Kochfeldern bzw Kochfeldern und des BORA- Kochfeldabzuges nebeneinander: BORA- Arbeitsplatten-Ausschnitt Kochfelder Kochfeld- abzug 1114 1086 1224 1196 1334 1306 Rückwand Zwischen den Kochfeldern bzw. den Kochfeldern und dem BORA-Kochfeldabzug...
  • Seite 7: Einbau Des Kochfeldes In Den Ausschnitt Einer Arbeitsplatte

    All manuals and user guides at all-guides.com ... Montage Einbau des Kochfeldes in den Ausschnitt einer Arbeitsplatte Abstand von der Ausschnittkante zu Rück- und Seitenwand mindestens 65 mm. ■ Bei Einbaumöbeln muss der Kunststoffbelag bzw. das Furnier mit hitze- beständigem Kleber verarbeitet sein, sonst kann er sich, insbesondere an den Schmalseiten, verformen oder lösen.
  • Seite 8 All manuals and user guides at all-guides.com ... Montage Ausschnittmaße beim Einbau von Kochfeldern bzw Kochfeldern und des BORA- Kochfeldabzuges nebeneinander: Arbeitsplatten- BORA- Ausschnitt Kochfelder Kochfeld- abzug 1086 1196 1306 Rückwand Zwischen den Kochfeldern bzw. den Kochfeldern und dem BORA-Kochfeldabzug...
  • Seite 9: Einbau Des Schaltkastens In Die Blende Des Unterschrankes

    All manuals and user guides at all-guides.com ... Montage Einbau des Schaltkastens in die Blende des Unterschrankes Oberseite Arbeitsplatte Arbeitsplatte Blende Die vier Bohrungen für den Schaltkasten mittig zum Kochfeld anbringen. Unterhalb des Schaltkastens ist ein Kabelschutzboden (Zwischen- boden) anzubringen. Im rückwärtigen Bereich ist eine Öffnung von 100 mm über die gesamte Unterschrankbreite vorzusehen.
  • Seite 10: Flächenbündiger Einbau Des Kochfeldes

    Silikonkleber den Klebe- spalt schließen. Überstehenden Silikonkleber mit einer Spachtel ab- ziehen. Einbau des Kochfeldes in den Ausschnitt einer Arbeitsplatte ► Das Kochfeld in den Ausschnitt einsetzten und mit den Spannelementen befestigen. Das Einbau-Kochfeld so einbauen, dass der BORA-Schriftzug hinten rechts ist.
  • Seite 11: Einbau Des Schaltkastens In Die Blende Des Unterschrankes

    All manuals and user guides at all-guides.com ... Montage Einbau des Schaltkastens in die Blende des Unterschrankes Vor dem Einsetzen und Befestigen des Schaltkastens in den Unterschrank den Elektroanschluss herstellen – siehe Abschnitt Elektroanschluss. ► Mit den beiliegenden Ausgleichsplatten eine Blendendicke von insgesamt 36 mm einstellen.
  • Seite 12 All manuals and user guides at all-guides.com ... Montage ► Linsen (rot) in die Leitungsstufenmanschetten einstecken. ► Schalkasten mit aufgestecken Ausgleichsplatten von hinten her in die Blende stecken. Auf der Vorderseite die beiden Leistungsstufenmanschetten auf- stecken und mit den beiliegenden Muttern und mittels des beiliegenden Befestigungsbügels befestigen.
  • Seite 13 All manuals and user guides at all-guides.com ... Montage ► Knebel aufstecken und Maß 18,5 mm in 0-Stellung kontrollieren. Blende Leistungsstufen- Sechskant- manschette Stiftschlüssel Knebel ► Falls die beiden Knebel nicht gleich weit von der Leistungs- stufenmanschette wegstehen, die Stellschraube im Knebel- schaft mit beiliegendem Sechskant-Stiftschlüssel so justieren, dass beide Knebel 18,5 mm Abstand haben (siehe oben- stehende Zeichnung).
  • Seite 14: Elektroanschluss

    ■ Falls das Gerät über Stecker angeschlossen wird, muss dieser nach der Montage des Gerätes noch zugänglich sein. ■ Wenn die Anschlussleitung beschädigt wurde, muss diese durch eine besondere ersetzt werden. Dies darf nur durch einen von der BORA Lüftungstechnik GmbH autorisierten Reparaturservice erfolgen. CE: Diese Geräte entsprechen den folgenden EG-Richtlinien:...
  • Seite 15: Sicherheitshinweise

    Betriebsstörungen führen. Beachten Sie bei einer Betriebsstörung an Ihrem Gerät oder im Falle eines Reparaturauftrages die Hinweise unter «Reparatur- Service». Wenden Sie sich bei Bedarf an die BORA Lüftungstechnik GmbH. ■ Das Gerät darf nicht zum Beheizen des Raumes verwendet werden.
  • Seite 16: Zum Gebrauch

    Geräten. Achten Sie auf gute Raumlüftung. ■ Wenn das Gerät sichtbare Beschädigungen aufweist, nehmen Sie es nicht in Betrieb und wenden Sie sich an die BORA Lüftungstechnik GmbH. ■ Sobald eine Funktionsstörung entdeckt wird oder durch extreme mechanische Einwirkungen Risse an der Oberfläche auftreten, muss das Gerät sofort ausser Betrieb genommen werden.
  • Seite 17: So Vermeiden Sie Schäden Am Gerät

    All manuals and user guides at all-guides.com ... Sicherheitshinweise So vermeiden Sie Schäden am Gerät Die Oberfläche ist gegenüber Hitze (bis 650 °C) und Temperaturschwan- kungen unempfindlich und in gewissen Grenzen schlag- und kratzfest. Beachten Sie bitte trotzdem die nachfolgenden Hinweise, um Schäden zu vermeiden.
  • Seite 18: Vorsicht, Verbrennungs-/Brandgefahr

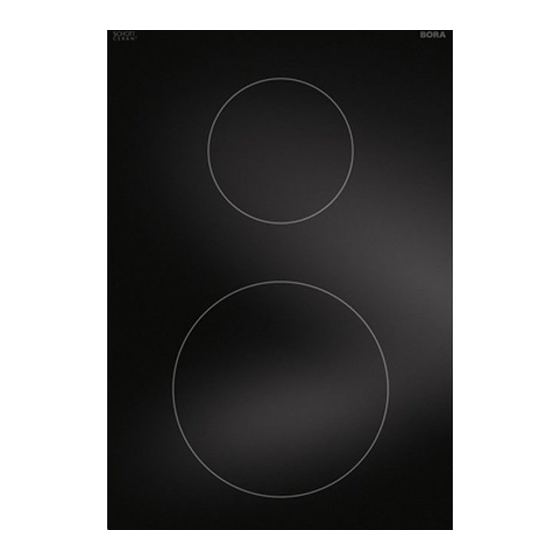
    All manuals and user guides at all-guides.com ... Sicherheitshinweise Vorsicht, Verbrennungs-/Brandgefahr! ■ Lassen Sie das Gerät während des Betriebes nicht unbeaufsichtigt. ■ Halten Sie Gegenstände aus Metall oder mit metallhaltigen Bestandteilen, z.B. Besteck, Aluminiumfolie, Geschenkpapier von der Oberfläche fern. ■ Die aufgeheizte Oberfläche bleibt auch nach dem Ausschalten noch längere Zeit heiß...
  • Seite 19 ■ Elektronische Leistungsregelung (9 Stufen) ■ Ankochautomatik ■ Automatische Sicherheitsabschaltung ■ Restwärmeanzeige ■ Markierung der einzelnen Kochzonen ■ Kindersicherung PI 11-000 ■ Eine Kochzone Ø 155 mm ■ Eine Kochzone Ø 230 mm Schaltkasten PIS 11-100 Leistungsstufenmanschetten Kochzone vorne Kochzone hinten...
  • Seite 20: Ihr Gerät

    All manuals and user guides at all-guides.com ... Ihr Gerät Anzeigeelemente des Kochfeldes Jeder Kochzone ist eine 7-Segment-Anzeige zugeordnet, welche den aktuellen Betriebszustand der Kochzone anzeigt. Anzeigen 1 1 1 1 - 9 9 9 9 ..Leistungsstufen A A A A .... Ankochautomatik H H H H ....
  • Seite 21: Benutzereinstellungen

    All manuals and user guides at all-guides.com Benutzereinstellungen Kindersicherung Die Kindersicherung soll ein unbeabsichtigtes Einschalten verhindern. Solange die Kindersicherung aktiviert ist, lässt sich keine Kochzone in Betrieb nehmen. Kindersicherung einschalten Es darf keine Kochzone in Betrieb sein. ► Knebel des linken oder rechten Drehschalters der Kochzonen drücken und für mindestens 5 Sekunden und weniger als 30 Sekunden nach links drehen (Position A).
  • Seite 22: Bedienung

    All manuals and user guides at all-guides.com Bedienung Kochzonen Der Drehschalter dient zum Ein- und Aus- schalten und zum Regulieren der zuge- ordneten Kochzone. Einschalten ► Knebel des Drehschalters der Kochzone drücken und auf die gewünschte Leistungsstufe stellen. 1 = geringste Leistung, 9 = maximale Leistung ─...
  • Seite 23: Topferkennung

    All manuals and user guides at all-guides.com ... Bedienung So stellen Sie ein: Warm halten von fertig gegarten Speisen bei ca. 65 ° C Warmhaltestufe Schmelzen von Butter und Schokolade, Auflösen von Gelatine Warm halten von Saucen und Suppen, Quellen von Reis Kochen von Kartoffeln, Teigwaren, Suppen, Ragouts, Dünsten von Obst, Gemüse und Fisch, Auftauen von Speisen Braten in beschichteten Pfannen, schonendes Braten (ohne...
  • Seite 24: Powerstufe

    All manuals and user guides at all-guides.com ... Bedienung Powerstufe Jede Kochzone ist mit der leistungsverstärkenden Powerstufe P P P P ausgestattet. Ist die Powerstufe zugeschaltet, arbeitet die gewählte Kochzone für die Dauer von 10 Minuten mit einer extra hohen Leistung. Nach 10 Minuten wird automatisch auf die Leistungsstufe 9 9 9 9 zurückgeschalten.
  • Seite 25: Ankochautomatik

    All manuals and user guides at all-guides.com ... Bedienung Ankochautomatik Lassen Sie das Gerät während der Dauer der Ankochautomatik nicht unbeaufsichtigt. Kleinere Mengen werden sehr schnell heiß! Beide Kochzonen sind mit einer zuschaltbaren Ankochautomatik ausgestattet. Mit dieser Funktion arbeitet die Kochzone nach dem Einschalten für eine bestimmte Dauer (siehe Tabelle) mit voller Leitung.
  • Seite 26: Kochgeschirr

    All manuals and user guides at all-guides.com ... Bedienung Kochgeschirr Der Geschirrboden darf keine scharfen Rillen und keinen scharfkanti- gen Rand aufweisen. Gusseisengeschirr darf nur verwendet werden, wenn es über einen glatten Boden verfügt. Nur für Induktions-Kochfelder geeignetes Kochgeschirr verwenden. Meistens wird dieses vom Hersteller am Geschirrboden gekennzeichnet.
  • Seite 27: Sicherheitsfunktionen

    All manuals and user guides at all-guides.com Sicherheitsfunktionen Automatische Sicherheitsabschaltung Das Gerät ist mit einer zeitlichen Überwachung der Kochzonen ausgestattet. Diese schaltet, abhängig von der eingestellten Leistungsstufe, nach folgender Betriebsdauer die Kochzone automatisch aus. Warm- Leistungsstufe halte- stufe Betriebsdauerbegrenzung in Stunden ─...
  • Seite 28: Pflege Und Wartung

    All manuals and user guides at all-guides.com Pflege und Wartung Reinigung Lassen Sie vor der Reinigung das Gerät zuerst abkühlen. Während und nach der Reinigung darauf achten, dass keine Kochzone versehentlich in Betrieb ist. Zum Reinigen keinen Dampfreiniger verwenden! Reinigung der Glaskeramikfläche Frühzeitiges Reinigen der Glaskeramikfläche erspart ein später mühevolles Entfernen hartnäckigen...
  • Seite 29: Reinigung Der Knebel

    All manuals and user guides at all-guides.com ... Pflege und Wartung Durch unsachgemäße Behandlung bei der Reinigung kann das Dekor oder die Glaskeramikoberfläche beschädigt werden. Die Oberfläche erscheint an diesen Stellen dunkler. Solche Flecken können durch Reinigen nicht mehr entfernt werden.
  • Seite 30: Störungen Selbst Beheben

    ■ Sicherung oder Sicherungs- ► Sicherung wechseln. automat der Wohnungs- bzw. ► Sicherungsautomat wieder einschalten. der Hausinstallation ist defekt. ■ Die Sicherung oder der Siche- ► BORA Lüftungstechnik GmbH anrufen. rungsautomat löst mehrfach aus. ■ Unterbruch in der Stromversor- ► Stromversorgung überprüfen. gung.
  • Seite 31 Behebung ■ Dauerbetätigung eines ► Kebel rückstellen. Knebels in einer Überdreh- stellung. ■ Bruch der Verbindungsleitung ► BORA Lüftungstechnik GmbH anrufen. zwischen Kochfeld und Drehschalter..in einer oder beiden Anzeigen E E E E -Anzeigen stehen Mögliche Ursache Behebung ■...
  • Seite 32: Entsorgung

    All manuals and user guides at all-guides.com Entsorgung Verpackung ■ Das Verpackungsmaterial (Karton, Kunststofffolie PE und Styropor EPS) ist gekennzeichnet und soll wenn möglich dem Recycling zugeführt und umwelt- gerecht entsorgt werden. Deinstallation ■ Gerät vom Stromnetz trennen. Bei fest installierten Geräten ist dies durch einen konzessionierten Elektriker vorzunehmen! Sicherheit ■...
  • Seite 33: Notizen

    All manuals and user guides at all-guides.com Notizen...
  • Seite 34 All manuals and user guides at all-guides.com ... Notizen...
  • Seite 35 All manuals and user guides at all-guides.com ... Notizen...
  • Seite 36 All manuals and user guides at all-guides.com Typschild Kochfeld Typschild Schaltkasten BORA Lüftungstechnik GmbH Rosenheimer Str. 32 D-83064 Raubling Fon +49 (0)8035 / 907 240 Ind. Kochfeld: Fax +49 (0)8035 / 907 249 PI-UM-D-0010910 info@boragmbh.com www.boragmbh.com 05.2011 - 1031063...
  • Seite 37 All manuals and user guides at all-guides.com Glass-ceramic induction cooktop with control unit PI 11-000 Installation and operating manual...
  • Seite 38 All manuals and user guides at all-guides.com Dear BORA customer Thank you for purchasing our product. Your appliance meets the highest standards and is extremely easy to use. We would nevertheless ask you to read this installation and operating manual...
  • Seite 39 All manuals and user guides at all-guides.com Contents Installation....................5 Prior to installation ............5 Flush installation of cooktop ........5 Installation of the cooktop in the worktop cut-out ..7 Installation of the control unit in the front cover of the bottom kitchen cabinet....9 Installation ..............
  • Seite 40 All manuals and user guides at all-guides.com ... Contents Maintenance and care................28 Cleaning ............... 28 Cleaning glass-ceramic top ......... 28 Cleaning toggles ............29 Troubleshooting..................30 What to do, if ............... 30 Disposal....................32 Repair service ..................32 Notes...................... 33...
  • Seite 41: Installation

    All manuals and user guides at all-guides.com Installation Prior to installation ■ The built-in cooktops are designed for integration into the kitchen worktop with suitable cut-out. The associated control unit is built into the bottom cabinet front cover. ■ The appliance must be installed and connected to the power supply according to the instructions in this manual.
  • Seite 42 All manuals and user guides at all-guides.com ... Installation Cut-out dimensions for the installation of cooktops or for cooktops and BORA cooktop extractor fans beside each other: BORA Worktop cut-out cooktops cooktop extractor fan 1114 1086 1224 1196 1334 1306...
  • Seite 43: Installation Of The Cooktop In The Worktop Cut-Out

    All manuals and user guides at all-guides.com ... Installation Installation of the cooktop in the worktop cut-out The distance between the cut-out edge and the rear and side walls must be minimum 65 mm. For installation in built-in kitchen units, ensure that the plastic or veneer of the ■...
  • Seite 44 All manuals and user guides at all-guides.com ... Installation Cut-out dimensions for the installation of cooktops or for cooktops and BORA cooktop extractor fans beside each other: BORA Worktop cut-out cooktops cooktop extractor fan 1086 1196 1306 rear wall Install the installation rail supplied with your appliance between the BORA built-in...
  • Seite 45: Installation Of The Control Unit In The Front Cover Of The Bottom Kitchen Cabinet

    All manuals and user guides at all-guides.com ... Installation Installation of the control unit in the front cover of the bottom kitchen cabinet upper side of worktop worktop cover The four bores for the control unit must be made at the centre of the cooktop.
  • Seite 46: Flush Installation Of Cooktop

    Installation of the cooktop in the worktop cut-out ► Place the cooktop in the cut-out and secure it with the clamps. The BORA logo must be positioned in the rear right corner of the built-in cooktops.
  • Seite 47: Installation Of The Control Unit In The Front Cover Of The Bottom Kitchen Cabinet

    All manuals and user guides at all-guides.com ... Installation Installation of the control unit in the front cover of the bottom kitchen cabinet Before installing and securing the control unit in the bottom cabinet, connect the electric cable – see section Electric connection.
  • Seite 48 All manuals and user guides at all-guides.com ... Installation ► Insert the lenses (red) into the power control sleeves. ► Insert the control cabinet with mounted spacer plates from the rear into the front cover. Mount the two power control sleeves from the front and secure them with the supplied nuts and fixing bracket.
  • Seite 49 All manuals and user guides at all-guides.com ... Installation ► Mount the toggles. Ensure that dimension 18,5 mm is maintained when the knobs are in "0" position. Cover Power control Allen sleeve wrench Toggle ► If the two toggles are not at the same distance from the power control sleeves, adjust the distance with the adjusting screw in the toggle shaft, using the enclosed Allen wrench.
  • Seite 50: Electrical Connection

    Before carrying out any repairs to the appliance, always disconnect it from the electric power supply. Never open the appliance. For repairs, contact a repair workshop authorized by BORA Lüftungstechnik GmbH.
  • Seite 51: Safety Instructions

    Proper use ■ The appliance is designed for the preparation of food in a domestic environment. BORA Lüftungstechnik GmbH shall not be liable for damage resulting from improper use or incorrect operation of the appliance. ■ All repairs, and in particular repairs to powered components, must be carried out by suitably trained technicians.
  • Seite 52: Safe Operation

    This is normal for new appliances. Ensure proper ventilation of the kitchen. ■ If you detect any visible damage to the appliance, do not switch it on and contact BORA Lüftungstechnik GmbH. If you encounter any malfunctions or other problems with the hob, or if there is ■...
  • Seite 53: Preventing Damage To The Appliance

    All manuals and user guides at all-guides.com ... Safety instructions Preventing damage to the appliance The surface is heat-proof (up to 650 ° C) and can withstand temperature fluctuations. Within limits, the appliance is scratch-proof and resistant to impact. We nevertheless recommend observing the instructions below to prevent damage.
  • Seite 54: Caution! Risk Of Fire/Injury From Burning

    All manuals and user guides at all-guides.com ... Safety instructions Caution! Risk of fire/injury from burning! ■ Do not leave the appliance unattended during operation. ■ Keep objects made of or containing metal (e.g. cutlery, aluminium foil, wrapping paper) away from the cooktop surface. ■...
  • Seite 55: Your Appliance

    Residual heat indicator ■ ■ ■ Marking indicating the individual cooking zones Child safety device ■ PI 11-000 ■ 1 cooking zone Ø 155 mm ■ 1 cooking zone Ø 230 mm PIS 11-100 control unit Power control sleeves Front cooking zones...
  • Seite 56: Display Elements On The Cooktop

    All manuals and user guides at all-guides.com ... Your appliance Display elements on the cooktop Each cooking zone is equipped with a separate 7-segment display indicating the current status of the cooking zone. Displays 1 1 1 1 - 9 9 9 9 ..Power levels A A A A ....
  • Seite 57: User Settings

    All manuals and user guides at all-guides.com User settings Child safety child safety feature is designed to prevent inadvertent switching on of the cooktop. None of the cooking zones can be switched on while the child safety Activating child safety Ensure that both cooking zones are switched off.
  • Seite 58: Operation

    All manuals and user guides at all-guides.com Operation Cooking zones Turn the knob to switch on/off the respective cooking zone and to regulate the heat. Switching on ► Press the toggle (child safety device) of the turn knob of the cooking zone and turn the knob to the desired power level.
  • Seite 59: Pot Detection

    All manuals and user guides at all-guides.com ... Operation Recommended settings: Keeping fully cooked food hot (approx. 65 ° C) Warming level Melting butter, chocolate; dissolving gelatine Keeping sauces and soups hot, steeping rice Cooking potatoes, pasta, soups, ragout Stewing fruit, vegetables and fish, defrosting food Roasting in coated frying pans, slow roasting chops, fish (without overheating of fat) Heating fat, browning meat, cooking creamy sauces and soups,...
  • Seite 60 All manuals and user guides at all-guides.com ... Operation High power level Each cooking zone features a high power level P P P P . If this power level is switched on, the cooking zone is operated for 10 minutes with particularly high power output.
  • Seite 61: Automatic Heat-Up Function

    All manuals and user guides at all-guides.com ... Operation Automatic heat-up function Never leave the appliance unattended when using the automatic heat- function. Small quantities of food are heated very quickly! Both cooking zones are equipped with the optional automatic heat-up function.
  • Seite 62: Pots And Pans

    All manuals and user guides at all-guides.com ... Operation Pots and pans Pots and pans to be used on the induction cooktop must be free of sharp edges or burs. Cast iron pans may only be used, if they have a smooth level base.
  • Seite 63: Safety Functions

    All manuals and user guides at all-guides.com Safety functions Automatic safety shut-off The appliance is equipped with a time monitoring system for the cooking zones. This system automatically switches off the cooking zone after a set operating time, irrespective of the selected power level.
  • Seite 64: Maintenance And Care

    All manuals and user guides at all-guides.com Maintenance and care Cleaning Before cleaning the appliance, let it cool down. While cleaning the appliance, ensure that the cooking zones are not inadvertently switched on. Do not clean the appliance with a steam cleaner! Cleaning glass-ceramic top Immediately remove any spilled food or liquid from the glass-ceramic top, as it...
  • Seite 65: Cleaning Toggles

    All manuals and user guides at all-guides.com ... Maintenance and care Cleaning toggles ■ When removing and mounting the toggles, do not confuse them, as they might be designed to fit only onto a pin of a certain size. ■ Clean the toggles with a soft cloth or sponge, water and a conventional stainless steel cleaner or special care product (Chromol, Caramba, etc).
  • Seite 66: Troubleshooting

    ► Reset automatic circuit breaker. house installation is defective or has been triggered. ■ The fuse or the automatic ► Call BORA Lüftungstechnik GmbH. circuit breaker is repeatedly triggered. ■ Power failure. ► Check power supply.
  • Seite 67 Possible cause Remedy ■ The respective cooking zone ► Write down error code. or the power unit is defective. Call BORA Lüftungstechnik GmbH. ► ... v v v v is shown on the display Possible cause Remedy ■ The pot or pan you are using is ►...
  • Seite 68: Disposal

    All manuals and user guides at all-guides.com Disposal Packaging ■ The packaging material (cardboard, PE plastic foil and EPS polystyrene) is labelled for recycling and should be disposed of in an environmentally friendly manner. Dismantling ■ Disconnect the appliance from the power supply. For permanently installed appliances, this must be done by an approved electrician! Safety ■...
  • Seite 69: Notes

    All manuals and user guides at all-guides.com Notes...
  • Seite 70 All manuals and user guides at all-guides.com ... Notes...
  • Seite 71 All manuals and user guides at all-guides.com ... Notes...
  • Seite 72 All manuals and user guides at all-guides.com Type plate cooktop Type plate control unit BORA Lüftungstechnik GmbH Rosenheimer Str. 32 83064 Raubling Germany Fon +49 (0)8035 / 907 240 Ind. Kochfeld: Fax +49 (0)8035 / 907 249 PI-UM-GB-0010910 info@boragmbh.com www.boragmbh.com...
  • Seite 73 All manuals and user guides at all-guides.com Table de cuisson à induction en vitrocéramiqe avec coffret de commande PI 11-000 Instructions de montage et de service...
  • Seite 74: Modifications

    All manuals and user guides at all-guides.com Cher cliente BORA, cher client BORA, Nous vous remercions d’avoir décidé d’acheter un de nos produits. Votre appareil satisfait à des exigences élevées et sa commande est simple. Prenez quand même du temps pour lire les présentes instructions de montage, de service et d’entretien.
  • Seite 75 All manuals and user guides at all-guides.com Table des matières Montage ....................5 Avant l’installation ............5 Installation affleurante de la table de cuisson... 5 Installation de la table de cuisson dans l’evidement d’un plan de travail ....... 7 Installation du coffret de commande dans le cache du sous-meuble .........
  • Seite 76 All manuals and user guides at all-guides.com ... Table des matières Fonctions de sécurité ................27 Désactivation de sécurité automatique......27 Protection contre la surchauffe de la zone de cuisson .. 27 Soin et entretien..................28 Nettoyage..............28 Nettoyage de la surface vitrocéramique ...... 28 Nettoyage des interrupteurs ........
  • Seite 77: Montage

    All manuals and user guides at all-guides.com Montage Avant l’installation ■ La table de cuisson à encastrer est prévue pour l’installation dans l’évidement correspondant dans un plan de travail. Le coffret de commande correspondant est installé dans le cache du sous-meuble. ■...
  • Seite 78 All manuals and user guides at all-guides.com ... Montage Dimensions des évidements pour l'installations de tables de cuisson ou de tables de cuisson et du système de ventilation à évacuation descendante BORA l'un à côté de l'autre. Evidement dans le plan...
  • Seite 79: Installation De La Table De Cuisson Dans L'evidement D'un Plan De Travail

    All manuals and user guides at all-guides.com ... Montage Installation de la table de cuisson dans l'évidement d'un plan de travail Distance minimale de 65 mm entre le bord de l’évidement et les parois arrière et latérale. ■ Pour ce qui est des meubles encastrés, le revêtement plastique ou bien la feuille de placage doivent être apposés avec de la colle résistante à...
  • Seite 80 All manuals and user guides at all-guides.com ... Montage Dimensions des évidements pour l'installations de tables de cuisson ou de tables de cuisson et du système de ventilation à évacuation descendante BORA l'un à côté de l'autre. Evidemente dans Evacuation...
  • Seite 81: Installation Du Coffret De Commande Dans Le Cache Du Sous-Meuble

    All manuals and user guides at all-guides.com ... Montage Installation du coffret de commande dans le cache du sous-meuble Face supérieure du plan de travail Plan de travail Cache Percer les quatre trous pour le coffret de commande au milieu par rapport à la table de cuisson.
  • Seite 82: Installation Affleurante De La Table De Cuisson

    Installation de la table de cuisson dans l'évidement d'un plan de travail ► Placer la table de cuisson dans l'évidement et la fixer à l’aide des éléments de serrage. Installer la table de cuisson à encastrer de sorte que le logo BORA se situe à droite à l’arrière.
  • Seite 83: Installation Du Coffret De Commande Dans Le Cache Du Sous-Meuble

    All manuals and user guides at all-guides.com ... Montage Installation du coffret de commande dans le cache du sous-meuble Avant de placer et de fixer le coffret de commande dans le sous-meuble, établir l'alimentation électrique – voir la section Raccordement électrique. ►...
  • Seite 84 All manuals and user guides at all-guides.com ... Montage ► Enficher les lentilles (rouges) dans les boutons de réglage. ► Depuis l’arrière, enficher le coffret de commande avec les plaques de compensation enfichées, dans le cache. Sur la face avant, enficher les deux boutons de réglage et les fixer à...
  • Seite 85 All manuals and user guides at all-guides.com ... Montage ► Enficher l’interrupteur et contrôler la saillie de 18,5 mm à la position 0. Cache Bouton de Clé mâle réglage coudée Interrupteur ► Si la saillie des deux interrupteurs par rapport aux boutons de réglage n'est pas identique, ajuster la vis de réglage dans la manche de l'interrupteur à...
  • Seite 86: Alimentation Électrique

    ■ Si le câble d'alimentation est endommagé, il faut le remplacer par un câble qui est confectionné spécialement. Ce remplacement doit exclusivement être réalisé par un service de réparation agréé par la BORA Lüftungstechnik GmbH. CE: Ces appareils sont conformes aux directives CE suivantes: -2004/108/CE Directive - Comptabilité...
  • Seite 87: Consignes De Sécurité

    En cas d'un dysfonctionnement sur votre appareil ou en cas d'un ordre de réparation, veuillez respecter les consignes au chapitre « Service de réparation ». En cas de besoin, contactez la BORA Lüftungstechnik GmbH. ■ L'appareil ne doit pas être utilisé pour chauffer la pièce.
  • Seite 88: Utilisation

    Veillez à ce que la pièce soit bien aérée. ■ Si l’appareil présente des dommages visibles, ne le mettez pas en service et contactez la BORA Lüftungstechnik GmbH. ■ Mettez l’appareil hors service dès que vous constatez un dysfonctionnement ou que la surface présente des fissures dues à...
  • Seite 89: Comment Éviter Les Dommages Au Niveau De L'appareil

    All manuals and user guides at all-guides.com ... Consignes de sécurite Comment éviter les dommages au niveau de l’appareil La surface vitrocéramique est résistante à la chaleur (jusqu’à 650 °C) et aux variations de température et résiste, dans une certaine mesure, aux chocs et aux rayures.
  • Seite 90: Attention, Risque De Brûlures/D'incendie

    All manuals and user guides at all-guides.com ... Consignes de sécurite Attention, risque de brûlures/d’incendie ! ■ Ne laissez pas l’appareil sans surveillance lorsqu’il fonctionne. ■ Veillez à maintenir à distance de la surface les objets en métal ou présentant des composants métalliques, p.
  • Seite 91: Votre Appareil

    ■ Marquage des différentes zones de ■ Témoin de chaleur résiduelle cuisson ■ Sécurité enfant PI 11-000 ■ Une zone de cuisson Ø 155 mm ■ une zone de cuisson Ø 230 mm Coffret de commande PIS 11-100 Boutons de réglage Zone de cuisson avant Zone de cuisson arrière...
  • Seite 92: Éléments D'affichage De La Table De Cuisson

    All manuals and user guides at all-guides.com ... Votre appareil Éléments d'affichage de la table de cuisson Pour chaque zone de cuisson, il y a un affichage à 7 segments qui affiche l'état de fonctionnement actuel de la zone de cuisson. Affichages 1 1 1 1 - 9 9 9 9 ..
  • Seite 93: Paramétrages Utilisateur

    All manuals and user guides at all-guides.com Paramétrages utilisateur Sécurité enfant La fonction Sécurité enfant sert à éviter l'activation accidentelle. Tant que cette fonction est activée, aucune zone de cuisson ne peut être mise en service. Activer la fonction Sécurité enfant Aucune zone de cuisson ne doit être activée.
  • Seite 94: Commande

    All manuals and user guides at all-guides.com Commande Zones de cuisson Le bouton tournant sert à activer, à désactiver et à réguler la zone de cuisson correspon- dante. Activer ► Enfoncer l'interrupteur du bouton tournant de la zone de cuisson et régler le bouton sur le niveau de puissance désiré.
  • Seite 95: Détection De Casserole

    All manuals and user guides at all-guides.com ... Commande Les réglages : Fonction Maintenir au chaud des repas préparés à environ 65° C Maintien au chaud Faire fondre le beurre et le chocolat, dissoudre de la gélatine Maintenir au chaud des sauces et des soupes, faire gonfler le Cuire des pommes de terre, des pâtes, des soupes ou des ragouts, Étuver des fruits, des légumes et du poisson, décongeler des...
  • Seite 96: Fonction Booster

    All manuals and user guides at all-guides.com ... Commande Fonction Booster Chaque zone de cuisson est équipée de la fonction Booster P P P P qui intensifie la puissance. Si la fonction Booster est activée, la zone de cuisson sélectionnée fonctionne à...
  • Seite 97: Fonction Début De Cuisson Automatique

    All manuals and user guides at all-guides.com ... Commande Fonction Début de cuisson automatique Ne laissez pas l'appareil sans surveillance pendant que la fonction Début de cuisson automatique est active. De petites quantités sont chauffées très rapidement! Les deux zones de cuisson sont équipées d'une fonction de début de cuisson automatique qui peut être activée en cas de besoin.
  • Seite 98: Ustensils De Cuisson

    All manuals and user guides at all-guides.com ... Commande Ustensiles de cuisson Le fond des ustensiles ne doit pas avoir des rainures tranchantes ou un bord à angles vifs. Les ustensiles en fonte ne doivent être utilisés que s'ils ont un fond lisse. N'utiliser que des ustensiles qui conviennent pour les tables de cuisson à...
  • Seite 99: Fonctions De Sécurité

    All manuals and user guides at all-guides.com Fonctions de sécurité Désactivation de sécurité automatique L'appareil est équipé d'une surveillance temporelle des zones de cuisson. En fonction du niveau de puissance réglé, ce mécanisme éteint automatiquement la zone de cuisson après la durée de fonctionnement suivante: Maintien Niveau de puissance chaud...
  • Seite 100: Soin Et Entretien

    All manuals and user guides at all-guides.com Soin et entretien Nettoyage Laisser refroidir l'appareil avant de procéder au nettoyage. Pendant et après le nettoyage, veiller à ce qu'aucune plaque ne fonctionne accidentellement. Ne pas utiliser des nettoyeurs à jet de vapeur ! Nettoyage de la surface vitrocéramique Le nettoyage immédiat de la surface vitrocéramique vous épargne l'élimination ultérieure pénible d'encrassements résistants.
  • Seite 101: Nettoyage Des Interrupteurs

    All manuals and user guides at all-guides.com ... Soin et entretien Le traitement incorrect dans le cadre du nettoyage risque d'endommager le décor ou la surface vitrocéramique. La surface est plus sombre aux endroits concernés. De telles taches ne peuvent plus être enlevées par nettoyage. Nettoyage des interrupteurs ■...
  • Seite 102: Dépannage Autonome

    ► Réarmer le coupe-circuit automatique. l’appartement ou dans la maison est défectueux. ■ Le fusible saute ou le coupe- ► Appeler la BORA Lüftungstechnik GmbH. circuit automatique est déclenché à plusieurs reprises. ■ Interruption de l’alimentation ► Vérifier l’alimentation électrique.
  • Seite 103 ► Tourner l'interrupteur en arrière. tourné trop loin. ■ Rupture du câble de connexion ► Appeler la BORA Lüftungstechnik GmbH. entre la zone de cuisson et le bouton tournant..l'un des affichages indique ou les deux affichages indiquent une erreur E E E E Cause possible Remède...
  • Seite 104: Élimination

    All manuals and user guides at all-guides.com Élimination Emballage ■ Le matériel d’emballage (carton, film plastique PE et polystyrène EPS) est identifié en tant que tel et doit, si possible, être recyclé et éliminé dans le respect de l’environnement. Désinstallation ■...
  • Seite 105: Notes

    All manuals and user guides at all-guides.com Notes...
  • Seite 106 All manuals and user guides at all-guides.com ... Notes...
  • Seite 107 All manuals and user guides at all-guides.com ... Notes...
  • Seite 108 All manuals and user guides at all-guides.com Plaque signalétique de Plaque signalétique du la zone de cuisson coffret de commande BORA Lüftungstechnik GmbH Rosenheimer Str. 32 D-83064 Raubling Allemagne Tél. +49 (0)8035 / 907 240 Ind. Kochfeld: Fax +49 (0)8035 / 907 249 PI-UM-F-0010910 info@boragmbh.com...
  • Seite 109: Glaskeramisch Inductiekookveld

    All manuals and user guides at all-guides.com Glaskeramisch inductiekookveld met schakelkast PI 11-000 Montage- en bedieningshandleiding...
  • Seite 110 ─ Beschrijft de reactie van het apparaat op uw uitgevoerde stap ■ Markeert een opsomming Geeft handige gebruikerstips aan Deze montage- en bedieningshandleiding is van toepassing op de volgende modellen: Glaskeramisch inductiekookveld Schakelkast PI 11-000 PIS 11-100 Gedrukt op chloorvrij gebleekt papier. Onze bijdrage aan de bescherming van het milieu.
  • Seite 111 All manuals and user guides at all-guides.com Inhoudsopgave Montage ....................5 Voor de inbouw .............. 5 Vlakinbouw van het kookveld ........5 Inbouw van het kookveld in de uitsparing van een werkblad ......7 Inbouw van de schakelkast in de blende van de onderkast........9 Inbouw ................
  • Seite 112 All manuals and user guides at all-guides.com ... Inhoudsopgave Verzorging en onderhoud..............28 Reiniging ..............28 Reiniging van het glaskeramische oppervlak ....28 Reiniging van de knoppen ........... 29 Storingen zelf verhelpen ..............30 Wat moet u doen, als ..........30 Afvalverwijdering ..................
  • Seite 113: Montage

    All manuals and user guides at all-guides.com Montage Voor de inbouw ■ Het inbouwkookveld is bestemd voor montage in de uitsparing van een werkblad. De bijbehorende schakelkast wordt in de blende van de onderkast ingebouwd. ■ Het apparaat mag uitsluitend volgens deze installatievoorschriften worden ingebouwd en op het stroomnet worden aangesloten.
  • Seite 114 Een overzicht van de uitsparingsafmetingen bij de inbouw van kookvelden resp. kookvelden en de BORA-kookveldafzuiging: Uitsparing van een BORA- werkblad Kookvelden kookveld- afzuiging 1114 1086 1224 1196 1334 1306 achterwand Tussen de kookvelden resp. de kookvelden en de BORA-kookveldafzuiging dient steeds de bij het apparaat geleverde montagerails te worden gemonteerd.
  • Seite 115: Inbouw Van Het Kookveld In De Uitsparing Van Een Werkblad

    All manuals and user guides at all-guides.com ... Montage Inbouw van het kookveld in de uitsparing van een werkblad Afstand van de rand van de uitsparing tot aan de achter- en zijwand moet minimaal 65 mm zijn. ■ Bij inbouwmeubelen moet de kunststof bekleding resp. het fineer verwerkt zijn met hittebestendige lijm.
  • Seite 116 Een overzicht van de uitsparingsafmetingen bij de inbouw van kookvelden resp. kookvelden en de BORA-kookveldafzuiging: Uitsparing van BORA- een werkblad Kookvelden kookveld- afzuiging 1086 1196 1306 achterwand Tussen de kookvelden resp. de kookvelden en de BORA-kookveldafzuiging dient steeds de bij het apparaat geleverde montagerails te worden gemonteerd.
  • Seite 117: Inbouw Van De Schakelkast In De Blende Van De Onderkast

    All manuals and user guides at all-guides.com ... Montage Inbouw van de schakelkast in de blende van de onderkast Bovenzijde werkblad Werkblad Blende Breng de vier boorgaten voor de schakelkast in het midden ten opzichte van het kookveld aan. Onder schakelkast dient kabelbeschermingsplaat...
  • Seite 118: Vlakinbouw Van Het Kookveld

    Inbouw van het kookveld in de uitsparing van een werkblad ► Plaats het kookveld in de uitsparing en zet het met de spanelementen vast. Bouw de inbouwkookplaat zo in dat het BORA-opschrift zich aan de rechter- achterzijde bevindt.
  • Seite 119: Inbouw Van De Schakelkast In De Blende Van De Onderkast

    All manuals and user guides at all-guides.com ... Montage Inbouw van de schakelkast in de blende van de onderkast Voor het plaatsen en bevestigen van de schakelkast in de onderkast, moet eerst de elektrische aansluiting tot stand worden gebracht. Zie het hoofdstuk Elektrische aansluiting.
  • Seite 120 All manuals and user guides at all-guides.com ... Montage ► Steek de lenzen in de afsluitringen van de vermogensschakelaars. ► Steek de schakelkast met opgeplaatste compensatieplaten vanaf de achterzijde in de blende. Plaats aan de voorkant de beide afsluitringen van de standenschakelaars en bevestig deze met de meegeleverde moeren en bevestigingsbeugel.
  • Seite 121 All manuals and user guides at all-guides.com ... Montage ► Plaats de knop en controleer maat 18,5 mm in 0-stand. Blende Inbussleutel Afsluitringen vermogensschakela Knop ► Indien de beide knoppen niet even ver van de afsluitringen van de vermogensschakelaars af staan, dient u de stelschroef in de knopas met de meegeleverde inbussleutel zo af te stellen dat beide knoppen een afstand hebben van 18,5 mm (zie bovenstaande tekening).
  • Seite 122: Elektrische Aansluiting

    ■ Indien het apparaat via een stekker wordt aangesloten, moet deze na de montage toegankelijk blijven. ■ Indien de aansluitkabel is beschadigd, moet deze worden vervangen door een nieuwe. Dit mag uitsluitend worden uitgevoerd door een door BORA Lüftungstechnik GmbH geautoriseerde reparatiedienst. CE: Deze apparaten voldoen aan de volgende EG-richtlijnen:...
  • Seite 123: Veiligheidsvoorschriften

    "Reparatieservice" bij een functiestoring van uw apparaat of als u een afspraak voor een reparatie wilt maken. Neem indien nodig contact op met BORA Lüftungstechnik GmbH. ■ Het apparaat mag niet worden gebruikt voor het verwarmen van de ruimte.
  • Seite 124: Voor Het Gebruik

    ■ Indien het apparaat zichtbaar is beschadigd, dient u het niet in gebruik te nemen. Neem in dit geval contact op met BORA Lüftungstechnik GmbH. ■ Zodra een functiestoring wordt ontdekt of wanneer door extreme mechanische inwerking scheuren in het oppervlak ontstaan, moet het apparaat direct buiten gebruik worden genomen.
  • Seite 125: Zo Voorkomt U Schade Aan Het Apparaat

    All manuals and user guides at all-guides.com ... Veiligheidsvoorschriften Zo voorkomt u schade aan het apparaat oppervlak bestand tegen hitte (tot 650° C) temperatuurschommelingen en binnen bepaalde grenzen stoot- en krasvast. Neem echter de volgende instructies in acht om eventuele schade te voorkomen.
  • Seite 126: Voorzichtig, Verbrandings- En Brandgevaar

    All manuals and user guides at all-guides.com ... Veiligheidsvoorschriften Voorzichtig, verbrandings- en brandgevaar! ■ Het apparaat mag niet zonder toezicht in werking zijn. ■ Houd voorwerpen van metaal of met metaalhoudende onderdelen, zoals bestek, aluminiumfolie, cadeaupapier uit de buurt van het kookveld. ■...
  • Seite 127 ■ Elektronische vermogensregeling (9 standen) ■ Automatisch aankoken ■ Automatische veiligheidsuitschakeling ■ Restwarmteaanduiding ■ Markering van afzonderlijke kookzones ■ Kinderbeveiliging PI 11-000 ■ Een kookzone Ø 155 mm ■ Een kookzone Ø 230 mm Schakelkast PIS 11-100 Afsluitringen vermogensschakelaars kookzone voorzijde...
  • Seite 128: Uw Apparaat

    All manuals and user guides at all-guides.com ... Uw apparaat Weergave-elementen van het kookveld Bij elke kookzone hoort een display bestaande uit 7 segmenten dat de actuele bedrijfsstatus van de kookzone aangeeft. Weergaven 1 1 1 1 - 9 9 9 9 ..Vermogensstanden A A A A ....
  • Seite 129: Gebruikersinstellingen

    All manuals and user guides at all-guides.com Gebruikersinstellingen Kinderbeveiliging De kinderbeveiliging dient te voorkomen dat het apparaat onbedoeld wordt ingeschakeld. Zolang de kinderbeveiliging is geactiveerd, kan geen kookzone worden gebruikt. Kinderbeveiliging inschakelen Er mag geen kookzone ingeschakeld zijn. ► Druk de knop van de linker of rechter draaischakelaar van de kookzones in en houd deze gedurende minimaal 5 en maximaal 30 seconden linksom gedraaid (positie A).
  • Seite 130: Bediening

    All manuals and user guides at all-guides.com Bediening Kookzones De draaischakelaar dient voor het in- en uitschakelen regelen betreffende kookzone. Inschakelen ► Druk de knop van de draaischakelaar van de kookzone in en zet de schakelaar op de gewenste stand. 1 = minimaal vermogen, 9 = maximaal vermogen ─...
  • Seite 131: Panherkenning

    All manuals and user guides at all-guides.com ... Bediening Zo kunt u instellen: Warmhouden van gerechten die reeds gaar zijn bij ca. 65° C Warmhoudstand Smelten van boter en chocolade, oplossen van gelatine Warmhouden van sauzen, soep, wellen van rijst Koken van aardappelen, pasta, soep, ragout Stomen van fruit, groente en vis, gerechten ontdooien Braden in pannen met coating, zacht aanbraden (zonder...
  • Seite 132: Powerstand

    All manuals and user guides at all-guides.com ... Bediening Powerstand Elke kookzone is uitgerust met een vermogensversterkende powerboost-functie P P P P . Als de powerstand is ingeschakeld, werkt de gekozen kookzone gedurende 10 minuten op extra hoog vermogen. Na 10 minuten wordt automatisch teruggeschakeld naar vermogensstand 9 9 9 9 .
  • Seite 133: Automatisch Aankoken

    All manuals and user guides at all-guides.com ... Bediening Automatisch aankoken Laat het apparaat bij automatisch aankoken niet zonder toezicht in werking zijn. Kleinere hoeveelheden worden zeer snel heet! Beide kookzones zijn uitgerust met een schakelbare functie voor automatisch aankoken. Met deze functie werkt de kookzone na het inschakelen gedurende een bepaalde duur (zie tabel) op vol vermogen.
  • Seite 134: Kookgerei

    All manuals and user guides at all-guides.com ... Bediening Kookgerei De panbodem mag geen scherpe groeven of scherpgekante rand hebben. Gietijzeren pannen mogen alleen worden gebruikt als deze zijn voorzien van een gladde bodem. Gebruik alleen kookgerei dat geschikt is voor inductiekookvelden. Meestal wordt dit door de fabrikant op de onderzijde van de pan aangegeven.
  • Seite 135: Veiligheidsfuncties

    All manuals and user guides at all-guides.com Veiligheidsfuncties Automatische veiligheidsuitschakeling Het apparaat is voorzien van een continue bewaking van de kookzones. Deze schakelt afhankelijk van de ingestelde vermogensstand de kookzone automatisch uit conform de volgende gebruiksduur. Warm- Vermogensstand houd- stand Gebruiksduurbegrenzing in uren ─...
  • Seite 136: Verzorging En Onderhoud

    All manuals and user guides at all-guides.com Verzorging en onderhoud Reiniging Laat het apparaat eerst afkoelen voordat u het gaat schoonmaken. Zorg tijdens en na het reinigen dat de kookzones niet per ongeluk zijn ingeschakeld. Gebruik voor het reinigen geen stoomreiniger! Reiniging van het glaskeramische oppervlak Het vroegtijdig reinigen van de glaskeramische plaat voorkomt dat u later hardnekkig vuil bijna niet kunt verwijderen.
  • Seite 137: Reiniging Van De Knoppen

    All manuals and user guides at all-guides.com ... Verzorging en onderhoud Door een verkeerde behandeling bij het reinigen, kan het decor of het glaskeramische oppervlak worden beschadigd. Het oppervlak wordt op deze plaatsen donkerder. Dergelijke vlekken kunnen niet meer worden verwijderd. Reiniging van de knoppen ■...
  • Seite 138: Storingen Zelf Verhelpen

    ► Schakel de veiligheidsschakelaar weer in. resp. de huisinstallatie is defect. ■ De zekering of veiligheids- ► Neem contact op met BORA Lüftungs- schakelaar wordt meerdere technik GmbH. malen geactiveerd. ■ Onderbreking in de ► Controleer de stroomvoorziening.
  • Seite 139 ► Zet de knop terug in oorspronkelijke stand. knop in een te ver doorgedraaide stand. ■ Breuk in de verbindingskabel ► Neem contact op met BORA Lüftungs- tussen kookveld en technik GmbH. draaischakelaar..op een of beide displays E E E E staat...
  • Seite 140: Afvalverwijdering

    All manuals and user guides at all-guides.com Afvalverwijdering Verpakking ■ Het verpakkingsmateriaal (karton, kunststoffolie PE en piepschuim EPS) is gekenmerkt dient indien mogelijk gescheiden volgens milieuvoorschriften te worden verwijderd. De-installatie ■ Verbreek de aansluiting tussen apparaat en netvoeding. Bij vast geïnstalleerde apparaten dient dit door een bevoegd elektricien te worden uitgevoerd! Veiligheid ■...
  • Seite 141: Notities

    All manuals and user guides at all-guides.com Notities...
  • Seite 142 All manuals and user guides at all-guides.com ... Notities...
  • Seite 143 All manuals and user guides at all-guides.com ... Notities...
  • Seite 144 All manuals and user guides at all-guides.com Typeplaatje kookveld Typeplaatje schakelkast BORA Lüftungstechnik GmbH Rosenheimer Str. 32 83064 Raubling Duitsland Tel. +49 (0)8035 / 907 240 Ind. Kochfeld: Fax +49 (0)8035 / 907 249 PI-UM-NL-0010910 info@boragmbh.com www.boragmbh.com 05.2011 - 1031075...
  • Seite 145: Piano Di Cottura Ad Induzione In Vetroceramica

    All manuals and user guides at all-guides.com Piano di cottura ad induzione in vetroceramica con scatola elettrica PI 11-000 Istruzioni per uso e montaggio...
  • Seite 146 All manuals and user guides at all-guides.com Gentili clienti della BORA GmbH Vi ringraziamo di aver scelto uno dei nostri prodotti. Il vostro apparecchio soddisfa le esigenze più elevate e il suo uso è molto semplice. Tuttavia, vi preghiamo di investire un po' di tempo per leggere le presenti Istruzioni per montaggio, uso e manutenzione.
  • Seite 147 All manuals and user guides at all-guides.com Indice Montaggio....................5 Prima dell’installazione ..........5 Incasso del piano di cottura a filo del top ....5 Incasso del piano di cottura nel ritaglio praticato in un piano di lavoro ....7 Montaggio della scatola elettrica nella cieca della base ..........
  • Seite 148 All manuals and user guides at all-guides.com ... Indice Cura e manutenzione................28 Pulizia................28 Pulizia della superficie di vetroceramica...... 28 Pulizia delle manopole ..........29 Eliminare i guasti .................. 30 Che cosa si può fare, se ..........30 Smaltimento ..................
  • Seite 149: Montaggio

    All manuals and user guides at all-guides.com Montaggio Prima dell'installazione ■ I piani di cottura ad incasso sono previsti per l'inserimento nell'apertura praticata in un piano di lavoro. La relativa scatola elettrica è montata nella cieca della base. ■ L'apparecchio deve essere montato e collegato alla rete di corrente soltanto in conformità...
  • Seite 150 Piani di d'aspirazione cottura vapori BORA 1114 1086 1224 1196 1334 1306 Pannello posteriore Trai i singoli piani di cottura e/o tra i piani di cottura e l'impianto di aspirazione vapori BORA va montata la barra di montaggio in dotazione all'apparecchio.
  • Seite 151: Incasso Del Piano Di Cottura Nel Ritaglio Praticato In Un Piano Di Lavoro

    All manuals and user guides at all-guides.com ... Montaggio Incasso del piano di cottura nel ritaglio praticato in un piano di lavoro Distanza tra il bordo esterno del ritaglio e i pannelli posteriore e laterale almeno 65 mm. ■ Per i mobili a incasso, il rivestimento sintetico o l'impiallacciatura devono essere incollati con colla termoresistente, altrimenti potrebbero deformarsi o sciogliersi, in particolar modo ai lati stretti.
  • Seite 152 BORA 1086 1196 1306 Pannello posteriore Trai i singoli piani di cottura e/o tra i piani di cottura e l'impianto di aspirazione vapori della BORA va montata la barra di montaggio in dotazione all'apparecchio.
  • Seite 153: Montaggio Della Scatola Elettrica Nella Cieca Della Base

    All manuals and user guides at all-guides.com ... Montaggio Montaggio della scatola elettrica nella cieca della base lato superiore piano di lavoro piano di lavoro cieca Praticare i quattro fori per la scatola elettrica al centro rispetto al piano di cottura.
  • Seite 154: Incasso Del Piano Di Cottura A Filo Del Top

    Incasso del piano di cottura nel ritaglio praticato in un piano di lavoro ► Inserire il piano di cottura nel ritaglio e fissarlo mediante i morsetti. Montare il piano di cottura a incasso in modo che la scritta della BORA si trovi posteriormente a destra.
  • Seite 155: Montaggio Della Scatola Elettrica Nella Cieca Della Base

    All manuals and user guides at all-guides.com ... Montaggio Montaggio della scatola elettrica nella cieca della base Prima d'inserire e fissare la scatola elettrica nella base, realizzare il collegamento elettrico - vedasi capitolo "collegamento elettrico”. ► Con l'ausilio delle piastre di livellamento in dotazione, realizzare uno spessore totale della cieca pari a 36 mm.
  • Seite 156 All manuals and user guides at all-guides.com ... Montaggio ► Inserire le spie (rosse) nei manicotti di livelli di potenza. ► Inserire la scatola elettrica da dietro nella cieca, con le piastre di livellamento infilate. Sul lato anteriore, infilare i due manicotti di livelli di potenza e fissarli tramite i dadi e la staffa di fissaggio in dotazione.
  • Seite 157 All manuals and user guides at all-guides.com ... Montaggio ► Infilare la manopola e controllare la misura di 18,5 mm in posizione 0. Cieca Manicotti di Chiave a perno livelli di potenza esagonale Manopola ► Qualora le due manopole non dovessero essere posizionate a distanza uguale dal manicotto di livelli di potenza, con la chiave a perno esagonale in dotazione, tarare la vite di regolazione sita nel gambo della manopola, in modo da...
  • Seite 158: Collegamento Elettrico

    Per gli interventi di riparazione separare gli apparecchi dalla rete di corrente. Non aprire mai gli apparecchi, in caso di necessità informare un servizio assistenza autorizzato dalla BORA Lüftungstechnik GmbH.
  • Seite 159: Avvisi Di Sicurezza

    "servizio assistenza". In caso di necessità, rivolgersi alla BORA Lüftungstechnik GmbH. ■ L'apparecchio non deve essere utilizzato per riscaldare l'ambiente. ■ Il presente apparecchio non è idoneo e/o ammesso per l'installazione nei veicoli.
  • Seite 160: Uso

    Questo è un fenomeno normale negli apparecchi nuovi di fabbrica. Procurare una ventilazione corretta del locale. ■ In presenza di danni visibili sull'apparecchio, non utilizzarlo e rivolgersi alla BORA Lüftungstechnik GmbH. ■ Se si verifica un guasto o compaiono delle crepe superficiali in seguito ad azioni...
  • Seite 161: Evitare Danni Sull'apparecchio

    All manuals and user guides at all-guides.com ... Avvisi di sicurezza Evitare danni sull'apparecchio La superficie in vetroceramica è resistente al calore (fino a 650 ° C) e alle variazioni delle temperature e, entro determinati limiti, è resistente a urti e graffi.
  • Seite 162: Attenzione, Pericolo Di Ustioni E D'incendio

    All manuals and user guides at all-guides.com ... Avvisi di sicurezza Attenzione, pericolo di ustioni e d'incendio! ■ Non lasciare l'apparecchio senza sorveglianza durante la cottura. ■ Tenere lontani dalla superficie oggetti di metallo o con componenti metallici, ad es. posate, foglio di alluminio, carta da regalo. ■...
  • Seite 163: Il Vostro Apparecchio

    ■ Disinserzione automatica di cottura sicurezza ■ Indicatore del calore residuo ■ Sicurezza bambini PI 11-000 ■ Una zona di cottura Ø 155 mm ■ Una zona di cottura Ø 230 mm Scatola elettrica PIS 11-100 Manicotti di livelli di potenza...
  • Seite 164: Elementi Indicativi Del Piano Di Cottura

    All manuals and user guides at all-guides.com ... Il vostro apparecchio Elementi indicativi del piano di cottura Ad ogni zona di cottura è assegnato un display da 7 segmenti che visualizza lo stato di funzionamento della zona di cottura. Indicazioni 1 1 1 1 - 9 9 9 9 ..
  • Seite 165: Impostazioni Per L'utilizzatore

    All manuals and user guides at all-guides.com Impostazioni per l'utilizzatore Sicurezza bambini La sicurezza bambini impedisce l'inserzione involontaria. Finché è attivata la sicurezza bambini, non si può accendere alcuna zona di cottura. Attivare la sicurezza bambini Non deve essere in funzione alcuna zona di cottura. ►...
  • Seite 166: Comando

    All manuals and user guides at all-guides.com Comando Zone di cottura La manopola serve all'inserimento e al disinserimento e per regolare le zone di cottura assegnate. Accensione ► Schiacciare la manopola della zona di cottura e regolarla al livello di potenza desiderato.
  • Seite 167: Sensore Di Riconoscimento Pentola

    All manuals and user guides at all-guides.com ... Comando Si regola in questo modo: Funzione Mantenere in caldo i cibi cotti a circa 65 ° C. scaldavivande Sciogliere burro, cioccolato o gelatina Mantenere in caldo salse e brodi, far ammollire il riso 1 -3 Cottura di patate, paste, brodi e minestrone, ragù, 2 -6...
  • Seite 168: Funzione Power

    All manuals and user guides at all-guides.com ... Comando Funzione power Ogni zona di cottura è dotata di una funzione power P P P P per potenza aggiuntiva. Con funzione power inserita, la zona di cottura selezionata funziona 10 minuti a potenza estremamente elevata.
  • Seite 169: Funzione Automatica Di Prima Cottura

    All manuals and user guides at all-guides.com ... Comando Funzione automatica di prima cottura Non lasciare l'apparecchio senza sorveglianza durante la funzione automatica di prima cottura. Le quantità piccole si riscaldano molto rapidamente! Entrambe le zone di cottura sono dotate di funzione automatica di prima cottura che può...
  • Seite 170: Pentolame

    All manuals and user guides at all-guides.com ... Comande Pentolame I fondi delle stoviglie non devono avere righettature affilate o bordi con spigoli vivi. Stoviglie di ghisa devono essere utilizzate solo se sono dotate di un fondo liscio. Utilizzare solo pentole e padelle idonee per i piani di cottura ad induzione. Solitamente quest'idoneità...
  • Seite 171: Sistemi Di Sicurezza

    All manuals and user guides at all-guides.com Sistemi di sicurezza Disinserzione automatica di sicurezza L'apparecchio è dotato di un dispositivo di sorveglianza temporale delle zone di cottura. Lo stesso disinserisce la zona di cottura automaticamente alla scadenza della durata del livello di potenza regolato, e cioè: Funzione Livello di potenza scalda-...
  • Seite 172: Cura E Manutenzione

    All manuals and user guides at all-guides.com Cura e manutenzione Pulizia Prima di effettuare interventi di pulizia, far raffreddare l'apparecchio. Durante e dopo la pulizia prestare attenzione che non sia in funzione alcuna delle zone di cottura. Non utilizzare mai dei pulitori a vapore per la pulizia! Pulizia della superficie di vetroceramica Una pulizia della superficie di vetroceramica effettuata in tempo, evita l'eliminazione difficile di macchie resistenti.
  • Seite 173: Pulizia Delle Manopole

    All manuals and user guides at all-guides.com ... Cura e manutenzione Con una pulizia inappropriata può essere danneggiata la decorazione o la superficie di vetroceramica. La superficie appare scurita in questi punti. Queste macchie non possono più essere eliminate mediante pulizia. Pulizia delle manopole ■...
  • Seite 174: Eliminare I Guasti

    ► Sostituire il fusibile. l'interruttore automatico della ► Reinserire l'interruttore automatico. casa o dell'impianto elettrico dell'edificio. ■ Il fusibile o l'interruttore ► Chiamare la BORA Lüftungstechnik GmbH. automatico scatta più volte. ■ Mancanza di corrente. ► Controllare l'alimentazione di corrente.
  • Seite 175 ■ Rottura della linea di ► Chiamare la BORA Lüftungstechnik GmbH. collegamento tra piano di cottura e manopola..in uno o in entrambi i display è visualizzato E E E E...
  • Seite 176: Smaltimento

    All manuals and user guides at all-guides.com Smaltimento Materiale d'imballo ■ Il materiale d'imballaggio (cartone, pellicola plastica PE e polistirolo EPS) è contrassegnato e deve, per quanto possibile, riciclato e smaltito in conformità alla tutela dell'ambiente. Smontaggio ■ Separare l'apparecchio dalla rete di corrente. In caso di apparecchi d'installazione fissa, ciò...
  • Seite 177: Note

    All manuals and user guides at all-guides.com Note...
  • Seite 178 All manuals and user guides at all-guides.com ... Note...
  • Seite 179 All manuals and user guides at all-guides.com ... Note...
  • Seite 180 All manuals and user guides at all-guides.com Targhetta del tipo Targhetta del tipo Piano di cottura Scatola elettrica BORA Lüftungstechnik GmbH Rosenheimer Str. 32 D-83064 Raubling Germania Fon +49 (0)8035 / 907 240 Ind. Kochfeld: Fax +49 (0)8035 / 907 249 PI-UM-I-0010910 info@boragmbh.com...
  • Seite 181 All manuals and user guides at all-guides.com Placa vitrocerámica por inducción con módulo de mando PI 11-000 Instrucciones de montaje y de uso...
  • Seite 182 All manuals and user guides at all-guides.com Estimada clienta de BORA, estimado cliente de BORA Le agradecemos que usted haya decidido adquirir uno de nuestros productos. Su aparato satisface las altas exigencias y es fácil de manejar. De todas maneras, tómese tiempo para leer las presentes instrucciones de montaje, de manejo y de mantenimiento.
  • Seite 183 All manuals and user guides at all-guides.com Contenido Montaje ....................5 Antes de empotrar ............5 Empotrado enrasado en la superficie de la encimera.. 5 Empotrado de la cocina encimera en la sección de corte de una encimera....7 Empotrado del módulo de mando en el panel del armario de base .......
  • Seite 184 All manuals and user guides at all-guides.com ... Contenido Funciones de seguridad ............... 27 Apagado automático de seguridad ......27 Protección contra temperatura excesiva de las zonas de cocción..........27 Cuidado y mantenimiento ..............28 Limpieza............... 28 Limpieza de la superficie de vitrocerámica....28 Limpieza de las manillas..........
  • Seite 185: Montaje

    All manuals and user guides at all-guides.com Montaje Antes de empotrar ■ La placa de cocción para empotrar está prevista para colocarla en la sección de corte de una encimera. El módulo de mando correspondiente se debe empotrar en el panel del armario de base. ■...
  • Seite 186 ... Montaje Medidas de la sección de corte durante el empotrado de placas de cocción/ cocinas encimeras o de placas de cocción/ cocinas encimeras y extractora de humo BORA para mesa al costado: Placas de Sección de corte extractora de cocción...
  • Seite 187: Empotrado De La Cocina Encimera En La Sección De Corte De Una Encimera

    All manuals and user guides at all-guides.com ... Montaje Empotrado de la cocina encimera en la sección de corte de una encimera Distancia de por lo menos 65 mm desde el borde de la sección de corte hacia la pared lateral y la pared del fondo. ■...
  • Seite 188 ... Montaje Medidas de la sección de corte durante el empotrado de placas de cocción/ cocinas encimeras o de placas de cocción/ cocinas encimeras y extractora de humo BORA para mesa al costado: Placas de Sección de corte extractora de cocción...
  • Seite 189: Empotrado Del Módulo De Mando En El Panel Del Armario De Base

    All manuals and user guides at all-guides.com ... Montaje Empotrado del módulo de mando en el panel del armario de base cara superior de la encimera encimera Panel Hacer las cuatro perforaciones para el módulo de mando alineados al centro hacia la cocina encimera. Colocar un debajo del módulo de mando un fondo protector de cables (fondo intermedio).
  • Seite 190: Empotrado Enrasado En La Superficie

    Empotrado de la placa de cocción en la sección de corte de una encimera. ► Colocar la placa de cocción en la encimera y fijar con los elementos tensores. Empotrar la placa de cocción para empotrar de tal manera que el rótulo BORA quede atrás a la derecha.
  • Seite 191: Empotrado Del Módulo De Mando En El Panel Del Armario De Base

    All manuals and user guides at all-guides.com ... Montaje Empotrado del módulo de mando en el panel del armario de base Antes de colocar y fijar el módulo de mando en el armario de base, crear la conexión eléctrica - ver el párrafo de la conexión eléctrica. ►...
  • Seite 192 All manuals and user guides at all-guides.com ... Montaje ► Introducir las lentes (rojas) en los mandos reguladores del nivel de potencia. ► Introducir el módulo de mando en el panel con las placas de compensación encajadas por atrás. Encajar ambas Mandos reguladores del nivel de potencia en la parte frontal y fijar con las tuercas incluidas y con el estribo de fijación incluido Momento de giro máximo de las tuercas: 10 Nm.
  • Seite 193 All manuals and user guides at all-guides.com ... Montaje ► Encajar la manilla y controlar la medida de 18,5 mm en la posición 0. Panel llave de Mando espigón reguladores del hexagonal manilla nivel de potencia ► Si ambas manillas no están a la misma distancia del mando regulador del nivel de potencia, ajustar el tornillo de regulación en la caña de la manilla con la llave de espigón hexagonal incluida de tal manera que ambas manillas tengan una...
  • Seite 194: Conexión Eléctrica

    ■ Si se dañó el cable de conexión, tiene que ser reemplazado por uno confeccionado especialmente. Esto solamente lo debe hacer un servicio de reparación autorizado por la empresa BORA Lüftungstechnik GmbH. CE Estos aparatos cumplen con las directivas de le CE a continuación: -2004/108/CE Directiva compatibilidad electromagnético...
  • Seite 195: Disposiciones De Seguridad

    «Servicio de reparación». En caso necesario comunicarse con la empresa BORA Lüftungstechnik GmbH. ■ El aparato no se debe utilizar para calentar el ambiente.
  • Seite 196: Para El Uso

    Preocuparse de que haya buena ventilación del ambiente. ■ Si el aparato muestra daños evidentes, no ponerlo a funcionar y comunicarse con la empresa BORA Lüftungstechnik GmbH. ■ Poner el aparato inmediatamente fuera de servicio apenas se descubra un fallo en el funcionamiento o si se presentaran acciones mecánicas tales como...
  • Seite 197: Así Se Evitan Daños En El Aparato

    All manuals and user guides at all-guides.com ... Disposiciones de seguridad Así se evitan daños en el aparato La superficie de vitrocerámica es insensible al calor (hasta 650° C) y a fluctuaciones de temperatura y con ciertos límites resistente a los golpes y resistentes al rayado.
  • Seite 198: Cuidado, Peligro De Quemadura / Incendio

    All manuals and user guides at all-guides.com ... Disposiciones de seguridad ¡Cuidado, peligro de quemadura / incendio! ■ No dejar de vigilar el aparato durante el funcionamiento. ■ Mantener lejos de la superficie los objetos de mental o con partes de metal, p.ej.
  • Seite 199: Su Aparato

    ■ seguro contra apertura por ■ Marcado de cada una de las zonas de niños cocción. PI 11-000 ■ Una zona de cocción de Ø 155 mm ■ Una zona de cocción de Ø 230 mm Módulo de mando PIS 11-100 Mandos reguladores del nivel de potencia Zona de cocción adelante...
  • Seite 200: Elementos Indicadores De La Placa De Cocción

    All manuals and user guides at all-guides.com ... Su aparato Elementos indicadores de la placa de cocción Cada zona de cocción tiene un indicador de 7 segmentos asignado, el cual muestra el estado de funcionamiento actual de la zona de cocción. Indicadores 1 1 1 1 - 9 9 9 9 ..
  • Seite 201: Ajustes Del Usuario

    All manuals and user guides at all-guides.com Ajustes del usuario Seguro para niños El seguro para niños debe evitar un encendido involuntario. Mientras esté activado el seguro para niños, no se puede hacer funcionar ninguna zona de cocción. Encender el seguro para niños No debe haber ninguna zona de cocción en funcionamiento.
  • Seite 202: Manejo

    All manuals and user guides at all-guides.com Manejo Zonas de cocción El interruptor giratorio sirve para encender y apagar, para regular zona calentamiento asignada. Encender ► Presionar la manilla del interruptor giratorio de la zona de cocción y llevarla al nivel de potencia de preferencia.
  • Seite 203: Detección De La Olla

    All manuals and user guides at all-guides.com ... Manejo Así se ajusta: Mantener caliente la comida lista a 65 ° C aprox. Nivel calentador Derretir mantequilla y chocolate, diluir gelatina. Mantener calientes salsa y sopas, hacer arroz Cocer papa, pastas, sopas, ragús, Rehogar fruta, verduras y pescado, descongelar comida Asar /freír en sartenes con Teflón, asar con cuidado (sin sobrecalentar la grasa) escalopes y pescado...
  • Seite 204: Nivel De Potencia

    All manuals and user guides at all-guides.com ... Manejo Nivel de potencia Cada zona de cocción tiene un nivel de potencia amplificador de potencia P P P P . Si el nivel de potencia está conectado adicionalmente, la zona de trabajo elegida trabaja durante 10 minutos con una potencia alta extra.
  • Seite 205: Sistema Automático Para Cocer Brevemente

    All manuals and user guides at all-guides.com ... Manejo Sistema automático para cocer brevemente No dejar de vigilar el aparato durante la duración del sistema automático para cocer brevemente. ¡Las porciones más pequeñas se calientan muy rápido! Ambas zonas cocción tienen sistema automático...
  • Seite 206: Vajilla De Cocinar

    All manuals and user guides at all-guides.com ... Manejo Vajilla de cocinar El fondo de la vajilla no debe tener ranuras cortantes ni borde con canto vivo. Solamente utilizar vajilla de fierro fundido si tiene un fondo liso. Solamente utilizar vajilla de cocinar adecuada para placas de cocción por inducción.
  • Seite 207: Funciones De Seguridad

    All manuals and user guides at all-guides.com Funciones de seguridad Apagado automático de seguridad El aparato tiene un controlador temporal de las zonas de cocción. Dependiendo del nivel de potencia ajustado, este apaga la zona de cocción después de la duración de funcionamiento a continuación.
  • Seite 208: Cuidado Y Mantenimiento

    All manuals and user guides at all-guides.com Cuidado y mantenimiento Limpieza Primero dejar enfriar el aparato antes de limpiar. Durante y después de la limpieza, prestar atención que no esté funcionando ninguna zone de cocción por descuido. ¡No utilizar depurador de vapor para limpiar! Limpieza de la superficie de vitrocerámica La limpieza a tiempo de la superficie de vitrocerámica ahorra eliminar posteriormente con mucho esfuerzo las suciedades pertinaces.
  • Seite 209: Limpieza De Las Manillas

    All manuals and user guides at all-guides.com ... Cuidado y mantenimiento Debido al tratamiento inadecuado durante la limpieza se puede dañar la decoración o la superficie de vitrocerámica. La superficie se torna más oscura en estas partes. Dichas manchas ya no se pueden eliminar con la limpieza. Limpieza de las manillas ■...
  • Seite 210: Eliminar Uno Mismo Los Fallos

    ► Volver a encender el fusible automático. del apartamento o de la casa está defectuoso. ■ El fusible o el fusible ► Llamar a BORA Lüftungstechnik GmbH. automático salta varias veces. ■ Interrupción en el suministro ► Verificar el suministro de energía.
  • Seite 211 ■ Rotura del cable de conexión ► Llamar a BORA Lüftungstechnik GmbH. entre la placa de cocción y el interruptor giratorio..en uno o en ambos indicadores E E E E quedan los indicadores Causa posible Reparación...
  • Seite 212: Eliminación

    All manuals and user guides at all-guides.com Eliminación Embalaje ■ El material de embalaje (cartón, lámina de plástico de PE e icopor EPS) está marcado y se tiene que enviar en lo posible en al reciclaje y desechar protegiendo el medio ambiente. Desinstalación ■...
  • Seite 213: Notas

    All manuals and user guides at all-guides.com Notas...
  • Seite 214 All manuals and user guides at all-guides.com ... Notas...
  • Seite 215 All manuals and user guides at all-guides.com ... Notas...
  • Seite 216 All manuals and user guides at all-guides.com Placa de identificación Placa de identificación de la placa de cocción del módulo de mando BORA Lüftungstechnik GmbH Rosenheimer Str. 32 D-83064 Raubling Alemania Fon +49 (0)8035 / 907 240 Ind. Kochfeld: Fax +49 (0)8035 / 907 249 PI-UM-E-0010910 info@boragmbh.com...

Inhaltsverzeichnis