
Verwandte Anleitungen für geo-FENNEL selection PRO 360 Liner SP


Inhaltszusammenfassung für geo-FENNEL selection PRO 360 Liner SP
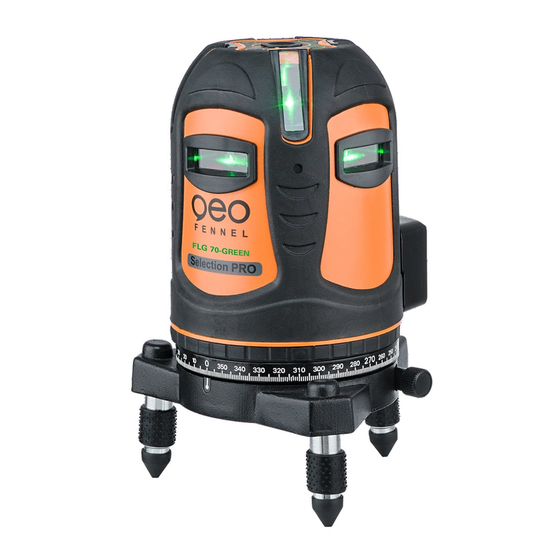
- Seite 1 DE | EN | FR All manuals and user guides at all-guides.com 360° Liner SP BEDIENUNGSANLEITUNG USER MANUAL MODE D‘EMPLOI www.geo-fennel.com...
-
Seite 2: Lieferumfang
All manuals and user guides at all-guides.com Sehr geehrter Kunde, vielen Dank für das Vertrauen, welches Sie uns beim Erwerb Ihres neuen geo-FENNEL-Gerätes ent- gegengebracht haben. Dieses hochwertige Qualitätsprodukt wurde mit größter Sorgfalt produziert und qualitätsgeprüft. Die beigefügte Anleitung wird Ihnen helfen, das Gerät sachgemäß zu bedienen. Bitte lesen Sie ins- besondere auch die Sicherheitshinweise vor der Inbetriebnahme aufmerksam durch. -
Seite 3: Funktionen
All manuals and user guides at all-guides.com Technische Daten Selbstnivellierbereich ± 5° Genauigkeit ±3 mm / 10 m Arbeitsbereich • ohne Empfänger 30 m* • mit Empfänger (optional) 80 m Stromversorgung / Li-Ion (alternativ: Alkaline) Betriebsdauer 13 h (8 h) Staub-/Wasserschutz IP 54 Laserdiode... -
Seite 4: Bedienung
All manuals and user guides at all-guides.com BEDIENUNG Gerät aufstellen Auf dem Fußboden oder Auf ein Stativ mit 1/4“- oder 5/8“-Gewinde aufschrauben oder Mitgelieferte Halterung als Wandhalterung mit dem Laser verbinden und dann mit den Löchern an Schrauben aufhängen oder Mitgelieferte Halterung als Wandhalterung mit dem Laser verbinden und mit den Magneten an einer magnetischen Oberfläche befestigen... -
Seite 5: Empfängerbetrieb (Optional)
All manuals and user guides at all-guides.com MANUELL-FUNKTION / PULS-FUNKTION Wenn das Gerät sich in OFF-Position befindet, Taste (3) einmal drücken, um die MANUELL -Funktion ein- zuschalten; die AN/AUS-LED leuchtet, die MANUELL -LED blinkt, die Laserlinien sind eingeschaltet. Nun kann das Gerät auch schräg eingesetzt werden; der Kompensatoralarm ist ausgeschaltet. Taste (3) ein zweites Mal drücken, um den Empfängerbetrieb einzuschalten;... -
Seite 6: Sicherheitshinweise
All manuals and user guides at all-guides.com SICHERHEITSHINWEISE UMSTÄNDE, DIE DAS MESSERGEBNIS VERFÄLSCHEN KÖNNEN Messungen durch Glas- oder Plastikscheiben; verschmutzte Laseraustrittsfenster; Sturz oder starker Stoß. Bitte Genauigkeit überprüfen. Große Temperaturveränderungen: Wenn das Gerät aus warmer Umgebung in eine kalte oder umgekehrt gebracht wird, vor Benutzung einige Minuten warten. -
Seite 7: Bestimmungsgemässe Verwendung
All manuals and user guides at all-guides.com BESTIMMUNGSGEMÄSSE VERWENDUNG Das Gerät sendet einen sichtbaren Laserstrahl aus, um z.B. folgende Messaufgaben durchzuführen: Ermittlung von Höhen; rechten Winkeln, Ausrichtung von horizontalen und vertikalen Bezugsebenen (je nach Gerät). WARN- UND SICHERHEITSHINWEISE · Richten Sie sich nach den Anweisungen der Bedienungsanleitung. ·... - Seite 8 All manuals and user guides at all-guides.com Dear customer, Thank you for your confidence in us having purchased a geo-FENNEL instrument. This manual will help you to operate the instrument appropriately. Please read the manual carefully - particularly the safety instructions. A proper use only guarantees a longtime and reliable operation.
-
Seite 9: Technical Data
All manuals and user guides at all-guides.com Technical Data Self-levelling range ± 5° Accuracy ±3 mm / 10 m Working range • w/o receiver 30 m* • with receiver (optional) 80 m Power supply Li-Ion (Alkaline batteries alternatively) Operating time 13 h (8 h) Dust / water protection IP 54... - Seite 10 All manuals and user guides at all-guides.com OPERATION Set up the laser On the floor On a tripod with a 1/4“ or 5/8“ thread Fix the bracket supplied with as a wall mount and set up the laser with screws on a wall Fix the magnet of the wall mount on a magnetic surface Fix the unit on a column by means of the fixing...
-
Seite 11: Accuracy Check
All manuals and user guides at all-guides.com MANUAL FUNCTION / PULSE FUNCTION If the instrument is in OFF position press button (3) once to enter into the MANUAL function; the ON/ OFF LED and the MANUAL LED are illuminated, all laser lines are on. Now the instrument can be used in slope mode, the compensator alarm is off. -
Seite 12: Safety Notes
All manuals and user guides at all-guides.com SAFETY NOTES SPECIFIC REASONS FOR ERRONEOUS MEASURING RESULTS Measurements through glass or plastic windows; dirty laser emitting windows; after the instrument has been drop- ped or hit. Please check the accuracy. Large fluctuation of temperature: If the instrument will be used in cold areas after it has been stored in warm areas (or the other way round) please wait some minutes before carrying out measurements. -
Seite 13: Intended Use Of Instrument
All manuals and user guides at all-guides.com INTENDED USE OF INSTRUMENT The instrument emits a visible laser beam in order to carry out the following measuring tasks (depending on instru- ment): Setting up heights, horizontal and vertical planes, right angles. SAFETY INSTRUCTIONS ·... - Seite 14 Cher client, Nous tenons à vous remercier pour la confiance que vous avez témoignée, par l‘acquisition de votre nouvel instrument geo-FENNEL. Les instructions de service vous aideront à vous servir de votre instrument de manière adéquate. Nous vous recommandons de lire avec soin tout particulièrement les consignes de sécurité de ladite notice avant la mise en service de votre appareil.
-
Seite 15: Données Techniques
All manuals and user guides at all-guides.com Données techniques Plage d‘auto-nivellement ± 5° Précision ± 3 mm / 10 m Portée • sans cellule 30 m* • avec cellule Ø (en option) 80 m Alimentation en courant Li-Ion (piles alcalines) Autonomie 13 h (8 h) Étanche aux poussière / à... -
Seite 16: Mise En Marche
All manuals and user guides at all-guides.com APPLICATION Mise en place de l‘appareil Sur le sol Visser l’instrument laser sur un trépied pourvu d’une fixation filetée de 1/4“ ou 5/8“ . Relier l‘instrument à son support (inclus de série) pour s‘en servir comme support mural, puis suspendre celle-ci par des vis à... - Seite 17 All manuals and user guides at all-guides.com FONCTION MANUELLE / FONCTION PULSE Lorsque l’instrument se trouve en position ARRÊT (OFF), presser la touche (3) une seule fois pour mettre en circuit la fonction MANUEL; la LED MARCHE/ARRÊT s’allume, la LED MANUEL clignote et les lignes laser sont en mesure de fonctionner.
-
Seite 18: Compatibilité Électromagnétique
All manuals and user guides at all-guides.com NOTICES DE SÉCURITÉ CIRCONSTANCES POUVANT FAUSSER LES RÉSULTATS DE MESURES Mesures effectuées à travers des plaques de verre ou de matière plastique; mesures effectuées à travers la fenêtre de sortie du faisceau laser lorsqu‘elle est sale. Mesures après que le niveau soit tombé ou ait subi un choc très fort. Mesures effectuées pendant de grandes différences de température - p. - Seite 19 All manuals and user guides at all-guides.com 5. Le fabricant et son représentant déclinent toute responsabilité pour les dommages et le bénéfices non réalisés par suite d‘une manoeuvre non conforme aux instructions. 6. Le fabricant et son représentant déclinent toute responsabilité pour les dommages et les bénéfices non réalisés qui decoulent d‘une utilisation inadéquante ou en liaison avec des produits d‘autres fabricants.
- Seite 20 All manuals and user guides at all-guides.com geo-FENNEL GmbH geo-FENNEL GmbH Technische Änderungen vorbehalten. Technische Änderungen vorbehalten. Kupferstraße 6 All instruments subject to technical changes. All instruments subject to technical changes. Kupferstraße 6 D-34225 Baunatal Sous réserve de modifications techniques.