ONKRON M2S Benutzerhandbuch
Inhaltsverzeichnis
Verfügbare Sprachen
Verfügbare Sprachen
Quicklinks
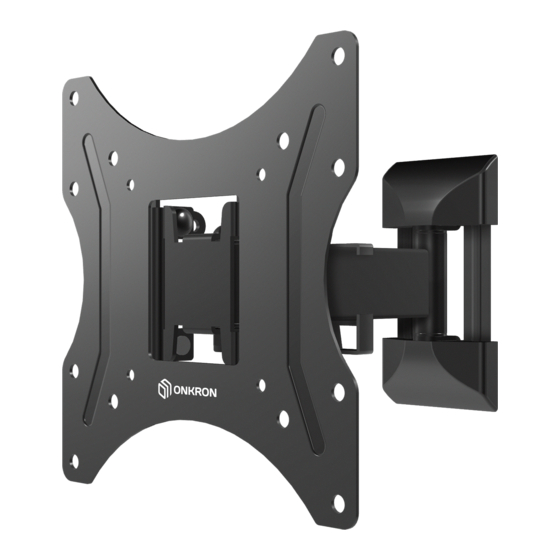
Screen size
17" - 43"
Max weight
35 kg
77 lbs
Swivel
80°
VESA
100 x 100, 200 x 100,
200 x 200 mm
Wall distance
35 - 205 mm
1.4"- 8.0"
Tilt
-2° to +12°
EN
USER GUIDE
DE
BENUTZERHANDBUCH
FR
MODE D'EMPLOI
IT
GUIDA UTENTE
ES
GUÍA DEL USUARIO
RU
РУКОВОДСТВО ПОЛЬЗОВАТЕЛЯ
KZ
ПАЙДАЛАНУШЫ НҰСҚАУЛЫҒЫ
Tilt-swivel TV wall mount for
Neig-schwenkbare TV-Wandhalterung
Support inclinable et orientable pour TV
Supporto per TV full-motion
Soporte para TV inclinable y giratorio
Наклонно-поворотный кронштейн для ТВ
Айналмалы-бұрылатын теледидар тірегі
M2S
17 43
"-
"
Inhaltsverzeichnis

Verwandte Anleitungen für ONKRON M2S


Inhaltszusammenfassung für ONKRON M2S
- Seite 12 Sie bitte Ihr Feedback. Wenn Sie irgendwelche Fragen oder Probleme haben, dann können Sie uns jederzeit kontaktieren und wir werden Ihnen helfen: USA: sale@onkron.us / +13159682278 Europa: info@onkron.de / +494029996807 Russland: support@onkron.ru / +78007772176 Lesen Sie diese Anleitung vollständig durch, bevor Sie mit der Montage und Installation beginnen.
-
Seite 13: Bausatz
BAUSATZ: Entpacken Sie zuerst alle Komponenten und stellen Sie sicher, dass Sie alle notwendigen Teile haben. Wenn Teile fehlen, wenden Sie sich bitte an den Kundendienst. Überprüfen Sie die Stückliste: ZUSAMMENSETZUNG DER Halterung (x1) BEFESTIGUNGSELEMENTE ZUR BEFESTIGUNG AN DER WAND: Gewindeschraube Kabelkanal (x1) M6x50 (x4) -
Seite 14: Demontage Des Vesa-Panels
1. Demontage des VESA-Panels • Legen Sie Ihr VESA-Panel auf Oben eine ebene Fläche. • Schrauben Sie die beiden unteren Muttern von der VESA-Platte ab und legen Sie sie beiseite. • Verwenden Sie den im Befestigungssatz enthaltenen Schraubenschlüssel (K). VESA-Panel ACHTUNG: Schrauben Sie die obere Mutter der VESA-Platte nicht ab! 2. -
Seite 15: Halterungsmontage An Die Holzwand, Den Holzträger Für Einschichtige Gipskartonplatten
2.1 Halterungsmontage an die Holzwand, den Holzträger für einschichtige Gipskartonplatten • Positionieren Sie die Basis d e r H a l t e r u n g i n d e r g e w ü n s c h t e n P o s i t i o n , m a r k i e r e n S i e d i e v i e r Schraubenlöcher mit einem Bleistift. -
Seite 16: Halterungsmontage An Die Betonwand
Halterungsmontage an die Betonwand • Positionieren Sie die Basis d e r H a l t e r u n g i n d e r g e w ü n s c h t e n P o s i t i o n , m a r k i e r e n S i e d i e v i e r Schraubenlöcher mit einem Bleistift. -
Seite 17: Montage Der Dekorativen Kunststoffauskleidungen
3. Montage der dekorativen Kunststoffauskleidungen • B e fe s t i g e n S i e j e e i n e d e k o r a t i v e Kunststoffplatte oben und unten am Halterungsfuß an der Wand, bis Sie ein deutliches Klicken hören. -
Seite 18: Montage Des Vesa-Panels Zu Dem Fernseher
D i e Ve r w e n d u n g v o n S c h r a u b e n , d i e l ä n g e r a l s d i e erforderliche Größe sind, oder der Einbau von Schrauben in einer geneigten Position kann das Innere des Fernsehers beschädigen. - Seite 19 • A. Die Option für die Installation ohne Abstandshalter (Fernseher mit flacher Rückseite). • B . D i e O p t i o n f ü r d i e I n s t a l l a t i o n m i t d e r Ve r w e n d u n g v o n d e n Abstandshaltern (ist für die Fernseher mit abgerundeter Rückseite oder integrierten Montagelöchern geeignet).
-
Seite 20: Montage Des Fernsehers An Die Halterung
6. Montage des Fernsehers an die Halterung • Bringen Sie das TV-Gerät mit der Rückseite zu der an der Wand montierten Halterung und senken Sie es, ohne die Unterseite des TV-Geräts gegen die Halterung zu drücken, vorsichtig auf die Plattform ab, bis die obere Schraube und die Mutter in die Plattform einrasten. -
Seite 21: Einstellung Der Halterungsposition
7. Einstellung der Halterungsposition • Stellen Sie die gewünschte Position der Halterung ein. • Die Halterung kann um -2° +12° geneigt werden, indem die Muttern auf beiden Seiten der Halterung gelöst, die Neigung eingestellt und wieder angezogen werden. • Verwenden Sie den Schraubenschlüssel (K) aus dem Montagesatz. Nuss -2°... -
Seite 63: Inhaltsverzeichnis
Content: PAGE Assembly Kit.............................3 1. VESA panel disassembly......................4 2. Wall mounting..........................4 2.1 Wooden wall mounting, wooden studs for single layered dry walls......5 2.2 Concrete wall mounting......................6 3. Installation of the plastic covers....................7 4. Choose suitable bolts for VESA panel installation..............7 5.