Inhaltsverzeichnis
Werbung
Verfügbare Sprachen
Verfügbare Sprachen
Werbung
Kapitel
Inhaltsverzeichnis
Fehlerbehebung

Verwandte Anleitungen für Gaggia Milano VELASCA RI8260


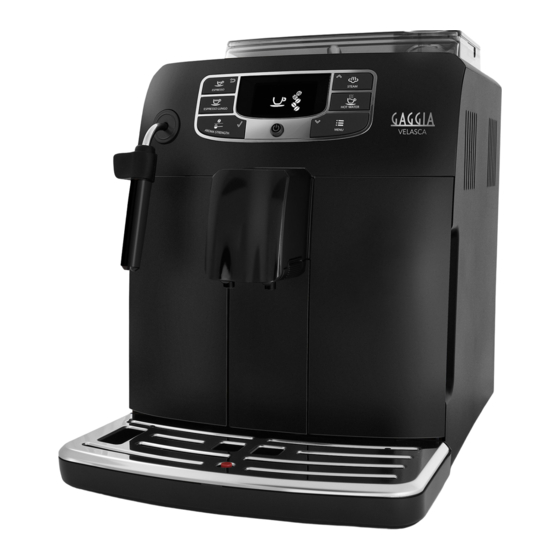
Inhaltszusammenfassung für Gaggia Milano VELASCA RI8260
- Seite 1 Type RI8260, SUP047G GAGGIA VELASCA USER MANUAL BENUTZERHANDBUCH MANUALE UTENTE...
- Seite 3 ESPRESSO STEAM ESPRESSO LUNGO HOT WATER MENU...
-
Seite 4: Inhaltsverzeichnis
English Contents Introduction ______________________________________________________________________ Important ________________________________________________________________________ Warning_________________________________________________________________________ Caution__________________________________________________________________________ Electromagnetic fields (EMF)________________________________________________________ Machine overview (Fig. 1)___________________________________________________________ The display ______________________________________________________________________ First installation ___________________________________________________________________ Manual rinsing cycle _______________________________________________________________ AquaClean filter __________________________________________________________________ AquaClean filter installation _________________________________________________________ Replacing the AquaClean filter ______________________________________________________ Using the machine ________________________________________________________________ Brewing coffee with beans__________________________________________________________ Adjusting the coffee quantity ________________________________________________________ Adjusting the grind setting__________________________________________________________... -
Seite 5: Important
English Important Warning - Connect the machine to a wall socket with a voltage matching the technical specifications of the machine. - Connect the machine to an earthed wall socket. - Do not let the power cord hang over the edge of a table or counter, or touch hot surfaces. -
Seite 6: Caution
English - Cleaning and user maintenance shall not be made by children unless they are older than 8 and supervised. - Keep the machine and its cord out of the reach of children aged less than 8 years. - Children should be supervised to ensure that they do not play with the machine. -
Seite 7: Electromagnetic Fields (Emf)
English - Do not leave water in the water tank when the machine is not used over a long period of time. The water can be contaminated. Use fresh water every time you use the machine. Electromagnetic fields (EMF) This Gaggia appliance complies with all applicable standards and regulations regarding exposure to electromagnetic fields. -
Seite 8: First Installation
English - AROMA STRENGTH button = OK button: you can press this button to select, confirm or stop a function. - STEAM button = UP button: press this button to scroll up through the display menu STEAM - MENU button = DOWN button: press this button to scroll down through the display menu. - Seite 9 English 11 The display shows the following icon to indicate you have to install the AquaClean filter. If you want to install the AquaClean filter afterwards, press the ESC AQUACLEAN button and continue with the manual rinsing cycle. For installation, see AQUA FILTER? CLEAN...
-
Seite 10: Manual Rinsing Cycle
English The display shows a tick icon to confirm the activation. 19 The display shows the filter ready icon to indicate the AquaClean filter has been installed correctly. 20 To rinse the filter, press the HOT WATER button and let half a litre of water flow out from the hot water/steam dispensing spout. -
Seite 11: Aquaclean Filter Installation
English AquaClean filter installation Your machine has to be completely limescale-free before you start to use the AquaClean filter. If you did not activate the filter upon first use and brewed more than 50 cups (with 100 ml capacity), you need to descale the machine before you activate the filter. -
Seite 12: Using The Machine
English Display icon AquaClean filter What to do 10% + icon flashes The performance of this filter is decreasing. It is recommended to remove the old filter and place the new filter as described in section 'AquaClean filter installation’ to retain proper filter performance. 0% + icon flashes Remove the old filter immediately and place the new filter as described in section ‘AquaClean filter... -
Seite 13: Frothing Milk
English 6 Brew 2-3 coffees to taste the difference. Frothing milk Warning: Danger of scalding. Only grab the steam wand by its protective handle. Dispensing may be preceded by small jets of hot water. 1 Fill 1/3 of a jug with cold milk. 2 Immerse the classic milk frother in milk. -
Seite 14: Lubrication
English 5 To place the brew group back, make sure that the lever is in contact with the base of the brewing unit. Note: If it is not in contact with the base, push it down. 6 Make sure the locking hook of the brew group is in the correct position. To position the hook correctly, push it upwards until it is in uppermost position. -
Seite 15: Classic Milk Frother Cleaning (Daily)
English 2 Apply lubricant to the rails on both sides, as shown in the illustration. 3 Slide the brew group back into the machine along the guiding rails on the sides until it clicks into position. Then place the coffee residues drawer back in the machine. -
Seite 16: Descaling Procedure
English If you do not descale when the display shows the CALC CLEAN icon or after 8 AquaClean filter replacements, the machine may stop working properly. In this case, repairs are not covered by the guarantee). START CALC Never drink the water with descaling mixture that you pour into CLEAN the water tank or any water with residues that comes out of the machine during the descaling procedure. -
Seite 17: Interruption Of The Descaling Cycle
English - The display shows the following icon to indicate that the rinsing cycle is finished. 14 The display shows a tick icon. 15 Rinse the water tank and fill it with fresh water up to the MAX level. Slide CALC CLEAN the water tank back into the machine. - Seite 18 English - The bean hopper is empty. Put new coffee beans in the bean hopper. - The brew group is not in the machine. Insert the group. - Close the service door. - Remove the coffee grounds container and empty it. - There is too much powder in the brew group.
-
Seite 19: Meaning Of Error Codes
English - You forgot to place the lid on the pre-ground coffee compartment. If you do not place it back within 30 seconds the display will return to the main menu and the brewing cycle will be stopped. Meaning of error codes Error code Problem Cause... -
Seite 20: Guarantee And Support
English Guarantee and support If you need information or support, please visit www.gaggia.com/n-m- co/espresso/world-wide or www.gaggia.it/n-m-co/espresso/contact, or read the separate warranty booklet. Recycling - This symbol means that this product shall not be disposed of with normal household waste (2012/19/EU). - Follow your country's rules for the separate collection of electrical and electronic products. - Seite 21 English The brew group cannot The brew group is not positioned Close the maintenance door. Switch be removed. correctly. the machine off and back on again. Wait for the machine ready screen to appear and then remove the brew group. The coffee grounds container is Remove the coffee grounds container not removed.
- Seite 22 English The machine grinds the The grind is set too fine. Adjust the grinder to a coarser setting. coffee beans, but coffee does not come out. The brew group is dirty. Clean the brew group. The coffee dispensing spout is Clean the coffee dispensing spout and dirty.
- Seite 23 English The AquaClean filter was not Follow the instructions on the display correctly activated during first until you receive confirmation that the installation. filter has been activated. The AquaClean filter is After 8 filter replacements, you First descale the machine and then installed, but the need to descale the machine install a new AquaClean filter.
-
Seite 24: Einführung
Deutsch Inhalt Einführung _______________________________________________________________________ Wichtig __________________________________________________________________________ Warnhinweis______________________________________________________________________ Achtung_________________________________________________________________________ Elektromagnetische Felder (EMF)____________________________________________________ Übersicht über die Maschine (Abb. 1)__________________________________________________ Das Display ______________________________________________________________________ Inbetriebnahme __________________________________________________________________ Manueller Spülzyklus ______________________________________________________________ AquaClean-Filter _________________________________________________________________ Installation des AquaClean-Filters ___________________________________________________ AquaClean-Filter austauschen ______________________________________________________ Verwenden des Geräts _____________________________________________________________ Kaffee aus Kaffeebohnen zubereiten_________________________________________________ Einstellen der Kaffeemenge ________________________________________________________ Mahlgrad einstellen________________________________________________________________ Aufschäumen von Milch____________________________________________________________... -
Seite 25: Wichtig
Deutsch Wichtig Warnhinweis - Die Maschine benötigt eine Netzsteckdose mit Netzanschlusswerten, die mit den Angaben auf der Maschine übereinstimmen. - Die Netzsteckdose muss schutzgeerdet sein. - Lassen Sie das Netzkabel nicht über die Kante des Tischs oder der Arbeitsfläche hängen oder heiße Flächen berühren. - Tauchen Sie die Maschine, den Netzstecker oder das Netzkabel nie in Wasser (Stromschlaggefahr). -
Seite 26: Achtung
Deutsch - Dieses Gerät kann von Kindern ab 8 Jahren und Personen mit eingeschränkten physischen, sensorischen oder geistigen Fähigkeiten oder ohne Erfahrung und besondere Kenntnisse verwendet werden, wenn sie beim Gebrauch des Geräts beaufsichtigt werden oder in den sicheren Gebrauch des Geräts unterwiesen wurden und die verbundenen Gefahren verstanden haben. -
Seite 27: Elektromagnetische Felder (Emf)
Deutsch - Füllen Sie den Wasserbehälter nie mit warmem, heißem oder Mineralwasser, da dies zu Schäden am Wasserbehälter und an der Maschine führen kann. - Reinigen Sie die Maschine nie mit einem Scheuerschwamm oder Scheuermittel oder mit aggressiven Flüssigkeiten wie Benzin oder Azeton. -
Seite 28: Das Display
Deutsch 20 Netzkabel 21 Reinigungsbürste (nur für bestimmte Gerätetypen) 22 Fett (nur für bestimmte Gerätetypen) 23 Messlöffel für vorgemahlenen Kaffee 24 Wasserhärtetester 25 Kaffeeresteschublade 26 Brühgruppe 27 Heißwasser-/Dampfdüse 28 Klassischer Milchaufschäumer Das Display Einige Tasten können zum Navigieren durch die Menüs verwendet werden: - ESPRESSO-Taste = ESC_Taste: Drücken Sie diese Taste, um zurück zum Hauptmenü... - Seite 29 Deutsch 8 Drücken Sie zum Einschalten der Maschine die STANDBY-Taste. 9 Drücken Sie die OK-Taste, um die automatische Kreislaufvorbereitung zu starten. 10 Das folgende Symbol in der Anzeige zeigt an, dass sich das Gerät aufheizt. - Die Maschine führt einen automatischen Spülzyklus durch. 11 Das Display zeigt das folgende Symbol an, um Sie auf den Einbau des AquaClean-Filters hinzuweisen.
-
Seite 30: Manueller Spülzyklus
Deutsch 15 Nehmen Sie den Wassertank aus dem Gerät, entleeren Sie ihn und setzen Sie den Filter senkrecht auf den Filteranschluss. 16 Füllen Sie den Wassertank mit frischem Wasser, und setzen Sie ihn wieder ein. 17 Drücken Sie die OK-Taste. 18 Wählen Sie ON (Ein) auf dem Display und bestätigen Sie die Aktivierung durch Drücken der OK-Taste. -
Seite 31: Aquaclean-Filter
Deutsch 5 Stellen Sie einen Behälter unter den klassischen Milchaufschäumer. 6 Drücken Sie die HOT WATER-Taste (Heißwasser). Die Ausgabe des heißen Wassers beginnt automatisch. Lassen Sie Wasser laufen, bis das Symbol „Kein Wasser" gezeigt wird. 7 Füllen Sie den Wassertank bis zur Markierung MAX mit frischem Wasser und entfernen Sie den Behälter. -
Seite 32: Aquaclean-Filter Austauschen
Deutsch 6 Wählen Sie ON (Ein) auf dem Display und bestätigen Sie die Aktivierung durch Drücken der OK-Taste. A Q U A CLEAN Hinweis: Die Aktivierung wird im Display mit einem Häkchen bestätigt. 7 Drücken Sie zum Spülen des Filters die HOT WATER-Taste (Heißwasser) und lassen Sie einen halben Liter Wasser durch den Heißwasser/Dampfauslauf fließen. -
Seite 33: Einstellen Der Kaffeemenge
Deutsch 2 Drücken Sie die Taste AROMA STRENGTH (Aromastärke), um die gewünschte Kaffeestärke von 1 bis 5 Bohnen auszuwählen. 3 Drücken Sie die ESPRESSO-Taste, um einen Espresso zu brühen, oder die ESPRESSO LUNGO-Taste, um einen Kaffee zu brühen. Einstellen der Kaffeemenge 1 Halten Sie die ESPRESSO-Taste oder die ESPRESSO LUNGO-Taste gedrückt, bis das Display das Wort MEMO anzeigt. -
Seite 34: Reinigung Und Pflege
Deutsch 1 Stellen Sie einen Behälter unter den klassischen Milchaufschäumer. 2 Drücken Sie die HOT WATER-Taste (Heißwasser). Die Ausgabe des heißen Wassers beginnt automatisch. 3 Drücken Sie die OK-Taste, um die Heißwasserausgabe zu stoppen, Entfernen Sie den Behälter. Reinigung und Pflege Wöchentliche Reinigung der Brühgruppe Reinigen Sie die Brühgruppe einmal pro Woche. -
Seite 35: Schmierung
Deutsch 7 Der Haken ist nicht richtig positioniert, wenn er noch in der untersten Position ist. 8 Schieben Sie die Brühgruppe entlang der Führungsschienen an den Seiten wieder in das Gerät, bis sie hörbar einrastet. Setzen Sie dann die Kaffeeresteschublade wieder in das Gerät ein. Schmierung Schmieren Sie die Brühgruppe nach ungefähr 500 Tassen oder einmal im Monat. -
Seite 36: Entkalken
Deutsch 2 Entfernen Sie den oberen Teil des klassischen Milchaufschäumers von der Dampfdüse und spülen Sie ihn mit frischem Wasser. 3 Reinigen Sie die Dampfdüse mit einem feuchten Tuch. 4 Setzen Sie alle Teile des klassischen Milchaufschäumer wieder zusammen. Entkalken Wenn das Display das Symbol CALC CLEAN anzeigt oder der AquaClean- Filter 8 Mal ausgewechselt wurde, muss das Gerät entkalkt werden. -
Seite 37: Unterbrechung Des Entkalkungsvorgangs
Deutsch 4 Das Display zeigt das folgende Symbol an, um anzuzeigen, dass das Gerät den Entkalkungsvorgang startet. Wenn Sie den Entkalkungsvorgang abbrechen möchten, drücken Sie die ESC-Taste. 5 Gießen Sie die gesamte Flasche Gaggia Entkalkungslösung (250 ml) in den Wasserbehälter. 6 Füllen Sie die Entkalkungslösung im Wasserbehälter bis zur Markierung CALC CLEAN mit Wasser auf. -
Seite 38: Warnsymbole Und Fehlercodes
Deutsch oder das Stromkabel versehentlich ausgesteckt wird, können Sie den Entkalkungsvorgang abbrechen, indem Sie die Standby-Taste drücken. In diesem Fall leeren und spülen Sie den Wassertank gründlich und füllen Sie ihn dann bis zur Markierung CALC CLEAN mit frischem Wasser. Bevor Sie Getränke zubereiten, führen Sie nochmals einen manuellen Spülzyklus wie im Kapitel „Inbetriebnahme“, Abschnitt „Manueller Spülzyklus“... -
Seite 39: Bedeutung Der Fehlercodes
Deutsch - Entnehmen Sie den Kaffeesatzbehälter, und leeren Sie den Behälter. - Es ist zu viel Pulver in der Brühgruppe. Reinigen Sie die Brühgruppe. - Wenn ein Fehlercode ausgelöst wird, sehen Sie im Abschnitt „Bedeutung der Fehlercodes“ nach, was der Code im Display bedeutet und was Sie tun können. -
Seite 40: Bestellen Von Zubehör
Deutsch Problem im Es ist Luft im Den Wasserbehälter Wasserkreislauf Wasserkreislauf. mehrmals entfernen und wieder einsetzen. Vergewissern Sie sich, dass Sie ihn ordnungsgemäß in die Machine einfügen. Überprüfen Sie, ob der Wasserbehälterbereich sauber ist. Andere Fehlercodes Schalten Sie das Gerät aus und nach 30 Sekunden wieder ein. -
Seite 41: Fehlerbehebung
Deutsch Fehlerbehebung Problem Ursache Die Lösung Das Gerät schaltet sich Die Maschine ist nicht Prüfen Sie, ob das Netzkabel richtig nicht ein. angeschlossen, oder der eingesteckt ist. Hauptschalter steht auf OFF (Aus). Kontrollieren Sie, dass der Hauptschalter auf ON (Ein) steht. Das Gerät befindet sich im Die Standby-Taste wurde länger Die Maschine mit dem Hauptschalter... - Seite 42 Deutsch Die Brühgruppe lässt sich Die Brühgruppe ist nicht in der Die Brühgruppe wurde vor dem nicht einsetzen. richtigen Position. Zurückbauen nicht in die Ausgangsposition gebracht. Achten Sie darauf, dass der Hebel die Unterseite der Brühgruppe berührt und dass der Haken der Brühgruppe in der richtigen Position ist.
- Seite 43 Deutsch Der Kaffeeauswurfschacht ist Reinigen Sie den blockiert. Kaffeeauswurfschacht mit dem Griff des Multifunktionswerkzeugs oder einem Löffelgriff. Der Kaffee läuft langsam Der Kaffee ist zu fein gemahlen. Stellen Sie einen gröberen Mahlgrad aus der Maschine. ein. Die Brühgruppe ist verschmutzt. Reinigen Sie die Brühgruppe.
- Seite 44 Deutsch Der AquaClean-Filter wurde bei Folgen Sie den Anweisungen auf dem der Inbetriebnahme des Geräts Display, bis Sie die Bestätigung nicht richtig aktiviert. erhalten, dass der Filter aktiviert wurde. Der AquaClean-Filter ist Nach 8 Filterwechseln müssen Entkalken Sie das Gerät zuerst und eingebaut, aber die Sie die Maschine entkalken.
- Seite 45 Deutsch www.gaggia.com/n-m-co/espresso/world-wide oder www.gaggia.it/n-m- co/espresso/contact.
-
Seite 46: Introduzione
Italiano Indice Introduzione _____________________________________________________________________ Importante _______________________________________________________________________ Avvertenza_______________________________________________________________________ Attenzione_______________________________________________________________________ Campi elettromagnetici (EMF)_______________________________________________________ Panoramica della macchina (Fig. 1)___________________________________________________ Il display ________________________________________________________________________ Prima installazione ________________________________________________________________ Ciclo di risciacquo manuale _________________________________________________________ Filtro AquaClean __________________________________________________________________ Installazione del filtro AquaClean ____________________________________________________ Sostituzione del filtro AquaClean ____________________________________________________ Modalità... -
Seite 47: Importante
Italiano Importante Avvertenza - Collegate la macchina a una presa di corrente a muro con voltaggio corrispondente alle specifiche tecniche della macchina. - Collegate la macchina a una presa di corrente dotata di messa a terra. - Assicuratevi che il cavo di alimentazione non penda dal bordo del tavolo o del bancone e che non tocchi superfici calde. -
Seite 48: Attenzione
Italiano - Questa macchina può essere usata da bambini di età superiore agli 8 anni e da persone con capacità mentali, fisiche o sensoriali ridotte, prive di esperienza o conoscenze adatte, a condizione che tali persone abbiano ricevuto assistenza o formazione per utilizzare la macchina in maniera sicura e capiscano i potenziali pericoli associati a tale uso. -
Seite 49: Campi Elettromagnetici (Emf)
Italiano - Non riempite mai il serbatoio dell'acqua con acqua calda, bollente o frizzante per evitare di danneggiare il serbatoio stesso e la macchina. - Non usate prodotti o sostanze abrasive o detergenti aggressivi, come benzina o acetone, per pulire la macchina. Utilizzate semplicemente un panno morbido inumidito con acqua. -
Seite 50: Il Display
Italiano 20 Cavo 21 Spazzolina per la pulizia (solo per alcuni modelli) 22 Lubrificante (solo per alcuni modelli) 23 Misurino per caffè pre-macinato 24 Tester della durezza dell'acqua 25 Cassetto residui di caffè 26 Gruppo infusore 27 Erogatore di acqua calda/vapore 28 Pannarello classico Il display Alcuni pulsanti possono essere utilizzati per navigare nei menu:... - Seite 51 Italiano 9 Premete il pulsante OK per avviare il ciclo automatico di preparazione del circuito. 10 Il display mostra l'icona seguente per indicare che la macchina si sta riscaldando. - La macchina esegue un ciclo di risciacquo automatico. 11 Il display mostra l'icona seguente per indicare che è necessario installare il filtro AquaClean.
-
Seite 52: Ciclo Di Risciacquo Manuale
Italiano 15 Estraete il serbatoio dell'acqua dalla macchina, svuotatelo e inserite il filtro verticalmente sul punto di aggancio del filtro. 16 Riempite il serbatoio dell'acqua con acqua del rubinetto e reinseritelo nella macchina per il caffè. 17 Premete il pulsante OK. 18 Selezionate ON sul display e confermate l'attivazione premendo il pulsante OK. -
Seite 53: Filtro Aquaclean
Italiano 5 Posizionate un recipiente sotto il pannarello classico. 6 Premete il pulsante HOT WATER. La macchina inizia a erogare acqua calda automaticamente. Erogate acqua fino a quando viene visualizzato il simbolo di mancanza di acqua. 7 Riempite il serbatoio dell'acqua fino al livello MAX e rimuovete il recipiente. -
Seite 54: Sostituzione Del Filtro Aquaclean
Italiano 6 Selezionate ON sul display e confermate l'attivazione premendo il pulsante OK. A Q U A CLEAN Nota: il display mostra un segno di spunta per confermare l'attivazione. 7 Per sciacquare il filtro, premete il pulsante HOT WATER (Acqua calda) e lasciate scorrere mezzo litro di acqua dall'erogatore di acqua calda/vapore. -
Seite 55: Modalità D'uso Della Macchina
Italiano Modalità d'uso della macchina Preparazione del caffè con caffè in grani 1 Regolate il beccuccio di erogazione del caffè in base alle dimensioni della tazza. 2 Premete il pulsante AROMA STRENGTH (Intensità aroma) per selezionare l'intensità del caffè desiderata da 1 a 5 chicchi. 3 Premete il pulsante ESPRESSO per preparare un espresso o il pulsante ESPRESSO LUNGO per preparare un caffè. -
Seite 56: Acqua Calda
Italiano Acqua calda Avvertenza: Pericolo di ustioni. Toccate l'erogatore di vapore solo utilizzando l'impugnatura protettiva. All'inizio dell'erogazione possono verificarsi brevi spruzzi di acqua calda. 1 Posizionate un recipiente sotto il pannarello classico. 2 Premete il pulsante HOT WATER. La macchina inizia a erogare acqua calda automaticamente. -
Seite 57: Lubrificazione
Italiano 6 Assicuratevi che il gancio di bloccaggio del gruppo infusore sia nella posizione corretta. Per posizionare il gancio correttamente, spingetelo verso l'alto fino alla posizione più alta raggiungibile. 7 Se il gancio è ancora in posizione inferiore significa che non è posizionato correttamente. -
Seite 58: Pulizia Del Pannarello Classico E Dell'erogatore Di Vapore (Settimanale)
Italiano Pulizia del pannarello classico e dell'erogatore di vapore (settimanale) 1 Rimuovete la parte esterna del pannarello classico e sciacquatelo con acqua corrente. 2 Rimuovete la parte superiore del pannarello classico dall'erogatore di vapore e sciacquatelo con acqua corrente. 3 Pulite l'erogatore di vapore con un panno umido. 4 Riassemblate le parti del pannarello classico. -
Seite 59: Procedura Di Rimozione Del Calcare
Italiano Procedura di rimozione del calcare Potete mettere in pausa il ciclo di pulizia anticalcare o di risciacquo premendo il pulsante ESC. Il display mostrerà la seguente icona. Per CALC continuare il ciclo di pulizia anticalcare o di risciacquo premete il pulsante CLEAN 1 Rimuovete e svuotate il vassoio antigoccia. -
Seite 60: Interruzione Del Ciclo Di Pulizia Anticalcare
Italiano 18 Il display mostra l'icona seguente per indicare che la macchina si sta riscaldando. - La macchina esegue un ciclo di risciacquo automatico. 19 Rimuovete il recipiente. Rimuovete e svuotate il vassoio antigoccia. Riposizionate il vassoio antigoccia nella macchina. 20 Reinserite il filtro AquaClean nel serbatoio dell'acqua. -
Seite 61: Significato Dei Codici Di Errore
Italiano - Il gruppo infusore non è nella macchina. Inserite il gruppo. - Chiudete lo sportello di servizio. - Rimuovete il recipiente dei fondi di caffè e svuotatelo. - Il gruppo infusore contiene una quantità eccessiva di polvere. Pulite il gruppo infusore. -
Seite 62: Ordinazione Degli Accessori
Italiano Macinacaffè bloccato Condotto di uscita del Pulite a fondo il caffè ostruito condotto di uscita del caffè con l'impugnatura dell'utensile multifunzione o con il manico di un cucchiaio. 3 - 4 Impossibile rimuovere il Il gruppo infusore non è Chiudete lo sportello di gruppo infusore. -
Seite 63: Garanzia E Assistenza
Italiano Garanzia e assistenza Per assistenza o informazioni, visitate il sito Web www.gaggia.com/n-m- co/espresso/world-wide o www.gaggia.it/n-m-co/espresso/contact o leggete l'opuscolo della garanzia fornito a parte. Riciclaggio - Questo simbolo indica che il prodotto non può essere smaltito con i normali rifiuti domestici (2012/19/UE). - Ci sono due situazioni in cui potete restituire gratuitamente il prodotto vecchio a un rivenditore: 1 Quando acquistate un prodotto nuovo, potete restituire un prodotto... - Seite 64 Italiano Il display visualizza Il recipiente dei fondi di caffè è Svuotate sempre il recipiente dei fondi costantemente l'icona di stato svuotato a macchina di caffè a macchina accesa. Se il recipiente dei fondi di spenta. recipiente dei fondi di caffè viene caffè...
- Seite 65 Italiano Il gruppo infusore è sporco. Pulite il gruppo infusore. Per una pulizia accurata, seguite la procedura di pulizia mensile con una pastiglia sgrassante. Il condotto di uscita del caffè è Pulite a fondo il condotto di uscita del sporco. caffè...
- Seite 66 Italiano Il tipo di latte utilizzato non è Secondo il tipo di latte, la quantità e la adatto a produrre schiuma. qualità di schiuma prodotte sono diverse. Il latte vaccino parzialmente scremato o intero offre risultati soddisfacenti. Impossibile attivare il filtro È...
- Seite 67 Italiano Non avete attivato il filtro sostitutivo nel menu della macchina. Non avete sostituito il filtro quando il simbolo del filtro ha iniziato a lampeggiare. Il filtro non si inserisce. Dovete far uscire l'aria dal filtro. Lasciate fuoriuscire le bolle d'aria dal filtro.
- Seite 68 GAGGIA S.p.A. reserves the right to make any necessary modifi cation. S.p.A. GAGGIA Sede Legale/Registered Offi ce Piazza Eleonora Duse, 2 20122 MILANO Sede Amministrativa/Administrative Offi ce Via Torretta, 240 40041 Gaggio Montano (BO) +39 0534 771111 www.gaggia.com...