Herunterladen Inhalt Inhalt Diese Seite drucken
Bosch VBD5780S0 Gebrauchsanleitung

Bosch VBD5780S0 Gebrauchsanleitung

Einbaubackofen
Vorschau ausblenden Andere Handbücher für VBD5780S0:
Inhaltsverzeichnis

Werbung

Verfügbare Sprachen

Verfügbare Sprachen

Built-in oven
VBD5780S0
[de] Gebrauchsanleitung
[en] Instruction manual
[es]
Instrucciones de uso
[pt]
IInstruções de serviço
Einbaubackofen
Built-in oven
Horno integrado
Forno de encastrar
3
27
51
76

Werbung

Inhaltsverzeichnis
loading

Inhaltszusammenfassung für Bosch VBD5780S0

  • Seite 1 Built-in oven VBD5780S0 [de] Gebrauchsanleitung Einbaubackofen [en] Instruction manual Built-in oven [es] Instrucciones de uso Horno integrado [pt] IInstruções de serviço Forno de encastrar...
  • Seite 3: Inhaltsverzeichnis

    Automatische Sicherheitsabschaltung ... . 13 Für Produktinformationen sowie Anwendungs- und Bedienungsfragen berät Sie unser Bosch-Infoteam Zeitfunktionen ......13 unter Tel.: 089 69 339 339 (Mo-Fr: 8.00-18.00 Uhr) Nur...
  • Seite 4: Bestimmungsgemäßer Gebrauch

    Bestimmungsgemäßer Gebrauch 8Bestimmungsgemäßer (Wichtige Gebrauch Sicherheitshinweise D iese Anleitung sorgfältig lesen. Nur dann G enerell B e s t i m m u n g s g e m ä ß e r G e b r a u c h W i c h t i g e S i c h e r h e i t s h i n w e i s e können Sie Ihr Gerät sicher und richtig Warnung –...
  • Seite 5: Reinigungsfunktion

    Wichtige Sicherheitshinweise Reinigungsfunktion Warnung – Verbrühungsgefahr! Die zugänglichen Teile werden im Betrieb ■ Warnung – Brandgefahr! heiß. Nie die heißen Teile berühren. Kinder Lose Speisereste, Fett und Bratensaft fernhalten. ■ können sich während der Beim Öffnen der Gerätetür kann heißer Verbrühungsgefahr! ■...
  • Seite 6: Ursachen Für Schäden

    Ursachen für Schäden ]Ursachen für Schäden G enerell U r s a c h e n f ü r S c h ä d e n Achtung! Zubehör, Folie, Backpapier oder Geschirr auf dem ■ Garraumboden: Kein Zubehör auf den Garraumboden legen.
  • Seite 7: Umweltschutz

    Umweltschutz Öffnen Sie die Gerätetür während dem Betrieb 7Umweltschutz ■ möglichst selten. I hr neues Gerät ist besonders energieeffizient. Hier U m w e l t s c h u t z erhalten Sie Tipps, wie Sie beim Umgang mit Ihrem Gerät noch mehr Energie sparen können und wie Sie das Gerät richtig entsorgen.
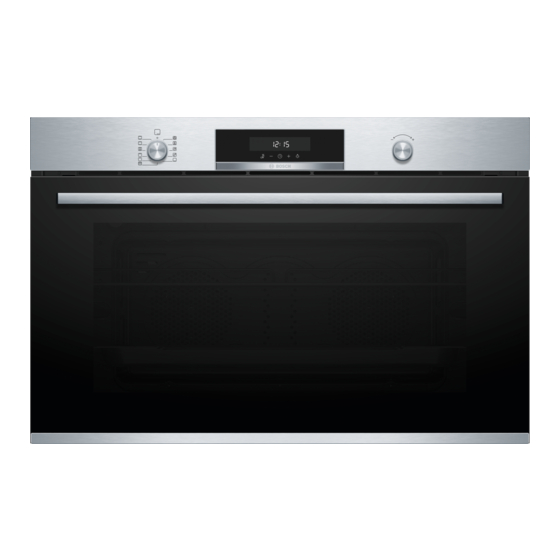
  • Seite 8: Gerät Kennen Lernen

    Gerät kennen lernen *Gerät kennen lernen I n diesem Kapitel erklären wir Ihnen die Anzeigen und G e r ä t k e n n e n l e r n e n Bedienelemente. Außerdem lernen Sie die verschiedenen Funktionen Ihres Gerätes kennen. Je nach Gerätetyp sind Abweichungen in den Hinweis: Farben und Einzelheiten möglich.
  • Seite 9: Heizarten Und Funktionen

    Gerät kennen lernen Heizarten und Funktionen Mit dem Funktionswähler stellen Sie die Heizarten und Damit Sie immer die richtige Heizart für Ihr Gericht weitere Funktionen ein. finden, erklären wir Ihnen hier die Unterschiede und Anwendungsbereiche. Heizart Temperatur/Stufe Verwendung Nullstellung Der Backofen ist ausgeschaltet. Û...
  • Seite 10: Garraumfunktionen

    Zubehör Garraumfunktionen _Zubehör Einige Funktionen erleichtern den Betrieb Ihres Gerätes. So wird z. B. der Garraum großflächig ausgeleuchtet I hrem Gerät liegt diverses Zubehör bei. Hier erhalten und ein Kühlgebläse schützt das Gerät vor Überhitzung. Z u b e h ö r Sie einen Überblick über das mitgelieferte Zubehör und dessen richtige Verwendung.
  • Seite 11: Rastfunktion

    Zubehör Rastfunktion Sonderzubehör Das Zubehör kann etwa bis zur Hälfte herausgezogen Zubehör können Sie beim Kundendienst nachkaufen. werden, bis es einrastet. Die Rastfunktion verhindert Zubehör Beschreibung das Kippen des Zubehörs beim Herausziehen. Das Zubehör muss richtig in den Garraum eingeschoben Emailliertes Backblech Für Blechkuchen und Kleingebäck.
  • Seite 12: Vor Dem Ersten Gebrauch

    Vor dem ersten Gebrauch Teleskopauszug-Set montieren KVor dem ersten Gebrauch Hinweise zur Montage des Teleskopauszug-Sets entnehmen Sie dem im Lieferumfang enthaltenen Kit. H ier erfahren Sie was Sie tun müssen, bevor Sie mit V o r d e m e r s t e n G e b r a u c h Ihrem Backofen zum ersten Mal Speisen zubereiten.
  • Seite 13: Gerät Bedienen

    Gerät bedienen 1Gerät bedienen OZeitfunktionen B ackofen ein- und ausschalten I hr Gerät verfügt über verschiedene Zeitfunktionen. G e r ä t b e d i e n e n Z e i t f u n k t i o n e n Backofen einschalten Übersicht über die Zeitfunktionen Mit dem Funktionswähler die Heizart einstellen.
  • Seite 14: Zeitschaltautomatik Einstellen

    Zeitfunktionen Elektronikuhr einstellen Endzeit einstellen Bei Bedarf kann die Uhrzeit geändert werden (z.B. von Das Backen oder Braten beginnt für die eingestellte Sommer- auf Winterzeit). Der Backofen muss dazu Dauer zu einem von Ihnen gewählten, späteren ausgeschaltet sein. Zeitpunkt. Gewünschte Heizart und Temperatur einstellen. Taste drücken.
  • Seite 15: Akindersicherung

    Kindersicherung AKindersicherung QGrundeinstellungen D amit Kinder den Backofen nicht versehentlich D amit Sie Ihr Gerät optimal und einfach bedienen K i n d e r s i c h e r u n g G r u n d e i n s t e l l u n g e n einschalten, hat er eine Kindersicherung.
  • Seite 16: Grundeinstellungen Ändern

    Reinigen Grundeinstellungen ändern DReinigen Der Funktionswähler muss auf der Nullstellung sein. B ei sorgfältiger Pflege und Reinigung bleibt Ihr Gerät Taste ca. 4 Sekunden lang drücken. R e i n i g e n lange schön und funktionsfähig. Wie Sie Ihr Gerät Im Display erscheint die erste Grundeinstellung, richtig pflegen und reinigen, erklären wir Ihnen hier.
  • Seite 17: Gerät Sauberhalten

    Reinigen Hinweise Kleine Farbunterschiede an der Gerätefront Gerät innen ■ entstehen durch verschiedene Materialien, wie z. B. Emailflächen Heiße Spüllauge oder Essigwasser: Glas, Kunststoff oder Metall. Mit einem Spültuch reinigen und einem weichen Schatten an den Türscheiben, die wie Schlieren ■...
  • Seite 18: Reinigungsfunktion

    Reinigungsfunktion Das Gerät wird während der Reinigungsfunktion .Reinigungsfunktion ■ außen sehr heiß. Nie brennbare Gegenstände, wie z. B. Geschirrtücher, an den Türgriff hängen. Vorderseite des Gerätes freihalten. Kinder fernhalten. I hr Gerät verfügt über Selbstreinigung. Mit der R e i n i g u n g s f u n k t i o n Selbstreinigung können Sie den Garraum reinigen.
  • Seite 19: Gestelle

    Gestelle pGestelle qGerätetür G estelle aushängen B ei sorgfältiger Pflege und Reinigung bleibt Ihr Gerät G e s t e l l e G e r ä t e t ü r lange schön und funktionsfähig. Hier erfahren Sie, wie Die Gestelle sind jeweils an drei Punkten an den Sie die Gerätetür reinigen können.
  • Seite 20: Gerätetür Aus- Und Einhängen

    Gerätetür Die beiden mittleren Scheiben mit ihren Halterungen Backofentür seitlich mit beiden Händen greifen und herausnehmen. Backofentür um etwa 30° schließen (b). Die beiden mittleren Scheiben sind nicht Hinweis: mit Haltestiften befestigt, sondern werden von Halterungen in Position gehalten. Backofentür leicht anheben und herausziehen. Backofentür nicht vollständig schließen.
  • Seite 21: Störungen, Was Tun

    Störungen, was tun? 3Störungen, was tun? S t ö r u n g e n , w a s t u n ? Störung Mögliche Ursache Hinweise/Abhilfe Gerät funktioniert nicht Stecker ist nicht eingesteckt Gerät am Stromnetz anschließen Stromausfall Prüfen, ob andere Küchengeräte funktionieren Sicherung defekt Im Sicherungskasten prüfen, ob die Sicherung für das Gerät in Ordnung ist...
  • Seite 22: Backofenlampe Auswechseln

    Kundendienst Backofenlampe auswechseln 4Kundendienst Wenn die Backofenlampe ausgefallen ist, muss sie ausgewechselt werden. Temperaturbeständige W enn Ihr Gerät repariert werden muss, ist unser Ersatzlampen erhalten Sie beim Kundendienst oder im K u n d e n d i e n s t Kundendienst für Sie da.
  • Seite 23: Für Sie In Unserem Kochstudio Getestet

    Für Sie in unserem Kochstudio getestet Beim Zubereiten von Lebensmitteln kann viel Hinweis: JFür Sie in unserem Wasserdampf im Garraum entstehen. Kochstudio getestet Ihr Gerät ist sehr energieeffizient und gibt während des Betriebs nur wenig Wärme nach außen ab. Aufgrund der hohen Temperaturunterschiede zwischen dem H ier finden Sie eine Auswahl an Speisen und die Geräte-Innenraum und den äußeren Teilen des Gerätes,...
  • Seite 24: Anwendungstipps

    Für Sie in unserem Kochstudio getestet Gericht Gewicht (in kg) Einschubhöhe Heizart Temperatur in °C Dauer in Minuten Mürbeteigkuchen 170** Paradies-Kuchen 160* 55-60 Windbeutel 180* 80-90 Biskuitkuchen 150-160* 55-60 Milchreis 160* 55-60 Brioche 160* 30-35 * vorheizen ** nicht vorheizen Anwendungstipps Benutzen Sie immer einen Topflappen, wenn Sie ■...
  • Seite 25: Tipps Zum Braten Und Schmoren

    Für Sie in unserem Kochstudio getestet Der Kuchen sieht gut aus, ist aber Backen Sie mit niedrigerer Temperatur etwas länger und geben Sie ggf. weniger Flüssigkeit hinzu. Bei innen nicht durchgebacken. Kuchen mit saftigem Belag backen Sie erst den Boden vor. Bestreuen Sie ihn mit Mandeln oder Paniermehl und geben dann den Belag darauf.
  • Seite 26 Für Sie in unserem Kochstudio getestet Gericht Zubehör Einschubhöhe Heizart Temperatur in °C Dauer in Minuten Wasserbiskuit, 2 Ebenen 2 Springformen 160* 40-45 < Gedeckter Apfelkuchen, 1 Stück Springform 170* Gedeckter Apfelkuchen, 2 Stück 2 Springformen 170* < * Vorheizen Grillen Schieben Sie zusätzlich die Universalpfanne ein. Die Flüssigkeit wird aufgefangen und der Garraum bleibt sauberer.
  • Seite 27: Www.bosch-Eshop.com

    Operating the appliance ....37 www.bosch-home.com and in the online shop Switching the oven on and off ....37 www.bosch-eshop.com...
  • Seite 28: Intended Use

    Intended use 8Intended use (Important safety information R ead these instructions carefully. Only then I n t e n d e d u s e will you be able to operate your appliance G eneral information safely and correctly. Retain the instruction I m p o r t a n t s a f e t y i n f o r m a t i o n manual and installation instructions for future Warning –...
  • Seite 29: Cleaning Function

    Important safety information Cleaning function Warning – Risk of scalding! The accessible parts become hot during ■ Warning – Risk of fire! operation. Never touch the hot parts. Keep Loose food residues, grease and meat children at a safe distance. ■...
  • Seite 30: Causes Of Damage

    Causes of damage ]Causes of damage G eneral information C a u s e s o f d a m a g e Caution! Accessories, foil, greaseproof paper or ovenware on ■ the cooking compartment floor: do not place accessories on the cooking compartment floor. Do not cover the cooking compartment floor with any sort of foil or greaseproof paper.
  • Seite 31: Environmental Protection

    Environmental protection Open the appliance door as infrequently as possible 7Environmental protection ■ when the appliance is in use. Y our new appliance is particularly energy-efficient. E n v i r o n m e n t a l p r o t e c t i o n Here you can find tips on how to save even more energy when using the appliance, and how to dispose of your appliance properly.
  • Seite 32: Getting To Know Your Appliance

    Getting to know your appliance *Getting to know your appliance I n this section, we will explain the indicators and G e t t i n g t o k n o w y o u r a p p l i a n c e controls.
  • Seite 33: Types Of Heating And Functions

    Getting to know your appliance Types of heating and functions Use the function selector to set the types of heating and To make sure you always use the right type of heating other functions. to cook your food, we have explained the differences and applications below.
  • Seite 34: Cooking Compartment Functions

    Accessories Cooking compartment functions _Accessories Some functions make your appliance easier to use. This, for example, enables the cooking compartment to Y our appliance is accompanied by a range of be well lit and a cooling fan to prevent the appliance A c c e s s o r i e s accessories.
  • Seite 35: Locking Function

    Accessories Locking function Special accessories The accessories can be pulled out approximately You can buy accessories from the after-sales service. halfway before they lock in place.The locking function Accessories Description prevents the accessories from tilting when they are pulled out.The accessories must be inserted into the Enamelled baking tray For tray bakes and small baked items.
  • Seite 36: Before Using For The First Time

    Before using for the first time Cleaning the accessories KBefore using for the first Before using the accessories, clean them thoroughly time using a cloth and warm soapy water. I n this section, you can find out what you must do Fitting the telescopic shelf set B e f o r e u s i n g f o r t h e f i r s t t i m e before using your oven to prepare food for the first time.
  • Seite 37: Operating The Appliance

    Operating the appliance 1Operating the appliance OTime-setting options S witching the oven on and off Y our appliance has different time-setting options. O p e r a t i n g t h e a p p l i a n c e T i m e - s e t t i n g o p t i o n s Switching on the oven Overview of the time-setting options...
  • Seite 38: Setting The Electronic Clock

    Time-setting options Setting the electronic clock Setting the end time You can alter the clock if you need to (e.g. from Baking or roasting starts for the set duration at a later summer to winter time).To do this, the oven must be time which you chose.
  • Seite 39: Childproof Lock

    Childproof lock AChildproof lock QBasic settings T he oven has a childproof lock to prevent children from T here are various settings available to you in order to C h i l d p r o o f l o c k B a s i c s e t t i n g s switching it on by accident.
  • Seite 40: Changing The Basic Settings

    Cleaning Changing the basic settings DCleaning The function selector must be set to the "Off" position. W ith good care and cleaning, your appliance will retain Press and hold the button for approx. 4 seconds. C l e a n i n g its appearance and remain fully functioning for a long The first basic setting will appear on the display, time to come.
  • Seite 41: Keeping The Appliance Clean

    Cleaning Notes Slight differences in colour on the front of the Appliance interior ■ appliance are caused by the use of different Enamelled sur- Hot soapy water or a vinegar solution: materials, such as glass, plastic and metal. faces Clean with a dish cloth and then dry with a soft Shadows on the door panels, which look like ■...
  • Seite 42: Cleaning Function

    Cleaning function .Cleaning function Warning Risk of fire! Loose food remnants, fat and meat juices may catch ■ Y our appliance has a self-cleaning function. You can fire when the cleaning function is in progress. Before C l e a n i n g f u n c t i o n use the self-cleaning function to clean the cooking you start the cleaning function, always remove the compartment.
  • Seite 43: Rails

    Rails qAppliance door pRails D etaching the shelf supports W ith good care and cleaning, your appliance will retain R a i l s A p p l i a n c e d o o r its appearance and remain fully functional for a long The shelf supports are each fixed to the side panels of time to come.
  • Seite 44: Removing And Fitting The Appliance Door

    Appliance door Remove the two middle panels, along with their Take hold of the sides of the oven door with both holders. hands and close the oven door by approx. 30° (b). The two middle panels are not fastened using Note: retaining pins;...
  • Seite 45: Trouble Shooting

    Trouble shooting 3Trouble shooting T r o u b l e s h o o t i n g Fault Possible cause Notes/remedy The appliance does not work The plug is not plugged into the mains Connect the appliance to the power supply Power cut Check whether other kitchen appliances are working The circuit breaker is faulty...
  • Seite 46: Replacing The Oven Light Bulb

    Customer service Replacing the oven light bulb 4Customer service If the oven light bulb fails, it must be replaced. Replacement heat-resistant bulbs can be obtained from O ur after-sales service is there for you if your appliance the after-sales service or from specialist retailers. C u s t o m e r s e r v i c e needs to be repaired.
  • Seite 47: Tested For You In Our Cooking Studio

    Tested for you in our cooking studio A lot of steam can build up in the cooking Note: JTested for you in our compartment when cooking food. cooking studio Your appliance is very energy-efficient and radiates very little heat to its surroundings during operation. Due to the high difference in temperature between the H ere, you can find a selection of dishes and the ideal appliance interior and the external parts of the...
  • Seite 48: User Tips

    Tested for you in our cooking studio Dish Weight (in kg) Shelf position Heating function Temperature in °C Cooking time in minutes Short-crust pastry 160-170* 35-40 Short-crust pastry 170** Parfait cake 160* 55-60 Cream puffs 180* 80-90 Sponge cake 150-160* 55-60 Rice pudding 160*...
  • Seite 49: Acrylamide In Foodstuffs

    Tested for you in our cooking studio You were baking on several levels. Always select hot air when baking on several levels. Baked items that are placed into the oven on trays or in The items on the top baking tray are baking tins/dishes at the same time will not necessarily be ready at the same time.
  • Seite 50 Tested for you in our cooking studio Dish Accessories Shelf position Heating Temperature in °C Cooking time in function minutes Hot water sponge cake Springform cake tin 170* Hot water sponge cake, 2 levels 2 springform cake tins 160* 40-45 < Double-crusted apple pie, x 1 Springform cake tin 170* Double-crusted apple pie, x 2...
  • Seite 51: Produktinfo

    Encender y apagar el horno....61 www.bosch-home.com y también en la tienda online: Desconexión de seguridad automática ... 61 www.bosch-eshop.com...
  • Seite 52: Uso Correcto Del Aparato

    Uso correcto del aparato 8Uso correcto del aparato (Indicaciones de seguridad importantes L eer con atención las siguientes U s o c o r r e c t o d e l a p a r a t o instrucciones. Solo así se puede manejar el E n general aparato de forma correcta y segura.
  • Seite 53: Función De Limpieza

    Indicaciones de seguridad importantes Un aparato defectuoso puede ocasionar Advertencia – ¡Peligro de quemaduras! ■ una descarga eléctrica. No conectar nunca Las partes accesibles se calientan durante ■ un aparato defectuoso. Desenchufar el el funcionamiento. No tocar nunca las aparato de la red o desconectar el partes calientes.
  • Seite 54: Peligro De Quemaduras

    Causas de los daños Advertencia – ¡Peligro de quemaduras! ]Causas de los daños El interior del aparato alcanza temperaturas ■ muy elevadas durante la función de E n general limpieza. No abrir nunca la puerta del C a u s a s d e l o s d a ñ o s aparato.
  • Seite 55: Protección Del Medio Ambiente

    Protección del medio ambiente Abrir la puerta del aparato lo menos posible durante 7Protección del medio ■ el funcionamiento. ambiente S u nuevo aparato presenta una gran eficiencia P r o t e c c i ó n d e l m e d i o a m b i e n t e energética.
  • Seite 56: Presentación Del Aparato

    Presentación del aparato * Presentación del aparato E n este capítulo se describen el panel indicador y los P r e s e n t a c i ó n d e l a p a r a t o mandos.
  • Seite 57: Tipos De Calentamiento Y Funciones

    Presentación del aparato Tipos de calentamiento y funciones Con el mando de funciones se pueden seleccionar los tipos de calentamiento y funciones adicionales. A continuación se explican las diferencias y la aplicación de cada tipo de calentamiento, para encontrar siempre el más adecuado para cada alimento.
  • Seite 58: Mando De Temperatura

    Presentación del aparato Mando de temperatura Ventilador El ventilador se enciende y se apaga según sea Con el mando de temperatura se puede programar la necesario. El aire caliente escapa por la parte superior temperatura. En la pantalla se muestra la temperatura de la puerta.
  • Seite 59: Accesorios

    Accesorios Función de encaje _Accesorios Los accesorios pueden extraerse hasta la mitad, hasta que encajen.La función de encaje evita que los E l aparato incluye varios accesorios. Aquí se presenta accesorios se caigan al extraerlos.Los accesorios A c c e s o r i o s un resumen de los accesorios suministrados y su uso tienen que introducirse correctamente en el interior del correcto.
  • Seite 60: Accesorios Especiales

    Antes del primer uso Accesorios especiales KAntes del primer uso Los accesorios pueden adquirirse en el Servicio de Atención al Cliente. A continuación, se indican los pasos que deben A n t e s d e l p r i m e r u s o seguirse antes de utilizar el horno por primera vez.
  • Seite 61: Limpiar Los Accesorios

    Manejo del aparato Limpiar los accesorios 1Manejo del aparato Antes de utilizar los accesorios, limpiarlos a fondo con agua caliente con jabón y un paño de limpieza. E ncender y apagar el horno M a n e j o d e l a p a r a t o Encender el horno Montar el juego de carriles telescópicos Ajustar el tipo de calentamiento con el selector de...
  • Seite 62: Funciones De Programación Del Tiempo

    Funciones de programación del tiempo Ajustar el reloj electrónico OFunciones de En caso necesario, se puede cambiar la hora (p. ej., de programación del tiempo horario de invierno a horario de verano).El horno debe estar apagado. E l aparato dispone de distintas funciones de tiempo. Pulsar la tecla F u n c i o n e s d e p r o g r a m a c i ó...
  • Seite 63: Seguro Para Niños

    Seguro para niños Ajustar la hora de finalización con las teclas ASeguro para niños Al pulsar la tecla por primera vez, aparece un Nota: valor predeterminado en el panel indicador. El valor predeterminado resulta de la hora actual y la E l horno incorpora un seguro para niños para evitar S e g u r o p a r a n i ñ...
  • Seite 64: Ajustes Básicos

    Ajustes básicos Modificar los ajustes básicos QAjustes básicos El selector de funciones debe encontrarse en la posición cero. P ara utilizar el aparato fácilmente y de forma óptima, A j u s t e s b á s i c o s existen distintos ajustes a disposición del usuario.
  • Seite 65: Limpieza

    Limpieza DLimpieza Tirador de la Agua caliente con jabón: puerta Limpiar con una bayeta y secar con un paño suave. E l aparato mantendrá durante mucho tiempo su Si el tirador de la puerta entra en contacto con el L i m p i e z a aspecto reluciente y su capacidad funcional siempre y producto descalcificador, limpiarlo inmediata- cuando se lleven a cabo la limpieza y los cuidados...
  • Seite 66: Mantener Limpio El Aparato

    Limpieza Limpieza del interior del aparato Sistema de Agua caliente con jabón: extracción Limpiar con una bayeta o un cepillo. Verter 0,4 litros de agua sobre el centro de la base No sacar los rieles de extracción para eliminar la del aparato. grasa, es preferible limpiarlos en el interior del Ajustar el tipo de calentamiento horno.
  • Seite 67: Función De Limpieza

    Función de limpieza .Función de limpieza Advertencia ¡Peligro de incendio! Los restos de comida, aceite y jugo de asado ■ E l aparato cuenta con una función de autolimpieza. La pueden incendiarse durante la función de limpieza. F u n c i ó n d e l i m p i e z a autolimpieza limpia el compartimento de cocción.
  • Seite 68: Rejillas

    Rejillas qPuerta del aparato pRejillas D esmontaje de las rejillas E l aparato mantendrá durante mucho tiempo su R e j i l l a s P u e r t a d e l a p a r a t o aspecto reluciente y su capacidad funcional siempre y Las rejillas están fijadas en tres puntos a las paredes cuando se lleven a cabo la limpieza y los cuidados...
  • Seite 69: Desmontar Y Montar La Puerta Del Aparato

    Puerta del aparato Extraer los dos cristales intermedios con sus Sujetar la puerta del horno por los laterales con las respectivos soportes. dos manos y cerrarla unos 30° (b). Los dos cristales intermedios no están fijados Nota: con espigas de fijación, sino que se mantienen en su sitio mediante soportes.
  • Seite 70: Qué Hacer En Caso De Avería

    ¿Qué hacer en caso de avería? 3¿Qué hacer en caso de avería? ¿ Q u é h a c e r e n c a s o d e a v e r í a ? Avería Posible causa Consejos/solución El aparato no funciona El enchufe no está...
  • Seite 71: Cambiar La Bombilla Del Horno

    Servicio de Asistencia Técnica Cambiar la bombilla del horno 4Servicio de Asistencia Si la bombilla del horno está deteriorada, hay que Técnica cambiarla. Las bombillas de recambio resistentes a la temperatura se pueden obtener en un comercio especializado o poniéndose en contacto con el Servicio N uestro Servicio de Asistencia Técnica se encuentra a de Asistencia Técnica.
  • Seite 72: Sometidos A Un Riguroso Control En Nuestro Estudio De Cocina

    Sometidos a un riguroso control en nuestro estudio de cocina Durante la preparación de alimentos puede Nota: JSometidos a un riguroso producirse mucho vapor de agua en el interior del horno. control en nuestro estudio Su aparato utiliza la energía de forma muy eficiente, de cocina emitiendo muy poco calor hacia el exterior durante su funcionamiento.
  • Seite 73: Consejos De Aplicación

    Sometidos a un riguroso control en nuestro estudio de cocina Plato Peso (en kg) Altura de inser- Tipo de calenta- Temperatura en Duración en mi- ción miento °C nutos Pastel de requesón 160-170* 45-55 Pasteles de pastaflora 160-170* 35-40 Pasteles de pastaflora 170** Pastel paraíso 160*...
  • Seite 74: Presencia De Acrilamida En Alimentos

    Sometidos a un riguroso control en nuestro estudio de cocina Las pastas se han dorado de forma Seleccionar una temperatura más baja. irregular. Si el papel de hornear sobresale, la circulación del aire también puede verse afectada. Recortar siempre el tamaño justo de papel de hornear.
  • Seite 75: Comidas Normalizadas

    Sometidos a un riguroso control en nuestro estudio de cocina Comidas normalizadas Estas tablas han sido elaboradas para institutos de pruebas con el fin de facilitar los controles y pruebas del aparato. Según EN 60350-1. Horneado Plato Accesorios Altura de inser- Tipo de ca- Temperatura en Duración en mi-...
  • Seite 76 Assistência Ligar e desligar o forno ..... . . 86 Técnica na Internet: www.bosch-home.com e na loja Online: www.bosch-eshop.com Desativação de segurança automática .
  • Seite 77: Utilização Adequada

    Utilização adequada 8Utilização adequada (Instruções de segurança importantes L eia atentamente o presente manual. Só U t i l i z a ç ã o a d e q u a d a assim poderá utilizar o seu aparelho de forma G eneralidades segura e correcta.
  • Seite 78: Função De Limpeza

    Instruções de segurança importantes Função de limpeza Aviso – Perigo de queimaduras! As peças que se encontram acessíveis ■ Aviso – Perigo de incêndio! ficam quentes durante o funcionamento do Os restos de comida soltos, gorduras e aparelho. Nunca toque nas peças quentes. ■...
  • Seite 79: Causas De Danos

    Causas de danos ]Causas de danos G eneralidades C a u s a s d e d a n o s Atenção! Acessórios, película, papel vegetal ou recipientes ■ sobre a base do forno: não coloque quaisquer acessórios sobre a base do forno. Não forre a base do forno com película, seja de que tipo for, nem com papel vegetal.
  • Seite 80: Protecção Do Meio Ambiente

    Protecção do meio ambiente Abra a porta do aparelho o menos possível durante 7Protecção do meio ■ o funcionamento. ambiente O seu novo aparelho é especialmente eficiente do P r o t e c ç ã o d o m e i o a m b i e n t e ponto de vista energético.
  • Seite 81: Conhecer O Aparelho

    Conhecer o aparelho *Conhecer o aparelho N este capítulo explicamos as indicações e os C o n h e c e r o a p a r e l h o elementos de comando. Além disso, ficará a conhecer as diferentes funções do seu aparelho. Dependendo do tipo de aparelho, poderá...
  • Seite 82: Tipos De Aquecimento E Funções

    Conhecer o aparelho Tipos de aquecimento e funções O seletor de funções permite regular tipos de Para que encontre sempre o tipo de aquecimento aquecimento e outras funções. adequado para o seu prato, explicamos aqui as diferenças e os modos de aquecimento. Tipo de aquecimento Temperatura/Nível Utilização...
  • Seite 83: Funções Do Interior Do Forno

    Acessórios Funções do interior do forno _Acessórios Algumas funções facilitam o funcionamento do aparelho. O interior do forno tem, p. ex., superfícies O seu aparelho inclui vários acessórios: Aqui tem uma grandes iluminadas e uma ventoinha de arrefecimento A c e s s ó r i o s panorâmica sobre os acessórios incluídos e utilização protege o aparelho contra sobreaquecimento.
  • Seite 84: Função De Encaixe

    Acessórios Função de encaixe Acessórios especiais O acessório pode ser puxado para fora até cerca de Os acessórios podem ser posteriormente adquiridos metade, até encaixar. A função de encaixe impede que junto do serviço de assistência técnica. o acessório se vire ao puxá-lo para fora. O acessório Acessórios Descrição tem de ser inserido corretamente no interior do...
  • Seite 85: Antes Da Primeira Utilização

    Antes da primeira utilização Limpar os acessórios KAntes da primeira Antes de utilizar os acessórios, lave-os muito bem com utilização água morna e detergente e um pano. A qui encontrará informações acerca dos passos a Montar o conjunto de raile telescópico A n t e s d a p r i m e i r a u t i l i z a ç...
  • Seite 86: Utilizar O Aparelho

    Utilizar o aparelho 1Utilizar o aparelho OFunções de tempo L igar e desligar o forno O aparelho dispõe de várias funções de tempo. U t i l i z a r o a p a r e l h o F u n ç...
  • Seite 87: Regular O Temporizador Automático

    Funções de tempo Acertar o relógio eletrónico Regular a hora de conclusão Se necessário, pode alterar a hora, (p. ex. da hora de A cozedura ou assadura começa num momento verão para a hora de inverno). Para isso, o forno tem posterior, selecionado por si, durante o tempo de de estar desligado.
  • Seite 88: Fecho Segurança Para Crianças

    Fecho de segurança para crianças AFecho segurança para QRegulações base crianças P ara que possa utilizar o seu aparelho de forma R e g u l a ç õ e s b a s e perfeita e fácil, estão à sua disposição diferentes P ara evitar que as crianças liguem inadvertidamente o regulações.
  • Seite 89: Alterar As Regulações Base

    Limpeza Alterar as regulações base DLimpeza O seletor de funções tem de estar na posição zero. C om uma manutenção e limpeza cuidadosas, garante Prima a tecla durante aprox. 4 segundos. L i m p e z a a conservação e o correto funcionamento do seu No visor aparece a primeira regulação base, p.
  • Seite 90: Manter O Aparelho Limpo

    Limpeza Puxador da porta Solução de água quente e detergente: Sistema extensí- Solução de água quente e detergente: Limpe com um pano multiusos e seque com um Limpe com um pano multiusos ou uma escova. pano macio. Não remova a massa lubrificante dos railes; lave, Se produto de descalcificação entrar em contacto de preferência, com os railes fechados.
  • Seite 91: Função De Limpeza

    Função de limpeza .Função de limpeza Aviso Perigo de incêndio! Os restos de comida soltos, gorduras e molhos de ■ O seu aparelho possui uma função de autolimpeza. assados podem incendiar-se durante a função de F u n ç ã o d e l i m p e z a Com a autolimpeza pode limpar o interior do aparelho.
  • Seite 92: Estruturas De Suporte

    Estruturas de suporte pEstruturas de suporte qPorta do aparelho D esencaixar as estruturas de suporte C om uma manutenção e limpeza cuidadosas, garante E s t r u t u r a s d e s u p o r t e P o r t a d o a p a r e l h o a conservação e o correto funcionamento do seu As estruturas de suporte estão fixas em três pontos nas...
  • Seite 93: Desengatar E Engatar A Porta Do Aparelho

    Porta do aparelho Remova os dois vidros centrais com os seus Segure lateralmente a porta do forno com as duas suportes. mãos e feche-a cerca de 30° (b). Os dois vidros centrais não estão fixados Conselho: com pinos de retenção, mas são fixados na posição por suportes.
  • Seite 94: Defeito: O Que Fazer

    Defeito: O que fazer? 3Defeito: O que fazer? D e f e i t o : O q u e f a z e r ? Avaria Causa possível Indicações/solução O aparelho não funciona A ficha não está ligada Ligue o aparelho à corrente elétrica Falha de corrente Verifique se os outros eletrodomésticos funcionam Falha do fusível...
  • Seite 95: Substituir A Lâmpada Do Forno

    Serviços Técnicos Substituir a lâmpada do forno 4Serviços Técnicos Se a lâmpada do forno se fundir, deverá ser substituída. Poderá adquirir lâmpadas resistentes a S e o seu aparelho precisar de ser reparado, o nosso altas temperaturas junto do serviço de assistência S e r v i ç...
  • Seite 96: Cozinha

    Testado para si no nosso estúdio de cozinha Durante a preparação de alimentos pode Conselho: JTestado para si no nosso formar-se muito vapor de água no interior do aparelho. O seu aparelho é muito eficiente do ponto de vista estúdio de cozinha energético e, em funcionamento, desperdiça muito pouco calor para o exterior.
  • Seite 97: Sugestões De Utilização

    Testado para si no nosso estúdio de cozinha Prato Peso (em kg) Nível de inserção Tipo de aqueci- Temperatura em Tempo de dura- mento °C ção em minutos Bolo de ricotta 160-170* 45-55 Bolo de massa quebrada 160-170* 35-40 Bolo de massa quebrada 170** Bolos com creme 160*...
  • Seite 98: Refeições De Teste

    Testado para si no nosso estúdio de cozinha Cozeu em vários níveis. No tabuleiro Para cozer em vários níveis selecione sempre o Ar quente circulante. Os bolos que tiverem sido introduzidos superior o bolo ficou mais escuro do ao mesmo tempo sobre tabuleiros ou em formas não têm necessariamente de ficar prontos ao mesmo que no tabuleiro inferior.
  • Seite 99 Testado para si no nosso estúdio de cozinha Prato Acessórios Nível de inserção Tipo de Temperatura em Tempo de dura- aquecimento °C ção em minutos Bolinhos Tabuleiro universal 150* 21-23 Bolinhos, 2 níveis Tabuleiro universal + tabu- 160* 25-28 < leiro Pão de ló...
  • Seite 100 *9001299249* 9001299249 990208...

Inhaltsverzeichnis