Herunterladen Inhalt Inhalt Diese Seite drucken
Sharp LL-T1520 Bedienungsanleitung
Vorschau ausblenden Andere Handbücher für LL-T1520:
Inhaltsverzeichnis

Werbung

Verfügbare Sprachen
  • DE

Verfügbare Sprachen

  • DEUTSCH, seite 33
LCD Monitor
LCD Farbmonitor
Moniteur LCD
Monitor LCD
Monitor LCD
LL-T1520
LL-T1620
OPERATION MANUAL
BEDIENUNGSANLEITUNG
MODE D'EMPLOI
MANUALE D'USO
MANUAL DE FUNCIONAMIENTO
Downloaded from
www.Manualslib.com
manuals search engine

Werbung

Inhaltsverzeichnis
loading

Inhaltszusammenfassung für Sharp LL-T1520

  • Seite 1 LCD Monitor LCD Farbmonitor Moniteur LCD Monitor LCD Monitor LCD LL-T1520 LL-T1620 OPERATION MANUAL BEDIENUNGSANLEITUNG MODE D’EMPLOI MANUALE D’USO MANUAL DE FUNCIONAMIENTO Downloaded from www.Manualslib.com manuals search engine...
  • Seite 2 Table of Contents / Inhaltsverzeichnis / Table des matières / Indice / Índice English ..............3 Deutsch .
  • Seite 3: Inhaltsverzeichnis

    Table of Contents Notice for Users in the USA ............. 4 TCO '95/ '99 .
  • Seite 4: Notice For Users In The Usa

    Sharp Plaza, Mahwah, New Jersey 07430 TEL :1-800-BE-SHARP * As an ENERGY STAR Partner, SHARP has determined that this product meets the ENERGY STAR guidelines for energy efficiency. This product utilizes tin-lead solder, and fluorescent lamp containing a small amount of mercury.
  • Seite 5: Tco '95/ '99

    LL-T1520-B LL-T1520-H LL-T1620-B LL-T1620-H Congratulations! You have just purchased a TCO’95 or TCO’99 approved and labelled product! Your choice has provided you with a product developed for professional use. Your purchase has also contributed to reducing the burden on the environment and also to the further development of environmentally adapted electronics products.
  • Seite 6 TCO Development SE-114 94 Stockholm, Sweden Fax: +46 8 782 92 07 Email (Internet): development@tco.se Current information regarding TCO’99 approved and labelled products may also be obtained via the Internet, using the address: http://www.tco-info.com/ Environmental requirements Flame retardants Flame retardants are present in printed circuit boards, cables, wires, casings and housings. Their purpose is to prevent, or at least to delay the spread of fire.
  • Seite 7: Notice For Users In Europe

    Notice for Users in Europe This equipment complies with the requirements of Directives 89/336/EEC and 73/23/EEC as amended by 93/68/EEC. Dieses Gerät entspricht den Anforderungen der EG-Richtlinien 89/336/EWG und 73/23/EWG mit Änderung 93/68/EWG. Ce matériel répond aux exigences contenues dans les directives 89/336/CEE et 73/23/CEE modifiées par la directive 93/68/CEE.
  • Seite 8: Notice For Users In The Uk

    "WARNING :THIS APPARATUS MUST BE EARTHED" Notice for Users in Australia Service Inquiries Please contact your dealer for service if required or contact Sharp Corporation of Australia on 1 300 13 50 22 for referral to your nearest Sharp authorized Service Center. Downloaded from www.Manualslib.com...
  • Seite 9: Tips And Safety Precautions

    - Sharp Corporation holds authorship rights to the recognized under law. Utility Disk program. Do not reproduce it without - This monitor and its accessories may be permission.
  • Seite 10: Product Description

    Product description 1. INPUT button ....To switch between the signal’s input terminals. (Analogue RGB input terminal ↔ DVI-I input terminal) 2. MENU button ....This button is used to pop-up, select and close the OSD (On Screen Display) Menu.
  • Seite 11 DVI standard output terminal (DVI-D24 pin or DVI-I29 pin) for digital connection. (Note that the display may not appear correctly, depending on the connected computer.) LL-T1520: Computers capable of XGA output LL-T1620: Computers capable of SXGA output - Separately sold cables are necessary for connection.
  • Seite 12: Connecting The Monitor And Turning The Monitor On And Off

    (Note that the display may not appear correctly, depending on the connected computer.) LL-T1520: Computers capable of XGA output - If the cover is hard to refit, do not force it. LL-T1620: Computers capable of SXGA output Check whether cables are trapped.
  • Seite 13: Connection Of Headphones (Commercially Available)

    Connecting the monitor and turning the monitor on and off When connecting to an analog RGB output terminal: Connect the accessory audio cable - Use an analog signal cable (model name: NL- When the accessory audio cable is connected to C02E).
  • Seite 14: Connecting The Monitor To A Power Source

    Connecting the monitor and turning the monitor on and off 3.Turn on the computer. Connecting the monitor to a power source Turn on the computer power Press power button supply. Power terminal When a signal is input from the computer, the power LED lights up green, and the screen is displayed (After power is turned on, it may take a little time until the screen is displayed.)
  • Seite 15: Turning The Power Off

    Connecting the monitor and turning the monitor on and off Turning the power off 1. Turn the computer off. 2. Press the monitor's POWER button. The Power LED will disappear. Turn the compu- Press power button ter off If the monitor will not be used for a long time, turn off the main power switch of the monitor, and remove the power plug from the outlet.
  • Seite 16: Adjusting The Screen Display And Speaker Volume

    Adjusting the screen display and speaker volume For analog signal Adjustment lock function 1.First perform an automatic adjustment. (p. 18) 2. Perform manual adjustment where necessary. By disabling the control buttons (i.e. setting the (p. 19) lock) any attempted changes to adjusted values For digital signal will be voided.
  • Seite 17: Adjusting The Speaker Volume

    Adjusting the screen display and speaker volume Adjusting the speaker volume Carry out the commands without the On Screen Display (OSD) Menu displayed. If the OSD Menu is displayed, press the MENU button (several times may be required) and begin when the OSD Menu has disappeared.
  • Seite 18: Adjusting The Screen Display (When Using An Analog Signal)

    Adjusting the screen display (When using an analog signal) How to Adjust Automatic screen adjustment 1. Press the MENU button. Options in the ADJUSTMENT Menu can be The ADJUSTMENT Menu will be displayed. adjusted automatically (CLOCK, PHASE, H-POS V- ADJUSTMENT POS).
  • Seite 19: Manual Screen Adjustment

    Adjusting the screen display (When using an analog signal) CLOCK Manual screen adjustment The figure below demonstrates how to adjust so Adjustments can be made using On Screen that vertical flicker noise is not emitted. ( Display (OSD) Menu provided. buttons) On Screen Display for adjustment If you are using Windows, open the Adjustment...
  • Seite 20 Adjusting the screen display (When using an analog signal) GAIN CONTROL Menu COLOR CONTROL Menu GAIN CONTROL COLOR CONTROL MANUAL AUTO COLOR MODE sRGB VIVID WHITE BALANCE BLACK LEVEL CONTRAST SATURATION INPUT-1 ANALOG INPUT-1 ANALOG 1024 x 768 V : 60Hz H : 48.4kHz 1024 x 768 V : 60Hz...
  • Seite 21 Adjusting the screen display (When using an analog signal) COOL ... Color tone bluer than standard MODE SELECT Menu • ..Color tone slightly bluer than standard MODE SELECT STD ..Color tone standard setting OSD H-POSITION • ..Color tone slightly redder than standard OSD V-POSITION WARM ..
  • Seite 22: Adjusting The Screen Display (When Using A Digital Signal)

    Adjusting the screen display (When using a digital signal) Adjustments can be made using On Screen COLOR CONTROL Menu Display (OSD) Menu provided. COLOR CONTROL COLOR MODE sRGB VIVID On Screen Display for adjustment WHITE BALANCE If you are using Windows, open the Adjustment SATURATION Pattern on the accompanying Utility Disk.
  • Seite 23 Adjusting the screen display (When using a digital signal) COOL ... Color tone bluer than standard MODE SELECT Menu • ..Color tone slightly bluer than standard MODE SELECT STD ..Color tone standard setting OSD H-POSITION • ..Color tone slightly redder than standard OSD V-POSITION WARM ..
  • Seite 24: Monitor Care And Repair

    Use a soft dry cloth to lightly wipe away dirt and inquire at the shop where you purchased the dust from the surface of the LCD panel. (A soft monitor or your nearest Sharp authorized cloth such as gauze or that used for lens cleaning Service Center. (Never attempt this is suitable.)
  • Seite 25: Specifications

    - ° ° 5 f ° ° 5 Dimensions (Units: mm) LL-T1620 LL-T1520 Analog signal cable: Approx. 2.0m Audio cable: Approx. 2.0m Digital signal cable, NL-C01E (purchased separately): Approx. 2.0m Analog signal cable, NL-C02E (purchased separately): Approx. 2.0m Downloaded from www.Manualslib.com...
  • Seite 26 71.7kHz 67.2Hz 117.01MHz - Recommended resolution for LL-T1520 is 1024 x 768. - Recommended resolution for LL-T1620 is 1280 x 1024. - All are compliant only with non-interlaced. - The monitor can be connected to the following computers that have a DVI standard output terminal (DVI-D24 pin or DVI-I29 pin) for digital connection.
  • Seite 27 DPMS: Display Power Management Signalling DMPM: Digital Monitor Power Management Power Power DMPM mode Screen DPMS mode Screen H-sync V-sync consumption consumption LL-T1520: 36W LL-T1520: 36W Display on Display on LL-T1620: 42W LL-T1620: 42W LL-T1520: 3W STANDBY Display off LL-T1520: 3W LL-T1620: 3W SUSPEND...
  • Seite 28: Installing Set-Up Information And The Icc Profile (For Windows)

    Installing set-up information and the ICC profile (For Windows) Depending on the computer or OS, it may be For Windows98 necessary to use the computer to operate the Installing monitor set-up information into Win- installation of monitor set-up information etc. If so, dows98, and setting the monitor's ICC profile as a follow the steps below to install the monitor set-up predetermined value.
  • Seite 29 Installing set-up information and the ICC profile (For Windows) For Windows2000 For WindowsMe Installing monitor set-up information into Win- Installing monitor set-up information into dows2000, and setting the monitor's ICC profile as WindowsMe, and setting the monitor's ICC profile a predetermined value. as a predetermined value.
  • Seite 30 Installing set-up information and the ICC profile (For Windows) For WindowsXP Installing the ICC profile Installing the monitor’s ICC profile. (If the set-up Installing monitor set-up information into information has already been installed, so too has WindowsXP, and setting the monitor's ICC profile the profile, and there is no need to install it.) as a predetermined value.
  • Seite 31: Information About The Colorsync Profile (For Macos)

    Information about the ColorSync profile (For MacOS) About the ColorSync profile ColorSync is the Apple Corporation's color management system and is a function that enables color resolution to be realized when used with a compatible application. A ColorSync profile describes the color characteristics of the LCD monitor.
  • Seite 32: Instructions For Attaching A Vesa Compliant Arm

    Instructions for attaching a VESA compliant arm An arm or stand based on the VESA standard Notes: (commercially available) can be attached to the - The stand is specially made for use with this monitor. monitor. Once having removed the stand, never Procurement of the arm or stand is at the custom- attempt to attach it to another device.
  • Seite 33 Inhaltsverzeichnis Hinweis für Benutzer in den USA ............34 TCO'95/'99 .
  • Seite 34: Hinweis Für Benutzer In Den Usa

    SHARP ELECTRONICS CORPORATION Sharp Plaza, Mahwah, New Jersey 07430 TEL :1-800-BE-SHARP * Als ENERGY STAR-Partner bestätigt SHARP, daß dieses Produkt die Richtlinien des ENERGY STAR für sparsamen Verbrauch einhält. In diesem Produkt wird bleihaltiger Lötzinn und eine Leuchtstofflampe mit einem geringen Quecksilberanteil verwendet.
  • Seite 35: Tco'95/'99

    LL-T1520-B LL-T1520-H LL-T1620-B LL-T1620-H Herzlichen Glückwunsch! Sie haben gerade ein Gerät mit TCO’95- oder TCO’99-Zulassung und entsprechender Kennzeichnung erworben! Damit haben Sie sich für ein Produkt entschieden, das für professionelle Anwendungen konzipiert ist. Mit Ihrem Kauf leisten Sie auch einen Beitrag zum Umweltschutz und zur Weiterentwicklung von umweltfreundlichen Elektronikprodukten.
  • Seite 36 TCO Development SE-114 94 Stockholm, Sweden Fax: +46 8 782 92 07 Email (Internet): development@tco.se Aktuelle Informationen zu Produkten mit TCO’99-Zulassung und -Kennzeichnung erhalten Sie auch im Internet unter folgender Adresse: http://www.tco-info.com/ Umweltanforderungen Flammschutzmittel Flammschutzmittel kommen in Platinen, Kabeln, Drähten, Verkleidungen und Gehäusen vor. Sie sollen die Ausbreitung eines Brandes verhindern oder zumindest verzögern.
  • Seite 37: Hinweis Für Benutzer In Europa

    Hinweis für Benutzer in Europa This equipment complies with the requirements of Directives 89/336/EEC and 73/23/EEC as amended by 93/68/EEC. Dieses Gerät entspricht den Anforderungen der EG-Richtlinien 89/336/EWG und 73/23/EWG mit Änderung 93/68/EWG. Ce matériel répond aux exigences contenues dans les directives 89/336/CEE et 73/23/CEE modifiées par la directive 93/68/CEE.
  • Seite 38: Hinweis Für Benutzer In Gb

    Hinweis für Benutzer in Australien Serviceanfragen Wenden Sie sich an Ihren Händler, falls Reparaturen anfallen, oder setzen Sie sich mit Sharp Corpora- tion of Australia unter 1 300 13 50 22 in Verbindung, um die Adresse des nächstgelegenen autorisierten Sharp-Kundendienstzentrums zu erfragen.
  • Seite 39: Tips Und Sicherheitsvorkehrungen

    - Der Monitor darf niemals mit harten - Utility Disk (für Windows/Macintosh) (1) Gegenständen abgerieben oder berührt werden. - Bedienungsanleitung (1) - Wir bitten um Ihr Verständnis, daß Sharp Corporation über die gesetzlich anerkannte Hinweise: Leistungshaftung hinaus keine Haftung für Fehler - Das Digitalsignalkabel (DVI-D24polig –...
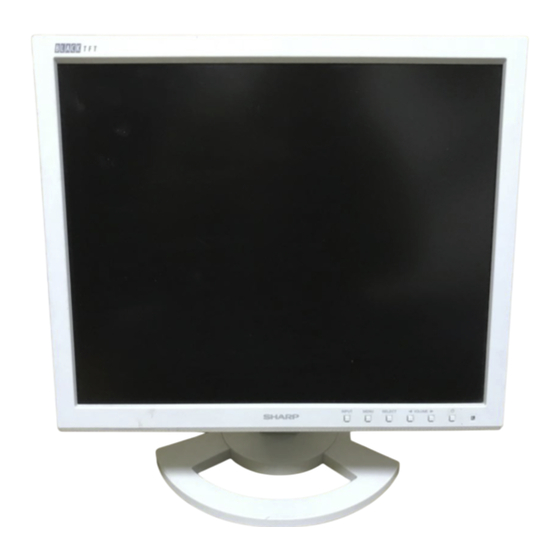
  • Seite 40: Produktbeschreibung

    Produktbeschreibung 1. Taste INPUT ........ Für die Umschaltung zwischen den Signaleingangsanschlüssen. (Analogen RGB-Eingangsanschluß ↔ DVI-I-Eingangsanschluß) 2. Taste MENU ........ Mit dieser Taste öffnen, wählen und schließen Sie das OSD (On screen Display) -Menü. 3. Taste SELECT ......Mit dieser Taste wählen Sie die Menüoptionen aus, wenn das OSD- Menü...
  • Seite 41 24polig oder DVI-I 29polig) für eine digitale Verbindung haben. (Bitte beachten Sie, dass abhängig vom angeschlossenen Compu- ter die Wiedergabe nicht korrekt sein kann.) LL-T1520: Computer mit XGA-Ausgang LL-T1620: Computer mit SXGA-Ausgang - Seperat erhältliche Kabel sind für die Verbindung notwendig.
  • Seite 42: Anschließen Des Monitors Und Ein- Und Ausschalten Des Monitors

    Anschließen des Monitors und Ein- und Ausschalten des Monitors - Bevor Sie den Monitor anschließen, müssen Sie 3. Die Abdeckung wieder anbringen. den Monitor und den Computer ausschalten. Vorsichtig vorgehen, damit die Kabel nicht - Achten Sie darauf, daß Sie das Kabel nicht eingeklemmt werden.
  • Seite 43 Sie, dass abhängig vom angeschlossenen Computer die Wiedergabe nicht korrekt sein kann.) Schliessen Sie das zusätzliche Audiokabel an LL-T1520: Computer mit XGA-Ausgang Wenn das zusätzliche Audiokabel am LL-T1620: Computer mit SXGA-Ausgang Audioausgangsanschluß des Computers Anschluss an einen analogen RGB- angeschlossen wird, wird der Ton des Ausgangsanschluß:...
  • Seite 44: Anschluss Von Kopfhörern (Im Handel Erhältlich)

    Anschließen des Monitors und Ein- und Ausschalten des Monitors Anschluss von Kopfhörern (im Handel Einschalten des Monitors erhältlich) 1. Den Monitor mit dem Hauptschalter einschalten. Kopfhörer (im Handel erhältlich) können angeschlossen werden. Kopfhöreranschluß Kopfhörer Hauptschalter Hinweis: - Beim Aus- und Einschalten des Monitors mit - Wenn Kopfhörer angeschlossen sind, ertönt aus dem Hauptschalter sollten Sie mindestens fünf den Lautsprechern des Monitors kein Klang.
  • Seite 45: Umschalten Zwischen Eingangsanschlüssen

    Anschließen des Monitors und Ein- und Ausschalten des Monitors Umschalten zwischen Eingangsanschlüssen Mit der Taste INPUT schalten Sie die Signaleingangsanschlüsse um. Analogen RGB-Eingangsanschluß INPUT-1 <ANALOG> INPUT DVI-I-Eingangsanschluß DVI-I-Eingangsanschluß (digital) (analog) INPUT-2 INPUT-2 <DIGITAL> <ANALOG> Ausschalten des Monitors 1. Schalten Sie den Computer aus. 2.Drücken Sie den Netzschalter am Monitor.
  • Seite 46: Einstellen Der Bildschirmanzeige Und Der Lautsprecher-Lautstärke

    Einstellen der Bildschirmanzeige und der Lautsprecher-Lautstärke Analogsignal Einstellsperrfunktion 1.Führen Sie zunächst eine automatische Einstellung durch. (S. 48) Wenn Sie die Steuertasten deaktivieren (d. h. die 2. Führen Sie bei Bedarf eine manuelle Einstellung Sperre setzen), können keine Werte eingestellt durch. (S. 49) werden.
  • Seite 47: Einstellen Der Lautsprecher-Lautstärke

    Einstellen der Bildschirmanzeige und der Lautsprecher-Lautstärke Einstellen Lautsprecher- Lautstärke Führen Sie die Befehle aus, wenn kein OSD-Menü angezeigt wird. Wenn das OSD-Menü angezeigt wird, drücken Sie die Taste MENU (bei Bedarf mehrmals), und beginnen Sie mit der Einstellung, nachdem das OSD-Menü ausgeblendet wurde. 1.
  • Seite 48: Einstellen Der Bildschirmanzeige (Bei Verwendung Eines Analogsignals)

    Einstellen der Bildschirmanzeige (bei Verwendung eines Analogsignals) Einstellen Automatische Bildschirmeinstellung 1. Drücken Sie die Taste MENU. Die Optionen im Menü ADJUSTMENT können Das Menü ADJUSTMENT wird angezeigt. automatisch eingestellt werden (CLOCK, PHASE, H-POS, V-POS). ADJUSTMENT MANUAL AUTO Hinweis: CLOCK - Wenn Sie den Monitor zum ersten Mal einrichten PHASE H-POS oder eine Komponente des bestehenden Systems...
  • Seite 49: Manuelle Bildschirmeinstellung

    Einstellen der Bildschirmanzeige (bei Verwendung eines Analogsignals) Hinweise: Manuelle Bildschirmeinstellung - Drücken Sie die Taste um [AUTO] Die Einstellungen können über das OSD-Menü auszuwählen. vorgenommen werden. - So wählen Sie eine Menüoption: Taste SELECT - So gelangen Sie zum nächsten Menü: Taste OSD für die Einstellung MENU Wenn Sie mit Windows arbeiten, öffnen Sie das...
  • Seite 50 Einstellen der Bildschirmanzeige (bei Verwendung eines Analogsignals) Menü GAIN CONTROL COLOR CONTROL Menu GAIN CONTROL COLOR CONTROL MANUAL AUTO COLOR MODE sRGB VIVID WHITE BALANCE BLACK LEVEL CONTRAST SATURATION INPUT-1 ANALOG INPUT-1 ANALOG 1024 x 768 V : 60Hz H : 48.4kHz 1024 x 768 V : 60Hz H : 48.4kHz...
  • Seite 51 Einstellen der Bildschirmanzeige (bei Verwendung eines Analogsignals) - Wenn USER ausgewählt wird, werden die Menü MODE SELECT Einstellwerte für [R-CONTRAST], [G- MODE SELECT CONTRAST] und [B-CONTRAST] angezeigt, OSD H-POSITION damit die Feineinstellung vorgenommen werden OSD V-POSITION kann. SCALING 400 LINES - Wählen Sie [R-CONTRAST], [G-CONTRAST] LANGUAGE und [B-CONTRAST] mit der Taste SELECT aus.
  • Seite 52: Einstellen Der Bildschirmanzeige (Bei Verwendung Eines Digitalsignals)

    Einstellen der Bildschirmanzeige (bei Verwendung eines Digitalsignals) Die Einstellungen können über das OSD-Menü COLOR CONTROL Menu vorgenommen werden. COLOR CONTROL COLOR MODE sRGB VIVID OSD für die Einstellung WHITE BALANCE Wenn Sie mit Windows arbeiten, öffnen Sie das SATURATION Einstellmuster auf der mitgelieferten Utility Disk. (S.
  • Seite 53 Einstellen der Bildschirmanzeige (bei Verwendung eines Digitalsignals) - Wählen Sie [COOL], [·], [STD], [·], [WARM] oder Menü MODE SELECT [USER] mit den Tasten aus. MODE SELECT - Wenn USER ausgewählt wird, werden die OSD H-POSITION Einstellwerte für [R-CONTRAST], [G- OSD V-POSITION SCALING CONTRAST] und [B-CONTRAST] angezeigt, LANGUAGE...
  • Seite 54: Pflege Des Monitors Und Reparaturen

    Gehäuse und Bedienfeld in dem Sie den Monitor gekauft haben, oder Wischen Sie das Gehäuse und das Bedienfeld mit an das nächste autorisierte Sharp- einem weichen, trockenen Tuch vorsichtig sauber. Kundendienstzentrum. (Nehmen Sie diesen Falls starke Verschmutzungen auftreten, geben Sie Austausch niemals selber vor.)
  • Seite 55: Technische Daten

    ) ß t i n ) ß Abmessungen (Einheiten: mm) LL-T1620 LL-T1520 Analogsignalkabel : ca. 2,0m Audiokabel : ca.2,0m Digitalsignalkabel, NL-C01E (separat erhältlich): ca. 2,0m Analogsignalkabel, NL-C02E (separat erhältlich): ca. 2,0m Downloaded from www.Manualslib.com manuals search engine...
  • Seite 56 71.7kHz 67.2Hz 117.01MHz - Die empfohlene Auflösung für das Gerät LL-T1520 ist 1024 x 768. - Die empfohlene Auflösung für das Gerät LL-T1620 ist 1280 x 1024. - Alle nur mit Non-Interlace. - Der Monitor kann an die folgenden Computer angeschlossen werden, die einen DVI-Standard- Ausgangsanschluß...
  • Seite 57 DPMS- Bild- Leistungs- DMPM Bild- Leistungs- H-sync V-sync Modus schirm aufnahme -Modus schirm aufnahme LL-T1520: 36W LL-T1520: 36W Anzeige ein Anzeige ein LL-T1620: 42W LL-T1620: 42W LL-T1520: 3W STANDBY Nein Anzeige aus LL-T1520: 3W LL-T1620: 3W SUSPEND Anzeige aus Nein...
  • Seite 58: Installieren Der Setup-Informationen Und Des Icc-Profils (Für Windows)

    Installieren der Setup-Informationen und des ICC-Profils (Für Windows) Je nach dem verwendeten Computer oder Be- 7. Prüfen Sie, ob der Monitor angezeigt wird, und triebssystem muß die Installation der Monitor- klicken Sie dann auf [Apply]. Setup-Informationen usw. eventuell über den 8.
  • Seite 59 Installieren der Setup-Informationen und des ICC-Profils (Für Windows) 9. Bestätigen Sie, daß die Monitordetails Bei dieser Beschreibung wird als ausgewählt sind, klicken Sie dann auf [Next], Laufwerksbuchstabe für das Diskettenlaufwerk [Next] und auf [Finish]. "Laufwerk A" angenommen. 10. Prüfen Sie, ob der Monitor angezeigt wird, und klicken Sie dann auf [Apply].
  • Seite 60 Installieren der Setup-Informationen und des ICC-Profils (Für Windows) Für Windows XP Installieren des ICC-Profils Installieren des Monitor-ICC-Profils (Wenn die Installieren der Monitor-Setup-Informationen unter Setup-Informationen bereits installiert wurden, ist Windows XP und Festlegen des Monitor-ICC- auch das Profil bereits installiert. Es braucht dann Profils als vorbestimmter Wert.
  • Seite 61: Informationen Zum Profil Colorsync (Für Macos)

    Informationen zum Profil ColorSync (Für MacOS) Informationen zum Profil ColorSync ColorSync ist das Farbverwaltungssystem der Apple Corporation. Damit erkennt das System die Farbauflösung bei Verwendung mit einer kompatiblen Anwendung. Ein ColorSync-Profil beschreibt die Farbeigenschaften des LCD- Monitors. Hinweise: - Das ColorSync-Profil dieses Monitors kann zusammen mit MacOS8.5 oder höher eingesetzt werden.
  • Seite 62: Anweisungen Zum Anbringen Eines Vesa-Kompatiblen Monitorarms

    Anweisungen zum Anbringen eines VESA- kompatiblen Monitorarms Ein Arm oder Fuß basierend auf dem VESA- Hinweise: Standard (im Handel erhältlich) kann am Monitor - Der Fuß ist nur für diesen Monitor bestimmt, angebracht werden. verwenden Sie ihn für keine anderen Geräte oder Der Arm oder Fuß...
  • Seite 63 Table des matières Avis aux utilisateurs américains ............64 TCO'95/'99 .
  • Seite 64: Avis Aux Utilisateurs Américains

    Sharp Plaza, Mahwah, New Jersey 07430 TEL :1-800-BE-SHARP * En sa qualité de partenaire du programme ENERGY STAR, SHARP a fait en sorte que ce produit réponde aux directives ENERGY STAR en matière d'économie d'énergie. Ce produit contient des soudures étain-plomb ainsi qu'une lampe fluorescente contenant une petite quantité...
  • Seite 65: Tco'95/'99

    LL-T1520-B LL-T1520-H LL-T1620-B LL-T1620-H Félicitations ! Vous venez d’acquérir un produit agréé et estampillé TCO’95 ou TCO’99 ! Votre choix vous permet de disposer désormais d’un produit développé pour être utilisé dans un environnement professionnel. Votre achat a également contribué à réduire les nuisances pesant sur l’environnement et à favoriser le développement de produits électroniques adaptés à...
  • Seite 66 TCO Development SE-114 94 Stockholm, Sweden Fax : +46 8 782 92 07 Email (Internet) : development@tco.se Les informations actualisées relatives aux produits agréés et labellisés TCO’99 peuvent également être obtenues via Internet, à l’adresse : http://www.tco-info.com/ Exigences environnementales Retardateurs de flamme Les retardateurs de flamme sont présents dans les cartes à...
  • Seite 67: Avis Aux Utilisateurs Européens

    Avis aux utilisateurs européens This equipment complies with the requirements of Directives 89/336/EEC and 73/23/EEC as amended by 93/68/EEC. Dieses Gerät entspricht den Anforderungen der EG-Richtlinien 89/336/EWG und 73/23/EWG mit Änderung 93/68/EWG. Ce matériel répond aux exigences contenues dans les directives 89/336/CEE et 73/23/CEE modifiées par la directive 93/68/CEE.
  • Seite 68: Avis Aux Utilisateurs Britanniques

    Avis aux utilisateurs australiens Demandes d'intervention Si une intervention sur l'appareil s'avère nécessaire, veuillez contacter votre revendeur ou Sharp Corporation Australia au numéro 1 300 13 50 22, qui vous communiquera les coordonnées du centre d'entretien agréé Sharp le plus proche de votre domicile.
  • Seite 69: Astuces Et Mesures De Sécurité

    - Disque utilitaire (pour Windows/Macintosh) (1) moniteur avec des objets durs. - Mode d’emploi (1) - Il faut savoir que la société Sharp décline toute responsabilité en cas d’erreur survenue durant Remarques : l’utilisation par le client ou une tierce personne, - Le câble de signal numérique (broche DVI-D24 -...
  • Seite 70: Description Du Produit

    Description du produit 1. Bouton INPUT ....Pour passer d’une borne d’entrée du signal à l’autre. (Borne d’entrée du RVB analogique ↔ Borne d’entrée DVI-I) 2. Bouton MENU ....Ce bouton est utilisé pour faire apparaître, sélectionner et refermer le menu OSD (On Screen Display).
  • Seite 71 DVI standard (DVI-D24 broches ou DVI-I29 broches). (Notez que l'affichage peut ne pas apparaître correctement selon l'ordinateur connecté.) LL-T1520: Ordinateurs compatibles avec une sortie XGA LL-T1620: Ordinateurs compatibles avec une sortie SXGA - Des câbles vendus séparément sont nécessaires pour la connexion.
  • Seite 72: Raccordement, Activation Et Désactivation Du Moniteur

    Raccordement, activation et désactivation du moniteur Attention : Raccordement du moniteur à un - Lors du raccordement, s’assurer que ordinateur l’alimentation tant du moniteur que de l’ordinateur est désactivée. - Ne pas courber le câble de manière excessive ni Raccordement avec le câble de signal y ajouter de rallonge car cela peut provoquer un analogique fourni dysfonctionnement.
  • Seite 73 3. Définir le paramètre sur "ON" avec les boutons que l'affichage peut ne pas apparaître correctement selon l'ordinateur connecté.) - Ne pas régler sur [ON] si vous n’utilisez pas LL-T1520: Ordinateurs compatibles avec une d’adaptateur ADC-DVI Belkin; cela risque de sortie XGA perturber l’affichage.
  • Seite 74: Raccordement D'un Casque D'écoute (En Vente Dans Le Commerce)

    Raccordement, activation et désactivation du moniteur Raccordement d'un casque d'écoute Activation de l’alimentation (en vente dans le commerce) 1. Activer la source d’alimentation principale du Un casque d'écoute (en vente dans le commerce) moniteur. peut être raccordé. Casque audio Fiche pour casque audio Interrupteur principal - Pour allumer et éteindre avec l’interrupteur...
  • Seite 75: Inversion Entre Les Bornes D'entrée

    Raccordement, activation et désactivation du moniteur Inversion entre les bornes d’entrée Utiliser le bouton INPUT pour basculer entre les bornes d’entrée. Borne d’entrée RVB analogique INPUT-1 <ANALOG> INPUT Borne d’entrée DVI-I Borne d’entrée DVI-I (Numérique) (Analogique) INPUT-2 INPUT-2 <DIGITAL> <ANALOG> Désactivation de l’alimentation 1.
  • Seite 76: Réglage De L'image Au Moniteur Et Volume Des Haut-Parleurs

    Réglage de l’image au moniteur et volume des haut-parleurs Pour le signal analogique Fonction de verrouillage des réglages 1. Effectuer tout d’abord un réglage automatique. (p. 78) En désactivant les boutons de commande (c’est-à- 2. Effectuer au besoin un réglage manuel. (p. 79) dire en les verrouillant), toute tentative de modifica- Pour le signal numérique tion des valeurs sera vaine.
  • Seite 77: Réglage Du Volume Des Haut-Parleurs

    Réglage de l’image au moniteur et volume des haut-parleurs Réglage du volume des haut-parleurs Opérer les commandes sans que le menu du moniteur actif (OSD) ne soit affiché. Si le menu OSD est affiché, presser le bouton MENU (plusieurs fois si nécessaire) et commencer la procédure lorsque le menu a disparu.
  • Seite 78: Réglage De L'image Du Moniteur (Lors De L'utilisation D'un Signal Analogique)

    Réglage de l’image du moniteur (lors de l’utilisation d’un signal analogique) Comment procéder aux réglages Réglage automatique de l'image 1. Presser le bouton MENU. Les options CLOCK,PHASE,H-POS,V-POS du Le menu ADJUSTMENT s'affiche. menu ADJUSTMENT peuvent être ajustées ADJUSTMENT automatiquement. MANUAL AUTO Remarque : CLOCK...
  • Seite 79: Réglage Manuel De L'image

    Réglage de l’image du moniteur (lors de l’utilisation d’un signal analogique) Remarques : Réglage manuel de l’image - Presser le bouton pour sélectionner [AUTO]. Des réglages peuvent être effectués au moyen du - Pour choisir une option du menu : Bouton menu du moniteur actif (OSD) proposé.
  • Seite 80 Réglage de l’image du moniteur (lors de l’utilisation d’un signal analogique) Menu GAIN CONTROL Menu COLOR CONTROL GAIN CONTROL COLOR CONTROL MANUAL AUTO COLOR MODE sRGB VIVID WHITE BALANCE BLACK LEVEL CONTRAST SATURATION INPUT-1 ANALOG INPUT-1 ANALOG 1024 x 768 V : 60Hz H : 48.4kHz 1024 x 768...
  • Seite 81 Réglage de l’image du moniteur (lors de l’utilisation d’un signal analogique) Remarques : Remarques : - En ce qui concerne les paramètres autres que - En fonction de la résolution du signal d’entrée, les [STD], toutes les graduations ne peuvent pas même si les options peuvent être sélectionnées, être affichées.
  • Seite 82: Réglage De L'image Du Moniteur (Lors De L'utilisation D'un Signal Numérique)

    Réglage de l'image du moniteur (lors de l’utilisation d’un signal numérique) Des réglages peuvent être effectués au moyen du Menu COLOR CONTROL menu interactif (OSD) proposé. COLOR CONTROL COLOR MODE sRGB VIVID Affichage à l’écran pour le réglage WHITE BALANCE Si l’on se trouve sous un environnement Windows, SATURATION ouvrir le Modèle de réglage se trouvant sur le...
  • Seite 83 Réglage de l'image du moniteur (lors de l’utilisation d’un signal numérique) Remarques : Menu MODE SELECT - En ce qui concerne les paramètres autres que MODE SELECT les [STD], toutes les graduations ne peuvent pas OSD H-POSITION être affichées. Pour afficher toutes les OSD V-POSITION graduations, définir le paramètre sur [STD].
  • Seite 84: Entretien Et Réparation Du Moniteur

    Châssis et panneau de réglage rétroéclairage. Se renseigner auprès du Utiliser un chiffon doux et sec pour éliminer les revendeur ou du mainteneur agréé Sharp le poussières du chassis et du panneau de réglage. plus proche. (Ne jamais tenter d’effectuer ce Si le chassis et le panneau de commande remplacement soi-même.)
  • Seite 85: Caractéristiques Techniques

    ) t r ) t r Dimensions (Unités : mm) LL-T1620 LL-T1520 Câble de signal analogique: Approx. 2,0m Câble audio: Approx. 2,0m Câble de signal numérique, NL-C01E (à acheter séparément): Approx. 2,0m Câble de signal analogique, NL-C02E (à acheter séparément): Approx. 2,0m Downloaded from www.Manualslib.com...
  • Seite 86 71.7kHz 67.2Hz 117.01MHz - La résolution recommandée pour le LL-T1520 est 1024 x 768. - La résolution recommandée pour le LL-T1620 est 1280 x 1024. - Toutes les fréquence sont non entrelacées. - Pour la connexion numérique , le moniteur peut être connecté aux ordinateurs suivants possédant une borne de sortie DVI standard (DVI-D24 broches ou DVI-I29 broches).
  • Seite 87 DMPM: Digital Monitor Power Management Consommation Consommation Mode DMPM Ecran Mode DPMS Ecran H-sync V-sync électrique électrique Affichage LL-T1520: 36W Affichage LL-T1520: 36W Activé Activé activé activé LL-T1620: 42W LL-T1620: 42W Affichage LL-T1520: 3W En veille Affichage Désactivé LL-T1520: 3W désactivé...
  • Seite 88: Installation Des Fichiers Relatifs Au Paramétrage Du Moniteur Et Au Profil Icc (Pour Windows)

    Installation des fichiers relatifs au paramétrage du moniteur et au profil ICC (Pour Windows) En fonction du type d’ordinateur ou du système 7. S’assurer que le moniteur affiche une image, d’exploitation, il peut parfois s’avérer nécessaire ensuite cliquer sur [Apply]. d’utiliser l’ordinateur pour consulter les paramètres 8.
  • Seite 89 Installation des fichiers relatifs au paramétrage du moniteur et au profil ICC (Pour Windows) 10. S’assurer que le moniteur diffuse une image, Pour Windows Me ensuite cliquer sur [Apply]. Installation des fichiers relatifs au paramétrage du 11. Cliquer sur [OK] et refermer la fenêtre. moniteur sous WindowsMe, et au réglage du profil 12.
  • Seite 90 Installation des fichiers relatifs au paramétrage du moniteur et au profil ICC (Pour Windows) Pour Windows XP Installation du profile ICC Installation du profile ICC du moniteur (Si Installation des fichiers relatifs au paramétrage du l’information relative à l’installation a déjà été moniteur sous WindowsXP, et au réglage du profil installée, alors le profile l’a été...
  • Seite 91: Informations Sur Le Profil Colorsync (Pour Macos)

    Informations sur le profil ColorSync (Pour MacOS) A propos du profile ColorSync ColorSync est le système de gestion des couleurs de Apple Corporation et est une fonction qui permet de d’optimiser l’affichage des couleurs lors d’une utilisation avec une application compatible. Un profil ColorSync décrit les caractéristiques de couleur du moni- teur LCD.
  • Seite 92: Instructions Relatives À L'installation D'un Bras Conforme Vesa

    Instructions relatives à l’installation d’un bras conforme VESA Un bras ou un support conforme à la norme VESA Remarques : (en vente dans le commerce) peut servir de - Le support est conçu spécifiquement pour ce support au moniteur. moniteur, ne pas l'utiliser pour un autre L’acquisition du bras ou du support est laissée à...
  • Seite 93 Indice Avviso per gli utenti negli the USA ............94 TCO '95/ '99 .
  • Seite 94: Avviso Per Gli Utenti Negli The Usa

    Sharp Plaza, Mahwah, New Jersey 07430 TEL :1-800-BE-SHARP * Nella sua qualità di partner dell'ENERGY STAR, la SHARP ha accertato che questo prodotto soddisfa le esigenze poste dalle direttive ENERGY STAR per la gestione efficiente dell'energia. Questo prodotto utilizza una lega per saldatura allo stagno-piombo ed una lampada fluorescente contenente una piccola quantità...
  • Seite 95: Tco '95/ '99

    LL-T1520-B LL-T1520-H LL-T1620-B LL-T1620-H Congratulazioni! Lei ha appena acquistato un prodotto riconosciuto e approvato con il marchio TCO’ 95 o TCO’ 99! La Sua scelta ci ha permesso di fornirle un prodotto sviluppato per l’uso professionale. Il Suo acquisto contribuisce anche a ridurre il carico sull’ambiente e ancor più incoraggiare lo sviluppo di prodotti elettronici adatti alle esigenze per la salvaguardia dell’ambiente.
  • Seite 96 TCO Development SE-114 94 Stockholm, Sweden Fax: +46 8 782 92 07 Email (Internet): Development@tco.se È possibile inoltre ricevere via Internet le informazioni relative ai prodotti approvati e dotati di marchio TCO’99 usando l’indirizzo: http://www.tco-info.com/ Requisiti ambientali Additivi ignifughi Gli additivi ignifughi sono presenti in circuiti stampati, cavi, fili, rivestimenti e alloggiamenti. Il loro scopo consiste nel prevenire o almeno ritardare l’espandersi delle fiamme.
  • Seite 97: Avviso Per Gli Utenti In Europa

    Avviso per gli utenti in Europa This equipment complies with the requirements of Directives 89/336/EEC and 73/23/EEC as amended by 93/68/EEC. Dieses Gerät entspricht den Anforderungen der EG-Richtlinien 89/336/EWG und 73/23/EWG mit Änderung 93/68/EWG. Ce matériel répond aux exigences contenues dans les directives 89/336/CEE et 73/23/CEE modifiées par la directive 93/68/CEE.
  • Seite 98: Avviso Per Gli Utenti Nel Regno Unito

    Per il servizio di assistenza tecnica , qualora se ne presentasse la necessità, per favore mettetevi in contatto con il vostro rivenditore oppure con la Sharp Corporation of Australia sull'1 300 13 50 22 per farvi indirizzare al Centro del Servizio Tecnico Assistenza Clienti autorizzato più vicino a voi.
  • Seite 99: Suggerimenti E Precauzioni Per La Sicurezza

    è scadente, vi è molta polvere, monitor. l’umidità è elevata e nei quali il monitor può - La Sharp Corporation è proprietaria dei diritti venire a contatto con olio o vapore, in quanto ciò d’autore per i programmi del dischetto delle può...
  • Seite 100: Descrizione Del Prodotto

    Descrizione del prodotto 1. Tasto INPUT ........ Per commutare tra i terminali di ingresso del segnale. (Terminale di ingresso RGB analogico ↔ terminale di ingresso DVI-I) 2. Tasto MENU ........ Questo tasto si usa per visualizzare, selezionare e chiudere il menu OSD (On Screen Display).
  • Seite 101 (Notare che la visualizzazione potrebbe non apparire correttamente, a seconda del computer collegato.) LL-T1520: i computer che possono assicurare un'uscita XGA. LL-T1620: i computer che possono assicurare un'uscita SXGA. - Per il collegamento sono necessari cavi da acquistare a parte.
  • Seite 102: Collegamento Del Monitor Ed Accensione E Spegnimento Del Monitor

    Collegamento del monitor ed accensione e spegnimento del monitor ATTENZIONE: - Se reinserire il coperchio al suo posto non è - Quando eseguite i collegamenti, assicuratevi che facile, non sforzare. Controllare che non ci sia il monitor che il computer siano spenti. siano cavi rimasti incastrati.
  • Seite 103 4. Premete il tasto MENU. LL-T1520: i computer che possono assicurare A questo punto l’impostazione è completata. un'uscita XGA. LL-T1620: i computer che possono assicurare un'uscita SXGA.
  • Seite 104: Collegamento Di Una Cuffia (Da Acquistare In Commercio)

    Collegamento del monitor ed accensione e spegnimento del monitor Collegamento di una cuffia (da Accensione acquistare in commercio) 1. Posizionate su acceso l’interruttore principale La cuffia (da acquistare in commercio) può essere rete del monitor. collegata. Terminale per le cuffia Cuffia Interruttore principale rete Note:...
  • Seite 105: Commutare Tra I Terminali Di Ingresso

    Collegamento del monitor ed accensione e spegnimento del monitor Commutare tra i terminali di ingresso Utilizzate il pulsante INPUT per commutare tra i terminali di ingresso del segnale. Terminale di ingresso RGB analogico INPUT-1 <ANALOG> INPUT Terminale di ingresso Terminale di ingresso DVI-I (digitale) DVI-I (analogico) INPUT-2...
  • Seite 106: Regolazione Della Visualizzazione Sullo Schermo E Volume Dell'altoparlante

    Regolazione della visualizzazione sullo schermo e volume dell’altoparlante Per il segnale analogico Funzione di blocco delle regolazioni 1. Prima di tutto eseguite una regolazione Disattivando i tasti di controllo (cioè settando il automatica. (p. 108) blocco) si impedirà ogni tentativo di cambiare i 2.
  • Seite 107: Regolazione Del Volume Dell'altoparlante

    Regolazione della visualizzazione sullo schermo e volume dell’altoparlante Regolazione del volume dell’altoparlante Eseguite i comandi senza che il menu On Screen Display (OSD) sia visualizzato. Se il menu OSD è visualizzato, premete il tasto MENU (può darsi che occorra farlo più volte) e cominciate quando il menu OSD è...
  • Seite 108: Regolazione Della Visualizzazione Sullo Schermo (Quando Si Usa Un Segnale Analogico)

    Regolazione della visualizzazione sullo schermo (quando si usa un segnale analogico) Come eseguire la regolazione Regolazione automatica dello schermo 1. Premete il tasto MENU. Le opzioni nel menu ADJUSTMENT si possono Il menu ADJUSTMENT verrà visualizzato. regolare automaticamente (CLOCK, PHASE ADJUSTMENT (FASE) , H-POS, V-POS).
  • Seite 109: Regolazione Manuale Dello Schermo

    Regolazione della visualizzazione sullo schermo (quando si usa un segnale analogico) CLOCK Regolazione manuale dello schermo La figura seguente dimostra come eseguire la Le regolazioni si possono fare mediante il menu regolazione in modo che non venga emesso del On Screen Display (OSD) fornito. rumore di sfarfallamento verticale.
  • Seite 110 Regolazione della visualizzazione sullo schermo (quando si usa un segnale analogico) Menu GAIN CONTROL Menu COLOR CONTLOR GAIN CONTROL COLOR CONTROL MANUAL AUTO COLOR MODE sRGB VIVID WHITE BALANCE BLACK LEVEL SATURATION CONTRAST INPUT-1 ANALOG INPUT-1 ANALOG 1024 x 768 V : 60Hz H : 48.4kHz 1024 x 768...
  • Seite 111 Regolazione della visualizzazione sullo schermo (quando si usa un segnale analogico) Menu MODE SELECT - Usate i tasti per selezionare [COOL], [·], [STD], [·], [WARM] oppure [USER]. MODE SELECT - Selezionando USER si visualizzano i valori delle OSD H-POSITION impostazioni per [R-CONTRAST], [G- OSD V-POSITION SCALING CONTRAST] e [B-CONTRAST], allo scopo di...
  • Seite 112: Regolazione Della Visualizzazione Sullo Schermo (Quando Si Usa Un Segnale Digitale)

    Regolazione della visualizzazione sullo schermo (quando si usa un segnale digitale) Le regolazioni si possono fare mediante il menu Menu COLOR CONTLOR On Screen Display (OSD) fornito. COLOR CONTROL On Screen Display per la regolazione COLOR MODE sRGB VIVID WHITE BALANCE Se usate Windows, aprite il monoscopio sul Disco SATURATION delle Utilità...
  • Seite 113 Regolazione della visualizzazione sullo schermo (quando si usa un segnale digitale) Menu MODE SELECT - Usate i tasti per selezionare [COOL], [·], [STD], [·], [WARM] oppure [USER]. MODE SELECT - Selezionando USER si visualizzano i valori delle OSD H-POSITION impostazioni per [R-CONTRAST], [G- OSD V-POSITION SCALING CONTRAST] e [B-CONTRAST], allo scopo di...
  • Seite 114: Cura E Riparazione Del Monitor

    Centro del Servizio Tecnico Assi- di controllo. stenza Clienti della Sharp più vicino a voi. (Non Se sono molto sporchi, applicate del detersivo tentate mai di eseguire la sostituzione da voi.)
  • Seite 115: Specifiche

    ° 5 r i c r i c Dimensioni (Unità: mm) LL-T1620 LL-T1520 Cavo segnale analogico: circa 2,0m Cavo audio: circa 2.0m Cavo segnale digitali, NL-C01E (da acquistato separatamente): circa 2.0m Cavo segnale analogico, NL-C02E (da acquistato separatamente): circa 2.0m Downloaded from www.Manualslib.com...
  • Seite 116 71.7kHz 67.2Hz 117.01MHz - La risoluzione consigliata per LL-T1520 è 1024 x 768. - La risoluzione consigliata per LL-T1620 è 1280 x 1024. - Tutti sono conformi solo al non interlacciamento. - Il monitor può essere collegato ai seguenti computer dotati di un terminale d'uscita standard DVI (DVI- D24 pin o DVI-I29 pin) per collegamento digitale.
  • Seite 117 DPMS: Display Power Management Signalling DMPM: Digital Monitor Power Management Potenza Potenza Sinc. Sinc. Modo DMPM Schermo Modo DPMS Schermo assorbita assorbita orizzontale verticale LL-T1520: 36W LL-T1520: 36W Attivo Attivo Sì Sì LL-T1620: 42W LL-T1620: 42W LL-T1520: 3W STANDBY Sì Non attivo LL-T1520: 3W...
  • Seite 118: Installazione Delle Informazioni Per Il Setup E Del Profilo Icc (Per Windows)

    Installazione delle informazioni per il setup e del profilo ICC (Per Windows) A seconda del computer oppure del sistema 7. Controllate che il monitor visualizzi, quindi fate operativo può essere necessario usare il computer clic su [Apply]. per eseguire l'installazione delle informazioni di 8.
  • Seite 119 Installazione delle informazioni per il setup e del profilo ICC (Per Windows) 9. Verificate che i particolari del monitor siano Per WindowsMe selezionati, fate quindi clic su [Next], [Next], e SInstallazione delle informazioni di setup del [Finish]. monitor in WindowsMe, e impostazione del profilo 10.
  • Seite 120 Installazione delle informazioni per il setup e del profilo ICC (Per Windows) Per WindowsXP Installazione del profilo ICC Installazione del profilo ICC del monitor. (Se le SInstallazione delle informazioni di setup del informazioni di setup sono già installate, lo è anche monitor in WindowsXP, e impostazione del profilo il profilo e non occorre installarlo.) ICC del monitor come valore predeterminato.
  • Seite 121: Informazioni Sul Profilo Colorsync (Per Macos)

    Informazioni sul profilo ColorSync (Per MacOS) Il profilo ColorSync ColorSync è il sistema di gestione del colore della Apple Corporation ed è una funzione che consente di realizzare la risoluzione del colore, quando lo si usa con un'applicazione compatibile. Un profilo ColorSync descrive le caratteristiche cromatiche del monitor LCD.
  • Seite 122: Istruzioni Per Collegare Un Braccio Compatibile Vesa

    Istruzioni per collegare un braccio compatibile VESA E’ possibile collegare al monitor un braccio oppure Note: un supporto basati sullo standard VESA (da - Il supporto è progettato appositamente per acquistare in commercio). questo monitor, non usatelo per altri apparecchi L’acquisto del braccio oppure del supporto è...
  • Seite 123 Índice Nota para usuarios en EE.UU............124 TCO’95/'99 .
  • Seite 124: Nota Para Usuarios En Ee.uu

    Sharp Plaza, Mahwah, New Jersey 07430 TEL :1-800-BE-SHARP * Como empresa asociada a ENERGY STAR, SHARP certifica que el presente producto cumple las directivas de ENERGY STAR sobre el ahorro energético. El presente producto se sirve de soldador de hilo de estaño y lámpara fluorescente que contiene una pequeña cantidad de mercurio.
  • Seite 125: Tco'95/'99

    LL-T1520-B LL-T1520-H LL-T1620-B LL-T1620-H ¡Enhorabuena! Acaba de adquirir un producto certificado y homologado conforme a TCO’95 o TCO’99. Con su elección se ha decidido por un producto diseñado para aplicaciones profesionales. Su compra también ha contribuido a reducir las cargas medioambientales al igual que al desarrollo posterior de productos electrónicos compatibles con el medio ambiente.
  • Seite 126 TCO Development SE-114 94 Stockholm, Suecia Fax: +46 8 782 92 07 Email (Internet): development@tco.se Vía Internet, usando la dirección http://www.tco-info.com/ también se puede obtener información actualizada sobre los productos aprobados y homologados por TCO’99. Requisitos medioambientales Productos antiinflamantes Los productos antiinflamantes se encuentran en las tarjetas de circuitos impresos, cables, hilos, cajas y carcasas.
  • Seite 127: Nota Para Usuarios En Europa

    Nota para usuarios en Europa This equipment complies with the requirements of Directives 89/336/EEC and 73/23/EEC as amended by 93/68/EEC. Dieses Gerät entspricht den Anforderungen der EG-Richtlinien 89/336/EWG und 73/23/EWG mit Änderung 93/68/EWG. Ce matériel répond aux exigences contenues dans les directives 89/336/CEE et 73/23/CEE modifiées par la directive 93/68/CEE.
  • Seite 128: Nota Para Usuarios En El Reino Unido

    Sírvase consultar con su proveedor para todo lo relacionado con el servicio técnico o contacte con Sharp Corporation of Australia, tel. 1 300 13 50 22, para información sobre el centro de asistencia técnica Sharp autorizado más cercano a su localidad.
  • Seite 129: Sugerencias Y Precauciones De Seguridad

    Ubicación transportar el monitor. - No coloque el monitor en lugares mal ventilados, - Sharp Corporation es titular de los derechos de polvorientos o con un alto grado de humedad o autor del programa del Disquete de utilidades. donde el monitor pueda entrar en contacto con No lo reproduzca sin previa autorización.
  • Seite 130: Descripción Del Producto

    Descripción del producto 1. Botón INPUT ....Para conmutar entre los bornes de entrada de la señal. (Borne de entrada RGB analógica ↔ borne de entrada DVI-I) 2.
  • Seite 131 DVI-I29) para hacer la conexión digital. (Tenga en cuenta que, dependiendo del ordenador conectado, la visualización puede que no aparezca correctamente.) LL-T1520: Ordenadores con capacidad de salida XGA LL-T1620: Ordenadores con capacidad de salida SXGA - Para hacer la conexión se necesitan cables vendidos separadamente.
  • Seite 132: Conexión Del Monitor Y Encendido/Apagado Del Mismo

    Conexión del monitor y encendido / apagado del mismo Precaución: - No fuerce la cubierta si resulta complicado - Antes de realizar la conexión, asegúrese de que colocarla. Compruebe si han quedado cables tanto el monitor como el ordenador están atrapados.
  • Seite 133 Con esto se completa el ajuste. conectado, la visualización puede que no aparezca correctamente.) LL-T1520:Ordenadores con capacidad de Conecte el cable de audio suministrado salida XGA Cuando el cable de audio suministrado se conecte LL-T1620:Ordenadores con capacidad de...
  • Seite 134: Conexión De Auriculares (De Venta En El Comercio)

    Conexión del monitor y encendido/apagado del mismo Conexión de auriculares (de venta en Encendido el comercio) 1. Conmute el interruptor primario del monitor. Se pueden conectar auriculares (de venta en el comercio). Borne de auriculares Auriculares Interruptor primario Notas: - Cuando conecte y desconecte la Interruptor - Cuando están conectados los auriculares, no se primario, espere siempre durante un intervalo oye ningún sonido por los altavoces del monitor.
  • Seite 135: Alternar Entre Bornes De Entrada

    Conexión del monitor y encendido/apagado del mismo Alternar entre bornes de entrada Utilizar el botón de ENTRADA (INPUT) para conmutar entre bornes de entrada de señal. Borne de entrada RGB analógica INPUT-1 <ANALOG> INPUT Borne de entrada Borne de entrada DVI-I (digital) DVI-I (analógica) INPUT-2...
  • Seite 136: Ajuste De La Pantalla Y Volumen Del Altavoz

    Ajuste de la pantalla y volumen del altavoz Para la señal analógica Función de bloqueo de ajustes 1.En primer lugar, lleve a cabo un ajuste Si deshabilita los botones de control (es decir, automático. (p. 138) activa el bloqueo) no podrá cambiar los valores 2.En caso necesario, realice un ajuste manual.
  • Seite 137: Ajuste Del Volumen Del Altavoz

    Ajuste de la pantalla y volumen del altavoz Ajuste del volumen del altavoz Realice los ajustes sin que el menú Máscara en pantalla (OSD) se vea en la pantalla. Si ve el menú OSD en la pantalla, pulse el botón MENU (varias veces si fuera necesario) y empiece cuando el menú...
  • Seite 138: Ajuste De La Pantalla (Cuando Se Utiliza Una Señal Analógica)

    Ajuste de la pantalla (cuando se utiliza una señal analógica) Cómo realizar el ajuste Ajuste automático de la pantalla 1. Pulse el botón MENU. Las opciones del Menú ADJUSTMENT (CLOCK, Aparecerá el menú ADJUSTMENT. PHASE, H-POS V-POS) se pueden ajustar ADJUSTMENT automáticamente.
  • Seite 139: Ajuste Manual De La Pantalla

    Ajuste de la pantalla (cuando se utiliza una señal analógica) CLOCK Ajuste manual de la pantalla En la figura siguiente se muestra cómo efectuar el Los ajustes se pueden realizar a través del Menú ajuste de forma que no se genere un parpadeo en pantalla (OSD).
  • Seite 140 Ajuste de la pantalla (cuando se utiliza una señal analógica) Menú GAIN CONTROL Menú COLOR CONTROL GAIN CONTROL COLOR CONTROL MANUAL AUTO COLOR MODE sRGB VIVID WHITE BALANCE BLACK LEVEL CONTRAST SATURATION INPUT-1 ANALOG INPUT-1 ANALOG 1024 x 768 V : 60Hz H : 48.4kHz 1024 x 768 V : 60Hz...
  • Seite 141 Ajuste de la pantalla (cuando se utiliza una señal analógica) Menú MODE SELECT - Utilice los botones para seleccionar [COOL], [·], [STD], [·], [WARM] o [USER]. MODE SELECT - Al seleccionar USER (usuario), aparecen los OSD H-POSITION valores programados para [R-CONTRAST], OSD V-POSITION SCALING [G-CONTRAST] y [B-CONTRAST], para poder...
  • Seite 142: Ajuste De La Pantalla (Cuando Se Utiliza Una Señal Digital)

    Ajuste de la pantalla (cuando se utiliza una señal digital) Los ajustes se pueden realizar a través del menú Menú COLOR CONTROL Máscara en pantalla (OSD). COLOR CONTROL COLOR MODE sRGB VIVID Máscara en pantalla para el ajuste WHITE BALANCE Si está...
  • Seite 143 Ajuste de la pantalla (cuando se utiliza una señal digital) Menú MODE SELECT - Utilice los botones para seleccionar [COOL], [·], [STD], [·], [WARM] o [USER]. MODE SELECT - Al seleccionar USER (usuario), aparecen los OSD H-POSITION valores programados para [R-CONTRAST], OSD V-POSITION SCALING [G-CONTRAST] y [B-CONTRAST], para poder...
  • Seite 144: Conservación Y Reparación Del Monitor

    Utilice un paño suave y seco para limpiar, sin servicio autorizado de asistencia técnica de apretar demasiado, la caja y el panel de control. Sharp más cercano. (No intente jamás hacer Si estuvieran muy sucios, eche un poco de usted mismo este cambio.) detergente neutro en un paño suave previamente...
  • Seite 145: Especificaciones

    á á ) . l ) . l Dimensiones (Unidades: mm) LL-T1520 LL-T1620 Cable de señal analógica: 2,0m aprox. Cable de audio: 2,0m aprox. Cable de señal digital, NL-C01E (que debe adquirir aparte): 2,0m aprox. Cable de señal analógica, NL-C02E (que debe adquirir aparte): 2,0m aprox.
  • Seite 146 71.7kHz 67.2Hz 117.01MHz - La resolución recomendada para el modelo LL-T1520 es 1024 x 768. - La resolución recomendada para el modelo LL-T1620 es 1280 x 1024. - Todos son compatibles únicamente con «non-interlace». - El monitor se puede conectar a los ordenadores siguientes que tengan un borne de salida estándar DVI (contacto DVI-D24 o contacto DVI-I29) para hacer la conexión digital.
  • Seite 147 (Sistema de administración de energía del monitor) (Gestión de energía del monitor digital) Consumo de Consumo de Modo DMPM Pantalla Modo DPMS Pantalla H-sync V-sync corriente corriente LL-T1520: 36W LL-T1520: 36W Encendida Encendida Sí Sí LL-T1620: 42W LL-T1620: 42W LL-T1520: 3W STANDBY Sí Apagada...
  • Seite 148: Instalación De La Información De Configuración Y Del Perfil Icc (Para Windows)

    Instalación de la información de configuración y del perfil ICC (Para Windows) Según sea el tipo de ordenador o de sistema 7. Compruebe que el monitor está funcionando y operativo, puede que sea necesario utilizar el a continuación haga clic en [Apply]. ordenador para llevar a cabo la instalación de la 8.
  • Seite 149 Instalación de la información de configuración y del perfil ICC (Para Windows) 10. Compruebe que el monitor está funcionando y Para WindowsMe a continuación haga clic en [Apply]. Instalación de la información de configuración del 11. Haga clic sobre [OK] y cierre la ventana. monitor en WindowsMe y configuración del perfil 12.
  • Seite 150 Instalación de la información de configuración y del perfil ICC (Para Windows) Para WindowsXP Instalación del perfil ICC Instalación del perfil ICC del monitor. (Si ya ha Instalación de la información de configuración del instalado la información de configuración, se habrá monitor en WindowsXP y configuración del perfil instalado también el perfil por lo que no hace falta ICC del monitor como valor predeterminado.
  • Seite 151: Información Acerca Del Perfil Colorsync (Para Macos)

    Información acerca del perfil ColorSync (Para MacOS) Acerca del perfil ColorSync ColorSync es el sistema de gestión del color de Apple Corporation y se trata de una función que permite obtener una resolución cromática cuando se utiliza con una aplicación compatible. Un perfil ColorSync describe las características cromáticas del monitor LCD.
  • Seite 152: Instrucciones Para Acoplar Un Brazo De Compatibilidad Vesa

    Instrucciones para acoplar un brazo de compatibilidad VESA Puede acoplar al monitor un brazo o una base (de Notas: venta en el comercio) conforme al estándar VESA. - La base se ha diseñado específicamente para La adquisición del brazo o la base queda a este monitor, no la use con ningún otro equipo ni discreción del cliente.
  • Seite 153 Downloaded from www.Manualslib.com manuals search engine...
  • Seite 154 SHARP CORPORATION © 2002 SHARP CORPORATION DSC2 TINSM1035MPZZ (2) Downloaded from www.Manualslib.com manuals search engine...

Diese Anleitung auch für:

Ll-t1620

Inhaltsverzeichnis