Herunterladen Inhalt Inhalt Diese Seite drucken
Sharp LL-T15A4 Bedienungsanleitung

Sharp LL-T15A4 Bedienungsanleitung

Lcd farbmonitor
Vorschau ausblenden Andere Handbücher für LL-T15A4:
Inhaltsverzeichnis

Werbung

Verfügbare Sprachen
  • DE

Verfügbare Sprachen

  • DEUTSCH, seite 27
LCD Monitor
LCD Farbmonitor
Moniteur LCD
Monitor LCD
Monitor LCD
LL-T15A4
OPERATION MANUAL
BEDIENUNGSANLEITUNG
MODE D'EMPLOI
MANUALE D'USO
MANUAL DE FUNCIONAMIENTO

Werbung

Inhaltsverzeichnis
loading

Inhaltszusammenfassung für Sharp LL-T15A4

  • Seite 1 LCD Monitor LCD Farbmonitor Moniteur LCD Monitor LCD Monitor LCD LL-T15A4 OPERATION MANUAL BEDIENUNGSANLEITUNG MODE D'EMPLOI MANUALE D'USO MANUAL DE FUNCIONAMIENTO...
  • Seite 2: Inhaltsverzeichnis

    Table of Contents/Inhaltsverzeichnis/Table des matières/Indice/Índice Notice for Users in Europe ............. 3 Notice for Users in the UK .
  • Seite 3: Notice For Users In Europe

    Notice for Users in Europe This equipment complies with the requirements of Directives 89/336/EEC and 73/23/EEC as amended by 93/68/EEC. Dieses Gerät entspricht den Anforderungen der EG-Richtlinien 89/336/EWG und 73/23/EWG mit Änderung 93/68/EWG. Ce matériel répond aux exigences contenues dans les directives 89/336/CEE et 73/23/CEE modifiées par la directive 93/68/CEE.
  • Seite 4: Notice For Users In The Uk

    "WARNING: THIS APPARATUS MUST BE EARTHED." Notice for Users in Australia Service Inquiries Please contact your dealer for service if required or contact Sharp Corporation of Australia on 1 300 13 50 22 for referral to your nearest Sharp authorized Service Center.
  • Seite 5: Notice For Users In The Usa

    Sharp Plaza, Mahwah, New Jersey 07430 TEL :1-800-BE-SHARP * As an ENERGY STAR Partner, SHARP has determined that this product meets the ENERGY STAR guidelines for energy efficiency. This product utilizes tin-lead solder, and fluorescent lamp containing a small amount of mercury.
  • Seite 6: Tco'99

    TCO Development SE-114 94 Stockholm, Sweden Fax: +46 8 782 92 07 Email (Internet): development@tco.se Current information regarding TCO'99 approved and labelled products may also be obtained via the Internet, using the address: http://www.tco-info.com/ Congratulations! Environmental requirements You have just purchased a TCO'99 approved and labelled product! Your choice has provided you with a Flame retardants product developed for professional use.
  • Seite 7: English

    Table of Contents Tips and safety precautions ............. 8 Product description .
  • Seite 8: Tips And Safety Precautions

    - Sharp Corporation holds authorship rights to the - This monitor and its accessories may be Utility Disk program. Do not reproduce it without upgraded without advance notice.
  • Seite 9: Product Description

    Product description 10 11 1. MENU button ......This button is used to pop-up, select and close the OSD (On Screen Display) Menu. / MODE button ..... When the OSD Menu is displayed: This button is used to select menu options. When the OSD Menu is not displayed: This button is used to set DISPLAY MODE.
  • Seite 10 Product description Standing up and adjusting the monitor Angle adjustment Press down on the stand and adjust it to a suitable viewing angle. CAUTION! approx. 5° approx. 25° - Pressure from hands on the LCD panel could cause damage. - Be careful not to allow your fingers to be pinched.
  • Seite 11: Connecting The Monitor And Turning The Monitor On And Off

    Connecting the monitor and turning the monitor on and off Connect the accessory audio cable CAUTION! When the accessory audio cable is connected to the - When connecting, ensure that both the monitor audio output terminal of the computer, the sound of and computer are switched off.
  • Seite 12: Connecting The Monitor To A Power Source

    Connecting the monitor and turning the monitor on and off Connecting the monitor to a power source Installing set-up information and the ICC profile (for Windows) Depending on the type of computer or OS, you may Power terminal need to install the monitor set-up information on your system.
  • Seite 13 Connecting the monitor and turning the monitor on and off For Windows 98 For Windows 2000 Installing monitor set-up information into Windows 98, Installing monitor set-up information into Windows and setting the monitor's ICC profile as a 2000, and setting the monitor's ICC profile as a predetermined value.
  • Seite 14 Connecting the monitor and turning the monitor on and off Installing the ICC profile If the "Add New Hardware Wizard" has not appeared: Installing the monitor s ICC profile. (If the set-up information has already been installed, so too has 1.
  • Seite 15: Information About The Colorsync Profile (For Macos)

    Connecting the monitor and turning the monitor on and off Information about the ColorSync profile (for MacOS) About the ColorSync profile ColorSync is Apple Computer's color management system and enables color reproduction characteristics to be realized when used with a compatible application.
  • Seite 16: Adjusting The Screen Display And Speaker Volume

    Adjusting the screen display and speaker volume Adjustment lock function Adjustment the backlight (right column) Brightness of backlight can be adjusted. By disabling the control buttons (i.e. setting the lock) any attempted changes to adjusted values Speaker volume adjustment (p.17) will be voided.
  • Seite 17: Adjusting The Speaker Volume

    Adjusting the screen display and speaker volume Adjusting the speaker volume Automatic screen adjustment 1. Without the OSD Menu being displayed, press the Options in the ADJUSTMENT Menu can be adjusted automatically (CLOCK, PHASE, H-POS, or the button. 2. Check that [VOLUME] is selected. V-POS).
  • Seite 18: Manual Screen Adjustment

    Adjusting the screen display and speaker volume Adjusting the screen automatically Manual screen adjustment 1. Press the MENU button. Adjustments can be made using OSD (On Screen The ADJUSTMENT Menu will be displayed. Display) Menu provided. ADJUSTMENT MANUAL AUTO 1.Display an image that makes the entire screen CLOCK very bright.
  • Seite 19 Adjusting the screen display and speaker volume ADJUSTMENT Menu GAIN CONTROL Menu ADJUSTMENT GAIN CONTROL MANUAL AUTO MANUAL AUTO CLOCK BLACK LEVEL PHASE CONTRAST H-POS V-POS 1024x768 1024x768 V : 6 0Hz H : 4 8.4kHz V : 6 0Hz H : 4 8.4kHz MANUAL: Individual menu options are manually MANUAL: Individual menu options are manually adjusted.
  • Seite 20 Adjusting the screen display and speaker volume WHITE BALANCE Menu MODE SELECT Menu WHITE BALANCE MODE SELECT OSD H-POSITION COOL WARM USER OSD V-POSITION SCALING HIGH R-CONTRAST COLORS 260K G-CONTRAST LANGUAGE B-CONTRAST 1024x768 1024x768 V : 6 0Hz H : 4 8.4kHz V : 6 0Hz H : 4 8.4kHz Notes: Notes:...
  • Seite 21: Monitor Care And Repair

    Use a soft dry cloth to lightly wipe away dirt and inquire at the shop where you purchased the dust from the surface of the LCD panel. (A soft monitor or your nearest Sharp authorized cloth such as gauze or that used for lens cleaning Service Center. (Never attempt this is suitable.)
  • Seite 22: Specifications

    Specifications Product specifications Dimensions (Units: mm) Model name LL-T15A4-H (Frosty gray)/LL-T15A4-B (Black) LCD display 38 cm measured diagonally TFT LCD module Resolution (max.) XGA 1024 x 768 pixels Displayable colors (max.) Approx.16.19 million colors (6bit + FRC) Brightness (max.) 260 cd/m Dot pitch 0.297(H) x 0.297(V) mm...
  • Seite 23 Specifications Signal timings Power management The monitor is based on VESA DPMS (Display Power Management Signaling). Display mode Hsync Vsync frequency To activate the monitor's power management 640x480 31.5kHz 60Hz 25.175MHz VESA function, both the video card and the computer 37.9kHz 72Hz 31.5MHz...
  • Seite 24: Instructions For Attaching A Vesa Compliant Arm

    Instructions for attaching a VESA compliant arm An arm or stand based on the VESA standard 6. Attach the arm to the monitor with four screws. (commercially available) can be attached to the monitor. Procurement of the arm or stand is at the customer's discretion.
  • Seite 25 Instructions for attaching a VESA compliant arm The stand may be removed. 1.Turn off the monitor, and remove the analog signal cable, the audio cable and the power cord from the monitor. 2. Being careful not to damage the monitor, spread out a soft cloth and lay the monitor on it display- side down.
  • Seite 27: Deutsch

    Inhaltsverzeichnis Tipp und Sicherheitsvorkehrungen ............28 Produktbeschreibung .
  • Seite 28: Tipp Und Sicherheitsvorkehrungen

    - Utility Disk (für Windows/Macintosh) (1) - Der Monitor darf niemals mit harten Gegenständen - Bedienungsanleitung (1) abgerieben oder berührt werden. - Wir bitten um Ihr Verständnis, dass Sharp Corporation Hinweise: über die gesetzlich anerkannte Leistungshaftung - Nur die mit dem Monitor mitgelieferten Kabel verwenden.
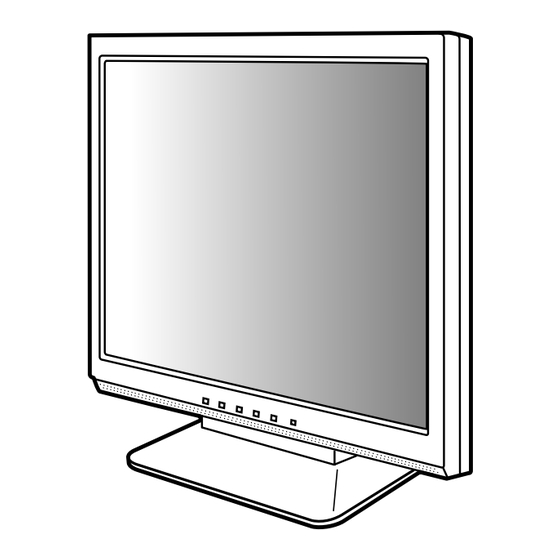
  • Seite 29: Produktbeschreibung

    Produktbeschreibung 10 11 1. Taste MENU ......Mit dieser Taste öffnen, wählen und schließen Sie das OSD (On Screen Display) -Menü. 2. Taste / MODE ...... Wenn das OSD-Menü angezeigt wird: Diese Taste wird zum Wählen der Menüoptionen verwendet. Wenn kein OSD-Menü angezeigt wird: Diese Taste wird zur Einstellung von DISPLAY MODE verwendet.
  • Seite 30 Produktbeschreibung Aufstellen und Justieren des Monitors Winkeleinstellung Drücken Sie auf den Fuß, und stellen Sie den Monitor auf einen angenehmen Blickwinkel ein. ACHTUNG! - Wenn Sie mit der Hand auf den LCD-Bildschirm ca. 5° ca. 25° drücken, kann dieser beschädigt werden. - Vorsichtig vorgehen und darauf achten, dass die Finger nicht eingeklemmt werden.
  • Seite 31: Anschließen Des Monitors Und Ein- Und Ausschalten Des Monitors

    Anschließen des Monitors und Ein- und Ausschalten des Monitors Schließen Sie das zusätzliche Audiokabel an ACHTUNG! Wenn das zusätzliche Audiokabel am - Bevor Sie den Monitor anschließen, müssen Sie Audioausgangsanschluss des Computers den Monitor und den Computer ausschalten. angeschlossen wird, wird der Ton des - Achten Sie darauf, dass Sie das Kabel nicht angeschlossenen Computers über die Monitor- überdehnen, und schließen Sie kein...
  • Seite 32: Anschließen Des Monitors An Eine Stromquelle

    Anschließen des Monitors und Ein- und Ausschalten des Monitors Anschließen des Monitors an eine Installieren der Setup-Informationen Stromquelle und des ICC-Profils (für Windows) Je nach dem verwendeten Computer oder Betriebssystem muss die Installation der Monitor- Netzanschluss Setup-Informationen usw. eventuell über den Computer erfolgen.
  • Seite 33 Anschließen des Monitors und Ein- und Ausschalten des Monitors 7. Prüfen Sie, ob der Monitor angezeigt wird, und 12. Entnehmen Sie die Utility Disk aus Laufwerk A. klicken Sie dann auf [Apply]. 8. Klicken Sie auf [OK], und schließen Sie das Für Windows 2000 Fenster.
  • Seite 34 Anschließen des Monitors und Ein- und Ausschalten des Monitors 3. Aktivieren Sie [Display a list of all the drivers in a 6. Klicken Sie auf [Properties], [Driver] und specific location, so you can select the driver you [Update Driver]. want.], und klicken Sie auf [Next]. 7.
  • Seite 35: Informationen Zum Profil Colorsync (Für Macos)

    Anschließen des Monitors und Ein- und Ausschalten des Monitors Informationen zum Profil ColorSync (für MacOS) Informationen zum Profil ColorSync ColorSync ist das Farbverwaltungssystem von Apple Computers. Mit dieser Funktion erkennt das System die Farbwiedergabeeigenschaften bei Verwendung mit einer kompatiblen Anwendung. Ein ColorSync-Profil beschreibt die Farbeigenschaften des LCD-Monitors.
  • Seite 36: Einstellen Der Bildschirmanzeige Und Der Lautsprecher-Lautstärke

    Einstellen der Bildschirmanzeige und der Lautsprecher-Lautstärke Einstellung der Hintergrundbeleuchtung 2. Drücken Sie gleichzeitig die Taste MENU und die (rechte Spalte) Taste . Wenn [RESET] auf dem Bildschirm Die Helligkeit der Hintergrundbeleuchtung lässt sich angezeigt wird, ist der Reset abgeschlossen. einstellen. Hinweis: Einstellung der Lautstärke der Lautsprecher - Falls sich die Werte nicht zurücksetzen lassen,...
  • Seite 37: Einstellen Der Lautsprecher-Lautstärke

    Einstellen der Bildschirmanzeige und der Lautsprecher-Lautstärke Einstellen Lautsprecher- Automatische Bildschirmeinstellung Lautstärke Die Optionen im Menü ADJUSTMENT können automatisch eingestellt werden (CLOCK, PHASE, 1. Wenn das OSD-Menü nicht angezeigt wird, H-POS, V-POS). drücken Sie die Taste oder die Taste 2. Sicherstellen, dass [VOLUME] gewählt ist. Hinweis: Wenn es nicht gewählt ist, drücken Sie die Taste - Wenn Sie den Monitor zum ersten Mal einrichten...
  • Seite 38: Automatisches Einstellen Des Bildschirms

    Einstellen der Bildschirmanzeige und der Lautsprecher-Lautstärke Hinweis: - Es ist möglich, dass eine automatische Einstellung - Wenn der Anzeigemodus Ihres Computers auf abhängig von der auf dem Bildschirm 65K Farben eingestellt ist, lassen sich die wiedergegebenen Anzeige - bewegliche Bilder verschiedenen Farbgrade in den einzelnen oder die MS-DOS-Eingabeaufforderung - nicht Farbmustern darstellen, oder die Graustufen...
  • Seite 39 Einstellen der Bildschirmanzeige und der Lautsprecher-Lautstärke Menü ADJUSTMENT Menü GAIN CONTROL ADJUSTMENT GAIN CONTROL MANUAL AUTO MANUAL AUTO CLOCK BLACK LEVEL PHASE CONTRAST H-POS V-POS 1024x768 1024x768 V : 6 0Hz H : 4 8.4kHz V : 6 0Hz H : 4 8.4kHz MANUAL: Einzelne Menüoptionen werden manuell MANUAL: Einzelne Menüoptionen werden manuell eingestellt.
  • Seite 40 Einstellen der Bildschirmanzeige und der Lautsprecher-Lautstärke Menü WHITE BALANCE Menü MODE SELECT WHITE BALANCE MODE SELECT OSD H-POSITION COOL WARM USER OSD V-POSITION SCALING HIGH R-CONTRAST COLORS 260K G-CONTRAST LANGUAGE B-CONTRAST 1024x768 1024x768 V : 6 0Hz H : 4 8.4kHz V : 6 0Hz H : 4 8.4kHz Hinweise: Hinweise:...
  • Seite 41: Pflege Des Monitors Und Reparaturen

    Wenden Sie sich an das Geschäft, in Gehäuse und Bedienfeld dem Sie den Monitor gekauft haben, oder an Wischen Sie das Gehäuse und das Bedienfeld mit das nächste autorisierte Sharp- einem weichen, trockenen Tuch vorsichtig sauber. Kundendienstzentrum. (Nehmen Sie diesen Falls starke Verschmutzungen auftreten, geben Sie Austausch niemals selber vor.)
  • Seite 42: Technische Daten

    Technische Daten Produktspezifikationen Abmessungen (Einheiten: mm) Modellbezeichnung LL-T15A4-H (Frostig grau)/LL-T15A4-B (Schwarz) LCD-Anzeige 38 cm diagonal gemessen TFT-LCD-Modul Auflösung (max.) XGA 1024 x 768 Pixel Anzeigbare Farben (max.) Ca.16,19 Millionen Farben (6bit + FRC) Helligkeit (max.) 260 cd/m Punktabstand 0,297 (H) x 0,297 (V) mm Kontrastverhältnis...
  • Seite 43: Pinbelegung Des Analogsignal-Eingangsanschlusses

    Technische Daten Signaltakte Power Management Der Monitor basiert auf VESA DPMS (Display Anzeigemodus Hsync Vsync Punktfrequenz Power Management Signaling). Um die Power Management-Funktion des Monitors 640x480 31.5kHz 60Hz 25.175MHz VESA zu aktivieren, müssen sowohl die Videokarte als 37.9kHz 72Hz 31.5MHz auch der Computer dem Standard VESA DPMS 37.5kHz 75Hz...
  • Seite 44: Anweisungen Zum Anbringen Eines Vesa-Kompatiblen Monitorarms

    Anweisungen zum Anbringen eines VESA- kompatiblen Monitorarms Ein Arm oder Fuß basierend auf dem VESA- 6. Lösen Sie die vier Schrauben, und nehmen Sie Standard (im Handel erhältlich) kann am Monitor den Monitorfuß ab. angebracht werden. Der Arm oder Fuß muss vom Kunden gesondert erworben werden.
  • Seite 45 Anweisungen zum Anbringen eines VESA-kompatiblen Monitorarms Der Fuß kann entfernt werden. 1. Den Monitor ausschalten und das Analogsignalkabel, das Audiokabel und den Netzstecker vom Monitor abtrennen. 2. Achten Sie dabei darauf, dass der Monitor nicht beschädigt wird. Breiten Sie ein weiches Tuch aus, und legen Sie den Monitor mit der Anzeige- seite nach unten darauf.
  • Seite 47: Français

    Table des matières Conseils et mesures de sécurité ............48 Description du produit .
  • Seite 48: Conseils Et Mesures De Sécurité

    - Ne jamais heurter ou taper sur l'ordinateur avec des - Mode d'emploi (1) objets durs. - Il faut savoir que la société Sharp décline toute Remarques : responsabilité en cas d'erreur survenue durant - Utilisez uniquement les câbles fournis avec le l'utilisation par le client ou une tierce personne, ainsi moniteur.
  • Seite 49: Description Du Produit

    Description du produit 10 11 1. Bouton MENU ......Ce bouton est utilisé pour faire apparaître, sélectionner et refermer le menu OSD (On Screen Display). 2. Bouton / MODE ....... Lorsque le menu OSD est affiché : Ce bouton est utilisé pour sélectionner les options du menu. Lorsque le menu OSD n'est pas affiché...
  • Seite 50 Description du produit Relevage et réglage de l'inclinaison du Réglage de l'inclinaison Appuyer sur le support et l'ajuster jusqu'à obtenir moniteur un angle de visualisation adéquat. ATTENTION ! approx. 5° approx. 25° - Appuyer les mains sur l'écran LCD peut provoquer son endommagement.
  • Seite 51: Raccordement, Activation Et Désactivation Du Moniteur

    Raccordement, activation et désactivation du moniteur Connecter le câble audio fourni ATTENTION ! Quand le câble audio fourni est connecté à la borne - Lors du raccordement, s'assurer que de sortie audio de l'ordinateur, le son de l'ordinateur l'alimentation tant du moniteur que de connecté...
  • Seite 52: Raccordement Du Moniteur À Une Source D'alimentation

    Raccordement, activation et désactivation du moniteur Raccordement du moniteur à une Installation des fichiers relatifs au paramétrage du moniteur et au profil source d'alimentation ICC (pour Windows) Borne En fonction du type d'ordinateur ou du système d'alimentation d'exploitation, il peut parfois s'avérer nécessaire d'utiliser l'ordinateur pour consulter les paramètres secteur relatifs à...
  • Seite 53 Raccordement, activation et désactivation du moniteur 6. Confirmer la sélection des caractéristiques du 9. Confirmer la sélection des caractéristiques du moniteur et ensuite cliquer sur [OK]. moniteur et ensuite cliquer sur [Next], [Next] et 7. S'assurer que le moniteur affiche une image, [Finish].
  • Seite 54 Raccordement, activation et désactivation du moniteur Pour Windows Me Pour Windows XP Installation des fichiers relatifs au paramétrage du Installation des fichiers relatifs au paramétrage du moniteur sous Windows Me, et au réglage du profil moniteur sous Windows XP, et au réglage du profil ICC du moniteur en tant que valeur par défaut.
  • Seite 55: Informations Sur Le Profil Colorsync (Pour Macos)

    Raccordement, activation et désactivation du moniteur Installation du profil ICC Informations sur le profil ColorSync Installation du profil ICC du moniteur. (Si l'information (pour MacOS) relative à l'installation a déjà été installée, alors le profil l'a été également, et il n'est donc plus nécessaire de l'installer.) A propos du profil ColorSync Les explications qui suivent considèrent que le...
  • Seite 56: Réglage De L'image Sur Le Moniteur Et Du Volume Des Haut-Parleurs

    Réglage de l'image sur le moniteur et du volume des haut-parleurs Réglage du rétro-éclairage (colonne de droite) Remarque : La luminosité du rétro-éclairage peut être ajustée. - Il n'est pas possible de retourner aux valeurs initiales lorsque le réglage est verrouillé. Ajustement du volume des haut-parleurs (p.57) Déverrouiller les réglages avant de tenter d'utiliser Le volume des haut-parleurs peut être ajusté.
  • Seite 57: Réglage Du Volume Des Haut-Parleurs

    Réglage de l'image sur le moniteur et du volume des haut-parleurs Réglage du volume des haut-parleurs Réglage automatique de l'image 1. Sans que le menu OSD ne soit affiché, appuyer Les options du menu ADJUSTMENT peuvent être effectués automatiquement (CLOCK, PHASE, H- sur le bouton ou le bouton POS, V-POS).
  • Seite 58: Réglage Manuel De L'image

    Réglage de l'image sur le moniteur et du volume des haut-parleurs Remarque : Réglage manuel de l'image - Si le mode d'affichage de l'ordinateur utilisé est Des réglages peuvent être effectués au moyen du réglé sur 65K couleurs, il est possible de voir menu du moniteur actif (OSD) proposé.
  • Seite 59 Réglage de l'image sur le moniteur et du volume des haut-parleurs Menu ADJUSTMENT (REGLAGE) Menu GAIN CONTROL (REGLAGE DES COULEURS) ADJUSTMENT MANUAL AUTO GAIN CONTROL CLOCK MANUAL AUTO PHASE BLACK LEVEL H-POS CONTRAST V-POS 1024x768 V : 6 0Hz H : 4 8.4kHz 1024x768 MANUAL : Les options individuelles du menu sont V : 6 0Hz H : 4 8.4kHz...
  • Seite 60 Réglage de l'image sur le moniteur et du volume des haut-parleurs Menu WHITE BALANCE Menu MODE SELECT (SELECTION DU (EQUILIBRE DU BLANC) MODE) WHITE BALANCE MODE SELECT OSD H-POSITION COOL WARM USER OSD V-POSITION SCALING HIGH R-CONTRAST COLORS 260K G-CONTRAST LANGUAGE B-CONTRAST 1024x768...
  • Seite 61: Entretien Et Réparation Du Moniteur

    (p.57) correctement, contacter le magasin où il a été - Aucun son ne sort des haut-parleurs quand le acheté ou votre réparateur agréé Sharp le plus moniteur est en mode d'économie d'énergie. proche. Quand l'appareil est éteint ou le moniteur en mode économie d'énergie, il peut apparaître, sur...
  • Seite 62: Caractéristiques Techniques

    Caractéristiques techniques Dimensions (Unités : mm) Caractéristiques techniques du produit Nom du modèle LL-T15A4-H (Gris glacé)/LL-T15A4-B (Noir) Moniteur LCD 38 cm en diagonale Module TFT à cristaux liquides Résolution (max.) XGA 1024 x 768 pixels Couleurs affichables (max.) Approx. 16,19 millions de couleurs (6bit + FRC) Luminosité...
  • Seite 63: Gestion De L'alimentation

    Caractéristiques techniques Fréquence des signaux Gestion de l'alimentation Le moniteur est basé sur un système VESA DPMS Bande Hsync Mode affichage Vsync (signalisation de la gestion d'alimentation de passante l'affichage). 640x480 31.5kHz 60Hz 25.175MHz VESA Pour activer la fonction de gestion de 37.9kHz 72Hz 31.5MHz...
  • Seite 64: Instructions Relatives À L'installation D'un Bras Conforme Vesa

    Instructions relatives à l'installation d'un bras conforme VESA Un bras ou un support conforme à la norme VESA 6. Fixer le bras au moniteur à l'aide des quatre vis. (en vente dans le commerce) peut servir de support au moniteur. L'acquisition du bras ou du support est laissée à...
  • Seite 65 Instructions relatives à l'installation d'un bras conforme VESA Le support peut être séparé. 1. Mettre le moniteur hors tension puis retirer le câble pour signal analogique, le câble audio et le cordon d'alimentation du moniteur. 2. Tout en prenant garde de ne pas endommager le moniteur, étendre un chiffon et y déposer le moniteur avec l'écran tourné...
  • Seite 67: Italiano

    Indice Suggerimenti e precauzioni per la sicurezza ..........68 Descrizione del prodotto .
  • Seite 68: Suggerimenti E Precauzioni Per La Sicurezza

    - La Sharp Corporation è proprietaria dei diritti d'autore per eccezione dei casi nei quali la responsabilità per un i programmi del dischetto delle utilità. Non riproducetelo indennizzo è...
  • Seite 69: Descrizione Del Prodotto

    Descrizione del prodotto 10 11 1. Tasto MENU ......Questo tasto si usa per visualizzare, selezionare e chiudere il menu OSD (On Screen Display). 2. Tasto / MODE ....... Quando il menu OSD è visualizzato: Questo tasto si usa per selezionare delle opzioni di menu. Quando il menu OSD non è...
  • Seite 70 Descrizione del prodotto Collocare il monitor verticalmente e regolarlo Regolazione dell'angolazione Premete verso il basso sul supporto ed regolatelo su un angolo visivo adatto. ATTENZIONE! circa 5° circa 25° - La pressione con le mani sul pannello LCD può produrre dei danni. - Fare attenzione a non rimanere con le dita incastrate.
  • Seite 71: Collegamento Del Monitor Ed Accensione E Spegnimento Del Monitor

    Collegamento del monitor ed accensione e spegnimento del monitor Collegare il cavo audio, accessorio ATTENZIONE! Quando il cavo audio, accessorio, è collegato al - Quando eseguite i collegamenti, assicuratevi che terminale di uscita audio del computer, il suono del sia il monitor che il computer siano spenti. computer collegato viene ascoltato dagli altoparlante - Fate attenzione a non piegare eccessivamente il dello schermo.
  • Seite 72: Collegamento Del Monitor Ad Una Sorgente Di Alimentazione Elettrica

    Collegamento del monitor ed accensione e spegnimento del monitor Collegamento del monitor ad una Installazione delle informazioni per il sorgente di alimentazione elettrica setup e del profilo ICC (per Windows) A seconda del computer oppure del sistema operativo Terminale di può...
  • Seite 73 Collegamento del monitor ed accensione e spegnimento del monitor Per Windows 98 Per Windows 2000 Installazione delle informazioni di setup del monitor in Installazione delle imformazioni di setup del Windows 98, e impostazione del profilo ICC del monitor in Windows 2000, e impostazione del monitor come valore predeterminato.
  • Seite 74 Collegamento del monitor ed accensione e spegnimento del monitor 3. Spuntate [Display a list of all the drivers in a 6. Fate clic su [Properties], [Driver] e [Update specific location, so you can select the driver Driver]. you want.], quindi fate clic su [Next]. 7.
  • Seite 75: Informazioni Sul Profilo Colorsync (Per Macos)

    Collegamento del monitor ed accensione e spegnimento del monitor Informazioni sul profilo ColorSync (per MacOS) Il profilo ColorSync ColorSync è il sistema di gestione dei colori della Apple Computer e consente di realizzare la riproduzione dei colori, quando lo si usa con un'applicazione compatibile.
  • Seite 76: Regolazione Della Visualizzazione Sullo Schermo E Volume Dell'altoparlante

    Regolazione della visualizzazione sullo schermo e volume dell'altoparlante Nota: Regolazione della retroilluminazione (colonna destra) - Non è possibile resettare dei valori, mentre il blocco delle regolazioni è in funzione. Rimuovete il La luminosità della retroilluminazione può essere regolara. blocco delle regolazioni, prima di tentare di far funzionare i tasti di controllo.
  • Seite 77: Regolazione Del Volume Dell'altoparlante

    Regolazione della visualizzazione sullo schermo e volume dell'altoparlante Regolazione del volume dell'altoparlante Regolazione automatica dello schermo 1. Senza che il menu OSD sia visualizzato premete il Le opzioni nel menu ADJUSTMENT (REGOLAZIONE) si possono regolare tasto oppure il tasto . automaticamente (CLOCK, PHASE (FASE) , H-POS, 2.
  • Seite 78: Regolazione Manuale Dello Schermo

    Regolazione della visualizzazione sullo schermo e volume dell'altoparlante Regolazione automatica dello schermo Regolazione manuale dello schermo 1. Premete il tasto MENU. Le regolazioni si possono fare mediante il menu Il menu ADJUSTMENT verrà visualizzato. OSD (On Screen Display) fornito. ADJUSTMENT MANUAL AUTO 1.
  • Seite 79 Regolazione della visualizzazione sullo schermo e volume dell'altoparlante Menu ADJUSTMENT (REGOLAZIONE) Menu GAIN CONTROL (CONTROLLO DEL GUADAGNO) ADJUSTMENT MANUAL AUTO GAIN CONTROL CLOCK MANUAL AUTO PHASE BLACK LEVEL H-POS CONTRAST V-POS 1024x768 V : 6 0Hz H : 4 8.4kHz 1024x768 MANUAL: le singole opzioni del menu vengono V : 6 0Hz H : 4 8.4kHz...
  • Seite 80 Regolazione della visualizzazione sullo schermo e volume dell'altoparlante Menu WHITE BALANCE Menu MODE SELECT (BILANCIAMENTO DEL BIANCO) MODE SELECT OSD H-POSITION WHITE BALANCE OSD V-POSITION SCALING HIGH COOL WARM USER COLORS 260K R-CONTRAST LANGUAGE G-CONTRAST B-CONTRAST 1024x768 V : 6 0Hz H : 4 8.4kHz 1024x768 Note: V : 6 0Hz H : 4 8.4kHz...
  • Seite 81: Cura E Riparazione Del Monitor

    Centro del Servizio controllo. Tecnico Assistenza Clienti della Sharp più Se sono molto sporchi, applicate del detersivo neutro vicino a voi. (Non tentate mai di eseguire la ad un panno morbido inumidito, strizzatelo bene, e sostituzione da voi.)
  • Seite 82: Specifiche

    Specifiche Specifiche del prodotto Dimensioni (Unità: mm) Nome del modello LL-T15A4-H (Grigio gelido)/LL-T15A4-B (Nero) Display LCD 38 cm misurati diagonalmente Modulo TFT LCD Risoluzione (max.) XGA 1024 x 768 pixel Colori visualizzabili (max.) Circa 16,19 million di colori (6bit + FRC) Luminosità...
  • Seite 83 Specifiche Sincronizzazione dei segnali Gestione dell'energia Il monitor è basato su VESA DPMS (Display Power Modalità di Sincronismo Sincronismo Frequenza Management Signaling) (Segnalazioni della visualizzazione orizzontale verticale punti gestione dell'energia del display). 640x480 31.5kHz 60Hz 25.175MHz VESA Per attivare la funzione di gestione dell'energia del 37.9kHz 72Hz 31.5MHz...
  • Seite 84: Istruzioni Per Collegare Un Braccio Compatibile Vesa

    Istruzioni per collegare un braccio compatibile VESA E' possibile collegare al monitor un braccio 6. Attaccate il braccio al monitor con le quattro viti. oppure un supporto basati sullo standard VESA (acquistati separatamente). L'acquisto del braccio oppure del supporto è a discrezione del cliente.
  • Seite 85 Istruzioni per collegare un braccio compatibile VESA Si può procedere alla rimozione del supporto. 1. Spegnere il monitor e staccare dal monitor il cavo del segnale analogico, il cavo audio ed il cavo di alimentazione. 2. Facendo attenzione a non danneggiare il monitor, stendete un panno morbido ed appoggiate su di esso il monitor con il lato display verso il basso.
  • Seite 87: Español

    Índice Sugerencias y precauciones de seguridad ..........88 Descripción del producto .
  • Seite 88: Sugerencias Y Precauciones De Seguridad

    - Sharp Corporation es titular de los derechos de autor su utilización, excepto en los casos en los que la del programa del Disquete de utilidades. No lo obligación de indemnizar esté...
  • Seite 89: Descripción Del Producto

    Descripción del producto 10 11 1. Botón MENU ......Este botón se utiliza para ampliar, seleccionar y cerrar el menú OSD (On Screen Display). 2. Botón / MODE ..... Cuando el menú OSD se vea en la pantalla: Este botón se utiliza para seleccionar opciones de menú. Cuando el menú...
  • Seite 90 Descripción del producto Levantamiento y ajuste del monitor Ajuste de ángulo Ejerza presión sobre la base y ajústelo hasta que el ángulo de visión sea el adecuado. ¡PRECAUCIÓN! aprox. 5° - Si presiona el panel LCD con las manos podría aprox.
  • Seite 91: Conexión Del Monitor Y Encendido/Apagado Del Mismo

    Conexión del monitor y encendido/apagado del mismo Conecte el cable de audio suministrado ¡PRECAUCIÓN! Cuando el cable de audio suministrado se conecte al - Antes de realizar la conexión, asegúrese de que borne de salida de audio del ordenador, el sonido del tanto el monitor como el ordenador están ordenador conectado saldrá...
  • Seite 92: Conexión Del Monitor A Una Toma De Corriente

    Conexión del monitor y encendido/apagado del mismo Conexión del monitor a una toma de Instalación de la información de corriente configuración y del perfil ICC (para Windows) Borne de Según sea el tipo de ordenador o de sistema alimentación Toma de operativo, puede que sea necesario utilizar el corriente alterna ordenador para llevar a cabo la instalación de la...
  • Seite 93 Conexión del monitor y encendido/apagado del mismo Instalación de la información de configuración Si el "Add New Hardware Wizard" no apareció: 1. Introduzca el Disquete de utilidades en la unidad Para Windows 95 A del ordenador. Instalación de la información de configuración del 2.
  • Seite 94 Conexión del monitor y encendido/apagado del mismo 10. Haga clic sobre [Next], asegúrese de que el 9. Seleccione los datos del monitor y a nombre del monitor aparece en la pantalla y haga continuación haga clic sobre [Next], [Next] y clic en [Finish].
  • Seite 95: Información Acerca Del Perfil Colorsync (Para Macos)

    Conexión del monitor y encendido/apagado del mismo Instalación del perfil ICC Información acerca perfil Instalación del perfil ICC del monitor. (Si ya ha ColorSync (para MacOS) instalado la información de configuración, se habrá instalado también el perfil por lo que no hace falta que lo vuelva a instalar.) Acerca del perfil ColorSync Los mensajes de Windows mencionados a...
  • Seite 96: Ajuste De La Pantalla Y Volumen Del Altavoz

    Ajuste de la pantalla y volumen del altavoz Regulación de la retroiluminación (columna Nota: derecha) - No se pueden reponer los valores cuando la La luminosidad de la retroiluminación se puede función de bloqueo de ajustes se encuentra regular. activada. Desactive la función de bloqueo de ajustes antes de utilizar los botones de control.
  • Seite 97: Ajuste Del Volumen Del Altavoz

    Ajuste de la pantalla y volumen del altavoz Ajuste del volumen del altavoz Ajuste automático de la pantalla Las opciones del Menú ADJUSTMENT (CLOCK, 1. Sin el menú OSD a la vista, pulse el botón PHASE, H-POS, V-POS) se pueden ajustar 2.
  • Seite 98: Ajuste Manual De La Pantalla

    Ajuste de la pantalla y volumen del altavoz Ajuste automático de la pantalla Ajuste manual de la pantalla 1. Pulse el botón MENU. Los ajustes se pueden realizar a través del Menú Aparecerá el menú ADJUSTMENT. en pantalla (OSD). ADJUSTMENT 1.
  • Seite 99 Ajuste de la pantalla y volumen del altavoz Menú ADJUSTMENT Menú GAIN CONTROL ADJUSTMENT GAIN CONTROL MANUAL AUTO MANUAL AUTO CLOCK BLACK LEVEL PHASE CONTRAST H-POS V-POS 1024x768 1024x768 V : 6 0Hz H : 4 8.4kHz V : 6 0Hz H : 4 8.4kHz MANUAL: Las diferentes opciones del menú...
  • Seite 100 Ajuste de la pantalla y volumen del altavoz Menú WHITE BALANCE Menú MODE SELECT WHITE BALANCE MODE SELECT OSD H-POSITION COOL WARM USER OSD V-POSITION SCALING HIGH R-CONTRAST COLORS 260K G-CONTRAST LANGUAGE B-CONTRAST 1024x768 1024x768 V : 6 0Hz H : 4 8.4kHz V : 6 0Hz H : 4 8.4kHz Notas: Notas:...
  • Seite 101: Conservación Y Reparación Del Monitor

    (Desaparecerá después de unos segundos.) persistentemente o no se enciende, puede que sea necesario cambiar el tubo fluorescente. Consulte a su proveedor o al servicio autorizado de asistencia técnica de Sharp más cercano. (No intente jamás hacer usted mismo este cambio.)
  • Seite 102: Especificaciones

    Especificaciones Especificaciones del producto Dimensiones (Unidades: mm) Nombre del modelo LL-T15A4-H (Gris Plomizo)/LL-T15A4-B (Negro) Display LCD 38 cm medidos en diagonal Módulo TFT LCD Resolución (máx.) XGA 1024 x 768 pixels Colores reproducibles (máx.) Aprox. 16,19 millones de colores (6bit + FRC) Luminosidad (máx.)
  • Seite 103 Especificaciones Señales de sincronización Gestión de energía El monitor está basado en la tecnología VESA Modo display Hsync Vsync Frecuencia DPMS (Display Power Management Signaling). Para activar la función Power Management del 640x480 31.5kHz 60Hz 25.175MHz VESA monitor, tanto la tarjeta de vídeo como el 37.9kHz 72Hz 31.5MHz...
  • Seite 104: Instrucciones Para Acoplar Un Brazo De Compatibilidad Vesa

    Instrucciones para acoplar un brazo de compatibilidad VESA Puede acoplar al monitor un brazo o una base (de 6. Acople el brazo al monitor apretando los cuatro venta en el comercio) conforme al estándar VESA. tornillos. La adquisición del brazo o la base queda a discreción del cliente.
  • Seite 105 Instrucciones para acoplar un brazo de compatibilidad VESA La base puede quitarse. 1. Apague el monitor y retire el cable de señal analógica, el cable de audio y el cable de alimentación del monitor. 2. Con mucho cuidado de no dañar el monitor, extienda un paño suave y ponga el monitor sobre él con la parte de la pantalla mirando hacia abajo.
  • Seite 108 SHARP CORPORATION © 2003 SHARP CORPORATION Printed in Taiwan P/N: 0NIT15A4-E001 1915-1300-4750...

Inhaltsverzeichnis