Sharp Plaza, Mahwah, New Jersey 07430 TEL :1-800-BE-SHARP * As an ENERGY STAR Partner, SHARP has determined that this product meets the ENERGY STAR guidelines for energy efficiency. This product utilizes tin-lead solder, and fluorescent lamp containing a small amount of mercury. Disposal of these materials may be regulated due to environmental considerations.
Congratulations! You have just purchased a TCO'99 approved and labelled product! Your choice has provided you with a product developed for professional use. Your purchase has also contributed to reducing the burden on the environment and also to the further development of environmentally adapted electronics products. Why do we have environmentally labelled computers? In many countries, environmental labelling has become an established method for encouraging the adaptation of goods and services to the environment.
Seite 6
TCO Development SE-114 94 Stockholm, Sweden Fax: +46 8 782 92 07 Email (Internet): development@tco.se Current information regarding TCO'99 approved and labelled products may also be obtained via the Internet, using the address: http://www.tco-info.com/ Environmental requirements Flame retardants Flame retardants are present in printed circuit boards, cables, wires, casings and housings. Their purpose is to prevent, or at least to delay the spread of fire.
Notice for Users in Europe This equipment complies with the requirements of Directives 89/336/EEC and 73/23/EEC as amended by 93/68/EEC. Dieses Gerät entspricht den Anforderungen der EG-Richtlinien 89/336/EWG und 73/23/EWG mit Änderung 93/68/EWG. Ce matériel répond aux exigences contenues dans les directives 89/336/CEE et 73/23/CEE modifiées par la directive 93/68/CEE.
"WARNING :THIS APPARATUS MUST BE EARTHED" Notice for Users in Australia Service Inquiries Please contact your dealer for service if required or contact Sharp Corporation of Australia on 1 300 13 50 22 for referral to your nearest Sharp authorized Service Center.
This monitor and its accessories may be up- Authorship rights to the Monitor Settings graded without advance notice Adjustment Disk program are held by Sharp Corporation. Do not reproduce it without Location permission. Do not use the monitor where ventilation is poor,...
Product description Front view Rear view 1. MENU button This button is used to pop-up, select and close the OSD Menu. 2. SELECT button Selects the menu option to be adjusted. buttons When the On Screen Display (OSD) Menu is displayed: These buttons are used to increase or decrease the value of a selected option.
Seite 11
Product description Standing up and adjusting the monitor CAUTION! Be sure to hold the green section only. Pressure from hands on the LCD panel could cause damage. Standing up the monitor Press down on the stand and lift up the top section of the monitor.
Connecting the monitor and turning the monitor on and off 2. Attach the power cord to the AC adapter and Connecting the monitor to a computer place the power plug into the AC terminal (PC etc.) When connecting, ensure that both the monitor and computer are switched off.
Seite 13
Connecting the monitor and turning the monitor on and off Installing set-up information For Windows98 Depending on the computer or OS, it may be neces- sary to use the computer to operate the installation of Installing monitor set-up information into Win- monitor set-up information etc.
Connecting the monitor and turning the monitor on and off 6. Remove the Monitor Settings Adjustment Disk For Windows2000 from the A drive. Installing monitor set-up information into Win- If the "Add New Hardware Wizard" has not ap- dows2000. peared: This explanation assumes that the floppy disk drive (This explanation assumes that the floppy disk drive is "A drive".
Adjusting the screen display If necessary, the screen can be adjusted as follows. Choosing a message language Automatic screen adjustment (p.16) The clock, phase, H-POS (horizontal positioning) Messages displayed on the screen and OSD Menu and V-POS (vertical positioning) functions can be contents can be changed to the following languages.
Adjusting the screen display Opening the Adjustment Pattern (for Windows) Automatic screen adjustment If you are using Windows, you can use the Adjust- ment Pattern on the accompanying Monitor Settings Options in MENU 1 (ADJUSTMENT) can be ad- Adjustment Disk. justed automatically (CLOCK, PHASE, H-POS, This explanation is for Windows 95/98/Me/2000, and V-POS).
Adjusting the screen display When not adjusting brightness automatically Adjusting the backlight 1. Without the OSD Menu being displayed, press button or the button. The backlight brightness can be set to change automatically for use in different surroundings. (Automatic brightness adjustment) If the surroundings become brighter, the backlight 2.
Seite 18
Adjusting the screen display MENU 1: ADJUSTMENT MENU 2: GAIN CONTROL BLACK LEVEL and CONTRAST are optimized before shipment, but can be adjusted to suit. MANUAL: Individual menu options are manually adjusted. AUTO: Every menu option is automatically MANUAL: Individual menu options are manually adjusted.
Seite 19
Adjusting the screen display MENU 3: WHITE BALANCE MENU 4: MODE SELECT WHITE BALANCE (color tone) can be adjusted as necessary. (As adjustments are made before ship- ment, there is no real necessity for further altera- tion.) Notes: Depending on the resolution of the input signal, even if menu options can be selected, the display Notes: may not change.
LCD panel. (A soft cloth such inquire at the shop where you purchased the as gauze or that used for lens cleaning is suitable.) monitor or your nearest Sharp authorized Service Center. (Never attempt this CAUTION! replacement on your own.)
Specifications LCD display Dimensions (Units: mm) 38 cm (15 inch) TFT Color LCD module Dot pitch 0.297(H) x 0.297(V) mm Screen display size Horizontal 304.1 mm x Vertical 228.1 mm Resolution (max.) XGA 1024 x 768 Displayable colors (max.) 16.19 million colors Video signal Analog RGB (0.7Vp-p) [75Ω] Sync signal...
Specifications Power management DDC (Plug & Play) The monitor is based on VESA DPMS (Display This monitor supports the VESA DDC (Display Data Power Management Signaling). Channel) standard. To activate the monitor's Power Management func- DDC is a signal standard for carrying out Plug & tion, both the video card and the computer must Play functions on the monitor or PC.
Instructions for installing a VESA compliant arm An arm based on the VESA standard can be at- 4. Remove the four screws and then remove the tached to the monitor. The arm must be purchased stand from the monitor. separately. When choosing the arm to be installed please take note of the following points.
Seite 25
Inhaltsverzeichnis Hinweis für Benutzer in den USA ............26 TCO'99 .
SHARP ELECTRONICS CORPORATION Sharp Plaza, Mahwah, New Jersey 07430 TEL :1-800-BE-SHARP * Als ENERGY STAR-Partner bestätigt SHARP , daß dieses Produkt die Richtlinien des ENERGY STAR für sparsamen Verbrauch einhält. In diesem Produkt wird bleihaltiger Lötzinn und eine Leuchtstofflampe mit einem geringen Quecksilberanteil verwendet.
Herzlichen Glückwunsch! Sie haben gerade ein Gerät mit TCO‘99-Zulassung und entsprechender Kennzeichnung erworben! Damit haben Sie sich für ein Produkt entschieden, das für professionelle Anwendungen konzipiert ist. Mit Ihrem Kauf leisten Sie auch einen Beitrag zum Umweltschutz und zur Weiterentwicklung von umweltfreundlichen Elektronikprodukten.
Seite 28
TCO Development SE-114 94 Stockholm, Sweden Fax: +46 8 782 92 07 Email (Internet): development@tco.se Aktuelle Informationen zu Produkten mit TCO‘99-Zulassung und -Kennzeichnung erhalten Sie auch im Internet unter folgender Adresse: http://www.tco-info.com/ Umweltanforderungen Flammschutzmittel Flammschutzmittel kommen in Platinen, Kabeln, Drähten, Verkleidungen und Gehäusen vor. Sie sollen die Ausbreitung eines Brandes verhindern oder zumindest verzögern.
Hinweis für Benutzer in Europa This equipment complies with the requirements of Directives 89/336/EEC and 73/23/EEC as amended by 93/68/EEC. Dieses Gerät entspricht den Anforderungen der EG-Richtlinien 89/336/EWG und 73/23/EWG mit Änderung 93/68/EWG. Ce matériel répond aux exigences contenues dans les directives 89/336/CEE et 73/23/CEE modifiées par la directive 93/68/CEE.
Hinweis für Benutzer in Australien Serviceanfragen Wenden Sie sich an Ihren Händler, falls Reparaturen anfallen, oder setzen Sie sich mit Sharp Corporation of Australia unter 1 300 13 50 22 in Verbindung, um die Adresse des nächstgelegenen autorisierten Sharp-Kundendienstzentrums zu erfragen.
Der Monitor darf niemals mit harten Gegenstän- Checkliste für Monitor und Zubehör den abgerieben oder berührt werden. Prüfen Sie den Kartoninhalt auf Vollständigkeit. Wir bitten um Ihr Verständnis, daß Sharp Corpo- LCD-Monitor (1) ration über die gesetzlich anerkannte Leistungs- Netzadapter (1) haftung hinaus keine Haftung für Fehler über-...
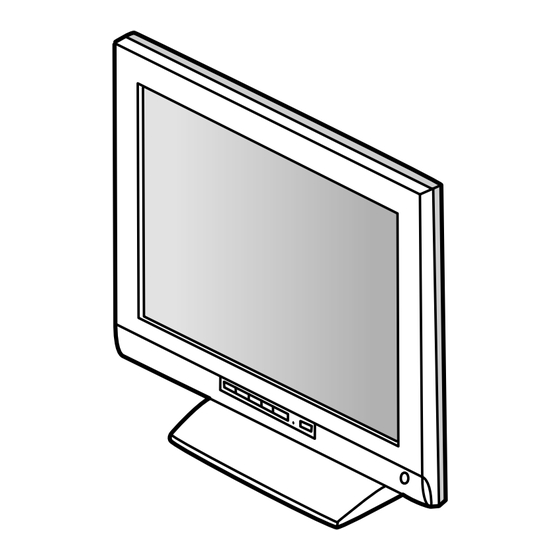
Produktbeschreibung Vorderansicht Rückansicht 1. Taste MENU Mit dieser Taste öffnen, wählen und schließen Sie das OSD-Menü. 2. Taste SELECT Hiermit wählen Sie die einzustellende Menüoption aus. 3. Tasten Wenn das OSD-Menü (Onscreen Display) angezeigt wird: Mit diesen Tasten erhöhen oder verringern Sie den Wert einer ausgewählten Option.
Seite 33
Produktbeschreibung Aufstellen und Justieren des Monitors ACHTUNG! Halten Sie den Monitor nur im grünen Bereich. Wenn Sie mit der Hand auf den LCD-Bildschirm drücken, kann dieser beschädigt werden. Aufstellen des Monitors Drücken Sie auf den Fuß, und heben Sie den oberen Teil des Monitors an.
Anschließen des Monitors und Ein- und Ausschalten des Monitors 2. Stecken Sie das Netzkabel im Netzadapter und Verbinden des Monitors mit einem den Netzstecker in die Steckdose ein. Computer (PC usw.) Bevor Sie den Monitor anschließen, müssen Sie den Monitor und den Computer ausschalten. Hinweis: Überdehnen Sie das Kabel nicht, und schließen Sie kein Verlängerungskabel an, da dies Funktions-...
Anschließen des Monitors und Ein- und Ausschalten des Monitors Installieren der Setup-Informationen Für Windows 98 Je nach dem verwendeten Computer oder Betriebs- system muß die Installation der Monitor-Setup-Infor- Installieren der Monitor-Setup-Informationen unter mationen usw. eventuell über den Computer erfol- Windows 98 gen.
Anschließen des Monitors und Ein- und Ausschalten des Monitors 2. Aktivieren Sie [Specify the location of the driver 11. Klicken Sie auf [OK], und schließen Sie das [Advanced]], und klicken Sie auf [Next]. Fenster. 3. Aktivieren Sie [Display a list of all the drivers in a 12.
Einstellen der Bildschirmanzeige Falls erforderlich, kann der Bildschirm folgendermaßen Auswählen einer Meldungssprache eingestellt werden. Automatische Bildschirmeinstellung (S. 38) Die Bildschirmmeldungen und der Inhalt des OSD- Die Funktionen Clock, Phase, H-POS (horizontale Menüs lassen sich in folgenden Sprachen Positionierung) und V-POS (vertikale Positionierung) anzeigen: können automatisch eingestellt werden.
Einstellen der Bildschirmanzeige Öffnen des Einstellmusters (für Windows) Automatische Bildschirmeinstellung Wenn Sie mit Windows arbeiten, können Sie das Einstellmuster auf der mitgelieferten Monitor-Einstell- Die Optionen im MENU 1 (ADJUSTMENT) können diskette verwenden. automatisch eingestellt werden (CLOCK, PHASE, Die in den nachstehenden Bedienungshinweisen H-POS, V-POS).
Einstellen der Bildschirmanzeige Wenn die Helligkeit nicht automatisch eingestellt Einstellen der Hintergrundbeleuchtung wird 1. Wenn das OSD-Menü nicht angezeigt wird, drük- Die Helligkeit der Hintergrundbeleuchtung kann so ein- ken Sie die Taste oder die Taste gestellt werden, daß sie sich automatisch an die unter- schiedlichen Umgebungsbedingungen anpaßt.
Seite 40
Einstellen der Bildschirmanzeige MENU 1: ADJUSTMENT MENU 2: GAIN CONTROL BLACK LEVEL und CONTRAST werden vor der Auslieferung optimal eingestellt. Eine Justage ist jedoch möglich. MANUAL: Einzelne Menüoptionen werden manuell eingestellt. AUTO: Alle Menüoptionen werden automatisch eingestellt. Hinweise: MANUAL: Einzelne Menüoptionen werden manuell eingestellt.
Seite 41
Einstellen der Bildschirmanzeige MENU 3: WHITE BALANCE WHITE BALANCE (Farbton) kann nach Bedarf einge- MENU 4: MODE SELECT stellt werden. (Da die Einstellungen vor der Ausliefe- rung erfolgen, ist normalerweise keine Änderung erforderlich.) Hinweise: Abhängig von der Auflösung des Eingangs- Hinweise: signals ändert sich die Anzeige eventuell selbst Bei einer anderen Einstellung als [STD] können...
Wenden Sie sich an das Geschäft, in dem Sie Tuch vorsichtig ab. (Es eignet sich ein weiches Tuch, den Monitor gekauft haben, oder an das beispielsweise ein Gaze-Tuch, das auch zum Reinigen nächste autorisierte Sharp-Kundendienst- von Linsen verwendet wird. zentrum. (Nehmen Sie diesen Austausch niemals selber vor.)
Seite 45
Technische Daten Power Management DDC (Plug & Play) Der Monitor basiert auf VESA DPMS (Display Power Dieser Monitor unterstützt den Standard VESA DDC Management Signaling). (Display Data Channel). Um die Power Management-Funktion des Monitors zu DDC ist ein Signalstandard zum Ausführen von Plug & aktivieren, müssen sowohl die Videokarte als auch der Play-Funktionen am Monitor oder PC.
Anweisungen zum Anbringen eines VESA- kompatiblen Monitorarms Ein Arm basierend auf dem VESA-Standard kann am 4. Lösen Sie die vier Schrauben, und nehmen Sie Monitor angebracht werden. Der Arm ist separat den Monitorfuß ab. erhältlich. Falls Sie sich dafür entscheiden, einen Arm zu instal- lieren, müssen Sie folgende Punkte beachten.
Seite 47
Table des matières Avis aux utilisateurs américains ............48 TCO'99 .
Sharp Plaza, Mahwah, New Jersey 07430 TEL :1-800-BE-SHARP * En sa qualité de partenaire du programme ENERGY STAR, SHARP a fait en sorte que ce produit réponde aux directives ENERGY STAR en matière d'économie d'énergie. Ce produit contient des soudures étain-plomb ainsi qu'une lampe fluorescente contenant une petite quantité...
Félicitations ! Vous venez d'acquérir un produit agréé et estampillé TCO'99 ! Votre choix vous permet de disposer désor- mais d'un produit développé pour être utilisé dans un environnement professionnel. Votre achat a également contribué à réduire les nuisances pesant sur l'environnement et à favoriser le développement de produits électroniques adaptés à...
Seite 50
TCO Development SE-114 94 Stockholm, Sweden Fax: +46 8 782 92 07 Email (Internet): development@tco.se Les informations actualisées relatives aux produits agréés et labellisés TCO'99 peuvent également être obtenues via Internet, à l'adresse : http://www.tco-info.com/ Exigences environnementales Retardateurs de flamme Les retardateurs de flamme sont présents dans les cartes à...
Avis aux utilisateurs européens This equipment complies with the requirements of Directives 89/336/EEC and 73/23/EEC as amended by 93/68/EEC. Dieses Gerät entspricht den Anforderungen der EG-Richtlinien 89/336/EWG und 73/23/EWG mit Änderung 93/68/EWG. Ce matériel répond aux exigences contenues dans les directives 89/336/CEE et 73/23/CEE modifiées par la directive 93/68/CEE.
Avis aux utilisateurs australiens Demandes d'intervention Si une intervention sur l'appareil s'avère nécessaire, veuillez contacter votre revendeur ou Sharp Corporation of Australia au numéro 1 300 13 50 22, qui vous communiquera les coordonnées du Centre d'entretien agréé Sharp le plus proche de votre domicile.
Ne pas faire subir de coups, légers ou forts au pour l’environnement Windows (1) moniteur avec des objets durs. Mode d’emploi (1) Il faut savoir que la société Sharp décline toute responsabilité en cas d’erreur survenue durant l’utilisation par le client ou une tierce personne, Remarques : ainsi qu’en cas de dysfonctionnement ou d’un...
Description du produit Vue avant Vue arrière Bouton MENU Ce bouton est utilisé pour faire apparaître, sélectionner et refermer le menu OSD. Bouton SELECT Sélectionne l’option du menu qui doit être ajustée. Les boutons Lorsque le menu du moniteur actif (OSD) est affiché : Ces boutons sont utilisés pour augmenter ou diminuer la valeur de l’option sélectionnée.
Seite 55
Description du produit Relevage et réglage de l’inclinaison du moniteur ATTENTION ! Veiller à ne tenir que les parties vertes. Une pression des mains sur l’écran LCD peut provoquer un endommagement. Relevage du moniteur Appuyer sur le support et relever la partie supérieure du moniteur.
Raccordement, activation et désactivation du moniteur 2. Brancher le cordon d’alimentation dans l’adapta- Raccordement du moniteur à un teur en c.a. et insérer la fiche d’alimentation dans ordinateur (PC, etc.) la borne c.a. Lors du raccordement, s’assurer que l’alimentation tant du moniteur que de l’ordinateur est désactivée. Remarque : Ne pas courber le câble de manière excessive ni y ajouter de prolongateur car cela peut...
Seite 57
Raccordement, activation et désactivation du moniteur Informations relatives à l’installation Pour Windows 98 En fonction du type d’ordinateur ou du système d’exploitation, il peut parfois s’avérer nécessaire Installation de l’information relative à l’installation du d’utiliser l’ordinateur pour consulter l’information moniteur sous Windows 98. relative à...
Raccordement, activation et désactivation du moniteur 4. Lorsque [Models] apparaît, cliquer sur [Have Pour Windows 2000 Disk], et s’assurer que [Copy manufacturer’s files from:] est [A:] et cliquer sur [OK]. Installation de l’information relative à l’installation du 5. Sélectionner les caractéristiques du moniteur moniteur sous Windows 2000.
Réglage de l’image au moniteur Si nécessaire, le moniteur peut être réglé comme suit : Choix de la langue Réglage automatique du moniteur (p. 60) L’horloge, la phase, le H-POS (positionnement hori- Les messages affichés à l’écran du moniteur et le zontal) et le V-POS (positionnement vertical) peuvent contenu du Menu OSD peuvent être diffusés dans les être ajustés automatiquement.
Réglage de l’image au moniteur Ouverture du modèle de réglage (pour Windows) Réglage automatique du moniteur Si l’on se trouve sous un environnement Windows, on peut se servir du Modèle de réglage se trouvant Les options du MENU 1 ADJUSTMENT(RÉGLAGE) sur la disquette de réglage des paramètres du peuvent être ajustées automatiquement moniteur.
Réglage de l’image au moniteur Lorsque la luminosité n’est pas réglée automati- Réglage du rétro-éclairage quement 1. Sans que le menu OSD ne soit affiché, enfoncer le La luminosité du rétro-éclairage peut être réglée pour bouton ou le bouton changer automatiquement en fonction du lieu de travail.
Seite 62
Réglage de l’image au moniteur MENU 1 : ADJUSTMENT (RÉGLAGE) MENU 2 : GAIN CONTROL (COMMANDE DU GAIN) Le NIVEAU DE NOIR et le CONTRASTE sont optimisés avant la livraison, mais peuvent être adaptés par la suite à la convenance de l’utilisateur. MANUEL : Les options individuelles du menu sont réglées manuellement.
Seite 63
Réglage de l’image au moniteur MENU 3 : WHITE BALANCE MENU 4 : MODE SELECT (BALANCE DE BLANC) (SÉLECTION DU MODE) La BALANCE DE BLANC (nuances des couleurs) peut être réglée si nécessaire. (Étant donné que les réglages ont été réalisés en usine avant expédition, il n’y a pas de réelle nécessité...
Utiliser un chiffon doux et sec pour éliminer les pous- l’unité du tube fluorescent. Se renseigner sières de la surface vitrée (écran) du moniteur. (Un auprès du revendeur ou du centre Sharp chiffon doux tel qu’une gaze utilisée pour le nettoyage agréé le plus proche. (Ne jamais tenter des lentilles est idéal).
Caractéristiques techniques Moniteur LCD Dimensions (Unités : mm) Module TFT Couleur à cristaux liquides 38 cm (15 pouces) Définition 0,297(H) x 0,297(V) mm Taille de l’écran d’affichage Horizontal : 304,1 mm x Vertical : 228,1 mm Résolution (max.) XGA 1024 x 768 Couleurs affichables (max.) 16,19 millions de couleurs Signal vidéo...
Seite 66
Caractéristiques techniques Fréquence des signaux Fréquence par Mode affichage Hsync (kHz) Vsync (Hz) point (MHz) 31,5kHz 60Hz 25,175MHz 640x480 37,9kHz 72Hz 31,5MHz 37,5kHz 75Hz 31,5MHz VESA 35,1kHz 56Hz 36,0MHz 37,9kHz 60Hz 40,0MHz 800x600 48,1kHz 72Hz 50,0MHz 46,9kHz 75Hz 49,5MHz 48,4kHz 60Hz 65,0MHz 1024x768...
Caractéristiques techniques Gestion de l’alimentation Canal de transfert de données d’affichage (Plug & Play) Le moniteur est basé sur un système VESA DPMS (signalisation de la gestion d’alimentation de l’affi- Ce moniteur supporte la norme VESA DDC (Canal de chage). transfert de données d’affichage).
Instructions relatives à l’installation d’un bras conforme VESA Un bras conforme à la norme VESA peut être fixé au 4. Enlever les quatre vis et ensuite le support du moniteur. Ce bras doit être acheté séparément. moniteur. Lors du choix du bras à installer, veiller à tenir compte des points suivants : •...
Seite 69
Indice Avviso per gli utenti negli in USA ............70 TCO'99 .
Sharp Plaza, Mahwah, New Jersey 07430 TEL :1-800-BE-SHARP * Nella sua qualità di partner dell'ENERGY STAR, la SHARP ha accertato che questo prodotto soddisfa le esigenze poste dalle direttive ENERGY STAR per la gestione efficiente dell'energia. Questo prodotto utilizza una lega per saldatura allo stagno-piombo ed una lampada fluorescente conte- nente una piccola quantità...
Congratulazioni! Lei ha appena acquistato un prodotto riconosciuto e approvato con marchio TCO'99! Scegliendo questo prodotto, Lei ha acquistato uno strumento d'uso professionale ed ha contribuito a diminuire la presenza nell'ambiente di sostanze nocive favorendo lo sviluppo di prodotti elettronici adattati, per un maggior rispetto ambientale.
Seite 72
TCO Development SE-114 94 Stockholm, Sweden Fax: +46 8 782 92 07 Email (Internet): development@tco.se È possibile inoltre ricevere via Internet le informazioni relative ai prodotti approvati e dotati di marchio TCO'99 scrivendo all'indirizzo: http://www.tco-info.com/ Requisiti ambientali Additivi ignifughi Gli additivi ignifughi sono presenti nelle schede a circuito stampato, nei cavi, nei rivestimenti e negli alloggiamenti.
Avviso per gli utenti in Europa This equipment complies with the requirements of Directives 89/336/EEC and 73/23/EEC as amended by 93/68/EEC. Dieses Gerät entspricht den Anforderungen der EG-Richtlinien 89/336/EWG und 73/23/EWG mit Änderung 93/68/EWG. Ce matériel répond aux exigences contenues dans les directives 89/336/CEE et 73/23/CEE modifiées par la directive 93/68/CEE.
Per il servizio di assistenza tecnica , qualora se ne presentasse la necessità, per favore mettetevi in contatto con il vostro rivenditore oppure con la Sharp Corporation of Australia sull'1 300 13 50 22 per farvi indirizzare al Centro del Servizio Tecnico Assistenza Clienti autorizzato più vicino a voi.
Disco di regolazione delle impostazioni del mo- Per favore abbiate comprensione per il fatto che nitor per Windows (1) la Sharp Corporation non si assume nessuna re- Manuale operativo (1) sponsabilità per errori fatti nell’uso da parte del cliente o di terzi, né per altri difetti di funziona-...
Descrizione del prodotto Vista frontale Vista posteriore 1. Tasto MENU Questo tasto si usa per visualizzare, selezionare e chiudere il menu OSD. 2. Tasto SELECT Seleziona l’opzione di menu da regolare. 3. Tasti Quando il menu dell’ On Screen Display (OSD) è visualizzato: questi tasti si usano per aumentare o ridurre il valore dell’opzione sele- zionata.
Seite 77
Descrizione del prodotto Collocare il monitor verticalmente e regolarlo ATTENZIONE! Assicuratevi di tenere solo la sezione verde. La pressione con le mani sul pannello LCD può pro- durre dei danni. Mettere su il monitor Premete verso il basso sul supporto ed alzate la sezio- ne superiore del monitor.
Collegamento del monitor ed accensione e spegnimento del monitor 2. Collegate il cavo di alimentazione all’adattatore AC Collegamento del monitor ad un ed inserite la spina dell’alimentazione al terminale computer (PC ecc.) Quando eseguite i collegamenti, assicuratevi che sia il monitor che il computer siano spenti.
Seite 79
Collegamento del monitor ed accensione e spegnimento del monitor Installazione delle informazioni per il setup Per Windows98 A seconda del computer oppure del sistema opera- tivo può essere necessario usare il computer per Installazione delle informazioni per il setup del monitor eseguire l’installazione delle informazioni di setup in Windows98.
Collegamento del monitor ed accensione e spegnimento del monitor 4. Quando viene visualizzato [Models] fate clic su Per Windows2000 [Have Disk], confermate che [Copy manufacturer’s files from:] sia [A:], e fate clic su Installazione delle informazioni per il setup del moni- [OK].
Regolazione della visualizzazione sullo schermo Se necessario, è possibile regolare lo schermo come Selezione di una lingua per i messaggi segue. Regolazione automatica dello schermo (p. I messaggi visualizzati sullo schermo ed il contenuto del menu OSD si possono impostare sulle seguenti lin- Le funzioni clock, fase, H-POS (posizionamento oriz- gue.
Regolazione della visualizzazione sullo schermo Apertura del monoscopio (per Windows) Regolazione automatica dello schermo Se utilizzate Windows, potete utilizzare il monoscopio sul dischetto allegato per la Le opzioni in MENU 1 (ADJUSTMENT) regolazione delle impostazioni del monitor. (REGOLAZIONE) si possono regolare automaticamen- I messaggi di Windows, citati nelle istruzioni per l'uso te (CLOCK, FHASE, H-POS (POSIZIONE ORIZZON- che seguono, si basano sulla versione inglese di...
Regolazione della visualizzazione sullo schermo Quando non regolate la luminosità automaticamente Regolazione della retroilluminazione 1. Senza il menu OSD visualizzato, premete il tasto oppure il tasto La luminosità della retroilluminazione si può impostare in modo da variare automaticamente per l’uso in am- bienti circostanti differenti.
Seite 84
Regolazione della visualizzazione sullo schermo MENU 1: ADJUSTMENT (REGOLAZIONE) MENU 2: GAIN CONTROL (CONTROLLO DEL GUADAGNO) BLACK LEVEL (livello del nero) e CONTRAST (contra- sto) sono ottimizzati prima della spedizione, ma si pos- sono regolare in modo da essere adatti. MANUAL: Le singole opzioni del menu vengono regolate manualmente.
Seite 85
Regolazione della visualizzazione sullo schermo MENU 3: WHITE BALANCE (BILANCIAMENTO DEL BIANCO) MENU 4: MODE SELECT (SELEZIONE DEL WHITE BALANCE (tonalità del colore) si può regolare MODO) a seconda delle necessità. (Dato che le regolazioni vengono fatte prima della spedizione, non vi è una ne- cessità...
Centro del Servizio Tecnico Assistenza Clienti ATTENZIONE! della Sharp più vicino a voi. (Non tentate mai di eseguire la sostituzione da voi.) Non usate mai dei solventi, della benzina, Nel periodo iniziale del loro uso, a causa dell’alcol, del detersivo per vetri, ecc.
Specifiche Display LCD Dimensioni (Unità: mm) 38 cm (15 inch) TFT Color LCD module Dimensione dei pixel 0,297(H) x 0,297(V) mm Dimensioni di visualizzazione dello schermo Orizzontale 304,1 mm x Verticale 228,1 mm Risoluzione (max.) XGA 1024 x 768 Colori visualizzabili (max.) 16,19 milioni di colori Segnale video RGB analogico (0,7Vp-p) [75Ω]...
Seite 88
Specifiche Sincronizzazione dei segnali Modalità di visualizzazione Sincronizzazione Sincronismo Frequenza dei orizzontale (kHz) verticale (Hz) pixel (MHz) 31.5kHz 60Hz 25,175MHz 640x480 37,9kHz 72Hz 31,5MHz 37,5kHz 75Hz 31,5MHz VESA 35,1kHz 56Hz 36,0MHz 37.9kHz 60Hz 40,0MHz 800x600 48,1kHz 72Hz 50,0MHz 46,9kHz 75Hz 49,5MHz 48,4kHz 60Hz...
Seite 89
Specifiche Gestione dell’energia DDC (Plug & Play) Il monitor è basato su VESA DPMS (Display Power Questo monitor supporta lo standard VESA DDC Management Signaling) (Segnalazioni della gestione (Display Data Channel). dell’energia del display). DDC è uno standard per i segnali per eseguire le fun- Per attivare la funzione di gestione dell’energia del zioni Plug &...
Istruzioni per l’installazione di un braccio compatibile VESA Un braccio basato sullo standard VESA si può collega- 4. Rimuovete le quattro viti e rimuovete quindi il sup- re al monitor. Il braccio deve essere acquistato porto dal monitor. separatamente. Nello scegliere il braccio da installare, per favore pren- dete nota dei seguenti punti.