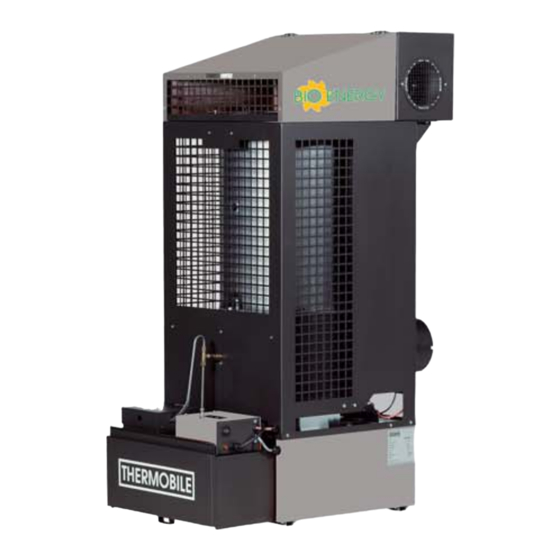
Herunterladen Inhalt Inhalt Diese Seite drucken
Inhaltsverzeichnis

Werbung

Verfügbare Sprachen
  • DE

Verfügbare Sprachen

  • DEUTSCH, seite 28

Werbung

Inhaltsverzeichnis

Fehlerbehebung

loading

Inhaltszusammenfassung für THERMOBILE Bio Energy 1

  • Seite 2 /h........... 1000 Volt/Hz/Amp........... 230/50/1,2 Prod. code..........41.906.150 Fabr.year 2006 Serial nr: 49.0051 Made by THERMOBILE Ind. B.V. Breda, Holland - 1 - - 2 - - 4 - - 3 - - 5 - 40.020.944 - rev. 05 - 2015...
  • Seite 3 - 7 - - 8 - Bio Energy series 40.020.944 - rev. 05 - 2015...
  • Seite 4 Nederlands ..........5 English ............16 Deutsch............26 Français .............37 Español............49 Русский язык..........61 40.020.944 - rev. 05 - 2015 Bio Energy series...
  • Seite 5: Inhaltsverzeichnis

    Nederlands Inhoud Milieu Nederlands Veiligheidsinstructies........6 Let op Introductie ........... 6 De kachel is gemaakt van diverse Voorbereidingen.......... 8 metalen en kunststoffen. De kachel Gebruik ............9 bevat tevens elektronische Onderhoud ..........10 onderdelen, die als elektronisch afval Storingen........... 12 moeten worden behandeld.
  • Seite 6: Veiligheidsinstructies

    Nederlands VEILIGHEIDSINSTRUCTIES Algemene instructies WAARSCHUWING Pictogrammen in deze handleiding • Lees deze handleiding VOORZICHTIG Wijst op gevaar voor beschadiging zorgvuldig door, alvorens de van de apparatuur. heteluchtkachel te gebruiken. • Bewaar dit document bij de WAARSCHUWING heteluchtkachel. Wijst op een gevaarlijke situatie, die •...
  • Seite 7 Nederlands De tweede elektromotor drijft de Identificatie plaatje verbrandingslucht-ventilator aan, die de Brandstoffilter verbrandingslucht in de verbrandingskamer G Schakelkastje blaast. Brandstoftank De derde elektromotor drijft de warmelucht- Brandstofpomp ventilator aan, die de warme lucht rond de Aftapkraan verbrandingskamer wegtrekt. De verwarmde Vulfilter lucht wordt in de te verwarmen ruimte Brandstofopvoerpijp...
  • Seite 8: Voorbereidingen

    Nederlands 4. Tap condens af uit de brandstoftank, zie Thermostaat fig. 3 (J). De Bio Energy kent de volgende 5. Zorg ervoor dat de verwarmde lucht thermostaten: ongehinderd kan uitstromen. • Als de pompthermostaat op 6. Zorg dat brandbare stoffen voldoende ver temperatuur is, schakelt de van de kachel verwijderd zijn, zie 1.4.
  • Seite 9: Gebruik

    Nederlands Opstarten Op automatische bediening: 1. Zet de wipschakelaar in stand “1”, zie fig. 5 (A). De verbrandingsluchtventilator begint te draaien. Als de branderschaal de juiste temperatuur heeft bereikt, begint de brandstofpomp te draaien en de controlelamp brandt. 2. Zet de pompregelaar gedurende de eerste 20 tot 30 minuten in de stand “1”, zie fig.
  • Seite 10 Nederlands ONDERHOUD Onderhoudstabel Registreer na elk winterseizoen het onderhoud in de tabel achterin dit boek. WAARSCHUWING Reinig de verbrandingskamer altijd voor het opstarten van de kachel. Beschrijving Periode Elke 12 Iedere Iedere Ieder week maand jaar Reinig de verbrandingskamer. Tap condens(water) af van de brandstoftank, als de plantaardige olie of biodiesel water bevat.
  • Seite 11: Onderhoud

    Nederlands 7. Reinig de brandstoftoevoerleiding met Heet Raak de schoorsteen en de een borstel (binnendiameter 8.5 mm branderkamer niet aan! (0.33”), zie fig. 3 (O). Wacht met onderhoud totdat de 8. Breng alle delen in de omgekeerde schoorsteen en de branderkamer zijn volgorde aan.
  • Seite 12: Wegnemen Brandstoftank (Fig. 8)

    Nederlands Reinigen schoorsteenklep (fig. 7) 1. Verwijder het bodemdeksel (B) van het T- stuk (A). 2. Reinig de schoorsteen van boven tot onder met een draadster. 3. Controleer de aansluitingen op lekkage. 4. Controleer de schoorsteendelen op roest. 5. Breng het bodemdeksel weer aan. Wegnemen brandstoftank (fig.
  • Seite 13 Nederlands Tabel storingzoeken Storing Oorzaak Oplossing Actie De vlam dooft direct De kachel heeft geen Controleer de elektrische Gebruiker na het aansteken. spanning. aansluiting. Er is water of bezinksel Reinig de tank en het brand- Gebruiker in de brandstoftank. stoffilter, zie fig. 3(F). De brandstofpomp is Zet de schakelaar in stand Gebruiker...
  • Seite 14 Nederlands Storing Oorzaak Oplossing Actie De vlam dooft direct 10 De trek in de schoor- Controleer of de schoorsteen Gebruiker na het aansteken. steen in niet goed. aangebracht is volgens opgave, zie “schoorsteen”. Controleer de schoorsteen Gebruiker op lekkage. Reinig de schoorsteen, in- Gebruiker dien nodig.
  • Seite 15: Reserveonderdelen

    2. Schuif de schoorsteenpijp op het T-stuk. schoorsteen. 3. Schroef de schoorsteenpijp met drie schroeven vast op het T-stuk. Diameter schoorsteen VOORZICHTIG Bio Energy 1 De schoorsteen moet aan de onderstaande eisen voldoen. 150 mm Bio Energy series 40.020.944 - rev. 05 - 2015...
  • Seite 16: Eg-Verklaring Van Overeenstemming

    Nederlands EG-VERKLARING VAN OVEREENSTEMMING De EG-Verklaring van overeenstemming kunt u vinden op www.thermobile.nl. 40.020.944 - rev. 05 - 2015 Bio Energy series...
  • Seite 17 English Contents Environment English Safety instructions........17 Note Introduction ..........17 The heater is made of various metals Preparations..........19 and synthetic materials. The heater Use............20 also contains electronic parts, which Maintenance ..........21 must be treated as electronic waste. Faults ............
  • Seite 18: Safety Instructions

    English SAFETY INSTRUCTIONS General instructions Warning Pictograms in this manual • Read this manual carefully Caution Indicates risk of damage to the before using the hot air heater. appliance. • Keep this document with the hot air heater. Warning • Follow the described procedures.
  • Seite 19: Working Principle

    English Working principle The stationary used heater (vegetable or biodiesel) is equipped with three electric motors. The first electric motor drives a fuel pump, which pumps up the fuel from the fuel tank. The second electric motor drives the combustion air fan, which blows the combustion air into the combustion chamber.
  • Seite 20: Accessories

    English Thermostat Main components stationary used The Bio Energy has the following thermostats: heater (vegetable oil or biodiesel (fig. 3) When the pumpthermostat is sufficiently pre- • Cover heated, the fuel pump automatically starts up. Flue connection • Maximum thermostat Combustion chamber The thermostat stops the fuel pump when Connection for hot air fan...
  • Seite 21: Preparing To Install

    English 4. Drain condensate from the fuel tank, see Starting up Automatic operation: fig. 3 (J). 1. Switch the rocker switch to "1", see fig. 5 5. Make sure that the hot air can flow out (A). freely. The combustion air fan starts to run. 6.
  • Seite 22: Maintenance Table

    English MAINTENANCE Maintenance table Use the table in this booklet to record performed maintenance after each winter season. Warning Always clean the combustion chamber before starting the heater. Description Period Every Weekly Monthl Annu- ally hours Clean the combustion chamber. Drain (water of) condensation from the fuel tank, when the vegetable oil or biodiesel contains water.
  • Seite 23: Maintenance

    English 6. Remove any soot pieces from the floor of Do not touch the flue stack or the combustion chamber. combustion chamber! 7. Clean the fuel supply line with a brush Do not perform maintenance until the (inner diameter 8.5 mm (0.33”), see fig. 3 flue and combustion chamber have (O).
  • Seite 24 English Fault Cause Solution Action The flame goes out The heater has no volt- Check the electric connec- User directly after ignition. age. tion. There is water or sedi- Clean the tank and the fuel User ment in the fuel tank. filter, see fig.
  • Seite 25 English Fault Cause Solution Action The flame goes out The pump thermostat Let the heater cool down. User directly after ignition. has not reached the Restart the heater. right temperature yet. Let the heater burn longer User with the switch on "1", see fig.
  • Seite 26: Spare Parts

    English Fault Cause Solution Action The flame goes out 13 The maximum thermo- Reset the thermostat, see fig. User directly after ignition. stat is not installed prop- 3(Q). erly or defective. Replace the thermostat, see Dealer fig. 3(Q). 14 The overflow protection Clean the overflow protection User is filled with vegetable...
  • Seite 27: Installing Accessories

    4. Fit the following pipe pieces. 5. Place a cap (D) at the end of the flue. Diameter flue Bio Energy 1 150 mm EC DECLARATION OF CONFORMITY For the EC declaration of conformity, go to www.thermobile.nl.
  • Seite 28 Deutsch Inhalt Umweltschutzbestimmungen Deutsch Sicherheitshinweise ........27 Hinweis Einleitung ...........27 Das Heizgerät besteht aus Vorbereitungen ..........29 verschiedenen Metallen und Anwendung..........30 synthetischen Materialien. Darüber Wartung .............31 hinaus enthält es elektronische Störungen ..........32 Komponenten, die den Ersatzteile ..........35 Sondermüllbestimmungen Technische Information......35 unterliegen und als Elektronikschrott Installation von Zubehör ......36 zu entsorgen sind.
  • Seite 29: Sicherheitshinweise

    Deutsch Durchgangslagern und Lagern sowie zum SICHERHEITSHINWEISE Beheizen von Werkstätten in Garagen konzipiert worden. Zeichenerklärung Vorsicht Allgemeine Hinweise Weist auf Beschädigungsgefahr für das Gerät hin. Achtung Achtung • Lesen Sie diese Warnt vor einer gefährlichen Bedienungsanleitung sorgfältig Situation, die schwere oder sogar durch, bevor Sie den tödliche Verletzungen zur Folge Warmluftheizer verwenden.
  • Seite 30 Deutsch Wärmeschutz und Anschlüsse für einen Die Kraftstoffzufuhr ist mit einem Überlauf Schornstein mit Regenhaube sowie einen ausgestattet, wodurch das Rübsamenöl oder optionalen Raumthermostat. der Biodiesel bei Blockierung der Der Heizer verfügt über einen Kraftstoffleitung in den Tank zurückfließt. Warmluftventilator. Der Überlaufschutz schaltet die Die Warmluftheizer wurden auf Kraftstoffpumpe bei Überlaufen der...
  • Seite 31: Vorbereitungen

    Deutsch Installation Schaltkasten (fig. 5) 1. Stellen Sie den feststehenden, mit Altöl Wippschalter (Rübsamenöl oder Biodiesel) 0: Die Pumpe ist ausgeschaltet. betriebenen Heizer horizontal auf. 1: Niedrige Pumpendrehzahl 2. Bringen Sie die Bestandteile der 2: Hohe Pumpendrehzahl Brennkammer sachgemäß an (siehe Abbildung 4).
  • Seite 32: Anwendung

    Deutsch 3. Öffnen Sie den Wärmeschirm (siehe ANWENDUNG Abb. 4. (A). 4. Überprüfen Sie, ob die Brennschüssel Während des Betriebes heiß oder kalt ist. Heiß 5. Reinigen Sie ggf. die Brennschüssel und Berühren Sie weder den Schornstein den Boden der Brennkammer. noch die Ausblasöffnung des 6.
  • Seite 33: Wartung

    Deutsch WARTUNG Wartungsintervalle Nach jeder Wintersaison bitte die Wartungsarbeiten in der Tabelle im Anhang dieser Bedienungsanleitung registrieren. Achtung Reinigen Sie vor dem Starten des Heizers die Brennkammer. Beschreibung Intervall Alle 12 Wöche Monat- Jähr- Stun- ntlich lich lich Reinigen Sie die Brennkammer. Lassen Sie das Kondenswasser des Kraftstofftanks ab, falls das Rübsamenöl oder der Biodiesel Wasser ent- halten sollte.
  • Seite 34: Allgemeines

    Deutsch Heiß Reinigung des Abzugventils (Abb. Schornstein oder Brennkammer nicht berühren! 1. Entfernen Sie die Bodenabdeckung (B) Führen Sie die Wartung erst durch, des T-Stücks (A). wenn Schornstein und Brennkammer 2. Reinigen Sie den Schornstein von oben abgekühlt sind. nach unten mit einer Bürste. 3.
  • Seite 35 Deutsch Tabelle zur Störungssuche Fehler Ursache Fehlerbehebung Vorge- Die Flamme erlöscht Es liegt keine Span- Den elektrischen Anschluss Anwen- direkt nach dem Zün- nung am Heizer an. prüfen. den. Im Kraftstofftank befin- Tank und Kraftstofffilter reini- Anwen- den sich Wasser oder gen (siehe Abbildung 3 (F)).
  • Seite 36 Deutsch Fehler Ursache Fehlerbehebung Vorge- Die Flamme erlöscht Der Verbrennungsluft- Motor prüfen und gegebe- Händler direkt nach dem Zün- ventilator läuft nicht. nenfalls ersetzen. den. Die Verbrennungsluftzu- Öffnungen im Verdampfer Anwen- fuhr reicht nicht aus. reinigen (siehe Abbildung 4 (F)). Verbrennungsluftventilator Händler überprüfen.
  • Seite 37: Ersatzteile

    Deutsch Fehler Ursache Fehlerbehebung Vorge- Die Kraftstoffpumpe Siehe auch Fehler 3, 6 und läuft nicht, die Kon- trollleuchte leuchtet nicht, während der Heizer vorgeheizt wird und der Schalter auf "1" oder "2" steht. Die Flamme geht Siehe auch Fehler 2, 5, 7, 9, aus, während die 10 und 12.
  • Seite 38: Installation Von Zubehör

    4. Montieren Sie die folgenden Leitungsteile. 5. Bringen Sie eine Regenhaube (A) am Ende des Schornsteins. Durchmesser Schornstein Bio Energy 1 150 mm EG-KONFORMITÄTSERKLÄRUNG Die EG-Konformitätserklärung finden Sie unter www.thermobile.nl. 40.020.944 - rev. 05 - 2015 Bio Energy series...
  • Seite 39 Français Table des matières Environnement Français Consignes de sécurité ......38 Remarque Introduction ..........38 Le générateur alimenté à l'huile à Préparations..........40 utilisation fixe se compose de Emploi ............41 plusieurs métaux et matériaux Entretien............ 43 synthétiques. Le générateur contient Erreurs ............
  • Seite 40: Consignes De Sécurité

    Français CONSIGNES DE SÉCURITÉ Consignes générales Avertissement Pictogrammes de ce manuel • Lire attentivement ce manuel Précaution Indique le risque de dommages à la avant d'utiliser le générateur d'air machine. chaud. • Conserver ce document près du Avertissement générateur d'air chaud. Indique une situation dangereuse, •...
  • Seite 41 Français Le premier moteur électrique entraîne une Principaux composants des pompe à combustible qui pompe le générateurs alimentés à l'huile (à combustible du réservoir de combustible. l'huile de colza ou au biodiesel) à Le second moteur électrique entraîne le utilisation fixe (fig. 3) ventilateur d'air de combustion qui souffle l'air Cache de combustion dans la chambre de...
  • Seite 42: Préparations

    Français Boîtier d'interrupteurs (fig. 5) Installation Interrupteur à bascule : 1. Assurez-vous que le générateur alimenté 0: La pompe est arrêtée à l'huile (à l'huile de colza ou au 1: Vitesse pompe bas biodiesel) utilisé est positionné 2: Vitesse pompe élevée horizontalement.
  • Seite 43 Français 4. Vérifiez si le plateau brûleur est propre et froid. 5. Nettoyez le plateau brûleur et le fond de la chambre de combustion, si nécessaire. 6. Versez 0,2 litre d'huile de colza ou de biodiesel sur le plateau brûleur, voir fig. 4 (F).
  • Seite 44: Emploi

    Français EMPLOI Au cours du fonctionnement Chaud Ne pas toucher au tuyau de cheminée ni à la sortie d?air ! Le tuyau de cheminée et la sortie d'air deviennent chauds pendant le fonctionnement! Arrêt Arrêt du chauffage: 1. Positionnez l'interrupteur à bascule sur "0".
  • Seite 45 Français Description Fréquence Toutes Hebdo- Men- Annuel les 12 madair suel heures Nettoyez la chambre de combustion. Purgez la condensation (l'eau) du réservoir de com- bustible si l'huile de colza ou le biodiesel contient de l'eau. Nettoyez la chambre de combustion et le vaporisateur avec une brosse à...
  • Seite 46 Français Description Fréquence Toutes Hebdo- Men- Annuel les 12 madair suel heures Vérifiez le câblage du générateur. 5. Nettoyez l'intérieur des chambres de Chaud Ne touchez pas au tuyau de combustion (B) et de vaporisation (D) cheminée ni à la chambre de avec l'avant de la pelle.
  • Seite 47: Erreurs

    Français Nettoyage de la vanne de tuyau de cheminée (fig. 7) 1. Retirez le cache du fond (B) de la pièce en T (A). 2. Nettoyez le tuyau de cheminée du fond avec un hérisson. 3. Vérifiez si les connexions fuient. 4.
  • Seite 48 Français Tableau de dépannage Défaillance Cause Solution Action La flamme s'éteint Le générateur n'est pas Vérifier le branchement élec- Utilisateur directement après sous tension. trique. l'allumage. Présence d'eau ou de Nettoyez le réservoir et le fil- Utilisateur sédiment dans le réser- tre à...
  • Seite 49 Français Défaillance Cause Solution Action La flamme s'éteint Le thermostat de pompe Laissez le générateur refroi- Utilisateur directement après n'a pas encore atteint la dir. l'allumage. bonne température. Redémarrez le générateur. Laissez le générateur brûler Utilisateur plus longtemps avec l'inter- rupteur sur "1", voir fig.
  • Seite 50 Français Défaillance Cause Solution Action La flamme s'éteint 12 Le tirage du tuyau de Vérifiez toutes les con- Utilisateur directement après cheminée est trop faible. nexions du tuyau de chemi- l'allumage. née. Réduisez le nombre de cou- Utilisateur des. Relevez le tuyau de chemi- Utilisateur née.
  • Seite 51: Pièces Détachées

    T. 150 mm Précaution Le tuyau de cheminée doit respecter DÉCLARATION DE CONFORMITÉ les impératifs suivants. Pour la déclaration de conformité CE, rendez-vous sur le site www.thermobile.nl. Bio Energy series 40.020.944 - rev. 05 - 2015...
  • Seite 52: Instrucciones De Seguridad

    Español Índice Español Instrucciones de seguridad......49 Medio ambiente Introducción ..........51 Nota Preparaciones..........53 El generador de uso estacionario que Uso ............54 utiliza aceite está fabricado de Mantenimiento ...........55 diversos materiales metálicos y Fallos ............57 sintéticos. El generador también Piezas de repuesto ........61 contiene componentes electrónicos, Información técnica........61 que tienen que tratarse como...
  • Seite 53 Español Caliente ¡Algunas superficies pueden estar calientes! Espere hasta que estos componentes se hayan enfriado lo suficiente antes de realizar el mantenimiento. Sugerencias y consejos para simplificar la realización de las tareas o acciones especificadas. Bio Energy series 40.020.944 - rev. 05 - 2015...
  • Seite 54 Español Pictogramas en el generador de Instrucciones generales aire caliente de uso estacionario Advertencia que utiliza aceite de colza o biodiesel (fig. 2) • Lea este manual detenidamente Información sobre el aceite de colza o antes de utilizar el generador de biodiesel.
  • Seite 55: Principio De Funcionamiento

    Español El generador está equipado con un ventilador El suministro de combustible tiene un de aire caliente. rebosadero que garantiza que el aceite de Los generadores de aire caliente se han colza o biodiesel regrese al depósito de probado a nivel del mar y a una temperatura combustible cuando se obstruye el conducto de 20 °C.
  • Seite 56: Preparación De La Instalación

    Español Caja de conmutación (fig. 5) Instalación 1. Asegúrese de que el generador de uso Interruptor basculante: estacionario que utiliza aceite (de colza o 0: la bomba está apagada - biodiesel) se coloque horizontalmente. 1: Velocidad de la bomba baja 2.
  • Seite 57: Puesta En Marcha

    Español 4. Compruebe si el plato quemador está Desconexión limpio y frío. Desconexión del calentador: 5. Limpie el plato quemador y el suelo de la 1. Sitúe el interruptor basculante en "0". cámara de combustión en caso La bomba de combustible deja de necesario.
  • Seite 58: Tabla De Mantenimiento

    Español MANTENIMIENTO Tabla de mantenimiento Utilice la tabla incluida en este manual para registrar las operaciones de mantenimiento llevadas a cabo después de cada temporada de invierno. Advertencia Limpie siempre la cámara de combustión antes de arrancar el generador. Descripción Período Cada Sema-...
  • Seite 59: Aspectos Generales

    Español Descripción Período Cada Sema- Men- Anual sual horas Limpie la pieza en T de la chimenea, consulte "Lim- pieza de la válvula de la chimenea". Compruebe el cableado del generador. 5. Limpie el interior de la cámara de Caliente ¡No toque la chimenea ni la cámara combustión (B) y la cámara de de combustión!
  • Seite 60: Tabla De Localización De Averías

    Español 4. Tire hacia arriba del cierre del depósito Limpieza de la válvula de la (D). chimenea (fig. 7) 1. Retire la cubierta inferior (B) de la pieza 5. Separe el depósito de combustible (E) en T (A). del generador con cuidado. 2.
  • Seite 61 Español Fallo Causa Solución Acción La llama se apaga El generador no tiene Compruebe la conexión eléc- Usuario directamente tras el tensión. trica. encendido. Hay agua o sedimentos Limpie el depósito y el filtro Usuario en el depósito de com- de combustible, véase la fig.
  • Seite 62 Español Fallo Causa Solución Acción La llama se apaga El termostato de la Deje que el generador se Usuario directamente tras el bomba aún no ha alcan- enfríe. encendido. zado la temperatura Restablezca el generador. correcta. Deje que el generador Usuario queme más tiempo con el interruptor en "1", véase la...
  • Seite 63 Español Fallo Causa Solución Acción La llama se apaga 12 El tiro de la chimenea es Compruebe todas las Usuario directamente tras el demasiado bajo. conexiones de la chimenea. encendido. Reduzca el número de Usuario codos. Aumente la chimenea. Usuario Aísle la chimenea en el exte- Usuario rior del edificio.
  • Seite 64: Información Técnica

    Consulte las especificaciones técnicas la chimenea. en la tabla C en el apéndice que se incluye en este manual. Diámetro de chimenea INSTALACIÓN DE ACCESORIOS Bio Energy 1 150 mm Chimenea El generador tiene una conexión de DECLARACIÓN CE DE chimenea.
  • Seite 65: Окружающая Среда

    pусский язык Содержание Окружающая среда Русский язык Инструкции по технике безопасности ..62 Примечание Введение..........63 Нагреватель сделан из различных Подготовка к работе ........ 65 металлов и синтетических Эксплуатация........... 66 материалов. Воздухонагреватель Техническое обслуживание ....66 содержит электронные части, Неисправности ........68 которые...
  • Seite 66 я PУССКИЙ ЗЫК Инструкции по технике Используйте данное изделие по назначению безопасности Стационарный, работающий на отработанном масле воздухонагреватель Пиктограммы в данном предназначен для обогрева помещений руководстве компаний, занимающихся механизацией, ВНИМАНИЕ отопления и защиты от холодов залов, Указывает на опасность ангаров, складских помещений и гаражей. повреждения...
  • Seite 67: Общие Указания

    pусский язык соединениями для дымохода с дождевым Общие указания колпаком и необязательным комнатным ОСТОРОЖНО термостатом. Нагреватель оборудован воздушным • Прежде чем использовать вентилятором. воздухонагреватель, Воздухонагреватели были испытаны при внимательно прочитайте температуре 20 °C на уровне моря. данное руководство. • Храните данный документ на Принцип...
  • Seite 68 я PУССКИЙ ЗЫК Топливный насос выключается, когда Термостат вентилятора выключается нагреватель. Насос термостата и кислородный Воздушный вентилятор продолжает двигатель работать до тех пор, пока термостат Лопата вентилятора не выключит вентилятор Распределительная коробка (рис. 5) после его достаточного охлаждения. A Кулисный переключатель: Топливоподающий...
  • Seite 69: Вспомогательное Оборудование

    pусский язык 11. Убедитесь, что кулисный Вспомогательное оборудование • Дымоход с дождевым колпаком переключатель находится в положении 12. Проверьте напряжение питания: см. Подготовка к работе маркировочную табличку. 13. Воткните вилку в розетку. Распаковка 1. Распакуйте нагреватель. 2. Распакуйте свободные части в камере Подготовка...
  • Seite 70: Эксплуатация

    я PУССКИЙ ЗЫК 2. В течение первых 20-30 минут Техническое обслуживание переключите регулятор насоса на 1, Таблица техобслуживания см. рис. 5 (А). После каждого зимнего сезона 3. По достижении максимальной регистрируйте проведение техосмотра в температуры переключите регулятор таблице, которая находится в конце насоса...
  • Seite 71: Общие Положения

    pусский язык Описание Период Каждые Еженед Ежемес Ежегод ельно ячно но месяцев Почистите камеру сгорания и испаритель стальной щеткой. Почистите сливной топливопровод на дне камеры сгорания, см. рис. 4 (G). Почистите топливоподающий провод. Замените топливоподающий провод, если он сгорел или поврежден. Проверьте...
  • Seite 72: Неисправности

    я PУССКИЙ ЗЫК Чистка камеры сгорания (рис. 4) Чистка клапана дымохода (рис. 1. Снимите крышку (А). 2. Почистите Кольцо парообразования 1. Снимите нижнюю крышку (В) тройника (С) стальной щеткой. (А). 3. Снимите чашу горелки (F) крючком 2. Прочистите дымоход сверху вниз лопатки...
  • Seite 73: Таблица Поиска И Устранения Неисправностей

    pусский язык Таблица поиска и устранения неисправностей Неисправность Причина Решение Действие Пламя гаснет сразу В нагревателе Проверьте Пользова после возгорания. отсутствует электроподключение. тель напряжение. В топливном баке вода Почистите бак и Пользова или осадок. топливный фильтр, см. тель рис. 3 (F). Топливный...
  • Seite 74 я PУССКИЙ ЗЫК Неисправность Причина Решение Действие Пламя гаснет сразу Топливо слишком Подогрейте топливо Пользова после возгорания. вязкое. (максимум 50 °C) или тель разбавьте его дизельным топливом. Проверьте термостат Дилер насоса и замените его при необходимости. Проверьте двигатель Дилер насоса. Осмотрите...
  • Seite 75 pусский язык Неисправность Причина Решение Действие Пламя гаснет сразу 10 Дымоход имеет Убедитесь, что дымоход Пользова после возгорания. недостаточную тягу. установлен согласно тель описанию, см. "дымоход". Проверьте дымоход на Пользова предмет утечки. тель Почистите дымоход, если Пользова необходимо. тель Тяга в дымоходе Установите...
  • Seite 76: Запасные Части

    я PУССКИЙ ЗЫК Неисправность Причина Решение Действие Топливный насос не См. неисправности: 3, 6 и работает, и контрольная лампочка выключена, тогда как нагреватель предварительно нагрет и переключатель находится в положении 1 или 2. Пламя не горит, а См. неисправности: 2, 5, 7, топливный...
  • Seite 77: Установка Вспомогательного Оборудования

    язык Установка вспомогательного Диаметр дымохода оборудования Bio Energy 1 Дымоход 150 мм Нагреватель имеет соединение для дымохода. Декларация соответствия EС 1. Вставьте тройник (А) сразу над соединением (В). Относительно соответствия декларации 2. Поместите трубу дымохода (С) на ЕС следует обратиться на сайт...
  • Seite 78 Datum Omschrijving: Onderhoud of Storing Actie door Date Description: Maintenance or Failure Action by Datum Beschreibung: Wartung oder Fehler Aktion durch Date Description: Entretien ou Erreur Action par Fecha Descripcíon Mantenimiento o fallo Accíon por Дата Описание: устранение неисправности Выполнено 40.020.944 - rev.
  • Seite 79 Datum Omschrijving: Onderhoud of Storing Actie door Date Description: Maintenance or Failure Action by Datum Beschreibung: Wartung oder Fehler Aktion durch Date Description: Entretien ou Erreur Action par Fecha Descripcíon Mantenimiento o fallo Accíon por Дата Описание: устранение неисправности Выполнено Bio Energy series 40.020.944 - rev.
  • Seite 80 Bio Energy 1 Verbrandings-schaal Échelle de combustion 41.900.521 Combustion scale Plato de combustión Verbrennungsschale Уровень горения 40.020.944 - rev. 05 - 2015 Bio Energy series...
  • Seite 81 Bio Energy 1 Minimaal bruto vermogen Capacité brute minimum Minimum Gross capacity Capacidad bruta mínima Geringste Bruttoleistung Общая минимальная емкость Maximaal bruto vermogen Capacité brute maximum Maximum Gross capacity Capacidad bruta máxima Höchste Bruttoleistung Общая максимальная емк Brandstofverbruik minimaal Consommation de...
  • Seite 82 Bio Energy 1 Breedte Largeur Width Anchura Breite Ширина Hoogte Hauteur Height Altura Höhe Высота Gewicht Poids Weight Peso Gewicht Вес • ρ (15° C): 0.85 kg/dm • = 42.689 MJ/kg • = 45.5 MJ/kg • 1 kW = 860 kcal/h •...
  • Seite 83 All rights reserved. The available information has been prepared to a high level of care, but Thermobile Industries B.V. cannot be held liable for possible errors in the information or the consequences thereof. The information provided herein may not be reproduced and/or published in any form, by print, (electronically or mechanically) without the prior written authorisation of Thermobile Industries B.V.

Inhaltsverzeichnis