Videotec NXM36 Bedienungsanleitung
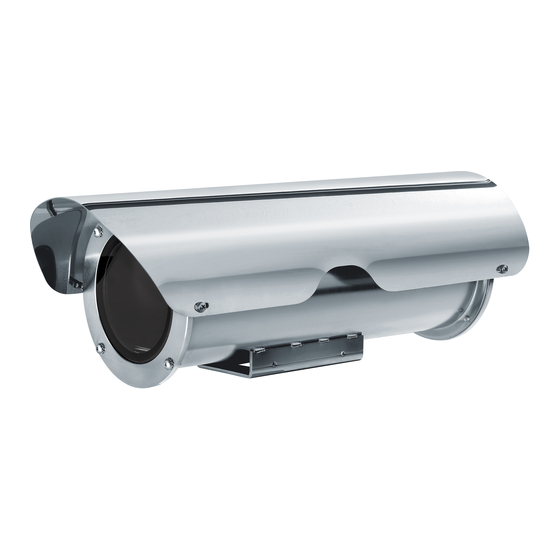
Camera housing for installation in aggressive environments
Vorschau ausblenden
Andere Handbücher für NXM36:
- Bedienungsanleitung (104 Seiten) ,
- Bedienungsanleitung (64 Seiten) ,
- Bedienungsanleitung (54 Seiten)

Verwandte Anleitungen für Videotec NXM36


Inhaltszusammenfassung für Videotec NXM36
- Seite 1 NXM36 Camera housing for installation in aggressive environments English - Instructions manual Italiano - Manuale di istruzioni Français - Manuel d’instructions Deutsch - Bedienungslanleitung Русский - Руководство по эксплуатации...
- Seite 33 NXM36 Kameragehäuse für korrosive Umgebungen Deutsch - Bedienungslanleitung...
- Seite 34 Inhaltsverzeichnis DEUTSCH 1 Allgemeines ........................3 1.1 Schreibweisen ................................3 2 Anmerkungen zum Copyright und Informationen zu den Handelsmarken ..... 3 3 Sicherheitsnormen ......................3 4 Identifizierung ....................... 3 4.1 Beschreibung und Bezeichnung des Produktes ................... 3 4.2 Kennzeichnung des Produkts..........................3 5 Vorbereitung des Produktes auf den Gebrauch............
-
Seite 35: Allgemeines
Angebot eine Version mit verstärkter Heizung. Geräte entstanden ist. Ferner behält er sich das Recht vor, den Inhalt ohne Vorkündigung Das Gehäuse NXM36 kann auf den Schwenk-Neige- abzuändern. Die Dokumentation in diesem Kopf NXPTH installiert werden und bietet somit ein Handbuch wurde sorgfältig ausgeführt und... -
Seite 36: Vorbereitung Des Produktes Auf Den Gebrauch
5 Vorbereitung des 6 Installation Produktes auf den Gebrauch 6.1 Öffnung des Schutzgehause Jede vom Hersteller nicht ausdrücklich Die Schrauben an der hinteren Flansche ausdrehen, genehmigte Veränderung führt zum Verfall indem man den mitgelieferten Sechskantschlüssel der Gewährleistungsrechte. verwendet. 5.1 Entfernen der Verpackung Bei der Lieferung des Produktes ist zu prüfen, ob die Verpackung intakt ist oder offensichtliche Anzeichen von Stürzen oder Abrieb aufweist. -
Seite 37: Installation Der Kamera
6.2 Installation der Kamera 6.2.2 Ausführung 120/230Vac Das Gehäuse öffnen wie beschrieben (6.1 Öffnung IN 115/230Vac des Schutzgehause, Seite 4). Die Kamera auf den Schlitten positionieren, indem man das Isolierplättchen und die mitgelieferte 1/4“ Schraube benutzt. Falls erforderlich Abstandstücke benutzen, um die Fernsehkamera unddie Optik korrekt zu positionieren. -
Seite 38: Installation Des Gehaüse
6.1 Installation des Gehaüse 6.1.1 Befestigung des Dachs (Sonderausstattung) Vor dem Verschluß, vergewissern Sie sich, dass Die mitgelieferten sechseckigen der innere Schlitten des Gehaüses, je nach dem Befestigungszwischenlagen auf den Flanschen Installationstyp, richtig orientiert wird. des Gehaüses schrauben. Das Sonnenschutzdach auf dem Gehaüse positionieren (02) und mit den mitgelieften Schrauben auf den Zwischenlagen es befestigen (03). -
Seite 39: Heizung
7 Reinigung 6.2 Heizung Einige Ausführungen des Gehäuses sind mit Normal- 7.1 Reinigung des Glases und der und Doppelheizung ausgerüstet. Kunststoffteile Es wird empfohlen, ein weiches Tuch und neutrale mit Wasser verdünnte Seife oder ein spezifisches Reinigungsmittel für Brillengläser zu verwenden. Zu vermeiden sind Äthylalkohol, Lösungsmittel, hydrierte Kohlenwasserstoffe, starke Säuren... -
Seite 40: Technische Daten
9 Technische Daten 9.3 Elektrik Heizung (Ton 15°C±3°C, Toff 22°C±3°C) 9.1 Allgemeines • Netzteil/Verbrauch: IN 12Vdc/24Vac, 20W max Aus elektro-poliertem rostfreiem Stahl hergestelltes • Netzteil/Verbrauch: IN 120/230Vac, 40W max,80W Gehäuse (Legierter Austenitstahl, der rostfrei, max (mit Doppelheizung) korrosions- und hitzebeständig ist): Kameranetzteil •... -
Seite 41: Technische Zeichnungen
10 Technische Zeichnungen Die Abmessungen der Zeichnungen sind in Millimeter angegeben. SPEISELEITUNG NUTZFLÄCHE A - A Ø 112 PLATINE BEFESTIGUNGS PLATTE NUTZ- FLÄCHE B - B Abb. 11 NXM36. MNVCNXM36_1511_DE...