Bpt HSC Serie Installationsanleitung
Quicklinks
07.2007/2404-9311
HSC/...
HEC/...
BPT S.p.A.
Via Roma, 41
30020 Cinto Caomaggiore/VE/Italy
http: www.bpt.it/e-mail: info@bpt.it
1
ISTRUZIONI
I
PER L'INSTALLAZIONE
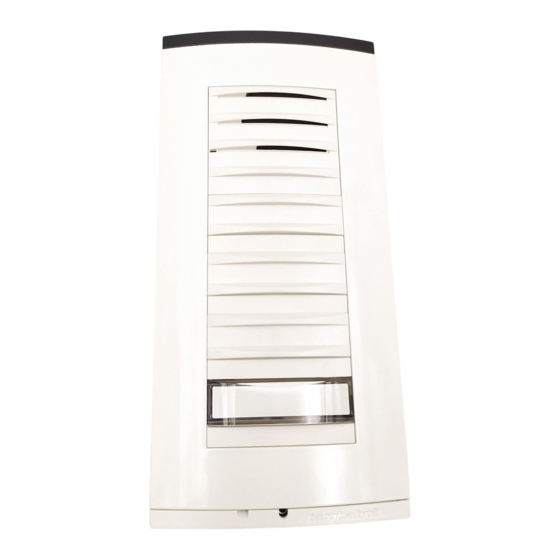
POSTO ESTERNO VERSIONE
DA PARETE HSC/...
Murare la scatola incasso (da tre moduli o tonda Ø
65 mm) a filo muro e ad un'altezza adeguata.
Tramite la chiave maschio esagonale s 2,5 in dota-
zione svitare la vite di bloccaggio e smontare la
placca dalla base (fig. 1).
Fissare la base al muro utilizzando le viti ed i tasselli
in dotazione (fig. 2).
Inserire il gruppo audio in alto, vicino alla testata
della base (fig. 3).
Nel caso di impianti dove può insorgere l'effetto
Larsen, il microfono può essere montato in posizio-
ne remota, come indicato nelle figure 4 e 5.
Togliere la piastrina fermacavi ed effettuare i colle-
gamenti (fig. 6). Rimettere la piastrina fermacavi.
Per scrivere i dati desiderati sul cartellino portanome,
estrarre il ferma cartellino e quindi il cartellino (fig. 7).
NOTA. Si possono utilizzare cartellini portanome per-
sonalizzati fino ad un massimo di 2 mm di spessore.
Per montare la placca inserire prima la parte supe-
riore nella testata e quindi avvitare la vite di bloc-
caggio (fig. 8).
2
POSTO ESTERNO VERSIONE
DA INCASSO HEC/...
La scatola incasso va murata a filo muro e ad un'al-
tezza adeguata. Nella messa in opera della scatola
incasso saranno evitate possibili deformazioni uti-
lizzando l'apposito distanziale in dotazione (fig. 9).
È possibile utilizzare il cacciavite ricavato dal
distanziale per regolare i potenziometri dei moduli
audio.
Tramite la chiave maschio esagonale s 2,5 in dota-
zione svitare la vite di bloccaggio e smontare la
placca dal telaio (fig. 10).
Togliere i due bollini di protezione dei fori filettati
nella scatola incasso e fissare il telaio tramite le due
viti in dotazione (fig. 11).
Inserire il gruppo audio in alto, vicino alla testata del
telaio (fig. 12).
Nel caso di impianti dove può insorgere l'effetto
Larsen, il microfono può essere montato in posizio-
ne remota, come indicato nelle figure 13 e 14.
Togliere la piastrina fermacavi ed effettuare i colle-
gamenti (fig. 15). Rimettere la piastrina fermacavi.
Per scrivere i dati desiderati sul cartellino portano-
me, estrarre il ferma cartellino e quindi il cartellino
(fig. 7).
NOTA. Si possono utilizzare cartellini portanome per-
sonalizzati fino ad un massimo di 2 mm di spessore.
Per montare la placca inserire prima la parte supe-
riore nella testata e quindi avvitare la vite di bloc-
3
caggio (fig. 16).
Caratteristiche tecniche
• Potenza massima commutabile del microcontat-
to: 24 V 1 A.
• Assorbimento del gruppo di illuminazione: 40
mA, 17,5 V.
• Temperatura di funzionamento: da -15 °C a +50
°C.
SMALTIMENTO
Assicurarsi che il materiale d'imballaggio non
venga disperso nell'ambiente, ma smaltito seguen-
do le norme vigenti nel paese di utilizzo del prodot-
to.
Alla fine del ciclo di vita dell'apparecchio evitare
che lo stesso venga disperso nell'ambiente.
Lo smaltimento dell'apparecchiatura deve essere
effettuato rispettando le norme vigenti e privilegian-
do il riciclaggio delle sue parti costituenti.
Sui componenti, per cui è previsto lo smaltimento
con riciclaggio, sono riportati il simbolo e la sigla
del materiale.
GB INSTALLATION
INSTRUCTIONS
HSC/...SURFACE-MOUNTED
ENTRY PANEL
Fit the embedding box (3-module or round Ø 65mm
version) flush with the wall at an appropriate height.
Using the Allenkey s 2.5 supplied, unscrew the lock
screw and remove the front plate from the base (fig. 1).
Fasten the base onto the wall using the screws and
screw anchors supplied (fig. 2).
Insert the audio module at the top, near to the top
moulding of the base (fig. 3).
In those installations liable to be affected by the
Larsen effect, the microphone can be fitted in a
remote position, as indicated in figures 4 and 5.
Remove the cable-clamp plate and perform the
wiring (fig. 6). Refit the cable-clamp plate.
The name card can be removed and filled in with
the relevant information by removing the card clip
followed by the actual card itself (fig. 7).
NOTE. Personalized name cards can be used up to
a maximum of 2 mm thick.
In order to fit the front plate, first insert the upper
part in the top moulding and then tighten the lock
screw (fig. 8).
HEC/...RECESSED
ENTRY PANEL
The embedding box must be fitted flush with the
wall at an appropriate height.
Fit the spacer into embedding boxes to avoid defor-
mation (fig. 9).
It is possible to use the screwdriver obtained from the
spacer to adjust the potentiometers of the audio
modules. Using the Allenkey s 2.5 supplied,
unscrew the lock screw and remove the front plate
from the chassis (fig. 10).
Remove the two plugs protecting the threaded holes in
the embedding box and secure the chassis using the
two screws supplied (fig. 11).
Insert the audio module at the top, near to the top
moulding of the chassis (fig. 12). In those installa-
tions liable to be affected by the Larsen effect, the
microphone can be fitted in a remote position, as
indicated in figures 13 and 14.
Remove the cable-clamp plate and perform the
wiring (fig. 15). Refit the cable-clamp plate.
The name card can be removed and filled in with
the relevant information by removing the card clip
followed by the actual card itself (fig. 7).
NOTE. Personalized name cards can be used up to
a maximum of 2 mm thick.
In order to fit the front plate, first insert the upper
part in the top moulding and then tighten the lock
screw (fig. 16).
Technical features
• Max. switching capacity of the micro-contact: 24
V 1 A.
1

Verwandte Anleitungen für Bpt HSC Serie


Inhaltszusammenfassung für Bpt HSC Serie
- Seite 1 Sui componenti, per cui è previsto lo smaltimento con riciclaggio, sono riportati il simbolo e la sigla del materiale. BPT S.p.A. Via Roma, 41 30020 Cinto Caomaggiore/VE/Italy http: www.bpt.it/e-mail: info@bpt.it GB INSTALLATION INSTRUCTIONS ISTRUZIONI PER L’INSTALLAZIONE HSC/…SURFACE-MOUNTED ENTRY PANEL Fit the embedding box (3-module or round Ø...
- Seite 2 • Current demand of the lighting module: 40 mA, • Stromaufnahme des Beleuchtungeinheit: 40 mA, 17.5 V. 17,5 V. • Working temperature range: from -15 °C to +50 °C. • Betriebstemperatur: von -15 °C bis +50 °C. DISPOSAL ENTSORGUNG Do not litter the environment with packing material: Vergewissern Sie sich, dass das Verpackungs- make sure it is disposed of according to the regula- material gemäß...
- Seite 3 Caractéristique techniques Para montar la placa, primero se debe introducir la • Pouvoir de coupure du micro-contact: 24 V 1 A parte superior en el cabezal y seguidamente enro- maxi. scar el tornillo bloqueador (fig. 16). • Consommation du groupe d’éclairage: 40 mA, Caractéristicas técnicas 17,5 V.
- Seite 4 NOTA. Podem-se utilizar letreiros porta-nome per- sonalizados até um máximo de 2 mm de espessu- Para montar a placa inserir em primeiro lugar a parte superior na cabeceira e em seguida apertar o parafuso de fixação (fig. 16). Caractéristicas técnicas •...