Herunterladen Inhalt Inhalt Diese Seite drucken

Werbung

Verfügbare Sprachen
  • DE

Verfügbare Sprachen

  • DEUTSCH, seite 1
BOM 650 C
2715 630 002 0 b
WN 923016-51-6-50 12/15
D
GB
FR
ES
NL
IT

Werbung

Inhaltsverzeichnis
loading

Inhaltszusammenfassung für Becker BOM 650 C

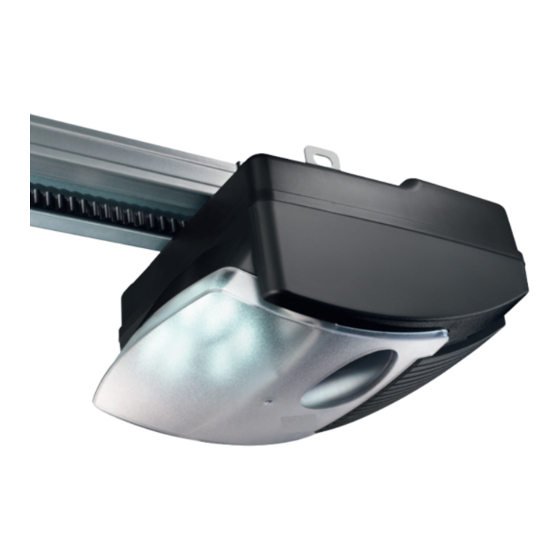
  • Seite 1 BOM 650 C 2715 630 002 0 b WN 923016-51-6-50 12/15...
  • Seite 2 A = 3050 mm B = 2560 mm C = 2905 mm D = 2960 mm E >= 30 mm F = 0 - 100 mm G >= 140 mm...
  • Seite 3 8 x 16 6,3 x 16...
  • Seite 4 max. 45°...
  • Seite 5 AWG 22 AWG 22 AWG 22 AWG 22 24V- E43U 24V- WE GN BN 1 2 3 4 5 6 7 LS 2 LS 2 LS 2 LS 2 LS 2 230V~...
  • Seite 6 A a C B D 3 sec 3 sec Nr. 1 Nr. 2 3 sec 3 sec. 3 sec Nr. 2 F< 400N 50mm...
  • Seite 7: Allgemeine Informationen

    • Demontage • Allgemeine Informationen Die Demontage erfolgt in umgekehrter Reihenfolge der Montageanleitung 13 - 1. • Sicherheit Für die Sicherheit von Personen ist es wichtig, • Entsorgung Garagentor- diesen Anweisungen Folge zu leisten. Diese Es sind die entsprechenden Ländervorschriften zu A n w e i s u n g e n s i n d a u f z u b e w a h r e n .
  • Seite 8 • Montageanleitung Laufschlitten rastet bei der nächsten Bewegung Befestigung Laufschiene / Antriebskopf automatisch wieder ein. Laufschiene (wie im Bild dargestellt) mit Bitte vor der Montage sorgfältig lesen! Antriebsritzel ( ) auf die Antriebswelle (1a) stecken, Anschlussplan Die Montage ist nur durch entsprechend qualifizierte B e f e s t i g u n g s b ü...
  • Seite 9: Sondereinstellungen

    • Programmieren des senders für 3 Sekunden. Richtung “AUF” auffährt. Die Quittierung erfolgt durch einmaliges Wenn das Tor mit der Taste in die verkehrte Antriebes → Aufleuchten der LED (IV). Richtung Zu fährt, dann Taste für weitere 5 Sekunden gedrückt halten. Bedienelemente Drücken Sie nun die Einlerntaste eines neuen Lauflicht signalisiert Bewegungsumkehr.
  • Seite 10: Gewährleistung

    Automatisches Schließen Menüschritt 5: Kraftbegrenzung für Auffahrt Menüschritt 8: Toranpassung Abbruch der Offenhaltezeit durch Nach ca. 2 Sekunden blinkt die Anzeige mit dem Taste betätigen. Ziffer 8 erscheint auf der Lichtschranke eingestellten Wert der Kraftbegrenzung für die Anzeige. Auffahrt. Automatisches Schließen Mit Taste kann der Wert für die Kraftbe- Menü-...
  • Seite 11: Weitere Betriebsarten

    • Bedienungsanleitung bzw. verhindert das Starten des Antriebes. vorzeitige Beendigung der Offenhaltezeit und die Vorwarnzeit wird gestartet. Lichtschranke (STOP B) Diese Betriebsanleitung beschreibt den sicheren Eine Unterbrechung der Lichtschranke bewirkt und sachgerechten Umgang mit dem Produkt. Die während der Schließfahrt ein Stoppen und angegebenen Sicherheitshinweise und Anwei- eineRichtungsumkehr.
  • Seite 12: Fehlersuchanleitung

    • Fehlersuchanleitung Wichtiger Hinweis: Bei Arbeiten am Antrieb ist unbedingt vorher der Netzstecker zu ziehen!!! Störung Mögliche Ursachen Abhilfe Tor schließt / öffnet nicht vollständig. Tormechanik hat sich verändert. Tor überprüfen lassen. Schließ- / Öffnungskraft zu schwach eingestellt. Krafteinstellung durchführen (Menüschritte 5 und 6). Endposition nicht richtig eingestellt.
  • Seite 15: General Information

    Changes and modifications to the product • • General Information In order to prevent hazards and ensure optimum performance, no changes, modifications or Safety conversions may be made to the product that have Before commencing any work on the product, Garage not been expressly approved by the manufacturer.
  • Seite 16: Installation Instructions

    • Installation Instructions parking position ( ) on the left and restore the Fastening the track to operator head connection between the operator and the door. On Slot track (as illustrated) with chain sprocket ( ) onto the next movement, the carriage automatically re- Please read these instructions carefully prior to the operator shaft ( ) and screw down with the 4...
  • Seite 17: Programming The Operator

    • Programming the operator travelling direction is altered. Press the programming button (II) of the Now travel by pressing button into the desired door master transmitter for 3 seconds. end position OPEN Control elements → The LED (IV) lights up once to confirm. By pressing button , the position can be corrected The controls for programming the door operator are...
  • Seite 18 Menu stage 5: The opening force limit Menu stage 8: Door fitting Automatic Closing After approx. 2 seconds, the display flashes showing Press button . “8” appears in the display. Set open phase in menu stage A. the set value of the opening force limit. The force limit Menu Start Stop...
  • Seite 19: Maintenance / Checks

    interruption of the light barrier during the opening Automatic Closing (7) • Operating Instructions cycle makes no difference. Same function as operation mode (6). However, an interruption of the photocell during the open phase of These Operating Instructions describe how to use •...
  • Seite 20: Possible Cause

    Trouble-shooting • Important note: When working on the operator, always pull out the mains plug beforehand!!! Fault/Malfunction Possible cause Remedy Door does not fully close/open Door mechanics have changed Have door checked. Change force setting (menu stages 5 and 6) Set closing/opening force too weak.
  • Seite 23: Informations Générales

    • Modifications et transformations du produit • Informations générales Pour éviter la mise en danger des personnes et assurer une performance optimale, il est interdit de • Sécurité procéder à des modifications, des transformations Lire attentivement la notice dans son intégralité Motorisation ou des extensions du produit sans l’autorisation avant de commencer toute opération sur le produit,...
  • Seite 24 Veuillez conserver cette notice de pose, d’emploi et d’entretien pendant toute la durée d’utilisation!
  • Seite 25: Programmations Spéciales

    • Programmation de la Étape de menu 3 : Réglage de la position motorisation d'ouverture de la porte Appuyer pendant 3 secondes sur la touche chiffre 3 apparaît sur l'afficheur ( ). Attendre un petit Éléments de commande moment jusqu'à ce que le chiffre 3 clignote. Appuyer Les éléments de commande servant à...
  • Seite 26 Étape de menu 5: limitation d'effort pour le Étape de menu 8: distances freinées Ouverture partielle d'une porte mouvement d'ouverture Appuyer sur la touche . Le chiffre 8 apparaît sur sectionnelle latérale Appuyez ensuite 2 fois sur la touche jusqu'à ce l'afficheur.
  • Seite 27: Entretien / Contrôle

    • Notice d’utilisation fermeture entraîne l'arrêt et la remontée Fermeture automatique (6) En mode fermeture automatique, si vous appuyer automatique de la porte. Une interruption du La présente notice d’utilisation d´écrit le maniement sur le bouton, la porte s'ouvre totalement. Après le faisceau pendant l'ouverture n'a aucune influence sûr et correct du produit.
  • Seite 28: Affichage De Diagnostic

    • Mode de reconnaissance des anomalies Remarque importante: débrancher impérativement le courant avant de procéder à toute operation sur la motorisation! Anomalie Causes possibles Remède La porte ne s’ouvre ou ne se ferme pas Le mécanisme de porte s’est modifié. Faire contrôler la porte.
  • Seite 31: Informaciones Generales

    • Modificaciones y reformas en el producto • Informaciones generales Para evitar peligros y asegurar el óptimo rendimiento, no se deben realizar en el producto • Seguridad modificaciones, montajes adicionales, ni reformas, Antes de iniciar cualquier trabajo en el producto se que no hayan sido previamente autorizadas de Automatismo deben leer totalmente las instrucciones de manejo,...
  • Seite 32 • Instrucciones de montaje Montaje consola de conexión para la puerta Orientación de la antena / esquema de Leer atentamente antes del montaje! conexión El montaje debe ser ejecutado únicamente por La consola de conexión para la puerta adjunta es Antes de abrir la cubierta es instaladores cualificados.
  • Seite 33: Ajustes Especiales

    Mantenga presionada durante 3 segundos la tecla • Programación del pueden programarse hasta 7 emisores en el receptor de radio. . Aparece la cifra 3 en el indicador . Espere un automatismo poco, hasta que la cifra 3 parpadee. Pulse la tecla y observe que la puerta se mueve en dirección Pulse durante 3 segundos la tecla de Elementos de mando...
  • Seite 34 Paso de menú 5: Limitación de fuerza para la seccional latera Pulse la tecla Aparece la cifra 8 en el indicador. apertura Se puede arrancar la posición parcial de Al cabo de aprox. 2 segundos parpadea la indicación valor de Start Stop Start Stop...
  • Seite 35 • Cierre automatico (7) • Instrucciones de manejo Barrera fotoeléctrica unidireccional (STOP B) Misma funcion que modo (6). Sin embargo, la La interrupción de la barrera fotoeléctrica interrupcion de la fotocelula en fase de apertura unidireccional durante la maniobra de cierre Estas instrucciones de manejo describen la manera provoce que la puerta se pare y empieze ella fase de produce la parada y la inversión del sentido de...
  • Seite 36 • Instrucciones para la localización de fallos Nota importante: ¡¡¡Antes de realizar cualquier trabajo en el automatismo, se tiene que separar siempre el enchufe de la red!!! Fallo Posibles causas Correción La puerto no se cierra / abre por El mecanismo de la puerta se ha modificado Hacer comprobar la puerta.
  • Seite 39: Algemene Informatie

    • Veranderingen aan en ombouwen van het • Algemene informatie product Om gevaarlijke situaties te voorkomen en om te • Veiligheid kunnen garanderen dat het product optimaal Bij alle werkzaamheden aan het product geldt dat u Garage- functioneert, mogen er geen veranderingen aan eerst de handleiding voor het bedrijf, en wel in het worden uitgevoerd en mag het ook niet uitgebreid of bijzonder het hoofdstuk over de veiligheid en de...
  • Seite 40 • Montagehandleiding aandrijfas ( ) en schroef de looprail vast met de Richten van de antenne / aansluitschema plaatschroeven 8 x 16. Aanwijzingen: Voor de montage a.u.b. zorgvuldig lezen! Montage van de deurconsole Met de montage mag uitsluitend gekwalificeerd Trek voor het openen van de kap montagepersoneel worden belast! eerst de stekker uit het stopcontact! De meegeleverde deurconsole is geschikt voor...
  • Seite 41 • Programmeren van de Andere zenders programmeren De nieuwe masterzender werd geprogrammeerd Aanwijzing: Er kunnen behalve de masterzender en de oude masterzender werd overschreven. aandrijving nog max. 7 zenders in de draadloze ontvanger worden geprogrammeerd. Menuoptie 3: Instellen van de positie Deur Bedieningselementen Open De bedieningselementen voor het programmeren...
  • Seite 42 Menuveld 5: krachtbegrenzing voor het openen Menuveld 8: Aanpassing van de deur Gedeeltelijk openen van zywaartse Na ca. 2 seconden knippert de indicator met de Druk op de toets . Het cijfer 8 verschijnt in het sectionaaldeuren ingestelde waarde van de krachtbegrenzing voor het display.
  • Seite 43 • Handleiding voor de Fotocel (STOP B) Automatisch sluiten (6) Het geven van een impuls zorgt er altijd voor dat de Indien de fotocel tijdens het sluitproces wordt bediening deur geopend wordt. onderbroken, wordt de deur gestopt en in de andere N a a f l o o p v a n d e o p e n i n g s t i j d e n d e richting bewogen.
  • Seite 44: Opsporen Van Storingen

    • Opsporen van storingen Belangrijke aanwijzing: bij werkzaamheden aan de aandrijving dient steeds eerst de stekker uit het stopcontact te worden getrokken! Storing Eventuele oorzaak Verhelpen Deur sluit / opent niet volledig. Het mechanisme van de deur is veranderd. Deur laten controleren. Sluit- / openingskracht te zwak ingesteld.
  • Seite 47: Informazioni Generali

    • Informazioni generali • Modifiche e trasformazioni del prodotto Per evitare pericoli e garantire una prestazione ottimale è vietato effettuare modifiche, ampliamenti • Sicurezza e trasformazioni sul prodotto non espressamente Automazioni Prima di qualsiasi intervento sul prodotto, devono autorizzati dal produttore. essere lette e comprese le istruzioni per l'uso, in particolare il capitolo Sicurezza e le relative •...
  • Seite 48: Istruzioni Di Montaggio

    • Istruzioni di montaggio sull'albero motore ( ), e fissare con 4 viti auto- motoriduttore. Al movimento successivo, le rotaie si filettanti 8x16. innesteranno di nuovo automaticamente. Leggere attentamente le istruzioni prima di procedere con l'installazione! Montaggio attacco di connessione porta Orientamento dell'antenna / Schema di Il montaggio deve essere eseguito solo da personale connessione...
  • Seite 49: Impostazioni Speciali

    e il vecchio trasmettitore master è stato • P r o g r a m m a z i o n e d e l radioricevitore è possibile programmare altri max. sovrascritto. 7 trasmettitori. motoriduttore Step di menu 3: Impostazione della Premere per 3 secondi il tasto di Elementi di comando posizione di fine corsa superiore...
  • Seite 50 Chiusura automatica Per passare ai menu per le impostazioni speciali è L'impostazione di fabbrica è 1. Impostare il tempo di apertura nel sottomenu necessario mantenere premuto il tasto di nuovo per 3 minuti. Sul display compare la cifra 3. Azionare Step di menu 8: Adattamento della porta il tasto per saltare al sottomenu 3.
  • Seite 51: Istruzioni Operative

    • Istruzioni operative Fotocellula (STOP B) • Manutenzione / Controlli Se la fotocellula è interrotta mentre la porta si sta Prima di eseguire qualsiasi lavoro sul chiudendo, la porta si arresta e inverte la direzione. Per la vostra sicurezza motoriduttore, rimuovere sempre la spina di Durante la fase di apertura, un'interruzione non raccomandiamo di far controllare il alimentazione!
  • Seite 52: Ricerca Anomalie

    • Ricerca anomalie Avvertenza importante: prima di ogni intervento sulla motorizzazione staccare la spina elettrica! Guasto Possibile causa Far controllare la porta. Cambiare l'impostazione La porta non si apre/chiude È cambiata la meccanica della porta. La forza di apertura / della forza (menu 5 e 6).

Inhaltsverzeichnis