Herunterladen Diese Seite drucken
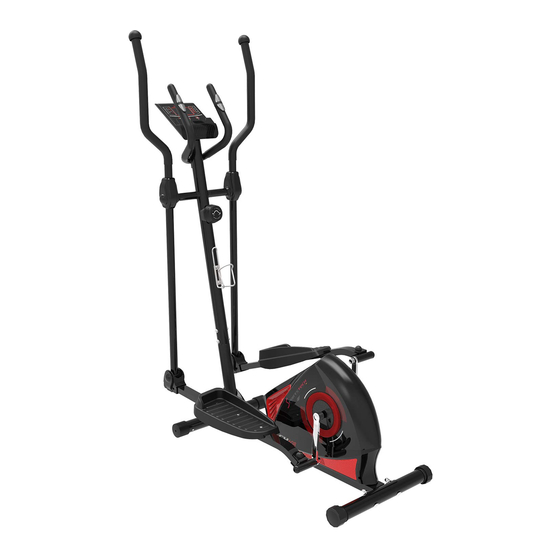
SPORTSTECH CX608 Benutzerhandbuch
Vorschau ausblenden Andere Handbücher für CX608:

Werbung

Verfügbare Sprachen
  • DE

Verfügbare Sprachen

  • DEUTSCH, seite 1
CX608
DE
EN
ES
FR
IT
NL

Werbung

Fehlerbehebung

loading

Inhaltszusammenfassung für SPORTSTECH CX608

  • Seite 1 CX608...
  • Seite 3 Unsere Video Tutorials für Dich! Aufbau Benutzung Abbau In 3 einfachen Schritten zum schnellen und sicheren Start: 1. QR-Code scannen 2. Videos anschauen 3. schnell und sicher starten Link zu den Videos: https://service.innovamaxx.de/cx608_video...
  • Seite 4 Sehr geehrter Kunde wir freuen uns, dass Sie sich für ein Gerät aus der SPORTSTECH Produktpalette entschieden haben. SPORTSTECH Sportgeräte bieten Ihnen höchste Qualität und neueste Technologie. Um die Leistungsfähigkeit des Gerätes voll nutzen zu können und viele Jahre Freude an Ihrem Gerät zu haben, lesen Sie bitte vor der Inbetriebnahme und dem Beginn des Trainings dieses Benutzerhandbuch sorgfältig durch und verwenden Sie das Gerät den Anweisungen entsprechend.
  • Seite 5: Inhaltsverzeichnis

    INHALTSVERZEICHNIS WICHTIGE SICHERHEITSHINWEISE ................6 EXPLOSIONSZEICHNUNG / ERSATZTEILLISTE ..............7 MONTAGEANLEITUNG ....................8 COMPUTER-BETRIEB ....................12 WARTUNG ......................... 14 FEHLERBEHEBUNG ..................... 14 AUFWÄRM- UND ABKÜHL-ROUTINE ................15 ANWENDUNGSSOFTWARE (APP) .................. 17 DECLARATION OF CONFORMITY ................... 104...
  • Seite 6: Wichtige Sicherheitshinweise

    WICHTIGE SICHERHEITSHINWEISE Diese allgemeinen Sicherheitsinformationen müssen unbedingt für die Benutzung dieses Produkt beachtet werden. Lesen Sie alle Hinweise, bevor Sie das Produkt in Benutzung nehmen. • Vor dem Training sind Aufwärm-Übungen für den ganzen Körper notwendig, um Verletzungen der Muskeln zu vermeiden. Siehe den Abschnitt Aufwärm- und Abkühl-Routine. Nach dem Training ist es ratsam, den Körper zur Abkühlung enstpannen zu lassen.
  • Seite 7: Explosionszeichnung / Ersatzteilliste

    EXPLOSIONSZEICHNUNG / ERSATZTEILLISTE Unter folgendem Link Unter folgendem Link finden Sie die Explosionszeichnung finden Sie die Explosionszeichnung und die Ersatzteile-Liste: und die Ersatzteile-Liste: https://service.innovamaxx.de/cx608_spareparts https://service.innovamaxx.de/cx608_spareparts...
  • Seite 8: Montageanleitung

    MONTAGEANLEITUNG 63 64 1. Installation der vorderen und hinteren Stabilisatoren Positionieren Sie den vorderen Stabilisator (10) vor dem Hauptrahmen (1) und richten die Schraubenlöcher aneinander aus. Befestigen Sie den vorderen Stabilisator (10) mit zwei M10x57 Schraubbolzen (61), zwei Ø 10x Ø 20x1,5 PVC-Unterlegscheiben (62), zwei Ø10 grossen gewölbten Federscheiben (63) und zwei M10 Hutmuttern (64) auf der vorderen Krümmung des Hauptrahmens (1).
  • Seite 9 2. Montage von Frontsäule und Regelknopf für Zugspannung Entfernen Sie sechs M8x15 Schrauben (20), sechs Ø 10x Ø 20x1,5 PVC-Unterlegscheiben (62), sechs Ø8xØ20x2 gewölbte Federscheiben (65) und sechs Ø8 Federscheiben (66) aus dem Hauptrahmen (1). Schraubbolzen und Unterlegscheiben mit dem mitgelieferten S6 Inbusschlüssel entfernen. Setzen Sie das Spannseil (69) in das untere Loch der Frontsäule (8) ein und ziehen es aus der quadratischen Bohrung in der Frontsäule (8) heraus.
  • Seite 10 3. Montage der Handlauf-Arme links/rechts, Fussstangen links/rechts,Fusspedale links/rechts und der Fussstangenabdeckungen-A/B Entfernen Sie zwei M10x18 Schraubbolzen (23), zwei Federscheiben Ø18x10x2 (24), zwei grosse Unterlegcheiben Ø10x Ø20x2,0 (25) und zwei D Unterlegscheiben Ø28x5,0 (26) von den linken und rechten horizontalen Achsen der Frontsäule (8).
  • Seite 11 31 34 72 73 4. Handläufe links/rechts und linke/rechte Handlauf-Armabdeckungen-A/B Befestigen Sie die linken/rechten Handläufe (6, 7) mit vier M6x35 Schraubbolzen (28), vier Ø6 gewölbten Federscheiebn (29) und vier M6 Hutmuttern (30) an den linken/rechten Handlauf-Armen (4, 5). Ziehen Sie die Hutmuttern mit dem beiliegenden Multi Hex-Schlüssel mit Kreuzschlitz-Schraubendreher fest.
  • Seite 12: Computer-Betrieb

    5. Montage von Griffstange und Computer Entfernen Sie zwei M8x15 Schraubbolzen (20), zwei Ø10xØ20x1,5 PVC- Unterlegscheiben (62) und zwei Ø8xØ16x1,5 gewölbte Federscheiben (19) von der Frontsäule (8). Führen Sie die Handpulssensor-Drähte (15) von der Griffstange (9) aus durch die Bohrung in der Frontsäule (8) und ziehen sie dann vom oberen Ende der Frontsäule (8) heraus.
  • Seite 13 Funktion und Betrieb: SCAN - Drücken Sie die Taste "MODE", bis "SCAN" erscheint, der Monitor wird durch alle 6 Funktionen gehen: Zeit, Geschwindigkeit, Entfernung, Kalorien, Kilometerzähler und Puls. Jede Anzeige erscheint 6 Sekunden lang. TIME - (1) Die Gesamtzeit vom Trainingsbeginn bis zum Ende zählen. (2) Taste "MODE" drücken, bis "TIME" erscheint, Taste "SET"...
  • Seite 14: Wartung

    WARTUNG Reinigung: Der Cross-Trainer kann mit einem weichen Tuch und einem milden Reinigungsmittel gereinigt werden. Verwenden Sie keine Scheuermittel oder Lösungsmittel auf Kunststoffteilen. Bitte wischen Sie nach jedem Gebrauch Ihren Schweiss vom Cross-Trainer ab. Seien Sie vorsichtig, um übermässige Feuchtigkeit auf dem Computer-Anzeigefeld zu vermeiden, da dies eine elektrische Gefahr oder ein Versagen der Elektronik auslösen könnte.
  • Seite 15: Aufwärm- Und Abkühl-Routine

    AUFWÄRM- UND ABKÜHL-ROUTINE Ein gesundes Trainingsprogramm besteht aus Aufwärmen, dem Aerobik-Training, und Abkühlen. Sie sollten dieses Programm mindestens zwei- bis dreimal wöchentlich durchführen, mit einer Ruhepause von einem Tag zwischen den Trainings. Nach ein paar anfänglichen Monaten können Sie Ihr Training auf vier- bis fünfmal in der Woche ausdehnen. Eine AEROBIK-ÜBUNG ist jede nachhaltige Aktivität, die über Ihr Herz und Ihre Lunge Sauerstoff zu Ihren Muskeln bringt.
  • Seite 16 QUADRIZEPS-DEHNUNG Mit einer Hand an der Wand abstützen, um das Gleichgewicht besser zu halten, nach hinten greifen und den rechten Fuss nach oben ziehen. Die Ferse so nahe wie möglich an das Gesäss heranbringen. Halten Sie diese Stellung für 15 Sekunden und wiederholen es mit dem linken Fuss. INNENSCHENKEL-DEHNUNG Setzen Sie sich hin, mit den Fusssohlen gegeneinander, und Ihre Knie weisen nach aussen.
  • Seite 17: Anwendungssoftware (App)

    ANWENDUNGSSOFTWARE (APP) Sie können die App's über die hier abgebildeten QR-Codes herunterladen oder in Ihrem Store suchen. Voraussetzung für mobiles Gerät: Android 5.0 oder höher mit Bluetooth 4.0, iOS 8.0 oder höher. Android Kinomap Hinweise zur Nutzung der App: Als Android-Nutzer stellen Sie bitte sicher, dass unter dem Punkt "Einstellungen -> Gerätesicherheit" ein Haken unter "Unbekannte Quellen"...
  • Seite 18 Europäische Entsorgungsrichtlinie 2002/96/EG Entsorgen Sie Ihr Trainingsgerät in keinem Fall über den normalen Hausmüll. Entsorgen Sie das Gerät ausschließlich über einen kommunalen oder zugelassenen Entsorgungsbetrieb. Beachten Sie hierbei die aktuell geltenden Vorschriften. Erkundigen Sie sich im Zweifelsfall bei Ihrer Stadt- bzw. Gemeindeverwaltung nach einer sach- und umweltgerechten Entsorgungsmöglichkeit.
  • Seite 20 video tutorials for you! construction reduction 3 simple steps for a fast and safe start: 1. scan the QR code 2. watch videos 3. start fast and safely Link to the videos: https://service.innovamaxx.de/cx608_video...
  • Seite 21 Dear customer, We are pleased you chose a device from the SPORTSTECH product range. With sports equipment from SPORTSTECH you get the highest quality and latest technology. In order to fully use the potential of your device and be able to enjoy it for many years, please read this manual carefully before starting up and beginning of training, and use the device according to the instructions.
  • Seite 22 INDEX INHOUD IMPORTANT SAFETY INSTRUCTIONS ................23 EXPLODED DRAWING/SPARE PARTS LIST ..............24 ASSEMBLY INSTRUCTIONS ..................25 COMPUTER OPERATION ....................30 MAINTENANCE ......................31 TROUBLESHOOTING ....................31 WARM UP AND COOL DOWN ROUTINE ................. 32 APPLICATION SOFTWARE (APP) ................... 34 DECLARATION OF CONFORMITY ...................
  • Seite 23: Important Safety Instructions

    IMPORTANT SAFETY INSTRUCTIONS Basic precautions should always be followed, including the following safety instructions when using the crosstrainer: Read all instructions before using this equipment. • Read all the instructions in this manual and do warm up exercises before using this equipment. •...
  • Seite 24: Exploded Drawing/Spare Parts List

    EXPLODED DRAWING/SPARE PARTS LIST At the following link At the following link you will find the exploded drawing you will find the exploded drawing and the spare parts list: and the spare parts list: https://service.innovamaxx.de/cx608_spareparts https://service.innovamaxx.de/cx608_spareparts...
  • Seite 25: Assembly Instructions

    ASSEMBLY INSTRUCTIONS 1. Front and Rear Stabilizers Installation Position the Front Stabilizer (10) in front of Main Frame (1) and align bolt holes. Attach the Front Stabilizer (10) onto the front curve of the Main Frame (1) with two M10x57 Bolts (61), two Ø 10x Ø 20x1.5 PVC washer (62),two Ø10 Big Curve Washers (63)and two M10 Cap Nuts (64).
  • Seite 26 2. Front Post and Tension Control Knob Installation Remove six M8x15 Bolts (20), six Ø 10x Ø 20x1.5 pvc washer (62),six Ø8xØ20x2 Curva Washer (65) and six Ø8 Spring Washer (66) from the Main Frame (1). Remove bolts and washers with the S6 Allen Wrench provided. Insert the Tension Cable (69) through into the bottom hole of Front Post (8) and pull it out from the square hole of Front Post (8).
  • Seite 27 3. Left/Right Handrail Arms, Left/Right Foot Bars, Left/Right Foot Pedals, and Foot Bar Covers-A/B Installation Remove two M10x18 Bolts (23), two Spring Washer Ø18x10x2 (24), two Big Washer Ø10x Ø20x2.0 (25), and two D Washer Ø28x5.0 (26) from the left and right horizontal axes of the Front Post (8). Attach the Left Handrail Arm (4) onto the left horizontal axis of the Front Post (8) with one M10x18 Bolts (23), one Spring Washer Ø18x10x2 (24), one Big Washer Ø10x Ø20x2.0 (25), and one D Washer Ø28x5.0 (26) that were removed.
  • Seite 28 31 34 72 73 4. Left/Right and Left/Right Handrail Arm Covers-A/B Handrails Attach the Left/Right Handrails (6, 7) onto the Left/Right Handrail Arms (4, 5) with four M6x35 Bolts (28), four Ø6 Curve Washers (29), and four M6 Cap Nuts (30). Tighten cap nuts with the Multi Hex Tool with Phillips Screwdriver provided.
  • Seite 29 5. Handlebar and Computer Installation Remove two M8x15 Bolts (20) ,two Ø10xØ20x1.5 pvc washer(62) and two Ø8xØ16x1.5 Curve Washers (19) from the Front Post (8). Insert the Hand Pulse Sensor Wires (15) from the Handlebar (9) into the hole on the Front Post (8) and then pull them out from the top end of the Front Post (8).
  • Seite 30: Computer Operation

    COMPUTER OPERATION Functional buttons: MODE - Push down for selecting functions SET - To Set the consumer movement of time, distance, calories and hand pulse. RESET - For resetting consumer movement of time, distance, calories and hand pulse. Function and operations: SCAN - Press “MODE”...
  • Seite 31: Maintenance

    MAINTENANCE Cleaning: The elliptical trainer can be cleaned with a soft cloth and mild detergent. Do not use abrasives or solvents on plastic parts. Please wipe your perspiration off the elliptical trainer after each use. Be careful not get excessive moisture on the computer display panel as this might cause an electrical hazard or electronics to fail.
  • Seite 32: Warm Up And Cool Down Routine

    WARM UP AND COOL DOWN ROUTINE A good exercise program consists of a warm-up, aerobic exercise, and a cool down. Do the entire program at least two to three times a week, resting for a day between workouts. After several months you can increase your workouts to four or five times per week.
  • Seite 33 QUADRICEPS STRETCH With one hand against a wall for balance, reach behind you and pull your right foot up. Bring your heel as close to your buttocks as possible. Hold for 15 counts and repeat with left foot. INNER THIGH STRETCH Sit with the soles of your feet together and your knees pointing outward.
  • Seite 34: Application Software (App)

    APPLICATION SOFTWARE (APP) You can download the app using the QR codes shown here or search in your store. Minimum compatibility specifications for mobile device; android 5.0 or higher with Bluetooth 4.0, iOS 8.0 or higher. Android Kinomap Notes on using the App: As an android user, please make sure that under "Settings ->...
  • Seite 35 European Disposal Directive 2002/96/EG Never dispose your training device in your regular household waste. Dispose the device only at a local or approved disposal. Take care of the currently applicable regulations. If you have doubts contact your local authorities for information about a correct and environment friendly disposal option.
  • Seite 37 tutoriales en video Nuestros para usted! Construcción Utilizar Reducción En 3 sencillos pasos para un arranque rápido y seguro: 1. Escanear el código QR 2. Ver vídeos 3. Comienza rápido y seguro Enlace a los videos: https://service.innovamaxx.de/cx608_video...
  • Seite 38 Estimado cliente, Nos complace que haya elegido un dispositivo de la línea de productos SPORTSTECH. Con el equipo deportivo de SPORTSTECH usted obtiene la más alta calidad y la mejor tecnología. Con el fin de usar todo el potencial de su dispositivo y para que pueda disfrutarlo durante muchos años, por favor lea este manual cuidadosamente antes de comenzar a ejercitarse, y use el dispositivo...
  • Seite 39 ÍNDICE INHOUD INSTRUCCIONES DE SEGURIDAD IMPORTANTES ............40 DIBUJO DE EXPLSOIÓN / LISTA DE REPUESTOS ............41 INSTRUCCIONES DE ENSAMBLAJE ................42 FUNCIONAMIENTO DE LA CONSOLA ................46 MANTENIMIENTO ......................48 SOLUCIÓN DE PROBLEMAS ..................48 RUTINA DE CALENTAMIENTO Y ENFRIAMIENTO .............. 49 SOFTWARE (APLICACIÓN) ....................
  • Seite 40: Instrucciones De Seguridad Importantes

    INSTRUCCIONES DE SEGURIDAD IMPORTANTES Al usar la caminadora siempre se deben seguir las precauciones básicas, incluyendo las siguientes instrucciones de seguridad importantes. Lea todas las instrucciones antes de usar este producto. • Antes de ejercitarse, para evitar lesiones musculares, es necesario hacer ejercicios de calentamiento en cada posición corporal.
  • Seite 41: Dibujo De Explsoión / Lista De Repuestos

    DIBUJO DE EXPLSOIÓN / LISTA DE REPUESTOS En el siguiente enlace En el siguiente enlace encontrarás el dibujo de explosión encontrarás el dibujo de explosión y la lista de repuestos: y la lista de repuestos: https://service.innovamaxx.de/cx608_spareparts https://service.innovamaxx.de/cx608_spareparts...
  • Seite 42: Instrucciones De Ensamblaje

    INSTRUCCIONES DE ENSAMBLAJE 63 64 1. Instalación del estabilizador frontal y posterior Ubique el estabilizador frontal (10) frente a la estructura principal (1) y alinee los agujeros de los tornillos. Fije el estabilizador frontal (10) en la curva frontal de la estructura principal (1) con dos tornillos M10x57 (61), dos arandelas plásticas Ø...
  • Seite 43 2. Instalación del poste frontal y de la perilla de control de tensión Retire seis tornillos M8x15 (20), seis arandelas plásticas Ø 10x Ø 20x1.5 (62), seis arandelas curvas Ø8xØ20x2 (65) y seis arandelas elásticas Ø8 (66) de la estructura principal (1). Retire los tornillos y arandelas con la llave Allen S6 incluida.
  • Seite 44 3. Instalación del reposabrazos izquierdo/derecho, reposapiés izquierdo/derecho, pe- dal izquierdo/derecho, cubierta para reposapiés A/B Retire dos tornillos M10x18 (23), dos arandelas elásticas Ø18x10x2 (24), dos arandelas grandes Ø10x Ø20x2.0 (25), y dos arandelas Ø28x5.0 (26) del eje horizontal izquierdo y derecho del poste frontal (8). Fije el reposabrazos izquierdo (4) al eje horizontal izquierdo del poste frontal (8) con un tornillo M10x18 (23), una arandela elástica Ø18x10x2 (24), una arandela grande Ø10x Ø20x2.0 (25), y una arandela Ø28x5.0 (26) retiradas previamente.
  • Seite 45 31 34 72 73 4. Instalación del soporte izquierdo/derecho y de la cubierta derecha/izquierda A/B del reposabrazos Fije el soporte izquierdo y derecho (6, 7) en el reposabrazos izquierdo y derecho (4, 5) con cuatro tornillos M6x35 (28), cuatro arandelas curvas Ø6 (29), y cuatro tuercas de sombrete M6 (30). Apriete las tuercas de sombrete usando la herramienta multihexagonal con destornillador incluido.
  • Seite 46: Funcionamiento De La Consola

    5. Instalación del manillar y la consola Retire dos tornillos M8x15 (20), dos arandelas plásticas Ø10xØ20x1.5 (62) y dos arandelas curvas Ø8xØ16x1.5 (19) del poste frontal (8). Inserte los cables del sensor de pulso (15) del manillar (9) en el agujero del poste frontal (8) y luego extráigalos desde el extremo superior del poste frontal (8).
  • Seite 47: Funciones Y Operaciones

    Funciones y operaciones: SCAN - Presione la tecla “MODE” hasta que “SCAN” aparezca, la pantalla pasará por todas las 6 funciones: Time, speed, distance, calorie, odometer y pulse. Cada pantalla durará 6 segundos. TIME - (1) Cuenta el tiempo total desde el comienzo del ejercicio hasta el final. (2) Presione la tecla “MODE” hasta que “TIME”...
  • Seite 48: Mantenimiento

    MANTENIMIENTO Limpieza: La bicicleta elíptica puede limpiarse con un paño suave y un detergente suave. No use abrasivos o disolventes sobre las piezas plásticas. Por favor limpie su sudor de la bicicleta elíptica de cada uso. Tenga cuidado de no mojar en exceso la pantalla de la consola ya que esto podría causar riesgo eléctrico o que las piezas electrónicas fallen.
  • Seite 49: Rutina De Calentamiento Y Enfriamiento

    RUTINA DE CALENTAMIENTO Y ENFRIAMIENTO Un buen programa de ejercicios está compuesto de un calentamiento, ejercicios aeróbicos y un enfriamiento. haga todo el programa al menos dos o tres veces por semana, descansando un día entre ejercicios. Después de varios meses puede aumentar sus ejercicios hasta cuatro o cinco veces por semana.
  • Seite 50 ESTIRAMIENTO DE CUÁDRICEPS Con una mano hacia la pared para equilibrarse, mueva su otra mano hacia atrás y levante su pie derecho. Lleve su talón lo más cerca posible de sus glúteos. Aguante durante 15 segundos y repita con el pie izquierdo. ESTIRAMIENTO DEL MUSLO INTERIOR Siéntese con las suelas de sus pies juntas y sus rodillas apuntando hacia afuera.
  • Seite 51: Software (Aplicación)

    SOFTWARE (APLICACIÓN) Puede descargar las aplicaciones usando los códigos QR mostrados aquí o buscarlos en la tienda. Requisitos para dispositivos móviles: Android 5.0 o superior con Bluetooth 4.0, iOS 8.0 o superior. Android Kinomap Consejos para el uso de las aplicaciones: Como usuario de Android, por favor, asegúrese de marcar la opción "Fuentes desconocidas"...
  • Seite 52 Directiva Europea de Residuos 2002/96/EG Nunca elimine su dispositivo de entrenamiento en su basura doméstica ordinaria. Elimine el dispositivo únicamente en un sitio de eliminación aprobado. Tenga en cuenta las normativas aplicables actualmen- te. Si tiene dudas contacte a las autoridades locales para conseguir información sobre una opción de eliminación adecuada y ecológica.
  • Seite 53 MANUEL FRANÇAIS...
  • Seite 54 tutoriels vidéo pour vous! construction utilisation réduction 3 étapes simples pour un démarrage rapide et sécurisé: 1. Scannez le code QR 2. Regarder les vidéos 3. Démarrez rapidement et en toute sécurité. Lien vers les vidéos: https://service.innovamaxx.de/cx608_video...
  • Seite 55 Cher client, Nous sommes ravis que vous ayez choisi un appareil de la gamme de produits SPORTSTECH. Avec les équipements sportifs de SPORTSTECH, vous obtenez la plus haute qualité et la meilleure technologie. Afin d'utiliser pleinement le potentiel de votre appareil et de pouvoir l'apprécier pendant de nombreu- ses années, lisez attentivement ce manuel avant l'utilisation et le début de votre entraînement et utilisez...
  • Seite 56 SOMMAIRE INHOUD INFORMATIONS DE SÉCURITÉ IMPORTANTES ..............57 DESSIN ÉCLATÉ/LISTE DES PIÈCES DE RECHANGE ............58 INSTRUCTIONS D'ASSEMBLAGE ................... 59 OPERATIONS DE L'ORDINATEUR ................... 63 ENTRETIEN ......................... 65 DÉPANNAGE ....................... 65 EXERCICES D'ÉCHAUFFEMENT ET DE REFROIDISSEMENT ..........66 LOGICIEL D’APPLICATION (APP) ..................68 DECLARATION OF CONFORMITY ...................
  • Seite 57: Informations De Sécurité Importantes

    INFORMATIONS DE SÉCURITÉ IMPORTANTES Les précautions de base, y compris les consignes de sécurité importantes suivantes doivent toujours être respectées lorsque vous utilisez ce tapis roulant. Lisez toutes les instructions avant d'utiliser cette appareil. • Avant l'exercice, afin d'éviter de blesser le muscle, il faut effectuer des exercices •...
  • Seite 58: Dessin Éclaté/Liste Des Pièces De Rechange

    DESSIN ÉCLATÉ/LISTE DES PIÈCES DE RECHANGE A l‘adresse suivante A l‘adresse suivante vous trouverez le dessin éclaté vous trouverez le dessin éclaté et la liste des pièces de rechange : et la liste des pièces de rechange : https://service.innovamaxx.de/cx608_spareparts https://service.innovamaxx.de/cx608_spareparts...
  • Seite 59: Instructions D'assemblage

    INSTRUCTIONS D'ASSEMBLAGE 1. Installation des stabilisateurs avant et arrière Positionnez le stabilisateur avant (10) devant le cadre principal (1) et alignez les trous du boulon. Fixez le stabilisateur avant (10) sur la courbe frontale du cadre principal (1) avec deux boulons M10x57 (61), deux rondelles en PVC Ø...
  • Seite 60 2. Installation du poste avant et du bouton de contrôle de la tension Enlevez six boulons M8x15 (20), six rondelles Ø 10x Ø 20x1.5 pvc (62), six rondelles courbées Ø8xØ20x2 (65) et six rondelles à ressort Ø8 (66) du cadre principal (1). Retirez les boulons et les rondelles avec la clé Allen S6 fournie. Insérez le câble de tension (69) dans le trou inférieur du poste avant (8) et retirez-le du trou carré...
  • Seite 61 3. Bras droite / gauche de mains courantes, barres de pied gauche / droite, pédales gauche / droite et installation des couvre-pieds-A / B Retirez deux Boulons M10x18 (23), deux Rondelles à ressort18, 10x2x2 (24), deux grandes rondelles Ø10x Ø20x2.0 (25) et deux D rondelles Ø28x5.0 (26) des axes horizontaux gauche et droit du Poste Avant ( 8). Fixez le bras gauche de la main courante (4) sur l'axe horizontal gauche du poste avant (8) avec un boulon M10x18 (23), une rondelle élastique Ø18x10x2 (24), une grande rondelle Ø10x Ø20x2.0 (25) et une rondelle D Ø28x5.0 (26) qui ont été...
  • Seite 62 31 34 72 73 4. Gauche/Droite et Gauche/droite couvercle de mains courantes A / B mains courantes Fixez les mains courantes gauche / droite (6, 7) sur les bras des mains courantes gauche / droite (4, 5) avec quatre boulons M6x35 (28), quatre rondelles de courbe Ø6 (29) et quatre écrous M6 (30). Serrez Écrous avec l'outil Multi Hex avec tournevis Phillips fourni.
  • Seite 63: Operations De L'ordinateur

    5. Installation du guidon et de l'ordinateur Retirez deux boulons M8x15 (20), deux rondelles en PVC Ø10xØ20x1,5 (62) et deux rondelles de courbe Ø8xØ16x1.5 (19) du poste avant (8). Insérez les fils du capteur d'impulsions à main (15) dans le guidon (9) dans le trou du poste avant (8), puis retirez-les de l'extrémité...
  • Seite 64 Fonctions et operations: SCAN - Appuyez sur le bouton « MODE » jusqu'à ce que « SCAN » apparaîsse, le moniteur tournera à travers toutes les 6 fonctions: temps, vitesse, distance, calories, odomètre et l'impulsion. Chaque affichage tiendra 6 secondes. TIME - (1) Comptez la durée totale de l'exercice du début à...
  • Seite 65: Entretien

    ENTRETIEN Nettoyage: Le vélo elliptique peut être nettoyé avec un chiffon doux et un détergent doux. N'utilisez pas des abrasifs ou des solvants sur des pièces en plastique. Veuillez essuyer votre transpiration du vélo elliptique après chaque utilisation. Veillez à ne pas avoir d'humidité excessive sur l'écran de l'ordinateur, car cela pourrait causer un risque électrique ou court-circuit.
  • Seite 66: Exercices D'échauffement Et De Refroidissement

    EXERCICES D'ÉCHAUFFEMENT ET DE REFROIDISSEMENT Un bon programme d'exercice consiste en un échauffement, un exercice aérobique et un refroidissement. Faites l'ensemble du programme au moins deux à trois fois par semaine, avec un jour de repos entre les séances d'entraînement. Après plusieurs mois, vous pouvez augmenter le nombre de vos séances d'entraînement à quatre ou cinq fois par semaine.
  • Seite 67 ETIREMENT DU QUADRICEPS D'une seule main contre un mur pour l'équilibre, essayez d'atteindre votre derrière et etendez votre pied droit. Apportez votre talon aussi près que possible de vos fesses. Comptez 15 fois et répétez avec le pied gauche. ETIREMENT DE LA CUISSE Asseyez-vous avec les plantes de vos pieds ensemble et vos genoux pointant vers l'extérieur.
  • Seite 68: Logiciel D'application (App)

    LOGICIEL D’APPLICATION (APP) Pour télécharger l’application, scannez son code QR ou recherchez-la dans votre App Store. Conditions requises : l’appareil mobile doit correspondre à un Android 5.0 ou davantage avec Blue- tooth 4.0 ou un iOS 8.0 ou davantage. Android Kinomap Informations sur l’utilisation de l’application : Les utilisateurs d’Android doivent veiller à...
  • Seite 69 Directive européenne n° 2002/96/EG relative aux déchets Ne jeter en aucun cas l‘appareil avec les ordures ménagères. Ne disposez de l‘appareil que dans les décharges publiques (Gestion des déchets communaux de la ville). Pour leur élimination respectez les réglementations en vigueur locales. Renseignez-vous à la mairie ou à la commune de votre ville sur les possibilités offertes pour éliminer votre appareil correctement et en respectant l‘environnement.
  • Seite 70 MANUALE D’USO ITALIANO...
  • Seite 71 Video Tutorial Il nostro per te! Montaggio Utilizzo Smontaggio 3 semplici passaggi per un inizio veloce e sicuro: 1. Scannerizza il QR-Code 2. Guarda il Video 3. Inizia ad allenarti! Link per il Video: https://service.innovamaxx.de/cx608_video...
  • Seite 72 Gentile cliente Siamo lieti che abbiate scelto un dispositivo della gamma SPORTSTECH. Con le attrezzature sportive di SPORSTECH potrete usufruire della più alta qualità e della più recente tecnologia. Per sfruttare a pieno il potenziale del dispositivo e poterlo utilizzare per molti anni, raccomandiamo di leggere attentamente questo manuale prima di iniziare l’allenamento e di utilizzare il dispositivo...
  • Seite 73 INDICE INHOUD IMPORTANTI ISTRUZIONI DI SICUREZZA ................ 74 DISEGNO ESPLOSO / LISTA DEI PEZZI DI RICAMBIO ............75 ISTRUZIONI DI MONTAGGIO ..................76 FUNZIONAMENTO DEL COMPUTER ................80 MANUTENZIONE ......................82 RISOLUZIONE DEI PROBLEMI ..................82 ROUTINE DI RISCALDAMENTO E RAFFREDDAMENTO ............. 83 SOFTWARE DI UTILIZZO (APP) ..................
  • Seite 74: Importanti Istruzioni Di Sicurezza

    IMPORTANTI ISTRUZIONI DI SICUREZZA Precauzioni minime, incluse importanti istruzioni di sicurezza incluse nel presente manual dovrebbero essere sempre seguite durante l’uso del tapisroulant. Leggere tutte le istruzioni prima di utilizzare il dispositivo. • Prima dell’allenamento, per evitare di danneggiare il muscolo, è necessario fare degli esercizi di riscaldamento di ogni posizione del corpo.
  • Seite 75: Disegno Esploso / Lista Dei Pezzi Di Ricambio

    DISEGNO ESPLOSO / LISTA DEI PEZZI DI RICAMBIO Al seguente link Al seguente link troverete il disegno esploso troverete il disegno esploso e la lista dei pezzi di ricambio: e la lista dei pezzi di ricambio: https://service.innovamaxx.de/cx608_spareparts https://service.innovamaxx.de/cx608_spareparts...
  • Seite 76: Istruzioni Di Montaggio

    ISTRUZIONI DI MONTAGGIO 63 64 1. Installazione degli stabilizzatori anteriori e posteriorin Posizionare lo stabilizzatore anteriore (10) davanti al telaio principale (1) e allineare i fori dei bulloni. Fissare lo stabilizzatore anteriore (10) sulla curva anteriore del telaio principale (1) con due bulloni M10x57 (61), due rondelle in PVC Ø...
  • Seite 77 2. Installazione della manopola di controllo della tensione e postazione anteriore Rimuovere sei bulloni M8x15 (20), sei rondelle in PVC Ø 10x Ø 20x1.5 (62), sei rondelle curve Ø8 x Ø20 x 2 (65) e sei rondelle a molla Ø8 (66) dal telaio principale (1). Rimuovere i bulloni e le rondelle con la chiave a brugola S6 in dotazione.
  • Seite 78 3. Installazione corrimano sinistro / destro, sostegno per pedale sinistro / destro, pe- dale sinistro / destro e coperture pedali-A / B Rimuovere due dadi M10x18 (23), due rondelle a molla Ø18x10x2 (24), due rondelle grandi Ø10x Ø20x2.0 (25) e due rondelle a D Ø28x5,0 (26) dagli assi orizzontali sinistro e destro della postazione anteriore 8).
  • Seite 79 31 34 72 73 4. Corrimano sinistro / destro e coperture per corrimano destro / sinistro Attaccare i corrimani destro e sinistro (6, 7) sul braccio sinistro / destro (4, 5) con quattro bulloni M6x35 (28), quattro rondelle curve Ø6 e quattro dadi con copertura M6 (30). Stringere le protezioni dei dadi con lo strumento multi esagonale con il cacciavite Phillips fornito.
  • Seite 80: Funzionamento Del Computer

    5. Manubrio e installazione del computer Rimuovere due bulloni M8x15 (20), due rondelle in PVC Ø10xØ20x1.5 (62) e due rondelle curve Ø8xØ16x1.5 (19) dalla postazione frontale (8). Inserire i fili del sensore a impulsi (15) dal manubrio (9) nel foro sulla postazione frontale (8) e quindi estrarli dall'estremità...
  • Seite 81 Funzione e operazioni: SCAN - Premere il pulsante "MODE" fino a visualizzare "SCAN", il monitor ruoterà attraverso tutte e 6 le funzioni: tempo, velocità, distanza, calorie, contachilometri e pulsazioni. Ogni display verrà mostrato per 6 secondi. TIME - ((1) Conta il tempo totale dall'inizio all'esercizio. (2) Premere il pulsante "MODE" fino a visualizzare "TIME", premere il tasto "SET"...
  • Seite 82: Manutenzione

    MANUTENZIONE Pulizia: L’ellittica può essere pulita con un panno morbido e un detergente delicato. Non utilizzare sostanze abrasive o solventi sulle parti in plastica. Dopo ogni utilizzo, pulire il sudore dall’apparecchio. Fare attenzione a non creare un’umidità eccessiva sul pannello del computer, in quanto ciò potrebbe causare un pericolo elettrico o un malfunzionamento dei dispositivi elettrici.
  • Seite 83: Routine Di Riscaldamento E Raffreddamento

    ROUTINE DI RISCALDAMENTO E RAFFREDDAMENTO Un buon programma di allenamento consiste in un riscaldamento, un esercizio aerobico e un raffreddamento. Completa l'intero programma almeno due o tre volte alla settimana, riposando per un giorno tra gli allenamenti. Dopo alcuni mesi puoi incrementare la frequenza dei tuoi allenamenti a quattro o cinque volte alla settimana. L' ESERCIZIO AEROBICO è...
  • Seite 84 STRETCHING DEI QUADRICIPITI Con una mano contro un muro per mantenere l'equilibrio, andare verso l’indietro e sollevare il piede destro verso l'alto. Portare il tallone più vicino alle natiche possibile. Trattenere per 15 conteggi e ripetere con il piede sinistro. STRETCHING INTERNO COSCIA Sedersi con le suole dei piedi unite e le ginocchia che puntano verso l'esterno.
  • Seite 85: Software Di Utilizzo (App)

    SOFTWARE DI UTILIZZO (APP) Puoi scaricare l'app utilizzando i codici QR mostrati qui o cercando direttamente nel negozio. Pre- requisito per il dispositivo mobile: Android 5.0 o versioni successive con Bluetooth 4.0, iOS 8.0 o versioni successive. Android Kinomap Note sull'uso dell'app: Come utente Android, assicurati che in "Impostazioni ->...
  • Seite 86 Direttive Europee 2002/96/EG per lo smaltimento Non gettare mai il tuo attrezzo sportivo nell’immondizia normale. Smaltisci l’attrezzo solo tramite un siste- ma locale o approvato. Tieni in conto le regole applicabili correntemente. Se hai dubbi contatta le autorità locali per informazioni circa le opzioni per uno smaltimento corretto ed ecosostenibile. Batterie / Batterie ricaricabili In accordo con il regolamento per le batterie, sei obbligato legalmente a ritornare tutte le batterie usate ed esaurite.
  • Seite 87 GEBRUIKERSAANWIJZING NEDERLANDS...
  • Seite 88 Onze video-tutorials voor jou! Montage Gebruik Demontage In 3 eenvoudige stappen voor een snelle en veilige start: 1. Scan de QR-code 2. Bekijk video's 3. Begin snel en veilig Koppeling naar de video's: https://service.innovamaxx.de/cx608_video...
  • Seite 89 Geachte klant We zijn blij dat je een apparaat uit het SPORTSTECH-assortiment hebt gekozen. De sportuitrusting van SPORTSTECH biedt je de hoogste kwaliteit en de nieuwste technologie. Lees deze gebruikershandleiding vóór gebruik aandachtig door en gebruik het apparaat zoals aange- geven.
  • Seite 90 INHOUD BELANGRIJKE VEILIGHEIDSINSTRUCTIES ............... 91 EXPLOSIETEKENING / ONDERDELENLIJST ..............92 MONTAGE-INSTRUCTIES....................93 WERKING VAN DE COMPUTER ..................97 ONDERHOUD ......................99 PROBLEMEN OPLOSSEN ..................... 99 WARMING-UP EN COOLING-DOWN ................100 APPLICATIESOFTWARE (APP) ..................102 DECLARATION OF CONFORMITY ................... 104...
  • Seite 91: Belangrijke Veiligheidsinstructies

    BELANGRIJKE VEILIGHEIDSINSTRUCTIES Deze algemene veiligheidsinformatie moet strikt worden nageleefd bij het gebruik van dit product. Lees alle instructies voordat je het apparaat gebruikt. • Voorafgaand aan de training zijn er opwarmingsoefeningen voor het hele lichaam nodig om spierblessures te voorkomen. Zie de paragraaf Warming-up en cooling-down. Na de training is het raadzaam om het lichaam te laten ontspannen om af te koelen.
  • Seite 92: Explosietekening / Onderdelenlijst

    EXPLOSIETEKENING / ONDERDELENLIJST Onder de volgende koppeling Onder de volgende koppeling vind je de explosietekening vind je de explosietekening en de lijst van reserveonderdelen: en de lijst van reserveonderdelen: https://service.innovamaxx.de/cx608_spareparts https://service.innovamaxx.de/cx608_spareparts...
  • Seite 93: Montage-Instructies

    MONTAGE-INSTRUCTIES 63 64 1. Plaatsing van de voorste en achterste stabilisatoren Plaats de voorste stabilisator (10) voor het hoofdframe (1) en lijn de schroefgaten uit. Bevestig de voorste stabilisator (10) met twee M10x57-schroefbouten (61), twee Ø10x Ø20x1,5 pvc-sluitringen (62), twee Ø10 grote gegolfde veerringen (63) en twee M10-dopmoeren (64) op de voorste kromming van het hoofdframe (1).
  • Seite 94 2. Montage van de stuurbuis en regelknop voor trekspanning Verwijder de zes M8x15-schroeven (20), zes Ø10x Ø20x1,5 pvc-sluitringen (62), zes Ø8xØ20x2 gegolfde veerringen (65) en zes Ø8-veerringen (66) uit het hoofdframe (1). Verwijder de schroefbouten en sluitringen met de meegeleverde S6-inbussleutel. Plaats de spankabel (69) in de onderste opening van de stuurbuis (8) en trek hem uit de vierkante opening in de stuurbuis (8).
  • Seite 95 3. Montage van de linkse en rechtse ondersteuningsbuis voor de armen, linkse en rechtse voetstangen, linkse en rechtse voetpedalen en voetstangkappen A en B Verwijder twee M10x18-schroefbouten (23), twee Ø18x10x2 veerringen (24), twee grote Ø10x Ø20x2,0 sluitringen (25) en twee Ø28x5,0 D-sluitringen (26) van de linker en rechter horizontale assen van de stuurbuis (8). Bevestig de linker ondersteuningsbuis (4) met een M10x18-schroefbout (23), een Ø18x10x2 veerring (24), een grote Ø10x Ø20x2,0 sluitring (25) en een Ø28x5,0 D-sluitring (26) die je eerder had verwijderd, op de linker horizontale as van de stuurbuis (8).
  • Seite 96 31 34 72 73 4. Linker en rechter swingarm en linker en rechter afdekkap van de ondersteunings- buis A/B Bevestig de linker en rechter swingarm (6, 7) aan de linker en rechter ondersteuningsbuis (4, 5) met vier M6x35- schroefbouten (28), vier Ø6 gegolfde veerringen (29) en vier M6-dopmoeren (30). Draai de dopmoeren vast met de meegeleverde multi-inbussleutel met een kruiskopschroevendraaier.
  • Seite 97: Werking Van De Computer

    5. Montage van de vaste steun en de computer Verwijder twee M8x15-schroefbouten (20), twee Ø10xØ20x1,5 pvc-sluitringen (62) en twee Ø8xØ16x1,5 gegolfde veerringen (19) van de stuurbuis (8). Steek de kabel van de hartslagsensor (15) van de vaste steun (9) door het gat in de stuurbuis (8) en trek deze vervolgens uit de bovenkant van de stuurbuis (8).
  • Seite 98 Functies en werking: SCAN: druk op de “MODE”-knop tot "SCAN" verschijnt. Het display gaat door de 6 functies: tijd, snelheid, afstand, calorieën, kilometerteller en hartslag. Elke functie verschijnt gedurende 6 seconden. TIME: (1) telt de totale tijd vanaf het begin tot het einde van de training. (2) Druk op de "MODE"-knop tot "TIME" verschijnt.
  • Seite 99: Onderhoud

    ONDERHOUD Reiniging: De crosstrainer kan worden gereinigd met een zachte doek en een mild schoonmaakmiddel. Gebruik geen schuurmiddelen of oplosmiddelen op onderdelen van kunststof. Veeg na elk gebruik je zweet van de crosstrainer. Wees voorzichtig en voorkom overmatig vocht op het beeldscherm van de computer, omdat dit elektrische gevaar of storingen van de elektronica kan veroorzaken.
  • Seite 100: Warming-Up En Cooling-Down

    WARMING-UP EN COOLING-DOWN Een gezond trainingsprogramma bestaat uit een warming-up, een aerobe training en cooling-down. Je moet dit programma minstens twee tot drie keer per week uitvoeren, met een rustpauze van één dag tussen de trainingen. Na enkele maanden, kun je de training uitbreiden tot vier of vijf keer per week. Een AEROBE OEFENING is elke duurzame activiteit die zuurstof naar je spieren via je hart en longen brengt.
  • Seite 101 STRETCH VAN DE QUADRICEPS Steun met een hand tegen de muur om betere balans te houden, grijp je rechtervoet langs achteren en trek deze naar boven. Breng de hiel zo dicht mogelijk tegen de billen. Houd gedurende 15 seconden aan en herhaal deze beweging met de linkervoet.
  • Seite 102: Applicatiesoftware (App)

    APPLICATIESOFTWARE (APP) Je kunt de app's downloaden met behulp van de hier weergegeven QR-codes of zoeken in je store. Voorwaarde voor mobiel apparaat: Android 5.0 of hoger met Bluetooth 4.0, iOS 8.0 of hoger. Android Kinomap Opmerkingen over het gebruik van de app: Zorg er als Android-gebruiker voor dat onder "Instellingen ->...
  • Seite 103 Europese Verwijderingsrichtlijn 2002/96/EG Gooi je trainingsapparatuur nooit bij het normale huisvuil. Voer het apparaat uitsluitend af via een ge- meentelijk of erkend afvalverwerkingsbedrijf. Neem de geldende voorschriften in acht. In geval van twijfel, vraag je de gemeente of het stadbestuur naar een geschikte en milieuvriendelijke afvalverwijderingsoptie. Batterijen/accu's Volgens de batterijverordening ben je als eindgebruiker wettelijk verplicht om alle gebruikte accu's en batterijen in te leveren.
  • Seite 104: Declaration Of Conformity

    DECLARATION OF CONFORMITY Unter folgendem Link Unter folgendem Link finden Sie die Konformitätserklärung: finden Sie die Konformitätserklärung: At the following link At the following link you will find the declaration of conformity: you will find the declaration of conformity: https://service.innovamaxx.de/cx608_conformity https://service.innovamaxx.de/cx608_conformity...
  • Seite 106 Verkauf durch / Distributed by / Distribuido por / Distribué / Distribuito da / Verkocht door Innovamaxx GmbH Potsdamer Platz 11 10785 Berlin +49 30 220 663 530 service@innovamaxx.de http://www.sportstech.de...