Herunterladen Inhalt Inhalt Diese Seite drucken
Inhaltsverzeichnis

Werbung

Verfügbare Sprachen
  • DE

Verfügbare Sprachen

  • DEUTSCH, seite 1
FITNESS TECHNOLOGY MADE IN GERMANY
CX640
DE
EN
ES
FR
IT

Werbung

Inhaltsverzeichnis
loading

Inhaltszusammenfassung für SPORTSTECH CX640

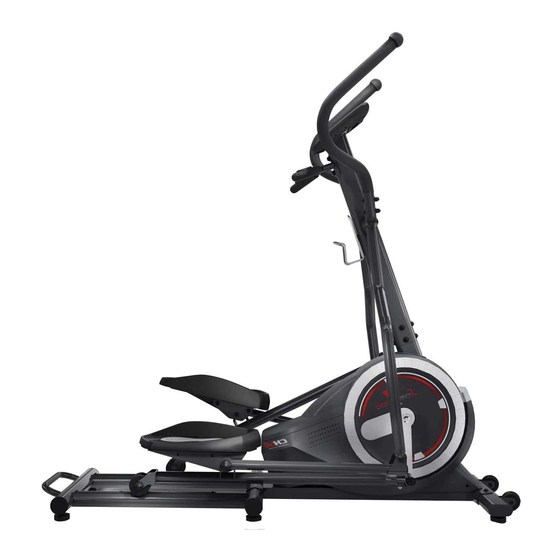
  • Seite 1 FITNESS TECHNOLOGY MADE IN GERMANY CX640...
  • Seite 3: Video Tutorials

    Video Tutorials Unsere für dich! Aufbau Benutzung Abbau In 3 einfachen Schritten zum schnellen und sicheren Start: 1. QR-Code scannen 2. Videos anschauen 3. schnell und sicher starten Link zu den Videos: www.sportstech.de/qr/cx640.html...
  • Seite 4 Sehr geehrter Kunde wir freuen uns, dass Sie sich für ein Gerät aus der SPORTSTECH Produktpalette entschieden haben. SPORTSTECH Sportgeräte bieten Ihnen höchste Qualität und neueste Technologie. Um die Leistungsfähigkeit des Gerätes voll nutzen zu können und viele Jahre Freude an Ihrem Gerät zu haben, lesen Sie bitte vor der Inbetriebnahme und dem Beginn des Trainings dieses Benutzerhandbuch sorgfältig durch und verwenden Sie das Gerät den Anweisungen entsprechend.
  • Seite 5: Inhaltsverzeichnis

    INHALT Wichtige Sicherheitshinweise Teileliste Explosionszeichnung Werkzeug Montage Anleitung Wichtige Dinge Vor Dem Training Funktionen Und Features Hauptfunktionen Programmeinführung Und Bedienung Bedienung LCD Trainingsgrafiken Benutzerdefinierte Programme Herzfrequenzprogrammprofile Körperfettmessung Wartung Fehlerbehebung Dehnungsübungen...
  • Seite 6: Wichtige Sicherheitshinweise

    WICHTIGE SICHERHEITSHINWEISE Diese allgemeinen Sicherheitsinformationen müssen unbedingt für die Benutzung dieses Produkt beachtet werden. Lesen Sie alle Hinweise, bevor Sie das Produkt in Benutzung nehmen. ACHTUNG: Konsultieren Sie einen Arzt, bevor Sie trainieren. Dieser Hinweis ist unbedingt für Ältere oder gesundheitlich eingeschränkte Personen zu beachten. Lesen Sie alle Sicherheits hinweise dieser Anleitung sorgfältig, bevor Sie das Gerät benutzen.
  • Seite 7: Teileliste

    TEILE LISTE Description Qty No Description Hauptrahmen Unterlegscheibe Ø8x Ø20x2,0 Linker Handlauf-Arm Bolzen M8X25 Linkes Fussrohr Kunststoffbuchse Grosse Unterlegscheibe Rechtes Fussrohr Ø8xØ25x2,0 Antriebsrohr Abdeckung Kunststoffbuchse Ø24.5x Ø16x14 Rechter Handlauf-Arm Verbindungsstück Mutter M10x1,25x6 Hinterer Hauptrahmen Kurbelabdeckung Frontsäule Mutter S15 Griffstange Netzadapter L=2.000mm Linker Handlauf Kappe S16 Rechter Handlauf...
  • Seite 8 Description Qty No Description Konsole Federscheibe Ø6 Rechtes Pedal U-Halter Unterlegscheibe Ø8x Ø16x2 Ösenschraube M6X36 Endkappe 80x40x1,5 Mutter M10x1,0x6 Schraube M8x35 Schwungrad Transportrad Schraube M6x15 Schraube M8x49 Band-Riemenscheibe Mutter M8 Welle Schraube M8x10 Buchse Ø38x32.6x80 Handgriff-Schaumstoffteil Mutter M6 S10 Ø31x37x860 Endkappe für Handlauf Riemen Wellfederscheibe Ø19...
  • Seite 9: Explosionszeichnung

    EXPLOSIONSZEICHNUNG...
  • Seite 11: Werkzeug

    WERKZEUG (48) Schraube M8x80 2PCS (109) Hutmutter S13 2PCS (49) Kurvenscheibe Ø8xØ20x2.0 2PCS (22) Hutmutter S18 4PCS (18) Federunterlegscheibe Ø8 2PCS (68) Mutter M8 2PCS (67) Schraube M8x49 4PCS (41) Hutmutter S16 4PCS (60) Gewölbte Scheibe Ø8xØ16x1,5 4PCS (68) Hutmutter M8 4PCS (16) Hutmutter S38 4PCS Multi-Hex-Werkzeug / Phillips Schraubendreher Inbusschlüssel 6mm 1PC...
  • Seite 12: Montageanleitung

    MONTAGEANLEITUNG Fussauflage, Installation der vorderen und hinteren Stabilisatoren: Positionieren Sie zwei Fusspolster (52) auf dem vorderen Stabilisator (13). Positionieren Sie vier Fusspolster (52) auf dem hinteren Stabilisator (8). Entfernen Sie zwei M8x15 Schrauben (28), zwei Ø8x Ø20 Unterlegscheiben (31) vom vorderen Stabilisator (13).
  • Seite 13 Installation der Frontsäule: Acht Schrauben M8x15 (28), vier Scheiben Ø8x Ø20x2,0 (31), acht Federringe Ø8 (18), vier Scheiben Ø8x Ø16x2 (63) vom Hauptrahmen (1) entfernen. Verbinden Sie den Sensorkabel I (59) vom Hauptrahmen (1) mit dem Mitteldraht (20) vom vorderen Pfosten (2). Den vorderen Pfosten (9) auf das Rohr des Hauptrahmens (1) stecken und mit acht Schrauben M8x15 (28), vier Scheiben Ø8x Ø20x2,0 (31), acht Federringen Ø8 (18), vier Kurventrägern Ø8x Ø16x2 (63), die entfernt wurden.
  • Seite 14 Installation des linken/rechten Handlauf-Arms: Achtung: Vor dem Zusammenbau bitte das weisse Universalfett auf die horizontalen Achsen auftragen. Entfernen Sie zwei Schrauben M8x20 (28), zwei Federscheiben Ø8 (18), zwei gewölbte Scheiben Ø8xØ33x2,0 (19), zwei grosse Unterlegscheiben Ø19xØ25x2,0 (29) und Wellfederscheibe Ø19 (72) von den linken und rechten horizontalen Achsenden der Frontsäule (9).
  • Seite 15 Montage der Fusspedale links/rechts Achtung: Vor dem Zusammenbau bitte das weisse Universalfett auf die Kurbelwelle auftragen. Entfernen Sie zwei Schrauben M8x50 (110), zwei Scheiben Ø8x Ø16 (63) und zwei Muttern M8 (50) vom U Halterung (108). Befestigen Sie das linke Antriebsrohr (5) an der linken Kurbel (57) mit einem Bolzen M8x50 (110), einer Scheibe Ø8x Ø16 (63) und einer Mutter M8 (50), die entfernt wurden.
  • Seite 16 Montage des Fussrohrs links/rechts Entfernen Sie eine Schraube M12x85 (23), eine Unterlegscheibe Ø12 (26) und eine Mutter M12 (27) vom linken Handlauf-Arm (2). Befestigen Sie den linken Handlaufarm (2) am linken Fusspedalrohr (3) mit einer Schraube M12x85 (23), einer Unterlegscheibe Ø12 (26) und einer Mutter M12 (27), welche sie soeben entfernt hatten. Befestigen Sie zwei Kappen S18 (22) am linken Pedalrohr (3).
  • Seite 17 Montage des linken/rechten Fusspedals: Befestigen Sie das linke (L) und rechte (R) Pedal (47 bzw. 62) mit vier M8x20 Schrauben (32) am linken und rechten Fussrohr (3 bzw. 4).
  • Seite 18 Montage des linken/rechten Handlaufs: Befestigen Sie den linken/rechten Handlauf (11 bzw. 12) mit vier M8x47 Schrauben (67), vier gewölbten Scheiben Ø8xØ16x1,5 (60) und vier Muttern M8 (68) am linken/rechten Handlauf-Arm (2 bzw. 6).
  • Seite 19 Griffstange: Entfernen Sie zwei M8x15 Schrauben (28) und zwei Ø8xØ16 x1,5 gewölbte Scheiben (60) von der Frontsäule (9). Führen Sie die Handpulssensor-Kabel (43) von der Griffstange (10) aus durch die Bohrung in der Frontsäule (9) und ziehen sie dann vom oberen Ende der Frontsäule (9) heraus. Befestigen Sie die Griffstange (10) an der Frontsäule (9) mit den zuvor entfernten zwei Schrauben M8x15 (28) und zwei Ø8xØ16x1,5 gewölbten Scheiben (60) unter Zuhilfenahme des beiliegenden Inbusschlüssels.
  • Seite 20: Wichtige Dinge Vor Dem Training

    Montage des Netzadapters: Stecken Sie ein Ende des Netzadapters (40) in die Netzkabelbuchse der Spannungsversorgung (56) auf der Rückseite der linken Verkleidung. Prüfen Sie die auf dem Adapter angegebenen technischen Spezifikationen vor dem Anschliessen zunächst sorgfältig. Dann stecken Sie das andere Ende des Netzadapters (40) in die elektrische Wandsteckdose.
  • Seite 21: Funktionen Und Features

    FUNKTIONEN UND FEATURES 1. Zeigt Ihnen die Trainingszeit in Minuten und Sekunden an. Der Computer zählt automatisch von 0:00 bis 99:59. Sie können auch einen Countdown-Wert einstellen, indem Sie die UP und DOWN Tasten verwenden. Wenn Sie nach Ablauf der Zeit weiter trainieren, wird der Computer „beepen“...
  • Seite 22: Hauptfunktionen

    HAUPTFUNKTIONEN Es gibt 6 Tasten mit den folgenden Funktionen: 1. START/STOP Taste: a. Schnellstartfunktion: Erlaubt einen Schnellstart, ohne vorher ein Programm auszuwählen. Die Zeit zählt automatisch von null aufwärts. • Im Trainingsmodus: Training stoppen/pausieren. • Wenn das Training gestoppt/pausiert wurde, drücken Sie, um das Training wiederaufzunehmen. 2.
  • Seite 23: Programmeinführung Und Bedienung

    PROGRAMMEINFÜHRUNG UND BEDIENUNG Manuelles Programm: Bedienungsanleitung P1 ist ein manuelles Programm. Es kann durch Drücken der START/STOP Taste gestartet werden. Der voreingestellte Widerstand ist 5. Diesen kann der Benutzer durch Drücken der UP/DOWN Taste anpassen. Auch ein Kalorienwert oder eine Zieldistanz kann festgelegt werden. Bedienung: 1.
  • Seite 24 Benutzerdefinierte Programme: User 1, User 2, User 3, User 4 Die Programme 14-17 sind benutzerdefiniert. Die Benutzer können hier durch einstellen der Werte TIME, DISTANCE, CALORIES und Widerstand ihre eigenen Trainingseinheiten erstellen. Alle Einstellungen werden gespeichert. Die Programme können durch die UP/DOWN Taste gewechselt werden.
  • Seite 25 Herzfrequenzkontrolle: 55% H.R.C., 65% H.R.C., 75% H.R.C., 85% H.R.C., Ziel - H.R.C. Programm 18 – 22 sind Herzfrequenzkontrollprogramme; Programm 22 kontrolliert eine benutzerdefinierte Herzrate. Programm 18 ist die Programm 19 ist die Programm 20 ist die Programm 21 ist die Programm 22 ist die 55% Max H.R.C.
  • Seite 26 Wattkontrollprogramm: Programm 23 ist ein geschwindigkeitsabhängiges Programm. Drücken Sie ENTER, um die Werte WATT, ZEIT, DISTANZ und KALORIEN einzustellen. Während des Trainings kann der Widerstand diesmal nicht eingestellt werden. Dieser wird sich von selbst verändern, wenn Sie z.B. zu langsam sind erhöhen und sich verringern, wenn Sie zu schnell sind.
  • Seite 27 Körperfettprogramm: Körperfett Programm 24 ist ein spezielles Programm, um den Körperfettanteil des Benutzers auszurechnen. Es gibt drei Körpertypen, zwischen denen Unterschieden wird Typ 1: Körperfettanteil% > 27 Typ 2: Körperfettanteil% > 27 Typ 3: Körperfettanteil % < 20 Der Computer wird die Ergebnisse in Prozent angeben. Bedienung: 1.
  • Seite 28: Bedienung

    BEDIENUNG 1. Schlafmodus: Der Computer wird nach vier Minuten in den Schlafmodus gehen, wenn keine Eingabe erfolgt. Drücken Sie irgendwo auf den Bildschirm, um ihn wieder aufzuwecken. 2. Fehlermeldungen: E1 (ERROR 1): Normaler Status: Dieser Fehler erscheint, wenn der Monitor für mehr als vier Sekunden kein Signal mehr vom Motor erhalten hat.
  • Seite 29: Lcd Trainingsgrafiken

    LCD TRAININGSGRAFIKEN PROGRAMM 1: PROGRAMM 2: PROGRAMM 3: MANUELL SCHRITTE HÜGEL PROGRAMM 6: PROGRAMM 4: ROLLEN PROGRAMM 5: TAL FETTVERBRENNUNG PROGRAMM 9: PROGRAMM 7: RAMPE PROGRAMM 8: BERG INTERVALL PROGRAMM 10: PROGRAMM 11: PROGRAMM 12: ZUFÄLLIG PLATEAU FARTLEK PROGRAMM 13: KLIPPE...
  • Seite 30: Benutzerdefinierte Programme

    BENUTZERDEFINIERTE PROGRAMME PROGRAMM 14 PROGRAMM 15 PROGRAMM 16 PROGRAMM 17...
  • Seite 31: Herzfrequenzprogrammprofile

    HERZFREQUENZPROGRAMMPROFILE PROGRAMM 18 55% HRC PROGRAMM 19 65% HRC PROGRAMM 20 75% HRC PROGRAMM 21 85% HRC PROGRAMM 22 TARGET HRC PROGRAMM 23 WATT CONTROL...
  • Seite 32: Körperfettmessung

    KÖRPERFETTMESSUNG KÖRPERFETT (STOPPMODUS) KÖRPERFETT (START MODUS) Trainingszeit: 40 Minuten Trainingszeit: 40 Minuten Trainingszeit: 20 Minuten Eines der Trainingsprogramme erscheint automatisch bei der Messung von Körperfett WARTUNG Reinigung Der Cross-Trainer kann mit einem weichen Tuch und einem milden Reinigungsmittel gereinigt werden. Verwenden Sie keine Scheuermittel oder Lösungsmittel auf Kunststoffteilen. Bitte wischen Sie nach jedem Gebrauch Ihren Schweiss vom Gerät ab.
  • Seite 33: Fehlerbehebung

    FEHLERBEHEBUNG PROBLEM LÖSUNG Drehen Sie die Endkappe am hinteren Sta- Der Cross-Trainer wackelt beim Gebrauch. bilisator so weit, wie erforderlich ist, um den Cross-Trainer waagerecht auszurichten. Entfernen Sie die Computerkonsole und verge- wissern Sie sich, dass die von der Computer- konsole kommenden Kabel ordnungsgemäss an die Kabel angeschlossen sind, die von der Das Display auf der Computer-Konsole zeigt...
  • Seite 34: Dehnungsübungen

    DEHNUNGSÜBUNGEN Bevor Sie das Laufband benutzen, ist es am besten, 5 bis 10 Minuten zum Aufwärmen Stretching-Übungen durchzuführen. Dehnen vor dem Training wird hilft die Flexibilität zu verbessern und das Verletzungsrisiko zu mindern. QUADRIZEPS-DEHNUNG Mit einer Hand an der Wand abstützen, um das Gleichgewicht besser zu halten, nach hinten greifen und den rechten Fuss nach oben ziehen.
  • Seite 35 MIT DEM KOPF ROLLEN Drehen Sie den Kopf nach rechts für eine Sekunde, fühlen Sie die Streckung auf der linken Seite des Nackens, dann drehen Sie den Kopf zurück für eine Sekunde, recken Sie Ihr Kinn nach oben und lassen Ihren Mund geöffnet. Drehen Sie Ihren Kopf nach links für eine Sekunde, dann senken Sie Ihren Kopf auf die Brust für eine Sekunde.
  • Seite 36 Europäische Entsorgungsrichtlinie 2002/96/EG Entsorgen Sie Ihr Trainingsgerät in keinem Fall über den normalen Hausmüll. Entsorgen Sie das Gerät ausschließlich über einen kommunalen oder zugelassenen Entsorgungsbetrieb.Beachten Sie hierbei die aktuell geltenden Vorschriften.Erkundigen Sie sich im Zweifelsfall bei Ihrer Stadt- bzw. Gemeindeverwal- tung nach einer sach- und umweltgerechten Entsorgungsmöglichkeit.
  • Seite 38 3 simple steps for a fast and safe start: 1. scan the QR code 2. watch videos 3. start fast and safely Link to the videos: www.sportstech.de/qr/cx640.html...
  • Seite 39 Dear customer, We are pleased you chose a device from the SPORTSTECH product range. With sports equipment from SPORTSTECH you get the highest quality and latest technology. In order to fully use the potential of your device and be able to enjoy it for many years, please read this manual carefully before starting up and beginning of training, and use the device according to the instructions.
  • Seite 40 INDEX Important Safety Instructions Parts List Explode-View Tools Assembly Instructions Before You Start Functions & Features Key Functions Program Introduction & Operation Operation Guide Lcd Workout Graphics User Profile Lcd Graphics Heart Rate Program Graphics Body Fat Test Programs Maintenance Troubleshooting Stretch Exercise...
  • Seite 41: Important Safety Instructions

    IMPORTANT SAFETY INSTRUCTIONS Basic precautions should always be followed, including the following safety instructions when using the crosstrainer: Read all instructions before using this equipment. WARNING: Before beginning any exercise program consult your physician. This is especially important for people who are over 35 years old or who have pre-existing health problems.
  • Seite 42: Parts List

    PARTS LIST Description Qty No Description Main Frame Washer Ø8x Ø20x2.0 Left Handrail Arm Bolt M8x25 Left Foot Tube Plastic Bushing Right Foot Tube Big Waher Ø8x Ø25x2.0 Drive tube Cover Right Handrail Arm Plastic Bushing Ø24.5x Ø16x14 Connection piece Nut M10x1.25x6 Rear Main Frame Crank cover...
  • Seite 43 Description Qty No Description Console Eyebolt M6X36 Right pedal Nut M10x1.0x6 Washer Ø8x Ø16x2 Flywheel End cap 80x40x1.5 Bolt M6x15 Bolt M8x35 Belt Pulley Transport Wheel Shaft Bolt M8x10 Bolt M8x49 Nut M8 Nut M6 S10 Bushing Ø38x32.6x80 Belt Handlebar Foam Grip Ø31x37x860 Right chain cover End cap for Handrail Nut M8...
  • Seite 44: Explode-View

    EXPLODE-VIEW...
  • Seite 46: Tools

    TOOLS...
  • Seite 47: Assembly Instructions

    ASSEMBLY INSTRUCTIONS Foot Pad, Front and Rear Stabilizers Installation: Position two Foot Pad(52) onto the Front Stabilizer (13). Position four Foot Pad(52) onto the Rear Stabilizer (8). Remove two M8x15 Bolts (28), two Ø8x Ø20 Washers (31) from Front Stabilizer (13) . Position the Front Stabilizer (13) in front of the Main Frame (1) and align bolt holes.
  • Seite 48 Front Post Installation: Remove eight Bolt M8x15 (28), four Washer Ø8x Ø20x2.0 (31),eight spring washer Ø8 (18),four Curve Washer Ø8x Ø16x2 (63)from the Main Frame (1). Connect the Sensor Wire I(59) from the Main Frame (1) to the Middle wire (20) from the Front Post (2). Insert the Front Post (9) onto the tube of the Main Frame (1) and secure with eight Bolt M8x15 (28), four Washer Ø8x Ø20x2.0 (31),eight spring washer Ø8 (18),four Curve Washer Ø8x Ø16x2 (63)that were removed.
  • Seite 49 Left/Right Handrail Arms Installation: Caution: Before Assembling,please add the General White Grease onto the horizontal axes. Remove two Bolt M8x20 (28), two Spring washer Ø8 (18), two Curve Washer Ø8xØ33x2.0 (19), two Big Washer Ø19xØ25x2.0 (29) and Ware Washer Ø19(72) from the left and right horizontal axes of the Front Post (9).
  • Seite 50 Left/Right Foot Pedals Installation: Remove two Bolt M8x50(110),two Washer Ø8x Ø16(63) and two Nut M8 (50) from the U Bracket(108). Attach the left Drive tube (5) to the Left Crank (57) with one Bolt M8x50(110),one Washer Ø8x Ø16(63) and one Nut M8 (50) that were removed. Attach the Right Drive tube (5) to the Right Crank (57) with one Bolt M8x50(110),one Washer Ø8x Ø16(63) and one Nut M8 (50) that were removed.
  • Seite 51 Left/Right Foot Tube Installation: Remove one Bolt M12x85(23),one Washer Ø12(26) and one Nut M12(27) from the Left Handrail Arm (2) . Attach the Left Handrail Arm (2) to the Left Foot Pedal Tube (3) with one Bolt M12x85(23),one Washer Ø12(26) and one Nut M12(27) that were removed. Attach two Cap S18 (22) onto the Left Pedal Tube (3).
  • Seite 52 Left/Right Foot Pedal Installation: Attach the L & R Pedal (47,62) onto the Left & Right Foot Tube (3,4) with four M8x20 Bolt (32).
  • Seite 53 Left/Right Handrails Installation: Attach the Left/Right Handrails (11, 12) onto the Left/Right Handrail Arms (2,6) with four M8x47 Bolts (67), four Curve Washer Ø8x Ø16x1.5 (60), and four Nut M8 (68).
  • Seite 54 Handlebar: Remove two M8x15 Bolts (28) and two Ø8xØ16 x1.5Curve Washers (60) from the Front Post (9). Insert the Hand Pulse Sensor Wires (43) from the Handlebar (10) into the hole on the Front Post (9) and then pull them out from the top end of the Front Post (9). Attach the Handlebar (10) onto the Front Post (9) with two M8x15 Bolts (28) and two Ø8xØ16x1.5 Curve Washers (60) that were removed with the S6 Allen Wrench provided Computer and BollInstallation:...
  • Seite 55: Before You Start

    AC Adapter Installation: Plug one end of the AC Adapter (40) into the power jack of the Power Supply Wire(56)on the back of the Left Shroud. Before plugging in,make sure to check carefully the specifications on the Adapter. Plug the other end of the AC Adapter (40) into the electrical wall outlet. BEFORE YOU START Program select and setting value 1.
  • Seite 56: Functions & Features

    FUNCTIONS & FEATURES 1. TIME: Shows your elapsed workout time in minutes and seconds. Your computer will automatically count up from 0:00 to 99:59 in one second intervals. You can also program your computer to count down from a set value by using the UP and DOWN keys. If you continue exercising once the time has reached 0:00, the computer will begin beeping, and reset itself to the original time set, letting you know your workout is done.
  • Seite 57: Key Functions

    KEY FUNCTIONS There are 6 button keys and the function description as follows: 1. START/STOP key: a. Quick Start function: Allows you to start the computer without selecting a program. Manual workout only. Time automatically begins to count up from zero •...
  • Seite 58: Program Introduction & Operation

    PROGRAM INTRODUCTION & OPERATION Manual Program: Manual P1 is a manual program. User can start exercise by pressing START/STOP key. The default resistance level is 5. Users may exercise in any desirous of resistance level (Adjusting by UP/DOWN keys during the workout) with a period of time or a number of calories or a certain distance. Operations: 1.
  • Seite 59 User Setting Program: User 1, User 2, User 3, User 4 Program 14 to 17 is the user setting program. Users are free to create the values in the order of TIME, DISTANCE, CALORIES and the resistance level in 10 columns. The values and profiles will be stored in the memory after setup.
  • Seite 60 Heart Rate Control Program: 55% H.R.C., 65% H.R.C., 75% H.R.C., 85% H.R.C., Target H.R.C. Program 18 to Program 22 is the Heart Rate Control Programs and Program 22 is the Target Heart Rate Control program. Program 18 is the 55% Max H.R.C. - - Target H.R. = (220 – AGE) x 55% Program 19 is the 65% Max H.R.C.
  • Seite 61 Watt Control Program: Watt Control Program 23 is a Speed Independent Program. Press ENTER key to set up the values of TARGET WATT, TIME, DISTANCE and CALORIES. During the exercise mode, the level of resistance is not adjustable. For example, the level of resistance may increase while the speed is too slow. Also the level of resistance may decrease while the speed is too fast.
  • Seite 62 Body Fat Program: Body Fat Program 24 is a special program design to calculate users’ body fat ratio and to offer a specific loading profile for users. There are 3 body types divided according to the FAT% calculated. Type1: BODY FAT% > 27 Type2: 27 >...
  • Seite 63: Operation Guide

    OPERATION GUIDE 1. Sleep Mode: The computer will enter the sleep mode when there is no signal input and no keys be pressed after 4 minutes. You can press any key to wake up the computer. 2. Error Message: E1 (ERROR 1): Normal state: During workout, when the monitor did not get the count signal from the gear motor more than 4 seconds and check under successive 3 times then the LCD will show E1.
  • Seite 64: Lcd Workout Graphics

    LCD WORKOUT GRAPHICS PROGRAM1: Manual PROGRAM2: Steps PROGRAM3: Hill PROGRAM4: Rolling PROGRAM5: Valley PROGRAM6: Fat Burn PROGRAM7: Ramp PROGRAM8: Mountain PROGRAM9: Intervals PROGRAM10: Random PROGRAM11: Plateau PROGRAM12: Tartlek PROGRAM13: Precipice...
  • Seite 65: User Profile Lcd Graphics

    USER PROFILE LCD GRAPHICS PROGRAM 14 PROGRAM 15 PROGRAM 16 PROGRAM 17...
  • Seite 66: Heart Rate Program Graphics

    HEART RATE PROGRAM GRAPHICS PROGRAM 18 55% HRC PROGRAM 19 65% HRC PROGRAM 20 75% HRC PROGRAM 21 85% HRC PROGRAM 22 TARGET HRC PROGRAM 23 WATT CONTROL...
  • Seite 67: Body Fat Test Programs

    BODY FAT TEST PROGRAMS BODY FAT START MODE BODY FAT STOP MODE Workout Time 40 mins. Workout Time 40 mins. Workout Time 20 mins. One of the workouts will appear automatically when measuring body fat MAINTENANCE Cleaning The elliptical trainer can be cleaned with a soft cloth and mild detergent. Do not use abrasives or solvents on plastic parts.
  • Seite 68: Troubleshooting

    TROUBLESHOOTING PROBLEM SOLUTION Turn the rear stabilizer end cap on the rear The elliptical trainer wobbles when in use. stabilizer as needed to level the elliptical trainer. Remove the computer console and verify the wires that come from the computer console are properly connected to the wires that come from the front post.
  • Seite 69: Stretch Exercise

    STRETCH EXERCISE No matter how you do sports, please do some stretch at first, The warm muscle will extend easily, so warm up yourself with 5-10minutes, Then We suggest the following stretch exercise, five times.10counts for each time or longer do these exercise again after sports. QUADRICEPS STRETCH With one hand against a wall for balance, reach behind you and pull your right foot up.
  • Seite 70 HEAD ROLLS Rotate your head to the right for one count, feeling the stretch up the left side of your neck, then rotate your head back for one count, stretching your chin to the ceiling and letting your mouth open. Rotate your head to the left for one count, then drop your head to your chest for one count.
  • Seite 71 European Disposal Directive 2002/96/EG Never dispose your training device in your regular household waste. Dispose the device only at a local or approved disposal. Take care of the currently applicable regulations. If you have doubts contact your local authorities for information about a correct and environment friendly disposal option.
  • Seite 73 Nuestros para usted! Construcción Utilizar Reducción En 3 sencillos pasos para un arranque rápido y seguro: 1. Escanear el código QR 2. Ver vídeos 3. Comienza rápido y seguro Enlace a los videos: www.sportstech.de/qr/cx640.html...
  • Seite 74 Estimado cliente, Nos complace que haya elegido un dispositivo de la línea de productos SPORTSTECH. Con el equipo deportivo de SPORTSTECH usted obtiene la más alta calidad y la mejor tecnología. Con el fin de usar todo el potencial de su dispositivo y para que pueda disfrutarlo durante muchos años, por favor lea este manual cuidadosamente antes de comenzar a ejercitarse, y use el dispositivo...
  • Seite 75 CONTENIDOS Instrucciones De Seguridad Importantes Piezas De Montaje Vista En Despiece Herramientas Instrucciones De Ensamblaje Cosas Que Debe Saber Antes De Ejercitarse Funciones Y Características: Funciones De Las Teclas: Presentación & Funcionamiento De Los Programas Guía De Uso Diagramas Lcd Del Ejercicio Programas Configurados Por El Usuario Perfiles De Programas De Frecuencia Cardiaca: Programas De Prueba De Grasa Corporal:...
  • Seite 76: Instrucciones De Seguridad Importantes

    INSTRUCCIONES DE SEGURIDAD IMPORTANTES Al usar la caminadora siempre se deben seguir las precauciones básicas, incluyen- do las siguientes instrucciones de seguridad importantes. Lea todas las instruccio- nes antes de usar este producto. ADVERTENCIA: Antes de comenzar cualquier programa de ejercicios consulte a su médico. Esto es especialmente importante para personas mayores de 35 años o para quienes tienen problemas prexistentes de salud.
  • Seite 77: Piezas De Montaje

    PIEZAS DE MONTAJE Description Qty No Description Marco principal Arandela Ø8x Ø20x2.0 Reposabrazos izquierdo Tornillo M8x25 Tubo izquierdo del pie Casquillo plástico Tubo derecho del pie Arandela grande Ø8x Ø25x2.0 Tubo impulsor Cubierta Buje de plástico Ø24.5x Reposabrazos derecho Ø16x14 Pieza de conexión Tuerca M10x1.25x6 Marco principal posterior...
  • Seite 78 Description Qty No Description Consola Arandela elástica Ø6 Pedal derecho Soporte en U Arandela Ø8x Ø16x2 Argolla M6X36 Tapa de extremo 80x40x1.5 Tuerca M10x1.0x6 Tornillo M8x35 Rueda volante Rueda de transporte Tornillo M6x15 Tornillo M8x49 Polea de correa Tuerca M8 Buje Ø38x32.6x80 Tornillo M8x10 Agarre de espuma del manillar...
  • Seite 79: Vista En Despiece

    VISTA EN DESPIECE...
  • Seite 81: Herramientas

    HERRAMIENTAS (48) tornillo M8x80 2PCS (109) tuerca ciega S13 2PCS (49) lavadora de curvas Ø8xØ20x2.0 2PCS (22) tuerca ciega S18 4PCS (18) arandela de resorte Ø8 2PCS (68) tuerca M8 2PCS (67) tornillo M8x49 4PCS (41) tuerca ciega S16 4PCS (60) lavadora de curvas Ø8xØ16x1,5 4PCS (68) tuerca ciega M8 4PCS (16) tuerca ciega S38 4PCS...
  • Seite 82: Instrucciones De Ensamblaje

    INSTRUCCIONES DE ENSAMBLAJE Instalación de la almohadilla base, estabilizador frontal y posterior: Coloque dos almohadillas base (52) en el estabilizador frontal (13). Coloque cuatro almohadillas base (52) en el estabilizador posterior (8). Retire dos tornillos M8x15 (28), dos arandelas Ø8x Ø20 (31) del estabilizador frontal (13). Coloque el estabilizador frontal (13) frente al marco principal (1) y alinee ambos agujeros.
  • Seite 83 Instalación del poste frontal: Retire ocho tornillos M8x15 (28), cuatro arandelas Ø8x Ø20x2.0 (31), ocho arandelas elásticas Ø8 (18) y cuatro arandelas curvas Ø8x Ø16x2 (63) del marco principal (1). Conecte el cable del sensor I (59) desde el marco principal (1) hasta el cable central (20) del poste frontal (2). Inserte el poste frontal (9) en el tubo del marco principal (1) y asegure con los ocho tornillos M8x15 (28), las cuatro arandelas Ø8x Ø20x2.0 (31), las cuatro arandelas elásticas Ø8 (18) y las cuatro arandelas curvas Ø8x Ø16x2 (63)que fueron retirados previamente.
  • Seite 84 Instalación del reposabrazos izquierdo/derecho: Precaución: Antes del ensamblaje, por favor agregue grasa blanca en los ejes horizontales. Retire dos tornillos M8x20 (28), dos arandelas planas Ø8 (18), dos arandelas curvas Ø8xØ33x2.0 (19), dos arandelas grandes Ø19xØ25x2.0 (29) y una arandela Ø19 (72) de los ejes horizontales izquierdo y derecho del poste frontal (9).
  • Seite 85 Instalación del pedal izquierdo/derecho: Retire dos pernos M8x50 (110), dos arandelas Ø8x Ø16 (63) y dos tuercas M8 (50) de la U Soporte (108). Conecte el tubo de transmisión izquierdo (5) a la manivela izquierda (57) con un perno M8x50 (110), una arandela Ø8x Ø16 (63) y una tuerca M8 (50) que se quitaron.
  • Seite 86 Instalación del tubo izquierdo/derecho del pie: Retire un tornillo M12x85(23), una arandela Ø12 (26) y una tuerca M12 (27) del reposabrazos izquierdo (2). Conecte el reposabrazos izquierdo (2) al tubo del pedal izquierdo (3) con el tornillo M12x85(23), una arandela Ø12(26) y una tuerca M12 (27) que fueron retiradas previamente. Conecte dos tapas S18 (22) en el tubo del pedal izquierdo (3).
  • Seite 87 Instalación del pedal izquierdo/derecho: Conecte el pedal L & R (47,62) en el tubo del pedal derecho y del pedal izquierdo (3,4) con cuatro tornillos M8x20 (32).
  • Seite 88 Instalación del pasamanos derecho e izquierdo: Conecte los pasamanos derecho e izquierdo (11, 12) en el reposabrazos derecho e izquierdo (2,6) con cuatro tornillos M8x47 (67), cuatro arandelas curvas Ø8x Ø16x1.5 (60), y cuatro tuercas M8 (68).
  • Seite 89 Manillar: Retire dos tornillos M8x15(28) y dos arandelas curvas Ø8xØ16 x1.5 (60) del poste frontal (9). Inserte los cables del sensor de pulso (43) del manillar (10) en el agujero del poste frontal (9) y luego sáquelos por el extremo superior del poste frontal (9). Conecte el manillar (10) en el poste frontal (9) con los dos tornillos M8x15 (28) y las dos arandelas curvas Ø8xØ16x1.5 (60) que fueron retiradas previamente con la llave Allen S6 incluida.
  • Seite 90: Cosas Que Debe Saber Antes De Ejercitarse

    Instalación del adaptador de CA: Conecte un extremo del adaptador de CA (40) en el enchufe eléctrico del cable de alimentación (56) en la parte trasera de la cubierta izquierda. Antes de conectarlo, asegúrese de revisar cuidadosamente las especificaciones del adaptador. Conecte el otro extremo del adaptador de CA (40) en la tomacorriente COSAS QUE DEBE SABER ANTES DE EJERCITARSE Selección de programa y ajuste de valores...
  • Seite 91: Funciones Y Características

    FUNCIONES Y CARACTERÍSTICAS: 1. TIME: Muestra su tiempo de ejercicio transcurrido en minutos y segundos. Su ordenador contará automáticamente desde 0:00 hasta 99:59 en intervalos de un segundo. También puede programar su ordenador para contar hacia atrás desde un valor establecido usando las teclas Up y DOWN.
  • Seite 92: Funciones De Las Teclas

    FUNCIONES DE LAS TECLAS: Hay 6 teclas y la descripción de cada función es la siguiente: 1. Tecla START/STOP: a. Función de inicio rápido: Le permite iniciar el ordenador sin seleccionar un programa. Solo ejercicio manual. El tiempo comenzará a contar automáticamente desde cero. •...
  • Seite 93: Presentación & Funcionamiento De Los Programas

    PRESENTACIÓN & FUNCIONAMIENTO DE LOS PROGRAMAS Programa Manual: Manual P1 e un programa manual. El usuario puede comenzar el ejercicio presionando la tecla START/ STOP. El nivel de resistencia por defecto es 5. Los usuarios pueden ejercitarse en cualquier nivel de resistencia deseado (ajustando las teclas UP/DOWN durante el ejercicio) con un periodo de tiempo o un número de calorías o una distancia determinada.
  • Seite 94 Programa configurado por el usuario: User 1, User 2, User 3, User 4 Los programas 14 hasta 17 son programas configurados por el usuario. Los usuarios son libres de crear los valores en el orden de TIME, DISTANCE, CALORIES y el nivel de resistencia en 10 columnas.
  • Seite 95 Programa de control de la frecuencia cardíaca (H.R.C.): 55% H.R.C., 65% H.R.C., 75% H.R.C., 85% H.R.C., Target H.R.C. Desde el programa 18 hasta Programa 22 son los programas de control de la frecuencia cardíaca y el programa 22 es el programa objetivo de control de la frecuencia cardíaca. Programa 18 es el 55% Máx del H.R.C.
  • Seite 96 Programa de control de vatios: Watt Control El programa 23 es un programa independiente de la velocidad. Presione la tecla ENTER para configurar los valores de TARGET WATT, TIME, DISTANCE y CALORIES. Durante el ejercicio, el nivel de resistencia no es ajustable. Por ejemplo, el nivel de resistencia puede aumentar mientras la velocidad sea demasiado lenta.
  • Seite 97 Programa de grasa corporal: Body Fat El programa 24 es un programa especial diseñado para calcular el índice de grasa corporal del usuario y para ofrecer un perfil de carga específico para los usuarios. Typo1: % de GRASA CORPORAL > 27 Typo2: 27 <...
  • Seite 98: Guía De Uso

    GUÍA DE USO 1. Modo de reposo: El ordenador entrará en modo de reposo cuando no haya entrada de señal o si no se presiona ninguna tecla después de 4 minutos. Puede presionar cualquier tecla para activar el ordenador. 2. Mensaje de error: E1 (ERROR 1): Estado normal: Durante el ejercicio, cuando la pantalla no recibe la señal del motor por más de 4 segundos y revisa por más de 3 veces consecutivas entonces la pantalla LCD mostrará...
  • Seite 99: Diagramas Lcd Del Ejercicio

    DIAGRAMAS LCD DEL EJERCICIO PROGRAM1: Manual PROGRAM2: Steps PROGRAM3: Hill PROGRAM4: Rolling PROGRAM5: Valley PROGRAM6: Fat Burn PROGRAM7: Ramp PROGRAM8: Mountain PROGRAM9: Intervals PROGRAM10: Random PROGRAM11: Plateau PROGRAM12: Tartlek PROGRAM13: Precipice...
  • Seite 100: Programas Configurados Por El Usuario

    PROGRAMAS CONFIGURADOS POR EL USUARIO PROGRAM 14 PROGRAM 15 PROGRAM 16 PROGRAM 17...
  • Seite 101: Perfiles De Programas De Frecuencia Cardiaca

    PERFILES DE PROGRAMAS DE FRECUENCIA CARDIACA: PROGRAM 18 55% HRC PROGRAM 19 65% HRC PROGRAM 20 75% HRC PROGRAM 21 85% HRC PROGRAM 22 TARGET HRC PROGRAM 23 WATT CONTROL...
  • Seite 102: Programas De Prueba De Grasa Corporal

    PROGRAMAS DE PRUEBA DE GRASA CORPORAL: BODY FAT (MODO START) BODY FAT (MODO STOP) Tiempo de ejercicio: Tiempo de ejercicio: Tiempo de ejercicio: 40 minutos 40 minutos 20 minutos Uno de los entrenamientos aparecerá automáticamente al medir la grasa corporal MANTENIMIENTO Limpieza El entrenador elíptico puede limpiarse con un paño suave y un detergente suave.
  • Seite 103: Solución De Problemas

    SOLUCIÓN DE PROBLEMAS PROBLEMA SOLUCIÓN Gire la tapa de extremo en el estabilizador El entrenador elíptico se tambalea cuando está posterior lo que sea necesario para nivelar el en uso entrenador elíptico. Retire la consola y verifique que los cables provenientes de la consola estén conectados correctamente con los cables que provienen del poste frontal.
  • Seite 104: Ejercicios De Estiramiento

    EJERCICIOS DE ESTIRAMIENTO No importa cómo se ejercite, siempre haga algo de estiramiento primero. El calentamiento muscular hará que sus músculos se extiendan fácilmente, así que caliente al menos 5-10 minutos. Luego le sugerimos hacer los siguientes ejercicios de estiramiento cinco veces. El estiramiento antes del ejercicio le ayuda a mejorar la flexibilidad y reduce los riesgos de lesiones.
  • Seite 105 GIROS CON LA CABEZA Gire su cabeza hacia la derecha por un segundo, sienta como se estira el lado izquierdo de su cuello, luego gire su cabeza hacia tras por un segundo, estirando su barbilla hacia el techo y dejando su boca abierta. Gire su cabeza hacia la izquierda por un segundo, luego deje caer su cabeza hacia su pecho por un segundo.
  • Seite 106 Directiva Europea de Residuos 2002/96/EG Nunca elimine su dispositivo de entrenamiento en su basura doméstica ordinaria. Elimine el dispositivo únicamente en un sitio de eliminación aprobado. Tenga en cuenta las normativas aplicables actualmen- te. Si tiene dudas contacte a las autoridades locales para conseguir información sobre una opción de eliminación adecuada y ecológica.
  • Seite 107 MANUEL FRANÇAIS...
  • Seite 108 3 étapes simples pour un démarrage ra- pide et sécurisé: 1. Scannez le code QR 2. Regarder les vidéos 3. Démarrez rapidement et en toute sécurité. Lien vers les vidéos: www.sportstech.de/qr/cx640.html...
  • Seite 109 Cher client, Nous sommes ravis que vous ayez choisi un appareil de la gamme de produits SPORTSTECH. Avec les équipements sportifs de SPORTSTECH, vous obtenez la plus haute qualité et la meilleure technologie. Afin d'utiliser pleinement le potentiel de votre appareil et de pouvoir l'apprécier pendant de nombreuses années, lisez attentivement ce manuel avant l'utilisation et le début de votre entraînement et utilisez...
  • Seite 110 CONTENU Consignes De Sécurité Importantes Liste Des Pièzes Vué Éclatée Pièces Instructions D'assemblage Les Choses Que Vous Devez Savoir Avant L'exercice Fonctions Et Caractéristiques Fonction Cle Introduction Au Programme Et Opérations Guide Des Opérations Graphiques Lcd D’entrainement Programme De Configuration De L'utilisateur Programme Des Profils De Frequence Cardiaque: Programme Test Body Fat Entretien...
  • Seite 111: Consignes De Sécurité Importantes

    CONSIGNES DE SÉCURITÉ IMPORTANTES Les précautions de base, y compris les consignes de sécurité importantes suivantes doivent toujours être respectées lorsque vous utilisez ce tapis roulant. Lisez toutes les instructions avant d'utiliser cette appareil. AVERTISSEMENT: Avant de commencer un programme d'exercice, consultez votre médecin. Ceci est particulièrement important pour les personnes qui ont plus de 35 ans ou qui ont des problèmes de santé...
  • Seite 112: Liste Des Pièzes

    LISTE DES PIÈZES Description Qty No Description Cadre principal Rondelle Ø8x Ø20x2.0 Bras de la main courante gauche Boulon M8x25 Tube de pied gauche Douille en plastique Tube de pied droit Grande Rondelle Ø8x Ø25x2.0 Tube d'entraînement Couvercle Douille en plastique Bras de la main courante droite Ø24.5x Ø16x14 Pièce de raccordement...
  • Seite 113 Description Qty No Description Console Rondelle à ressort Ø6 Pédale droite Support en U Rondelle Ø8x Ø16x2 Boulon à œil M6X36 bouchon d'extrémité 80x40x1.5 Écrou M10x1.0x6 Boulon M8x35 Volant Roue de transport Boulon M6x15 Boulon M8x49 Poulie à courroie Écrou M8 Manche Douille Ø38x32.6x80 Boulon M8x10...
  • Seite 114: Vué Éclatée

    VUÉ ÉCLATÉE...
  • Seite 116: Pièces

    PIÈCES (48) boulon M8x80 2PCS (109) bouchon écrou S13 2PCS (49) rondelle de courbe Ø8xØ20x2.0 2PCS (22) bouchon écrou S18 4PCS (18) rondelle de ressort Ø8 2PCS (68) écrou M8 2PCS (67) boulon M8x49 4PCS (41) bouchon écrou S16 4PCS (60) rondelle de courbe Ø8xØ16x1,5 4PCS (68) bouchon écrou M8 4PCS (16) bouchon écrou S38 4PCS...
  • Seite 117: Instructions D'assemblage

    INSTRUCTIONS D'ASSEMBLAGE Installation du stabilisateur de pied, stabilisateur avant et arrière Positionnez deux coussins de pied (52) sur le stabilisateur avant (13) Positionnez quatre coussins de pied (52) sur le stabilisateur arrière (8) Enlevez deux boulons M8x15 (28), deux rondelles Ø8x Ø20 (31) du stabilisateur avant (13). Positionnez le stabilisateur avant (13) devant le cadre principal (1) et alignez les trous de boulons.
  • Seite 118 Installation des panneaux avant: Enlevez huit boulons M8x15 (28), quatre rondelles Ø8x Ø20x2.0 (31), huit rondelles Ø8 (18), quatre rondelles Ø8x Ø16x2 (63) du cadre principal (1). Connectez le fil du capteur I (59) du cadre principal (1) au fil médian (20) du poste avant (2). Insérez le panneau avant (9) sur le tube du cadre principal (1) et fixez-le avec huit boulons M8x15 (28), quatre rondelles Ø8x Ø20x2.0 (31), huit rondelles élastiques Ø8 (18), quatre rondelles Ø8x Ø16x2 (63) qui ont été...
  • Seite 119 Installation des bras de mains courantes gauche / droite Attention: Avant d'assembler, ajoutez de la graisse blanche sur les axes horizontaux. Retirez les deux boulons M8x20 (28), deux rondelles élastiques Ø8 (18), deux rondelles courbées Ø8xØ33x2.0 (19), deux grosse rondelles Ø19xØ25x2.0 ( 29) et la rondelle de stockage Ø19 (72) à...
  • Seite 120 Installation des pédales gauche / droite Retirez deux boulons M8x50 (110), deux rondelles Ø8x Ø16 (63) et deux écrous M8 (50) de l'U Support (108). Fixez le tube d'entraînement gauche (5) à la manivelle gauche (57) avec un boulon M8x50 (110), une rondelle Ø8x Ø16 (63) et un écrou M8 (50) qui ont été...
  • Seite 121 Installation du tube de pied gauche / droit: Retirez un boulon M12x85 (23), une rondelle Ø12 (26) et un écrou M12 (27) de la main courante gauche (2). Fixez la main courante gauche (2) au tube de la pédale gauche (3) avec un boulon M12x85 (23), une rondelle Ø12 (26) et un écrou M12 (27) qui ont été...
  • Seite 122 Installation des pédales gauche / droite: Fixez la pédale G & D (47,62) sur le tube de pied gauche et droit (3,4) avec quatre boulons M8x20 (32).
  • Seite 123 Installation des mains courantes gauches et droites: Fixez les mains courantes gauche / droite (11, 12) sur les bras gauches / droits (2,6) avec quatre boulons M8x47 (67), quatre rondelles Ø8x Ø16x1.5 (60) et quatre écrous M8 (68).
  • Seite 124 Guidon: Retirez deux Boulons M8x15 (28) et deux rondelles courbées Ø8xØ16 x1.5 (60) du panneau avant (9). Insérez les fils du capteur d'impulsions à main (43) à partir du guidon (10) dans le trou du panneau avant (9), puis retirez-les de l'extrémité supérieure du panneau avant (9). Fixez le guidon (10) sur le poteau avant (9) avec deux boulons M8x15 (28) et deux rondelles courbées Ø8xØ16x1.5 (60) qui ont été...
  • Seite 125: Les Choses Que Vous Devez Savoir Avant L'exercice

    Installation de l'adaptateur AC: Branchez une extrémité de l'adaptateur AC (40) dans la prise d'alimentation du fil d'alimentation (56) à l'arrière du carénage gauche. Avant de brancher, vérifiez attentivement les caractéristiques de l'adaptateur. Branchez l'autre extrémité de l'adaptateur secteur (40) dans la prise murale électrique. LES CHOSES QUE VOUS DEVEZ SAVOIR AVANT L'EXERCICE Séléction du programme et de la valeur de réglage 1.
  • Seite 126: Fonctions Et Caractéristiques

    FONCTIONS ET CARACTÉRISTIQUES 1. TIME: Affiche votre temps d'entraînement écoulé en minutes et secondes. Votre ordinateur va automatiquement compter de 0:00 à 99:59 en intervalles d'une seconde. Vous pouvez également programmer votre ordinateur pour le compte à rebours à partir d'une valeur cible en utilisant les touches HAUT et BAS.
  • Seite 127: Fonction Cle

    FONCTION CLE Il y a 6 touches bouton et la description de fonction comme suit: 1. la touche START / STOP: • fonction de démarrage rapide: Vous permet de démarrer l'ordinateur sans sélectionner un programme. Séance d'entraînement manuel uniquement. Le Temps commence automatiquement à...
  • Seite 128: Introduction Au Programme Et Opérations

    INTRODUCTION AU PROGRAMME ET OPÉRATIONS Programme manuel : Manuel P1 est un programme manuel. L'utilisateur peut commencer l'exercice en appuyant sur la touche START / STOP. Le niveau de résistance par défaut est 5. Les utilisateurs peuvent exercer à n’importe quel niveau de résistance (Réglage par touches HAUT / BAS pendant la séance d'entraînement) avec une période de temps ou un certain nombre de calories ou une certaine distance.
  • Seite 129 Programme de réglage d’utilisateurs : USER 1 USER 2 USER 3 USER 4 Programme 14-17 est le programme de configuration de l'utilisateur. Les utilisateurs sont libres de créer les valeurs dans l'ordre du temps, distance, calories et le niveau de résistance en 10 colonnes. Les valeurs et les profils seront stockées dans la mémoire après l'installation.
  • Seite 130 Programme de contrôle de la fréquence cardiaque: 55% H.R.C., 65% H.R.C., 75% H.R.C., 85% H.R.C., Cible H.R.C. Programme 18 Programme 22 sont les programmes de contrôle de fréquence cardiaque et le programme 22 est le programme du contrôle du taux de la fréquence cardiaque. Programme 18 est le 55% Max H.R.C.
  • Seite 131 Programme de contrôle Watt: Contrôle Watt Programme 23 est un programme indépendant de la vitesse. Appuyez sur la touche ENTER pour mettre en place les valeurs de TARGET WATT, TIME, DISTANCE et CALORIES. Pendant le mode d'exercice, le niveau de résistance est pas réglable. Par exemple, le niveau de résistance peut augmenter alors que la vitesse est trop lente.
  • Seite 132 Programme de graisse corporelle: graisse corporelle Programme 24 est un programme spécial conçu pour calculer le ratio de graisse corporelle des utilisateurs et d'offrir un profil de charge spécifique pour les utilisateurs. Il existe 3 types de corps divisés selon le FAT% calculé. Type1: BODY FAT%>...
  • Seite 133: Guide Des Opérations

    GUIDE DES OPÉRATIONS 1. Mode en veille : L'ordinateur sera en mode veille quand il n'y a pas d'entrée de signal et aucune touche pressée au bout de 4 minutes. Vous pouvez appuyer sur une touche pour réveiller l'ordinateur. 2. MESSAGE D’ERREUR : E1 (ERROR 1): état normal: Au cours de l'entraînement, lorsque le moniteur n'obtient pas de signal de comptage du moteur d'engrenage pendant plus de 4 secondes et après 3 vérifications successifs , puis l'écran...
  • Seite 134: Graphiques Lcd D'entrainement

    GRAPHIQUES LCD D’ENTRAINEMENT PROGRAM1: Manual PROGRAM2: Steps PROGRAM3: Hill PROGRAM4: Rolling PROGRAM5: Valley PROGRAM6: Fat Burn PROGRAM7: Ramp PROGRAM8: Mountain PROGRAM9: Intervals PROGRAM10: Random PROGRAM11: Plateau PROGRAM12: Tartlek PROGRAM13: Precipice...
  • Seite 135: Programme De Configuration De L'utilisateur

    PROGRAMME DE CONFIGURATION DE L'UTILISATEUR PROGRAM 14 PROGRAM 15 PROGRAM 16 PROGRAM 17...
  • Seite 136: Programme Des Profils De Frequence Cardiaque

    PROGRAMME DES PROFILS DE FREQUENCE CARDIAQUE: PROGRAM 18 55% HRC PROGRAM 19 65% HRC PROGRAM 20 75% HRC PROGRAM 21 85% HRC PROGRAM 22 TARGET HRC PROGRAM 23 WATT CONTROL...
  • Seite 137: Programme Test Body Fat

    PROGRAMME TEST BODY FAT BODY FAT START MODE BODY FAT STOP MODE Temps d'entraînement Temps d'entraînement Temps d'entraînement 40 minutes 40 minutes 20 minutes L'un des exercices apparaîtra automatiquement lors de la mesure de la graisse corporelle ENTRETIEN Nettoyage Le vélo elliptique peut être nettoyé avec un chiffon doux et un détergent doux. N'utilisez pas des abrasifs ou des solvants sur des pièces en plastique.
  • Seite 138: Dépannage

    DÉPANNAGE Problème Solution Tournez le bouchon d'extrémité du stabilisateur Le vélo elliptique vacille lorsqu'il est utilisé. arrière sur le stabilisateur arrière au besoin pour niveler le vélo elliptique 1. Retirez la console de l'ordinateur et vérifiez que les fils provenant de la console de l'ordina- teur sont correctement connectés aux fils issus du poste avant.
  • Seite 139: Excercice D'étirement

    EXCERCICE D'ÉTIREMENT Peu importe comment vous pratiquez le sport, Veuillez faire quelques étirements avant de commencer votre entraî- nement, le muscle chaud s’étendra facilement, donc réchauffez vous durant 5-10minutes, nous suggérons l'exercice d'étirement suivant : 5 fois ,10 comptes pour chaque fois ou plus, faire ces exercices à nouveau après le sport. ETIREMENT DU QUADRICEPS D'une seule main contre un mur pour l'équilibre, essayez d'atteindre votre derrière et etendez votre pied droit.
  • Seite 140 ROULER LA TÊTE Tournez la tête vers la droite une fois, en étirant le côté gauche de votre cou, puis faites pivoter votre tête en arrière une fois, étirez votre menton jusqu'au plafond et laissez votre bouche ouverte. Faites pivoter votre tête vers la gauche une fois, puis inclinez votre tête sur votre poitrine une fois.
  • Seite 141 Directive européenne n° 2002/96/EG relative aux déchets Ne jeter en aucun cas l‘appareil avec les ordures ménagères. Ne disposez de l‘appareil que dans les décharges publiques (Gestion des déchets communaux de la ville). Pour leur élimination respectez les réglementations en vigueur locales. Renseignez-vous à la mairie ou à la commune de votre ville sur les possibilités offertes pour éliminer votre appareil correctement et en respectant l‘environnement.
  • Seite 142 MANUALE D’USO ITALIANO...
  • Seite 143 Video Tutorial Il nostro per te! Montaggio Utilizzo Smontaggio 3 semplici passaggi per un inizio veloce e sicuro: 1. Scannerizza il QR-Code 2. Guarda il Video 3. Inizia ad allenarti! Link per il Video: www.sportstech.de/qr/cx640.html...
  • Seite 144 Gentile cliente Siamo lieti che abbiate scelto un dispositivo della gamma SPORTSTECH. Con le attrezzature sportive di SPORSTECH potrete usufruire della più alta qualità e della più recente tecnologia. Per sfruttare a pieno il potenziale del dispositivo e poterlo utilizzare per molti anni, raccomandiamo di leggere attentamente questo manuale prima di iniziare l’allenamento e di utilizzare il dispositivo...
  • Seite 145 INDICE Importanti Istruzioni Di Sicurezza Lista Della Parti Disegno Esploso Attrezzi Istruzioni Di Montaggio Le Cose Da Sapere Prima Di Iniziare L’allenamento Funzioni E Caratteristiche: Funzioni Introduzione E Funzionalità Programmi Guida Al Funzionamento Grafici Di Allenamento Su Schermo Lcd Impostazione Programma Utente Profili Programma Battito Test Programma Test Grasso Corporeo Manutenzione...
  • Seite 146: Importanti Istruzioni Di Sicurezza

    IMPORTANTI ISTRUZIONI DI SICUREZZA Precauzioni minime, incluse importanti istruzioni di sicurezza incluse nel presente manual dovrebbero essere sempre seguite durante l’uso del tapisroulant. Leggere tutte le istruzioni prima di utilizzare il dispositivo. ATTENZIONE: Prima di iniziare qualsiasi programma di esercizio consultare il proprio medico. Questo è...
  • Seite 147: Lista Della Parti

    LISTA DELLA PARTI Description Qty No Description Telaio principale Rondella Ø8x Ø20x2.0 Braccio Sinistro Corrimano Bullone M8x25 Tubo Pedale Sinistro Boccola in Plastica Tubo Pedale Destro Rondella grande Ø8x Ø25x2.0 Tubo Guida Coperchio Boccola in plastica Ø24,5x Braccio Destro Corrimano Ø16x14 Pezzo di connessione Dado M10x1.25x6...
  • Seite 148 Description Qty No Description Console Rondella Ø6 Pedale destro Supporto a U Rondella Ø8x Ø16x2 Vite a occhiello M6X36 Tappo finale 80x40x1.5 Dado M10x1.0x6 Bullone M8x35 Volano Ruota di Trasporto Bullone M6x15 Bullone M8x49 Puleggia Cinghia Dado M8 Asse Bullone M8x10 Boccola Ø38x32.6x80 Impugnatura Schiumosa Manubrio Dado S10...
  • Seite 149: Disegno Esploso

    DISEGNO ESPLOSO...
  • Seite 151: Attrezzi

    ATTREZZI (48) bullone M8x80 2PCS (109) cap noce S13 2PCS (49) rondella curva Ø8xØ20x2.0 2PCS (22) cap noce S18 4PCS (18) rondella elastica Ø8 2PCS (68) Noce M8 2PCS (67) bullone M8x49 4PCS (41) cap noce S16 4PCS (60) rondella curva Ø8xØ16x1,5 4PCS (68) cap noce M8 4PCS (16) cap noce S38 4PCS chiave a brugola 6mm 1PC strumento multi hex / Phillips Cacciavite...
  • Seite 152: Istruzioni Di Montaggio

    ISTRUZIONI DI MONTAGGIO Installazione Pedaliera e Stabilizzatori Anteriore e Posteriore: Posiziona due Pedaliere(52) sullo Stabilizzatore Anteriore (13) Posiziona quattro Pedaliere(52) sullo Stabilizzatore Posteriore (8) Rimuovere due Bulloni M8x15 (28), due Rondelle Ø8x Ø20 (31) dallo Stabilizzatore Frontale(13) . Posizionare lo Stabilizzatore Frontale (13) davanti al Telaio Principale (1) e allineare entrambi i buchi. Attacca lo Stabilizzatore Anteriore (13) sulla curva frontale del Telaio Principale (1) con le due Bulloni M8x15 (28) , due rondelle two Ø8x Ø20 (31) che sono state rimosse.
  • Seite 153 Installazione Cingolo Anteriore Rimuovere otto Bulloni M8x15 (28), quattro Rondelle Ø8x Ø20x2.0 (31),otto rondelle Ø8 (18),quattro Rondelle Curve Ø8x Ø16x2 (63) dal Telaio Principale (1). Connettere il Filo Sensore I(59)dal Telaio Principale (1) al filo medio (20)dal cingolo anteriore (2). Inserire il cingolo anteriore (9) sul tubo del telaio Principale(1) e assicurare con otto Bulloni M8x15 (28), quattro Rondelle Ø8x Ø20x2.0 (31), otto rondelle Ø8 (18),quattro Rondelle Curve Ø8x Ø16x2 (63)che sono state rimosse.
  • Seite 154 Installazione Braccio Destro/Sinistro corrimano: Attenzione: Prima del montaggio, per favore aggiungere il Grasso Biano Generico sugli assi orizzontali. Rimuovere due Bulloni M8x20 (28), due Rondelle Ø8 (18), due Rondelle Curve Ø8xØ33x2.0 (19), due Rondelle Grandi Ø19xØ25x2.0 (29) e la rondella Ø19(72) dagli assi sinistro e destro orizzontali del Cingolo Anteriore(9).
  • Seite 155 Installazione Pedali Destro/Sinistro: Rimuovere due bulloni M8x50 (110), due rondelle Ø8x Ø16 (63) e due dadi M8 (50) dalla U Staffa (108). Attaccare il tubo guida sinistro (5) alla manovella sinistra (57) con un bullone M8x50 (110), una rondella Ø8x Ø16 (63) e un dado M8 (50) che sono stati rimossi. Attaccare il tubo guida destro (5) alla manovella destra (57) con un bullone M8x50 (110), una rondella Ø8x Ø16 (63) e un dado M8 (50) che sono stati rimossi.
  • Seite 156 Installazione Tubo Pedale Sinistro/Destro: Rimuovere un Bullone M12x85(23) una Rondella Ø12(26) e un Dado M12(27) dal Braccio Sinistro del Corrimano (2) . Attaccare il braccio Sinistro del Corrimano (2) al Tubo del Pedale Sinistro (3) con un Bullone M12x85(23),una Rondella Ø12(26) e un Dado M12(27) che sono stati rimossi. Attaccare due Tappi S18 (22) sul Tubo del Pedale Sinistro (3).
  • Seite 157 Installazione Pedale Destro/Sinistro: Attaccare i pedali Destro e Sinistro (47,62)Sui Tubi Pedali Destro e Sinistro (3,4) con quattro Bulloni M8x20 (32).
  • Seite 158 Installazione Corrimano Destro/Sinistro: Attaccare i Corrimano Destro/Sinistro (11, 12)sui Bracci Destro/Sinistro dei Corrimano (2,6) con quattro Bulloni M8x47 (67), quattro Rondelle Curve Ø8x Ø16x1.5 (60),e quattro Dadi M8 (68).
  • Seite 159 Manubrio: Rimuovere due Bulloni M8x15 (28) e due Rondelle Curve Ø8xØ16 x1.5 (60) dal Cingolo Anteriore(9). Inserire I fili del Sensore Di Pulsazioni (43) dal Manubrio (10) nel buco sul Cingolo Anteriore (9) e poi tirarli fuori dalla parte superiore del Cingolo Anteriore (9). Attaccare il Manubrio (10) sul Cingolo anteriore (9) con due Bulloni M8x15 (28) e due Rondelle Curve Ø8xØ16x1.5 (60) tche sono stati rimossi con la Chiave a Brugola S6 fornita.
  • Seite 160: Le Cose Da Sapere Prima Di Iniziare L'allenamento

    Installazione Adattatore AC: Connettere un'estremità dell'Adattatore AC (40) nel jack di alimentazione del Filo di Alimentazione (56)sul retro della Copertura Sinistra. Prima di connettere, assicurarsi di aver letto attentamente le specifiche dell'Adattatore. Connettere l'altra estremità dell'Adattatore AC(40) alla presa di corrente. LE COSE DA SAPERE PRIMA DI INIZIARE L’ALLENAMENTO Selezione programma e impostazione valori 1.
  • Seite 161: Funzioni E Caratteristiche

    FUNZIONI E CARATTERISTICHE 1. TIME: Mostra il tempo dell’allenamento in minuti e secondi. Il computer conterà automaticamente da 0:00 a 99:59 ad intervallic di un secondo. Puoi anche programmare il tuo computer per fare un conto alla rovescia da un valore stabilito usando I pulsanti UP e DOWN. Se continui l’allenamento una volt ache il conteggio ha raggiunto i 0:00, il computer emetterà...
  • Seite 162 FUNZIONI Ci sono 6 pulsanti e la loro descrizione si trova qui di seguito: 1. START/STOP: • funzione Quick Start: ti permette di iniziare l’allenamento senza selezionare un programma. Solo per allenamento manuale. Il conteggio del tempo parte dallo zero •...
  • Seite 163: Funzioni

    INTRODUZIONE E FUNZIONALITÀ PROGRAMMI Programma Manuale: Manuale P1 è il programma manuale. L’utente può iniziare l’allenamento con il pulsante START/STOP .La resistenza standard è a livello 5. L’utente può decidere di aumentare il livello (regolando con I pulsanti UP/DOWN durante l’allenamento) con un period di tempo, un numero di calorie o di distanza. Funzioni: 1.
  • Seite 164 Programma prestabilito per utente: Utente 1, Utente 2, Utente 3, Utente 4 I programmi dal 14 al 17 sono I programmi predefiniti dall’utente. Gli utenti possono stabilire I valori di TIME, DISTANCE, CALORIES e il livello di resistenza in 10 colonne. I valori e I profile saranno conservati nella memoria dopo l’impostazione.
  • Seite 165 Programma controllo battito cardiaco: 55% H.R.C., 65% H.R.C., 75% H.R.C., 85% H.R.C., Target H.R.C. Programma 18 a Programma 22 sono I programmi Heart Rate Control (controllo battito cardiaco e il programma 22 stabilisce l’obiettivo del controllo del battito cardiaco. Programma 18 è il 55% del Massimo H.R.C. - -Obiettivo H.R. = (220 – ETA’) x 55% Programma 19 è...
  • Seite 166 Programma controllo Watt: Watt Control Il Programma è un programma a velocità indipendente. Premi ENTER per impostare I valori di TARGET WATT, TEMPO, DISTANZA E CALORIE. Durante l’allenamento il livello di resistenza non è regolabile. Per esempio il livello può aumentare quando la velocità è troppo bassa. O può diminuire quando la velocità...
  • Seite 167 Programma Grasso Corporeo: Body Fat Il Programma 24 è un programma speciale progettato per calcolare la percentuale di grasso corporeo dell’utente e per offrire un carico specifico per gli utenti. Ci sono 3 tipi di corporature secondo la % di grasso calcolata: Tipo 1: Grasso corporeo% >...
  • Seite 168: Guida Al Funzionamento

    GUIDA AL FUNZIONAMENTO 1. Sleep Mode: Il monitor entrerà in modalità SLEEP (LCD spento) quando non c’è input di segnale e nessun pulsante viene premuto per 4 minuti. Premi sullo schermo per riavviare il monitor. 2. Messaggio di errore: E1 (ERROR 1): stato normale: durante l’allenamento, se il motore non riceve il segnale di conteggio dal motore di trazione entro 4 secondi e ripete l’anomalia per altre tre volte,il display LCD mostrerà...
  • Seite 169: Grafici Di Allenamento Su Schermo Lcd

    GRAFICI DI ALLENAMENTO SU SCHERMO LCD PROGRAM1: Manual PROGRAM2: Steps PROGRAM3: Hill PROGRAM4: Rolling PROGRAM5: Valley PROGRAM6: Fat Burn PROGRAM7: Ramp PROGRAM8: Mountain PROGRAM9: Intervals PROGRAM10: Random PROGRAM11: Plateau PROGRAM12: Tartlek PROGRAM13: Precipice...
  • Seite 170: Impostazione Programma Utente

    IMPOSTAZIONE PROGRAMMA UTENTE PROGRAM 14 PROGRAM 15 PROGRAM 16 PROGRAM 17...
  • Seite 171: Profili Programma Battito

    PROFILI PROGRAMMA BATTITO PROGRAM 18 55% HRC PROGRAM 19 65% HRC PROGRAM 20 75% HRC PROGRAM 21 85% HRC PROGRAM 22 TARGET HRC PROGRAM 23 WATT CONTROL...
  • Seite 172: Test Programma Test Grasso Corporeo

    TEST PROGRAMMA TEST GRASSO CORPOREO BODY FAT MODALITA’START BODY FAT MODALITA’ STOP Tempo di allenamento: Tempo di allenamento: Tempo di allenamento: 40 minuti 40 minuti 20 minuti Uno degli allenamenti apparirà automaticamente quando si misura il grasso corporeo MANUTENZIONE Pulizia L'elliptical trainer può...
  • Seite 173: Risoluzione Dei Problemi

    RISOLUZIONE DEI PROBLEMI PROBLEMA SOLUZIONE Ruota il coperchio finale dello stabilizzatore pos- L'elliptical trainer oscilla quando è in uso. teriore finché necessario per regolare l'elliptical trainer. Rimuovere la console del computer e verificare che i fili provenienti dalla console del computer siano propriamente connessi ai fili provenienti dal cingolo anteriore.
  • Seite 174: Esercizi Di Stretching

    ESERCIZI DI STRETCHING Non importa la ragione per cui fai sport, fai in modo di fare sempre esercizi di stretching prima di cominciare. Il uscolo riscaldato si allungherà facilmente, quindi scaldati con degli esercizi per 5-10 minuti. Ti suggeriamo di eseguire i seguenti esercizi cinque volte conta fino a dieci ogni volta o anche più...
  • Seite 175 RULLI PER LA TESTA Ruotare la testa a destra, fino a sentir allungare il lato sinistro del collo, poi ruotare la testa indietro, allungando il mento verso il soffitto e aprendo la bocca. Ruotare la testa a sinistra, quindi abbassare la testa verso il petto per un conteggio. SOLLEVAMENTO SPALLE Sollevare la spalla destra verso l'orecchio.
  • Seite 176 Direttive Europee 2002/96/EG per lo smaltimento Non gettare mai il tuo attrezzo sportivo nell’immondizia normale. Smaltisci l’attrezzo solo tramite un siste- ma locale o approvato. Tieni in conto le regole applicabili correntemente. Se hai dubbi contatta le autorità locali per informazioni circa le opzioni per uno smaltimento corretto ed ecosostenibile. Batterie / Batterie ricaricabili In accordo con il regolamento per le batterie, sei obbligato legalmente a ritornare tutte le batterie usate ed esaurite.
  • Seite 177 Verkauf durch / Distributed by / Distribuido por / Distribué / Distribuito da InnovaMaxx GmbH Potsdamer Platz 11 10785 Berlin +49 30 220 663 569 service@innovamaxx.de http://www.sportstech.de...

Inhaltsverzeichnis