
Verwandte Anleitungen für Stahl miniCLIX


Inhaltszusammenfassung für Stahl miniCLIX
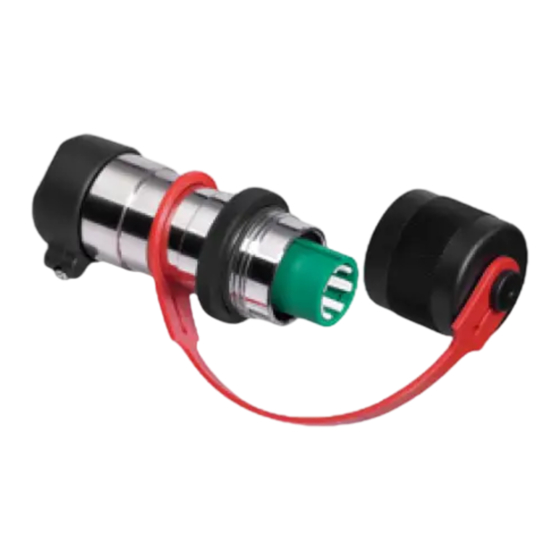
- Seite 1 Betriebsanleitung/Operating Instructions Ex Steckverbindung miniCLIX Ex Plug Connector miniCLIX > 8591/2...
- Seite 3 Betriebsanleitung Ex Steckverbindung miniCLIX > 8591/2...
-
Seite 4: Inhaltsverzeichnis
Flanschsteckdose in Metallausführungen ............21 Abschließvorrichtung ...................22 Winkelstück verdrehen ..................22 Inbetriebnahme ....................23 Vor Inbetriebnahme .....................23 Steckverbindung verbinden/trennen ..............23 Wartung .......................24 Regelmäßige Wartungsarbeiten ................24 Reparaturarbeiten ....................25 Reinigung ......................25 Zubehör und Ersatzteile ..................25 EG-Baumusterprüfbescheinigung (1. Seite) ............27 EG-Konformitätserklärung ...................28 Ex Steckverbindung miniCLIX 8591609300 8591/2 S-BA-8591/2-01-de-04/09/2009... -
Seite 5: Allgemeine Angaben
Allgemeine Angaben Allgemeine Angaben 2.1 Hersteller R. STAHL Schaltgeräte GmbH Am Bahnhof 30 D-74638 Waldenburg Telefon: +49 7942 943-0 Telefax: +49 7942 943-4333 Internet: www.miniclix.info www.stahl.de 2.2 Angaben zur Betriebsanleitung ID-NR.: 8591609300 Publikationsnummer: S-BA-8591/2-01-de-04/09/2009 Technische Änderungen vorbehalten. 2.3 Verwendete Symbole Handlungsaufforderung: Beschreibt durch den Anwender auszuführende Tätigkeiten. -
Seite 6: Allgemeine Sicherheitshinweise
Spannungsführende Kupplungen/Flanschsteckdosen sofort nach dem Trennen mit der Schutzkappe verschließen. Dabei korrekten Verschluss sicherstellen, da ansons- ten die Mindestschutzart und der Explosionsschutz nicht mehr gewährleistet sind. Nicht benutzte Komponenten mit der Schutzkappe verschlossen lagern. Ex Steckverbindung miniCLIX 8591609300 8591/2 S-BA-8591/2-01-de-04/09/2009... -
Seite 7: Warnhinweise
Anschlussraum verwenden, der den Anforderungen einer anerkannten Zündschutzart nach IEC/EN 60079-0, Abschnitt 1.2 entspricht. Metallausführung der Flanschsteckdose, des Gerätesteckers und des Winkel- stücks: Einbau zulässig in Wandungen von Gehäusen der Zündschutzart Druckfeste Kapse- lung „d“ oder Erhöhte Sicherheit „e“. 8591609300 Ex Steckverbindung miniCLIX S-BA-8591/2-01-de-04/09/2009 8591/2... -
Seite 8: Normenkonformität
Die Steckverbinder wurden gemäß dem Stand der Technik und gemäß EN 29001 (ISO 9001) entwickelt, gefertigt und geprüft. Sie entsprechen unter anderem folgenden Bestimmungen und Normen: IEC/EN 60079-0 IEC/EN 60079-1 IEC/EN 60079-7 IEC/EN 60079-11 IEC/EN 60079-14 94/9 EG 89/336/EWG „Elektromagnetische Verträglichkeit“ Ex Steckverbindung miniCLIX 8591609300 8591/2 S-BA-8591/2-01-de-04/09/2009... -
Seite 9: Vorgesehener Einsatzbereich
Signal- und Datenleitung, zur Stromversorgung von standortvariablen Vor-Ort-Steuerungen, zur Stromversorgung von elektrischen Anlagen, sowie von beweglichen Maschinen und Antrieben in explosionsgefährdeten Bereichen. Sie werden zum Schnellanschluss von explosionsgeschützten elektrischen Betriebsmit- teln im Ex- und Industriebereich verwendet. 8591609300 Ex Steckverbindung miniCLIX S-BA-8591/2-01-de-04/09/2009 8591/2... -
Seite 10: Technische Daten
II - wird von Kunststoff-Ausführungen erfüllt Umgebungstemperatur - 20 °C ... + 40 °C (Kunststoff) - 55 °C ... + 40 °C (Metall) - 55 °C ... + 75 °C (Metall max. 1 A) Ex Steckverbindung miniCLIX 8591609300 8591/2 S-BA-8591/2-01-de-04/09/2009... - Seite 11 191 g Winkelstück Schutzkappen: für Stecker / Gerätestecker ca. 10 g ca. 44 g für Kupplung / Flanschsteckdose ca. 13 g ca. 80 g Gewicht inklusive Kunststoffschutzkappe weitere technische Daten zur Projektierung: siehe Datenblatt 8591609300 Ex Steckverbindung miniCLIX S-BA-8591/2-01-de-04/09/2009 8591/2...
- Seite 12 6 P + ¿ Sonderzeit ohne 6 PE 05043E00 05116E00 24 V DC grau 05045E00 05121E00 6 P + ¿ Sonderzeit ohne 05050E00 05122E00 6 P + ¿ 400 V AC 10 h blau 05052E00 05123E00 Ex Steckverbindung miniCLIX 8591609300 8591/2 S-BA-8591/2-01-de-04/09/2009...
- Seite 13 8591/.8.-..-..01 Flanschsteckdose 8591/.9.-..-0.01 Gerätestecker 8591/.9.-..-..01 Gerätestecker (Metall) (Kunststoff) für Ex d Gehäuse mit Volumen < 2 l (Metall) 05136E00 05127E00 8591/.6.-..-..01 Gerätestecker 8591/11.-..-0.01 Winkelstück für Ex d Gehäuse mit Volumen > 2 l (Kunststoff/Metall) (Metall) 8591609300 Ex Steckverbindung miniCLIX S-BA-8591/2-01-de-04/09/2009 8591/2...
-
Seite 14: Transport, Lagerung Und Entsorgung
Montage strikt nach Anleitung und unter Berücksichtigung der nationalen Sicherheits- und Unfallverhütungsvorschriften (z.B. IEC/EN 60079-14) durchführen. Die Fa. R. STAHL liefert die miniCLIX Steckverbindungen auf Wunsch mit vorkonfektionierten Leitungen aus. Bitte wenden Sie sich hierfür an Ihre zu- ständige Vertriebsniederlassung. -
Seite 15: Getestete Kabeltypen
H05 V2V2-F 5G2,5 12,0 H05-RR-F 5G1,5 10,2 Y-JZ 07 x 1,5 NYM 7 x 1,5 10,5 NYM 5 x 2,5 12,1 NYY 5G1,5 11,1 NYY 5G2,5 13,3 LiYCY 5 x 0,75 ELSPRO-FLEX THERM 3x1,5 8591609300 Ex Steckverbindung miniCLIX S-BA-8591/2-01-de-04/09/2009 8591/2... -
Seite 16: Crimpanschluss
Beschädigung der Crimpkontakte! Bei Verwendung einer falschen Crimpzange können die Crimpkontakte beschädigt werden. Nur original R. STAHL-Crimpzange (siehe Zubehör) benutzen. Die Isolation der Anschlussleitungen muss bis an die Steckerstifte bzw. Ste- ckerbuchsen heranreichen. Der Leiter selbst darf nicht beschädigt sein. -
Seite 17: Stecker/Kupplung (Ex-E) - Kunststoff/Metall Mit Crimpanschluss
Druckstück (2) und Zugentlastung (3) auf Anschlussleitung aufschieben. Dichtung (4) auf Anschlussleitung aufschieben und in Zugentlastung (3) einführen. Druckscheibe (5) und Isolierhülse (6) auf Anschlussleitung aufschieben. Bei der Isolierhülse (6) auf die richtige Orientie- rung achten. Eine nachträgliche Korrektur ist schwierig. 8591609300 Ex Steckverbindung miniCLIX S-BA-8591/2-01-de-04/09/2009 8591/2... - Seite 18 Isolierhülse (6) schieben. Steckereinsatz (8) lagerichtig in das Steckergehäuse einführen (10). Nut und Nase müssen übereinstimmen. Überwurfmutter von der anderen Seite heranschieben. Druckstück (2) auf Steckerhülse schrauben und mit Arretierungsschraube (1) sichern. 06226E00 Ex Steckverbindung miniCLIX 8591609300 8591/2 S-BA-8591/2-01-de-04/09/2009...
-
Seite 19: Gerätestecker/Flanschsteckdose (Ex-E) - Kunststoff Mit Crimpanschluss
Passung im Steckereinsatz (4) ausgerichtet werden. Kompletten Gerätesteckereinsatz (4) mit der Anschlussleitung voran durch die Gerä- testeckerhülse (2) einschieben und lagerichtig eindrücken bis er hörbar einrastet. Nach dem Einrasten ist keine Demontage mehr möglich. 8591609300 Ex Steckverbindung miniCLIX S-BA-8591/2-01-de-04/09/2009 8591/2... -
Seite 20: Armierte Leitung Stecker/Kupplung (Ex-E) - Metall
Steckerstifte (11) von hinten in Gerätesteckereinsatz (12) bis zum Anschlag einführen. Der Sechskant der Steckerstifte muss lagerichtig zur Passung im Steckereinsatz (12) ausgerichtet werden. Steckerstifte rasten hörbar ein. Steckereinsatz (12) zusammen mit Isolierhülse (10) von hinten lagerichtig in die Ste- ckerhülse (13) stecken. 11382E00 Ex Steckverbindung miniCLIX 8591609300 8591/2 S-BA-8591/2-01-de-04/09/2009... -
Seite 21: Stecker/Kupplung (Ex-E) - Kunststoff/Metall Mit Käfigzugfederanschluss
Mit geeignetem Werkzeug (10) (z.B. Schraubendreher 2,5 x 75) Käfigzugfeder (9) ent- riegeln. Anschlussader (11) einführen. Werkzeug herausziehen. Dadurch wird die Käfigzugfeder auf den Anschlussleiter gepresst. Anschlussader und Steckerstift haben somit elektrischen Kontakt. Zum Lösen der Verbindung in umgekehrter Reihenfolge vorgehen. 8591609300 Ex Steckverbindung miniCLIX S-BA-8591/2-01-de-04/09/2009 8591/2... - Seite 22 Steckereinsatz (6) lagerichtig in die Stecker-/Kupplunghülse (7) einstecken. Druckscheibe/Schirmauflage (5), Dichtring (4) und Zugentlastung (3) in die Steckhülse (7) stecken. WARNUNG Beschädigung am Gewinde durch Verkanten! Komponenten sorgfältig und gerade einstecken und aufschrauben. Druckstück aufschrauben und mit Arretierungsschraube (1) sichern. Ex Steckverbindung miniCLIX 8591609300 8591/2 S-BA-8591/2-01-de-04/09/2009...
-
Seite 23: Direktanschluss Über Einzeladern Bei Gerätestecker/Flanschsteckdose In Metallausführungen
Betriebsanleitung. Flanschsteckdose bzw. Gerätestecker zusam- men mit Verdrehschutz (7) in das Gehäuse ein- schrauben (Bohrung des Gewindes: M25; Schlüsselweite: SW32). Mit Arretierungsschraube (8) die Flanschsteck- dose bzw. den Gerätestecker gegen Verdrehen sichern. 05147E00 8591609300 Ex Steckverbindung miniCLIX S-BA-8591/2-01-de-04/09/2009 8591/2... -
Seite 24: Abschließvorrichtung
Ein eingeschraubtes Winkelstück kann in seiner Lage verändert werden, ohne den Ein- schraubstutzen (1) herauszudrehen. Verdrehschutz (2) herausschrauben. Schrauben (3) herausdrehen. Winkelstück in gewünschte Position drehen. Schrauben (3) in die entsprechenden sichtbaren Löcher einschrauben. Verdrehschutz (2) wieder einschrauben. Ex Steckverbindung miniCLIX 8591609300 8591/2 S-BA-8591/2-01-de-04/09/2009... -
Seite 25: Inbetriebnahme
Spannungsführende Kupplung/Flanschsteckdose sofort nach dem Tren- nen mit Schutzkappe verschließen. Vor jedem Stecken des Steckers/Gerätesteckers diesen auf Beschädigungen prüfen. 06239E00 Stecker/Gerätestecker mit der Führungsnase lagerichtig in die entsprechende Füh- rungsnut einführen (1). Komponenten bis zum Anschlag zusammenstecken (2). 8591609300 Ex Steckverbindung miniCLIX S-BA-8591/2-01-de-04/09/2009 8591/2... -
Seite 26: Wartung
9.1 Regelmäßige Wartungsarbeiten Art und Umfang der Prüfungen den entsprechenden nationalen Vorschriften (z.B. IEC/EN 60079-17) entnehmen. Die Fristen so bemessen, dass entstehende Mängel in der Anlage, mit denen zu rechnen ist, rechtzeitig festgestellt werden. Ex Steckverbindung miniCLIX 8591609300 8591/2 S-BA-8591/2-01-de-04/09/2009... -
Seite 27: Reparaturarbeiten
Messing vernickelt 8591803140 Flanschsteckdose 10211E00 Schutzkappe für Kunststoff (Polyamid) 8591802140 Stecker, Messing vernickelt 8591804140 Gerätestecker 10210E00 Crimpzange 4618990 bis 4 mm , für alle Ausführungen mit Crimpanschluss 10198E00 Verdrehschutz für Flanschsteckdose und Gerätestecker 8591809290 10891E00 8591609300 Ex Steckverbindung miniCLIX S-BA-8591/2-01-de-04/09/2009 8591/2... - Seite 28 7 x 1,5 mm für Kupplung oder Flanschsteckdose 8591802500 7 x 2,5 mm für Kupplung oder Flanschsteckdose 05641E00 Verteilerkasten mit 1, 2, 4 oder 6 Abgängen (Flanschsteckdose: Kunststoff oder Metall) in Kunststoff oder Metall 10261E00 Ex Steckverbindung miniCLIX 8591609300 8591/2 S-BA-8591/2-01-de-04/09/2009...
-
Seite 29: Eg-Baumusterprüfbescheinigung (1. Seite)
EG-Baumusterprüfbescheinigung (1. Seite) 11 EG-Baumusterprüfbescheinigung (1. Seite) 8591609300 Ex Steckverbindung miniCLIX S-BA-8591/2-01-de-04/09/2009 8591/2... - Seite 31 Operating Instructions Ex Plug Connector miniCLIX > 8591/2...
- Seite 32 Connecting / disconnecting the plug connection ..........22 Maintenance and Servicing .................24 Regular Maintenance Work .................24 Repair work ......................24 Cleaning ......................25 Accessories and Spare Parts ................25 EC-Type Examination Certificate (Page 1) ............26 EC-Declaration of Conformity ................27 Ex Plug Connector miniCLIX 8591/2...
-
Seite 33: General Information
Describes the results or the reactions to the actions taken. Checklist sign Commentary sign: Describes the notes and recommendations. Warning sign: Danger from energised parts! Warning sign: Danger due to an explosive atmosphere! 8591609300 Ex Plug Connector miniCLIX S-BA-8591/2-01-en-04/09/2009 8591/2... -
Seite 34: General Safety Information
After disconnection, the coupler flange socket must be immediately closed off using the protective caps! When replacing the cap, make sure that it covers the connector correctly, otherwise the minimum protection level and the explosion protection cannot be guaranteed. Ex Plug Connector miniCLIX 8591609300 8591/2 S-BA-8591/2-01-en-04/09/2009... -
Seite 35: Warnings
IEC/EN 60079-0, Section 1.2. Metal versions of flanged socket, device plug and angled adaptor: Installation permitted in walls of enclosures designed with type of protection Flame- proof Enclosure “d“ and Increased Safety “e“. 8591609300 Ex Plug Connector miniCLIX S-BA-8591/2-01-en-04/09/2009 8591/2... -
Seite 36: Conformity To Standards
The connectors have been developed, manufactured and tested in accordance with the state-of-art and EN 29001 (ISO 9001). Among others, they comply with the following regulations and standards: IEC/EN 60079-0 IEC/EN 60079-1 IEC/EN 60079-7 IEC/EN 60079-11 IEC/EN 60079-14 94/9 EC 89/336/EEC „Electromagnetic Compatibility“ Ex Plug Connector miniCLIX 8591609300 8591/2 S-BA-8591/2-01-en-04/09/2009... -
Seite 37: Designated Use
They are used as quick-action connectors of explosion-protected electrical apparatus in intrinsically safe (Ex) and industrial areas. 8591609300 Ex Plug Connector miniCLIX S-BA-8591/2-01-en-04/09/2009 8591/2... -
Seite 38: Technical Data
- 20 °C ... + 40 °C (Plastic) - 55 °C ... + 40 °C (Metal) - 55 °C ... + 75 °C (Metal max. 1 A) Storage temperature - 55 °C ... + 80 °C Ex Plug Connector miniCLIX 8591609300 8591/2 S-BA-8591/2-01-en-04/09/2009... - Seite 39 10 g approx 44 g for coupler / flange socket approx 13 g approx 80 g Weight including plastic protective cap Additional technical data for layout and designs: see the data sheet 8591609300 Ex Plug Connector miniCLIX S-BA-8591/2-01-en-04/09/2009 8591/2...
- Seite 40 Special time without 6 PE 05043E00 05116E00 24 V DC grey 05045E00 05121E00 6 P + ¿ Special time without 05050E00 05122E00 6 P + ¿ 400 V AC 10 h blue 05052E00 05123E00 Ex Plug Connector miniCLIX 8591609300 8591/2 S-BA-8591/2-01-en-04/09/2009...
- Seite 41 8591/.9.-..-..01 Device plug (metal) (plastic) for Ex d enclosure with volumen < 2 l (metal) 05136E00 05127E00 8591/.6.-..-..01 Device plug 8591/11.-..-0.01 Angled adaptor for Ex d enclosure with volume > 2 l (plastic/metal) (metal) 8591609300 Ex Plug Connector miniCLIX S-BA-8591/2-01-en-04/09/2009 8591/2...
-
Seite 42: Transport, Storage And Disposal
Carry out the mounting in strict accordance with the instructions and national safety and accident prevention regulations (e.g. IEC/EN 60079-14). R. STAHL supplies the miniCLIX plug connectors on request with prefabricated leads. Please contact your local sales representative for more information. -
Seite 43: Tested Cable Types
H05 V2V2-F 5G2,5 12,0 H05-RR-F 5G1,5 10,2 Y-JZ 07 x 1,5 NYM 7 x 1,5 10,5 NYM 5 x 2,5 12,1 NYY 5G1,5 11,1 NYY 5G2,5 13,3 LiYCY 5 x 0,75 ELSPRO-FLEX THERM 3x1,5 8591609300 Ex Plug Connector miniCLIX S-BA-8591/2-01-en-04/09/2009 8591/2... -
Seite 44: Crimp Connection
Damage to the crimped contacts! Using an unsuitable crimping tool can damage the crimped contacts. Use only the original R. STAHL crimping tool (see accessories). The insulation of the wires connected must extend all the way to the plug pins or the pin socket sleeves. -
Seite 45: Plug/Coupler (Ex-E) - Plastic/Metal With Crimp Connection
Push the seal (4)onto the connecting cable and guide it into the cable strain-relief (3). Push the pressure washer (5) and insulating sleeve (6) onto the connecting cable. Take care that the insulation sleeve (6) is correctly oriented. A subsequent correction is difficult. 8591609300 Ex Plug Connector miniCLIX S-BA-8591/2-01-en-04/09/2009 8591/2... - Seite 46 Correctly guide the plug insert (8) in the plug enclosure (10). Groove and lug must match. Push the union nut from the opposite side to it makes contact. Screw the pressure fitting (2) onto the plug sleeve and secure with the locking screw (1). 06226E00 Ex Plug Connector miniCLIX 8591609300 8591/2 S-BA-8591/2-01-en-04/09/2009...
-
Seite 47: Device Plug/Flange Socket (Ex-E) - Plastic With Crimp Connection
Insert the entire device plug insert (4) with the connecting cable through the front on the device plug (2) sleeve until it audibly latches into position. After latching; disassembly is no longer possible. 8591609300 Ex Plug Connector miniCLIX S-BA-8591/2-01-en-04/09/2009 8591/2... -
Seite 48: Plug/Coupler (Ex-E) For Armoured Cable - Metal
Insert the plug pins until they audibly latch into position. In the correct position from behind, insert the plug insert (12) together with the insulating sleeve (10) into the plug sleeve (13). 11382E00 Ex Plug Connector miniCLIX 8591609300 8591/2 S-BA-8591/2-01-en-04/09/2009... -
Seite 49: Plug/Coupler (Ex-E) - Plastic/Metal With Cage Clamp Terminal
In so doing, the cage clamp spring will press against the connection wire. Electrical contact is hereby established with the connection wire and plug pin. Disconnection of the plug connection proceeds by reversing the order. 8591609300 Ex Plug Connector miniCLIX S-BA-8591/2-01-en-04/09/2009 8591/2... - Seite 50 Insert the pressure washer/shield (5), the seal ring (4) and the strain-relief (3) in the plug sleeve (7). WARNING Cross-threading can damage the threads! Align components before tightening. Screw on the pressure fitting and then secure it in place using the locking screw (1). Ex Plug Connector miniCLIX 8591609300 8591/2 S-BA-8591/2-01-en-04/09/2009...
-
Seite 51: Direct Connection Of Individual Wires For Metal Versions Of Device Plugs/ Flange Sockets
The plug connection can be ordered with an optional locking mechanism. It can then be padlock-safeguarded when not plugged in (hasp diameter: 3 ... 6 mm). The union nut must be unscrewed before the connection can be separated. The locking mechanism can not be retrofitted! 8591609300 Ex Plug Connector miniCLIX S-BA-8591/2-01-en-04/09/2009 8591/2... -
Seite 52: Rotating The Angled Adaptor
Explosion protection cannot be guaranteed any more if the plug and socket are incorrectly connected. Proceed in strict accordance with the instructions. WARNING Risk of damage to the plug socket! Components to be connected must have the same coding. Ex Plug Connector miniCLIX 8591609300 8591/2 S-BA-8591/2-01-en-04/09/2009... - Seite 53 Fully insert the plug into the socket. Screw on the coupling ring/union nut. The mechanical connection as well as the IP protection are now established. Disconnection of the plug connection proceeds by reversing the order. 8591609300 Ex Plug Connector miniCLIX S-BA-8591/2-01-en-04/09/2009 8591/2...
-
Seite 54: Maintenance And Servicing
In case of damage to the plug pins: Replace the apparatus. Disassembly cannot be performed, therefore repair is not possible. In case of damage to the flameproof enclosure: The device must be returned to the manufacturer for repair. Ex Plug Connector miniCLIX 8591609300 8591/2 S-BA-8591/2-01-en-04/09/2009... -
Seite 55: Cleaning
8591802500 7 x 2,5 mm for coupler or flange socket 05641E00 Distribution box with 1, 2, 4 or 6 branches (flange socket: plastic or metal) in plastic or metal 10261E00 8591609300 Ex Plug Connector miniCLIX S-BA-8591/2-01-en-04/09/2009 8591/2... -
Seite 56: Ec-Type Examination Certificate
EC-Type Examination Certificate (Page 1) 11 EC-Type Examination Certificate (Page 1) Ex Plug Connector miniCLIX 8591609300 8591/2 S-BA-8591/2-01-en-04/09/2009... - Seite 60 8591609300 S-BA-8591/2-01-de/en-04/09/2009...