
Verwandte Anleitungen für Stahl miniCON 8595/1 Serie


Inhaltszusammenfassung für Stahl miniCON 8595/1 Serie
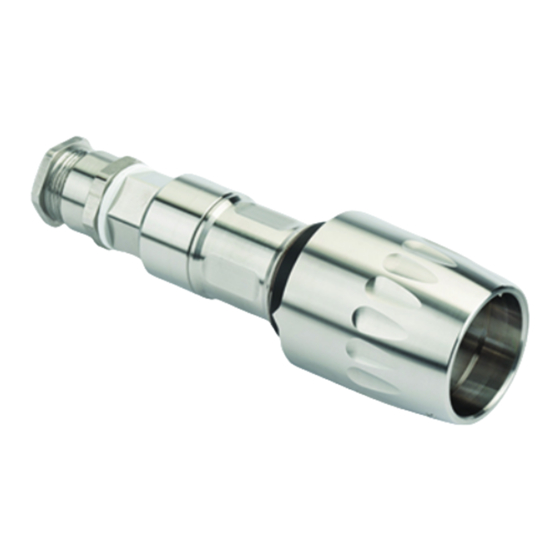
- Seite 1 Handbuch Additional languages r-stahl.com Ex Steckverbinder miniCON Reihe 8595/1...
-
Seite 2: Inhaltsverzeichnis
Inhaltsverzeichnis Inhaltsverzeichnis Allgemeine Angaben....................3 Hersteller......................3 Zu diesem Handbuch...................3 Weitere Dokumente .....................3 Konformität zu Normen und Bestimmungen ............3 Erläuterung der Symbole ..................4 Symbole im Handbuch..................4 Symbole am Gerät ....................4 Sicherheit ......................5 Bestimmungsgemäße Verwendung..............5 Qualifikation des Personals .................5 Restrisiken ......................6 Transport und Lagerung ..................7 Projektierung......................8 Montage und Installation..................9 Montage / Demontage ..................9... -
Seite 3: Allgemeine Angaben
▶ Handbuch dem Bedien- und Wartungspersonal jederzeit zugänglich machen. ▶ Handbuch an jeden folgenden Besitzer oder Benutzer des Geräts weitergeben. ▶ Handbuch bei jeder von R. STAHL erhaltenen Ergänzung aktualisieren. ID-Nr.: 296382 / 859560300020 Publikationsnummer: 2022-02-17·HB00·III·de·00 Das Originalhandbuch ist die deutsche Ausgabe. -
Seite 4: Erläuterung Der Symbole
Erläuterung der Symbole Erläuterung der Symbole Symbole im Handbuch Symbol Bedeutung Hinweis zum leichteren Arbeiten Gefahrensituation, die bei Nichtbeachtung der GEFAHR! Sicherheitsmaßnahmen zum Tod oder zu schweren Verletzungen mit bleibenden Schäden führen kann. Gefahrensituation, die bei Nichtbeachtung der WARNUNG! Sicherheitsmaßnahmen zu schweren Verletzungen führen kann. -
Seite 5: Sicherheit
Normen und Bestimmungen umfasst. Für Tätigkeiten in explosionsgefährdeten Bereichen sind weitere Kenntnisse erforderlich! R. STAHL empfiehlt einen Kenntnisstand, der in folgenden Normen beschrieben wird: • IEC/EN 60079-14 (Projektierung, Auswahl und Errichtung elektrischer Anlagen) • IEC/EN 60079-17 (Prüfung und Instandhaltung elektrischer Anlagen) •... -
Seite 6: Restrisiken
Gerät nur in Originalverpackung oder gleichwertiger Verpackung transportieren. ▶ Verpackung und Gerät auf Beschädigung prüfen. Beschädigungen umgehend an R. STAHL melden. Beschädigtes Gerät nicht montieren und nicht in Betrieb nehmen. Übermäßige Erwärmung oder elektrostatische Aufladung Durch eine nachträgliche Modifikation am Gerät, durch den Betrieb außerhalb zugelassener Bedingungen oder eine unsachgemäße Reinigung kann sich das Gerät stark erwärmen oder... -
Seite 7: Transport Und Lagerung
▶ Bei Montage, Installation und Wartung ausschließlich Originalteile/-ersatzteile von R. STAHL Schaltgeräte GmbH verwenden. ▶ Reparaturen am Gerät nur mit Original-Ersatzteilen und nach Absprache mit R. STAHL durchführen. ▶ Steckverbindung nach Kurzschluss im Stromkreis auf Funktion prüfen und gegebenenfalls austauschen. -
Seite 8: Projektierung
Projektierung Projektierung Anforderungen an die Anschlussleitung: • Die Anschlussleitung muss für die Installation und den Anwendungsbereich geeignet sein. • Es müssen die Anforderungen an die Installation der Anschlussleitung nach IEC/EN 60079-14 eingehalten werden. Einbaulage: • Staub: Einbaulage nach IEC/EN 60079-14 berücksichtigen •... -
Seite 9: Montage Und Installation
Montage und Installation Montage und Installation Montage / Demontage ▶ Gerät sorgfältig und nur unter Beachtung der Sicherheitshinweise (siehe Kapitel "Sicherheit") montieren. ▶ Folgende Einbaubedingungen und Montageanweisungen genau durchlesen und exakt befolgen. ▶ Einbaugrafiken sowie Maßzeichnungen in diesem Kapitel, im Kapitel "Technische Daten" und im Kapitel "Anhang B, Maßzeichnungen") beachten. - Seite 10 Montage und Installation KIT-Teile Buchse KIT-Teile Stift (Standard) (reverse Gender) = KIT 8595 = Adapter M20 Adapter M20 = Verschraubung (nur bei Kunststoffvariante) = 2-Ohrklemme 5-13 (nur bei Kunststoffvariante) = Zentrierscheibe (nur bei Kunststoffvariante) = KIT 8595 = Adapter M25 Adapter M25 = Verschraubung (nur bei Kunststoffvariante) = 2-Ohrklemme 13-17 (nur bei Kunststoffvariante)
- Seite 11 Montage und Installation Variante Stecker PA (Kunststoff), Metall, inkl. reverse Gender 6.2 6.1 6.1 6.2 6.3 23059E00 Legende KIT-Teile Stift KIT-Teile Buchse (Standard) (reverse Gender) = KIT 8595 Grundteil = Grundteil Stecker = KIT 8595 = Kontakthalter Stift = Kontakthalter Einsatz für Buchse Kontakte...
- Seite 12 Montage und Installation GEFAHR! Explosionsgefahr durch falsche Reihenfolge und unvollständige Montage! Nichtbeachten führt zu tödlichen oder schweren Verletzungen. ▶ Vollständigkeit der Komponenten prüfen. ▶ Montageschritte ausschließlich in angegebener Reihenfolge durchführen. ▶ Nur geeignetes Werkzeug verwenden. ▶ Komponenten bei der Montage nicht beschädigen. ▶...
-
Seite 13: Aderausrichtung Für Buchsenkontakte
Montage und Installation Leitung vorbereiten ▶ Darauf achten, dass die Aderkennzeichnung (Farbe bzw. Ziffern) mit der Pol-Kennzeichnung übereinstimmt. Falls nicht, das andere Ende der Leitung vorbereiten. 8/PE 8/PE 22700E00 22701E00 Aderausrichtung Aderausrichtung für Steckerkontakte für Buchsenkontakte Vorzugsbelegung: Leitungen mit Aderkennzeichnung nach VDE 0293-380 (Farbe) 3 Adern: 1-blau, 2-braun, 3...7-n/a, PE: grün/gelb 4 Adern: 1-braun, 2-schwarz, 3-grau, 4…7-n/a, PE: grün/gelb 5 Adern: 1-blau, 2-braun, 3-schwarz, 4-grau, 5...7-n/a, PE: grün/gelb... - Seite 14 Montage und Installation Löten: Querschnitt Abmantel- Abisolier- Position länge A länge B 2-Ohrklemme [mm] [mm] [mm] 0,25 mm AWG24 30 ±1 4 ±0,5 39 ±1 0,34 mm AWG22 5 ±0,5 0,5 mm AWG20 0,75 mm AWG18 1 mm 1,5 mm AWG16 5,5 ±0,5 Crimpen:...
- Seite 15 Montage und Installation ▶ Leitung nach folgenden Vorgaben löten bzw. crimpen: 23063E00 Zum Crimpen Vierdorncrimpzange DigiCrimp 0,14 ... 6 mm (Art. Nr. 295689) verwenden. Löten: Querschnitt KIT Stift-/ Kontroll- Buchsen- durchmesser kontakt [mm] 0,25 mm AWG24 0,25 ... 0,5 0,34 mm AWG22 0,75 ...
-
Seite 16: Buchseneinsatz
Montage und Installation 2-Ohrklemme (6.1) quetschen (nur bei Leitungseinführungen ohne integrierte Zugentlastung, z.B. 8161). 22708E00 ▶ 2-Ohrklemme positionieren, siehe Punkt 5, Tabelle "Crimpen", Maß C. ▶ 2-Ohrklemme mit geeignetem Werkzeug (z.B. von Knipex) crimpen. Durch abwechselndes Crimpen der beiden "Ohren" kann ein Quetschen des Leitungsmantels verhindert werden. - Seite 17 Montage und Installation Kontaktteile (3.1) in Kontakthalter (2.1) montieren HINWEIS! Kontaktteile so montieren, dass kein Pol ungenutzt bleibt. ▶ Kontaktteile in Kontakthalter einclipsen. Auf Nummerierung der Pole achten, damit die Steckverbinder zusammenpassen. 22691E00 Buchsen-Kontakthalter 22692E00 Stift-Kontakthalter ▶ Bei der Belegung immer bei 1 starten und bei PE enden. PE ist PE bzw. 8. Pol. 22689E00 22690E00 Buchsen-Kontakthalter...
-
Seite 18: Montage Und Installation
Montage und Installation Codierung einstellen und prüfen 13.1. Grundteil-Kupplung (1) 22696E00 22697E00 3-2-1 Ansicht hinten 1-2-3 Ansicht vorne ▶ Buchsen- bzw. Stifteinsatz in der gewünschten Codierung von hinten in Grundteil-Kupplung schieben. 22698E00 22699E00 Beispiel für Codierung 2 ▶ Codierung von vorne bzw. im montierten Zustand prüfen. Das Dreieck im Kontakteinsatz befindet sich an der Position der eingestellten Codierung. - Seite 19 Montage und Installation 13.2. Grundteil-Stecker (1) 23065E00 23064E00 3-2-1 Ansicht vorn 1-2-3 Ansicht hinten ▶ Buchsen- bzw. Stifteinsatz in der gewünschten Codierung von hinten in Grundteil-Stecker schieben. 23067E00 Beispiel für Codierung 2 23066E00 ▶ Codierung von vorne bzw. im montierten Zustand prüfen. Das Dreieck im Kontakteinsatz befindet sich an der Position der eingestellten Codierung.
- Seite 20 Montage und Installation Adapter (5.1) inkl. Leitungseinführung (5.2) montieren ▶ Anzugsdrehmomente anziehen. Anzugsdrehmoment Anschlussgewinde Hutmutter bei 20 °C bei 20 °C Leitungs- M20 x 1,5 2,3 Nm 1,5 Nm einführung M25 x 1,5 3,0 Nm 2,0 Nm 8161 PA (Kunststoff) Metall bei 20 °C bei 20 °C...
- Seite 21 Montage und Installation Codierscheibe (4.2) montieren 180° 180° 22710E00 23069E00 ▶ Schutzfolie von Codierschiebe entfernen (1). ▶ Codierscheibe um 180° drehen (2). ▶ Codierscheibe auf Grundteil-Kupplung bzw. Grundteil-Stecker aufschieben (3). 296382 / 859560300020 Ex Steckverbinder miniCON 2022-02-17·HB00·III·de·00 Reihe 8595/1...
- Seite 22 Montage und Installation 6.1.2 Montage Flanschsteckdose Ex e und Gerätestecker Ex e Vor Einbau der Ex Steckverbindung miniCON in ein Gehäuse folgende Prüfschritte durchführen: • Alle Anschlüsse und Verdrahtungen spannungsfrei schalten und gegen unbefugtes Schalten sichern. • Bohrungen und Einschraubgewinde auf Unversehrtheit und Sauberkeit prüfen. •...
- Seite 23 Montage und Installation Variante Gerätestecker Ex e Metall, inkl. reverse Gender 5.1 5.2 23073E00 Legende KIT-Teile Stift KIT-Teile Buchse (Standard) (reverse Gender) = KIT 8595 Grundteil = Grundteil Stecker = KIT 8595 = Kontakthalter Stift 2.1 = Kontakthalter Einsatz für Buchse Kontakte = Isolierkörper Stift...
- Seite 24 Montage und Installation ▶ Dichtung (5.1), Adapter (5.2), Klemmscheibe (5.3), Erdungsring (5.4) und Schutzkappe (4.1) in der angegebenen Reihenfolge auf Leitung ziehen. Leitung vorbereiten ▶ siehe Kapitel 6.1.1 Punkte 5 bis 7 Isolierkörper (2.2), Kontaktteile (3.1) und Kontakthalter (2.1) montieren ▶...
- Seite 25 Montage und Installation Adapter montieren ▶ 23075E00 Von oben den Adapter Ex e (5.2) mit der Dichtung (5.1) über die Klemmscheibe (5.3) und Erdungsring (5.4) ziehen und mit dem Grundteil (1) verschrauben. ▶ Anzugsdrehmomente anziehen. (Anzugsdrehmoment Adapter Ex e M32: 14 Nm) Schutzkappe (4.1) und Codierscheibe (4.2) montieren ▶...
- Seite 26 Montage und Installation In Ex e Gehäuse einbauen HINWEIS! Beim Einkleben (z.B. mit Loctite) sicherstellen, dass die Gebrauchstemperatur des Klebers min. 20 °C höher liegt als die am Einbauteil vorhandene Temperatur. 8.1. Einbau in Metallgehäuse (20) Variante 1 Variante 2 (max.
- Seite 27 Montage und Installation 8.2. Einbau in Kunststoffgehäuse (20) Variante 1 Variante 2 (max. Wandstärke: 3 mm) (max. Wandstärke: 3 mm) 30 20 30 20 23169E00 23079E00 • Metallplatte (30) 2 mm • Metallplatte (30) 3 mm mit Durchgangsbohrung mit Gewindebohrung •...
- Seite 28 Montage und Installation 6.1.3 Montage Flanschsteckdose Ex d und Gerätestecker Vor Einbau der Ex Steckverbindung miniCON in ein Ex d Gehäuse folgende Prüfschritte durchführen: • Alle Anschlüsse und Verdrahtungen spannungsfrei schalten und gegen unbefugtes Schalten sichern. • Bohrungen und Einschraubgewinde auf Unversehrtheit und Sauberkeit prüfen. •...
- Seite 29 Montage und Installation Variante Gerätestecker Ex d Metall, inkl. reverse Gender 23091E00 Legende = Stecker = Überwurfmutter = Schutzkappe Stecker = Durchführung = Codierscheibe = Adapter = Dichtung In Ex d Gehäuse (20) einbauen Variante 1 Variante 2 (max. Wandstärke: 8 mm) (min.
-
Seite 30: Ausrichtung Der Flanschsteckdose Bzw. Des Gerätesteckers Ändern
Montage und Installation 1.1. Ausrichtung der Flanschsteckdose bzw. des Gerätesteckers ändern 23095E00 ▶ Überwurfmutter lösen. 23096E00 ▶ Adapter von Durchführung trennen. ▶ 23097E00 Mit Hilfe des Positionierstifts kann die Position des Geräts geändert werden. ▶ Bei der Variante mit Schirm darauf achten, dass der Schirm zwischen Adapter und Durchführung aufliegt! ▶... -
Seite 31: Demontage
Inbetriebnahme 6.1.4 Demontage ▶ Arbeitsschritte der Montage in umgekehrter Reihenfolge durchführen. Inbetriebnahme Vor Inbetriebnahme folgende Prüfschritte durchführen: ▶ Montage auf korrekte Durchführung prüfen. ▶ Leitungen auf festen Sitz und Beschädigungen prüfen. ▶ Gerät auf Schäden prüfen. ▶ Kontakte auf Verunreinigungen prüfen und gegebenenfalls reinigen. ▶... -
Seite 32: Instandhaltung, Wartung, Reparatur
▶ Rücksendung bzw. Verpackung der Geräte nur in Absprache mit R. STAHL durchführen! Dazu mit der zuständigen Vertretung von R. STAHL Kontakt aufnehmen. Für die Rücksendung im Reparatur- bzw. Servicefall steht der Kundenservice von R. STAHL zur Verfügung. ▶ Kundenservice persönlich kontaktieren. -
Seite 33: Reinigung
Zubehör und Ersatzteile HINWEIS! Fehlfunktion oder Geräteschaden durch den Einsatz nicht originaler Bauteile. Nichtbeachten kann zu Sachschäden führen. ▶ Nur Original-Zubehör und Original-Ersatzteile der R. STAHL Schaltgeräte GmbH (siehe Datenblatt) verwenden. 296382 / 859560300020 Ex Steckverbinder miniCON 2022-02-17·HB00·III·de·00 Reihe 8595/1... -
Seite 34: 13.1 Technische Daten
Anhang A Anhang A 13.1 Technische Daten Explosionsschutz Global (IECEx) Gas und Staub IECEx EPS 20.0035X Ex db eb IIC T6 ... T5 Ex ia IIC T6 ... T5 Ex tb IIIC T80 °C Db Ex ia IIIC T80 °C Da Europa (ATEX) Gas und Staub EPS 20 ATEX 1075 X... - Seite 35 Anhang A Technische Daten Lebensdauer 550 V AC / 16 A: 25 Steckzyklen (unter Last) 550 V AC / 5 A: 350 Steckzyklen (unter Last) 110 V DC / 8 A: 100 Steckzyklen (unter Last) 110 V DC / 5,6 A: 500 Steckzyklen (unter Last) 60 V DC / 16 A: 100 Steckzyklen (unter Last) 60 V DC / 11,2 A: 500 Steckzyklen (unter Last) Werte gelten bei Raumtemperatur 20 °C...
- Seite 36 Anhang A Technische Daten 3-polig (1 ... 3 belastete Pole) Temperaturklasse Umgebungstemperatur ≤ 60 °C T ≤ 65 °C T ≤ 70 °C T ≤ 75 °C Anschluss- Gb / Db Bemessungsbetriebsstrom querschnitt 0,25 mm ≤ 4,0 A Staub AWG24 ≤...
- Seite 37 Anhang A Technische Daten 8-polig (4 ... 8 belastete Pole) Temperaturklasse Umgebungstemperatur ≤ ≤ ≤ ≤ ≤ ≤ ≤ ≤ ≤ 35 °C 40 °C 45 °C 50 °C 55 °C 60 °C 65 °C 70 °C 75 °C Anschluss- Gb / Db Bemessungsbetriebsstrom querschnitt...
- Seite 38 Anhang A Technische Daten 8-polig (4 ... 8 belastete Pole) Temperaturklasse Umgebungstemperatur ≤ ≤ ≤ ≤ ≤ ≤ ≤ 45 °C 50 °C 55 °C 60 °C 65 °C 70 °C 75 °C Anschluss- Gb / Db Bemessungsbetriebsstrom querschnitt 0,25 mm ≤...
- Seite 39 Kupplung Kunststoff: 0,130 kg Lebensdauer Kunststoff: 5.000 Steckzyklen Metall: 5.000 Steckzyklen Kunststoff / Metall: 2.000 Steckzyklen Elektrische Steckzyklen unter Last berücksichtigen. Werte gelten bei Raumtemperatur 20 °C Weitere technische Daten, siehe r-stahl.com. 296382 / 859560300020 Ex Steckverbinder miniCON 2022-02-17·HB00·III·de·00 Reihe 8595/1...
-
Seite 40: 14.1 Maßangaben / Befestigungsmaße
Anhang B Anhang B 14.1 Maßangaben / Befestigungsmaße Maßzeichnungen (alle Maße in mm [Zoll]) – Änderungen vorbehalten 109,10 [4,30] 148,10 [5,83] 50 [ 1,97] 42 [ 1,65] Ø Ø Ø Ø 22923E00 22922E00 8595/1 Kupplung 8595/1 Stecker X = abhängig von der verwendeten Kabelverschraubung 110 [4,33] 150 [5,91] 50 [ 1,97]... - Seite 41 Manual Additional languages r-stahl.com miniCON Ex plug connector Series 8595/1...
- Seite 42 Contents Contents General Information .....................3 Manufacturer......................3 About this Manual ....................3 Further Documents ....................3 Conformity with Standards and Regulations............3 Explanation of Symbols ..................4 Symbols used in this Manual ................4 Symbols on the Device ..................4 Safety........................5 Intended Use......................5 Personnel Qualification ..................5 Residual Risks .....................6 Transport and Storage ..................7 Project Engineering....................8 Mounting and Installation ..................9...
-
Seite 43: General Information
Make the manual accessible to operating and maintenance personnel at all times. ▶ Pass the manual on to each subsequent owner or user of the device. ▶ Update the manual every time you receive an amendment to it from R. STAHL. ID no.: 296382 / 859560300020 Publication code: 2022-02-17·HB00·III·en·00... -
Seite 44: Explanation Of Symbols
Explanation of Symbols Explanation of Symbols Symbols used in this Manual Symbol Meaning Handy hint for making work easier Dangerous situation which can result in fatal or severe injuries DANGER! causing permanent damage if the safety measures are not complied with. Dangerous situation which can result in severe injuries if the WARNING! safety measures are not complied with. -
Seite 45: Safety
Specialists who perform these activities must have a level of knowledge that meets applicable national standards and regulations. Additional knowledge is required for any activity in hazardous areas! R. STAHL recommends having a level of knowledge equal to that described in the following standards: •... -
Seite 46: Residual Risks
Transport the device only in its original packaging or in equivalent packaging. ▶ Check the packaging and the device for damage. Report any damage to R. STAHL immediately. Do not mount or commission a damaged device. Excessive heating or electrostatic charge Subsequently modifying the device, operating it outside of the approved conditions, or failing to clean it properly can cause it to heat up excessively or to become electrostatically charged. -
Seite 47: Transport And Storage
(see chapter 3.2). ▶ Do not damage components during mounting. ▶ Only use original parts/spare parts from R. STAHL Schaltgeräte GmbH for mounting, installation and maintenance. ▶ Perform repairs to the device only with original spare parts and after consultation with R. -
Seite 48: Project Engineering
Project Engineering Project Engineering Requirements to be met by the connection line: • The connection line must be suitable for the installation and application area. • The requirements for installation of the connection line according to IEC/EN 60079-14 must be met. Mounting orientation: •... -
Seite 49: Mounting And Installation
Mounting and Installation Mounting and Installation Mounting/Dismounting ▶ Mount the device carefully and only in accordance with the safety information (see "Safety" chapter). ▶ Read through the following installation conditions and assembly instructions carefully and follow them precisely. ▶ Observe the installation diagrams and dimensional drawings in this chapter, in the "Technical data"... - Seite 50 Mounting and Installation KIT parts socket KIT parts pin (standard) (reverse gender) = KIT 8595 = M20 adaptor M20 adaptor = cable gland (only for plastic variant) = 2-ear clamp 5-13 (only for plastic variant) = centering disk (only for plastic variant) = KIT 8595 = M25 adaptor M25 adaptor...
- Seite 51 Mounting and Installation PA (plastic) plug variant, metal, incl. reverse gender 6.2 6.1 6.1 6.2 6.3 23059E00 Legend KIT parts pin KIT parts socket (standard) (reverse gender) = KIT 8595 basic part = plug basic part = KIT 8595 = pin contact holder = socket contact insert for contacts holder...
- Seite 52 Mounting and Installation DANGER! Explosion hazard due to incorrect sequence and incomplete mounting! Non-compliance results in fatal or severe injuries. ▶ Check that the components are complete and present. ▶ Always perform the mounting steps in the specified order. ▶ Only use suitable tools.
- Seite 53 Mounting and Installation Preparing the conductor ▶ Ensure that the core marking (colour and/or number) matches the pole marking. If this is not the case, prepare the other end of the conductor. 8/PE 8/PE 22700E00 22701E00 Core alignment Core alignment for socket contacts for pin contacts Preferred assignment:...
- Seite 54 Mounting and Installation Soldering: Cross section Stripping Stripping 2-ear clamp length A length B position C [mm] [mm] [mm] 0.25 mm AWG24 30 ±1 4 ±0.5 39 ±1 0.34 mm AWG22 5 ±0.5 0.5 mm AWG20 0.75 mm AWG18 1 mm 1.5 mm AWG16 5.5 ±0.5...
- Seite 55 Mounting and Installation ▶ Solder or crimp the conductor according to the following specifications: 23063E00 For crimping, use a four-mandrel crimping tool DigiCrimp 0.14 to 6 mm (item no. 295689). Soldering: Cross section KIT pin/ Control socket contact diameter [mm] 0.25 mm AWG24 0.25 to 0.5...
- Seite 56 Mounting and Installation Squeeze the 2-ear clamp (6.1) (only for cable entries without integrated strain relief, e.g. 8161). 22708E00 ▶ Position the 2-ear clamp, see point 5, "Crimping" table, dimension C. ▶ Crimp the 2-ear clamp using a suitable tool (e.g. from Knipex). Alternately crimping the two ears can prevent the conductor sheath from being crushed.
-
Seite 57: Mounting And Installation
Mounting and Installation Mounting the contact parts (3.1) in the contact holder (2.1) NOTICE! Mount the contact parts so that no poles remain unused. ▶ Clip the contact parts into the contact holder. Observe the numbering on the poles to ensure that the plug connectors fit together. 22691E00 Socket contact holder 22692E00... - Seite 58 Mounting and Installation Adjusting and checking the coding 13.1. Coupling basic part (1) 22696E00 22697E00 3-2-1 rear view 1-2-3 front view ▶ Push the socket insert or pin insert into the required coding in the coupling basic part from the rear. 22698E00 22699E00 Example of coding 2...
- Seite 59 Mounting and Installation 13.2. Plug basic part (1) 23065E00 23064E00 3-2-1 Front view 1-2-3 rear view ▶ Push the socket insert or pin insert into the required coding in the pin basic part from the rear. 23067E00 Example of coding 2 23066E00 ▶...
- Seite 60 Mounting and Installation Mounting the adaptor (5.1) incl. cable entry (5.2) ▶ Tighten to the specified tightening torques. Tightening torque Connection thread Cap nut at 20 °C at 20 °C Cable entry M20 x 1.5 2.3 Nm 1.5 Nm 8161 M25 x 1.5 3.0 Nm 2.0 Nm...
- Seite 61 Mounting and Installation Mounting the coding plate (4.2) 180° 180° 22710E00 23069E00 ▶ Remove the protective foil from the coding plate (1). ▶ Turn the coding plate 180° (2). ▶ Push the coding plate onto the coupling basic part or plug basic part (3). 296382 / 859560300020 miniCON Ex plug connector 2022-02-17·HB00·III·en·00...
- Seite 62 Mounting and Installation 6.1.2 Mounting the Ex e Flange Socket and Ex e Device Plug Before installing the miniCON Ex plug connector in an enclosure, perform the following test steps: • Disconnect all connections and wires from the power supply and secure them against unauthorised switching.
- Seite 63 Mounting and Installation Ex e metal device plug variant, incl. reverse gender 5.1 5.2 23073E00 Legend KIT parts pin KIT parts socket (standard) (reverse gender) = KIT 8595 basic part = plug basic part = KIT 8595 = pin contact holder 2.1 = socket contact insert for contacts holder...
- Seite 64 Mounting and Installation ▶ Pull the seal (5.1), adaptor (5.2), clamping disc (5.3), grounding ring (5.4) and protective cap (4.1) onto the conductor in the specified order. Preparing the conductor ▶ see chapter 6.1.1, points 5 to 7 Mounting the insulation body (2.2), contact parts (3.1) and contact holder (2.1) ▶...
- Seite 65 Mounting and Installation Mounting the adaptor ▶ 23075E00 From above, pull the Ex e adaptor (5.2) with the seal (5.1) over the clamping disc (5.3) and grounding ring (5.4) and screw together with the basic part (1). ▶ Tighten to the specified tightening torques. (Ex e M32 adaptor tightening torque: 14 Nm) Mounting the protective cap (4.1) and coding plate (4.2) ▶...
- Seite 66 Mounting and Installation Installation in Ex e enclosure NOTICE! When using adhesive (e.g. gluing with Loctite), ensure that the usage temperature of the adhesive is at least 20 °C higher than the temperature present on the installed part. 8.1. Installation in metal enclosure (20) Variant 1 Variant 2 (max.
- Seite 67 Mounting and Installation 8.2. Installation in plastic enclosure (20) Variant 1 Variant 2 (max. wall thickness: 3 mm) (max. wall thickness: 3 mm) 30 20 30 20 23169E00 23079E00 • Metal plate (30), • Metal plate (30), 2 mm with through hole 3 mm with threaded hole •...
- Seite 68 Mounting and Installation 6.1.3 Mounting the Ex d Flange Socket and Device Plug Before installing the miniCON Ex plug connector in an Ex d enclosure, perform the following test steps: • Disconnect all connections and wires from the power supply and secure them against unauthorised switching.
- Seite 69 Mounting and Installation Ex d metal device plug variant, incl. reverse gender 23091E00 Legend = plug = throw over nut = plug protective cap = lead through = coding plate = adaptor = seal Installation in Ex d enclosure (20) Variant 1 Variant 2 (max.
- Seite 70 Mounting and Installation 1.1. Changing the alignment of the flange socket or device plug 23095E00 ▶ Loosen the throw over nut. 23096E00 ▶ Disconnect the adaptor from the lead through. ▶ 23097E00 Use the positioning pin to change the position of the device. ▶...
-
Seite 71: Commissioning
Commissioning 6.1.4 Dismounting ▶ Perform the mounting steps in reverse order. Commissioning Before commissioning, carry out the following checks: ▶ Check that mounting has been performed correctly. ▶ Check if the conductors have been clamped properly and that they are undamaged. ▶... -
Seite 72: Maintenance, Overhaul, Repair
Returning the Device ▶ Only return or package the devices after consulting R. STAHL! Contact the responsible representative from R. STAHL. R. STAHL's customer service is available to handle returns if repair or service is required. ▶ Contact customer service personally. ▶... -
Seite 73: Cleaning
NOTICE! Malfunction or damage to the device due to the use of non-original components. Non-compliance can result in material damage. ▶ Use only original accessories and spare parts from R. STAHL Schaltgeräte GmbH (see data sheet). 296382 / 859560300020 miniCON Ex plug connector 2022-02-17·HB00·III·en·00... -
Seite 74: Appendix A
Appendix A Appendix A 13.1 Technical Data Explosion protection Global (IECEx) Gas and dust IECEx EPS 20.0035X Ex db eb IIC T6 ... T5 Ex ia IIC T6 ... T5 Ex tb IIIC T80 °C Db Ex ia IIIC T80 °C Da Europe (ATEX) Gas and dust EPS 20 ATEX 1075 X... - Seite 75 Appendix A Technical data Service life 550 V AC/16 A: 25 mating cycles (under load) 550 V AC/5 A: 350 mating cycles (under load) 110 V AC/8 A: 100 mating cycles (under load) 110 V AC/5.6 A: 500 mating cycles (under load) 60 V AC/16 A: 100 mating cycles (under load) 60 V AC/11.2 A: 500 mating cycles (under load) Values apply at room temperature 20 °C...
- Seite 76 Appendix A Technical data 3-pole (1 to 3 poles under load) Temperature class Ambient temperature ≤ 60 °C T ≤ 65 °C T ≤ 70 °C T ≤ 75 °C Connection Gb/Db Rated operational current cross-section 0.25 mm ≤ 4.0 A Dust AWG24 ≤...
- Seite 77 Appendix A Technical data 8-pole (4 to 8 poles under load) Temperature class Ambient temperature ≤ ≤ ≤ ≤ ≤ ≤ ≤ ≤ ≤ 35 °C 40 °C 45 °C 50 °C 55 °C 60 °C 65 °C 70 °C 75 °C Connection Gb/Db...
- Seite 78 Appendix A Technical data 8-pole (4 to 8 poles under load) Temperature class Ambient temperature ≤ ≤ ≤ ≤ ≤ ≤ ≤ 45 °C 50 °C 55 °C 60 °C 65 °C 70 °C 75 °C Connection Gb/Db Rated operational current cross-section 0.25 mm ≤...
- Seite 79 Metal: 5000 mating cycles Plastic/metal: 2000 mating cycles Take into account the electrical mating cycles under load. Values apply at room temperature 20 °C For further technical data, see r-stahl.com. 296382 / 859560300020 miniCON Ex plug connector 2022-02-17·HB00·III·en·00 Series 8595/1...
-
Seite 80: Appendix B
Appendix B Appendix B 14.1 Dimensions/Fastening Dimensions Dimensional drawings (all dimensions in mm [inch]) – Subject to change 109.10 [4.30] 148.10 [5.83] 50 [ 1.97] 42 [ 1.65] Ø Ø Ø Ø 22923E00 22922E00 8595/1 coupling 8595/1 plug X = depending on the cable gland used 110 [4.33] 150 [5.91] 50 [ 1.97]...