VWR Signature Ergonomic Benutzerhandbuch
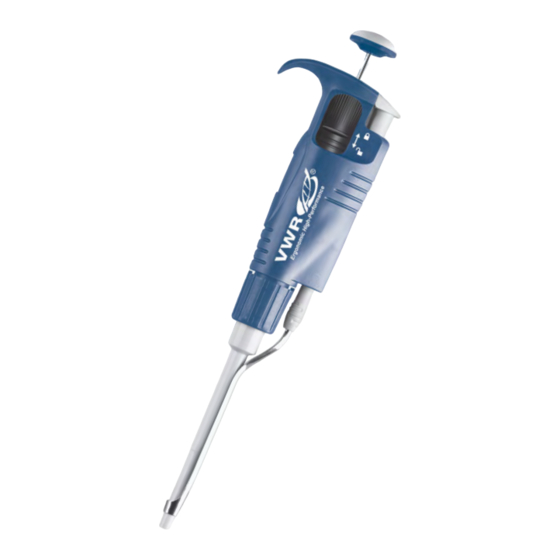
High-performance pipettor
Inhaltsverzeichnis
Verfügbare Sprachen
Verfügbare Sprachen
Kapitel
Inhaltsverzeichnis

Verwandte Anleitungen für VWR Signature Ergonomic


Inhaltszusammenfassung für VWR Signature Ergonomic
- Seite 1 ENGLISH 1 – 16 DEUTSCH 17 – 34 FRANÇAIS 35 – 50 ESPAπOL 51 – 66 ITALIANO 67 – 82...
-
Seite 11: Allgemein
Einstellung der Länge vom Spitzenabwurf eingestellten Volumens. Dazu soll man die Bremshülse - Pipettenmodelle VWR VE2 bis VWR VE1000 (Abb. 6A). in die obere Stellung verschieben. Die Position der Den Spitzenabwurf kann man um +1 bzw. + 2 mm mit Bremshülse wird durch entsprechende Symbole auf dem... -
Seite 12: Einstellen Des Volumens
DEUTSCH - Pipettenmodell VWR VE5000 und VWR VE10000 (Abb. 6B). Min. ± 1.6 0.40 VWR VE1000 ± 0.7 0.20 Die Regelung der Länge des Spitzenabwurfs erfolgt VWR V1000* Max. 1000 ± 0.6 0.15 durch Ein- bzw. Herausdrehen des Abwurfschaftes mit- Min. -
Seite 13: Pipettieren
Schaft fest gedrückt. Dies gewährleistet eine Skalenteilung = 20 μl 7.5 ml dichte Verbindung. Das Pipettenvolumen wird mit Hilfe des Rädchens im Achtung: Niemals Flüssigkeiten mit einer VWR-Pipette Pipettierknopf (Abb. 1A2) oder des Volumeneinstell - ohne Spitze aufnehmen. schraube (Abb. 1B) eingestellt. Ansaugen Eine Volumenänderung ist möglich, wenn sich die... -
Seite 14: Vorspülen
In Ausnahmefällen, soweit diese Vorgehen s weise nicht Filter das Erzielen von genauen Ergebnissen bei der Verwen - In der Pipetten VWR VE5000/V5000 und VWR VE10000/ dung der Pipette gewährleistet: V10000 wurde ein austausch ba res Filter angewandt, • mit dem Drehknopf das anzusaugende Volumen an der welches in der Öffnung im unteren Schaftteil montiert... -
Seite 15: Benutzungshinweise
Spitzen 10 Spitzen zur Entnahme von Flüssigkeit eines Volumens • Es darf niemals Flüssigkeit in den Pipetten schaft ein- von 0.1 μl bis 10 μl. Geeignet für Pipetten Typ VWR treten. Um das zu vermeiden: VE2/V2 und VWR VE10/V10. – den Druckknopf behutsam herunterdrücken und... - Seite 16 [μl] [μl] V [μl] brier sch lüssels ändert das zu entnehmende Volumen [μl] (24 Skalenteilungen) der Pipette um die in der Tabelle angegebenen Werte, VWR VE2/V2 0.1 - 2 0.176 - 0.224 0.06 (Abb. 4C). VWR VE10/V10 0.5 - 10 0.48 - 0.52...
-
Seite 17: Beseitigung Kleiner Mängel
DEUTSCH Beim Pipettieren von Flüssigkeiten, deren physikalische Bei den Pipetten VWR VE2/V2, VWR VE10/V10 und VWR VE20/V20 kann ein defekter Schaft die Beschä digung Eigenschaften sich wesentlich von den Eigenschaften des der Kolbeneinheit verursachen. Die defekten Teile Wassers unterscheiden, ist gemäß Kapitel 5 vorzugehen. -
Seite 18: Reinigung Und Sterilisation
Innenfläche der Dichtung und des O-Rings leicht mit kuum und Trocknung. Schmierfett behandeln. Die Pipette erneut - vor der Sterilisation bei den Pipetten VWR VE/V2–VWR zusammen setzen. VE/V1000 die Mutter, die den Schaft befestigt, und bei Wenn ein Anstieg der Pipettierkraft festgestellt wird,... -
Seite 19: Ersatzteile
K: Kalibrierschlüssel L: Filter M: Abwurfkappe N: Abwurfdruckknopf P: Bremshülse können Sie bei der zuständigen VWR Vertretung bestellen. Bei der Bestellung bitte die genaue Bezeichnung des Teiles und das entspre chende Pipettenmodell angeben. Zur Beachtung: Der Austausch der Kolbeneinheit bedarf einer Rekalibrierung gemäß Kapitel 8. - Seite 44 1-1000 µl 5000 µl, 10000 µl 5000 µl, 10000 µl 2 µl, 10 µl...
- Seite 45 Barcelona E-mail: sales@sg.vwr.com 4034 Debrecen Tel.: 902 222 897 Tel.: (52) 521-130 Fax: 902 430 657 Fax: (52) 470-069 E-mail: info@es.vwr.com E-mail: info@hu.vwr.com Go to www.vwr.com for the latest news, special offers and details of your local VWR distribution partner.