Herunterladen Inhalt Inhalt Diese Seite drucken
Inhaltsverzeichnis

Werbung

Verfügbare Sprachen
  • DE

Verfügbare Sprachen

I N S T R U C T I O N M A N U A L
Model#s: 119874 / 119875 / 119876 / 119877
03-17

Werbung

Inhaltsverzeichnis
loading

Inhaltszusammenfassung für Bushnell Trophy Cam HD Aggressor

  • Seite 1 I N S T R U C T I O N M A N U A L Model#s: 119874 / 119875 / 119876 / 119877 03-17...
  • Seite 3: Inhaltsverzeichnis

    TABLE OF CONTENTS PAGE ENGLISH 4-38 FRANÇAIS 39-79 ESPAÑOL 80-122 DEUTSCH 123-167 ITALIANO 168-208...
  • Seite 4: English

    Congratulations on your purchase of one of the best trail cameras on the market! Bushnell is very proud of this little unit and we are sure you will be pleased with it as well. We appreciate your business and want to earn your trust.
  • Seite 5 INTRODUCTION About the Trophy Cam HD Aggressor The Bushnell Trophy Cam HD Aggressor is a digital scouting camera. It can be triggered by any movement of game in a location, detected by a highly sensitive Passive Infra-Red (PIR) motion sensor, and then take high quality pictures (up to 20MP or 24MP still photos), or video clips.
  • Seite 6: Parts And Controls

    (user set) along with current data including temperature and moon phase. Applications The Trophy Cam HD Aggressor can be used as a trail camera for hunting or scouting game. It is also suitable for surveillance usage. PARTS AND CONTROLS The Trophy Cam HD Aggressor provides the following connections for external devices: USB port, SD card slot and external DC power in (pg 7, Fig.
  • Seite 7: Front View

    DC in Video Mic LED IR Cover Plug Flash Lens Motion/ Low Battery Indicator Light Sensor Lock Hole Tripod Socket Latch Sensor Fig. 1: Connections SD Card Slot USB Port FRONT VIEW Video Mic DC In (for optional solar panel accessory) INSIDE VIEW Cable to Battery Compartment...
  • Seite 8: Loading Batteries

    INSTALLING THE BATTERIES AND SD CARD Before you begin learning how to use your Trophy Cam HD Aggressor, you will first need to install a set of batteries and insert an SD card. Although that may only take you a minute, there are some important notes about both batteries and SD cards you...
  • Seite 9: Inserting The Sd Card

    Don’t insert or remove the SD card when the power switch is in the ON position. The Trophy Cam HD Aggressor uses a standard SD (Secure Digital) memory card to save photos (in .jpg format) and/or videos (in .mp4 format). SD and SDHC (High Capacity) cards up to a maximum 32GB capacity are supported.
  • Seite 10: Off Mode

    And of course, when you are storing or not using the camera, you will switch it to OFF. Please note that even in the OFF mode the Trophy Cam HD Aggressor still consumes power at a very low level. Therefore, it’s a good idea to take the batteries out of the battery compartment if the camera will not be used for a long time.
  • Seite 11: Setup Mode

    to its current parameter settings) when it is triggered by the PIR sensor’s detection of activity in the area it covers. You can either move the power switch directly from OFF to ON mode, or stop at the SETUP position first to change one or more settings, then move the switch to ON after you have finished doing so.
  • Seite 12: Video Mode

    Fig. 3: SETUP Information Screen (Model 119874/119875) Camera (Still Photo) Mode SD Card Status Image Size (Resolution) Still Photo Mode Battery Level Date:Month-Day- Y ear Time Stamp Time Field Scan On Hour:Minute:Second # of Photos Taken Remaining Photo Capacity Video Mode Video Resolution Video Sound On Video Mode...
  • Seite 13: Changing Parameter Settings In Setup Mode

    (available parameters vary with use of Presets-see pg. 19 for more details) so your Trophy Cam HD Aggressor operates exactly the way you want it to. You will do this by entering the SETUP Menu and pressing the keys below the LCD display, which will show you each parameter and its setting.
  • Seite 14 Fig. 4: Selecting Parameter Settings Press MENU (4a) Press DOWN (4b) Press OK...
  • Seite 15 EXAMPLES-Changing the Settings of Some Common Parameters Following this page, you will find tables listing all of the parameters found in the SETUP Menu, along with their possible settings (or range of settings), and a detailed description of what the parameter controls and what the settings do. If you read the previous section detailing how to select parameters and change their settings, you should be able to dive right in, find the parameter(s) you want, and setup the camera to suit your preferences.
  • Seite 16 Aggressor, which allows you to monitor your food plots or field edges with time lapse images or video. When set to “On”, the Trophy Cam HD Aggressor will take a photo (or record a video clip) automatically at your choice of intervals (for example, once every five minutes) during one or two blocks of time you set up for each day, without...
  • Seite 17 of time by pressing the DOWN key to select "B" (Step 4), then press OK and follow the same process to set Start and Stop times for Field Scan block "B" (Step 5). As an example of how you might use these two available time blocks, you could setup Field Scan time block "A"...
  • Seite 18 the IR sensor coverage zone, an image or video will still be captured every 15 minutes during the block(s) of time. If an animal triggers the camera “in between” the 15 minute intervals, it will be recorded. Note: Field Scan settings of frequent intervals and/or long periods between start and stop time can reduce battery life.
  • Seite 19 The SETUP Menu – Parameters and Settings List w/Descriptions Parameter Description Settings (Bold=default) Set Clock (Set) Press OK and use the UP/DOWN keys (to change the setting) and LEFT/RIGHT keys (to move to the next field) to set the hour (24-hr format only, “00”=midnight, “12”=noon) and minute, and then (on the lower row), the year, month and date.
  • Seite 20: Parameter Settings

    Parameter Description Settings (Bold=default) Image Size Selects resolution for still photos. Higher (only a ects resolution provides more pixels, but creates still photos HIGH larger files that take up more of the SD in Camera or card capacity (fills up faster). 4K is a good Hybrid modes) compromise between resolution and file size.
  • Seite 21 Parameter Description Settings (Bold=default) (Default= Allows the user to set a custom name for the Camera Name "TROPHY camera. Useful for ID purposes when multiple cameras are setup, since each camera will CAM") imprint its name on all photos (but not videos) See "Using the it captures.
  • Seite 22 Parameter Description Settings (Bold=default) Auto, Low, Selects the sensitivity of the PIR sensor. The Sensor Level Normal, High “High” setting will make the camera more sensitive to infrared (heat) and more easily triggered by motion, and the “Low” setting makes it less sensitive to heat and motion. The High setting can be useful when the ambient temperature is warm (making it more difficult for the sensor to detect animals), and the Low...
  • Seite 23 Parameter Description Settings (Bold=default) Execute (followed Deletes (erases) all files stored on a card to Format by an additional prepare it for reuse. Always format a card that No/Yes step) has been previously used in other devices. Caution! Make sure you have downloaded and backed up any files you want to preserve first! Press OK to execute, press MENU (or select NO then press OK) to exit...
  • Seite 24 Parameter Description Settings (Bold=default) Coordinate Off, On Allows the user to input latitude and Input longitude coordinates for the camera’s See "Using the location. This data will be embedded in Setup Menu the files saved on the camera’s SD card (if Input Screens"...
  • Seite 25 You can enter a nearby street address, just zip code, or use the various types of maps to locate the approximate position. The format you will need to use to enter the coordinates in the Trophy Cam HD Aggressor menu screen is shown below:...
  • Seite 26 Cam HD Aggressor. Push one end of the belt through the two brackets on the back of the Trophy Cam HD Aggressor. Thread the end of the strap through the buckle. Fasten the belt securely around the tree trunk by pulling the end of the strap firmly so there is no slack left.
  • Seite 27: Switching On The Camera

    - please visit www.bushnell.com for more information. Sensing Angle and Distance Test To test whether the Trophy Cam HD Aggressor can effectively monitor the area you choose, this test is recommended to check the sensing angle and monitoring distance of the Trophy Cam HD Aggressor.
  • Seite 28 (see pg. 7). REVIEWING/DELETING THE PHOTOS/VIDEOS After you have setup, mounted and activated your Trophy Cam HD Aggressor, you will of course be eager to return later and review the images it has captured for you. There are several different ways this can be done.
  • Seite 29 Aggressor or in your computer first and then insert the card into your Trophy Cam HD Aggressor and try again. • The default file system format of the Trophy Cam HD Aggressor is FAT16, which most computers can read. If you format an SD card for the Trophy Cam HD Aggressor in your computer, you should choose the file system format...
  • Seite 30 Trash to “eject” it before disconnecting.) The .JPG format photo files from the Trophy Cam HD Aggressor may be viewed and edited with any photo software you choose to use. The .MP4 video files may be viewed with the Windows Media Player on PCs with Windows 7.
  • Seite 31: Troubleshooting / Faq

    1. Battery life will vary with operating temperature and the number of images taken over time. Setting the Interval time to 0.6 second will decrease battery life. Typically, the Trophy Cam HD Aggressor will be able to capture several thousand images before the batteries die.
  • Seite 32 3. Make sure that the camera power switch is in the “On” position and not in the “Off” or “Setup” modes. 4. Make sure that you are using a good quality SD card in your camera. Bushnell recommends SanDisk ® SD Cards up to 32GB (Ultra...
  • Seite 33 If this is seen on a consistent basis, then the sensor may need servicing. Please contact Bushnell customer service. 7. Short video clips—not recording to the length expected a. Check to make sure that the SD card is not full.
  • Seite 34: Photos Do Not Capture Subject Of Interest

    battery life, the camera may choose to record shorter video clips to conserve power. c. When LED Control is set to "High" and camera is in Video mode, the maximum available dynamic video length at night is 15 seconds (not 60 seconds) to avoid potential overheating of batteries and/or electronic components.
  • Seite 35 2. LCD screen shows a faint black line after turning from “Setup” to “On”. The LCD will turn off when you slide the switch to the “On” position. In some cases, this black line will appear and then fade in about 1 second. This is normal and the camera will function properly.
  • Seite 36: Technical Specifications

    TECHNICAL SPECIFICATIONS 119874/119876: 5920x3416 (16:9) / 5280x3960 (4:3) Maximum Pixel Size 119875/119877: 6528x3672 (16:9) / 5280x3960 (4:3) F = 2.8; FOV=38°; Auto IR-Cut-Remove (at night) Lens Selectable (Low/Med/High), >100ft/30m (119874/119875), IR-Flash Range > 80ft/24m (119876/119877) Monochrome Display (119874/119876: 21x30mm(1.5”) Display Screen Color Display (119875/119877 only): 2.4"...
  • Seite 37 ONE YEAR LIMITED WARRANTY Your Bushnell product is warranted to be free of defects in materials and workmanship for one year after the date of purchase. In the event of a defect under this warranty, we will, at our option, repair or replace the product, provided that you return the product postage prepaid.
  • Seite 38: Fcc Compliance Statement

    The device does not contain any user-serviceable parts. Repairs should only be made by an Authorized Bushnell repair center. Unauthorized repairs or modifications could result in permanent damage to the equipment, and will void your warranty and your authority to operate this device under Part 15 regulations.
  • Seite 39: Français

    N O T I C E D ’ U T I L I S A T I O N FRANÇAIS www.trophycam.fr Nos de modèle: 119874 / 119875 / 119876 / 119877 03-17...
  • Seite 40: Remarques Importantes

    Ne mélangez pas différents types de piles. N'utilisez QUE des piles au lithium ou QUE des piles alcalines. Les piles rechargeables ne sont pas recommandées. Bushnell recommande l'utilisation de cartes SanDisk de classe 6 ou SDHC ® (jusqu'à 32 Go de capacité) dans ce modèle de Trophy Cam HD Aggressor.
  • Seite 41 (en noir et blanc) claires même dans le noir, et peuvent prendre des photos ou des vidéos en couleur lorsqu’il y a assez de lumière. Le Trophy Cam HD Aggressor est conçu pour être utilisé à l’extérieur et résiste à l’eau et à la neige.
  • Seite 42 • Fonction de géomarquage GPS : elle permet à l'utilisateur de saisir la latitude et la longitude de l'emplacement du Trophy Cam HD Aggressor, qui seront ensuite intégrées à chaque fichier photo. Ce système permet à Google Earth, Picassa et à d'autres logiciels compatibles avec le géomarquage d'afficher automatiquement une carte indiquant les lieux / sites des prises de vue lors de leur visionnage sur un ordinateur.
  • Seite 43 (défini par l'utilisateur) avec les données actuelles comme la température et la phase de la lune. Applications Le Trophy Cam HD Aggressor peut être utilisé comme un appareil photo de détection pour la chasse ou pour compter le gibier. Il convient également parfaitement à la surveillance...
  • Seite 44: Installation Des Piles Et De La Carte Sd

    Fig. 2 (p.43). INSTALLATION DES PILES ET DE LA CARTE SD Avant de pouvoir utiliser votre Trophy Cam HD Aggressor, vous devrez d’abord installer des piles et insérer une carte SD. Même si cela ne vous prendra qu’une minute, vous devez prendre conscience de quelques remarques importantes concernant à...
  • Seite 45: Insertion De La Carte Sd

    Vous pouvez également connecter un panneau solaire (modèle# 119756C -vendu séparément, plus d’informations sur www.bushnell.fr) facultatif dans « l'entrée d'alimentation CC » (p. 42, g.1) au bas de la Trophy Cam HD Aggressor. Veuillez ne pas utiliser d’autres sources de courant externes car cela pourrait entraîner un dysfonctionnement de votre Trophy Cam HD Aggressor.
  • Seite 46 SETUP si la carte est verrouillée). Il est recommandé de formater la carte SD en utilisant le paramètre « Format » du Trophy Cam HD Aggressor avant de l’utiliser pour la première fois, spécialement lorsque la carte a été utilisée dans d’autres appareils (voir la section «...
  • Seite 47 ARRÊT. Veuillez remarquer que même en mode ARRÊT le Trophy Cam HD Aggressor continue à consommer de l’électricité à un très bas niveau. Par conséquent, il est conseillé d’enlever les piles si vous êtes amené...
  • Seite 48: Mode Vidéo

    Fig. 3 : Écran d’information du mode CONFIGURATION (SETUP) Mode vidéo Mode appareil photo (photos) Son vidéo activé Résolution Statut de la carte SD Mode Photo Mode vidéo Résolution vidéo Niveau de charge des piles Date: Mois-Jour- Impression de Année la date et de l’heure sur les Affichage de...
  • Seite 49 (les paramètres disponibles varient en fonction de la préconfiguration sélectionnée, voir page 55 pour plus d'informations) pour que votre Trophy Cam HD Aggressor fonctionne de la façon souhaitée. Vous ferez ceci en lançant le Menu CONFIGURATION (SETUP) et en appuyant sur les touches situées sous l’écran LCD.
  • Seite 50 (les paramètres disponibles varient en fonction de la préconfiguration sélectionnée, voir page 19 pour plus d'informations) pour que votre Trophy Cam HD Aggressor fonctionne exactement comme vous le désirez. Le premier paramètre affiché lorsque vous entrez dans le Menu CONFIGURATION (SETUP) est «...
  • Seite 51 Fig. 4: Sélection des réglages des paramètres Appuyez sur MENU (4a) Appuyez sur BAS (4b) Appuyez sur OK et servez-vous des touches HAUT/BAS pour régler l'heure (format 24 heures, « 00 » pour minuit et « 12 » pour midi), puis appuyez sur la touche DROITE pour passer au réglage du champ des minutes (toujours en utilisant la touche HAUT/BAS).
  • Seite 52 à intervalles de temps réguliers. En position "On", le Trophy Cam HD Aggressor prend une photo (ou une séquence vidéo) automatiquement à la fréquence de votre choix (par exemple, une toutes les cinq minutes) pendant une ou deux périodes de temps que vous aurez déterminées, chaque...
  • Seite 53 les minutes de l'heure de démarrage à l'aide de HAUT/BAS, puis déplacez-vous sur les réglages de l'heure et des minutes de l'heure d'arrêt. Quand vous avez réglé les minutes de l'heure d'arrêt, appuyez sur OK pour confirmer le réglage de la première période d'enregistrement du balayage de champ. Si vous le souhaitez, vous pouvez créer une seconde période d'enregistrement en appuyant sur le bouton BAS pour sélectionner "B"...
  • Seite 54 aucun enregistrement du balayage de champ entre 8h et 17h30 et entre 19h et 6h. Rappelez-vous que ceci est indépendant des déclenchements normaux dus à l'activité détectée à proximité de l'appareil - même si aucun animal (ou humain) ne pénètre dans la zone de couverture du détecteur à...
  • Seite 55: Set Clock

    Liste des paramètres et réglages du Menu CONFIGURATION (SETUP) avec descriptions Paramètre Description Réglages (Gras=défaut) Set Clock Set (régler) Appuyez sur OK et utilisez les touches HAUT/ (Réglage BAS (pour changer le réglage) et les touches Horloge) GAUCHE/DROITE (pour passer au champ suivant) pour régler les heures (format 24h uniquement, «...
  • Seite 56 Paramètre Description Réglages (Gras=défaut) Sélectionnez au choix la prise de photos, Mode Camera (photos) de vidéos ou les deux lorsque l’appareil se déclenche. Le mode de saisie hybride Video, ou Hybrid (Saisie combine la fonction photo avec la fonction vidéo. Il permet ainsi la prise de photo et hybride) de vidéo, en même temps, et à...
  • Seite 57 Paramètre Description Réglages (Gras=défaut) Sélectionne combien de photos sont prises Capture 1 Photo, Number en rafale à chaque déclenchement en 2 Photo, (Nombre de mode Appareil photo. Ce réglage concerne 3 Photo également les photos prises en mode Field Photos) (a ecte Scan (pour prendre deux photos toutes les 10 uniquement...
  • Seite 58 Paramètre Description Réglages (Gras=défaut) (Nom par défaut= Permet à l'utilisateur de personnaliser le nom Camera "TROPHY CAM") Name (Nom de l'appareil. Très utile pour l'identifier quand de l'appareil) de multiples appareils sont installés puisque Voir chacun d'entre eux marque son nom sur UTILISATION toutes les photos (mais pas sur les vidéos) DES ECRANS...
  • Seite 59 Paramètre Description Réglages (Gras=défaut) Sélectionne la durée pendant laquelle Interval 10 s (secondes) (Intervalle) par défaut, l’appareil « attendra » avant de répondre à des déclenchements supplémentaires du capteur avec une plage infrarouge passif après qu’un mouvement de réglages ait été initialement détecté et reste dans les disponibles limites de la portée du capteur.
  • Seite 60 Paramètre Description Réglages (Gras=défaut) Sélectionne la sensibilité du capteur Sensor Level Auto (automa- (Sensibilité tique), Low infrarouge passif. Le réglage « High » rendra du Capteur l’appareil plus sensible aux infrarouges (faible), Normal, (chaleur) et il sera plus facilement déclenché infrarouge) High (élevée) par les mouvements, et le réglage «...
  • Seite 61 Paramètre Description Réglages (Gras=défaut) Camera Permet à l'utilisateur de limiter le 24 Hrs (24 h), fonctionnement de l'appareil uniquement Mode (Mode Day (Jour), Night appareil pendant le jour ou la nuit, si nécessaire. (Nuit) Le niveau de lumière ambiante que photo) perçoit le capteur de l'appareil détermine automatiquement s'il fait jour ou nuit.
  • Seite 62 Paramètre Description Réglages (Gras=défaut) Field Scan Active/Désactive le mode Field Scan. Si On, Off (Après vous appuyez sur OK alors que « On » est avoir sélectionné sélectionné, vous arriverez à l'écran de On) : "A" configuration mode Field Scan ; vous pourrez Démarrage/ y régler les horaires de démarrage et d’arrêt Arrêt, "B"...
  • Seite 63 Paramètre Description Réglages (Gras=défaut) Permet à l'utilisateur de saisir les coordonnées Coordinate Off, On de latitude et de longitude correspondant à Input (désactivé, l'emplacement de l'appareil. Ces données activé) seront intégrées aux fichiers enregistrés Voir sur la carte SD de l'appareil (si "On" est UTILISATION sélectionné).
  • Seite 64 Le format de saisie des coordonnées dans l'écran de menu du Trophy Cam HD Aggressor doit être le suivant : Latitude N=Nord, en degrés...
  • Seite 65 à portée idéale du flash, idéalement entre 3 et 19m (119876/119877) ou 24m (119874/119875) du Trophy Cam HD Aggressor. Il y a deux manières de monter le Trophy Cam HD Aggressor: en utilisant soit la sangle réglable fournie, soit le pas de vis situé sous l'appareil.
  • Seite 66: Allumer L'appareil

    Pour tester si le Trophy Cam HD Aggressor peut effectivement surveiller la zone que vous avez choisie, le test suivant est recommandé pour vérifier l’angle de détection et la distance de surveillance du Trophy Cam HD Aggressor. Pour faire un essai : • Mettez le Trophy Cam HD Aggressor en mode CONFIGURATION (SETUP).
  • Seite 67 (voir p. 43). VISIONNER/EFFACER LES PHOTOS/VIDÉOS Après avoir configuré, monté et activé votre Trophy Cam HD Aggressor, vous aurez bien sûr hâte de revenir plus tard et regarder les photos (ou les vidéos) qu’il aura prises pour vous.
  • Seite 68 C’est la méthode la plus simple pour visionner des images. Vous n’avez qu’à retirer la carte SD du Trophy Cam HD Aggressor. En rentrant chez vous, il vous suffit de mettre cette carte dans l'emplacement prévu à cet effet, soit dans votre ordinateur ou votre télévision (si elle est équipée d’un lecteur de carte SD).
  • Seite 69 Trophy Cam HD Aggressor et essayez de nouveau. • Le format de fichier par défaut du Trophy Cam HD Aggressor est FAT16, que la plupart des ordinateurs peuvent lire. Si vous formatez une carte SD pour le Trophy Cam HD Aggressor dans votre ordinateur, vous devrez choisir le format de système de fichier FAT16.
  • Seite 70 Le Trophy Cam HD Aggressor sera reconnu comme un « Disque amovible » si vous ouvrez la fenêtre « Mon ordinateur » (sur les Macs, une icône apparaîtra sur votre bureau). Les fichiers photos du Trophy Cam HD Aggressor sont appelés «...
  • Seite 71 Cam HD Aggressor sera capable de prendre plusieurs milliers de photos avant que les piles ne soient déchargées. 2. Vérifiez que vous avez utilisé des piles alcalines ou au lithium neuves. Bushnell vous recommande d'utiliser de piles AA au lithium Energizer avec votre ®...
  • Seite 72: L'appareil Ne S'allume Pas

    6. Si vous utilisez une carte SD dans un autre dispositif avant de l’insérer dans votre Trophy Cam HD Aggressor, vous voudrez peut-être essayer de formater la carte en utilisant le paramètre « Format » du mode SETUP (Configuration) - assurez-vous d’avoir sauvegardé...
  • Seite 73 Problèmes de qualité des photos et/ou vidéos 1. Les photos ou vidéos prises de nuit semblent trop sombres a. Vérifiez l’icône de charge des piles pour voir si les piles ont une charge suffisante. Le flash ne fonctionnera plus lorsque le niveau de charge des piles sera faible.
  • Seite 74 Si cela se produit régulièrement, il se peut que le détecteur soit défectueux. Dans ce cas, veuillez contacter votre revendeur Bushnell. 7. Séquences vidéos courtes a. Vérifiez que la carte SD n’est pas pleine.
  • Seite 75 1. Lorsque l’appareil est en mode SETUP (CONFIGURATION), une LED située sur la face avant du Trophy Cam HD Aggressor clignote à chaque mouvement détecté. Cela est utile lors de l’installation uniquement et aidera l’utilisateur à orienter correctement l’appareil.
  • Seite 76 changement. Si vous ne sauvegardez pas votre nouveau réglage après l’avoir changé, l’appareil continuera à utiliser le réglage par défaut original pour ce paramètre. Humidité ou fourmis à l'intérieur de la caméra 1. Afin d'empêcher toute infiltration d'eau dans le boîtier du Trophy Cam HD Aggressor, veillez à...
  • Seite 77: Caractéristiques Techniques

    CARACTÉRISTIQUES TECHNIQUES 119874/119876: 5920x3416 (16:9) / 5280x3960 (4:3) Résolution Maximale 119875/119877: 6528x3672 (16:9) / 5280x3960 (4:3) Objectif Focale = 2,8 ; Champ de Vision = 38 ° ; Infrarouge à activation automatique Sélectionnable (Elevé/Moyen/Faible), >100ft/30m (119874/119875), Portée du flash infrarouge >...
  • Seite 78 GARANTIE LIMITÉE D'UNE ANNÉE Votre produit Bushnell est garanti contre les éventuels vices de matière ou de fabrication pendant un an à compter de la date d’achat. En cas de défaut durant la période de garantie, nous nous réservons la possibilité de réparer, ou d’échanger le produit, sous condition que vous retourniez le produit en port payé.
  • Seite 79 Traitement des déchets d’équipements électriques et électroniques (En vigueur dans l’Union européenne et autres pays européens ayant des systèmes de collecte des déchets séparés) Cet équipement contient des composants électriques et/ou électroniques et par conséquent ne doit pas être éliminé en fin de vie avec les autres déchets ménagers.
  • Seite 80: Español

    M A N U A L D E I N S T R U C C I O N E S ESPAÑOL www.trophycam.es Modelo: 119874 / 119875 / 119876 / 119877 03-17...
  • Seite 81 Servicio Atención al Cliente de Bushnell. Bushnell recomienda la utilización de un juego de pilas de litio AA Energizer (8) en estos modelos Trophy Cam HD Aggressor para obtener la ®...
  • Seite 82 flash, por lo que proporciona fotos o vídeos claros (en blanco y negro) incluso en la oscuridad y puede tomar fotos o vídeos en color si hay suficiente luz diurna. La Trophy Cam HD Aggressor se ha diseñado para utilizarla en exteriores y resiste el agua y la nieve.
  • Seite 83: Vista Frontal

    • Barrido de campo (Field Scan) 2x con Disparo directo (Live Trigger): La función de “time lapse” (barrido de campo) incluye la opción de un segundo bloque de grabación con sus propios tiempos de inicio/parada. Las señales de disparo generadas por la actividad salvaje cercana continuarán generando fotografías y vídeos como lo harían normalmente, con independencia del funcionamiento de Barrido de campo (Field Scan).
  • Seite 84: Vista Interior

    VISTA INTERIOR Cable hacia el compar- timiento de las pilas Pantalla LCD ARRIBA/Vídeo IZQUIERDA Interruptor de ACEPTAR encendido/ modo SETUP DERECHA/Disparo (SHOT) ACTIVADO MENÚ CONFIGURACIÓN DESACTIVADO ABAJO/Foto Fig. 2: Guía de botones e interruptores • El modo de captura híbrida permite realizar tanto fotos fijas como vídeos en cada disparo con la resolución más alta para cada opción.
  • Seite 85: Piezas Y Controles

    Aplicaciones La Trophy Cam HD Aggressor puede usarse como cámara de rastreo para cazar o localizar piezas. Resulta poco adecuada para aplicaciones de vigilancia. PIEZAS Y CONTROLES La Trophy Cam HD Aggressor incorpora las siguientes conexiones para dispositivos externos: puerto USB, ranura para tarjetas SD y entrada para alimentación CC...
  • Seite 86: Insertar Una Tarjeta Sd

    "DC In" (p.83, Fig.1) en la parte inferior de la Trophy Cam HD Aggressor (otras fuentes de alimentación externas no deben utilizarse, ya que el cámara y / o la pantalla puede que no funcione correctamente).
  • Seite 87 32GB. Se recomienda usar tarjetas SD de alta velocidad (SanDisk SDHC clase 6 ® o superior) en caso de utilizar la configuracion de vídeo 1280x720 o 1920x1080. Antes de introducir la tarjeta SD en la ranura para tarjetas después de abrir la tapa delantera de la cámara, compruebe que el interruptor de protección contra escritura del lateral de la tarjeta está...
  • Seite 88 UTILIZACIÓN DE LA Trophy Cam HD Aggressor Después de preparar la Trophy Cam HD Aggressor instalando correctamente las pilas y la tarjeta SD, basta con llevarla al exterior, sujetarla a un árbol, encenderla y dejarla, y así obtendrá algunas grandes fotos, que es exactamente lo que usted deseaba.
  • Seite 89 10 segundos. Este intervalo le da tiempo para cerrar la tapa delantera de la Trophy Cam HD Aggressor, bloquearla y abandonar el área observada. Una vez en modo ENCENDIDO, no es necesario ni posible ningún control manual (las teclas de control no tienen ningún efecto).
  • Seite 90 (los parámetros varían con la utilización de las preconfiguraciones, vea la pág. 98 para más detalles) de manera que su Trophy Cam HD Aggressor funcione exactamente como usted quiere. Puede hacerlo entrando en el menú CONFIGURACIÓN y pulsando las teclas situadas bajo la pantalla LCD, que le mostrarán los distintos parámetros y sus ajustes.
  • Seite 91 en modo CONFIGURACIÓN, si pulsa el botón MENÚ podrá seleccionar cualquier parámetro y cambiar su ajuste. El nombre del parámetro y su ajuste actual aparecen en la LCD. Si pulsa la tecla DERECHA o IZQUIERDA se desplazará al parámetro siguiente o anterior (DERECHA para pasar al siguiente parámetro y p para volver al anterior) y pulsando las teclas ARRIBA o ABAJO le podrá...
  • Seite 92 que desea y configurar la cámara conforme a sus preferencias. Pero quizás prefiera ver antes uno o dos ejemplos: Para cambiar el ajuste de cualquier parámetro, empiece siempre con el interruptor de encendido en la posición CONFIGURACIÓN. Cuando se encienda la LCD, pulse la tecla MENÚ.
  • Seite 93 Pulse OK Barrido de campo 2x con función de disparo directo El Barrido de Campo es una nueva función de la Bushnell Trophy Cam HD Aggressor, que le permite monitorear sus parcelas de alimentación y los bordes del campo con imágenes o videos campturados por lapsos de tiempo. Cuando se establezca en "Activada"...
  • Seite 94 "Configurar reloj" (Set Clock) en primer lugar, de modo que su grabación de Barrido de campo (Field Scan) se detendrá y comenzará a las horas correctas del día]: 1. Mueva el interruptor principal a CONFIGURACIÓN (SETUP); a continuación, pulse MENÚ (MENU). 2.
  • Seite 95 temporal "A" de Barrido de campo (Field Scan) para las horas del amanecer, de 6 a. m. a 8 a. m., y el bloque B para capturar imágenes entre las 5.30 p. m y las 7 p. m. No tendrán lugar grabaciones de Barrido de campo (Field Scan) entre las 8 a.
  • Seite 96 Estas configuraciones provocarían que la cámara capturase una fotografía (o vídeo, si la cámara está configurada en ese modo) una vez cada 15 minutos, comenzando a las 6.00 a. m., hasta que el bloque de grabación de Barrido de campo (Field Scan) "A" finalizara a las 8.00 a.
  • Seite 97 (Paso 1)-establezca el - establezca (Paso 3)-establezca el inicio (Paso 2) modo de Barrido de el Barrido de campo (Start) y la finalización campo (Field Scan) (Stop) del Barrido de (Field Scan) "A" como "Activado" (On) campo (Field Scan) "A" [pulse Aceptar (OK)] (Paso 5)-establezca el inicio (Paso 4)-)(opcional):...
  • Seite 98 Menú CONFIGURACIÓN (Setup) – Parámetros y Ajustes Parámetro Descripción Ajustes (Negrilla = predeterminado) Set Clock / Ajustado (Set) Pulse OK y use las teclas ARRIBA/ Ajustar reloj ABAJO (para cambiar el ajuste) e IZQUIERDA/DERECHA (para pasar al campo siguiente) para fijar la hora (sólo formato de 24 horas, “00”...
  • Seite 99 Parámetro Descripción Ajustes (Negrilla = predeterminado) Modo Selecciona si se realizarán fotos fijas o Cámara, Vídeo o vídeos cuando se active la cámara. El Híbrido modo Híbrido combina tanto cámara como vídeo, de modo que se realizan fotos fijas y vídeos para cada disparo.
  • Seite 100 Parámetro Descripción Ajustes (Negrilla = predeterminado) Selecciona cuantas fotos se toman en Capture 1 Foto, Number/ secuencia por tirada en modo cámara. 2 Foto, Numero de Esta configuración afecta también a las 3 Foto captura fotografías tomadas en modo Barrido (sólo afecta a de campo (Field Scan) (para hacer las fotos fijas...
  • Seite 101 Parámetro Descripción Ajustes (Negrilla = predeterminado) Nombre de (Nombre Permite al usuario establecer un nombre predeterminado = personalizado para la cámara. Es útil la cámara "TROPHY CAM") (Camera para fines de identificación cuando se Consulte configuran varias cámaras, puesto que Name) "Utilización de cada cámara imprimirá...
  • Seite 102 Parámetro Descripción Ajustes (Negrilla = predeterminado) Intervalo 10S (10 Selecciona el tiempo que la cámara “esperará” hasta volver a responder a una segundos) activación del PIR después de detectar predeterminado, un animal y permanecer dentro del con una gama alcance del sensor. Durante este intervalo disponible entre de “ignorar activaciones”...
  • Seite 103 Parámetro Descripción Ajustes (Negrilla = predeterminado) Sensor Level Automática Selecciona la sensibilidad del sensor PIR. (Auto), Bajo La configuración "Alta" (High) hará que la (Nivel del sensor) (Low), Normal, cámara sea más sensible a los infrarrojos Alto (High) y (calor) y se dispare más fácilmente con Automática el movimiento;...
  • Seite 104 Parámetro Descripción Ajustes (Negrilla = predeterminado) Obturador Auto, Alto (High) Regula la velocidad del obturador durante el funcionamiento con visión nocturna, de Visión afectando la exposición y la apariencia nocturna (NV de movimiento. El valor predeterminado Shutter) "Auto" proporcionará buena exposición en condiciones variables.
  • Seite 105 Parámetro Descripción Ajustes (Negrilla = predeterminado) Selecciona “On” si quieres la fecha y hora; Time Stamp Desactivada, / Marca de la hora (a la que la foto fue tomada) marcada Activada (Off / en cada foto o vídeo, selecciona “off” en hora (sólo afecta a el caso que no quieras marcarla.
  • Seite 106 Parámetro Descripción Ajustes (Negrilla = predeterminado) Permite al usuario introducir las Coordinar Desactivada coordenadas de longitud y latitud para entrada (Off), Activada (Coordinate la ubicación de la cámara. Este dato se (On) Input) insertará en los archivos que se guarden en la tarjeta SD de la cámara [si ha Consulte seleccionado "Activado"...
  • Seite 107 El formato que necesitará utilizar para introducir las coordinadas en la pantalla de menú de la Trophy Cam HD Aggressor es el siguiente: Minutos...
  • Seite 108 Trophy Cam HD Aggressor. Presione uno extremo de la correa a través de las dos bridas de la parte trasera de la Trophy Cam HD Aggressor. Pase el extremo de la correa por la hebilla. Abróchese el cinturón con seguridad alrededor del tronco de un árbol tirando del extremo de la correa con firmeza...
  • Seite 109 Los resultados de los ensayos le ayudarán a encontrar la mejor ubicación al montar y apuntar la Trophy Cam HD Aggressor. La altura respecto al suelo para colocar el dispositivo debe variar adecuadamente en función del tamaño del animal. En general, es adecuada una altura de 1 a 2 m.
  • Seite 110 (véase la pág. 83). REPRODUCCIÓN/SUPRESIÓN DE FOTOS/VÍDEOS Después de configuración, montar y activar la Trophy Cam HD Aggressor se supone que deseará volver más tarde y revisar las imágenes que ha capturado para usted. Hay varias maneras de hacerlo.
  • Seite 111 *Los archivos de vídeo “.mp4” pueden precisar un software adicional para verlos en un Mac. La Trophy Cam HD Aggressor admite tres tipos de formatos de sistema: FAT12, FAT16 y FAT32. El valor determinado para guardar fotos y vídeos es FAT16. Aquí hay algunas notas al respecto: •...
  • Seite 112 SD. En tal caso, formatee la tarjeta SD con la Trophy Cam HD Aggressor o en su ordenador y después inserte la tarjeta en su Trophy Cam HD Aggressor e inténtelo de nuevo. • El formado del sistema de archivos predeterminado de la Trophy Cam HD Aggressor es FAT16, que pueden leer la mayoría de ordenadores.
  • Seite 113 HD Aggressor. (En ordenadores Mac, arrastre el “disco” que apareció en el escritorio al conectar la cámara hacia su Papelera para “expulsarlo” antes de desconectar.) Los archivos jpg estándar de la Trophy Cam HD Aggressor pueden editarse con cualquier software fotográfico que desee usar. Los archivos de vídeo .mp4 pueden verse con Windows Media Player (versión 7 o posterior) así...
  • Seite 114 4. Compruebe que utiliza una tarjeta SD de una marca de buena calidad en su cámara. Bushnell recomienda utilizar tarjetas SD y SDHC de marca SanDisk ® hasta 32GB. Nuestra experiencia indica que las tarjetas SD de baja calidad a veces pueden reducir la duración de las pilas de la Trophy Cam HD Aggressor.
  • Seite 115 AA Energizer en su ® Trophy Cam HD Aggressor para obtener la máxima duración de estas.. 2. Compruebe que las baterías se han colocado correctamente, respetando la polaridad. Coloque siempre el extremo negativo (plano) de la batería en contacto con el lado del muelle de su cavidad en la cámara.
  • Seite 116 flash dejará de funcionar cuando la batería se acerque al final de su vida. b. Obtendrá los mejores resultados cuando el sujeto se encuentra dentro del alcance idóneo del flash, a una distancia no superior a 80 ft/24m (119876/119877) o 100 ft/30m (119874/119875). c.
  • Seite 117 Si pasa con frecuentemente, el sensor puede necesitar una revisión. Por favor contacte con el Servicio de Posventa de Bushnell. 7. Videoclips cortos – no se graban hasta la duración fijada a. Compruebe que la tarjeta SD no esté llena.
  • Seite 118 5. Retire cualquier rama que esté justo delante del objetivo de la cámara. El LED del sensor PIR dispara/no dispara el flash 1. Si la cámara está en modo de “Configuración”, un LED especial de la parte delantera de la cámara destellará cuando detecte movimiento. Esto solo tiene objeto en la configuración y ayuda al usuario a orientar la cámara.
  • Seite 119 2. Las hormigas pueden ser atraídas por la vibraciones electrónicas de bajo nivel, e ingresar a travéz de alguna apertura que conecte el exterior con el interior de la cámara. Asegúrese de que el enchufe de entrada CC esté conectado con seguridad.
  • Seite 120: Especificaciones Técnicas

    ESPECIFICACIONES TÉCNICAS 119874/119876: 5920x3416 (16:9) / 5280x3960 (4:3) Tamaño máximo en píxeles 119875/119877: 6528x3672 (16:9) / 5280x3960 (4:3) Objetivo F=2.8; FOV=38°; Auto IR-Cut-Remove (para uso nocturno) Seleccionable (Bajo/Medio/Alto), hasta 100ft/30m (119744/119875) Alcance del flash IR o 80ft/24m (119876/119877) Pantalla de Pantalla B/N: (119874/119876: 21x30mm(1,5”) visualización Pantalla a color (sólo 119875/119877): 2.4"...
  • Seite 121: Garantía Limitada De Un Año

    GARANTÍA LIMITADA DE UN AÑO Su producto Bushnell tiene una garantía que le cubre los defectos de los materiales y de mano de obra durante un año a partir de la fecha de la compra. En caso de un defecto bajo la garantía, nosotros, a nuestra elección, repararemos o reemplazaremos el producto, dando por sentado que usted devuelve...
  • Seite 122 Eliminación de equipos eléctricos y electrónicos (Aplicable en la UE y otros países europeos con sistemas de recogida separada) Este equipo contiene elementos eléctricos o electrónicos y por tanto no debe eliminarse con los residuos domésticos normales. En cambio, debe eliminarse en los correspondientes puntos de recogida para reciclaje previstos por las comunidades.
  • Seite 123: Deutsch

    G E B R A U C H S A N L E I T U N G DEUTSCH www.trophycam.de Modellnummern: 119874 / 119875 / 119876 / 119877 03-17...
  • Seite 124 Wir gratulieren Ihnen zum Kauf einer der besten Wildkameras auf dem Markt! Bushnell ist auf die Entwicklung dieses Produktes sehr stolz, und wir sind sicher, dass auch Sie mit Ihrer Wahl zufrieden sein werden. Wir freuen uns über Ihren Kauf und danken Ihnen für das in uns gesetzte Vertrauen.
  • Seite 125: Einleitung

    EINLEITUNG Angaben zur Trophy Cam HD Aggressor Bei der Trophy Cam HD Aggressor von Bushnell handelt es sich um eine digitale Wildkamera. Ausgelöst wird die Kamera an einem Standort durch Bewegungen des Wilds, das mit einem hochempfindlichen passiven Infrarot (PIR)-Bewegungssensor aufgespürt wird.
  • Seite 126: Einsatzbereiche

    Standfotos, druckbarer Kameraname (Benutzereinstellung) zusammen mit aktuellen Daten wie Temperatur und Mondphase. Einsatzbereiche Die Trophy Cam HD Aggressor lässt sich als Wildkamera für das Aufspüren oder Beobachten von Wild einsetzen. Sie kann ebenfalls für Überwachungszwecke eingesetzt werden. TEILE UND BEDIENELEMENTE Die Trophy Cam HD Aggressor hat folgende Anschlüsse für externe Geräte: USB-...
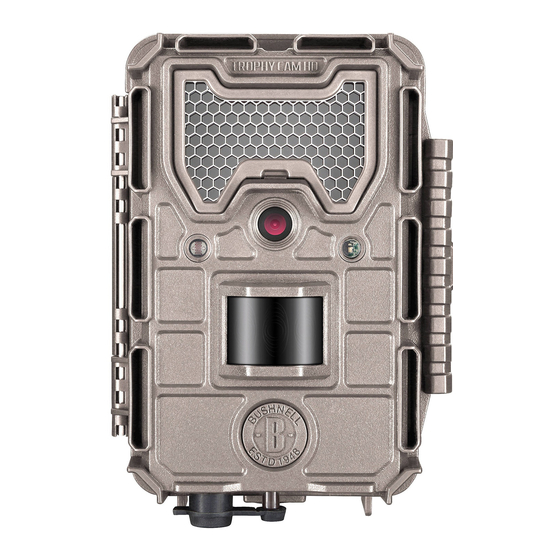
  • Seite 127: Vorderansicht

    Mit einem 3-Wege-Einschaltknopf werden die wichtigsten Bedienmodi eingestellt: OFF (Aus), SETUP (Einstellungen) und ON (Ein) (Seite 128 Abb. 2). Eine Leiste mit sechs Funktionstasten wird hauptsächlich im SETUP (Einstellungs)- Modus für die Auswahl der Bedienfunktionen und -parameter verwendet. Wie in Abb. 2 dargestellt handelt es sich bei diesen Tasten um: AUFWÄRTS, ABWÄRTS, LINKS, RECHTS, OK und MENÜ.
  • Seite 128: Innenansicht

    Einlegen der Batterien Nach dem Öffnen der beiden Riegel auf der rechten Seite der Trophy Cam HD Aggressor kommen acht Batteriefächer zum Vorschein. Legen Sie einen vollständigen Satz von 8 Batterien ein. Achten Sie beim Einlegen der Batterien auf die korrekte Polung (negative oder abgeflachte Seite an die lange...
  • Seite 129: Einlegen Der Sd-Karte

    Funktion der Kamera nicht gewährleistet werden kann). Wenn das Solar Panel angeschlossen ist UND AA Batterien eingelegt sind, verwendet die Trophy Cam HD Aggressor solange Energie vom eingebauten Li-Io Akku des Panels, solange dieser genügend Energie liefert.
  • Seite 130 Anzeige im SETUP-Modus (falls die SD-Karte gesperrt ist erscheint im SETUP- Modus das SD-Karten-Symbol mit einem "Schloss"-Symbol). Das Formatieren der SD-Karte mittels der Trophy Cam HD Aggressor wird vor der Erstnutzung der Kamera empfohlen, besonders dann, wenn die Karte zuvor bereits in anderen Geräten verwendet wurde (siehe “Menü...
  • Seite 131: Gebrauch Der Trophy Cam Hd Aggressor

    GEBRAUCH DER Trophy Cam HD Aggressor Nach dem Sie Ihre Trophy Cam HD Aggressor durch das korrekte Einlegen der Batterien und einer SD-Karte vorbereitet haben, ist sie bereit für den Einsatz im Freien. Sie lässt sich ganz einfach im eingeschalteten Zustand an einem Baum befestigen und liefert Ihnen genau die tollen Fotos, die Sie sich gewünscht haben.
  • Seite 132: Ein-Modus (On Mode)

    Befindet sich die Kamera erst einmal im EIN-Modus, sind keine manuellen Steuerungen mehr erforderlich oder möglich (die Funktionstasten sind gesperrt). Die Trophy Cam HD Aggressor ist so eingestellt, dass sie automatisch Fotos oder Videos macht (gemäß der aktuellen Parametereinstellungen), wenn der PIR-Sensor im überwachten Bereich Bewegung erkennt.
  • Seite 133 Abb. 3: Anzeige der SETUP-Informationen (Modellnummern 119874/119875) Kamera-Modus (Standfoto) Video-Modus SD-Kartenstatus Auflösung (Bildgröße) Video-Ton Ein Videoauflösung Video Modus Batteriestand Standfoto Modus Datum Monat/ Zeitstempel Tag/Jahr (Time Stamp) Uhrzeit Field Scan St.:Min.:Sek. Modus verbleibende Aufnahmezeit Anzahl der Aufnahmen Verbleibende Aufnahmen / Kapazität SETUP-Modus (Schnelltasten/Funktionen) Wie bereits oben im Abschnitt “Teile &...
  • Seite 134: Einstellungen Ändern Mit Dem Setup

    EINSTELLUNGEN ÄNDERN MIT DEM SETUP-Menü Die wichtigste Funktion des SETUP-Modus ist das Ändern der Einstellungen für die Kameraparameter (die verfügbaren Parameter variieren bei Verwendung der Voreinstellungen - siehe S. 141 für weitere Details), sodass Ihre Trophy Cam HD Aggressor genau so arbeitet, wie Sie es möchten. Gehen Sie dazu in das SETUP- Menü, drücken Sie die Tasten unter dem LCD-Display, worauf Ihnen jeder einzelne Parameter und seine Einstellung angezeigt wird.
  • Seite 135 Abb. 4: Auswahl der Parametereinstellungen MENÜ-Taste drücken (4a) NACH UNTEN drücken (4b) OK drücken ausgewählt wurde (Abb. 4a). Betätigen Sie zum Ändern der Einstellungen die Tasten AUFWÄRTS/ABWÄRTS zum Anzeigen der gewünschten neuen Einstellung (Abb. 4b). Drücken Sie danach auf OK, um die vorgenommene Änderung zu speichern. Wenn Sie die jetzt vorgenommene Änderung übernehmen möchten, drücken Sie lediglich auf die RECHTS-Taste, um zum nächsten Parameter zu gelangen, dann drücken Sie auf die LINKS-Taste, um wieder zum vorherigen Parameter zu gelangen.
  • Seite 136 Der erste Parameter, den Sie sehen, nachdem Sie sich im SETUP-Menü (EINSTELLUNGEN) befinden, „Set Clock“ (Uhr einstellen). Zeitstempelfunktion standardmäßig eingeschaltet ist, zeigt die Kamera normalerweise das Datum und die Uhrzeit auf jedem Foto und Video basierend auf Ihren Einstellungen für diesen Parameter an. Drücken Sie OK und verwenden Sie die Tasten NACH OBEN/NACH UNTEN, um die Uhrzeit einzustellen (24-Stundenformat, „00“...
  • Seite 137 HD Aggressor, die Ihnen die Überwachung Ihrer Futterfelder oder Feldränder mit Zeitrafferbildern oder Videos ermöglicht. Wenn Sie hier „On“ (Ein) wählen, nimmt die Trophy Cam HD Aggressor automatisch Fotos (oder Videoclips) auf. Dies erfolgt in den von Ihnen gewählten Zeitintervallen (z. B. alle fünf Minuten ein Foto/Video) innerhalb von einem oder zwei Zeitblöcken, die Sie für jeden Tag festlegen, ohne...
  • Seite 138 4. Stellen Sie die [Start]- und [Stopp]-Zeiten ein. Beginnen Sie dabei mit der Startstunde und verwenden Sie die AUFWÄRTS-/ABWÄRTS-Tasten zum Ändern der Einstellung (Schritt 3). Die Einstellung der Stunden basiert auf einer 24-Stunden-Uhr, wobei „00“ Uhr = Mitternacht, „12“ Uhr = Mittag, „23“ Uhr = 11 Uhr abends entspricht.
  • Seite 139 7. Hier sehen Sie ein Beispiel dazu, wie die Kamera basierend auf den folgenden „Field Scan“-Einstellungen funktionieren würde: Hinweis: Um die beabsichtigte Field Scan: On Funktionsweise sicherzustellen, Field Scan A: sollten beim Einstellen Start- Stoppzeiten [Start]: 6:00 Überschneidungen „Field [Stop]: 8:00 Scan“-Aufnahmeblöcke B vermeiden.
  • Seite 140 (Schritt 1)- Field Scan-Modus auf (Schritt 2)- Field Scan A wählen (Schritt 3)- Start und Stopp für Field „On“ (Ein) festlegen (OK drücken) Scan A einstellen Schritte 4 und 5 sind optional (nur erforderlich, wenn Sie einen zweiten „Field Scan“- Aufnahmeblock mit anderen Start- (Schritt 4) (optional) - Field...
  • Seite 141: Parameter Einstellungen (Fett= Standardeinstellung)

    SETUP-Menü (Aufstellung und Beschreibung der Menüparameter für EINSTELLUNGEN) Parameter Einstellungen Erklärung (Fett= Standardeinstellung) Set Clock (Zeit- Einstellen Drücken Sie OK und ändern Sie die Einstellungen mit den Tasten einstellungen) AUFWÄRTS/ABWÄRTS zum Ändern der Einstellungen und die LINKS/ RECHTS Tasten, um in das nächste Feld zu gelangen, wo Stunden (nur im 24-Stundenformat, “00”...
  • Seite 142: Erklärung

    Parameter Einstellungen Erklärung (Fett= Standardeinstellung) Feeder (Futterstelle) Aufnahmeanzahl (Fotos pro Auslöser) = 3, Intervall = 3 Min. Trail (Wildwechsel) Intervall = 0,6 Sek., Nachtsichtblende = Hoch Food Plot (Futteracker) Bildgröße = 4 K, Intervall = 2 Sek., Zeitraffer = Ein (A: 5:30 - 9:00, B: 15:30 -19:30, 5 Min.-Intervalle) Modus Kamera ,Video oder...
  • Seite 143 Parameter Einstellungen Erklärung (Fett= Standardeinstellung) Capture 1 Foto, 2 Fotos, 3 Fotos Damit wird die Anzahl der Aufnahmen nach Auslösen der Kamera im Number Kameramodus innerhalb einer (gilt nur für bestimmten Sequenz bestimmt. Standfotos im Diese Einstellung wirkt sich auch Kamera- oder auf Fotos aus, die im „Field Scan“- Hybridmodus)
  • Seite 144: Led Control

    Parameter Einstellungen Erklärung (Fett= Standardeinstellung) LED Control Niedrig, Mittel, Hoch Hier können Sie steuern, wie viele LED-Lampen leuchten, wenn Bilder (LED- bei schwachem Licht aufgenommen Steuerung) werden. „High“ (Hoch) = alle LEDs (Mehrfachblitz- leuchten (36 oder 48, je nach Modell), Funktion) Standardeinstellung.
  • Seite 145 Parameter Einstellungen Erklärung (Fett= Standardeinstellung) Video Size Auswahl der Videoauflösung (Pixel). Mit 1280x720, 1920x1080, einer höheren Auflösung verbessert sich (Videogröße) 640x360 auch die Qualität der Videoaufnahmen. Gleichzeitig steigt aber auch das (gilt nur für Speichervolumen und die Kapazität der Videos im SD-Karte ist schneller erreicht.
  • Seite 146: Einstellungen

    Parameter Einstellungen Erklärung (Fett= Standardeinstellung) Zeitabstand 10S (Sekunden) Bestimmt die Länge der Wartezeit der Kamera, bis sie auf weitere Standardeinstellung Auslöser des PIR-Sensors reagiert, mit einem möglichen nachdem das Tier das erste Mal von Einstellungsbereich von der Kamera entdeckt wurde und in 60M (Minute) bis zu .5S Reichweite des Sensors verbleibt.
  • Seite 147 Parameter Einstellungen Erklärung (Fett= Standardeinstellung) Sensor Level Auto (Automatisch), Hier wird die Empfindlichkeit des (Sensoreinstel- Low (Niedrig), Normal, PIR-Sensors eingestellt. Mit der lung) Einstellung “Hoch” reagiert die High (Hoch) Kamera empfindlicher auf Infrarot (Wärme) und wird durch Bewegung leichter ausgelöst. Mit der Einstellung “niedrig”...
  • Seite 148: Kameramodus

    Parameter Einstellungen Erklärung (Fett= Standardeinstellung) NV (Night Auto, High (Hoch) Reguliert die Verschlussgeschwindigkeit bei Vision)- Nachtsichtbetrieb und beeinflusst Verschluss die Belichtung und Darstellung der Bewegung. Die Standardeinstellung „Auto“ bietet eine gute Belichtung unter verschiedenen Bedingungen. Die Nachtsichtverschlussgeschwindigkeit (NV Shutter) „Hoch“ bietet sich an, wenn Sie die Bewegung eher einfrieren möchten und nicht nach der optimalen Belichtung suchen (bei...
  • Seite 149 Parameter Einstellungen Erklärung (Fett= Standardeinstellung) Time Stamp Off (Aus), On (Ein) Wählen Sie “Ein”, wenn Sie wünschen, dass Zeit und Datum auf den Fotos/ (Zeitstempel, Videos erscheinen; wählen Sie “Aus”, betrifft lediglich sollten Sie dies nicht wünschen. Standfotos) Hinweis: Ihre Fotos werden auch mit der aktuellen Temperatur, der Mondphase und dem (benutzerdefinierten) Kameranamen versehen.
  • Seite 150 Parameter Einstellungen Erklärung (Fett= Standardeinstellung) Coordinate Off (Aus), On (Ein) Hier können Sie die Koordinaten der Längen- und Breitengrade der Input Kameraposition einstellen. Diese Daten ( Eingabe von Siehe „Verwendung der werden in die Dateien eingebunden, Eingabebildschirme im Koordinaten) die auf der SD-Karte der Kamera Setup-Menü“...
  • Seite 151: Verwendung Der Eingabebildschirme Im Setup-Menü

    Websites abgerufen werden: http://itouchmap.com/latlong.html. Geben Sie eine nahe gelegene Straße oder auch nur die Postleitzahl ein oder lokalisieren Sie mithilfe der unterschiedlichen Kartentypen die nächst gelegene Position. Die Koordinaten müssen in dem folgenden Format am Menübildschirm der Trophy Cam HD Aggressor eingegeben werden: Grad...
  • Seite 152 • Verwenden des Gurtbands: In Abb. 5 wird die Verwendung des Gurtbands an der Trophy Cam HD Aggressor gezeigt. Führen Sie das eine Ende des Gurtbands durch die beiden Halterungen an der Rückseite der Trophy Cam HD Aggressor. Fädeln Sie das Ende des Riemens durch die Schnalle. Ziehen Sie das Ende des Riemens fest an, sodass dieser straff um den Baumstamm befestigt ist.
  • Seite 153: Sensorwinkel- Und Entfernungstest

    Abb. 5: Befestigung des Gurtbands Sensorwinkel- und Entfernungstest Um zu überprüfen, ob die Trophy Cam HD Aggressor den von Ihnen ausgewählten Bereich auch wirklich zuverlässig überwacht, wird ein Test des Sensorwinkels und der Überwachungsentfernung der Trophy Cam HD Aggressor empfohlen. Bringen Sie zur Testdurchführung die Trophy Cam HD Aggressor in den SETUP -Modus.
  • Seite 154: Infos Zum Antireflex-Filter

    Bevor Sie die Kamera unbeaufsichtigt lassen, nehmen Sie bitte noch einmal die folgenden Überprüfungen vor: • Sind Batterien oder Stromquelle (Bushnell-Solarmodul) richtig gepolt eingelegt, bzw. verbunden und ist die vorhandene Energie ausreichend? • Ist noch genügend Platz auf der Speicherkarte und ist der Schreibschutz (Sperre) deaktiviert? •...
  • Seite 155 ABSPIELEN UND LÖSCHEN DER FOTOS ODER VIDEOS Nach Einrichten, Befestigen und Aktivieren Ihrer Trophy Cam HD Aggressor, kön- nen Sie es sicherlich kaum erwarten zu sehen, welche Bilder Ihre Kamera für Sie eingefangen hat. Hierfür können Sie unter verschiedenen Möglichkeiten wählen.
  • Seite 156 SD-Karte zu lesen. Sollte dies der Fall sein, formatieren Sie zunächst die SD- Karte mit der Trophy Cam HD Aggressor oder Ihrem Computer und legen dann die Karte in die Trophy Cam HD Aggressor ein und versuchen es erneut. • Standardmäßig arbeitet die Trophy Cam HD Aggressor mit FAT16, was von den meisten Computern erkannt wird.
  • Seite 157 HERUNTERLADEN DER FOTOS UND VIDEOS Zum Herunterladen der Fotos oder Videos auf einen PC oder MAC überprüfen Sie zunächst, ob sich der Einschaltknopf der Trophy Cam HD Aggressor in der Position OFF (AUS) befindet. 1) Schließen Sie das Kabel an den USB-Anschluss der Kamera, dann direkt an den USB-Hauptanschluss Ihres Computers - benutzen Sie keine USB Anschlüsse an der Frontplatte/Tastatur oder einen stromlosen USB-Verteiler.
  • Seite 158: Fehlerbehebung / Häufig Gestellte Fragen Und Antworten

    Aufnahmen zusammen. Durch Einstellen der Intervallzeit auf 0.6 Sekunde wird die Batterielebensdauer verringert. In der Regel genügt die Batterieleistung der Trophy Cam HD Aggressor für mehrere tausend Aufnahmen. 2. Vergewissern Sie sich, ob Sie neue Alkali- oder Lithiumbatterien eingelegt haben.
  • Seite 159 5. Die Kamera macht keine Aufnahmen, wenn der Schreibschutz der SD-Karte aktiviert ist. 6. Falls Sie Ihre SD-Karte vor dem Gebrauch in Ihrer Trophy Cam HD Aggressor bereits in anderen Geräten verwendet haben, formatieren Sie die Karte mit dem Parameter “Format” im (SETUP)-Modus (vergewissern Sie sich, dass Sie davor wichtige Dateien bereits gespeichert haben, da eine Formatierung alle Dateien unwiederbringlich löscht).
  • Seite 160 Position befindet. Der Knopf darf sich nicht zwischen zwei Positionen befinden. 4. Vermeiden Sie es vom Modus “ON(Ein)” direkt in den “SETUP”-Modus zu wechseln. Stellen Sie den Funktionsknopf immer zuerst auf “OFF(Aus)” und dann erst zurück in “(SETUP)”. Qualitätsprobleme von Standfotos und/oder Videoaufnahmen 1.
  • Seite 161 Unter bestimmten Lichtverhältnissen kann der Sensor abgelenkt werden, was zu minderwertigen Farbergebnissen führt. b. Sollte dies aber regelmäßig auftreten, muss der Sensor eventuell gewartet werden. Wenden Sie sich in diesem Fall bitte an Ihren Bushnell-Fachhändler. 7. Kurze Videoaufnahmen—Gerät nimmt nicht in der vollständigen eingestellten Länge auf a.
  • Seite 162: Pir-Sensor Led-Blitz / Blitz Funktioniert Nicht

    Datums- und Zeitstempel werden nicht auf den Fotos aufgedruckt Überprüfen Sie ob der Parameter für “Time Stamp” auf “ON(Ein)” steht. Auf den Fotos ist nicht das gewünschte Objekt zu sehen 1. Prüfen Sie die Einstellung auf die Empfindlichkeit des PIR-Sensors. Stellen Sie den Sensorpegel bei hohen Temperaturen auf „High“...
  • Seite 163: Einstellungen Werden Von Der Kamera Nicht Gespeichert

    2. Auf dem LCD-Bildschirm erscheint ein schwacher schwarzer Streifen, nach dem Wechsel von “(SETUP)” zu “(ON)”. Sobald der Einschaltknopf auf “(ON)” gestellt wurde, schaltet sich der LCD- Bildschirm aus. Hin und wieder erscheint dann dieser schwarze Streifen, der in der Regel nach einer Sekunde wieder verschwindet. Das ist völlig normal und beeinträchtigt die Kamera nicht in ihrer Funktion.
  • Seite 164 ACHTUNG: VERWENDEN SIE NICHT die Intervalleinstellung von 0,6 Sek. an Futterstellen oder in ähnlichen Umgebungen. Möglicherweise kommt es zu lang andauerndem Leuchten bei den LEDs, was zu Überhitzung und zu einer verkürzten Lebenszeit der internen elektronischen Komponenten führen kann. Verwenden Sie nicht gleichzeitig alte und neue Batterien. Verwenden Sie keine unterschiedlichen Batterietypen, sondern entweder nur Lithium oder nur Alkali-Batterien.
  • Seite 165: Technische Spezifikationen

    TECHNISCHE SPEZIFIKATIONEN 119874/119876: 5920x3416 (16:9) / 5280x3960 (4:3) Maximale Pixelauflösung 119875/119877: 6528x3672 (16:9) / 5280x3960 (4:3) F = 2,8; FOV = 38°; automatisch entfernbarer Infrarot-Cut-Filter Objektiv (Auto IR-Cut-Remove) (bei Nacht) Wählbar (Niedrig, Mittel, Hoch), bis zu 100ft/30m Reichweite IR-Blitz (119844/119875) oder 80ft/24m (119876/119877) Schwarz/weiß-Bildschirm(119874/119876: 21x30mm(1.5”) Bildschirmanzeige Farbe Anzeige (nur 119875/119877): 2.4"...
  • Seite 166: Beschränkte Ein-Jahres-Garantie

    Vaughan, Ontario L4K 5W5 Für Produkte, die außerhalb der USA oder Kanada gekauft wurden, sprechen Sie im Garantiefall bitte Ihren Händler vor Ort auf die weitere Vorgehensweise an. In Europa können Sie Bushnell ebenfalls unter folgender Anschrift kontaktieren: Bushnell Germany GmbH European Service Centre Mathias-Brüggen-Str.
  • Seite 167 Entsorgung von elektrischen und elektronischen Geräten (Gültig in der EU und anderen europäischen Ländern mit getrennten Sammelsystemen) Dieses Gerät enthält elektrische und/oder elektronische Bauteile und darf deshalb nicht im normalen Haushaltmüll entsorgt werden. Stattdessen sollte es an den entsprechenden Sammelstellen für Recycling der jeweiligen Gemeinden abgegeben werden. Ihnen entstehen hierdurch keine Kosten.
  • Seite 168: Italiano

    M A N U A L E D I I S T R U Z I O N I ITALIANO www.trophycam.it No modelli: 119874 / 119875 / 119876 / 119877 03-17...
  • Seite 169 Evitare di utilizzare insieme diversi tipi di batterie; TUTTE le batterie devono essere alcaline o al litio. Bushnell raccomanda di utilizzare le schede SanDisk velocità classe 6 o ® superiore e SDHC (capacità fino a 32 GB) per Trophy Cam HD Aggressor.
  • Seite 170 INTRODUZIONE A proposito della Trophy Cam HD Aggressor La Bushnell Trophy Cam HD Aggressor è una fotocamera digitale per la ricerca. Può essere attivata da qualunque movimento nell'area monitorata, rilevato da un sensibilissimo sensore di movimento a raggi infrarossi passivo (Passive Infra-Red, PIR), e successivamente scattare immagini di elevata qualità...
  • Seite 171 Tale funzione risulta particolarmente utile per quanti impostano vari Trophy Cam HD Aggressor per il monitoraggio di aree ampie o fortemente separate. Multi Flash Mode (Controllo LED)- evita alle fotografie di subire una •...
  • Seite 172: Parti E Controlli

    PARTI E CONTROLLI La Trophy Cam HD Aggressor dispone delle seguenti connessioni ai dispositivi esterni: Porta USB, slot per scheda SD, e un’alimentazione CC esterna (Fig. 1). Un commutatore di potenza a 3 vie viene usato per selezionare le principali modalità...
  • Seite 173: Sostituzione Delle Batterie

    INSTALLAZIONE DELLE BATTERIE E DELLA SCHEDA SD Prima di imparare l’uso della Trophy Cam HD Aggressor, occorre installare un set di batterie e inserire una scheda SD. Vi bastano solo qualche minuto, per imparare cose importanti da sapere a proposito delle batterie e della scheda SD. Leggete con...
  • Seite 174: Inserimento Di Una Scheda Sd

    È anche possibile collegare un accessorio opzionale pannello solare (N. modello 119756C-si prega di visitare www.bushnell.com per maggiori informazioni) alla presa a jack “DC In” (ingresso CC-p.172, Fig.1) sotto la Trophy Cam HD Aggressor. (altri alimentatori esterni non dovrebbero essere utilizzati, la fotocamera e / o il display potrebbero non funzionare correttamente).
  • Seite 175 USO DELLA Trophy Cam HD Aggressor Una volta preparata la Trophy Cam HD Aggressor con l’installazione delle batterie e della scheda SD, si potrebbe semplicemente portarla fuori, agganciarla ad un albero, accenderla e lasciarla;...
  • Seite 176: Modalità Off

    OFF. Notare che anche nella modalità OFF la Trophy Cam HD Aggressor consuma ancora potenza a un livello molto basso. Quindi è una buona norma togliere le batterie se la fotocamera non viene usata per un lungo periodo di tempo.
  • Seite 177 su OFF e poi riportarlo ancora su SETUP. Tasti/funzioni veloci della modalità SETUP Come menzionato in precedenza in “Parti e Controlli”, quattro dei seguenti tasti nel display LCD hanno funzioni secondarie “abbreviate” quando la fotocamera è commutata su SETUP (ma il tasto MENU non è stato premuto): •...
  • Seite 178 185 per ulteriori dettagli), in modo che la Trophy Cam HD Aggressor funzioni esattamente come si desidera. Per questo, entrare nel menu SETUP e premere i tasti sotto il display LCD, che indicherà...
  • Seite 179 poi premere LEFT per tornare a quello precedente. Si dovrebbe vedere l’impostazione del parametro appena modificata. ESEMPI: modifica delle impostazioni di alcuni parametri comuni Consultando questa pagina, si troveranno le tabelle che elencano tutti i parametri che si trovano nel menu SETUP, assieme alle loro possibili impostazioni (o gamma di impostazioni), e una descrizione dettagliata di che cosa controlla il parametro e di che cosa effettuano le impostazioni.
  • Seite 180 Fig. 4: Selezionare le impostazioni dei parametri Premere MENU (4a) Premere DOWN (4b) Premere OK Premendo il tasto DESTRO diverse volte si arriva al parametro "Default Set" (Impostazione predefinita). Evidenziare o selezionare "Execute" (Esegui) (usando SU o GIÙ) e premere OK per ripristinare tutti i parametri (inclusi i parametri Mode (Modalità) e Video Length (Lunghezza filmato) appena modificati) alle impostazioni predefinite di fabbrica.
  • Seite 181 Aggressor, che consente all'utente di monitorare le esche con cibi o i confini dei campi mediante la realizzazione di immagini o videoclip entro intervalli di tempo prestabiliti. Una volta impostata su "On", la Trophy Cam HD Aggressor realizza una foto (oppure registra un videoclip) automaticamente, secondo gli intervalli selezionati dall'utente (ad esempio, una ogni cinque minuti) nel corso di uno o due blocchi di tempo impostati per ciascuna giornata;...
  • Seite 182 4. Impostare gli orari di inizio [Start] e fine [Stop] cominciando dall'ora di inizio, utilizzando i tasti UP/DOWN per modificare le impostazioni (Fase 3). Le impostazioni dell'ora si basano sul sistema a 24 ore, secondo cui "00"=mezzanotte, 12 = mezzogiorno, "23" = ore 11 di sera, ecc... Per passare all'impostazione seguente, premere il tasto RIGHT, modificare i minuti dell'orario di inizio con il tasto UP/DOWN, quindi passare alle impostazioni di ore e minuti per l'orario di chiusura.
  • Seite 183 7. Segue un esempio di funzionamento della videocamera, in base alle impostazioni seguenti di Field Scan: Attenzione: evitare eventuali • Field Scan: On sovrapposizioni di blocchi di registrazione A e B di Field Scan • Field Scan A: quando vengono impostati •...
  • Seite 184 (Fase 1)-impostare la (Fase 2)-selezionare Field (Fase 3)-impostare inizio e fine modalità Field Scan su "On" Scan "A" (premere OK) "A" di Field Scan Le fasi 4 e 5 sono opzionali (unicamente necessarie per impostare una secondo blocco di (Fase 4) (opzionale)- selezionare (Fase 5) (opz.)-impostare inizio registrazioni di Field Field Scan "B"...
  • Seite 185 Menu SETUP - Parametri ed elenco impostazioni con descrizioni Parametro Impostazioni Descrizione (Grassetto=predefinita) Impostare Impostare Premere OK e usare i tasti UP orologio (SU)/DOWN (GIÙ) (per modificare l’impostazione) e i tasti LEFT (sinistra)/ Impostare RIGHT (destra) (per spostarsi al campo orologio "Set successivo) per impostare l’ora (solo Clock"...
  • Seite 186 Parametro Impostazioni Descrizione (Grassetto=predefinita) Modalità "Camera", "Video" o Seleziona se catturate foto o filmati quando la telecamera viene attivata. La "Hybrid" ("Mode") modalità Hybrid combina le funzionalità di fotocamera e videocamera, catturando sia fotografie che filmati video quando il dispositivo viene attivato. Dimensione Sceglie la risoluzione per i fermi immagine.
  • Seite 187 Parametro Impostazioni Descrizione (Grassetto=predefinita) Controllo LED Basso, medio, alto Controlla il numero dei LED che si accendono quando vengono scattate (Funzione le fotografie in condizioni di bassa multi-flash) illuminazione. “High” (Alto) = si accendono tutti i LED (36 o 48, in base al modello), che è...
  • Seite 188 Parametro Impostazioni Descrizione (Grassetto=predefinita) Dimensione Seleziona la risoluzione del filmato (in 1280x720, 1920x1080, pixel per immagine). Maggiore risoluzione video "Video 640x360 produce foto di migliore qualità, ma crea Size" file più grandi che occupano maggior (influisce sui spazio di memoria nella scheda SD (si filmati video riempie più...
  • Seite 189 Parametro Impostazioni Descrizione (Grassetto=predefinita) Livello del Selezione della sensibilità del sensor PIR. Auto, Basso, Normale, sensore L'impostazione “High” (alta) renderà la Alto "Sensor videocamera più sensibile all'infrarosso Level" (heat) e più facilmente attivata dal movimento, mentre l'impostazione “Low” (bassa) la rende meno sensibile al calore e al movimento.
  • Seite 190: Camera Mode

    Parametro Impostazioni Descrizione (Grassetto=predefinita) NV Shutter Auto, High Regola la velocità dell'otturatore durante il funzionamento in visione notturna, (otturatore (Automatica, Alta) influendo sull'esposizione e sull'aspetto per visione del movimento. L'impostazione predefinita notturna) "Auto" (Automatica) garantisce una buona esposizione in condizioni variabili. È...
  • Seite 191 Parametro Impostazioni Descrizione (Grassetto=predefinita) Stampare Selezionare “On” (attiva) se si vuole Off (disattiva), On che la data e l’ora (di cattura della foto) l’ora "Time (attiva) sia stampata su tutte le foto e video, Stamp" selezionare “Off” (disattiva) in caso (riguarda solo contrario.
  • Seite 192 Parametro Impostazioni Descrizione (Grassetto=predefinita) On, Off Field Scan Attivazione/disattivazione della modalità di registrazione (intervallo temporale) di Field Scan. L'utente può impostare gli (Una volta selezionato orari di inizio e fine per un massimo di due On): "A" inizio/fine, "B" "blocchi" indipendenti di registrazioni Field inizio/fine, intervallo Scan, nonché...
  • Seite 193 Parametro Impostazioni Descrizione (Grassetto=predefinita) Video Sound On, Off Selezionare "On" per effettuare registrazioni video con il sonoro quando la (solo per videocamera è impostata in modalità video videoclip) (le dimensioni del file salvato risulteranno leggermente superiori). Impostazione Annulla, Esegui Selezionare “Execute” (esegui) e premere OK per ripristinare tutti i parametri alle predefinita impostazioni predefinite di fabbrica.
  • Seite 194 Inserire l'indirizzo di una strada nelle vicinanze, oppure solo il CAP, oppure utilizzare diversi tipi di cartine per stabilire la posizione approssimativa. Il formato da utilizzare per immettere le coordinate nella schermata del menu Trophy Cam HD Aggressor è: Gradi...
  • Seite 195 “ON”. Quando si imposta la Trophy Cam HD Aggressor per il gioco di esplorazione o per altre applicazioni esterne, si deve essere sicuri di posizionarla correttamente e con sicurezza.
  • Seite 196 Nella modalità ON, il LED indicatore di movimento (rosso) lampeggerà per circa 10 secondi. Questo lascia il tempo di chiudere e bloccare il coperchio frontale della Trophy Cam HD Aggressor e poi andare via. Durante questo intervallo di tempo, il LED indicatore lampeggerà continuamente in rosso. Dopo che si arresta il...
  • Seite 197 (vedere pag 172). RIPRODUZIONE/CANCELLAZIONE DELLE FOTO E DI FILMATI Dopo aver installato, montato e attivata la Trophy Cam HD Aggressor, di desidera naturalmente ritornare in seguito e vedere le immagini catturate. Ci sono diversi modi per fare questo.
  • Seite 198 *I file video “.mp4” possono richiedere un software addizionale per la visualizzazione con il Mac. La Trophy Cam HD Aggressor supporta 3 generi di formati per il file system, FAT12, FAT16, e FAT32. Il valore predefinito è FAT16 per salvare foto e video. Ecco alcune note relative: •...
  • Seite 199 Mac, trascinare nel cestino il “disco” che è apparso sul desktop quando è stata collegata la fotocamera, per “espellerlo” prima di scollegare.) I file standard .jpg della Trophy Cam HD Aggressor possono essere visti e modificati con qualche software adatto. I file video .mp4 possono essere visualizzati con Windows Media Player (versione 7 o successivi) e con altri programmi di visualizzazione video che possono essere forniti con il computer, o disponibili online.
  • Seite 200 1. La durata della batteria varierà in funzione della temperatura operativa e dal numero di immagini riprese. Impostando il tempo di intervallo a 0.6 secondo, la durata della batteria si riduce. Solitamente, la Trophy Cam HD Aggressor potrà scattare diverse migliaia di immagini prima dell’esaurimento delle batterie.
  • Seite 201 4. Assicurarsi di usare una scheda SD di buona qualità nella fotocamera. Bushnell raccomanda schede del marchio SanDisk fino a 32 GB. La nostra esperienza ® indica che la scarsa qualità delle schede SD possono talvolta ridurre la vita delle batterie della Trophy Cam HD Aggressor.
  • Seite 202 Problemi con la qualità delle foto e/o dei filmati 1. Le foto e i video notturni appaiono troppo scuri a. Controllare l’icona della batteria per vedere se la batteria funziona a piena potenza. Il flash finirà di funzionare in prossimità della fine della batteria. b.
  • Seite 203 Se questo si vede in un modo evidente, allora il sensore va controllato. Contattare il servizio assistenza della Bushnell. 7. Filmati troppo brevi: registrazione non corrispondente all’impostazione a. Assicurarsi che la scheda SD non sia piena.
  • Seite 204 4. Evitare di montare la telecamera su piccoli alberi che si possono muovere sotto l’azione di venti forti. 5. Rimuovere ogni ramo che si trova proprio di fronte all’obiettivo. Il LED del sensore PIR lampeggia/non lampeggia 1. Quando la telecamera è in modalità “Setup”, un LED speciale sulla parte anteriore della telecamera lampeggerà...
  • Seite 205 Presenza di umidità o insetti nella videocamera 1. Per garantire di tenere umidità o pioggia lontano dalla videocamera, posizionare in modo saldo la spina CC In. 2. Gli insetti possono essere attratti da vibrazioni elettroniche a basso livello e entrare nei fori tra la parte interna ed esterna della videocamera. Verificare che la spina CC In sia attaccata in modo saldo.
  • Seite 206: Specifiche Tecniche

    SPECIFICHE TECNICHE 119874/119876: 5920x3416 (16:9) / 5280x3960 (4:3) Massima dimensione in Pixel 119875/119877: 6528x3672 (16:9) / 5280x3960 (4:3) Obiettivo F=2,8; FOV=38°; Auto IR-Cut-Remove (di notte) Selezionabile (Low/Med/High), fino a 100ft/30m Campo del flash IR (119744/119875) o 80ft/24m (119876/119877) Display B&W (119874/119876: 21x30 mm(1,5 pollici) Schermo display Display a colori (119875/119877 solo): 2.4"...
  • Seite 207 GARANZIA LIMITATA DI UNO ANNO Questo prodotto Bushnell è garantito esente da difetti del materiale e di fabbricazione per uno anno a decorrere dalla data di acquisto. In caso di difetto durante il periodo di garanzia, a nostra discrezione ripareremo o sostituiremo il prodotto purché sia restituito franco destinatario. Sono esclusi dalla garanzia eventuali danni causati da abuso, maneggiamento improprio, installazione o manutenzione eseguiti da persone non autorizzate dal servizio di assistenza Bushnell.
  • Seite 208: Smaltimento Di Apparecchiature Elettriche Ed Elettroniche

    Smaltimento di apparecchiature elettriche ed elettroniche (Vigente presso i Paesi UE e altri Paesi europei con sistemi di raccolta di erenziata dei ri uti) Il presente apparecchio componenti elettriche e/o elettroniche e non può pertanto essere smaltito come ri uto domestico ordinario. Al contrario, dovrebbe essere smaltito presso punti di raccolta destinati al riciclaggio, in base alle istruzioni delle amministrazioni locali.
  • Seite 212 For further questions or additional information please contact: Bushnell Outdoor Products 9200 Cody, Overland Park, Kansas 66214 (800) 423-3537 • www.bushnell.com ©2017 Bushnell Outdoor Products...

Diese Anleitung auch für:

119874119875119876119877

Inhaltsverzeichnis