Emerson CPHE-Serie Betriebsanleitung
Heißgasbypass-regler
Verfügbare Sprachen
Verfügbare Sprachen
Quicklinks
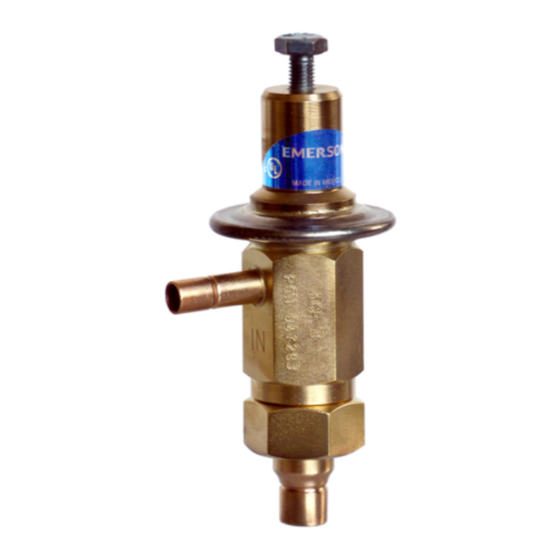
Pressure Regulator
Pressure Regulator
Description and Technical Data:
Regulators are used to avoid permanent on/off
cycling of compressor or to keep evaporating
temperatures above certain levels
• Can be installed in any position.
• Intended for use with CFC, HCFC, HFC
• Adjustable from:
CPHE -0,4 to 5 bar
•
ACP: 0 to 5 bar
• Factory setting:
CPHE: 1,4 bar
•
ACP: 2,7 bar
• Max. allowable pressure PS:
CPHE: 35 bar
•
ACP 31 bar
• Medium temperature range TS: -40°C to 120°C
• Ambient temperature range:
-40 to 50°C
• Transport temperature range:
-40 to 70°C
• Marking:
•
!
Safety Instructions:
• Read installation instructions thoroughly.
Failure to comply can result in device failure,
system damage or personal injury.
• It is intended for use by persons having the
appropriate knowledge and skill. Before
attempting to install the regulator, make sure
pressure in system is brought to and remains at
atmospheric pressure.
• Do not release any refrigerant into the
atmosphere.
• Do not use any other fluid media without prior
approval of Alco Controls. Use of fluid not
listed could result in change of Hazard
Category of the product and consequently
change of conformity assessment requirement
for product in accordance with European
Pressure Equipement Directive 97/23/EC.
• In a severely contaminated system, avoid
breathing acid vapours and avoid contact with
skin from contaminated refrigerant / lubricants.
Failure to do so could result in skin injury.
• CPHE and ACP are not released for use with
flammable refrigerants such as hydrocarbon
refrigerants and ammonia.
• The CPH(E) regulator's power assembly and
cage assembly must be removed before
soldering.
Installation and Mounting:
Two typical installation applications are possible:
Hot Gas Bypass to the evaporator inlet (with up to
100% of capacity control) per Fig. 1
Hot Gas Bypass to the suction line (max. 40% of
capacity control
because of oil return
capability) per Fig. 2
• Pressure regulators can be installed in any position.
• Direction of flow must match arrow on body.
• Before brazing clean tubing.
• CPHE: Remove power assembly and cage before
brazing.
• ACP: Do not disassemble valve before brazing.
CPHE_65008__R05
Operating Instructions
Operating Instructions
CPHE and ACP
CPHE and ACP
• Use wet rags or chill blocks when brazing to
Use wet rags or chill blocks when brazing to
prevent valve damage.
prevent valve damage.
Do not
Do not exceed max. body temperature of 120°C.
Direct flame away from valve body (Fig. 3).
Direct flame away from valve body (Fig. 3).
Use an inert gas such as nitrogen to pass through
Use an inert gas such as nitrogen to pass through
the valve to prevent
the valve to prevent copper oxide formation.
• The use of appropriate brazing material is required
The use of appropriate brazing material is required
(soft solder is not allowed).
(soft solder is not allowed).
• Never use
Never use oxygen or flammable gases.
• Internal parts must be protected from foreign
Internal parts must be protected from foreign
material and moisture. ALCO filter
material and moisture. ALCO filter-drier use in
liquid line and ALCO filter use in suction line is
liquid line and ALCO filter use in suction line is
recommended.
recommended.
• Install the external equalizer line to the compressor
Install the external equalizer line to the compressor
suction line alw
suction line always downstream from evaporator
pressure regulators. NEVER join the equalizer line
pressure regulators. NEVER join the equalizer line
with another control except of the Liquid Injection
with another control except of the Liquid Injection
Valve.
Valve.
Setting:
Setting:
If desired set point differs from factory setting,
If desired set point differs from factory setting,
follow the procedure for setting before any
follow the procedure for setting before any
installation and/or refer to the Adjustment Table
installatio
below:
below
The function of the CPHE and ACP series regulators
The function of the CPHE and ACP series regulators
is to prevent the suction pressure from falling below
is to prevent the suction pressure from falling below
a predetermined set point, thereby balancing the
a predetermined set point, thereby balancing the
system. Therefore, the first step after installation is
system. Therefore, the first step after installation is
to determine this set point for the minimum suction
to determine this set point for the minimum suction
pressure allowable for your application. To do so,
pressure allowable for your application. To do so,
follow this procedure:
follow this procedure:
• Start the system and determine if it is operating
Start the system and determine if it is operating
properly. Install a gauge on the compressor suction
properly. Install a gauge on the compressor suction
line and measure the suction
line and measure the suction pressure after the
system has stabilized. To make sure, that hot gas is
system has stabilized. To make sure, that hot gas is
not bypassed de-energize the hot gas solenoid.
not bypassed de
• Remove the seal cap (1) and turn the power
Remove the seal cap (1) and turn the power
assembly adjusting stem (2) full
assembly adjusting stem (2) full
COUNTERCLOCKWISE.
COUNTERCLOCKWISE.
• Reduce the evaporator load until the sucti
Reduce the evaporator load until the suction
pressure lowers to the point at which bypass is
pressure lowers to the point at which bypass is
desired.
desired.
• Energize hot gas solenoid to enable gas flow.
Energize hot gas solenoid to enable gas flow.
• Turn the power assembly adjusting stem on top of
Turn the power assembly adjusting stem on top of
the regulator in a CLOCKWISE direction until
the regulator in a CLOCKWISE direction until
bypass occurs and suction pressure does not fall
bypass occurs and suction pressure does not fall
below t
below the predetermined set point. A
CLOCKWISE turn of the adjusting stem will
CLOCKWISE turn of the adjusting stem will
increase the pressure setting; a
increase the pressure setting; a
COUNTERCLOCKWISE turn will decrease it.
COUNTERCLOCKWISE turn will decrease it.
Adjustments should be made in small increments,
Adjustments should be made in small increments,
allowing the system to stabilize after each turn.
allowing the system to stabilize after each turn.
Do not
Do not turn adjustment screw on the side of the
regulator (only CPHE). This screw should only be
regulator (only CPHE). This screw should only be
used when working in a vacuum temperature range
used when working in a vacuum temperature range
• Vary evaporator load to test at various conditions
Vary evaporator load to test at various conditions
that the suction pressure does not fall below the
that the suction pressure does not fall below the
predetermined set point.
predetermined set point
• CPHE: Replace the seal cap (1) on the adjusting
CPHE: Replace the seal cap (1) on the adjusting
stem (Fig 4).
stem (Fig 4).
• ACP: replace plastic cap
ACP: replace plastic cap
Replacement for 04
Replacement for 04
Emerson Climate Technologies GmbH
Emerson Climate Technologies GmbH
GB
Holzhauser Str. 180 - D-13509 Berlin
Germany
www.emersonclimate.eu
NOTES:
• On multiple evaporator systems, do not pipe hot
On multiple evaporator systems, do not pipe hot
gas to more than one evaporator. Use separate
gas to more than one evaporator. Use separate
bypass regulators or consult the ALCO
bypass regulators or consult the ALCO
Applications Engineering Department.
Applications Engineering De
• If the compressor is located above the evaporator,
If the compressor is located above the evaporator,
bypass should be piped to the evaporator to insure
bypass should be piped to the evaporator to insure
proper oil return during low load bypass
proper oil return during low load bypass
conditions.
• On a long piping run, bypass to the evaporator,
On a long piping run, bypass to the evaporator,
insulate the bypass to prevent condensate.
insulate the bypass to prevent condensate.
Condensate can lead to unstable conditions and
Condensate can lead to unstable conditions and
or flooding of the compressor.
or flooding of the compressor.
Solenoid Connections
Solenoid Connections
• If a compressor discharge line thermostat is used,
If a compressor discharge line thermostat is used,
it is recommended that the solenoid
it is recommended that the solenoid is wired in
series with the thermostat.
series with the thermostat.
• Voltage and frequency of the c
Voltage and frequency of the coil must correspond
to the power source. Connect leads to the power
to the power source. Connect leads to the power
source.
(NEVER wire on the load side of the motor
(NEVER wire on the load side of the motor
starter.)
Note 1: For installation of a Liquid Injection Valve
Note 1: For installation of a Liquid Injection Valve
(e.g. L-series), refer to ALCO's catalog for selection
and see the Superheat Table below.
Note 2: If a liquid-injection solenoid valve is used,
the electrical connections should be in parallel with
the electrical connections should be in parallel with
the hot gas solenoid valve.
the hot gas solenoid valve.
Leakage test:
• After completion of installation, a pressure test
After completion of installation, a pressure test
must be carried out as follows:
must be carried out as follows:
• - According to EN378 for systems which must
comply with European pressure equipment
comply with European pressure equipment
directive 97/23/EC.
• - To maximum working pressure of system for
other applications.
other applications.
Warning:
• Failure to do so could result in loss of refrigerant
Failure to do so could result in loss of refrigerant
and personal injury.
and personal injury.
• The pressure test must be conducted by skilled
persons with due respect regarding the danger
persons with due respect regarding the danger
related to pressure.
related to pressure.
Service:
• Before any service shut down system and
Before any service shut down system and
disconnect from power source.
disconnect from power source.
• Fully depressurize regulator. After reducing
Fully depressurize regulator. After reducing
pressure to atmospheric only CPHE regulator may
pressure to atmospheric
be opened, internal parts removed, cleaned and
be opened, internal parts removed, cleaned and
replaced, per Fig.4. Install parts in reverse
replaced, per Fig.4. Install parts in reverse
sequence as removed.
sequence as removed.
• Replace gaskets 4, 6 and 7 before reassembling the
Replace gaskets 4, 6 and 7 before reassembling the
regulator.
• Tighten capscrews evenly to torque specification
Tighten capscrews evenly to torque specification
35 Nm.
Date: 20.06.2013
13509 Berlin
series), refer to ALCO's catalog for selection
eat Table below.
injection solenoid valve is used,
According to EN378 for systems which must
97/23/EC.
To maximum working pressure of system for
ressure test must be conducted by skilled
DWG Nr.: CPH EZ 005000/PCN 863003
DWG Nr.: CPH EZ 005000/PCN 863003

Verwandte Anleitungen für Emerson CPHE-Serie


Inhaltszusammenfassung für Emerson CPHE-Serie
- Seite 3 Emerson Climate Technologies GmbH Betriebsanleitung Holzhauser Str. 180 - D-13509 Berlin Heißgasbypass-Regler, Germany Baureihe CPHE / ACP www.emersonclimate.eu Beschreibung und technische Daten: • Einbaulage ist beliebig • Verändern Sie den Verdampfungsdruck um die • Durchflußrichtung beachten korrekte Funktion des Reglers zu überprüfen.
- Seite 4 Emerson Climate Technologies GmbH Betriebsanleitung Holzhauser Str. 180 - D-13509 Berlin Heißgasbypass-Regler, Germany Baureihe CPHE / ACP www.emersonclimate.eu Einstelltabelle (FS = Werkseinstellung) Überhitzungstabelle für Nacheinspritzventile der L-Baureihe (K) Verdampfungs- Füllungs- R134a R407C R404A CPHE code R507 temperatur R134a R22 R407C R404A...